

Page 1
Page 2
ZeroWire Use
r Manual 11
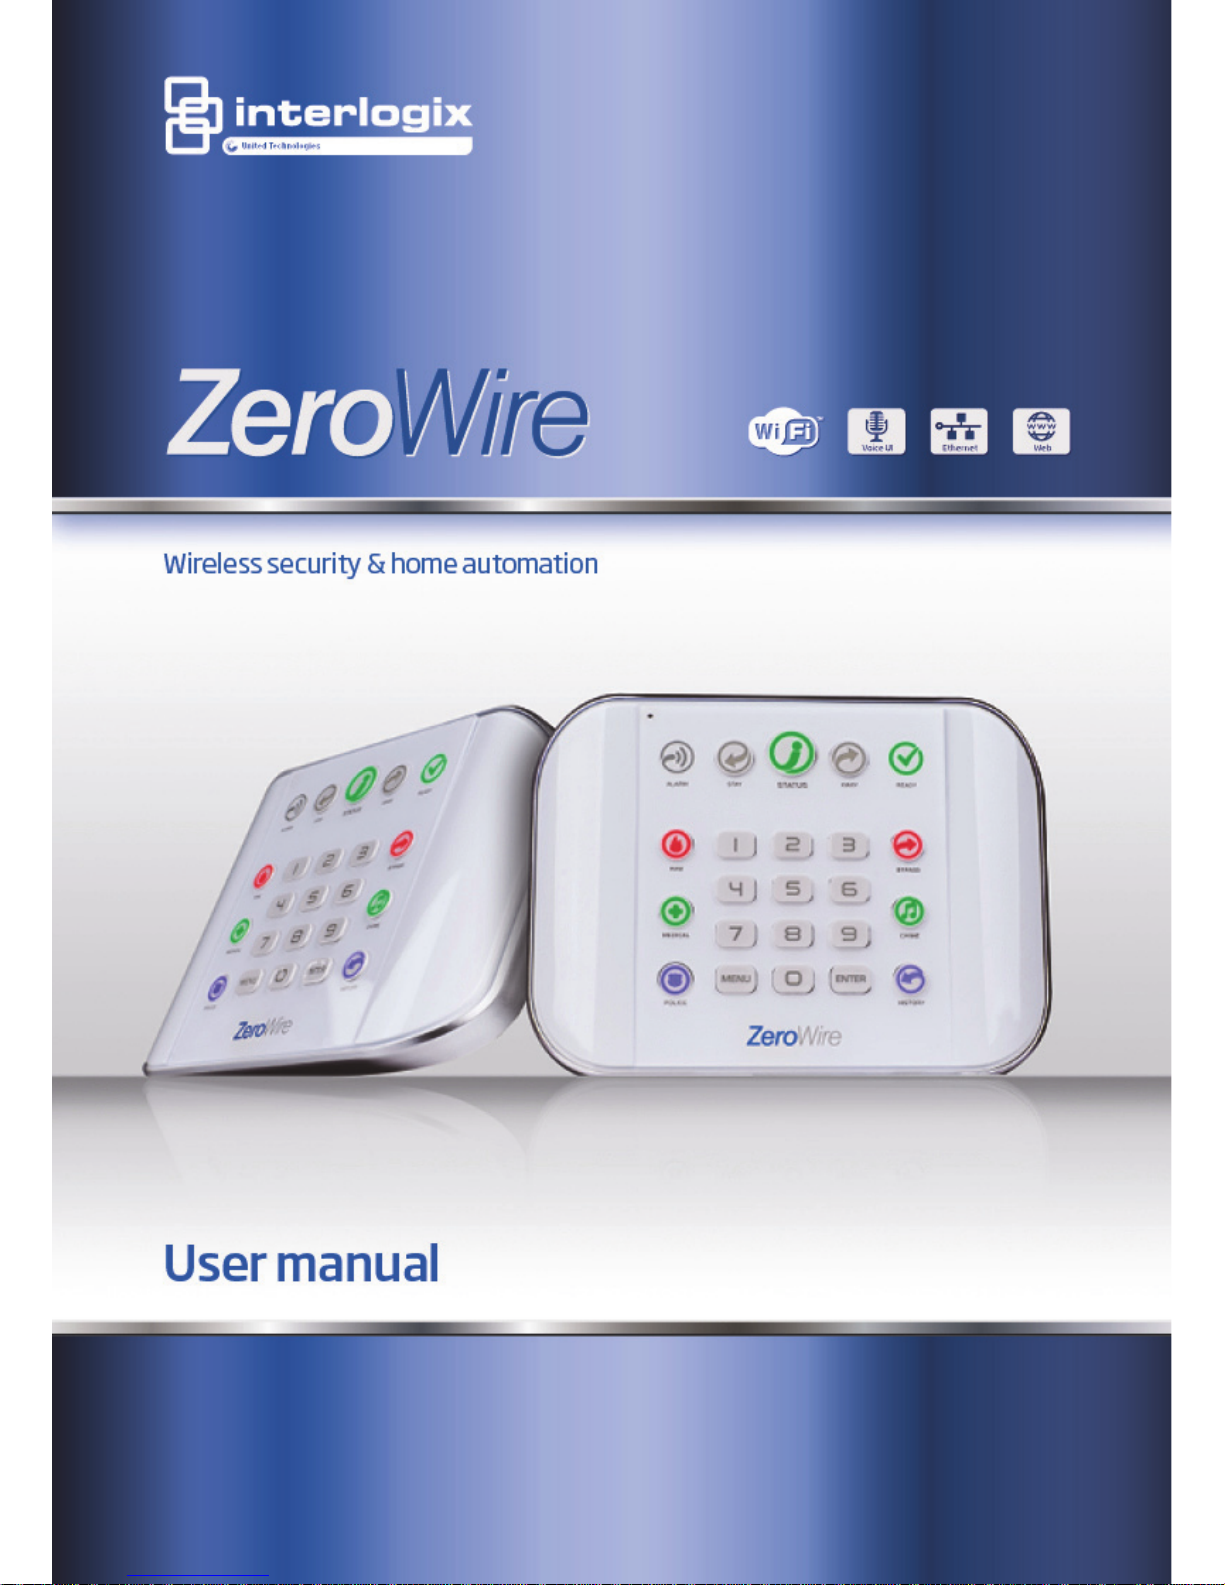
Front of ZeroWire
Ke
y Colour Description
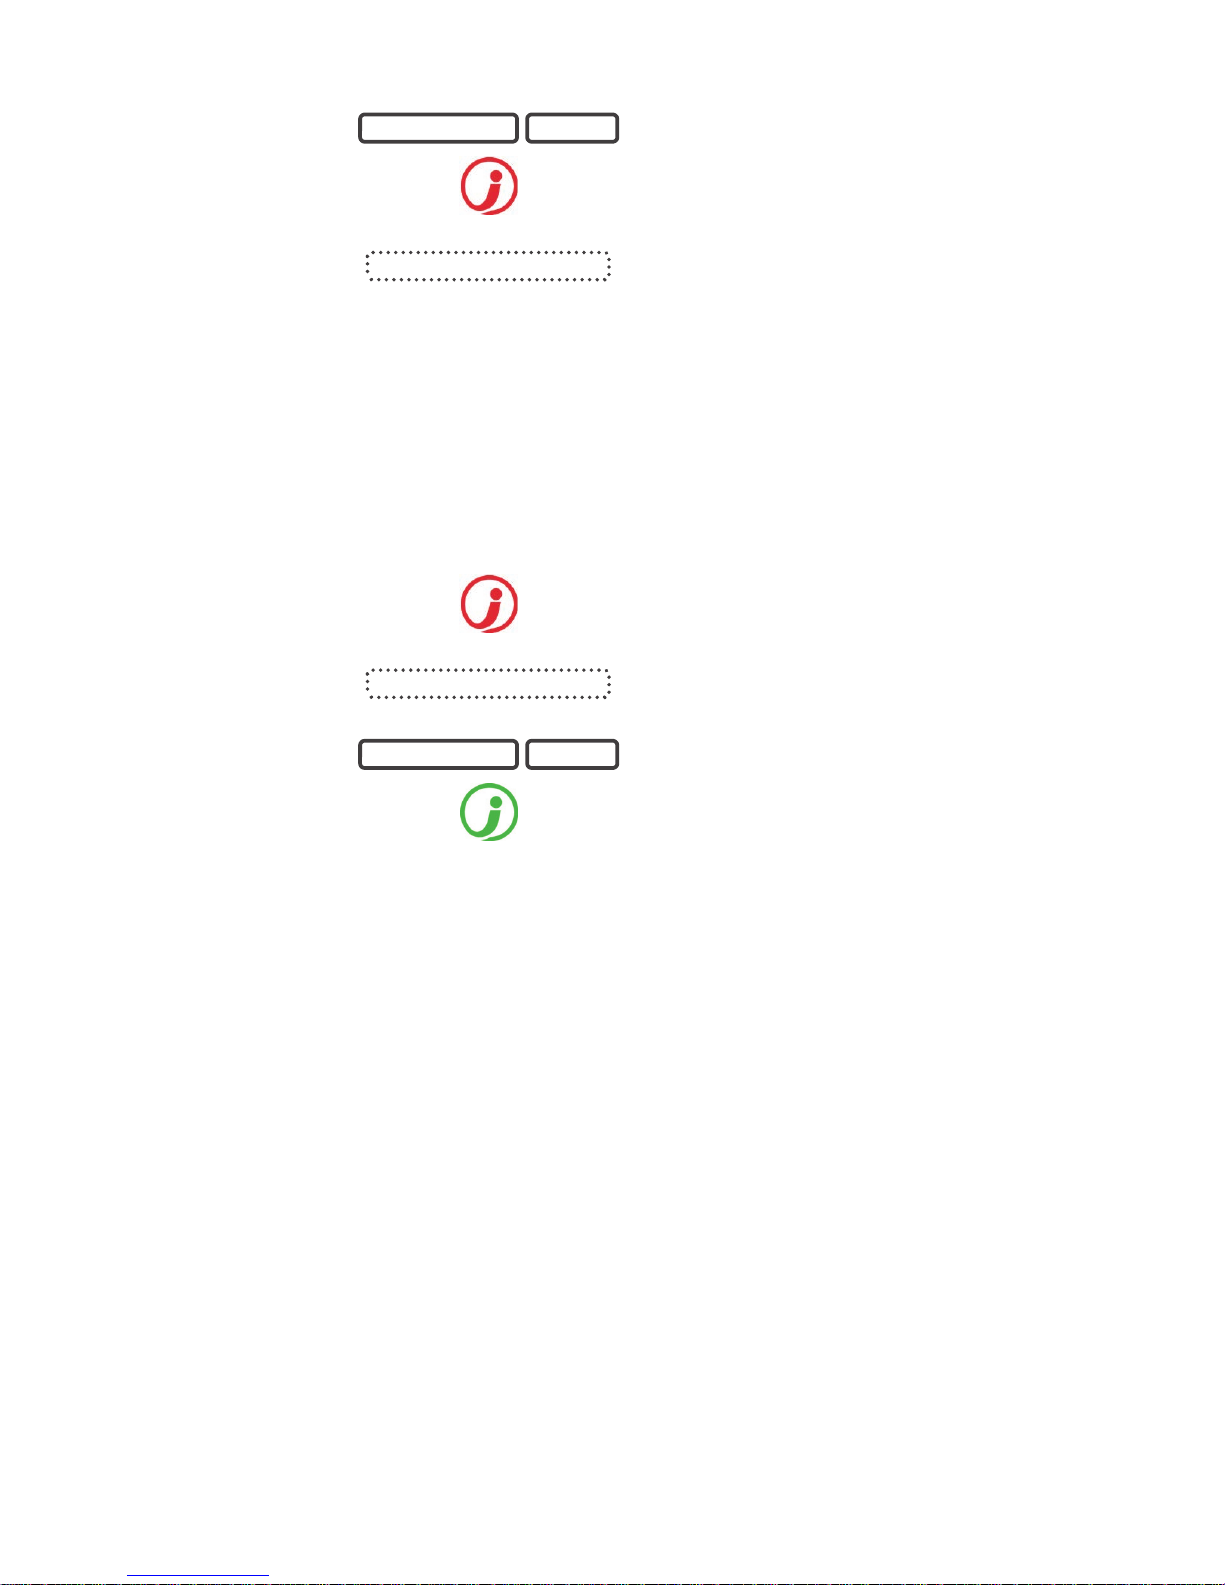
ALARM
Red
System is in alarm. Enter
your PIN code then
ENTER to turn off the
alarm. Press STATUS
key for more info.
STAY
Not lit
System is disarme
d if
Away is also not lit.
Yellow
System is armed in the
“STAY” mode.
STATUS
Green
System is ready to be
armed.
Yellow
System message
present.
Red
(steady)
System trouble message
present.
Touch the STATUS key to hear
system messages. If you are unable
to fix the issue, contact your service
provider for help.
AWAY
Not lit
System is disarmed if
Stay is also not lit.
Red System is armed in the
“AWAY” mode.
READY
Not lit
System cannot be
armed, press STATUS
key for more info
Green
(steady)
Your system is ready to
arm in Away or Stay
mode.
Green
(flashing)
Zones are currently
unsealed but system is
force-armable. If these
zones are not sealed by
the end of the exit time
the system will go into
alarm.
BYPASS
Touch the BYPASS key to access
the bypass menu where you can
bypass or un-bypass zones.
CHI
ME
Touch the CHIME key to access the
chime menu where you can select
zones to make a chime sound on
the ZeroWire when they are tripped.
HISTORY
Press
the HISTORY key to listen for
alarm and event history.
Microphone
Stay Arm Key Status Key Away Arm Key
Ready Light
Bypass Key
Chime Key
History Key
Siren
Enter Key Numeric
Keys
Menu
Key
Speaker
Alarm Light
SOS
Emergency
Keys
Page 3
12 ZeroWire User
Manual
Basic Features
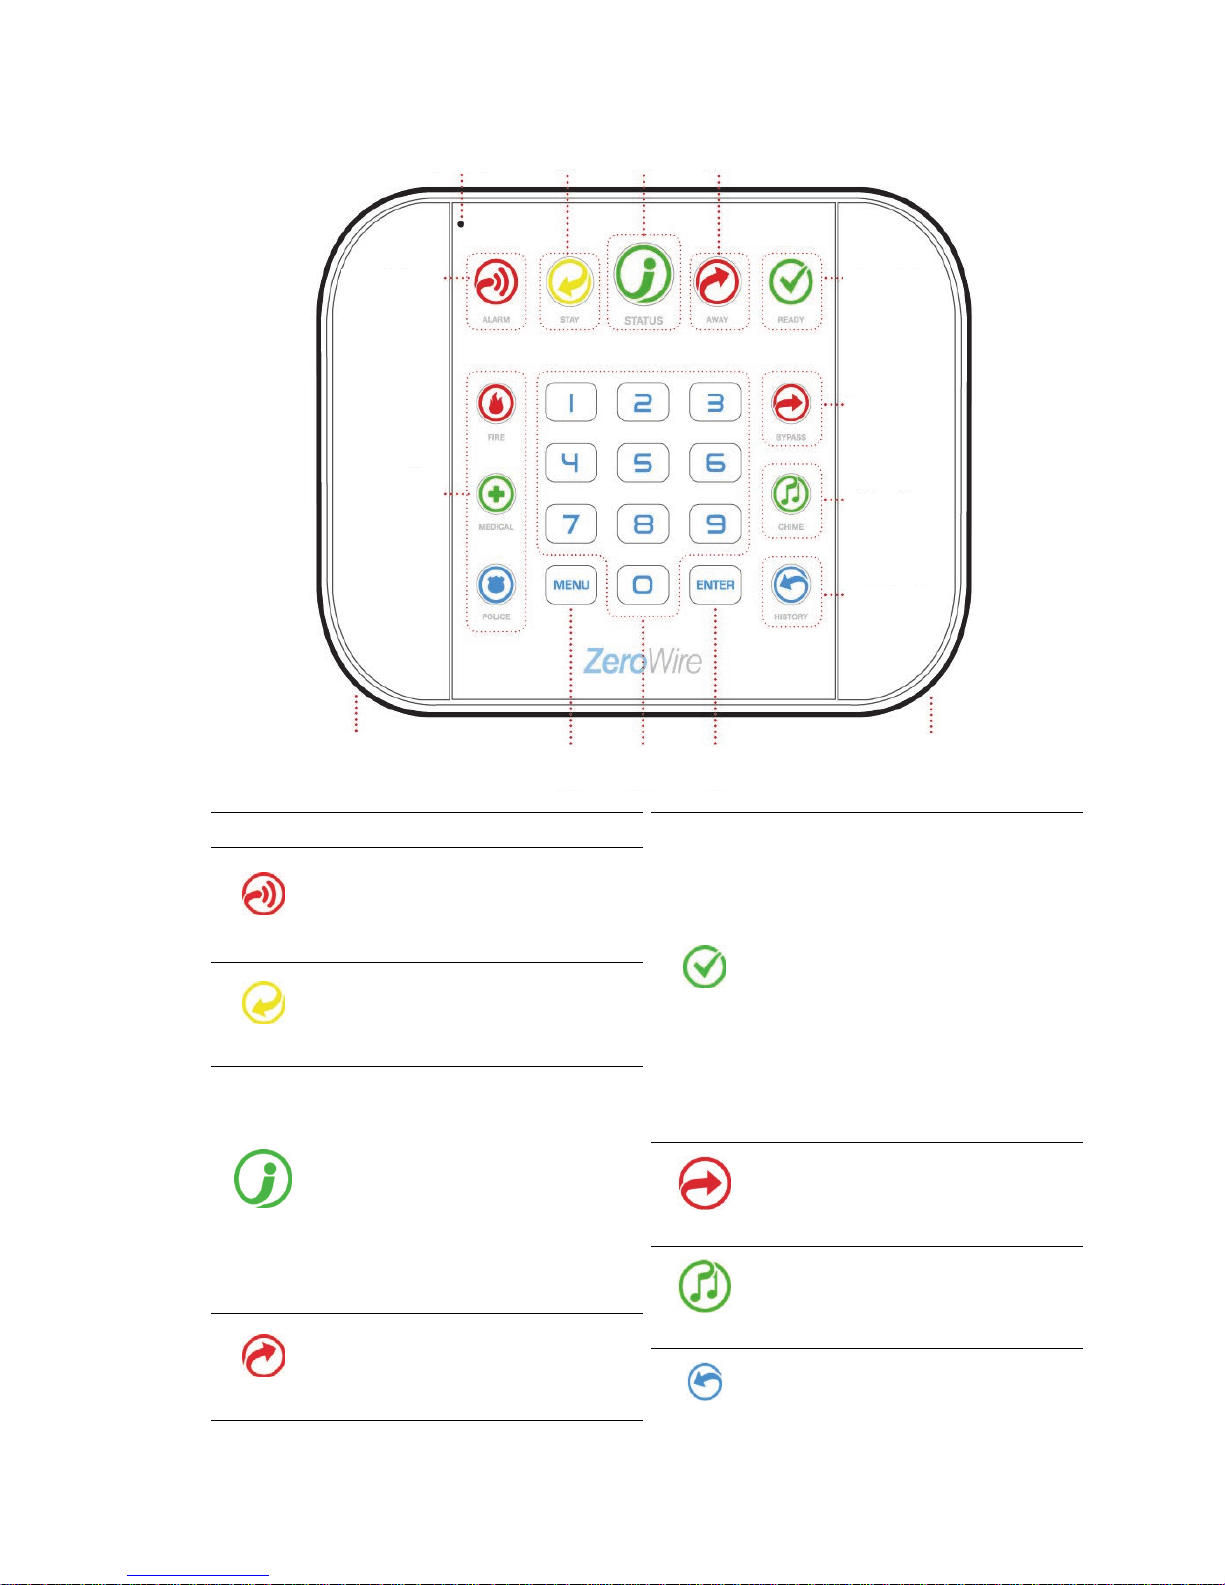
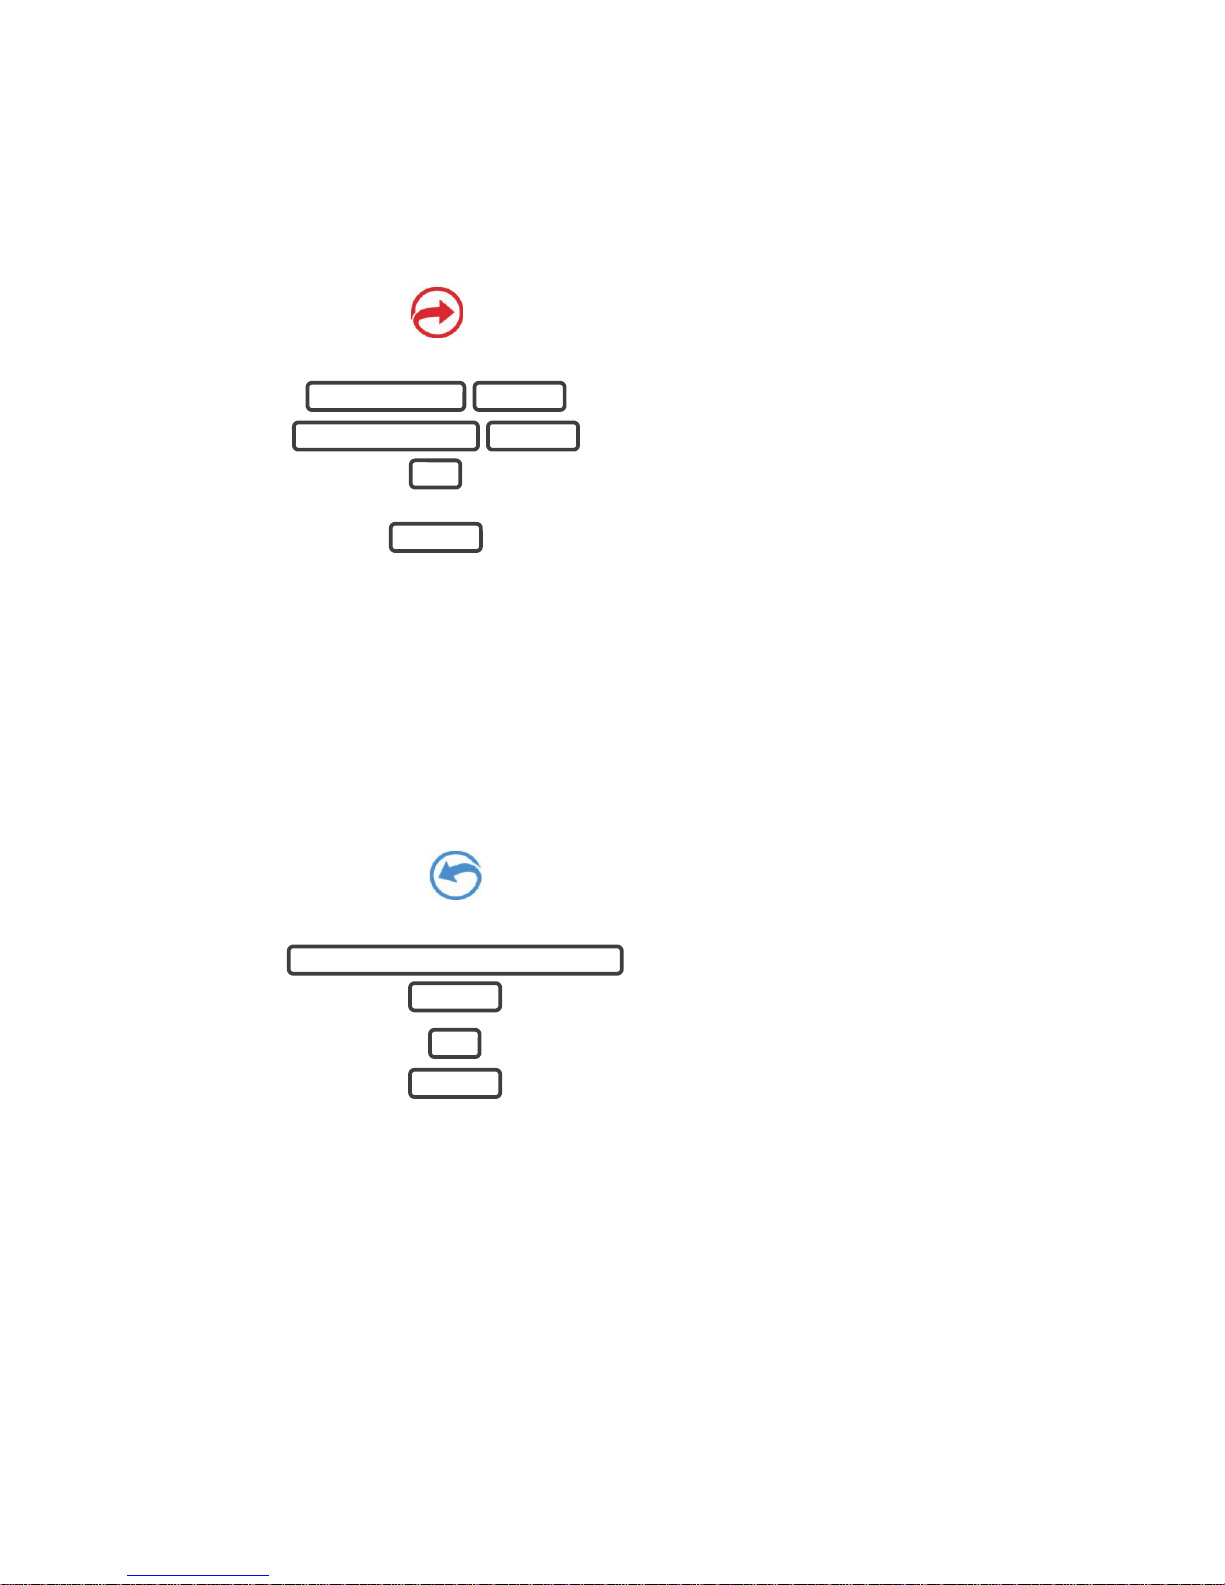
Arm your system in Away Mode
Protect your property using Away Mode when you are leaving the premises.
Normally zones must be secure before you can arm in Away Mode, this will be indicated
by the Ready Light being lit a solid green.
If the Ready Light is flashing green then “forced arming” is enabled. This means some
zones are not secure but you can still arm your security system. Read more about the
Forced Arming Feature on the next page.
If the Status Key is not green press the Status Key to hear what zones are not secured.
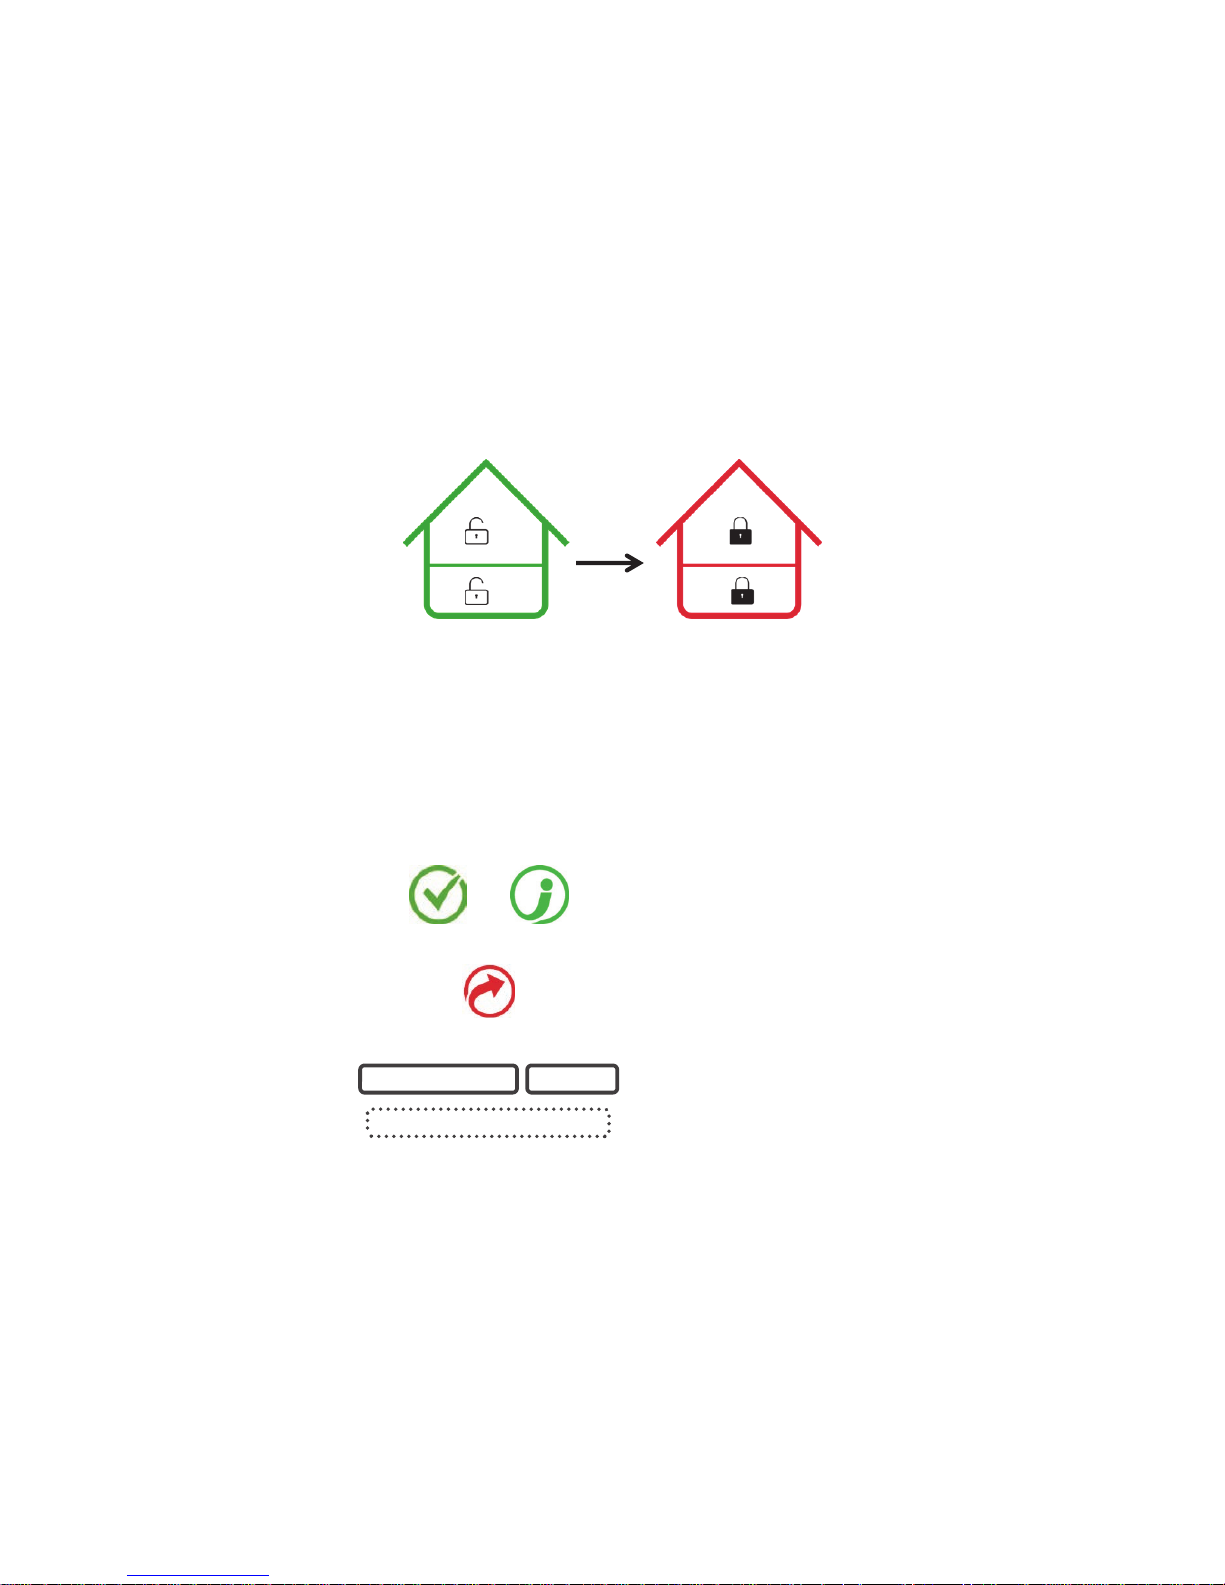
You may arm your system using your user PIN code:
READY STATUS
Check ready key is green.
Check status key is green.
1.
AWAY
Select the Away Mode.
2.
3.
Leave the premises.
To silence the Exit Delay beeping, press the Away Key again and the beeping will stop.
This can also be performed from the UltraConnect app.
USER PIN CODE ENTER
EXIT DELAY BEEPS
All partitions
now protected
Druk
Away
Ready Light
is green
Page 4
ZeroWire User Manual 13
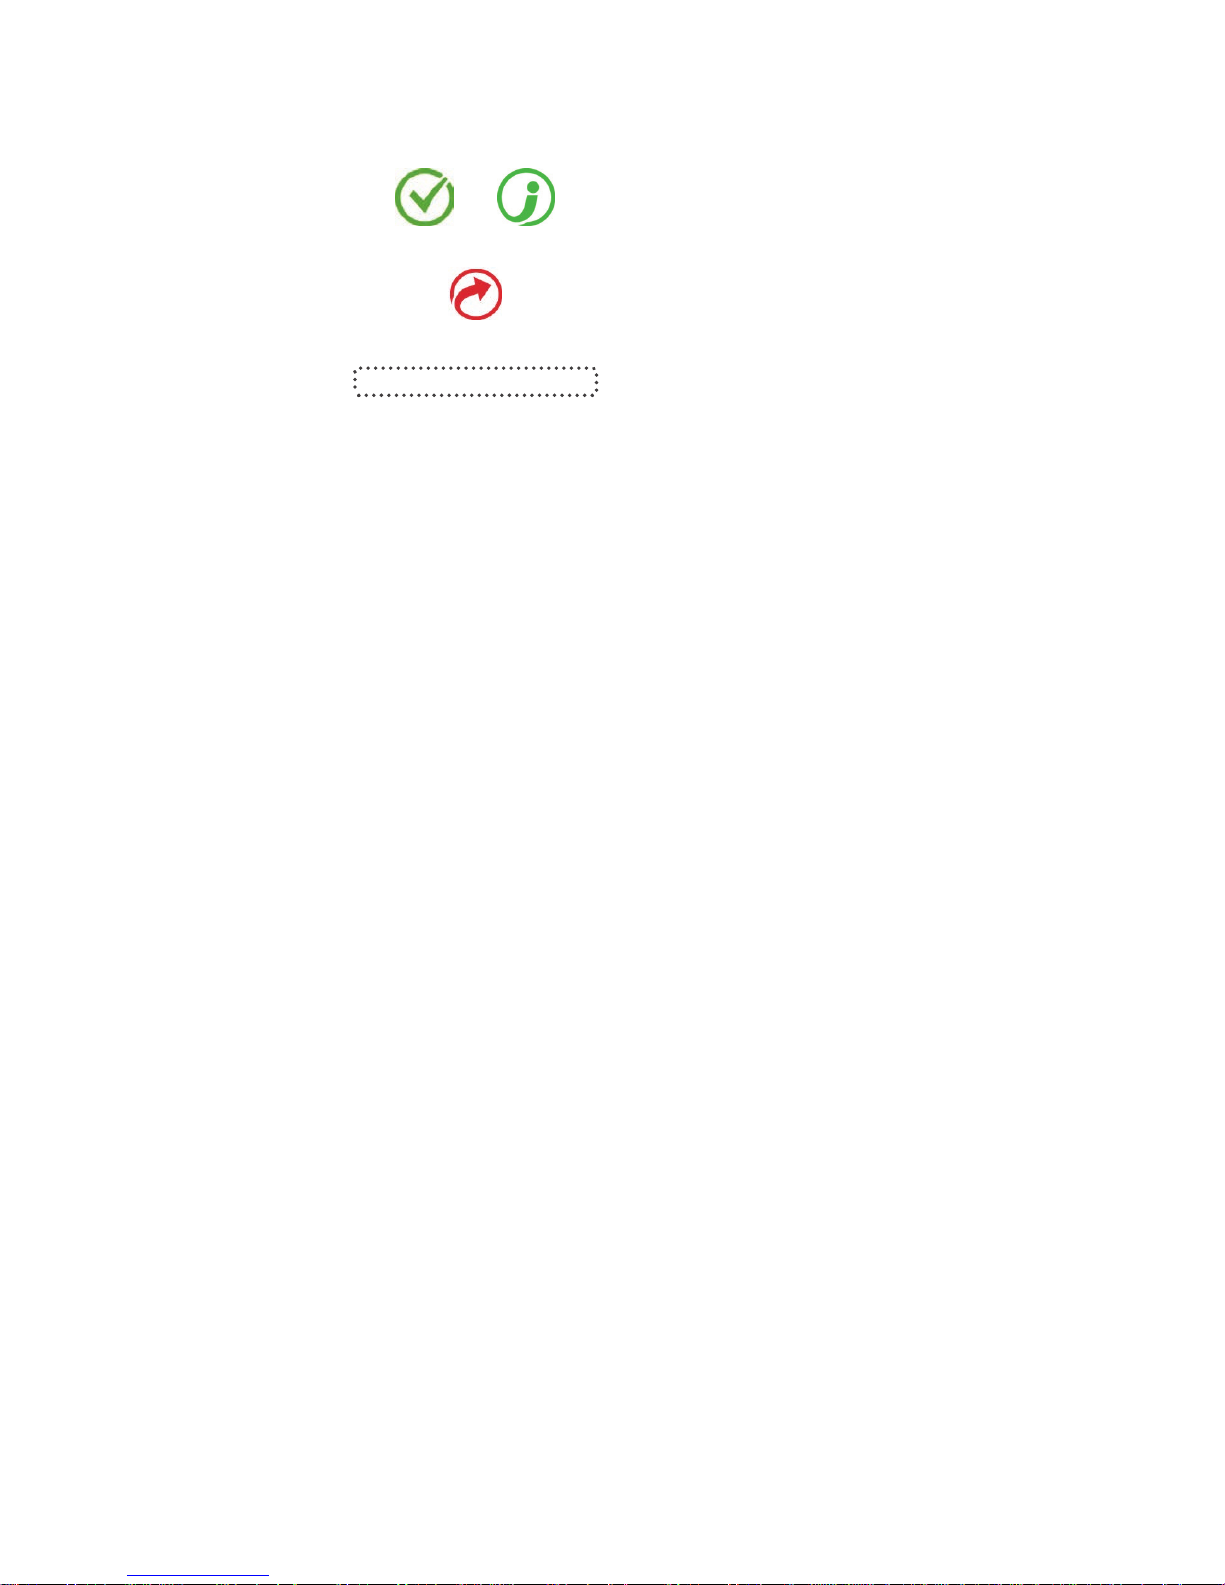
If your service provider has enabled the quick arm feature, you can simply touch the Away
key:
4.
READY STATUS
Check ready key is green.
Check status key is green.
5.
AWAY
Select the Away Mode.
6.
Leave the premises.
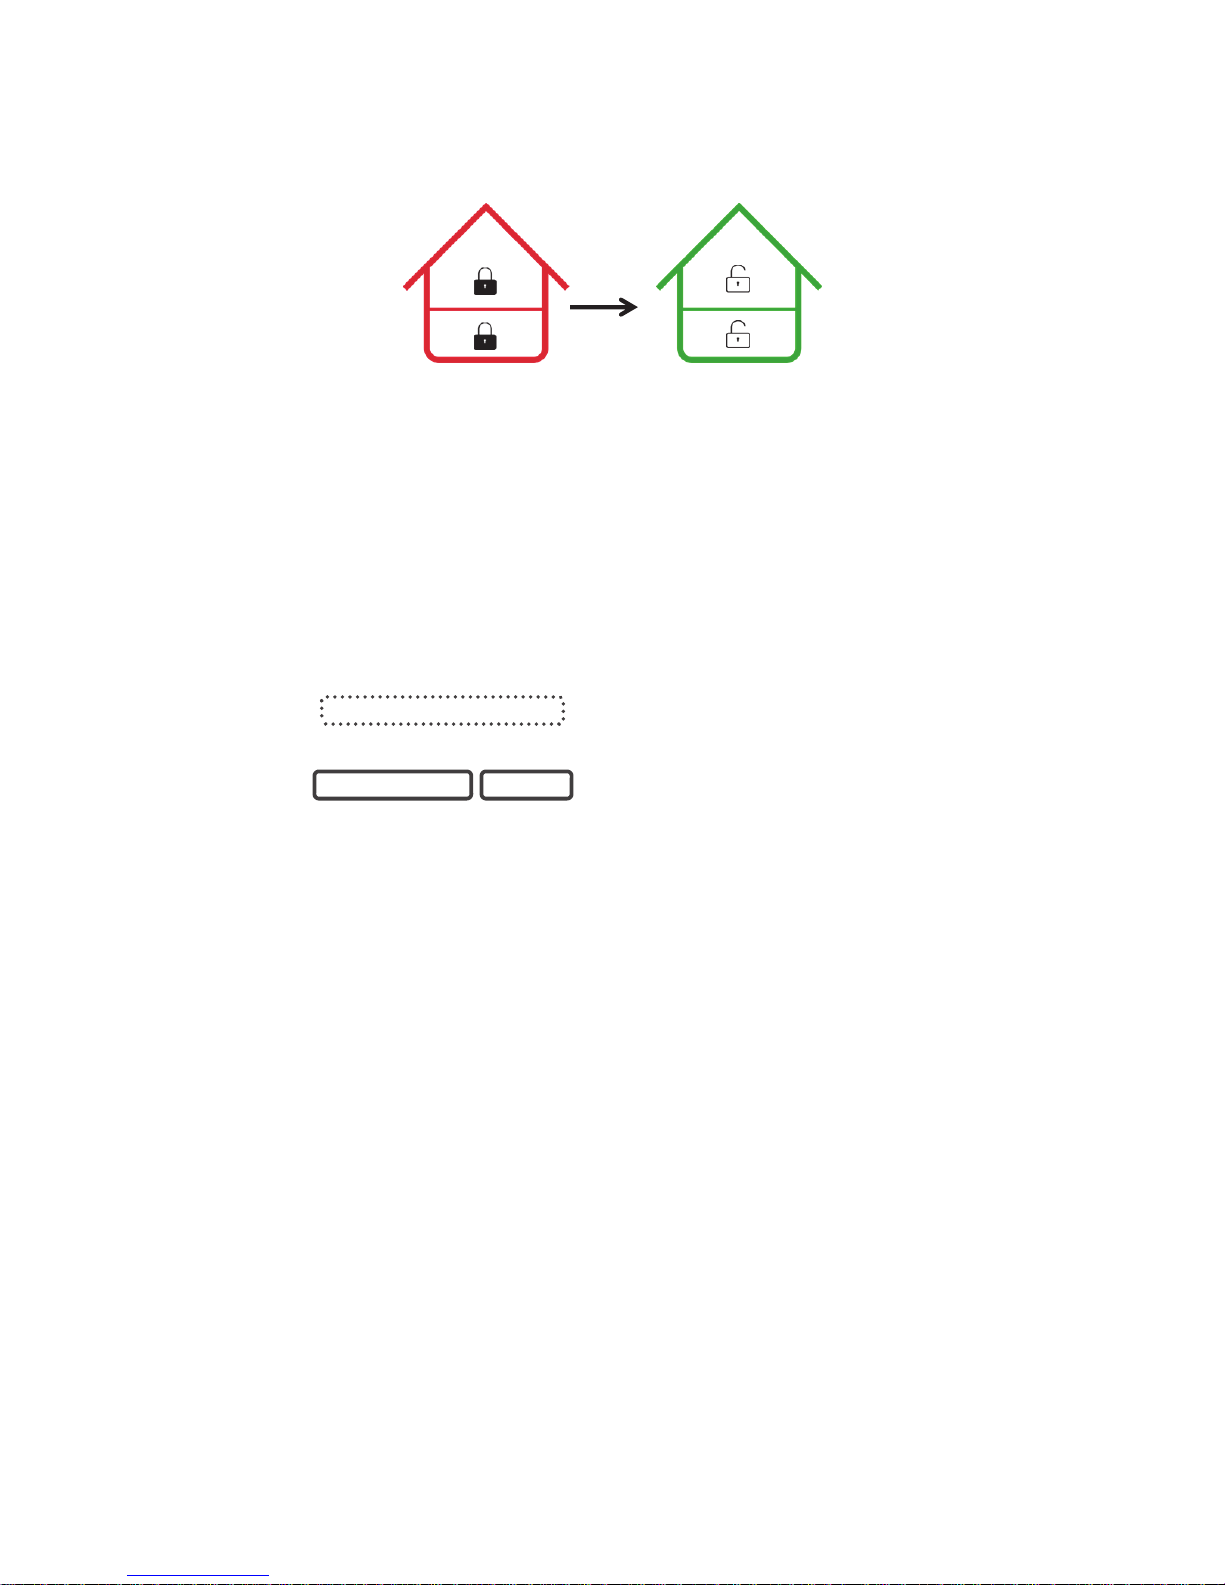
Forced Arming Feature
Normally all zones must be secure before you can arm your security system.
For example, a home with a door detector on the front door. When forced arming is NOT
enabled, you would have to close the door to secure the sensor before being allowed to
arm the system. When force arming is enabled, you can arm your system with the door
opened, and the door will automatically be protected after it is fully closed as you leave.
If your service provider has enabled the “forced arming” feature, you will be able to arm
your security system even if pre-selected zones are not secure. The Ready Light will flash
green to indicate this feature is available. Press Status key to hear which zones are not
secure.
Check with your installer to confirm how Forced Arming has been set up for your
system:
Option 1: At the end of the exit delay, zones that are not secured will automatically be
bypassed. If they later become secured, the bypass will be automatically removed and
they will become part of the active security system until the system is disarmed.
Option 2: At the end of the exit delay:
• delay sensor types that are not secured will start an entry delay and go into alarm if a
valid PIN code is not entered,
• instant sensor types that are not secured will go into alarm immediately.
Explanation of Stay Modes
Use one of the Stay Modes when you are staying inside the premises and you want the
perimeter protected. You will be able to move around inside the protected area without
setting the alarm off. This gives you peace of mind even when you are at home.
For example, Stay Mode is often used at night. Internal motion sensors will be ignored.
Perimeter detectors will be armed and active to detect intruders. The security of your home
in Stay mode is dependent on the type and number of detectors you have installed and are
active in Stay mode.
There are three similar modes available - Stay Mode, Stay Instant Mode, and Night Mode.
EXIT DELAY BEEPS
Page 5

14 ZeroWire User Manual
In Stay Mode – Entry/Exit zones will be active, and zones with the Stay or Night Mode
property will be bypassed. Entry via a zone with the Entry/Exit property will start the
partition entry timer as normal.
This will allow you to move around inside your home without causing the system to sound
an alarm. A person entering the house will have the ability and time to disarm the system
as usual.
In Instant Stay Mode – Entry/Exit zones will be active with entry delay time removed, and
zones with the Stay or Night Mode property will be bypassed. Entry via a zone with the
Entry/Exit property will trigger an instant alarm.
This is a higher level of security and requires you to disarm the system (from inside or
remotely) before entering the protected area. No person will be able to enter the house
without triggering an alarm.
In Night Mode – Entry/Exit zones will be active with entry delay time removed, zones with
the Stay property will be bypassed, zones with the Night Mode property will be active.
Entry via a zone with the Entry/Exit property will trigger an instant alarm.
This is a higher level of security and requires you to disarm the system (from inside or
remotely) before entering the protected area. No person will be able to enter the house
without triggering an alarm.
Example
For example, in a two-level home, the upstairs motion sensors are programmed as Stay
and the downstairs motion sensors are programmed as Night Mode. The first press of the
Stay button arms the system in Stay Mode, allowing free access in the downstairs and
upstairs levels and will start the entry delay if someone enters through an Entry/Exit zone
such as the front door.
The second press of the Stay button arms the system in Instant Stay Mode, allowing free
access in the downstairs and upstairs level and will trigger an instant alarm (no entry
delay) if someone enters through an Entry Exit zone such as the front door. This prevents
even authorized users from entering the area unless it is disarmed first (for example, by
someone inside the area).
The third press of the Stay button arms the system in Night Mode, allowing free access in
the upstairs level and will trigger an instant alarm (no entry delay) if someone enters the
protected Night Mode area downstairs. This prevents even authorized users from entering
the area unless it is disarmed first (for example by someone inside the Stay area).
Arm your system in Stay Mode
Use Stay Mode when you are staying in the premises and you want the perimeter
protected whilst allowing you to move around inside without setting the alarm off.
Normally all Stay Mode zones must be secure before you can arm in Stay Mode.
If the Ready Light is flashing green then “forced arming” is enabled. This means some
zones are not secure but you can still arm your security system. Read more about the
Forced Arming Feature on the previous page.
Page 6

ZeroWire User Manual 15
You may arm your system by entering your user PIN code:
1.
STATUS
Check status key is green. Close all
protected doors and windows. If you
have motion detectors outside your “stay
mode”, have everyone leave those
areas.
2.
STAY
Select the Stay Mode.
3.
4.
Stay within the protected areas.
Or, if your service provider has enabled the quick arm feature, you can simply touch the
Stay key:
5.
STATUS
Check status key is green. Close all
protected doors and windows. If you
have motion detectors outside your
“stay mode”, have everyone leave
those areas.
6.
STAY
Select the Stay Mode.
7.
Stay within the protected Stay or Night
Mode areas.
If an armed zone is alarmed whilst your security system is in the Stay mode, it will sound a
warning tone on your ZeroWire and start a timer. At the end of the Stay Mode Entry Time
your sirens will sound. Your service provider predetermines this warning time at the time of
installation.
Downstairs only
protected
Touch Stay
Ready Light
is green
Page 7

16 ZeroWire User Manual
To start the Stay Instant Mode touch the Stay key twice:
1.
STATUS
Check status key is green. Close all
protected doors and windows. If you
have motion detectors outside your
“stay mode”, have everyone leave
those areas.
2.
STAY
STAY
Select the Stay Mode twice.
Or press Stay button once when
system is already in Stay Mode. In this
case, you will not be asked second time
for a PIN code.
3.
STAY
(flashing yellow)
Stay button will flash on and off.
Stay within areas protected with Stay
Mode or Night Mode zones.
If an armed zone is alarmed whilst your security system is in the Stay mode there will be
no warning timer and your sirens will sound immediately.
To start the Night Mode touch the Stay key three times:
1.
STATUS
Check status key is green. Close all
protected doors and windows. If you
have motion detectors outside your
“stay mode”, have everyone leave
those areas.
2.
STAY
STAY
STAY
Select the Stay Mode three times.
Or when system is already in Instant
Stay Mode, press Stay once. In this
case you will not be asked second time
for a PIN code.
3.
STAY
(flashing red)
Stay button will flash on and off.
Stay within areas protected with Stay
Mode zones. Do not move into areas
protected with Night Mode zones.
If an armed zone is alarmed whilst your security system is in the Stay mode there will be
no warning timer and your sirens will sound immediately.
To set normal Stay Mode, touch the Stay key one more time:
1.
STAY
Select the Stay Mode when the system
is in Night Mode.
2.
STAY
Stay button will return to a solid yellow.
Stay within the protected areas.
Page 8

ZeroWire User Manual 17
Note: Subsequent presses of the Stay button loop through the three Stay Mode states:
Stay Mode Stay Instant Mode Night Mode
Sensors which are automatically bypassed for Stay Mode are logged in the event history
(but not reported) as bypassed.
Events Preventing Arming
The following system alarms will prevent a system in EMEA from arming. You must clear
all of these. Contact your service provider for assistance.
Wireless supervision faults
Wireless Low Battery
Tamper
Trouble
Ethernet or WiFi fault
Phone Line Fault
Wireless Jamming
Over-current fault
Power fail
Low Battery
Expander fail
Status Key in EN Grade 2
For EN Grade 2 compliant systems, the Status Key behaviour has been modified for
greater security. It will be off or red, and not announce system status when pressed.
To check system status on EN Grade 2 systems:
Page 9
18 ZeroWire User Manual
1.
Enter a valid user PIN
2.
STATUS
Select Status Key
3.
Status condition(s) are
announced
Acknowledging Latched System Alarms
When the Status Key is red, there may be latched system alarms present. A master user
(Level 2) is required to acknowledge and clear these. Standard users cannot acknowledge
and clear these.
To acknowledge Latched System Alarms:
1.
STATUS
Select Status Key
2.
Status condition(s) are
announced
3.
Enter a valid master PIN
4.
STATUS
Status Key will change to green if
no other conditions are present
Exit Error / Fail To Close
If during exit delay a zone is tripped which causes an alarm, then the areas affected will
not be armed. Exit Error and Fail To Close are logged in the event history.
Check the zone is secure and try to arm the area(s) again.
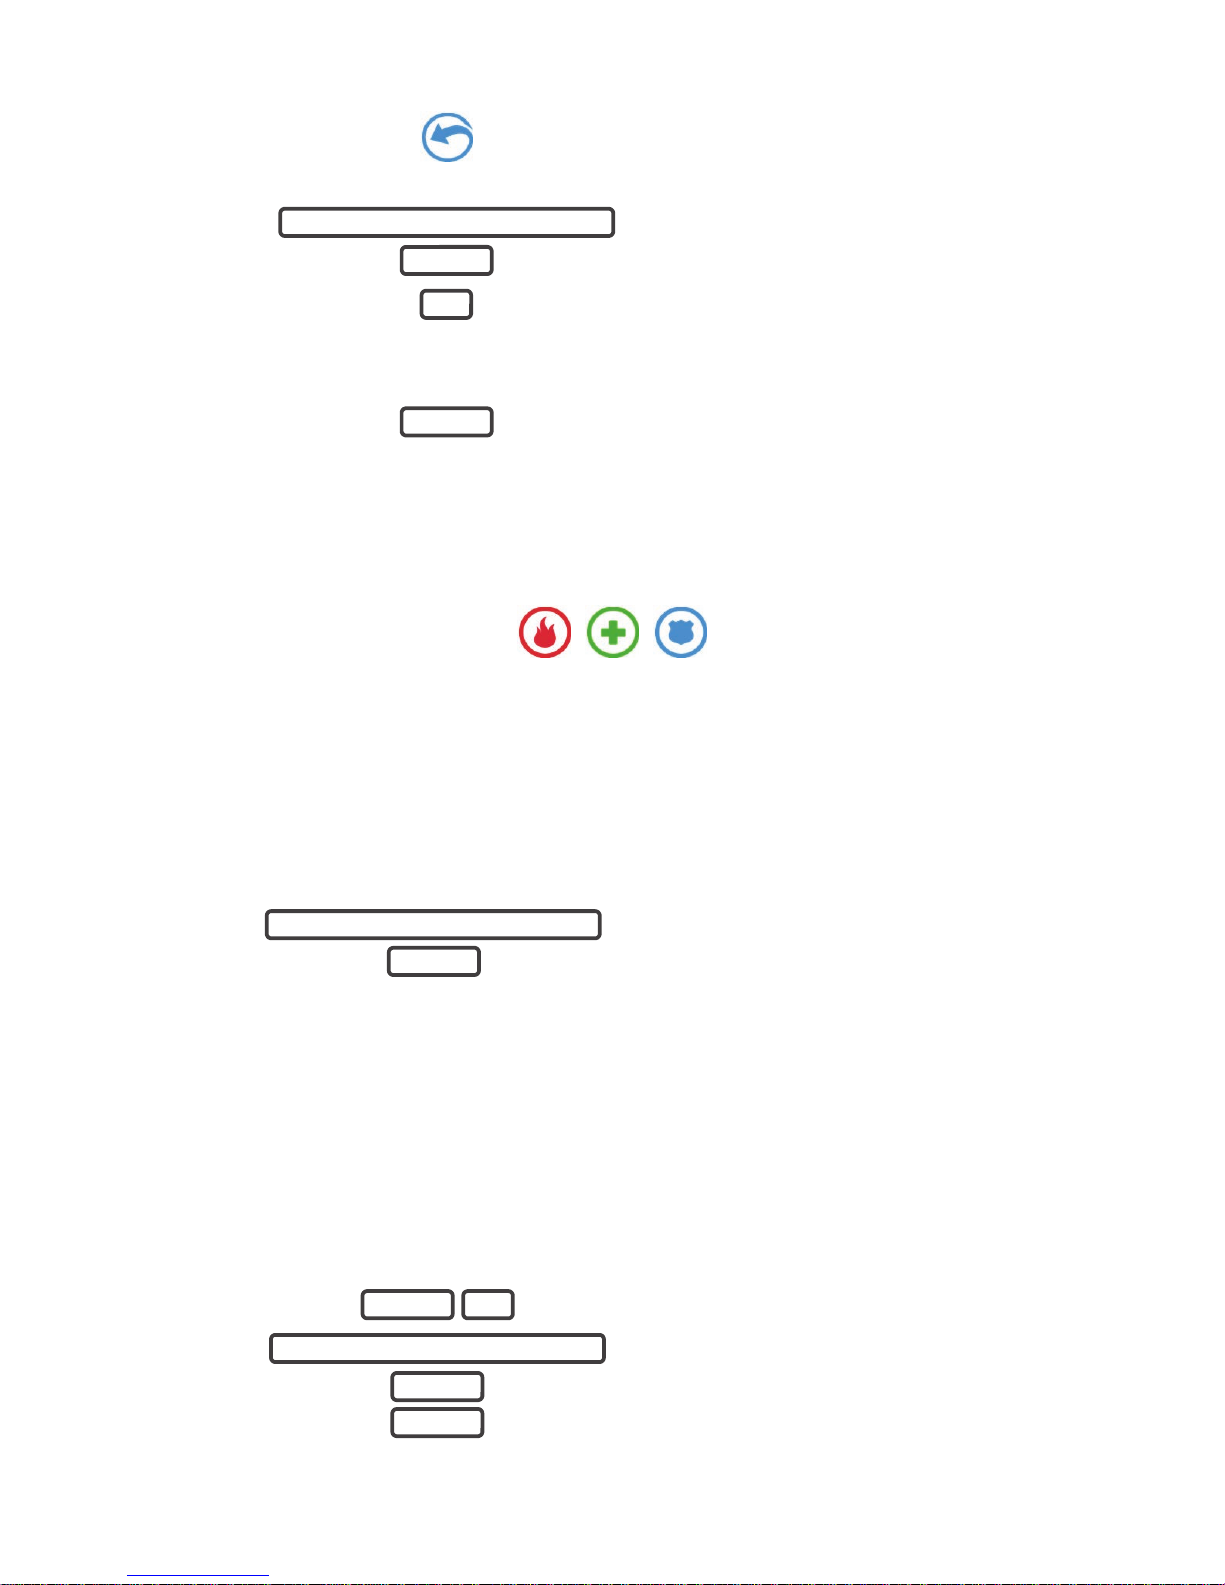
Disarming
Make your way to the ZeroWire through one of the designated entry / exit doors.
Once a detector detects your presence, the entry delay will begin counting down and your
ZeroWire will repeat a warning message until a valid PIN code is entered. If a valid PIN
code is not entered by the end of the entry delay time, your sirens and communicator will
activate.
If you require more time to disarm your system, the entry time can be modified in Menu 8
by a master user. Away and Stay modes can be configured with different entry delay
times, ask your service provider for further details.
USER PIN CODE ENTER
STATUS ANNOUNCED
STATUS ANNOUNCED
MASTER PIN
ENTER
Page 10
ZeroWire User Manual 19
Depending on how your system has been set up, entry through a non-designated door
may cause the alarm to sound immediately for greater security.
1.
Enter the premises through a
designated entry/exit door
2.
Approach the ZeroWire. When you are
detected, the entry warning timer will begin
and the ZeroWire will beep.
3.
Enter your PIN code before the entry delay
expires.
4.
All zones are now disarmed, any bypassed
zones are restored to normal operation.
Lock Out On 3 Invalid Attempts
If an invalid PIN code is entered three times, the ZeroWire will deny all login attempts for
90 seconds. Attempts are counted from any method (e.g. keypad, app, or web server).
You must wait the full 90 seconds before trying again with the correct PIN. This is to
prevent brute-force attacks on guessing PIN codes.
Bypass a Zone
The zone bypass menu is used to bypass (isolate) selected zones in your security system.
A bypassed zone is ignored by the system and is not capable of activating an alarm. This
option is commonly used to temporarily ignore zones that require service, or zones that
you wish to temporarily add to your “stay mode”.
Whilst still offering security with the remaining zones, bypassing zones lowers your level of
security.
All bypassed zones are reset and cleared from memory when your security system is next
armed / disarmed.
ENTRY DELAY BEEPS
USER PIN CODE ENTER
All partitions
now disarmed
Enter
PIN
One or more partitions
armed
Page 11
20 ZeroWire User Manual
Your security system must be disarmed (turned off) before being able to bypass zones.
After bypassing your selected zones, your security system must be armed (turned on) in
either the away or stay mode to secure the remaining zones.
The status light will turn to yellow to indicate there are one or more bypassed zones.
Touch the status key to check which zones are bypassed.
5.
BYPASS
Select Bypass Menu
6.
Enter PIN code with authority to bypass
7.
Select a zone to bypass
8.
Toggle between un-bypassed to bypassed
state
9.
Exits from Bypass Menu
Event History
The Event History menu is used to listen to events that occurred in your security system.
These events include arming, disarming, system faults and alarmed zones. Ensure your
clock is set correctly as all events are time stamped.
“Alarm Memory” will announce the last zone(s) that caused your security system to go into
an alarm condition:
1.
HISTORY
Select History Menu.
2.
3.
Listen to the last alarm memory event.
4.
Exits from History Menu.
It is recommended you record user names, zone names, and outputs names in Menu 8 –
Recordings. This will make reviewing any events much clearer as ZeroWire will announce
the recorded name.
You may also review all events recorded by your security system:
USER PIN CODE ENTER
ZONE NUMBER ENTER
0
MENU
YOUR 4 TO 8 DIGIT MASTER CODE
ENTER
1
MENU
Page 12
ZeroWire User Manual 21
1.
HISTORY
Select History Menu.
2.
3.
Listen to history events.
4.
Touch ENTER for next event.
Touch 0 for previous event.
5.
Exits from History Menu.
Emergency Keys
ZeroWire has three (3) emergency keys: Medical, Police (duress) and Fire.
If these keys are not lit, then the Emergency Keys are not available on your system. Check
with your service provider to clarify what responses will be provided upon activation.
Touch the required key for two seconds to activate that alarm. You should only touch
these keys in an emergency situation that requires a response by a central monitoring
station.
To cancel an emergency activation:
6.
Enter you code after an emergency key has
been activated.
Detector Reset
Check with your installer if this feature is configured.
Detection devices, such as smoke detectors, shock sensors and some glass break
detectors, “latch” their alarm lights to indicate an alarm condition. The alarm will stay on
until it is reset by an authorized user. Use this menu to acknowledge and clear the alarm.
Example: Reset latching detectors that are in alarm:
1.
Select main menu - Option 7, Detector Reset
2.
3.
Exits from Detector Reset Menu
YOUR 4 TO 8 DIGIT MASTER CODE
ENTER
2
MENU
YOUR 4 TO 8 DIGIT MASTER CODE
ENTER
MENU 7
YOUR 4 TO 8 DIGIT MASTER CODE
ENTER
MENU
Page 13
22 ZeroWire User Manual
Users
In the initial ZeroWire configuration, there are two users of two different user types Master and Engineer.
Master
A Master user can change Standard user PIN codes and Master user PIN codes, and can
access all menus except installation programming.
A default Master user name is "User 1", and a default passcode is "1234". Please note that
there is a space between "User" and "1".
In EN Grade 2 terminology, a master user is Level 2.
Engineer
An Engineer user can only access installation programming menus, but no user
programming menus. These users can always arm a system but can only disarm the
partitions they previously armed.
A default Engineer user name is "installer", and a default passcode is "9713".
In EN Grade 2 terminology, a master user is Level 3.
Caution: For security reasons, it is highly recommended to change the passcode for the
Installer and change the login and the passcode for the User 1, at the first opportunity.
Add a User
You need to be a Master user to add new users to the panel.
Example: Add a new user to ZeroWire and assign them a PIN code 2580. We will add this
as user 4.
4.
Selects User Configuration menu.
5.
6.
Selects configure user PIN.
7. Select user 4.
8.
Sets user 4 PIN code as 2580.
9.
Exits from Advanced system configuration.
Note: If you attempt to create a user with a PIN code that is the same as another user’s
PIN code your ZeroWire will announce "PIN code is occupied, select a new user PIN
code."
MENU 3
YOUR 4 TO 8 DIGIT MASTER CODE
ENTER
1
4 ENTER
2 5 8 0
ENTER
MENU MENU MENU
Page 14
ZeroWire User Manual 23
Add a Username
The UltraConnect app requires a username and PIN code to function. If you do not have
these details login to ZeroWire Web Server to view or program usernames:
1. On the ZeroWire press Menu – 8 – [PIN] – 6 and note the IP address announced.
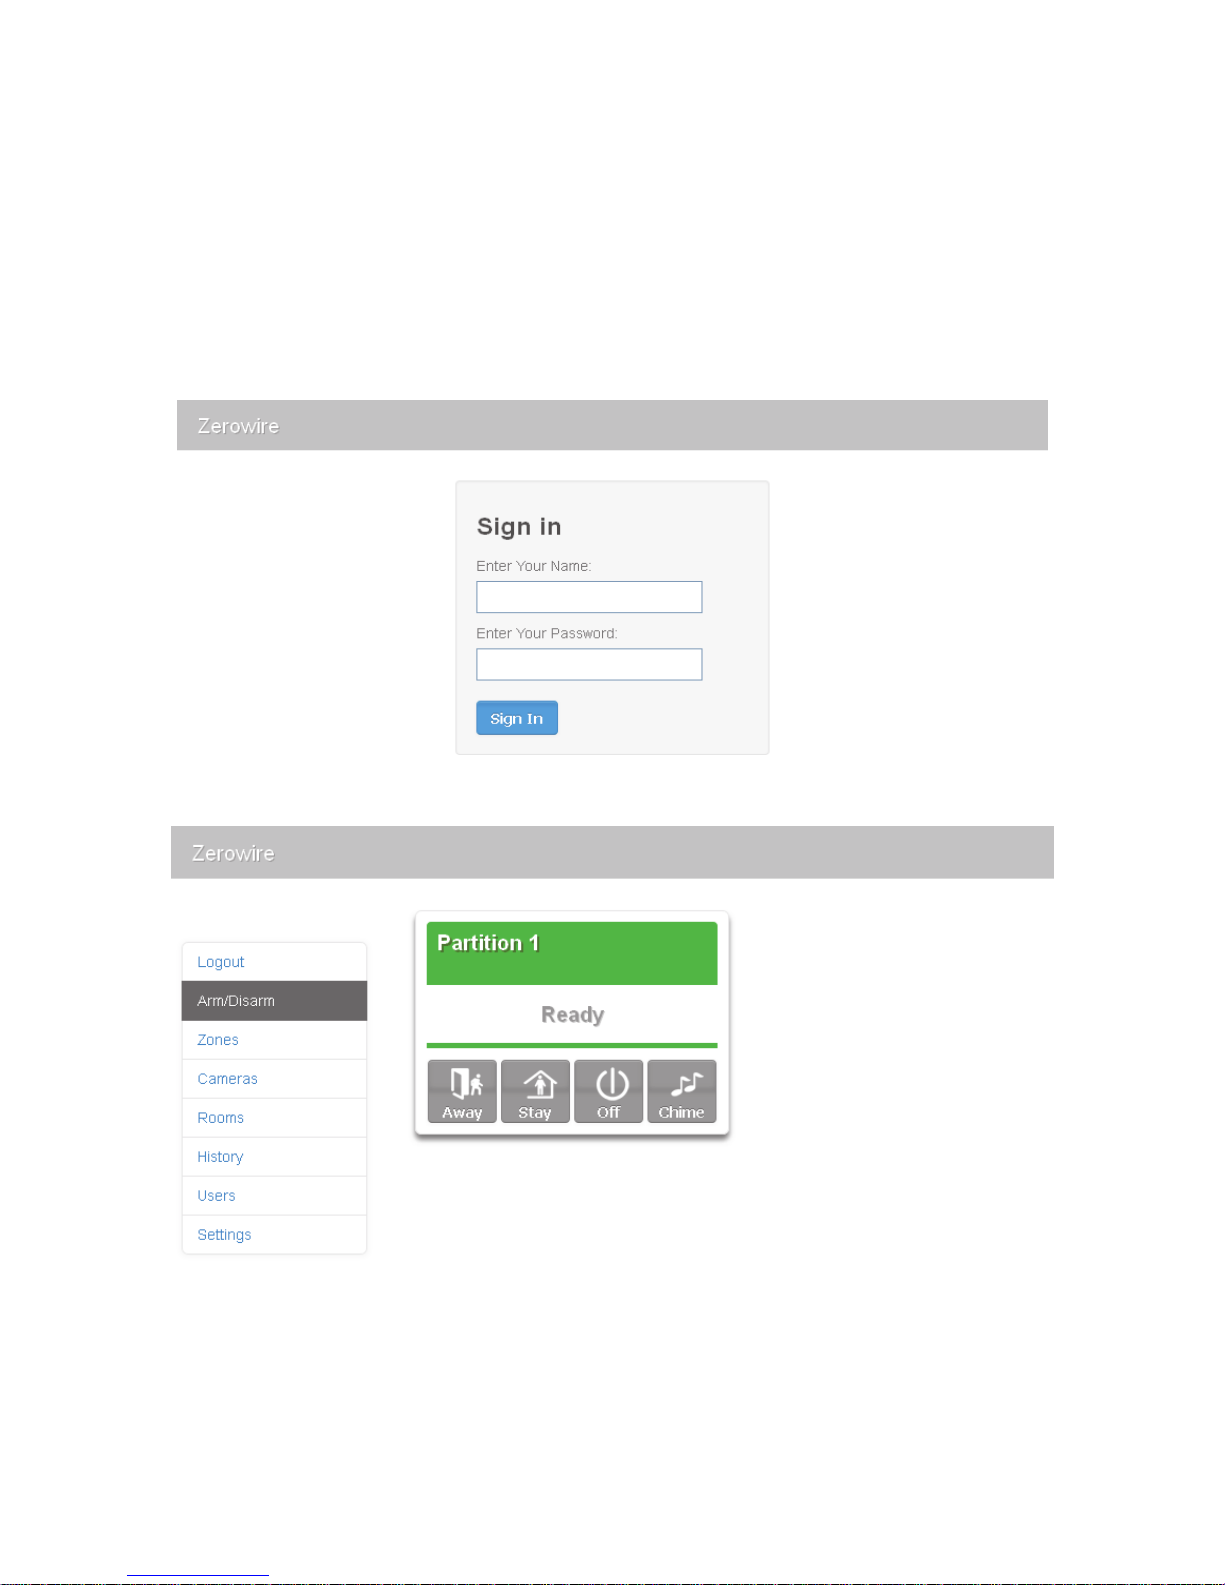
2. Open your web browser and enter the IP address. Some browsers may require you to
enter http:// before the IP address. The ZeroWire login screen should appear.
3. Enter your username and password, by default this is User 1 and 1234. Please note
that there is a space between "User" and "1".
4. You should now see a screen similar to the one below.
Page 15
24 ZeroWire User Manual
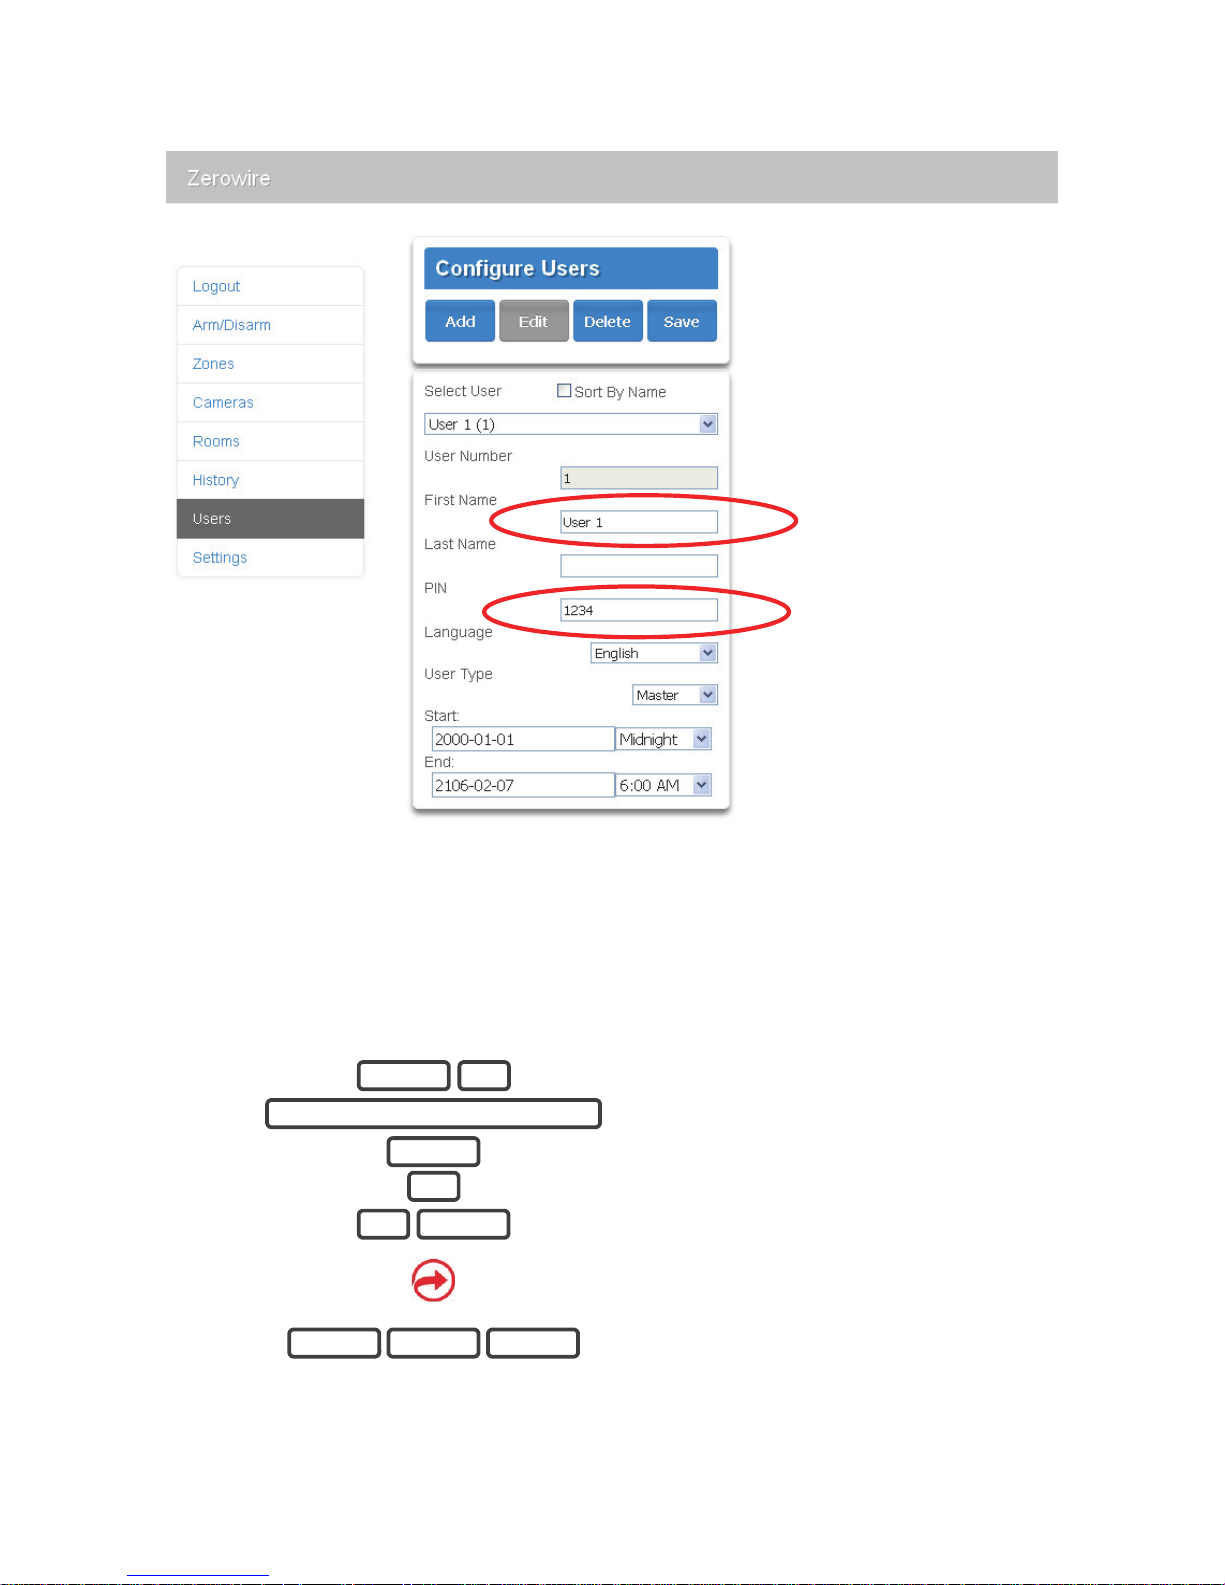
5. Click Users.
6. Enter a First Name, this will be the username for the user on the UltraConnect app.
7. Enter a PIN, this will be the PIN for the user on the UltraConnect app.
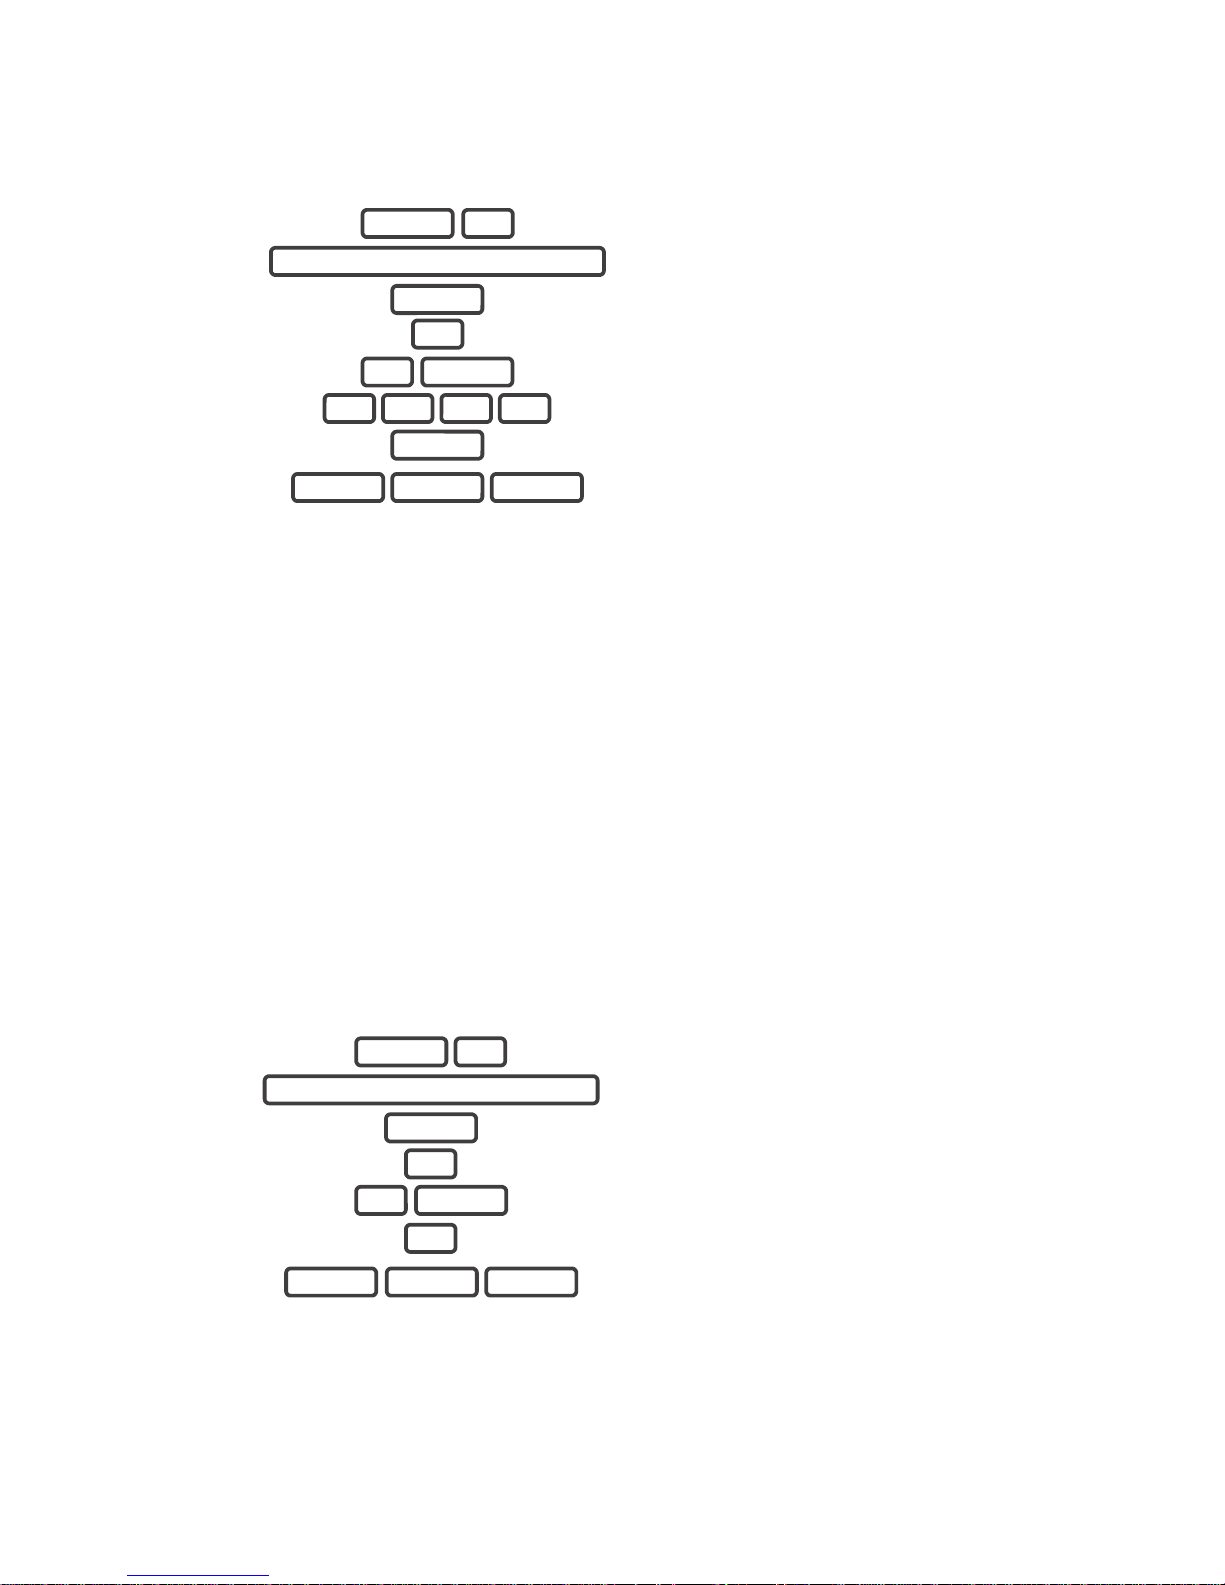
Remove a User
Example: Remove User 4 from your system.
1.
Selects User Configuration menu.
2.
3.
Selects configure user PIN.
4. Select user 4.
5.
BYPASS
Disables the user PIN.
6.
Exits from Advanced system configuration.
MENU 3
YOUR 4 TO 8 DIGIT MASTER CODE
ENTER
1
4 ENTER
MENU MENU MENU
Page 16
ZeroWire User Manual 25
Change a User PIN
Example: Change User 4 PIN code to 5555.
1.
Selects User Configuration menu.
2.
3.
Selects configure user PIN.
4. Select user 4.
5.
Sets user 4 PIN code as 5555
6.
Exits from Advanced system configuration.
Note: User must have a unique PIN code. If the new PIN code you enter is the same as
another user’s PIN code your ZeroWire will announce "PIN code is occupied, select a new
user PIN code."
Change the User Type
The user type determines what that user can do:
• Master users can arm and disarm partitions. They can create, delete, or modify user
codes. They can also change system settings.
• Standard users can arm and disarm partitions. But they cannot create users or review
event history.
• Arm only users can only turn on the security system, they cannot disarm, or dismiss
any system conditions.
Example: Change user 6 to a master user to allow them to add/remove users.
1.
Selects User Configuration menu.
2.
3.
Selects configure user type.
4.
Select user 6.
5.
Sets master user type.
6.
Exits from Advanced system configuration.
Add Keyfobs
Keyfobs require special programming depending on your requirements. Contact your
security provider to purchase additional keyfobs.
MENU 3
YOUR 4 TO 8 DIGIT MASTER CODE
ENTER
1
4 ENTER
5 5 5 5
ENTER
MENU MENU MENU
MENU 3
YOUR 4 TO 8 DIGIT MASTER CODE
ENTER
2
6 ENTER
2
MENU MENU MENU
Page 17

26 ZeroWire User Manual
More About Users
ZeroWire supports up to 40 users. For simplicity it is recommended you create user
numbers from 1-40. For advanced programming you can create user numbers 1-999.
Each user is assigned a PIN code and a user number. This allows them to interact with the
system.
PIN codes must be four (4) to eight (8) digits in length. Longer length PIN codes provide
greater security as they are harder to guess. Every user must have a unique PIN code.
Keep user PIN information in a safe place, do not disclose your PIN to others.
Users can have a recorded audio name to make it easier to manage users. See Record
User Names on page 29 for instruction to do this.
Users created on the physical ZeroWire unit via the menus will not be assigned a
username. These users will not have remote access to the ZeroWire (e.g. over the internet
or using the smartphone app). If you wish to give remote access to a user then you must
assign a username via ZeroWire Web Server (see User Name and PIN on page 21) or
DLX900 desktop software.
If you have many users to add you may find it is easier to use ZeroWire Web Server or
DLX900 desktop software. These are installer tools, refer to the Installation Manual for
instructions.
Notes:
• IMPORTANT: Change the default PIN codes of the installer and User 1 accounts.
• The system must be disarmed before accessing user configuration from the ZeroWire
unit. You may use the ZeroWire Web Server or UltraConnect app to access user
configuration at any time.
Send User PINs to Z-Wave Door Lock
ZeroWire can send user PIN codes to an existing Z-Wave Door Lock so the PIN codes on
the alarm system can also be used to operate the door lock.
This feature is available to User Types – Engineer, Master, and Custom users with ZWave menu access.
Communication is one way from the ZeroWire to the lock, instructing the lock to add or
remove PIN codes. Each lock is individually controlled.
When “Send PIN(s) to Lock” is selected, ZeroWire queries the lock for the number of
standard users it supports. Some locks support up to 250 PINS, others are limited to 40.
Check your lock documentation.
Page 18
ZeroWire User Manual 27
Each ZeroWire user number is sent to the same numbered slot in the lock, up to the
maximum slots available in the lock. For example, ZeroWire user number 1 will be sent to
the Z-Wave Door Lock slot 1. Users exceeding the capacity of the lock will not be sent.
Existing PIN codes in the door lock will be overridden. If the lock detects a duplicate PIN
then the send command will fail.
Selecting “Remove PIN(s) from Lock” will clear all PIN codes from the lock, whether or not
they were added by the ZeroWire.
Some door locks have special master/installer PIN codes, these will not be changed.
However, if they are default standard user PIN codes then ZeroWire will have access to
change or remove them. Each lock is different and you should test this feature on your
specific lock to ensure only the appropriate codes are present.
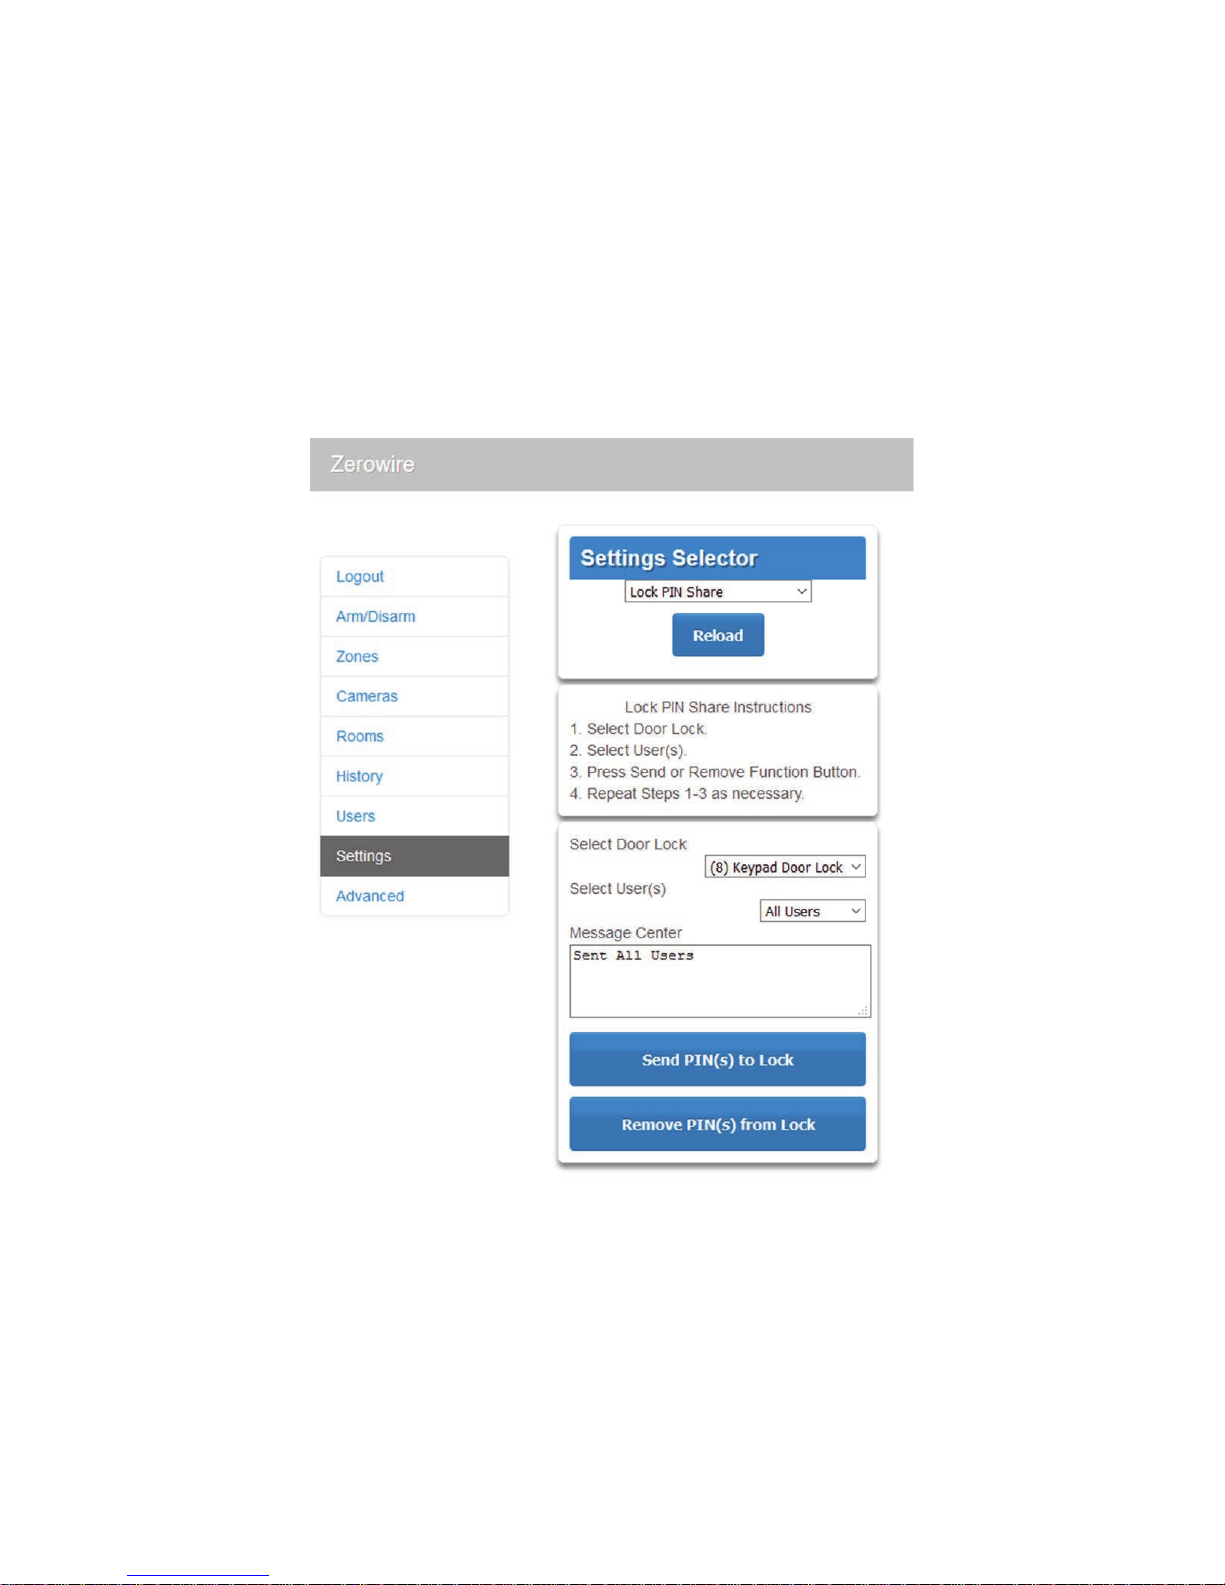
1. Log in to ZeroWire Web Server or UltraConnect app.
2. Click Settings – Lock PIN Share.
3. Select the Z-Wave Door Lock in the drop down list.
4. Wait for the “Building User List- Please Wait” message to be replaced with “Ready”.
5. The default will have “All Users” pre-selected. You may select an individual user
instead.
Page 19

28 ZeroWire User Manual
6. Optional and recommended, click “Remove PIN(s) from Lock”. This ensures any extra
PIN codes are removed from the lock and only the PIN codes from ZeroWire can
operate the lock. Once completed it will show “Removed All Users”.
7. Click “Send PIN(s) to Lock.
8. PIN codes will be sent to Z-Wave door lock one at a time. Once completed it will show
“Sent All Users”.
9. Test PIN codes on door lock and verify only the codes you want can operate the lock.
10. Refer to door lock manual to remove or change installer / master codes from door lock.
As PIN codes can also be changed on the door lock, over time there may be a mismatch
in PINs on the door lock compared to ZeroWire. To avoid this confusion, only make PIN
code changes via ZeroWire.
Page 20
ZeroWire User Manual 29
UltraConnect App
Introduction
UltraConnect is a smartphone app that allows you to:
• Check the status of your system
• Arm and Disarm partitions
• Bypass zones
• Manage users
• Operate Z-Wave devices
• Set up system and Z-Wave features (depends on your assigned user type: Standard or
Master)
• Receive push notifications
• Change push notification events
• View live cameras and retrieve recorded clips
Web Access Code
This code should be written on the rear of this manual. It permits remote access from the
UltraConnect app. When it is set to 00000000 the app is prevented from connecting.
Example: Listen to the Web Access Code or change it to a new one.
1.
Select Zone Configuration.
2.
3.
Select Web Access Code.
4.
Web Access Code will be flashed on the key pad.
5.
Enter a new 8 digit Web Access Code, or skip.
6.
Exit from Advanced system configuration.
User Name and PIN
The UltraConnect app requires a valid username and PIN code to function. A default user
should be written on the rear of this manual, or refer to "Add a Username" on page 23. The
menus available are dependent on the permissions for the user entered.
MENU 9
YOUR 4 TO 8 DIGIT MASTER CODE
ENTER
9
WEB ACCESS CODE
8 DIGIT CODE ENTER
MENU MENU MENU
Page 21

30 ZeroWire User Manual
Installing UltraConnect app
UltraConnect is an app that allows you to control your ZeroWire from an Apple®
iPhone/iPad, or Google Android device. First set up the ZeroWire Web Server then
download this app. Carrier charges may apply and an Apple iTunes or Google account is
required.
1. On your smartphone go to the Apple® App StoreTM or Google PlayTM store.
2. Search for UltraConnect.
3. Install the app.
4. Click the Smart Home icon on your device to launch it.
5. Click + on the top right to add a new site, or the (i) icon to edit an existing site.
6. Enter the details of your security system.
The serial number is printed on the back of the ZeroWire unit. Alternatively login to
ZeroWire Web Server and go to Settings – Details to view it.
The default Web Access Passcode of 00000000 disables remote access. To change it,
login to ZeroWire Web Server and go to Settings - Network.
The default username and PIN code is "installer" 9713 (for an installer) and “User 1”
1234 (for a user). Please note that there is a space between "User" and "1". You may
also use any other valid user account. Only menus a user has access to will be
displayed.
7. Click Done button to save the details, then Sites to go back.
8. Click the name of the Site, the app will now connect you to ZeroWire.
Page 22

ZeroWire User Manual 31
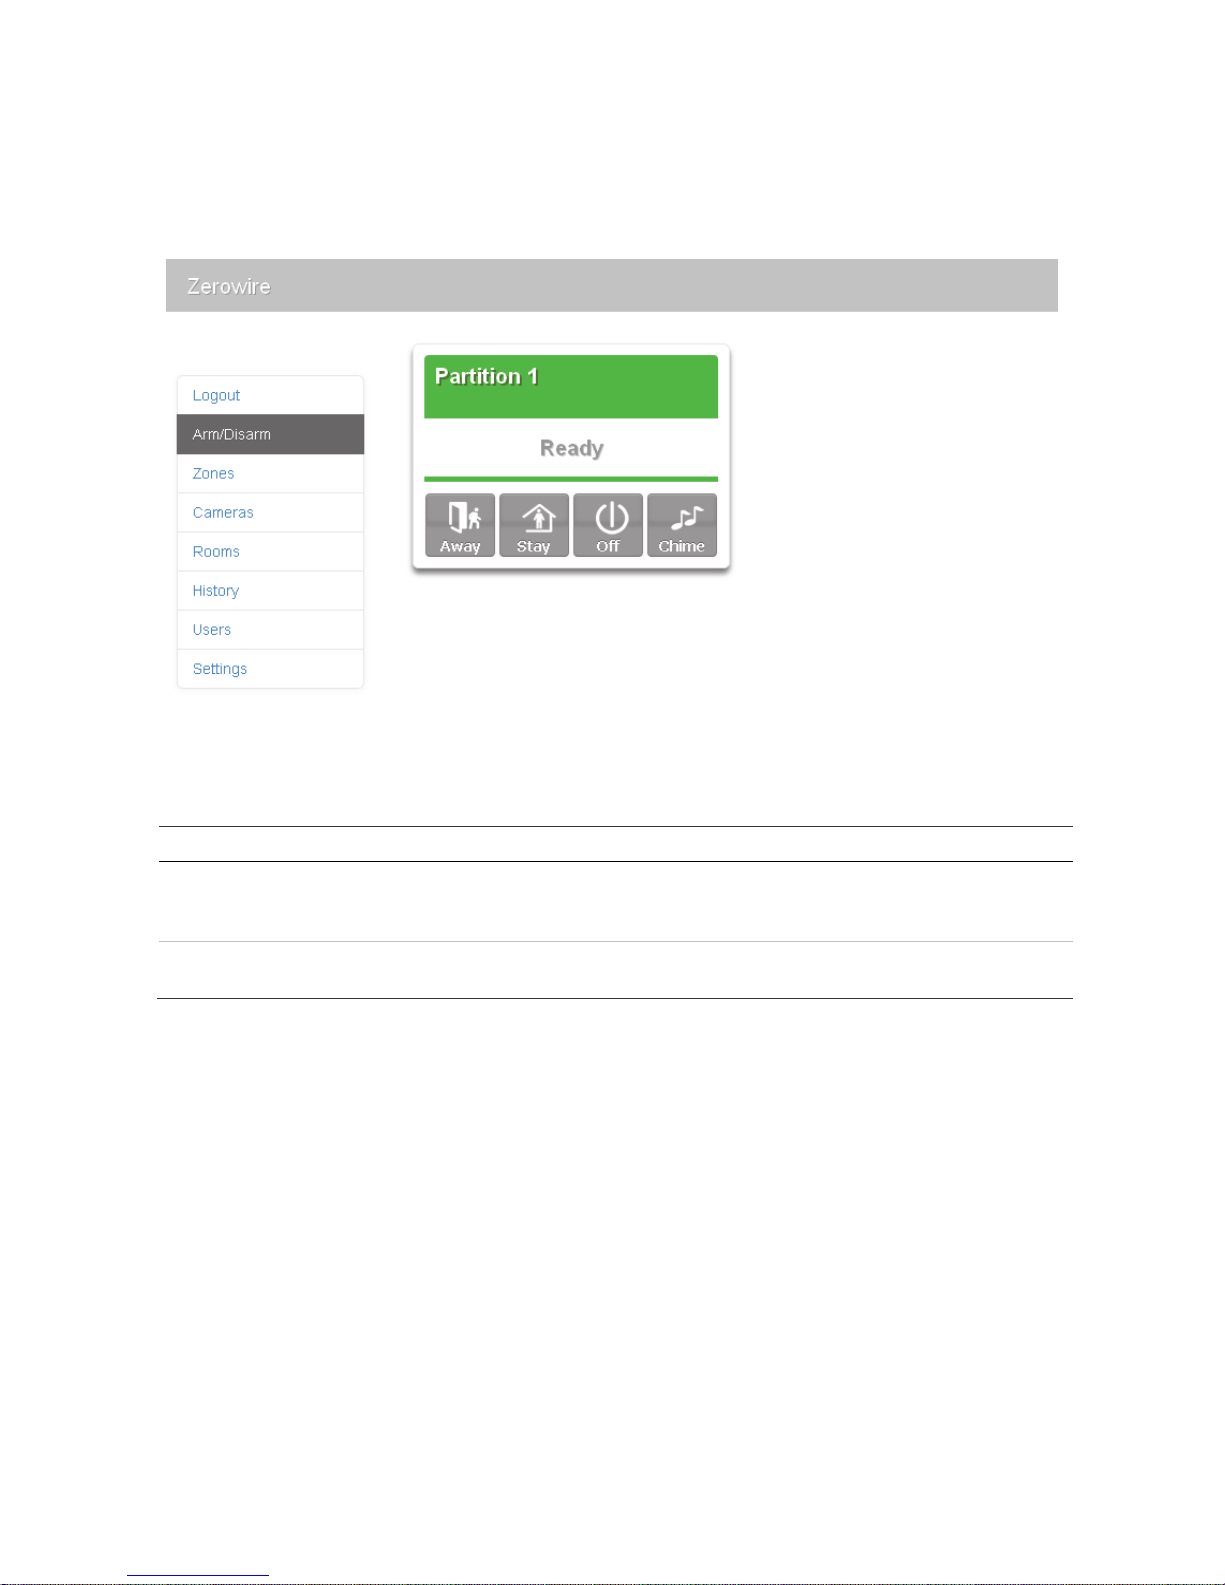
Using the App
The first screen that will appear once you connect is the Overview screen. This will display
the status of your system and allows you to arm or disarm partitions by touching Arm
Away, Arm Stay, or Disarm. It also allows you to activate programmed automation scenes.
The menu bar is located along the bottom of the app. Touch the Zones icon (last icon with
a dot and wireless signals) to view zone status.
Touch Bypass to ignore a zone or touch it again to restore it to normal operation.
Touch Chime to add or remove a zone from the Chime feature.
Touch Notify to receive push notifications when there is activity from that zone.
Page 23

32 ZeroWire User Manual
Touch the Camera icon to view cameras connected to your system.
Live snapshots from each camera will be shown. Touch the snapshot to open the
live stream in full screen. Rotate your device to make the image bigger. Touch the
screen then Back to return to the Camera screen.
Touch the Play button under each camera to view the last recorded clip by that
camera. Touch the Share button to save or forward the clip.
Touch the Record button to request that camera record a short clip which can be
retrieved at a later date.
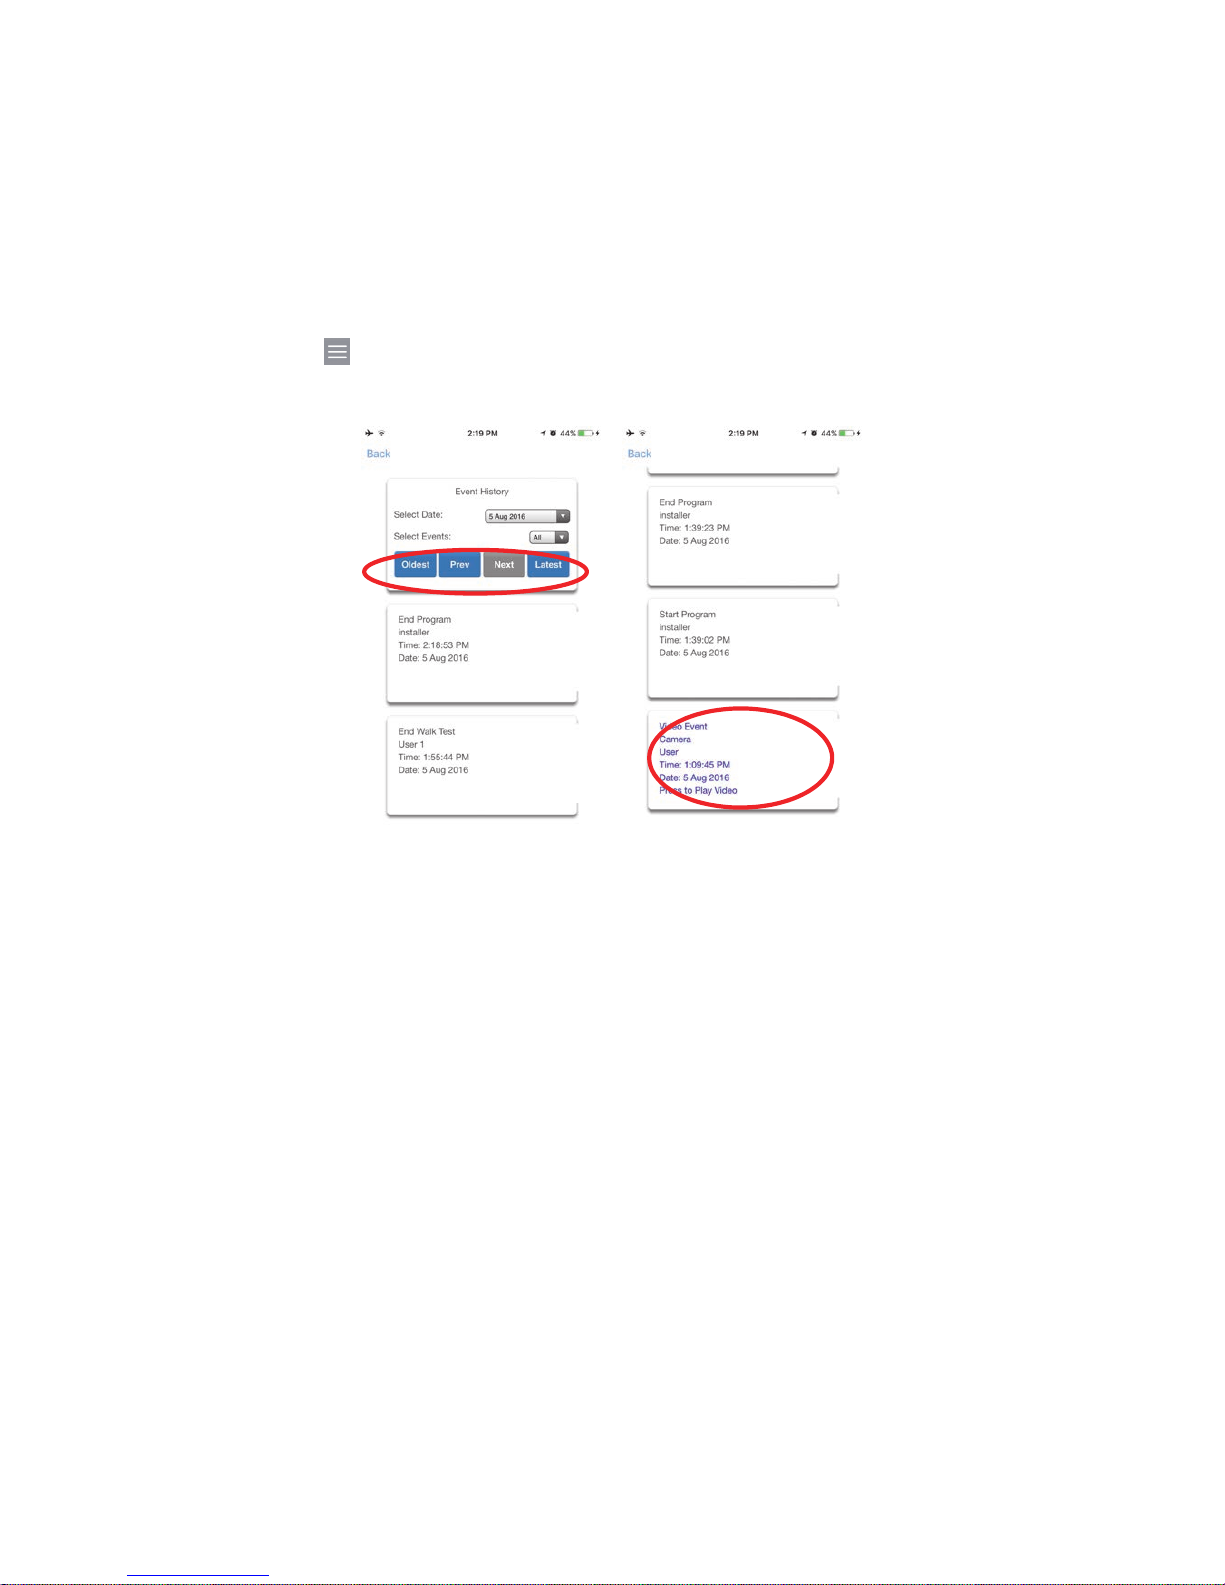
Video clips can also be accessed from the History screen. Touch Menu , HISTORY,
then change Selected Events to Video. Touch “Press to Play Video” to retrieve the clip
from the camera.
Page 24

ZeroWire User Manual 33
This History screen displays the event log of the ZeroWire, recording important events and
allowing authorized users the ability to audit the system. Changing the Selected Events to
Alarms will display the filtered Mandatory Event Log. Events followed with an * have not
yet been reported to a control room or have failed to report, while events with ** are for
events not intending to be reported to a control room.
If you have Z-Wave devices installed, touch the Light or Lock icon to view and control
them.
Master users will have access to the full Users menu for creating and managing users.
Touch Menu , USERS. After making any changes remember to click Save. To apply
custom permission to a user, change User Type to Custom to show additional options.
Page 25

34 ZeroWire User Manual
All users can change their PIN code by touching Menu , USERS.
A history of events and status changes on your ZeroWire can be accessed by touching
Menu , HISTORY:
The list of events can be filtered to make it easier to locate more relevant information. Click
Touch the Select Events drop down and select “Alarm” for Mandatory Log events, or “All”
for all event history.
Recommended Items To Change
• User 1 PIN code is 1234 at default. Always change this to prevent unauthorized access
to the security system.
• User 1 username is “User 1” at default, with a space between "User" and "1". This is
required to access to the ZeroWire Web Server and UltraConnect app.
Page 26

ZeroWire User Manual 35
ZeroWire Web Server
ZeroWire has a built in web server which makes it easy and simple to set up advanced
features of your system from a web browser instead of the ZeroWire keypad.
Features
• Simple forms to set up most commonly used features
• View status of partitions
• View system conditions
• Remotely arm and disarm partitions
• Turn chime mode on and off
• Bypass/Un-bypass zones
• Add, remove and edit users
• Add, remove and edit Z-Wave devices
• View Z-Wave device status
• Control Z-Wave devices
• Enter Installation menu and perform advanced programming for ZeroWire
Connecting over Wireless LAN
To connect via local WiFi you will need a router supporting 802.11 b or 802.11g.
1. Power on - Connect power to your ZeroWire.
2. Enable WiFi on ZeroWire - On the ZeroWire press Menu – 9 – [PIN] – 8. This will
enable WiFi Discovery Mode for 10 min.
3. Enable WiFi on your device - Turn on WiFi on your device (such as a smart phone,
tablet computer or laptop).
4. Connect to ZeroWire - Browse for available WiFi networks and select the
‘ZeroWire_xxx” network to connect to it. Only a single user can connect at any time
and there is no password. Once connected the ZeroWire will be assigned a fixed IP
address of 192.168.1.3 and a domain name of ZeroWire.
5. Open Web Browser - Open your web browser and enter http://192.168.1.3 or ZeroWire.
The ZeroWire login screen should appear.
Page 27

36 ZeroWire User Manual
6. Login - Enter your username and password, by default this is "installer" and 9713.
7. You should now see a screen similar to the one shown below:
Connecting over Wired LAN
1. Connect power to your ZeroWire.
2. If this ZeroWire was previously connected via WiFi, switch connection mode to switch
to Ethernet by pressing Menu, 9, Master PIN, 7. Press 7 again if it announces “WiFi is
on”. The ZeroWire will announce “Ethernet is on” when this is set correctly. Press
Menu, Menu to exit.
3. Connect an Ethernet cable to the rear of the ZeroWire and wait 10 sec for the local
router to assign the ZeroWire an IP address
4. On the ZeroWire press Menu, 8, [Master PIN], 6 and note the IP address announced. If
you hear “IP address is not configured” then wait a further 30 s and repeat this step.
5. Open your web browser
9713
installer
Page 28
ZeroWire User Manual 37
6. Enter the IP address from step 4 and the ZeroWire login screen should appear. Some
browsers may require you to enter http:// before the IP address.
7. Enter your username and password, by default this is "installer" and 9713.
8. You should now see a screen similar to the one shown below.
9. Click Advanced to program your ZeroWire.
Troubleshooting
Problem Solution
Cannot get IP address If you are unable to get an IP address then your wireless/router may
not be configured for automatic DHCP or certain security settings may
be enabled. Check your router settings and try again.
Cannot see local WiFi access point
from a smartphone
Ensure your WiFi access point is able to accept 802.11b or 802.11g.
Some 802.11n access points may not accept 802.11g connections.
Page 29

38 ZeroWire User Manual
Customizing Your ZeroWire
Volume Level
Example: Set volume level to 6
1.
Select main menu - Option 1 Volume level.
2.
Set volume level to 6.
3.
Exit menu.
Voice Annunciation
Example: Turn on/off the voice when arming and disarming
1.
Select main menu - Option 8, Basic system
configuration.
2.
3.
[4] Toggles voice annunciation on / off.
[5] Toggles full menu annunciation on / off
4.
Exits from Advanced system configuration.
Full Menu Annunciation
Turning this feature On, gives full descriptions to all the options within the main menu.
Turning this feature Off shortens the descriptions.
1.
Select main menu - Option 8, Basic system
configuration.
2.
3.
[4] Toggles voice annunciation on / off.
[5] Toggles full menu annunciation on / off.
4.
Exits from Advanced system configuration.
MENU 1
6
MENU MENU
MENU 8
YOUR 4 TO 8 DIGIT MASTER CODE
ENTER
4
MENU MENU
MENU 8
YOUR 4 TO 8 DIGIT MASTER CODE
ENTER
5
MENU MENU
Page 30

ZeroWire User Manual 39
Backlight Level
Example: Set run mode brightness level to 8
1.
Select main menu – Option 2 Backlight level.
2.
[1] Run mode backlight level.
[2] Idle mode backlight level.
3. Set brightness level to 8.
4.
Exit menu.
Idle mode is when your ZeroWire is not being used. The lights on the screen dim for your
comfort at night and to save power. All security functions work normally.
Example: Set idle mode brightness level to 1
1.
Select main menu – Option 2 Backlight level.
2.
[1] Run mode backlight level.
[2] Idle mode backlight level.
3.
Set brightness level to 1.
4.
Exit menu.
MENU 2
1
8
MENU MENU
MENU 2
2
1
MENU MENU
Page 31

40 ZeroWire User Manual
Change Time and Date
When ZeroWire is connected to the Internet, time and date are automatically updated with
an Internet time server
Example: Manually set the time as 9.30AM, and the date as 19.6.2014
1.
Select main menu - Option 8, Basic system
configuration.
2.
3.
Select time and date configuration.
4.
[1] To configure the time and date.
[2] To configure the date.
5.
Enter the hours value.
6.
Enter the minutes value.
7.
Select AM time.
8.
Enter the day.
9.
Enter the month.
10.
Enter the year, must be 4 digits.
11.
Exits from Advanced system configuration.
Adjust Partition Entry or Exit Times
Example: Setting the entry time as 90 seconds
1.
Select main menu - Option 8, Basic system
configuration.
2.
3.
[2] Select partition entry time.
[3] Select partition exit time.
4.
Enter the new entry time.
5.
Exits from Advanced system configuration.
MENU 8
YOUR 4 TO 8 DIGIT MASTER CODE
ENTER
1
1
9 ENTER
30 ENTER
1
19 ENTER
6 ENTER
2 0 1 4 ENTER
MENU MENU MENU
MENU 8
YOUR 4 TO 8 DIGIT MASTER CODE
ENTER
2
9 0 ENTER
MENU MENU MENU
Page 32

ZeroWire User Manual 41
Configure Zone Names
All zones can be named using the library words on page 65. This makes it easier to
identify the correct zone in the event of a condition. You may enter up to eight words to
achieve your desired description.
Example: Configure zone 1 name as “Dining Room Zone”
1.
Select main menu - Option 8, Basic system
configuration.
2.
3.
Select zone name recording.
4.
Select zone 1.
5.
Select word “Dining” from word library.
Select word “Room” from word library.
Select word “Zone” from word library.
6.
Exits from Advanced system configuration.
If you do not require all eight words, just press MENU as in step 6 after you have entered
the last word number.
Record Zone Names
You can also record the names of 64 zones using your voice.
Example: Record zone name for zone 1.
1.
Select main menu - Option 8, Basic system
configuration.
2.
3.
Select zone name recording.
4.
Select zone 1.
5.
Activate recording mode.
6.
Record voice, maximum 2 seconds.
7. Stop recording mode.
8.
Exits from Advanced system configuration.
MENU 6
YOUR 4 TO 8 DIGIT MASTER CODE
ENTER
4
1 ENTER
5 3 ENTER
1 1 7 ENTER
1 2 1 ENTER
MENU MENU MENU
MENU 6
YOUR 4 TO 8 DIGIT MASTER CODE
ENTER
4
1 ENTER
HOLD DOWN HISTORY
( ( SPEAK NAME ) )
RELEASE HISTORY
MENU MENU MENU
Page 33

42 ZeroWire User Manual
Record User Names
To make the system user friendly, users 1-40 can have a recorded name.
Example: Record user name for user 3.
1.
Select main menu - Option 8, Basic system
configuration.
2.
3.
Select user name recording.
4.
Select user 3.
5. Activate recording mode.
6.
Record voice, maximum 2 seconds.
7.
Stop recording mode.
8.
Exits from Advanced system configuration.
Voice Message Recording
ZeroWire has a digital message board so you can leave entry messages for users to hear
when they disarm the system and reminder messages for users arming the system.
Example: Record an Entry or Exit Message.
1.
Select main menu - Option 6, Voice Message
Recording.
2.
3.
[1] Select exit message recording.
[2] Select entry message recording.
4.
[History] Activate recording mode.
5.
Record voice, maximum 10 seconds.
6.
Stop recording mode.
7.
Exits from Advanced system configuration.
MENU 6
YOUR 4 TO 8 DIGIT MASTER CODE
ENTER
3
3 ENTER
HOLD DOWN HISTORY
( ( SPEAK NAME ) )
RELEASE HISTORY
MENU MENU MENU
MENU 6
YOUR 4 TO 8 DIGIT MASTER CODE
ENTER
1
HOLD DOWN HISTORY
( ( SPEAK ) )
RELEASE HISTORY
MENU MENU MENU
Page 34

ZeroWire User Manual 43
Set Zone Chime Mode
You can setup your ZeroWire so that it will make a “chime” sound when programmed
zones are unsealed. Chime mode does not trigger any alarms and is only used as a low
level alert such as a customer entry door.
1.
CHIME
Select Chime Menu.
2.
Toggle Chime Mode on or off.
3.
Exits from Chime Menu.
Add Zone to Chime Group
You can add and delete zones from the “chime group” offering a flexible chime mode
feature. The zones you have selected to be in the “chime group” stay in memory and are
not cleared when the security system is armed and disarmed.
4.
CHIME
Select Chime Menu
5.
Select a zone number
6.
Add or remove the zone to the Chime Group
7.
Exits from Chime Menu
Configure Email Reporting (User)
1. Login to ZeroWire Web Server or UltraConnect app.
2. Click Settings.
3. Click Channels.
4. Select a Channel to Configure.
0
MENU
ZONE NUMBER ENTER
0
MENU
Page 35

44 ZeroWire User Manual
5. Enter an email address in the Destination field.
6. Select an Event List.
7. Enter a Channel Name for future reference.
8. Click Save.
Page 36

ZeroWire User Manual 45
Add Z-Wave Devices
1. Log in to ZeroWire Web Server or UltraConnect app.
2. Click Settings, Rooms and edit Room Names.
3. Click Settings, Z-Wave Add/Remove.
4. Click Add.
Page 37

46 ZeroWire User Manual
5. Initiate LINK or ADD mode on Z-Wave device. See your Z-Wave device’s manual for
instructions.
Note: If a Z-Wave device has previously been added to another system, you must first
remove it before adding it to this system. To do this, click Remove, then activate LINK
or REMOVE mode on the device.
6. Click Rooms
7. Check you can see the device you just added. Click a button such as ON or OFF to
verify you can control the device.
Page 38

ZeroWire User Manual 47
Enabling Camera Recording
Adding Camera to UltraConnect
Make sure the ZeroWire panel is on the same local area network as the camera(s).
1. From your iOS or Android device, open the UltraConnect app and log in to the site as
an installer. Only an authorized installer may perform this step.
2. Touch Menu then Settings.
3. Select Cameras under the Settings Selector.
4. Click Scan for New Cameras. “Scanning…” will appear on the button, please wait for
the message to disappear.
5. Make sure the MAC ID that is automatically populated in the MAC Address field
matches the MAC Address printed on the underside surface of the camera.
6. Click Save. The camera will now register with ZeroWire and UltraConnect. This may
take up to 3 minutes before the camera is visible on the Cameras tab.
7. Congratulations! You have now added the camera to your ZeroWire system!
Viewing Live Stream and Latest Clip
1. Click Camera icon on the bottom menu.
2. All available cameras will be shown.
MAC: 28:57:BE:2F:0A:5D
Page 39

48 ZeroWire User Manual
3. Click the snapshot to open a live stream.
4. Click Latest Clip to view the last recorded clip from a specific camera.
Programming event triggered camera clips
Cameras can be programmed to automatically record when selected events occur. This is
achieved by creating a “Scene”.
Note: Ensure you can view the live stream from the camera before continuing.
1. Touch Menu then Settings.
2. Select Scenes under the Settings Selector.
3. Select the Scene to Configure and type a Scene Name.
4. Select the Scene Trigger.
Page 40
ZeroWire User Manual 49
5. Select Alarm System under Action Device.
6. Select Trigger Camera Video Clip under Action Type.
7. Select the Camera(s) which will record when the scene is triggered.
8. Clips are recorded on the Micro SD card installed in the camera and are linked to
events in History.
Viewing event triggered clips in History
1. Touch Menu then HISTORY.
2. Find the video event by using the navigation buttons and scrolling down.
Note: For faster searching you can show only Video events by selecting Video in
Select Events.
3. Tap the event to play the video.
5. Click the Share button to download or forward the clip.
Viewing recordings via Cameras
1. Open the UltraConnect app.
2. Click the Camera icon.
3. Click the Latest Clip button. Please wait while the ZeroWire servers retrieve the last
recorded video clip from the selected camera.
4. Click the Share button to download or forward the clip.
Page 41

50 ZeroWire User Manual
Enabling Notifications
ZeroWire can send notifications to the UltraConnect app via the Channels feature. Each
ZeroWire has up to 13 available channels. Each device registered to receive notifications
will take up a channel position.
1. Open the UltraConnect app.
2. Click the edit button next to the site you wish to receive notifications from.
3. Click Notification Services.
4. Enable Push Notifications.
5. Wait for the registration process to complete.
6. Optional: select the events you want to be notified about:
Page 42

ZeroWire User Manual 51
a. Click Show event selection.
b. Select the events you want a notification for.
c. Click Save >.
d. Click Back.
7. Click Back.
8. Click Done.
Note: If the device will no longer be used, repeat these steps and disable Push
Notifications to free up the channel position for future use.
Troubleshooting notifications
If notifications are not working:
• Confirm you can login and see the Overview screen on the device you wish to receive
notifications on. This ensures you have authority to access the ZeroWire.
Page 43

52 ZeroWire User Manual
• Check the ZeroWire has at least one unused channel. Login to the ZeroWire, touch
Menu , Settings, then Channels.
• Check your site is registered for notifications in the app (follow instructions above).
• Check your smartphone has notifications enabled (on Apple iOS click Settings,
Notifications, scroll down and click UltraConnect, check “Allow Notifications” and “Show
in Notification Centre” are enabled, optionally select the Alert Style as Banners or
Alerts).
• If you are on iOS, ensure your phone is logged into your Apple account under iTunes
or iCloud.
If you are on Android, ensure your phone is logged into your Google account under
Google Play or Settings. This is required as UltraConnect sends the push notification to
Apple and Google servers for delivery to your device. “Rooted” or “Jailbroken” phones
may not have the required software to receive push notifications.
• If you have multiple devices registered to receive notifications, each device must have
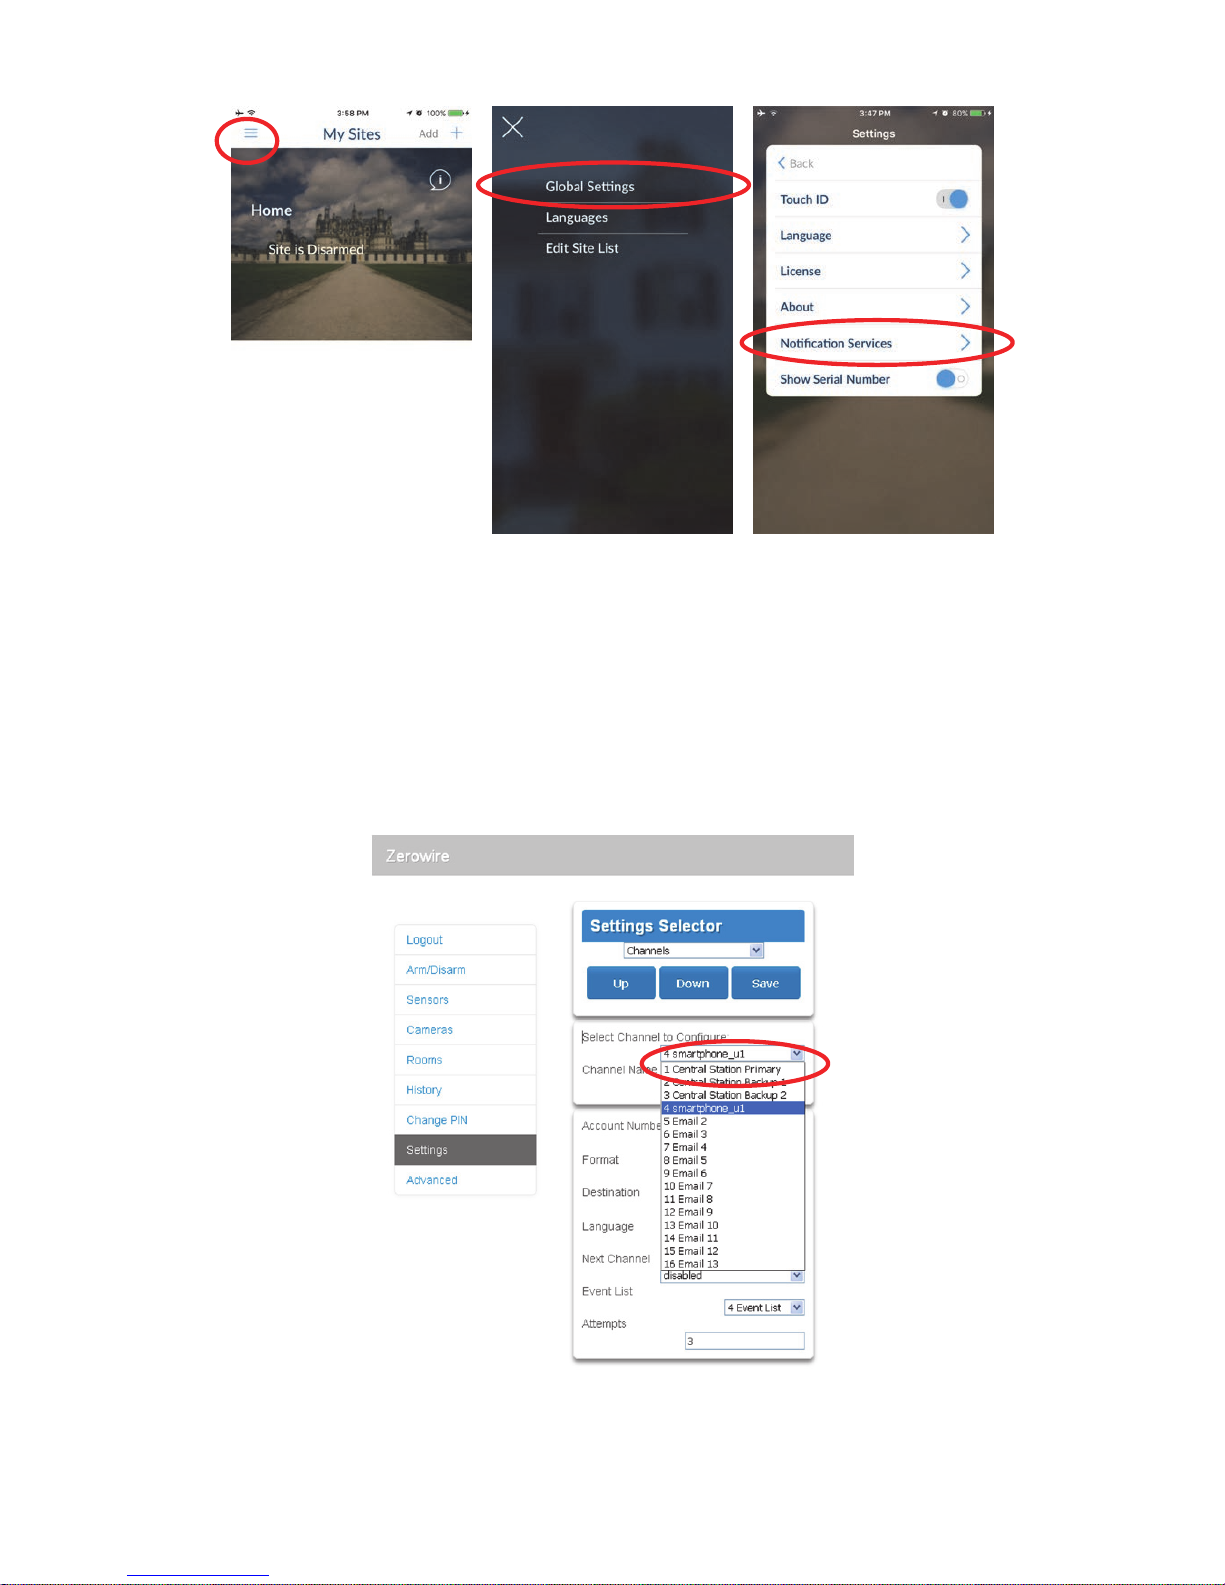
a unique name. This is set in the UltraConnect app:
1. Touch Menu from the Sites screen.
2. Touch Global Settings.
3. Touch Notification Services.
4. The device name is displayed and can be changed
Page 44
ZeroWire User Manual 53
Removing notifications
To manually remove a device from receiving notifications on the ZeroWire:
1. Log in to the ZeroWire.
2. Click Settings.
3. Click Channels from the Settings Selector.
4. Click the Channel Number in the drop down list, your device name will appear.
5. Delete the content of the Destination field.
Page 45

54 ZeroWire User Manual
6. Click Save.
7. Your device will no longer receive notifications from this ZeroWire and the Channel is
available to be reused.
Page 46

ZeroWire User Manual 55
Location Services
The UltraConnect app can advise the ZeroWire panel when a user has left or returned to a
predefined physical location.
For example, when a user leaves home, the UltraConnect app can detect this and remind
a user to arm the security system and automatically turn off Z-Wave lights. On return home
in the evening, the UltraConnect app can turn on Z-Wave lights.
Enabling Location Services
1. Open the UltraConnect app
2. Click the edit button next to the site you wish to monitor
3. Click Location Services.
Page 47

56 ZeroWire User Manual
4. Click Edit Map.
5. Drag the map around and set the home location using the red pin. You can zoom in
and out using two fingers to “pinch” the screen.
6. Click Save Map.
7. Enable Geo Actions if you want your device to regularly check it’s GPS location and
send a message to the ZeroWire when it enters or leaves the location.
Note: Enabling this feature will consume more battery.
8. Enable Check Status on Leaving if you want a reminder notification from the app when
it detects you have left the home location. This feature is independent of the
“Notification Services” feature on UltraConnect (i.e. Notification Services does not need
to be enabled inside the app).
9. Click Back.
10. Click Sites.
Page 48

ZeroWire User Manual 57
Program ZeroWire to Respond
When Location Services is enabled, the app can send to your ZeroWire one of two event
messages: Geosphere Entered or Geosphere Exited.
Your ZeroWire has 16 programmable “scenes”. Each scene can perform up to 16
sequential actions based on when the event is received, which event is received, and
which user triggered the event.
1. Log in to the ZeroWire.
2. Touch Menu , Settings, Scenes. The screen pictured above will appear.
3. Select a Scene Number.
4. Enter a Scene Name.
5. Optional - Select a Schedule during which this scene will be monitored, outside of this
schedule the scene will NOT respond to the selected event.
6. Select an Event Type (Geosphere 1 Entered or Geosphere 1 Exited).
7. Select a User to monitor, this must match the user in the UltraConnect app under the
Site Info screen.
8. Select the Device (Security System or Z-Wave Device).
9. Program the device action.
10. Repeat steps 8 and 9 for up to 16 Scene Actions.
11. Click Save.
Page 49

58 ZeroWire User Manual
Troubleshooting Location Services
For Location Services to work correctly:
• Your device needs access to mobile data or WiFi to send location service events and
to receive notifications.
• Your device needs the ability to track your location using GPS, cellular network, or WiFi
network. Most modern Google Android and Apple iOS smartphones have this feature.
• Your device needs to have Location Services enabled (on Apple iOS it is in Settings –
Privacy – Location Services).
• The UltraConnect app needs permission to monitor your location (on Apple iOS it is in
Settings – Privacy – Location Services – UltraConnect – When in use).
• A valid user must be entered in the site details screen.
• If actions are programmed in the ZeroWire with a User, the selected user must have
permissions to perform the selected action.
• Note on Apple iOS 7, the background Location Services of the UltraConnect app may
be terminated by the phone if it is low on memory and notifications will cease working.
It is recommended to upgrade to iOS 8 or above.
If Location Services are not working:
• Check you can see the Arm/Disarm screen of the device you wish to receive
notifications from, this ensures you have authority to access the ZeroWire.
• If you have enabled “Check Status on Leaving” feature but are not receiving
notifications when leaving the home location, check your smartphone has notifications
enabled (on Apple iOS click Settings, Notifications, scroll down and click UltraConnect,
check “Allow Notifications” and “Show in Notification Centre” are enabled, optionally
select the Alert Style as Banners or Alerts). Note you will not see notifications if the app
is open on the screen.
Page 50

ZeroWire User Manual 59
• If you are testing the Location Services feature, you must move at least 300m away
from the home location for the app to detect you have exited. To detect returning to the
home location you must move within 200m. This is designed to account for GPS errors
and prevent accidental triggering of location services alerts.
• If your home location does not appear accurate, return to the Edit Map screen and
zoom in using a “pinch-out” gesture. Then set the red pin on the location with greater
accuracy. Ensure you click the Save Map button.
• Take care when creating Scenes with Location Services for multiple users on separate
devices. Improper programming may lead to conflicting behaviour on the ZeroWire.
Selecting the appropriate “Activate User Number” in the Scene programming may be
beneficial.
• Take care when using the Arm and Disarm actions. For example if Geosphere Exited is
programmed to Arm an Area, other users may still be present inside the protected area
which would cause the ZeroWire to go into alarm.
Move outside 300 m of the home location
to trigger an “exited” event.
Move within 200 m of the home location
to trigger an “entered” event.
Page 51

60 ZeroWire User Manual
Testing Your System
System Tests
Your security system is only as effective as each of the components. This includes your
sirens, communicator, back up battery, and detection devices.
Each of these should be tested at least once per week and maintained to provide the
highest level of security. Failure to conduct regular testing can result in system failure
when most required.
The four system tests to perform are:
Perform a Walk Test
This is an important test to use regularly to verify that each zone is working correctly.
Example: How to perform a zone walk test from the keypad.
1.
Select main menu - Option 4, System Test.
2.
3.
Select zone walk test.
4.
Walk past each motion detector, open
and close windows and doors with
detectors.
The ZeroWire will chirp the siren and announce the
zone name and the signal level of each detector that is
triggered.
5. Hear the status of each zone that has been tested.
6.
Exits from System Test.
Example: How to perform a zone walk test from the app or web page.
1. Log in to the ZeroWire.
2. Click Settings – Walk Test.
MENU 4
YOUR 4 TO 8 DIGIT MASTER CODE
ENTER
4
STATUS
MENU MENU MENU
Page 52

ZeroWire User Manual 61
3. Click Start Walk Test.
4. Open (Trigger) a sensor.
5. Wait 8 Seconds.
6. Close (Restore) a sensor.
7. Wait 8 Seconds.
8. Check Result.
9. Repeat for all sensors.
Perform a Siren Test
The Sirens are used as audible deterrents in the event of your security system activating.
As this test sounds all the audible devices connected to your security system, it is
advisable to notify neighbours and other persons within the premises prior to activating this
test. Using hearing protection is also recommended.
Example: How to perform a siren test.
1.
Select main menu - Option 4, System Test
2.
3.
Select siren test
4.
To stop sirens (Within 30 seconds)
5.
Exits from System Test
MENU 4
YOUR 4 TO 8 DIGIT MASTER CODE
ENTER
1
MUTE
MENU MENU
Page 53

62 ZeroWire User Manual
Perform a Battery Test
The backup battery is located on the rear of the ZeroWire behind a cover. It provides
temporary power to the ZeroWire when mains power is not available. This may occur
during a power outage or an intruder cutting power to a property.
The ZeroWire will automatically test the battery each day. If the battery fails then your
system can no longer protect your property in a power outage. This is why replacing it
when needed is very important.
The battery is a consumable part of the system and should be replaced every 3 years or
when the battery test fails (whichever is sooner). Contact your service provider for
replacement parts.
A low battery or mains fail status message may take up to 5 minutes to clear after a mains
power fail event.
Example: How to perform a battery test.
1.
Select main menu - Option 4, System Test
2.
3.
Select battery test
4.
Exits from System Test
Perform a Communicator Test
The communicator is a part of the ZeroWire responsible for sending alarm messages. The
communicator test is only available if your security system has been set up to report to a
central monitoring station. Proper operation of this is very important for alarm reporting.
When testing your communicator, no sirens will sound and a test message will be sent to
the central monitoring station.
MENU 4
YOUR 4 TO 8 DIGIT MASTER CODE
ENTER
3
MENU MENU MENU
Page 54

ZeroWire User Manual 63
Example: Perform a communicator test.
1.
Call your central monitoring station and
tell them you are performing a
communicator test
2.
Select main menu - Option 4, System Test.
3.
4.
Select communicator test.
5.
The central monitoring station will confirm
the test message was received
6.
Exits from System Test.
7.
If communicator test fails,
notify your service provider
MENU 8
YOUR 4 TO 8 DIGIT MASTER CODE
ENTER
2
MENU MENU MENU
Page 55

64 ZeroWire User Manual
References
Full Installation Manual
It is recommended you contact your service provider to program advanced settings.
A full installation manual including instructions on advanced customization and automation
features is available from www.interlogix.com. Incorrect settings may render your system
non-functional. Proceed only if you accept this.
No technical support is available to end-users for customizing advanced features.
Main Menu
Touching the [MENU] key will give you access to main menu. Simply press [MENU] now to
try it out. The Personal Voice Guide will prompt you through each menu and announce
what options are available.
There are 9 main features used for customizing your security system. Some menus
require a Master User PIN code to access.
1. Volume Level
2. Backlight Level
3. User Configuration
4. System Test
5. Zone Configuration
6. Voice Message Recording
7. Detector Reset
8. Basic System Configuration
9. Advanced System Configuration
Page 56

ZeroWire User Manual 65
Voice Library
These words can be used to customize your zone names on page 41.
0 zero
1 one
2 two
3 three
4 four
5 five
6 six
7 seven
8 eight
9 nine
10 ten
11 eleven
12 twelve
13 thirteen
14 fourteen
15 fifteen
16 sixteen
17 seventeen
18 eighteen
19 nineteen
20 twenty
21 thirty
22 forty
23 fifty
24 sixty
25 seventy
26 eighty
27 ninety
28 hundred
29 thousand
30 air conditioner
31 area
32 attic
33 automatic
34 auxiliary
35 back
36 basement
37 bathroom
38 bedroom
39 boat
40 cabinet
41 car park
42 ceiling
43 cellar
44 childs
45 alert
46 closet
47 computer
48 cool
49 curtain
50 data
51 den
52 detector
53 dining
54 door
55 downstairs
56 driveway
57 duress
58 east
59 emergency
60 entry
61 family
62 fan
63 fence
64 fire
65 forced arm
66 foyer
67 freezer
68 front
69 games
70 garage
71 gas
72 gate
73 glass
74 glass break
75 ground
76 guest
77 gun
78 gym
79 hall
80 hallway
81 heat
82 heating
83 hold-up
84 home
85 home theatre
86 infra red
87 inside
88 instant
89 interior
90 key switch
91 Keychain
92 kitchen
93 lounge
94 laundry
95 lift
96 light
97 living
98 location
99 master
100 medicine
101 meeting
102 motion
103 night
104 north
105 nursery
106 office
107 output
108 outside
109 panic
110 pantry
111 partial
112 perimeter
113 pool
114 rear
115 reception
116 remote
117 roof
118 room
119 rumpus
120 safe
121 security
122 zone
123 shed
124 shock
125 shop
126 side
127 skylight
128 sliding
129 small
130 smoke
131 south
132 stairs
133 storage
134 study
135 temperature
136 spare
137 toilet
138 training
139 T V
140 upstairs
141 user
142 utility
143 volt
144 veranda
145 wall
146 warehouse
147 water
148 west
149 window
150 windows
151 wireless
152 yard
Page 57

66 ZeroWire User Manual
Glossary
Action
An action allows the ZeroWire to perform automation functions. These can monitor
the status up to 4 input conditions called Action Events, change state (Action State),
and perform a function (Action Result) such as arming a range of partitions.
Action Group
An action group is one or more actions that can be accessed by a device or user.
They are assigned to a user or device via permissions.
Arm To turn your security system On.
Arm-Disarm
Automatically arm and disarm partitions by a specific user according to a specified
schedule. The partitions armed and disarmed will be the ones that the user has
access to via their permissions.
Away Mode To turn your security system on when you are leaving the premises.
Bypass
Zones can be temporarily disabled so they will not be monitored by the security
system. For example, an interior door is left open, bypass it to temporarily ignore it
and allow arming of the security system. Bypassed zones are not capable of
activating an alarm. Zones will return to normal operation when the system is armed
then disarmed. This prevents unintentional permanent disabling of a zone.
Central Station
A company to which alarm signals are sent during an alarm report. Also known as
Central Monitoring Station (CMS).
Channel
A channel is a communication path for events to be sent from the ZeroWire panel to
a selected destination. Channels can be set to UltraConnect or Email.
A channel has an associated event list which contains the events it is allowed to
forward on.
Channel Group
A channel group is one or more destinations for event messages to be sent to.
When a message is sent to a channel group, it is sent to all the channels that it
contains. It forms the basis of multi-path reporting in ZeroWire.
Chime Group All the zones that will activate chime, when in chime mode.
Chime Mode
An operational mode that will emit a ding-dong sound at the keypad when specific
zones are activated.
Communicator
The communicator is responsible for notifying a control room or third party that an
alarm event has occurred so an appropriate response can be made.
It sends event messages to the specified destination including details such as where
the event originated from and the type of event. The receiver will then log the time
and date when it receives the event. For example, Alarm from Zone 2 in Partition 1
at 3:00am on 5/5/2014 from Account 1234.
ZeroWire has multiple communicator options including Ethernet IP interface, email,
and 3G (with optional cellular radio module).
Disarm To turn your security system Off.
Duress Code
A predetermined user PIN code that will arm / disarm the security system whilst
sending a special code to the central monitoring station indicating the user is
entering / leaving the premises under duress. Only applicable on monitored
systems.
Entry Delay
The time allowed to disarm your security system after the first detection device has
been activated.
Event
Events are messages that are sent by the ZeroWire due to system or partition
conditions. These include partitions in alarm, opening and closing, zone bypass, low
battery, tamper, communication trouble, and power issues.
Page 58

ZeroWire User Manual 67
Event List
Event lists contain events that a channel is allowed to send to the specified
destination. If a channel receives an event that is not in the associated event list,
then the channel will ignore the event.
Exit Delay The time allowed to exit the premises after the security system is armed.
Forced Arming
An option that permits arming even when there are unsealed pre-selected zones.
Generally assigned to zones that cover the ZeroWire (e.g.; motion zones, front door
reed switches), allowing the user to arm the security system without the need to wait
for those zones to be sealed. A security system that is ready to be “force armed” will
flash the ready light.
Master Code
A PIN code that is used by a user to arm or disarm the security system. Its main
feature is the ability to create, alter and delete user PIN codes. Can also be used as
a function code for all features.
Menus
ZeroWire has a large range of features sorted into various menus such as Users,
System, and Zones. Each menu item can be seen when using the ZeroWire Web
Server or the UltraConnect app.
Menus are used to restrict what is displayed by a device and what features a user
has access to.
Monitored
A security system that is configured to send all alarm signals to a central monitoring
station.
Output
Outputs on the ZeroWire panel can be connected to a siren and strobe when an
alarm condition occurs on the system.
Partition
Zones are grouped into partitions which can be secured independently from each
other. This allows you to split your security system in to smaller components that
can be separately managed. For example your system can be divided into an
upstairs partition and downstairs partition.
Partition Group
A partition group is one or more partitions that can be accessed by a device or user.
They are assigned to a user or device via permissions.
Perimeter
Typically this refers to zones located around the boundary of the protected partition
such as zones on doors and windows, and excludes interior motion zones.
Permission
A permission includes a list of features a user or device is allowed to access. This
includes programming menus, partitions, reporting channels, actions, reporting
options, access control options, special options, and special timers.
Profile
Each user can have up to four (4) permission profiles. Each profile contains a set of
permissions and a corresponding schedule. This allows advanced user
programming and provides specific access to different features of the security
system during specific dates/time.
With advanced programming, profiles can be enabled/disabled in response to
system conditions.
Quick Arm
An option that allows you to turn on (arm) the security system by touching the
[AWAY] key.
Scene
Each scene can trigger up to 16 actions to create an automation event. This can
save users time by automatically running multiple actions. A scene can be triggered
manually, through a schedule, or via a system event.
Page 59

68 ZeroWire User Manual
Schedule
A schedule is a list of up to 16 sets of days and times. Typically these are used to
provide access to users only within the specified sets of days and times. Outside of
the schedule a user will not have access to the system.
Schedules are used to automatically arm and disarm specified partitions using the
Arm-Disarm feature.
Scenes can perform a set of actions according to a specified schedule.
Schedules themselves can be enabled and disabled through actions. This powerful
feature allows you to provide conditional access to various users and devic es based
on system conditions.
Sealed
A zone in a normal state is “sealed”. The security system monitors each zone for
changes in state from sealed to unsealed and can respond with certain actions such
as sounding the siren.
For example, a reed switch on a front door may change from a sealed state to an
unsealed state when the door opens.
Service Provider T he installation / maintenance company servicing your security system.
Stay Mode
To turn your security system on when you are staying in the premises, this will
automatically bypass pre-programmed zones and arm others. Often used to arm
only the perimeter while allowing movement inside the premises.
Tamper
A physical switch on a device that detects unauthorised access to the unit. For
example opening the case of a zone or taking a keypad off the wall can trigger a
tamper alarm. This can provide early warning of someone attempting to undermine
the security of your system. Some devices use an optical zone to detect removal
from a surface.
Token
Each token is a pre-recorded word or phrase that can be used to name zones,
partitions, outputs, and rooms.
Each token is identified by a token number and a full list of tokens is in the "Voice
Library" on page 65.
UltraConnect app
Mobile app for smartphones to access your ZeroWire. View status, control zones
and outputs, control Z-Wave devices, view cameras, program users and other
ZeroWire features. Available to download for Apple
TM
iPhoneTM and GoogleTM
Android
TM
from the respective app store.
The UltraConnect app connects to the UltraConnect cloud servers which then
connects you securely to your ZeroWire system and cameras.
UltraConnect
Servers
A secure cloud service with full redundancy to route encrypted alarm messages
from your ZeroWire to a Central Monitoring Station. It also provides secure
connections between the UltraConnect app, ZeroWire, and cameras. No
programming, email addresses, user names, or PIN codes are stored on these
servers for greater security.
Unsealed
A zone in an abnormal state is “unsealed”. The security system monitors each zone
for changes in state from sealed to unsealed and can respond with certain actions
such as sounding the siren.
For example, when a PIR zone detects movement it will change from a sealed state
to an unsealed state.
Page 60

ZeroWire User Manual 69
User
An authorised person who can interact with the ZeroWire security system and
perform various tasks according to the permissions assigned to them.
Each ZeroWire user has a set of profile levels. These control what the user has
access to, a list of functions, and when the user is allowed to perform these
functions.
A user is typically a person who is assigned a PIN code and arms/disarms the
system with this code or keyfob device.
Users can also be automatic functions of the system. For example, ZeroWire can
automatically arm specific partitions a user has access to at a specified time. No
human interaction is required, all the permissions of the programmed user will still
be applied and enforced.
User Code
A PIN code that is used by a user to arm or disarm the security system. Also can be
used as a function code for certain features.
ZeroWire Panel
The main controller for the security system. It stores all programming, provides
network and other connectivity options for reporting, provides physical terminals for
connecting power, backup battery, zones, and outputs.
ZeroWire Web
Server
ZeroWire has a built-in web server which provides access to ZeroWire features via a
web browser interface or a native smartphone app.
This allows you to performing programming and control of the system without
needing to be physically in front of the ZeroWire keypad.
Zone
A detection device such as a Passive InfraRed motion zone (PIR), reed switch,
smoke detector, panic button, etc. Zones may be physically wired to the ZeroWire
system. Also known as an input or sensor on other security panels.
App and Web Error Messages
Various error messages may appear in the ZeroWire Web Server and
UltraConnect App.
Advanced/Settings Configuration Menus
• "You must select a Menu before you can scroll" – An attempt was made to
scroll up or down from the top level menu.
• "Select a submenu from the list or select back to access the main menu" – An
attempt was made to scroll up or down from a submenu that has no additional
levels.
• "Defaulting requires 2 levels" – a Shortcut was entered without two levels.
Read Write errors and results
• "Write Access Denied"
• "Nothing displayed can be Saved"
• "Program Success!"
• "Name Saved"
Sensors Page
• "No Sensors Configured For Your Access" – Displayed on Sensors page
when there are no sensors available to view.
Page 61

70 ZeroWire User Manual
WiFi
• "Connection Was lost before a response was received" – Sent when No
response received on a WiFi network change.
Data Entry Errors
• "Data must only contain the following characters"
• "Date must be of the form YYYY–MM–DD."
• "Day must be from 1 to 31"
• "Data entry must only contain the numbers 0 – 9 and A–F"
• "Data entry must only contain the numbers 0 – 9"
• "Data must be a number from X to Y"
• "Improper Time Value"
• "must be 4 to 8 digits
• "You must enter a user Number between 1 and 1048575"
• "PIN digits must be between 0 and 9"
• "PIN Must be 4–8 digits from 0–9"
• "Data must not contain the following characters []"
System Status Messages
Various messages may appear on the Status screen of ZeroWire Web Server
and UltraConnect App. These are also announced by voice when the Status
button is pressed.
System
• AC power fail – The security system has lost its electricity power. May take up
to 5 min to clear once power restored.
• Low battery – The security system’s back up battery requires charging. May
take up to 5 min to clear once battery charged.
• Battery test fail – The security system’s back up battery requires changing. If
after 48 hours this message does not clear, contact your service provider to
order a new battery. If the power fails, your system will not be operational.
• Box tamper – The security system’s cabinet tamper input has activated.
• Siren trouble – The security system’s external siren has a problem.
• Over current – The security system is drawing too much current.
• Time and date loss The security system time and date need resetting.
• Communication fault – The security system has detected a problem with the
communication channel.
Page 62

ZeroWire User Manual 71
• Fire alarm – A fire alarm has been activated from the ZeroWire unit.
• Panic – A panic alarm has been activated from the ZeroWire unit.
• Medical – A medical alarm has been activated from the ZeroWire unit.
Partition Number. Partition Name
• Is On in the away mode – This partition is armed in the away mode.
• Is On in the stay mode – This partition is armed in the stay mode.
• Is ready – This partition is secure and ready to be armed.
• Is not ready – This partition is NOT ready to be armed, a zone is not secure.
• All partitions are on in the away mode – All partitions in this multi partition
system are armed in the away mode.
• All partitions are on in the stay mode – All partitions in this multi partition
system are armed in the stay mode.
• All partitions are ready – All partitions in this multi partition system are secure
and ready to be armed.
Sensor Number. Sensor Name
• In Alarm – This zone has triggered a system alarm condition.
• Is bypassed – This zone is isolated (disabled) and will not activate an alarm.
• Chime is set – This zone is part of the chime group.
• Is not secure – This zone is not closed.
• Fire alarm – This zone has triggered a fire alarm.
• Tamper – This zone has triggered a tamper alarm.
• Trouble fault – This zone has an open circuit.
• Loss of wireless supervision – This zone is a wireless device and has lost its
communication link with the control panel.
• Low battery – This zone is a wireless device and needs its battery changed.
Features & Benefits
• 40 Users – enough for even moderate sized businesses
• 64 Zones + 25 Keyfobs – provides large coverage area
• 4 Partitions – split your system into smaller parts you can protect individually
• 16 Cameras - supports selected cameras with day/night vision capabilities
• Dynamic Key Lighting – lights up the available options to make it easier to
use
• Personal Voice Guide – walks you through how to use your system
Page 63

72 ZeroWire User Manual
• 2 Inputs – integrate non-wireless devices to your security system
• 2 Outputs for external siren and strobe – provides extra deterrent from
intruders
• Loud internal piezo siren – warns intruders they have been detected and
encourages them to leave quickly
• Modern self-contained unit – all in one box
• Battery backup – your property is still protected if there is a loss of power
• 802.11 b/g WiFi – enables remote access via a web browser or smart phone
• IEEE 802.3 Compliant Ethernet – use hardwired cable instead of wireless, the
choice is yours
• 3G Cellular radio support – allows reporting alarm messages without a fixed
line telephone service
Page 64

ZeroWire User Manual 73
Specifications
Voltage 9 VDC regulated
Current
maximum
without voice
210 mA
165 mA
Back Up Battery Rechargeable Ni-MH battery pack
Inputs 2x zone inputs up to 6.6 V, seal with 3.3k EOL
Outputs 2x open collector outputs at 100 mA 30 V (max)
Dimensions (W × H × D) 190 mm x 140 mm x 32 mm
Operating temperature 0 to 50°C
Shipping weight 1 kg
Page 65

74 ZeroWire User Manual
ZeroWire Web Server Login
IP Address (Menu 8 – 6):
Default User Name is: User 1
Default PIN Code is: 1234
UltraConnect App Login
Download the UltraConnect App on to your smartphone.
My Serial Number is:
Default Web Access Passcode is:
CHANGE YOUR USERNAME AND CODES (page 23 and 29), DO NOT WRITE
THEM DOWN!
TEST YOUR SECURITY SYSTEM WEEKLY (page 60).
My Installer Details
Page 66

ZeroWire User Manual 75
Index
A
access
via UltraConnect, 31
adding a username, 24
adding camera to UltraConnect, 48
adding users, 23
app and Web error messages, 70
arming in Stay mode, 14
Away mode, 12
B
backlight level, 40
battery test, 63
bypassing zones, 19
C
change a user PIN, 26
changing the user type, 26
chime mode, 44
communicator test, 63
D
detector reset, 21
disarming, 18
E
emergency keys, 21
enabling camera recording, 48
enabling location services, 56
enabling notifications, 51
entry and exit times, 41
event history, 20
F
features and benefits, 72
forced arming, 13
G
glossary, 67
L
location services, 56
M
main menu, 65
R
recording user names, 43
recording voice messages, 43
recording zone names, 42
references, 65
removing users, 25
S
siren test, 62
specifications, 74
Stay modes, 13
system status messages, 71
system tests, 61
T
testing the system, 61
time and date, 41
troubleshooting location services, 59
troubleshooting notifications, 52
U
UltraConnect app, 30, 31
using, 32
using
UltraConnect, 32
V
voice annunciation, 39
voice library, 66
volume level, 39
W
walk test, 61
web access code, 30
welcome, 9
what's inside, 9
Z
ZeroWire web server, 36
zone names, 42
Z-Wave devices, 46
 Loading...