

Page 1
© 2018 United Technologies Corporation. All rights reserved. P/N 1073437-EN • REV B • ISS 15MAY18
Interlogix is part of UTC Climate, Controls & Security, a unit of United Technologies Corporation.
TVP-CFM Compact PTZ Flush Mount Installation
Instructions
Specifications
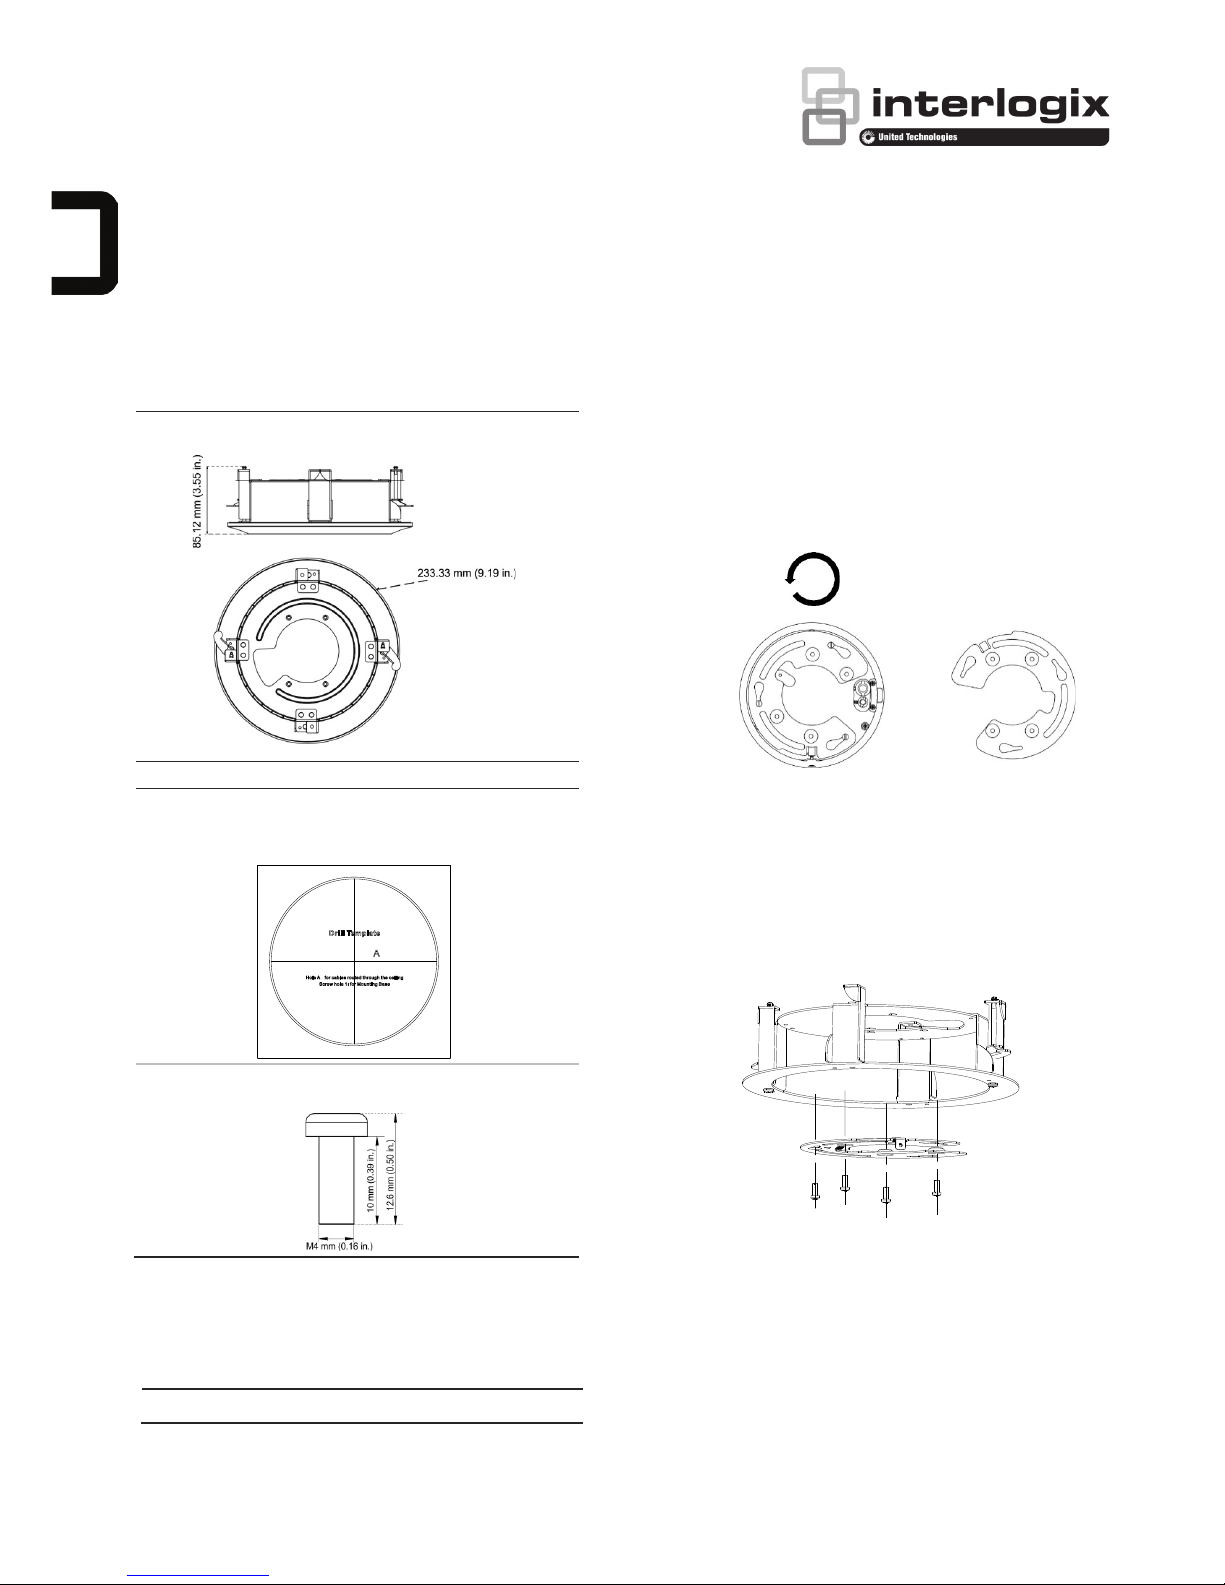
Dimensions
: 233.33 × 85.12 mm (9.19 × 3.35 in.)
Weight:
640 g (1.4 lbs.)
A
ccessories:
Drill template: 1
pcs
Used to
cut the hole for the flush mount.
Screw A: 4 pcs
Used to install the
mounting plate to the flush mount.
Supported cameras
The compact PTZ flush mount can be used with following
cameras:
IP Compact PTZ Camera: TVP-5103
Installation
To install the TVP-5103 PTZ camera recessed in a ceiling
using the TVP-CFM:
1. Using the supplied Torx wrench, loosen the Torx screw at
the base of the PTZ. Loosen slightly the three screws on
the base of the PTZ and rotate the metal adapter plate
counterclockwise to separate it from the PTZ camera.
Open
2. Cut a hole in the mounting surface using the supplied
template.
3. Align the cable access hole in the mounting plate with the
cable access in the flush mount. Install the mounting plate
to the flush mount with the A screw. Tighten screw A fully.
Otherwise, the dome will not slide properly into place over
the three standoffs, and the screw head will block the
rotation
4. Route the cables through the flush mount.
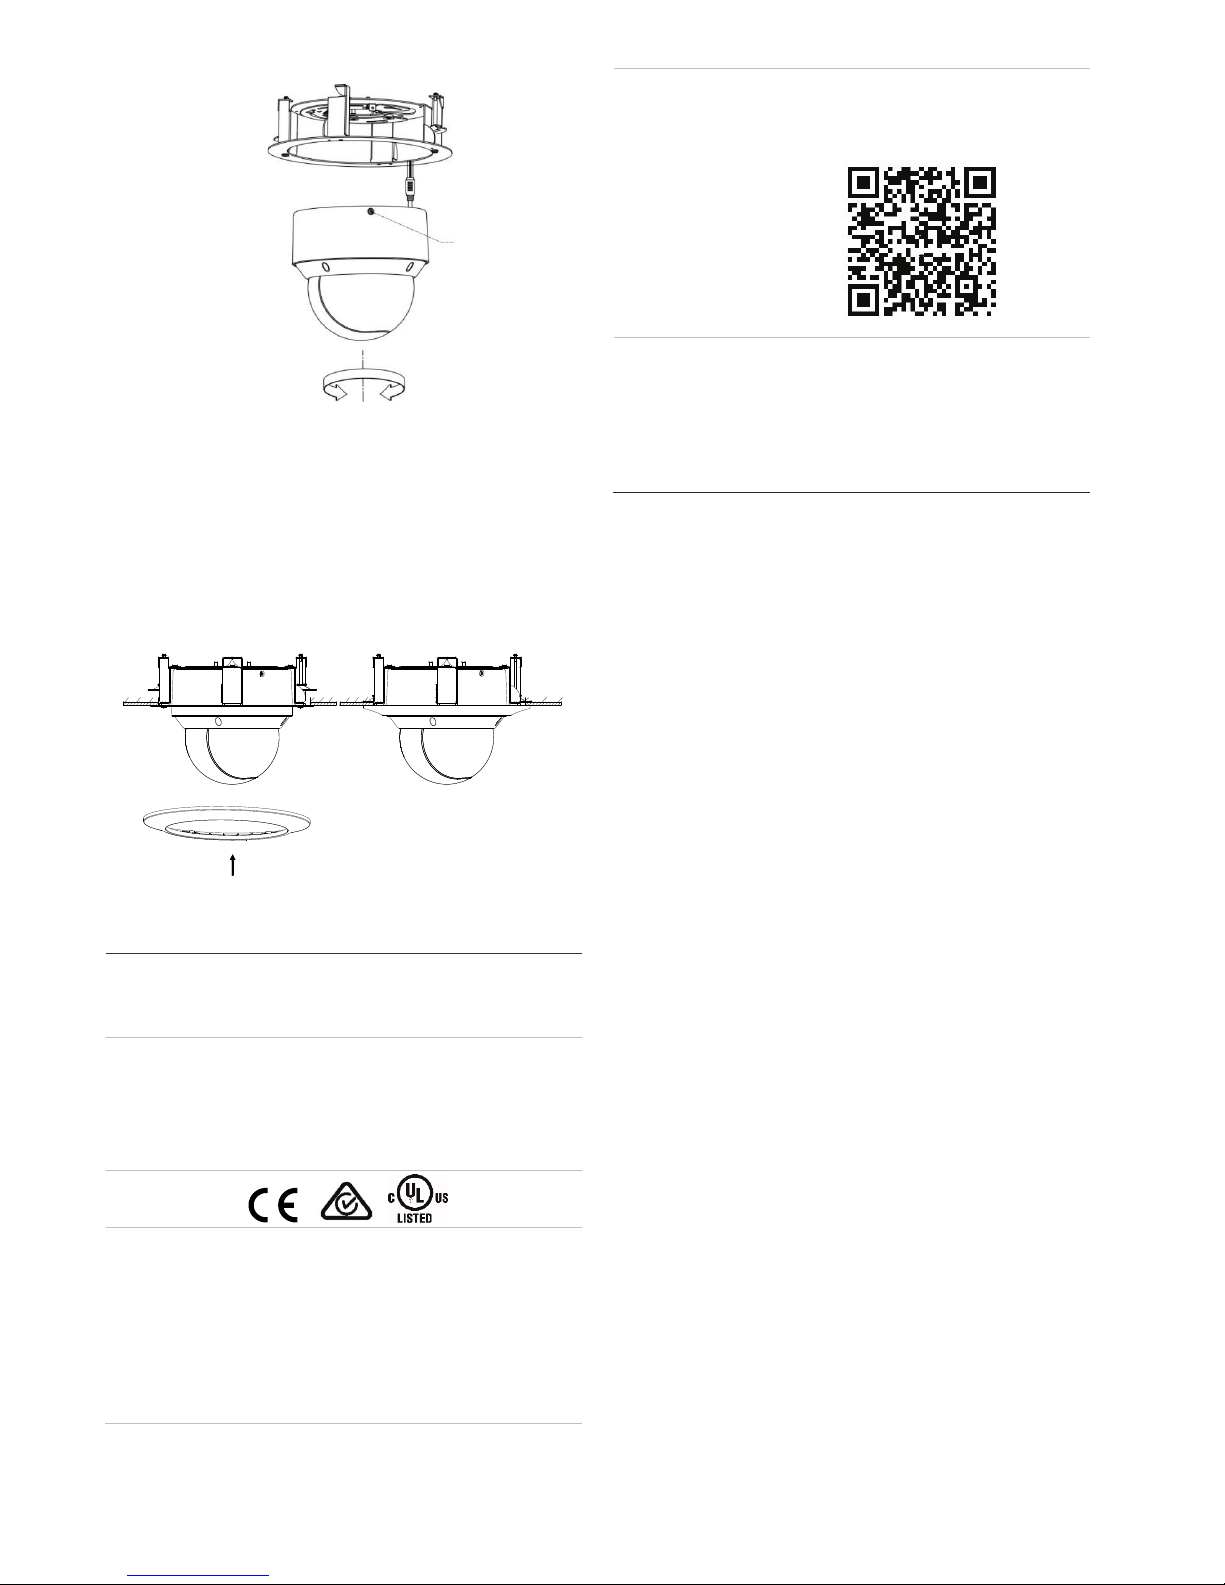
5. Align the PTZ camera with the mounting plate. Rotate the
PTZ camera clockwise into the mounting plate to lock the
assembly in place. Making sure that the locking Torx
screw is lined up with the metal tab on the metal adapter
plate.
6. Tighten the Torx screw with the Torx wrench that is
provided with the PTZ.
Page 2
2 / 2 P/N 1073437-EN • REV B • ISS 15MAY18
Torx screw
Open
Lock
7. Remove the plastic decorative trim ring from the flush
mount. It is held into place with six small magnets. Insert
the camera assembly and flush mount into the mounting
surface. While holding the camera and mount in place,
use a Philips screwdriver to lock the camera and mount in
to place (two locations. See the image of the hooks in the
Dimensions section).
8. Install the trim ring on to the flush mount. The trim ring will
snap into position, locking it in place.
Legal and regulatory information
Trademarks and
patents
The trade names used in this document may be
trademarks or registered trademarks of the
manufacturers or vendors of the respective
products.
Manufacturer
Interlogix.
2955 Red Hill Avenue, Costa Mesa, CA 92626
5923, USA
Authorized EU manufacturing representative:
UTC Fire & Security B.V.
Kelvinstraat 7, 6003 DH Weert, The Netherlands
Certification
Product warnings
and disclaimers
THESE PRODUCTS ARE INTENDED FOR
SALE TO AND INSTALLATION BY QUALIFIED
PROFESSIONALS. UTC FIRE & SECURITY
CANNOT PROVIDE ANY ASSURANCE THAT
ANY PERSON OR ENTITY BUYING ITS
PRODUCTS, INCLUDING ANY “AUTHORIZED
DEALER” OR “AUTHORIZED RESELLER”, IS
PROPERLY TRAINED OR EXPERIENCED TO
CORRECTLY INSTALL FIRE AND SECURITY
RELATED PRODUCTS.
For more information on warranty disclaimers and
product safety information, please check
www.firesecurityproducts.com/policy/productwarning/ or scan the following code:
Contact
information and
manuals / tools /
firmware
For contact information and to download the
latest manuals, tools, and firmware, go to the web
site of your region.
Americas: www.interlogix.com
EMEA: www.firesecurityproducts.com
Manuals are available in several languages
Australia/New Zealand: www.utcfs.com.au
 Loading...