

Page 1
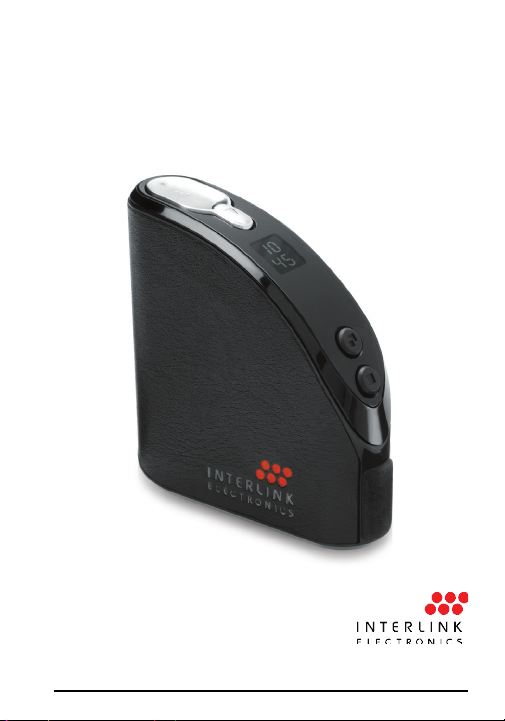
Users Manual
RemotePoint Onyx
Page 1
Page 2

Th a n k Yo u
Thank you for purchasing a RemotePoint
Onyx Presentation Remote. We know you had
other choices and we appreciate that you chose
Interlink Electronics by SMK-Link for your
wireless needs. So that we may better serve you
in the future, please register online at
www.smklink.com/register.
Wa r r a n T Y
30-Day Money Back Guarantee
2-Year, Limited Warranty
Page 2
Page 3

FCC Certication
This device complies with Part 15 of the FCC Rules.
Operation is subject to the following two conditions: (1)
This device may not cause harmful interference, and (2)
This device must accept any interference received, including
interference that may cause undesired operation.
This equipment has been tested and found to comply with
the limits for a CLASS B digital device, pursuant to Part
15 of the FCC rules. These limits are designed to provide
reasonable protection against harmful interference when the
equipment is operated in a residential installation.
This equipment generates, uses, can radiate radio frequency
energy and if not installed and used in accordance with
the instruction guide, may cause harmful interference to
radio communications. However, there is no guarantee
that this radio interference will not occur in a particular
installation.
If this equipment does cause harmful interference to radio
or television reception, which can be determined by turning
the equipment on and off, the user is encouraged to try to
correct the interference by one or more of the following
measures: Re-orient or relocate the receiving antenna.
Increase the separation between the equipment and the
receiver. Consult the dealer or an experienced Radio-TV
technician for help.
Page 3
Page 4

Notice: Any changes or modifications not
expressly approved by the party responsible for
compliance could void the user’s authority to
operate the equipment. Extension cables are not
recommended, if used, they must be shielded in
order to comply with the emission limits.
IC Certication
The term “IC” before the certication/registration
number only signies that the Industry Canada
technical specications were met.
Declaration of conformity
Manufacturer: SMK-Link Electronics, Inc.
546 Flynn Road
Camarillo, CA 93012
We declare under our sole responsibility that the VP4700 conforms to
the following directives and norms:
Directive 89/336/EEC, Amended by 93/68/
EEC
EMI: EN 55022 (1992) Class B
EMC: EN 50082-1 (1992)
Directive 73/23/EEC, Amended by 93/68/
EEC
Safety: EN 60950: 2000
Page 4
Page 5
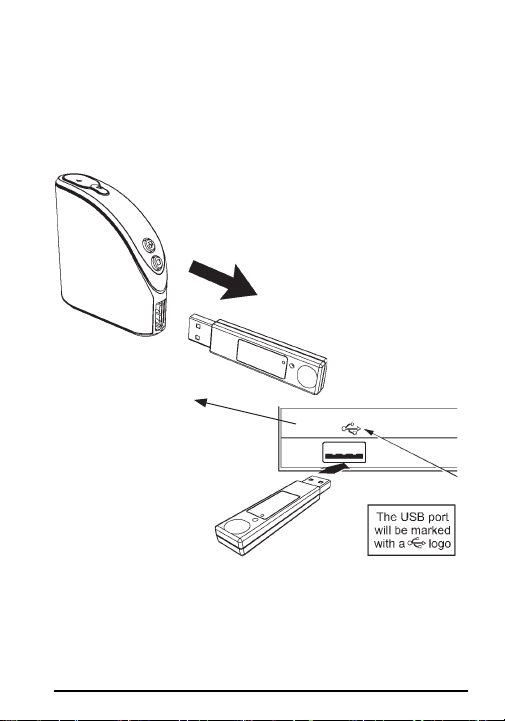
Connecting the USB Receiver
• Remove the USB receiver from the remote.
• Insert the USB receiver into any available
USB port on the computer.
Computer
You can use a USB
extension cable for
computers with
difcult to reach
USB ports or to
reposition the receiver.
Page 5
Page 6
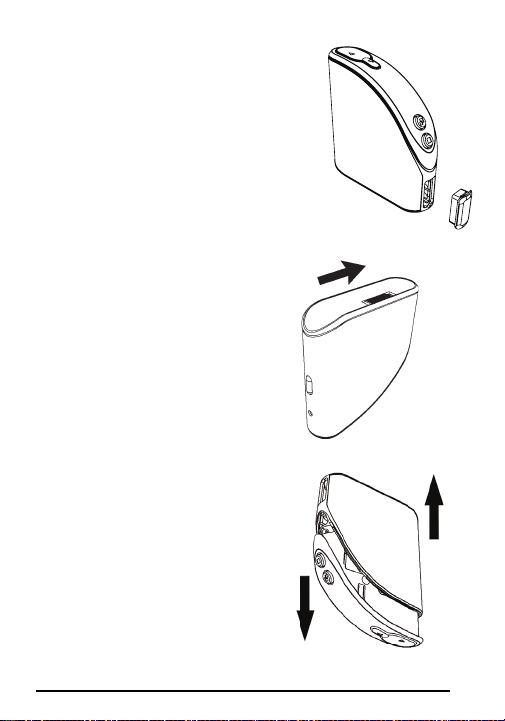
Installing the
Batteries
Step 1: Take out the USB
receiver or plug
Remove receiver or plug
prior to installing batteries.
Cover can not be removed
when inserted.
Step 2: Open Remote
Turn the remote upside down
and push on the eject slider
to release the outer cover.
Step 3: Remove Cover
Separate the outer cover
fr o m t he re m o t e by
gently pulling on the top
and bottom in opposite
directions. Once separated,
turn the remote over.
Page 6
Page 7
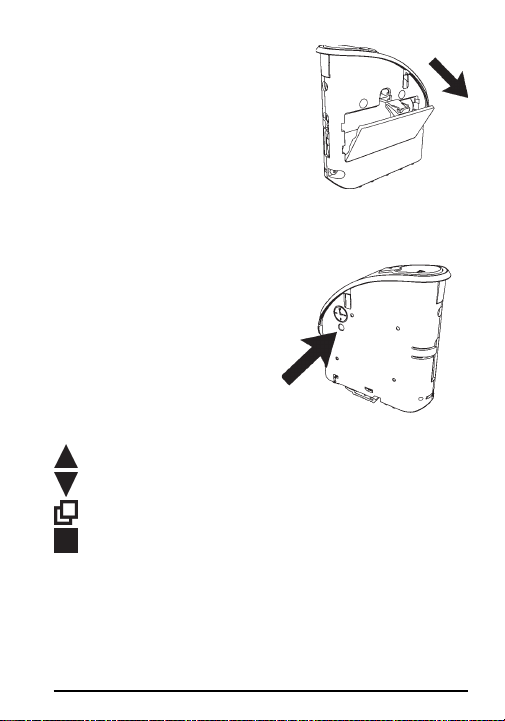
Step 4: Add Batteries
O p e n t h e b a t t e r y
compartment by pressing
down on the latch. Insert
the batterie s p e r t h e
diagram on the remote.
Step 5: Set the Clock
Set the clock by pressing
the clock set button. The
hour will start blinking.
Use the following keys
to set the time.
Increase value
Decrease value
Move to next digit
Done
For PC users, there is a Clock Setting Utility available at
http://www.smklink.com/support/downloads.html
Page 7
Page 8
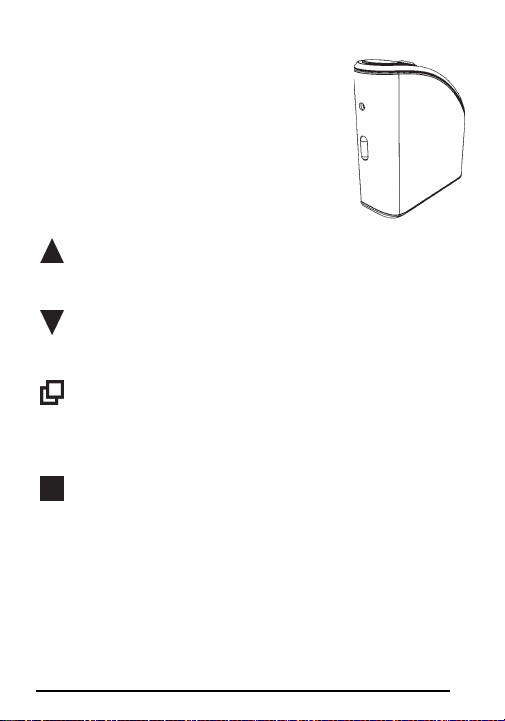
Step 6: Reassemble
Reasse mble your re mote by
closing the battery door and
sliding the outer cover over the
remote until it clicks into place.
Presenting
Next Slide: Advance to the
next slide.
Previous Slide: Return to the previous
slide.
Start Presentation: Press this to start your
presentation. Starts from your current position.
Blank Screen: Use the blank screen button
to hide your presentation while you make a
key point. Press again to reveal the presen-
tation.
Page 8
Page 9

Using the Laser Pointer
Press the button on the front of the remote to
activate the laser pointer. The
laser pointer can be used to
highlight important points on
slides and graphs.
Using with a Macintosh
The remote contro l has th ree di fferen t
compatibility modes. The light on the USB
receiver will blink one to three times every
second or so to tell you which mode your
receiver is currently set to.
Mode 1:
Windows compu t ers ru nning Micros oft
PowerPoint.
Mode 2:
Macintosh computers running Keynote.
Mode 3:
Macintosh comp uters runnin g Microsoft
PowerPoint.
Page 9
Page 10
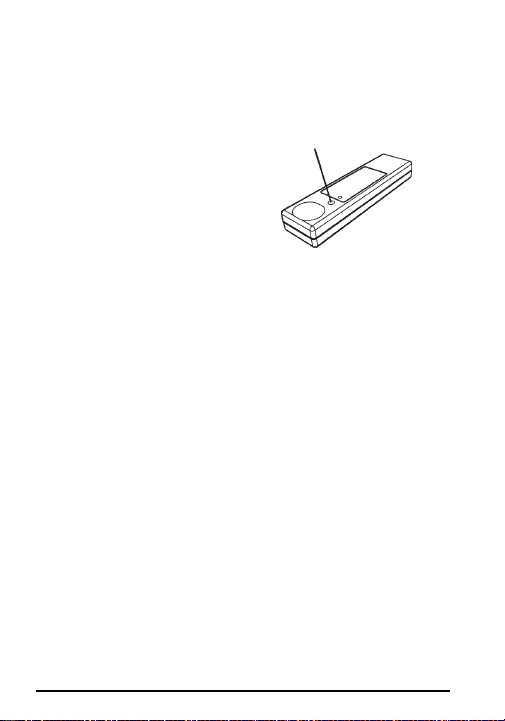
To switch modes you will need a pointy object,
such as a paper clip. While the receiver is plugged
into a USB port, press down on the recessed
button on the receiver. Each time you press the
button, it will move to the
next mode. Once set, the
mode is remembered for
next time.
Troubleshooting
Problem: When you plug the receiver into the
remote the light on the next slide button blinks
repeatedly for several minutes.
Solution: The remote and the receiver are unable
to pair. Unplug the receiver and try again. If this
continues please contact support.
Problem: When removing the receiver from the
remote, the indicator LED ashes red repeatly.
Solution: The batteries in the remote have
reached a low voltage level and need to be
replaced. The unit may continue to operate but
for a limited time.
Page 10
Page 11

For Product Support
Please Contact
SMK-Link Electronics
3601-B Calle Tecate
Camarillo, CA 93012 USA
TEL 888 696 3500
FAX 805 987 6665
SMKLINK.COM
P/N 94-01441 Rev. C
Page 11
 Loading...