

Page 1

Third Edition January 1998
Part Number 340-0506-03
Page 2

Notice
This document and the hardware, software, and other products described or referenced in it are confidential and proprietary
products of AccelGraphics, Inc. (“AccelGraphics”). They are provided under, and subject to, the terms and conditions of a
written license agreement between AccelGraph ics and its customers, and may not be transferred, disclo s e d or other wise provided to third parties, unless otherwise permitted by that agreement.
NO REPRESENTATION OR OT HER AFF IRMATION OF F ACT CONTAINED IN T HIS DOCUM ENT, I NCLUDING,
WITHOUT LIMITATION, STATEMENTS REGARDING CAPACITY, PERFORMANCE, OR SUITABILITY OR USE
OF HARDWARE OR SOFTWARE DESCRIBED HEREIN, SHALL BE DEEMED TO BE A WARRANTY BY ACCELGRAPHICS FOR ANY PURPOSE OR GIVE RISE TO ANY LIABILITY OF ACCELGRAPHICS WHA TSOEVER.
ACCELGRAPHICS MAKES NO WARRANTY OF ANY KIND IN OR WITH REGARD TO THIS DOCUMENT,
INCLUDING BUT NOT LIMITED TO, THE IMPLIED WARRANTIES OF MERCHANT ABILITY OR FITNESS FOR
A PARTICULAR PURPOSE.
ACCELGRAPHICS SHALL NOT BE RESPONSIBLE FOR ANY ERRORS THAT MAY APPEAR IN THIS DOCUMENT AND SHALL NOT BE LIABLE FOR ANY DAMAGES AR ISING OUT OF OR RELATED TO THIS DOC UMENT OR THE INFORMATION CONT AINED IN IT, EVE N IF ACCELGRAP HICS HAS BEEN ADVISED OF THE
POSSIBILITY OF SUCH DAMAGES.
Restricted Rights Legend for Agencies of the U.S. Department of Defense
Use, duplication or disclosure by the Government is subject to restrictions as set forth in subparagraph (c)(1)(ii) of the
Rights in Technical Data and Computer Software clause at 252.227-7013 or the DOD Supplement to the Federal Acquisition Regulation or the equivalent or successor clauses applicable to the subject agency and transaction.
AccelGraphics, Inc. 1873 Barber Lane, Milpitas, CA 95035 USA.
Restricted Rights Legend for Civilian Agencies of the U.S. Government
Use, reproduction or d isclo sure is subje ct t o restric tions set fo rth in su b parag raph (a ) th rough (d ) of the Commercial Co mputer Software—Restricted Righ ts c lause at 52 .227 -1 9 of the Fe d era l A cquis iti on Re gula ti on or the equi vale nt or su c cess or
clauses appli cable to the subject agen cy and trans action , and the limitat ions set forth in AccelGr aphic s’ stand ard commerc ial
agreements for this software. Unpublished rights reserved under the copyright laws of the United States and foreign countries.
The specifications and other information contained in this document may not be complete, current, or correct, and are subject to change w ithout notice.
A design, AccelGraphics, AccelECLIPSE, AccelPRO, AccelSTAR, AccelR8, AccelVIEW, AG300, and AG500 are either
registered trademarks or trademarks of AccelGr aphics, Inc. in the U nited States and/o r other countries.
All other products or services mentioned in this document are identified by the trademarks, service marks,
or product names as designated by the companies who market those products. The trademarks and
registered trademarks are held by the companies producing them. Inquiries co ncerning such trademarks
should be made directly to those companies.
Copyright © 1996, 1997
AccelGraphics, Inc.
All Rights Reserved. Made in USA.
AccelSTAR II User’s Guide 2
Page 3

Quick Con t en ts
This
QuickAccess
important information in this manual. Simply click on any word that is
underlined
See the detailed Table of Contents and/or the Index for specific topics.
to display that information.
About This Manual
About the AccelSTAR II
How to Install the Hardware and Software (Drivers)
Table of Contents contains direct links to the most
How to set up for Dual
Screens
How to Configure Applications
How to Set the Jumpers
Technical Information about the AccelSTAR II
I
AccelSTAR II User’s Guide 3
Page 4
How to use this on-line document
How to use this on-line document
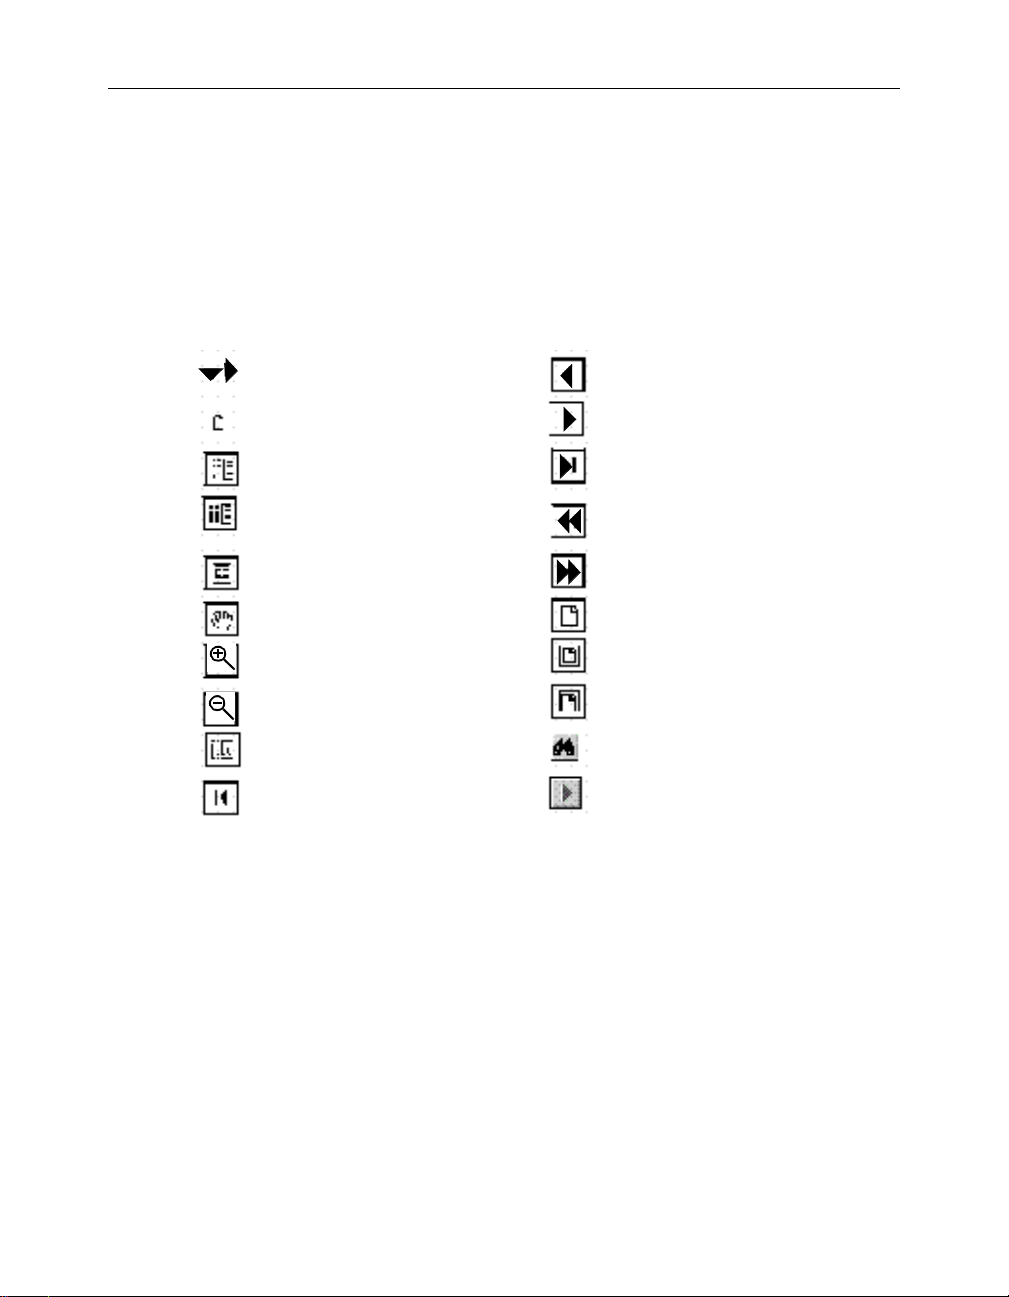
The following table explains the use of each icon in the Acrobat Reader. In
addition to the Acro Read functi ons, you can cl ick on a ny phrase i n this manual
that is blue and underlined to jump to the topic it describes. To return to the
place you jumped from, click on the << icon (below). Click on the HELP button
in the reader for more information.
Click to hide or show subtopics when
the bookmarks are shown.
Double click to select a topic when
the bookmarks are shown.
Display bookmarks (the table of contents, on the left).
Display thumbnails (small pictures of
each page).
Close the bookmarks or th umbnails.
Close the hand, “grab” the page and
move it vertically on the screen.
Select from menu and click on page
to zoom in.
Select from menu and click on page
to zoom out.
Click and drag the selection cursor
on this p age.
Click to go to the first page of the
manual.
Previous page
Next page
Last Page
Previous display (use after jumping
topics)
Go forward from the previous view.
Set view scale to 100%
Display the whole page (fit in window)
Expand page to fill width of window .
Search (open the
Go forward to selected topic.
search
dialog box).
How To Print This Document
This document was created with FrameMaker Release 5 and converted to
Adobe Portable Document Format (PDF) with Adobe Acrobat P ro, Version 2 .1.
It may be used on-line with the Ado be Acro bat Reader ( as you ar e do ing now),
or printed to any printer, PostScript or not.
Use the Print command in the File menu of the Acrobat Reader menu. Or, you
can simply type Ctrl-P.
You can print a selection of text, a single page, a range of pages, or the entire
manual.
AccelSTAR II User’s Guide
4
Page 5

Contents
Quick Contents
How to use this on-line document . . . . . . . . . . . . . . . . . . . . . . . . . . . . .4
How To Print This Document . . . . . . . . . . . . . . . . . . . . . . . . . . . . . . . . .4
Contents
About This Manual
User’s Guide Organization . . . . . . . . . . . . . . . . . . . . . . . . . . . . . . . . . .10
Important Information
Related Manuals . . . . . . . . . . . . . . . . . . . . . . . . . . . . . . . . . . . . . . . . . .11
Conventions . . . . . . . . . . . . . . . . . . . . . . . . . . . . . . . . . . . . . . . . . . . . . .11
FCC Notice . . . . . . . . . . . . . . . . . . . . . . . . . . . . . . . . . . . . . . . . . . . . . . .12
AccelGraphics Product Warranty . . . . . . . . . . . . . . . . . . . . . . . . . . . . .13
Software License Agreement . . . . . . . . . . . . . . . . . . . . . . . . . . . . . . . .14
AccelSTAR II User’s Guide 5
Page 6

Welcome to AccelSTAR II
About the AccelSTAR II . . . . . . . . . . . . . . . . . . . . . . . . . . . . . . . . . . . 1-2
Operating Modes . . . . . . . . . . . . . . . . . . . . . . . . . . . . . . . . . . . . . . . . . 1-3
2D (SVGA) . . . . . . . . . . . . . . . . . . . . . . . . . . . . . . . . . . . . . . . . . . . 1-3
2D Rendering functions:. . . . . . . . . . . . . . . . . . . . . . . . . . . . . . 1-3
3D (High Resolution) . . . . . . . . . . . . . . . . . . . . . . . . . . . . . . . . . . . 1-3
3D Rendering functions:. . . . . . . . . . . . . . . . . . . . . . . . . . . . . . 1-4
Supported Processors . . . . . . . . . . . . . . . . . . . . . . . . . . . . . . . . . . . . . 1-5
Supported Software . . . . . . . . . . . . . . . . . . . . . . . . . . . . . . . . . . . . . . . 1-5
Supported Applications . . . . . . . . . . . . . . . . . . . . . . . . . . . . . . . . . . . . 1-5
Software Distribution . . . . . . . . . . . . . . . . . . . . . . . . . . . . . . . . . . . . . 1-6
Supported Monitors and Output Formats . . . . . . . . . . . . . . . . . . . . . 1-6
Automatic Monitor Compatibility Testing . . . . . . . . . . . . . . . . . . 1-6
AccelSTAR II Display Mode Tables (Windows NT) . . . . . . . . . . . 1-7
AccelSTAR II Display Mode Tables (Windows 95) . . . . . . . . . . . 1-8
AccelSTAR II Color Modes . . . . . . . . . . . . . . . . . . . . . . . . . . . . . . 1-9
Installing the AccelSTAR II
Before Installing the AccelSTAR II Card . . . . . . . . . . . . . . . . . . . . . . 2-2
Task Overview . . . . . . . . . . . . . . . . . . . . . . . . . . . . . . . . . . . . . . . . . . . 2-3
Hardware Requirements. . . . . . . . . . . . . . . . . . . . . . . . . . . . . . . . 2-3
Software Requirements . . . . . . . . . . . . . . . . . . . . . . . . . . . . . . . . . 2-4
Save the Box . . . . . . . . . . . . . . . . . . . . . . . . . . . . . . . . . . . . . . . . . 2-4
Make Sure You Have Everything . . . . . . . . . . . . . . . . . . . . . . . . . 2-4
Installing the AccelSTAR II Card . . . . . . . . . . . . . . . . . . . . . . . . . . . 2-5
Tools Needed . . . . . . . . . . . . . . . . . . . . . . . . . . . . . . . . . . . . . . . . . 2-5
Back Up Data . . . . . . . . . . . . . . . . . . . . . . . . . . . . . . . . . . . . . . . . 2-6
Turn Off the PC and Ground Yourself . . . . . . . . . . . . . . . . . . . . . 2-6
Disconnect Cables and Open the PC . . . . . . . . . . . . . . . . . . . . . . 2-7
Remove Existing Video Cards . . . . . . . . . . . . . . . . . . . . . . . . . . . 2-7
Install the AccelSTAR II Card . . . . . . . . . . . . . . . . . . . . . . . . . . . 2-7
Close the PC. . . . . . . . . . . . . . . . . . . . . . . . . . . . . . . . . . . . . . . . . . 2-8
Connect the Video Cable . . . . . . . . . . . . . . . . . . . . . . . . . . . . . . . . 2-8
Connect the Remaining Cables . . . . . . . . . . . . . . . . . . . . . . . . . . . 2-8
Turn on the PC . . . . . . . . . . . . . . . . . . . . . . . . . . . . . . . . . . . . . . . 2-8
Dual Screen Installations . . . . . . . . . . . . . . . . . . . . . . . . . . . . . . . . . . 2-9
Hardware Requirements . . . . . . . . . . . . . . . . . . . . . . . . . . . . . . . . 2-9
Hardware Setup . . . . . . . . . . . . . . . . . . . . . . . . . . . . . . . . . . . . . 2-10
Software Setup . . . . . . . . . . . . . . . . . . . . . . . . . . . . . . . . . . . . . . 2 -11
6 AccelSTAR II User’s Guide
Page 7

Installing the Software . . . . . . . . . . . . . . . . . . . . . . . . . . . . . . . . . . . 2 -12
RAM Requirements . . . . . . . . . . . . . . . . . . . . . . . . . . . . . . . . . . . 2 -12
Automatic Monitor Compatibility Testing . . . . . . . . . . . . . . . . . 2-12
Driver Installation Procedure . . . . . . . . . . . . . . . . . . . . . . . . . . . 2-12
Installing the Software From a CDROM . . . . . . . . . . . . . . . 2-12
Alternate installation Method. . . . . . . . . . . . . . . . . . . . . . . . 2-13
Installing the Software From the Hard Disk . . . . . . . . . . . . 2-14
Changing Driver Settings . . . . . . . . . . . . . . . . . . . . . . . . . . . . . . 2 -14
Deinstalling the AccelSTAR II . . . . . . . . . . . . . . . . . . . . . . . . . . . . . 2-15
Hardware Procedure . . . . . . . . . . . . . . . . . . . . . . . . . . . . . . . . . . 2-15
Software Procedure . . . . . . . . . . . . . . . . . . . . . . . . . . . . . . . . . . . 2 -15
Configuring the AccelSTAR II
About the AccelPanel . . . . . . . . . . . . . . . . . . . . . . . . . . . . . . . . . . . . . 3-2
Starting AccelPanel . . . . . . . . . . . . . . . . . . . . . . . . . . . . . . . . . . . . . . . 3-2
AccelPanel Pages . . . . . . . . . . . . . . . . . . . . . . . . . . . . . . . . . . . . . . . . . 3-2
Windows 95 . . . . . . . . . . . . . . . . . . . . . . . . . . . . . . . . . . . . . . . . . . 3-3
The AccelPanel page (Windows 95). . . . . . . . . . . . . . . . . . . . . 3-4
The OpenGL Page (Windows 95). . . . . . . . . . . . . . . . . . . . . . . 3-5
The System Setup Page (Windows 95).. . . . . . . . . . . . . . . . . . 3-7
The Direct3D Page (Windows 95).. . . . . . . . . . . . . . . . . . . . . . 3-8
Windows NT 4.0 . . . . . . . . . . . . . . . . . . . . . . . . . . . . . . . . . . . . . . 3-9
The AccelPanel Page (Windows NT 4.0). . . . . . . . . . . . . . . . 3-10
The OpenGL Page (Windows NT 4.0).. . . . . . . . . . . . . . . . . . 3-11
The Applications Page (Windows NT 4.0). . . . . . . . . . . . . . . 3-13
The System Setup Page (Windows NT 4.0). . . . . . . . . . . . . . 3-14
Configuring Applications
Important Information . . . . . . . . . . . . . . . . . . . . . . . . . . . . . . . . . . . .A-2
Setting Up the Card . . . . . . . . . . . . . . . . . . . . . . . . . . . . . . . . . . .A-2
Use AccelPanel (Applications - Windows NT only) . . . . . . . . . . .A-2
Use a Double-Buffered Driver . . . . . . . . . . . . . . . . . . . . . . . . . . .A-3
Checking the SGRAM . . . . . . . . . . . . . . . . . . . . . . . . . . . . . . A-3
Configuring Applications . . . . . . . . . . . . . . . . . . . . . . . . . . . . . . . . . .A-4
AutoCAD . . . . . . . . . . . . . . . . . . . . . . . . . . . . . . . . . . . . . . . . . . . .A-4
Solidworks . . . . . . . . . . . . . . . . . . . . . . . . . . . . . . . . . . . . . . . . . . .A-4
3D Studio Max . . . . . . . . . . . . . . . . . . . . . . . . . . . . . . . . . . . . . . . .A-5
Photoshop . . . . . . . . . . . . . . . . . . . . . . . . . . . . . . . . . . . . . . . . . . . .A-7
AccelSTAR II User’s Guide 7
Page 8

Technical Information
Hardware Description . . . . . . . . . . . . . . . . . . . . . . . . . . . . . . . . . . . . .B-2
Mechanical and Electrical Specifications . . . . . . . . . . . . . . . . . . . . . .B-3
Mechanical Dimensions . . . . . . . . . . . . . . . . . . . . . . . . . . . . . . . .B-3
Electrical Requirements . . . . . . . . . . . . . . . . . . . . . . . . . . . . . . . .B-3
Video Connectors and Pin Assignments . . . . . . . . . . . . . . . . . . . . . .B-4
RGB Video Connector (out) . . . . . . . . . . . . . . . . . . . . . . . . . . . . . .B-4
Feature Connector - Video In . . . . . . . . . . . . . . . . . . . . . . . . . . . .B-4
Feature Connector - Video Out . . . . . . . . . . . . . . . . . . . . . . . . . . .B-5
Environmental and Safety Specifications . . . . . . . . . . . . . . . . . . . . .B-6
Mechanical Environment . . . . . . . . . . . . . . . . . . . . . . . . . . . . . . .B-6
Product Safety . . . . . . . . . . . . . . . . . . . . . . . . . . . . . . . . . . . . . . . .B-6
8 AccelSTAR II User’s Guide
Page 9

This manual provides detailed information on how to configure, test, and run
the AccelGraphics Acce lSTAR™ II graphics accelerator card. This manual
can guide you thr ough the installati on and c onfiguratio n of t he card
and associat ed soft ware. It is not intended to teach the basics of PC
operation or use and does not contain tutorial information.
In This Section
This section contains the following information:
• User’s Guide Organization
• Related Manuals
• Conventions (text types, etc.)
• FCC Notice
About This Manual
AccelSTAR II User’s Guide 9
Page 10

User’s Guide Organization
This manual contains three chapters and two appendixes, as follows:
Chapter 1: Welcome To AccelSTAR II
This chapter briefly de scribes the AccelSTAR II hardware and software,
including its feat ures and benefits.
Chapter 2: Ins t alling AccelSTAR II
This chapter provide s detailed instructions for installing the AccelSTAR II
hardware and software.
Chapter 3: Configuring the AccelSTAR II
This chapter provi des information on how to use the AccelPanel to configure
the AccelSTAR II and certain system parameters for optimum performance
and picture quality.
Appendix A: Configuring Applications
This appendix describe s the procedures to configure various applic ations to
use the AccelSTAR II card.
Append ix B: Te c hnical Infor m at ion
This appendix lists the specif ications for the AccelSTAR II Accelerator card.
10 AccelSTAR II User’s Guide
Page 11

Related Manuals
For further infor mation about inst alling hardware a nd software in y our PC, see
your PC owner’s manual and the following documents:
AccelSTAR II Release Notes
AccelGraphics FAQ (Frequently Asked Questions and answers)
Microsoft Windows NT User’s Guide
Microsoft Windows 95 User’s Guide
Conventions
The following conventi ons are used in this manual.
Convention How Used
bold Bold text in a sentence shows commands or menu choices tha t you
are to select or text or commands that you are to enter. It is also
used to highlight the firs t use of a new term. This term may be
defined in the Glossary or described i n the text where the wor d is
introduced.
italics Text in italics is used to call atte ntion to importa nt infor mation. I t
also distingui shes sof twar e funct ion terms and c ommands, librar y
names, file names, and director y path names.
screen text Plain screen text shows te xt that is displayed on the moni tor screen
(including the syste m prompts C:\>, etc.)
user en try Bold screen text in an ex ample shows text or commands that you
should enter. Example: Type a:\install.
user variable Italic and bol d screen te xt sh ows a variable that you are to r eplac e
with an actual value, such as a number or name. Example: enter
EASY
C:\<directory nam e>
Task difficulty or complex ity of informat ion
MEDIUM
MORE DIFFI CUL T MOST DIFFICU L T
AccelSTAR II User’s Guide 11
Page 12

FCC Notice
Federal Communic atio ns Commi ssion
This equipment has been tested and found to comply with the limits for a Class B digital device,
pursuant to part 15 of the FCC Rules. These limits are designed to provide reasonable protection
against harmful interf er ence in a resi dential installati on. This equipment generates, uses, and can
radiate radio frequency energy and, if not installed and used in
accordance with t he ins truct ion manual, may c ause harmful int erf erence to rad io or tele visio n communications. However, there is no guarantee that interference will not occur in a particular installation. If this equip ment does cause harm ful interferenc e to radio or tele vision recept ion, which can
be determined by turning the equipment off and on, the user is
encouraged to try to correct the interference by one or more of the following measures:
• Reorient or relocate the radio or television receiving antenna.
• Move the compu ter or eq uipm ent away from the receiv er.
• Plug the computer or equipment into an outlet on a circuit different from that which the radio
or television receiver is connected.
• Consult the dealer or an experienced radio/TV technician for help.
Caution
Changes or modifications to this equipment or connecting cable not
expressly approved by AccelGraphics could void your authority to
operate this eq uipment.
DOC Notice
Canadian Department of Communications
This digital apparatus doe s not exceed the Class B limits for radio noise emission s from digital apparatus set out in the Radio Interference Regula tion of the Canadian Department of Communications. Operation in a residential area may cause unacceptable interference
to radio and TV reception requiri ng the owner or operator to take whatever steps are
nece ss a ry to co r r ect the int er f erence .
Cet équipment ne dépasse pas les limit es de Classe B d’émis sion de bruit s radioélec triques pour les
appareils numériques, telles que pre sc r ites par le Règlement sur le br ouillag
radioélectrique établi par le Minis tère des Communications du Canada. L’exploitation faite en milieu rèsidentiel peut entraîner le brouillage de réceptions radio et té lé, ce qui obligerait le propriétaire ou l’opérateur à prenere les dispositions nécessaires pour en éliminer les causes.
12 AccelSTAR II User’s Guide
Page 13

AccelGraphic s Pro duc t Wa rran ty
A. Warranted and Unwarranted Products; Exclusions
AccelGraphics’ Standard Graphics Accelerator Card Warranty and Standard Software Warranty and Customer’s sole and exclusive remedies for such warranties are specified below. ACCELGRAPHICS’ WARRANTIES STATED IN THIS SECTION ARE IN LIEU OF ALL OTHER WARRANTIES EXPRESSED,
IMPLIED, OR STATUTORY, INCLUDING WITHOUT LIMITATION, ANY WARRANTY OF MERCHANTABILITY OR FITNESS FOR A PARTICULAR PURPOSE.
No statement, including without limitation, representations regarding capacity, suitability for use or performance of Product(s), whether made by AccelGraphics employees or otherwise, shall be deemed to be a warranty by Acc elGraphics for any purpos e or give rise t o any liability of AccelGraphics unless expressly
contained in this Warranty.
The warranties in th is section do not apply to any P roduct(s) which has been (i ) altered, except by AccelGraphics or by another party adhe ring to AccelG raphics’ inst ructions, (ii) used in conjunction with another
vendor’s product result ing in a defect, or (iii) dama ged by improper electrica l power or environment, abuse,
misuse, accident or negligence.
B. Limited Graphics Ac c elerator Card Warra nt y
AccelGraphics warrants to Customer that the Graphics Accelerator Card covered by the Standard Graphics
Accelerator Card Warranty will be free from defects in workmanship and materials for a period of thi rty-six
(36) mont hs from Custome r’s receipt of the Graphics Accelerator Car d.
Customer ’s exclusive remed y, and Acce lGr ap hic s’ sole obliga ti on for any G raphi cs Acc el erat or Ca rd fa ili ng to
meet this standard Graphic s Accelerator Card w arranty shall be as fo llows:
In the eve nt of a defec t i n wor kmans hi p or mat er ials , Acc el Gra phi cs, at it s opti on, sha ll at temp t t o eit he r repai r
or repla ce the defective Graphics Acceler ator Card or com ponent and return it to Custom er within (ten) 10
working days from receipt at AccelG raphics’ designated factory or depot for reinstallation by Customer. All
replaced Graphics Accelerator Card or components shall become AccelGraphics’ property. AccelGraphics,
after using all reasonable eff o rts to repair a defect ive Graphics A c celerator Card component shall replace the
defect ive Graphics A ccelerat or Card compone nt or Graphics Accelerator Card with a te sted, operational ne w
Graphics Accelerator Card component or Graphics Accelerator Card. Such G raphics Accelerator Card or
Graphics Accelerator Card component to be replaced by AccelG raphics w ill be repl aced with Gr aphics Acc elerator C a rd/Grap h ics Accelerator Card components at the then current revision level of the applicable Graphics Accelerator Card/ components. All in -w arranty repairs or replacements will be warranted for a period of
time equal to either the resi dual warranty period rem aining under the thirt y -six (36) month warranty or the
standard repair warranty of six (6) months, whichever is longer.
C. Limited Software Warranty
AccelGraphics warrants to Customer that Software covered by the Standard Software Warranty, as delivered
by AccelG raphics and properly installed and operated on a Designated System, will substantiall y conform to
its specificati ons as stated i n the Documenta tion provide d w ith the Software for a period of thirty-six (36)
months from Custo mer’s receipt of the Software. Accel G raphics does not warrant that any item of Software is
error-free or that its use will be uninterrupted.
If any it em of Software fails to conform to its specifica tions as stated in the Docum entation during this warranty period, Customer shal l promptl y notify an approved AccelGraphics dea ler or AccelGraphics of, and adequatel y describe, the failure. Customer’s exclusive remedy and Ac celGraphics’ sole obligation shall be that
AccelGraphics will use reasonable effo rts to correct any such failure which is reported to AccelG raphics
within the warra nty period.
AccelGraphics shall not be obligated to remedy any Software defect which cannot be adequately repeated at
either A ccelGraph ics’ or Customer’s facil ity.
AccelSTAR II User’s Guide 13
Page 14

Software License Agreement
READ THE TERMS AND CONDITIONS OF THIS LICENSE CAREFULLY BEFORE USING THIS
SOFTWARE. BY USING THIS SOFTWARE, YOU AGREE TO BE BOUND BY THE TERMS OF THIS
AGREEMENT, WHICH INCLUDE THE SOFTWARE LICENSE AND THE LIMITED WARRANTY (col-
lectively, the “Agreement”). IF YOU DO NOT ACCE PT OR AGREE TO BE BOUND BY THE TERMS OF
THIS AGREEMENT, RETURN THE SOFTWARE IN IT’ S UNOPENED CONTAINER WITHIN FI FTEEN
(15) DAYS OF PURCHASE FOR A REFUND. INCLUDE A COPY OF THE SALES RECEIPT.
1. License t o Use . Ac ce lGraph ics , Inc. (" AGI" ) gra nt s yo u ("Cu st omer") a none xclus iv e an d nontr an sf erabl e
licens e ("License") to use the enclosed AGI graphics software library and accompanyin g documentat ion
("Software") to develop and compile software applications that use the Software ("Applicati o ns"). Thi s
License does not grant the right to distribute any form of the Software with or without Applications
2. Restrictions. The Sof tware is copyrighted and title to all copies is retained by AGI. This program is
licensed to you for use under the terms of this Agreement. This license is not a sale. Title and copyrights to the
softwar e and any copy of the software made by you re m ain with AGI. U nauthorized copying of the Software,
or failure to comply with the restrictions below, will result in automatic termination of the license and will
make avail able to AGI other legal remedies.
You May:
• Make one (1) copy of the Software in machine readable form solely for backup purposes, provided
that you reproduce all copyright and proprietary notices on the copy.
You May Not:
• Make copies of the documentation or program disks except for the one (1) backup copy.
• Distr ibut e S oftw are or Appl ic atio ns wh ich inc orp ora te th e S oftw are in any ma nne r.
• Loan, rent, sell, sublicense or otherwise transfer the software and/or documentation.
• Modify, translate, reverse engineer, decompile, disassemble, create derivative works based on or
copy (except for the backup copy) the Software.
• Remove any proprietary notices, labels or marks on the Software of AGI or its licensors.
• Export or reexport, whether directly or indirectly, the Software, or any direct or derivative products
thereof, outside the United States without first obtaining the appropriate government export
licenses and approvals, and obtaining an export license from AGI.
3. Limited Warranty. AGI warrants that the media on which the Software is f urn is hed will be free of defects
in mater ials and workm anship under normal use for a period of thirty-six (3 6) months from the date of purchase, as evidenced by a copy of your receipt. Othe rw ise, the Software is pr ovided “AS IS,” without a warranty of any kind. This warranty extends only to Customer as the original licensee. AGI's entire liability and
Customer's exclusiv e remedy under this warr anty will be the correction of defects in media or rep lacement of
the media, or if correction or rep lacement is not reasonabl y achievable by AGI, the refund to Customer of the
license fee, upon return of the software.
4. Disclaimer of Warranty. EXCEPT AS SPECIFIED IN THIS LICENSE AGREEMENT, ALL
EXPRESS OR IMPLIED REPRESENTATIONS AND WARRANTIES, INCLUDING ANY IMPLIED
WARRANTY OF MERCHANTABILITY, FITNESS FOR A PARTICULAR PURPOSE OR
NON-INFRINGEMENT, ARE HEREBY EXCLUDED. AGI DOES NOT WARRANT THAT THE
OPERATION OF THE SOFTWARE WILL BE UNINTERRUPTED OR ERROR-FREE.
5. Limitation of Liability. IN NO EVENT WILL AGI BE LIABLE FOR ANY LOST REVENUE,
PROFIT, OR DATA, OR FOR SPECIAL, INDIRECT, CONSEQUENTIAL, INCIDENTAL OR PUNITIVE DAMAGES HOWEVER CAUSED AND REGARDLESS OF THEORY OF LIABILITY ARISING
OUT OF THE USE OF OR INABILITY TO USE THE SOFTWARE, EVEN IF AGI HAS BEEN
ADVISED OF THE POSSIBILITY OF SUCH DAMAGES.
6. Confidentiality. The Software is confidential and proprietary information of AGI and/or its licensors.
Customer agrees to ta ke adequate steps to prote ct the Software from unauthorized di sclosure, copying or use .
14 AccelSTAR II User’s Guide
Page 15

7. Termination. This License is effective until ter m inated. Customer may te rminate th is License by destroying all copies of the Software including accomp anying docume ntation. Thi s license will terminate immediately wi thout notice from AGI if Customer fails to comply with any provisi on of this License. Upon
termination, Custom er must destroy all copies of Software
8. U.S. Government Restricted Righ ts. If Custome r is acquiri ng the Software on behalf of the U.S. Govern-
ment, the following provisions apply. If the Software is supplied to the Department of Defense ("DOD"), the
Software is subject to "Restricted Rights" as that term is defined in the DOD Supplement to the Federal Acquisition Regulations in paragra ph 252.227-7013(c). If t he Software is supplied to any unit or agency of the
United States Government other than DOD, the government’s rights in the Software will be defined in paragraph 52.227-19(c)(2) of the Federal A cquisition Regulations. Use, duplication, reproduction or disclos ure by
the Government is subject to such restriction. Contractor/Manufacturer is:
AccelGraphics, Inc., 1873 Barber Lane, Milp itas, CA 95035 USA .
9. Governi ng Law. This Licens e is made under and w ill be governe d by the laws of the State of California,
USA, excluding its choice of law pr ovisions.
10. Integration. This Agreement between Customer and AGI is the entire agreement between Customer and
AGI relat ing in any way to the Software. This Agree m ent supersedes any proposal or prio r agreement, oral or
writt en and any other com municati on relating to the subject matter of this Agreement. No variatio n of the
terms of this Agreement or different terms will be enforceable against AG I unless AGI gives its express consent, inc l u di n g an ex pr e ss wa iv er of the terms of this A gr ee m e n t, signed in writing by an of fic e r of AGI.
IF YOU HAVE ANY QUESTIONS REGARDING THIS LICENSE, PLEASE CONTACT US IN WRITING AT:
ACCELGRAPHICS, INC.
1873 Barber Lane
MILPITAS, CA 95035 USA
Attention: Customer Support
AccelSTAR II User’s Guide 15
Page 16

Welcome to Ac celSTAR II
In this Chapter:
This chapter contains a brief description of the capabilities of
AccelGraphics’ AccelSTAR II accelerator card. Topics include:
• About the AccelSTAR II
• Operating Modes
• Supported Processor s
• Supported Software
• Supported Applications
• Supported Monitors and Format s
• Software Distribu tion
• Display Modes
• Color Modes
1
Welco m e t o
AccelSTAR II
Note
You do not need to know the information containe d in this c hapter to use
your AccelSTAR II card, but you may need the information a bout
resolutions, color depths, buffering, and textur e mapping when you
configure the driver.
Task difficulty or complexity of information
EASY MEDIUM MORE DIFFICULT MOST DIFFICULT
AccelSTAR II User’s Guide 1-1
Page 17

AccelSTAR II
About the AccelSTAR II
Welcome t o
About the AccelSTAR II
The AccelSTAR II is a high-performance graphics accelerator designed
for professional CAD users who require workstation- class screen
resolution, visual depth, and performance. It provides optimum
performance for 3D animation, 3D game users, and for smaller
applications whic h require less power than high-end ones. The card
features integra ted SVGA (generated within the Permedia chip),
eliminating the need for a video pass-through cable an d a separate (S)VGA
card in the system.
AccelSTAR II User’s Guide
1-2
The AccelSTAR II is configured with 8 MB industry-standard SGRAM
(Synchronous Grap hics RAM). The SGRAM is automatically partitioned
into front buffer, back buffer (for d oubl e- b uf fere d opera t ions), local (Z)
buffer, and texture memory, depending on the resolution and color depth
selected. The buffer configurations are described at the end of t his chapter .
Refresh rates of 60, 72, 75, 85, and 100 Hz are available at all color depths,
as these are set by the internal RAMDAC and are independent of the
SGRAM.
Note
Not all refresh rates are availa ble at all resolutions. See the table on
page 1-7 for details.
A detailed descripti on of the car d is located in Appendix B, “Technical
Specificatio ns”.
Page 18

Operating Modes
2D (SVGA)
During system sta rt-up (unt il Windows st arts), the Ac celSTAR II provides
SVGA video to the monitor. The SVGA video is generated in t he Permedia
engine, and there is no separate VGA chip on the card. This mode is also
used when you run Windows in (S)VGA mode.
2D Rendering fun ctio ns :
The AccelSTAR II provides the following 2D rendering functions:
• Full Primitive Support
• Window Clipping
• Ultra fast solid fill a nd monochr ome expansion
• High speed monochrome and color brushes
• Color translation
• Raster operations
• Fast upload and download
• High speed monochrome download
• Fast BLTs
• High speed stretch BLT
• Boolean Raster Operations
• Flexible font caching suppor t
• 24-bit True Color (in singl e-buffered mode)
• Stippling
Operating Modes
Welco m e t o
AccelSTAR II
3D (High Resolution)
This mode is available only after the AccelSTAR II drivers have been
installed. When Win dows starts, the AccelSTAR II dri vers switch the c ard
to 3D mode. The card can then be set to provide accelerated 3D video at
several combinati ons of resolut ions, color s, and refresh rates. See the table
at the end of this chapter for specific information. In 3D mode, any
application whic h uses OpenGL, Direct3D, or the He idi 3D graphics API
will use the hardware acceleration provided by the AccelSTAR II.
AccelSTAR II User’s Guide 1-3
Page 19

AccelSTAR II
Operating Modes
Welcome t o
3D Rendering fun ctio ns :
In addition to the 2D rendering functions listed above, the AccelSTAR II
provides the followi ng 3D rendering f unctions:
• Full primitive support
• Overlays
• Generalized point s, lines, triangles
• Gouraud and flat shading
• Z buffering in hardware
•Fog
• Transparency
• Alpha blending
• Scissors test
• Stipple-masking
• Texture functions: Ne arest neighbor and Bilinear interpolation
• Fast hidden surface elimi na tion
• Arbitrary cutout and multi- pass rendering
• High quality, rendering, textures, and lighting at any color depth
• Anti-aliased sprites
• Fast buffer clears
• 8, 15, or 16 bit rendering. The internal pr ecision of the rendering
engine is 15 bits. Therefore 24-bit 3D is not possible.
AccelSTAR II User’s Guide
1-4
Note
In 1024x768 true color (24-bit) mode, the 3D rendering actually occurs
with 15 bit accuracy; however, any single buffered window will enjoy
24-bit accuracy. This is useful in situations when an animator is working
with 3D programs for which 15-bit accuracy is adequa te, but wants to also
run Adobe Photoshop whic h is 2D, but re quires 24-bit t rue color a ccuracy.
Page 20

Supported Processors
The AccelSTAR II drivers support the following processor(s):
Supported Processors
• Intel 1386 architectu res including P entium a nd Pentium PRO, on both
AGP and PCI buses.
• Alpha architecture s, PCI bus only
Supported Software
The AccelSTAR II supports the fol lowing operating systems and drivers :
• Windows NT 4.0
• Windows 95
• Miniport
• Display Driver
• AccelPan el
• OpenGL
• Heidi
• Direct3D
Supported Applications
The AccelS TA R II w ill accel e rat e most applications which use the
OpenGL, Direct3D, or Heidi graphics APIs, including those lis ted below.
Welco m e t o
AccelSTAR II
• AutoCAD
• AVS
• I-DEAS Master Series
• Microstation
• Pro/ENGINEER
• Solid Designer
• Solidworks
• Unigraphics
• 3D Studio MAX
Drivers are currently being developed for other applications. See the
AccelGraphics web site for the latest information.
AccelSTAR II User’s Guide 1-5
Page 21

AccelSTAR II
Software Distribution
Welcome t o
Software Distribution
Software for the AccelS TAR II is distributed with the card on CD-R OM.
Supported Monitors and Output Formats
The AccelSTAR II sup ports color multisync monitors and color monitor s
capable of displayin g up to 1600 X 1200 pixels at 100Hz . or moni tors
which can be set to the exact resolutions and refresh rates as shown in the
tabls on the next two pages.
Note
All monitors must support non-interlaced video per EIA RS343 video
specification, which defines separate red, green, b lue , h-s ync and v- s ync
signals. See Appendix B, Technical Information for detailed signal and
connector specifications.
Automatic Monitor Compatibility Testing
The AccelSTAR II card c omplies with the VESA DDC2B standard. If th e
monitor connected to it also suppor ts this standard, the AccelSTAR II
automatically te sts the monitor to see which resolut ion and refre sh rates it
can display. The AccelSTAR II then provides only those rates which the
monitor can use, preventing out- of-sync displays. Resolutions, refresh
rates, and colors can be changed dynamically via the AccelPanel
Chapter 3).
(see
AccelSTAR II User’s Guide
1-6
Page 22

Supported Monitors and Output Formats
The table below sho ws the operating modes and th e available buffers and
texture memory in each. The driver will pr ovide double-buffering by
default whenever sufficient memory is available.
AccelSTAR II Display Mode Tables (Windows NT)
Resolution 2D 3D Colors Z-buffer
8-bit
640 x 480 Yes Yes
800 x 600 Yes Yes
1024 x 768 Yes Yes
Yes
1152 x 864 Yes
No
1280 x 1024 Yes
1600 x 1200 Yes No
1920 x 1080
1920 x 1200
1920 x 1440 Yes No
Yes
No 32-bit* n/a
Yes No
16-bit 6.3
24-bit 5.7
32-bit 5.1
8-bit
16-bit 5.3
24-bit 4.4
32-bit 3.6
8-bit
16-bit 3.6
24-bit 2
32-bit 0.5
8-bit
16-bit 3.2
24-bit n/a
32-bit* n/a
8-bit 16-bit 3.1
8-bit n/a
16-bit n/a
8-bit n/a
16-bit n/a
8-bit n/a
16-bit n/a
16-bit
16-bit
16-bit
16-bit
Texture
Memory (MB)
6.5
6.1
5
4.2
Refresh Rate
60/72/75/85/100
60/72/75/85/100
60/72/75/8 5/100
60/72/75/8 5/100
60/72/75/85/10016-bit 16-bit 0.5
60/72/75
60/72
60
Welco m e t o
AccelSTAR II
* Note: In 1152 x 864 and 1280 x 1024, 32-bit modes, colors are actually rendered in 24-bit color. The extra 8 bits help to
make data transfers faster.
BPP = Bits Per Pixel. Exampl e: 8 Bits Per Pixel = 8-bit colo r = 28 colors = 256 colors.
32K colors = 15BPP, 16.7M colors = 24BPP
See the next page for the Windows 95 display mode table.
AccelSTAR II User’s Guide 1-7
Page 23

AccelSTAR II
Supported Monitors and Output Formats
Welcome t o
AccelSTAR II Display Mode Tables (Windows 95)
Resolution 2D 3D Colors Z-buffer
8-bit
640 x 480 Yes Yes
800 x 600 Yes Yes
Yes
1024 x 768 Yes
1152 x 870 Yes
1280 x 1024 Yes
1600 x 1200 Yes No
1920 x 1080
1920 x 1200
1920 x 1440 Yes No
Yes No
Direct3D
Only
OpenGL
Only
Only
No 32-bit* n/a
Yes
No 32-bit* n/a n/a 60
32-bit 5.1
8-bit
16-bit 5.3
32-bit 3.6
8-bit
16-bit 3.6
32-bit 0.5
8-bit
16-bit 3.2
8-bit
16-bit 0.5
8-bit
16-bit
8-bit n/a
16-bit n/a
8-bit n/a
16-bit n/a
16-bit
16-bit
16-bit
16-bit
16-bit
n/a n/a 60
Texture
Memory
6.5
6.1
5
4.2
3.1
Refresh Rate
60/72/75/ 85/10016-bit 6.3
56/60/72/75/85
/100
60/70/75/85/100
60/70/75/85
60/70/75/85OpenGL
60/70/75/ 85
60/72
60
* Note: In 1152 x 864 and 1280 x 1024, 32-bit modes, colors are actually rendered in 24-bit color. The extra 8 bits help to
make data transfers faster.
AccelSTAR II User’s Guide
1-8
Page 24

AccelSTAR II Color Modes
The AccelSTAR II card has the following maximum color modes
available:
• True (24-bit) Color for 2D windows (windows that are not double
buffered and Z buffered)
• 32K colors (15- bit) or 65K col ors (16 bit s) fo r 3D windows (windows
that are double buffered and Z buffered)
It is easy to change color modes to suit the 2D and 3D applications you use,
as Windows NT allows changing display settings “on the fly”, that is,
without reboot ing. You can make good use of this capability by changing
the AccelSTAR II color settings to fit the application you are using.
For example, change the display settings to either 1024x768 or 800x600
resolution, an d True Color. Concurren tly, all 3D windows such a s those for
3D Studio MAX or Lightwave will run in 32K or 65K color mode which
is usually adequate for 3D modeling purposes. You can always switch to
the 24 bit mode to view/playback your fina l rende rings.
Supported Monitors and Output Formats
Welco m e t o
AccelSTAR II
To run Photoshop at 1280x1024, use the Accelpa nel
to select 1280x1024
single buffered resolution.
When you have fini shed using Photoshop, set the display to 1280x1024 x
32K or 65K colors, double buffered mode to use with your Lightwave 3D,
3D Studio MAX or other 3D application.
AccelSTAR II User’s Guide 1-9
Page 25

Installing the Ac celSTAR II
In This Chapter:
This chapter contains information about the following:
• Before Installing the Card
• Installing the Hardware
• Dual Screen Installations
• Installing the Soft ware
• Using AccelPanel
• Deinstalling the AccelSTAR II
2
Installation
EASY MEDIUM MORE DIFFICULT MOST DIFFICULT
Task difficulty or complexity of information
AccelSTAR II User’s Guide 2-1
Page 26

Before Installing the AccelSTAR II Card
Before Installing the AccelSTAR II Card
Installing the card is usually simple, easy, and fast. The jumpers on
the card are preset at the factory and do not normally need changing.
However, there are a few things you should know befor e you inst all the
card.
• The AccelSTAR II card comes in two versions, AGP and
PCI. The illustration below shows the two types of edge
connectors. Check the edge connector on your card to verify
Installation
which type you have.
PCI
Figure 2-1. AccelSTAR II AGP and PCI connectors
• A few types of machines may require special procedure s to install
the AccelGraphics hardware and/or software. See the Releas e
Notes before i nstalling t he AccelSTAR II card. The Release Not es and
answers included in the list of Frequently Asked Questions are
viewable on line by clicking on the respective menu items in the
AccelGraphics folde r.
• You must remove any existing video card(s) from your system
before insta lling th e Ac cel ST A R II. They may cause conflicts with
the on-boar d VGA on the Accel STAR II card, and the syst em may not
boot or Windows NT may not boot.
• When installing the PCI version of the AccelSTAR II card in a
PCI system, install it in the “Master” PCI slot. This is usua lly the
lowest numbered PCI slot. This is necessary to accommodate the
BIOS, which may otherwise incorrectly configure the card. If the
BIOS incorrectly confi gur es the card, either the system may hang
during system boot or Windows NT may hang when it tries to start.
Key
AGP
• The examples in this chapter show a “typical” PC with a
mini-tower case. Your PC may be different from those shown
here. See your PC manual for specific instructions and
examples.
Key
2-2
AccelSTAR II User’s Guide
Page 27

Task Overview
The following table lists the tasks you must complete to install the
AccelSTAR II card.
Tas k Deta il e d Info
Task Overview
Table 2-1 Installation Tasks
Save files, halt software, power off and ground
yourself.
Disconnect cables, open the PC.
Remove any existing VGA cards.
Install an AccelSTAR II card.
Close the PC and connect the video cable(s).
Reconnect the remaining cables, power on,
and wait for the PC to boot.
Install the software.
Hardware Requirements.
Before installing the AccelSTAR II Card, make sure that your PC
has at least the following hardware and software:
Table 2-2 Hardware Requirements
PC Intel-Based
CPU Intel Pentium or Pentium Pro
See page 2-6
See page 2-7
See page 2-7
Installation
See page 2-7
See page 2-8
See page 2-8
See page 2-9
Alpha-based - See Release
Notes for availability
21064, 21164, or other
DECChip
RAM
BUS PCI PCI
Hard Drive 200 MB or greater 200 MB or greater
Monito r
4 MB minimum. See Software Installation for other RAM
requirements
A color multisync monitor or a color monitor capable of displaying
640x480, 1800x600, 024x768, 1152x870, 1280x1024, or
1600x1200 pixels, and vertical refresh rates of 60, 72, 75, or 85 Hz.
AccelSTAR II User’s Guide 2-3
Page 28

Task Overview
Software Requirements
See page 2-10, Installing the Soft ware, for softw a re
requirements.
Save the Box
Save the box and packing materials in case you need to return the
board for any reason. Shipping damage is NOT covered under the
AccelGraphics warranty.
Make Sure You Have Everything
Installation
The AccelSTAR II graphics accelerator package should contain the
items shown in the illustration below. Contact your authorized
AccelGraphics reseller if any of these items is missing.
AccelSTAR II grap h ics accelerator
card in antistatic bag
Note: The Release Notes answers to Frequent ly Asked
Questions, and Software Upgrade Information can be accessed
from the icons in the AccelGraphics program group or f older.
Figure 2-2. AccelSTAR II Package Components
2-4
AccelSTAR II User’s Guide
AccelSTAR II software
and documentation
Page 29

Installing the AccelSTAR II Card
Installing the Acce lSTAR II Card
STOP! If you have not read Before Installing The
AccelSTAR II CARD, see page 2-2.
Tools Needed
• A Phillips and/or a flat-bladed screwdriver to remove and
reinstall the PC cover screws and card mounting screws. See
your PC manual for specific requirements.
• An antistatic wrist strap (recommended but not required.)
• AccelSTAR II Software Disk(s)
Warning
Possibility of Electric Shock: The power supply in your PC
contains high voltage. Do not remove cables or open the unit
while the power is on. Turn off the power and wait at least 10
seconds before removing cables or opening the unit.
Installation
Caution
WATCH OUT FOR STATIC ELECTRICITY!
Although the AccelSTAR II card is reasonably
protected against static electricity, we recommend that
you do not take the card out of the s tatic-protective bag
until you are grounded. You can ground yourself by
touching unpainted metal on your PC chassis while it
is plugged in but not turned on, or by using an antistatic ground strap.
See the information on static electricity near the beginning of this
manual.
AccelSTAR II User’s Guide 2-5
Page 30

Installing the AccelSTAR II Card
Back Up Data
1. Exit any applications you are running and back up working data.
Although the installation procedure automatically backs up any
files it changes, it is always a good idea to back up system and
configuration files before installing new hardware or software.
Turn Off the PC and Ground Yourself
2. After completing step 1, turn off the power to the PC and all
Installation
peripherals (monitors, printers, scanners, etc.) connected to it.
Ground yourself to the PC and the AccelSTAR II card before
removing the card from the static-protective bag:
3. Make sure the power to the PC and to the monitor is OFF.
4. Touch the antistatic plastic ba g that the card is packaged in and
the back or other unpainted metal on the PC for at least one
second.
OR, use an antistatic ground strap.
This will discharge any static electricity buildup in your body and
will help prevent damage to the card from static electricity.
2-6
AccelSTAR II User’s Guide
031
Figure 2-1. Discharging Static Electricity
Page 31
Disc onnect Cables and Open the P C
5. Disconnect the power cord. Disconnect the monitor video cable
and other cables as needed to be able to remove the PC cover. Be
careful not to pull on the wires themselves. Gently rock the
connectors out of their sockets.
6. Remove the PC cover retaining screws and remove the cover.
See your PC manual for details.
Remove Existing Video Cards
7. Remove any installed video card, as the VGA chip on it will
cause a hardware conflict with the VGA chip on the AccelSTAR
II and the system will probably hang as soon as it tries to boot.
Install the AccelSTAR II Card
8. Remove the mounting screw from the cover over the slot where
you want to install the AccelSTAR II card and remove the cover.
Save the screw for use when installing the AccelSTAR II card.
NOTE: Some sy stems use spr i n g cli p s i nst ead o f screws.
Installing the AccelSTAR II Card
Installation
032
Figure 2-2. Installing the AccelSTAR II Card
9. Remove the card from its static-protective bag. Install it in a
master PCI slot in your system
(see page 2-2). Use the mounting screw from step 8 to fasten
the card’s bracket to the PC frame. See your PC manual for
specific instructions on how to install a PCI option card and for
information regarding the master slot if needed.
AccelSTAR II User’s Guide 2-7
Page 32

Installing the AccelSTAR II Card
Close the PC.
10. Before closing the PC, make sure that the AccelSTAR II card is
11. Replace the cover and install the mounting screws. See your PC
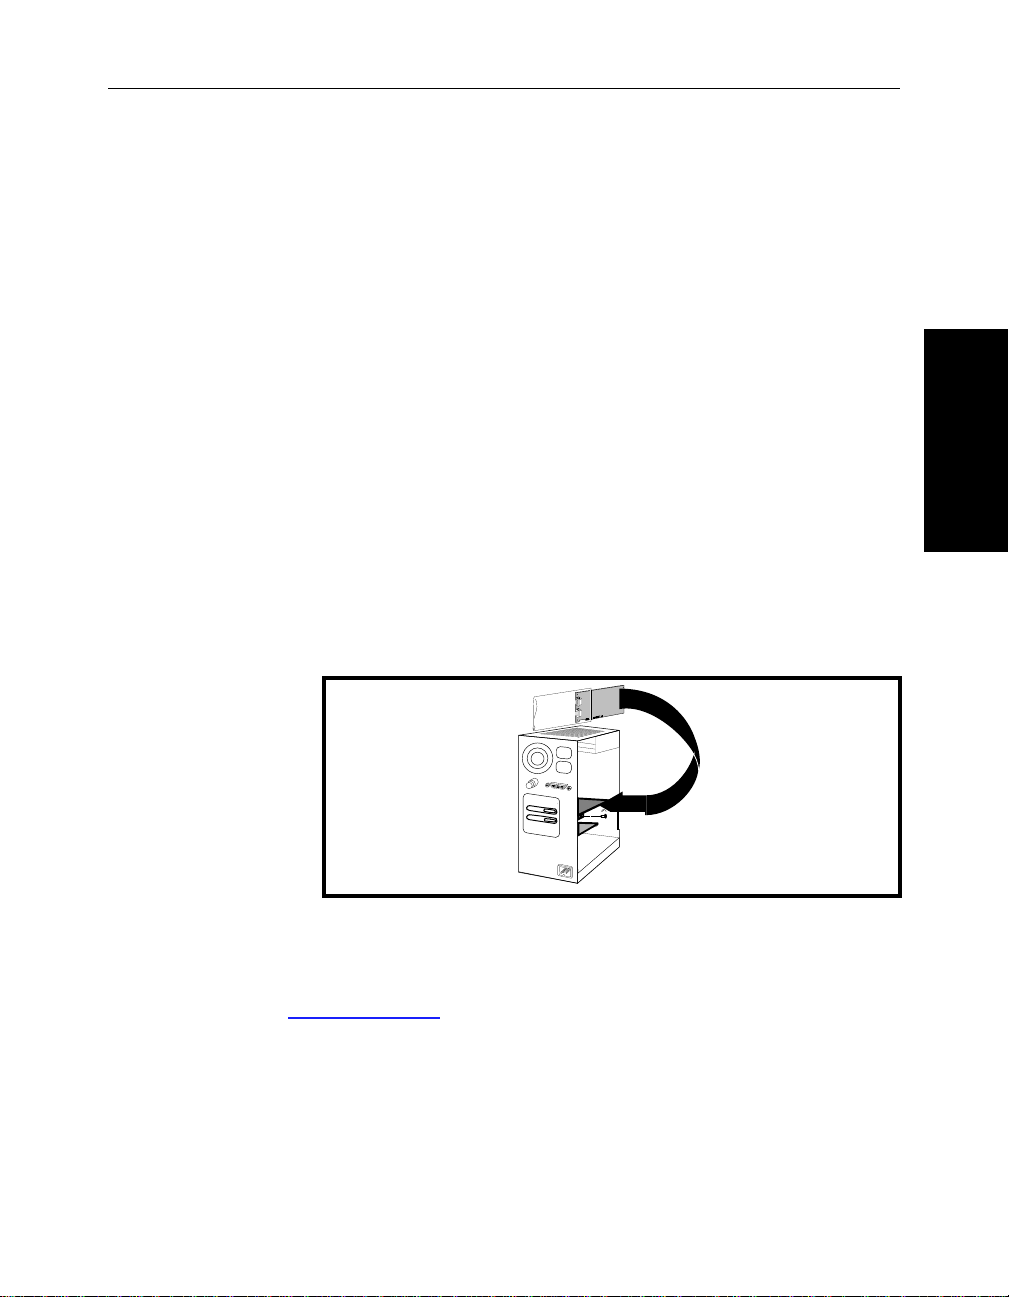
Connect the Video Cable
Installation
12. Connect the video cable as shown in the illustration below.
fully seated in its connector, the screw holding the card
mounting bracket to the PC frame is securely tightened, and the
card is not touching any other card or devices in the computer.
manual for specific instructions if needed.
AccelSTAR II
Card
Video O ut
Monitor Video Cable
Figure 2-3. Connecting the monitor cable to the AccelSTAR II
Connect the Remaining Cables
13. Connect the data cables to your printer and other peripherals.
14. Plug in the power cords to the PC, monitor, and other
peripherals.
Turn on the PC
15. Turn the PC and monitor power back on. Turn on other
peripherals as desired.
2-8
AccelSTAR II User’s Guide
Page 33
Dual Screen Installations
The AccelSTAR II card supports dual screen installations, as
needed with certain applications to provide more room for
graphics and text displays.
Dual Scr een Installations
1
0
Hardware Requirements
Dual screen installations require the following hardware:
• AccelSTAR II Cards: One AGP AccelSTAR II card and one
PCI AccelSTAR II card with the same memo ry co nfigu rat ion.
-OR-
Two AccelSTAR II PCI cards with the same me mo ry
configuration.
• System: A Pentium or Pentium PRO-based PC system with
one AGP slot and one free PCI slot, or a PCI system with at
least two free PCI slots. Alpha systems are not currently
supported.
• Monitors: Two color multisync monitors which can run the
same resolu t ions (from 800x600 to 1600x1200) and re fre sh
rates of 60 to 85 Hz. Both mo nitors shoul d either suppor t the
DDC2B standard or neither should.
Note
Card models cannot be mixed; for example, you cannot
use one AccelSTAR II and one AccelECLIPSE II card).
Installation
Software Requirements
Dual screens are supported in the AccelSTAR II driver release
4.6.06 and later onl y. This d river ca n be downloaded f rom either
the AccelGraphics Web site, FTP site, or BBS. Information
L
about these sites is located on page 13 of this manual.
AccelSTAR II User’s Guide 2-9
Page 34

Dual Screen Installations
Hardware Setup
The Primary Card
Installation
The Secondary Card
.
The two AccelSTAR cards are used as described below:
The primary card can be either an AGP card, or a PCI card with
VGA enabled. It is connected to the primary monitor. This card
has VGA enabled and provides video during startup as well as
after Windows boots.
If using a PC I card as th e pr imary card, ch e ck j u mper JP2 and
make sure it connects pins 1 and 2 as shown in the illustration
below.
The secondary card must be a PCI card with VGA disabled (AGP
cards do not ha ve jum pers) . T he m onitor connected to it wi ll not
display video until after Windows boots.
To disable VGA, move jumper JP2 to connect pins 2 and 3 as
shown in the illustration below
2-10
AccelSTAR II User’s Guide
VGA BIOS
JUMPER
JP1
JP2
VGA
3 2 1
VGA Enabled
(Primary C a rd)
JP3
3 2 1
VGA Disabled
(Secondary Card)
Note
See Appendix B, Technical Information, for instructions on setting
all the jumpers on the card.
Page 35

Installing the Cards
The Primary Card
• If the primary card is an AGP card, install it in the AGP slot
in your system.
• If the primary card is a PCI card, install it in the Master
(lowest numbered) PCI slot in your system. Make sure that
VGA is enabled on this card (see previous page).
The Secondary Card
Install the seconda ry AccelSTAR II card in any PCI slot that has
a higher number than the slot the primary card is in.
Dual Scr een Installations
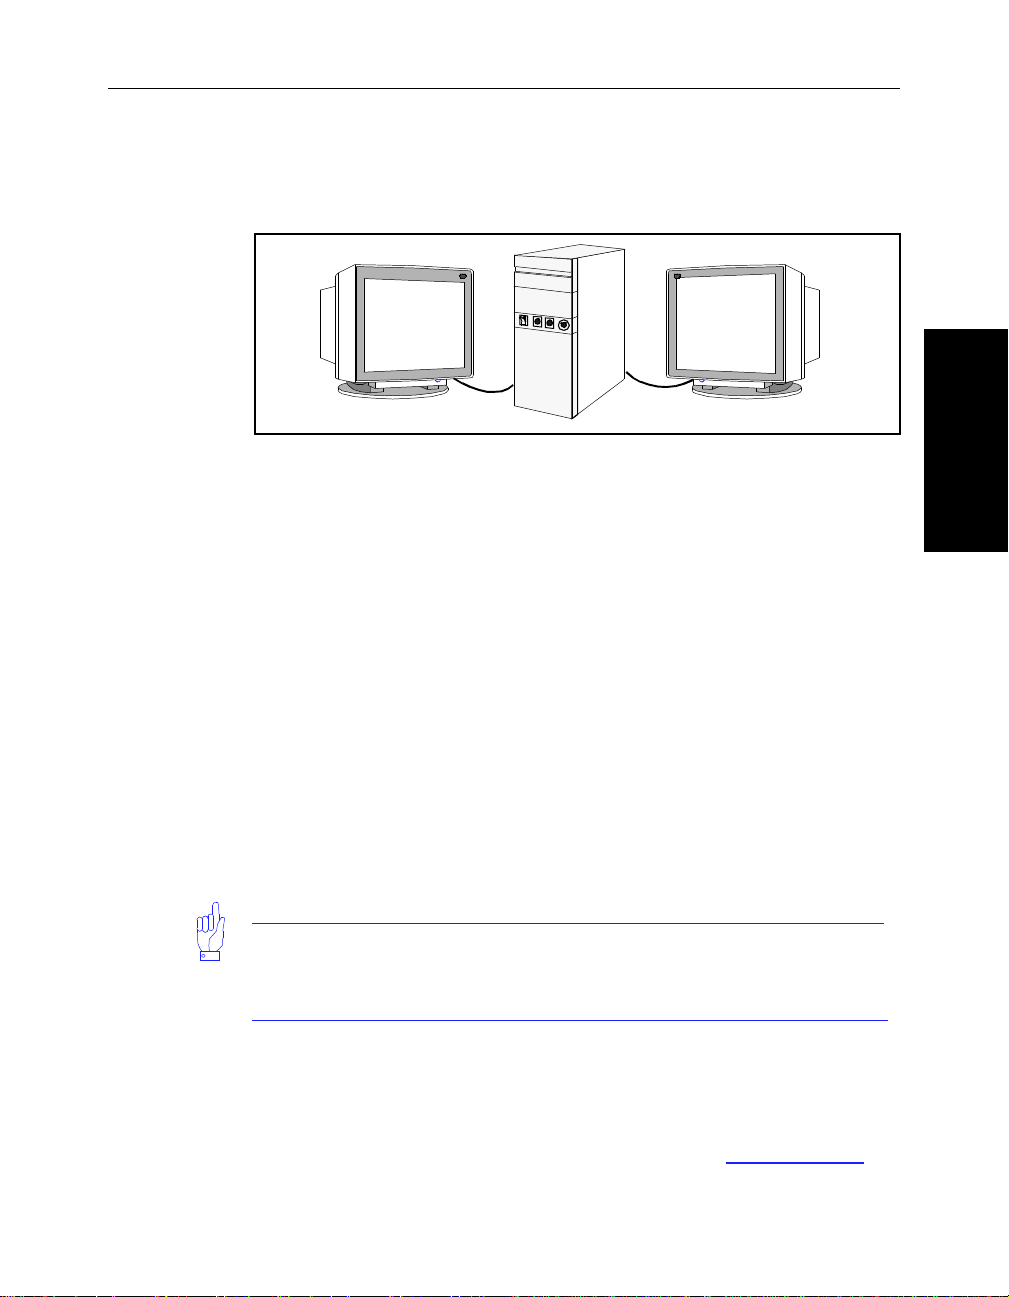
Monitors
Connect the primary (left) monitor video cable to the primary
AccelSTAR II card and connect the secondary (right) monitor
video cable to the secondary AccelSTAR II card as shown in the
.
illustration below.
Software Setup
Other than using release 4.6 .0 6 or la ter of the driver, no special
software setup is required. The AccelGraphics driver scans the
bus when Windows boots and detects the number and type of
AccelSTAR II cards that are insta lled. The driver then operates
accordingly.
Primary Monitor
Video Cable
(LEFT side of picture)
AccelSTAR II #1
(VGA ENABLED)
AccelSTAR II #2
(VGA DISABLED)
Secondary Monitor
Video Cable
(RIGH T sid e of pi cture)
Installation
For further information about the AccelSTAR II drivers, see
Installing the Software on the next page.
AccelSTAR II User’s Guide 2-11
Page 36

Installing the Software
Installing the Software
Note
If you install the software before you install the AccelSTAR II card,
Windows will default to the VGA mode on bootup.
RAM Requirements
Your system should contain at least the amount of RAM specified in
Installation
Automatic Monitor Compatibility Testing
the following table.
RAM USE
32 MB Windows 95 or NT and 2D applications
64 MB CAD applications under Windows
96 MB
or more
The AccelSTAR II card c omplies with the VESA DDC2B standard. If th e
monitor connected to it also suppor ts this standard, the AccelSTAR II
automatically te sts the monitor to see which resolut ion and refre sh rates it
can display. The AccelSTAR II then provides only those rates which the
monitor can use, preventing out- of-sync displays. Resolutions, refresh
rates, and colors can be changed dynamically via the AccelPanel
Chapter 3).
CAD appli cations under Windows, best performance
(see
Driver Installation Procedure
Installing the Software From a CDROM
1. Insert the CDROM provided with your AccelSTAR II card in the
CDROM drive.
2. Using either File Manager or Explorer, change directories to the
root directory of the CDROM.
3. Locate and double click on the file SETUP.EXE. The installer
(Installshield) will take a few seconds to load. The installer
examines the system and gets information about the processor
type and operating system being used, and automatically installs
the appropriate driver files in the correct directories.
2-12
AccelSTAR II User’s Guide
Page 37

4. Follow the directions on the screen. The installation program
will guide you through a few easy questions and then
automatically install the driver files for you.
5. Note that default directories are provided, but you do have the
option to edit the pathnames for custom installations.
6. When the installation is complete, a confirmation dialog box is
displayed. Select OK.
7. Restart Windows when prompted to do so.
Alternate installation Method
1. Pla ce the cur sor i n t he desktop a rea and pres s t he right mouse button
to display the main menu.
2. Select
3. Select Settings to display the Settings page.
4. Select
5. Select Change to open the Change Display window.
6. Select
7. If the drivers are on CDROM, either use Browse to locate the Win 95
8. If the files are on the hard drive, use
9. A progress indicator (“thermometer”) is displayed showing the files
10. Restart Windows NT when prompted to do so.
Properties to open the Display Properties window.
Display Type to open th e Display Type window.
Have Disk to open the Install from Disk window.
directory, -or- enter the pathname of the director y, then select
(For Windows NT, select Win NT 4.0.)
where the files are, -or- enter the pathname of the directory, then select
Open.
being loaded. When the files are loaded, a confirmation dialog box is
displayed. Select
Installing the Software
Installation
Open.
Browse to loc at e the directory
OK.
AccelSTAR II User’s Guide 2-13
Page 38

Installing the Software
Installing the Software From the Hard Disk
1. If you have downloaded the driver file from the Web site, FTP
site, or BBS, put it in an empty directory on your hard disk.
2. Expand the file by either double-clicking on the filename in
either Windows NT Explorer or File Manager, or by typing the
filename in a DOS window.
Installation
Note
Some versions of the insta llation program will automatically s tart as
soon as the file has expanded. If this happens, skip step 3 and
continue with step 4.
3. When the file has expanded, find SETUP.EXE and double-click
4. Follow the directions on the screen. The installation program
5. Restart Windows NT when prompted to do so.
6. When the installation is complete, a confirmation dialog box is
Changing Driver Settings
Use the Setti ngs and AccelPanel page s of the Windows Prope rties applet,
to change driver settings.
1. Pla ce the cur sor i n t he desktop a rea and pres s t he
on it to start the installation program (Installshield).
will guide you through a few easy questions and then
automatically install the driver files for you.
displayed. Select OK.
right mouse button
to display the main menu.
2-14
AccelSTAR II User’s Guide
2. Select
3. Select
4. Select the AccelPanel tab to change other setti ngs. See Chapter 3 for
Properties to open the Display Properties window.
Settings to display the Settings window, then select the
resolution, refresh rate, and color depth desired. You do not need to
restart Windows to make these changes.
information on using the AccelPanel
with AccelPanel, restart Windows when prompted to do so.
. To effect changes made
Page 39

Deinstalling the AccelSTAR II
Caution
Turn the power off to the PC and the monitor before r emoving or i nstalling
the video cable. You may damage the AccelSTAR II card if you remove
or install the video cabl e with the power on.
Hardware Procedure
When removing an AccelSTAR II from your system, you must
replace the card with another video card or your system will not run.
Software Procedure
No special software deinstallation procedure is needed when
deinstalling the AccelSTAR II card as the driver detects the presence
or absence of the card. If the driver finds an AccelSTAR II card, it
runs the selected settings for the installed card. If it does not find an
AccelSTAR II card in the system, it defaults to the VGA driver.
Deinsta lling th e Acc el S TA R II
Installation
Note
Depending on the video card you use to replace he AccelSTAR II
card with, it may be necessary to install a driver for that card.
AccelSTAR II User’s Guide 2-15
Page 40

Configuring the Acc elSTAR II
In This Chapter:
This chapter contains information about the following:
• About the AccelPanel
• Starting the AccelPanel
• AccelPanel Pages for Windows 95
• AccelPanel Pages for Windows NT 4.0
3
AccelSTAR II
Configu ring the
EASY
Task difficulty or complexity of information
MEDIUM
MORE DIFFICULT MOST DIFFICULT
AccelSTAR II User’s Guide 3-1
Page 41

About the AccelPanel
About the AccelPanel
The AccelPanel is a control apple t that is installed on your system when
you install the drivers for the AccelSTAR II card. It is integrated into the
Microsoft dis play property she ets and contains four pa ges for Windows 95
and four pages for Windows NT 4.0. These provide the capability of
reviewing and changing seve ral types of information and settings.
Starting AccelPanel
1. To st art the AccelP anel , place the cur sor in the desktop ar ea and press
the
right mouse button to display the main menu.
AccelSTAR II
2. Select
3. Sel ect the AccelPanel tab. When the panel starts, it checks to see
Configu ring the
AccelPanel Pages
The AccelPanel contains fo ur page s for Windows 95 and four pages for
Windows NT 4.0, as shown in the foll owing table. The foll owing sections
describe these page in deta il.
Windows 95 W indows NT 4.0 Description
AccelPanel AccelPanel
OpenGL OpenGL
System Set up System Setup
Direct3D
Properties to open the Display Properties window.
which operati ng system is running an d displays only the windows for
that operating system.
Displays system hardware and software information and
allows you to select the default factory settings or open
the con figuration pages described below.
Displays OpenGL settings and allows you to change
them as desired
Displays current 3D driver settings and allows you to
change them as desired
Displays current 3D driver settings and allows you to
change them as desired
Applications
Displays current 3D driver settings and allows you to
change them as desired.
AccelSTAR II User’s Guide
3-2
Note
When prompted to do so, you mu st resta rt Windows for cha nges made via
AccelPanel to ta ke effect.
Page 42

Windows 95
AccelPanel Pages
AccelPanel for Windows 95 contains four pages:
• The AccelPanel
information and allows you to select the default factory settings or
open the configuration pages described below.
• The OpenGL page displays OpenGL settings and allows you to
change them as desired.
• The System Setu p
allows you to change them as desired.
• The Direct 3D
you to change them as desired.
These are descsribed in detail in the following section.
page displays system hardware and software
page displays current 3D driver settings and
page displays current 3D driver settings and allows
Note
When prompted to do so , you must res tart Windows NT for changes made
via AccelPanel to take effect.
AccelSTAR II
Config uring the
AccelSTAR II User’s Guide 3-3
Page 43

AccelSTAR II
AccelPanel Pages
The AccelPanel page (Windows 95)
Configu ring the
Figure 2-1. AccelSTAR II Windows 95 AccelPanel - Page 1
Feature Title Description
Miniport Version Displays the version of the miniport driver.
Driver Version Displays the version of the AccelGraphics driver.
Resolut ion Disp lays the current scre en resolution.
Pixel Depth
Refresh Rate Displays the cur rent refresh r ate.
Adapter Displays the name of the graphics board installed in the system.
Video Memory Displays the number of MB of SGRAM installed on the card.
OpenGL Version Displays the version of the installed OpenGL API.
Chip Type Displays the name of the Graphics processor on the graphics board.
DAC Displays the type of the Permedia II chip’s internal Digital to Analog Converter
Factory Settings Resets all the choices in the AccelPanel to the default factory settings.
Configure Opens the AccelPanel configuration pages and displays t hem on the screen
OK Saves changes and closes the AccelPanel.
Cancel Ignores changes and closes the AccelPanel.
Help Displays the on-line help for AccelPanel on the screen.
AccelSTAR II User’s Guide
3-4
Displays the current pixel depth (Bits-Per-Pixel, or number of colors). See the
resolution table
in chapter 1 for information on BPP and number of colors.
Page 44

The
OpenGL
Page (Windows 95)
Figure 2-2. AccelSTAR II Windows 95 AccelPanel - Page 2, OpenGL
Feature Title Description
Force Nearest Neighbor Filtering- Setting this registry value will ensure that
OpenGL performs only nearest neighbor texturing operations. In some
applications , this can produce higher performance, though the v ideo may be
slight ly degraded. Note that t extures will still be rendered with perspective
correct io n. Sele ct t his bo x i f you ar e happ y w it h t h e per f orm an ce and/ or te xt uri ng
qualit y that is achieved with your application .
Enable Texture Compression - Setting this registry value will force OpenGL to
shrink 2D textu re ma ps as the y are load ed to re duce the memo ry ne eded to stor e
them. T ex tur e m aps are hal ve d i n b oth x an d y d ime ns io ns so th at th ey requ i re a
quarter of th e or igin al me mory. The s ettin g has no ef fect o n 1D or pal ett ed tex tur e
Texture Configuration
Export
PFD_SUPPORT_GDI
maps. This setting applies to all hardware configurations.
Perspective Correction - The accuracy of the perspective-correction calculations
performed during textured rendering can be varied in the following ways:
Force Nicest, the default option, enforces that the most accurate division always
operates, resulting in the best image quality.
Force Fastest switches to a reduced accuracy divide when Delta hardware is
present and no per spe ct iv e-c orr ec t ion a t a ll if D elt a i s n ot pre sen t. T hi s re su lt s in
best performance at the cost of lower image quality.
GLHint gives control of the division ac curacy t o OpenGL appl ications through the
API. A smart application can vary the division accuracy used on a per-primitive
basis, since primitives that are heavily perspected require higher accuracy for
good image quality than those that are not.
These two check-boxes control whether the PFD_SUPPORT_GDI flags are
exported for si ngle buffered and double buffer ed pixel formats.
AccelPanel Pages
AccelSTAR II
Config uring the
AccelSTAR II User’s Guide 3-5
Page 45

AccelSTAR II
AccelPanel Pages
Configu ring the
Feature Title Descriptio n
Accelerate OpenGL - Selecting this box enables hardware acceleration.
Disable MipMaps - Disables software levels of detail texturing mode. Disable
softwar e le vel s o f d et ail t ex t uri ng mo de .Th is fe atur e is u se d on .G lint 50 0 T X and
3D Accele ration
Advanced Options
OK Saves chan ges and closes the AccelPanel.
Apply Saves changes but leaves the AccelPanel open.
Cance l Ignores chan ge s and cl os es the AccelP anel.
Help Displays the on-line help for AccelPanel on the screen.
NOTE: When prompted to do so, you must restart Windows for changes made via the AccelPanel to take
effect.
MX only .
Export Alpha - Ensures that alpha blending is available to applications that request
it.
Use Fast Clear - Enables hardware aceleration of buffer initial ization (example:
texture buffers). Di sable software levels of d etail texturing mode.This feat ure is
used on.Glint 500 TX and MX only.
Draw Line Endpoints - This option when set can impr ove the legibility of t ext
rendered by some applications using stroke fonts, such as Pro/ENGINEER.
Number of DMA Sub-Buffers - Each DMA buffer is sub-divided into sub-buffers
which are used in conjunction with an Interrupt DMA mechanism to reduce
latency in the system. The number of sub-buffers can be set here, setting it to 2
will disable the interrupt mechanism.
AccelSTAR II User’s Guide
3-6
Page 46

The
System Setu p
AccelPanel Pages
Page (Windows 95).
Figure 2-3. AccelSTAR II Windows 95 AccelPanel - System Setup Page
Feature Title Description
Force Single Bufferi ng Turns off double buffering and sets single buffering only.
Number of D MA
Buffers
DMA Buffer Size Sets the size of each DMA buffer.
Advanced Controls
OK Saves changes and closes the AccelPanel.
Apply Saves changes but leaves the AccelPanel open.
Cancel Ignores changes and closes the AccelPanel.
Help Displays the on-line help for AccelPanel on the screen.
NOTE: W hen prompted to do so, you must restart Windows for changes made via the AccelPanel to
take effect.
Sets the number of DMA buffers that the driver will allocate. To disable DMA,
set to zero.
Font Cache - Sets the amount of memory allocated for the font cache. To
disabl e font caching, set this number to 0.
Off Scr een bitmaps - Enables the use of of fscreen bitmaps for faster
perfor mance.
Enable Auto Monitor Detect - uses the DDC2B function to test the monitor
and determine which resolutions and refresh rates it can accept.
Performance - Enables performance over pixel accuracy.
Interrupt Enable - Enables interrupts for DMA operations.
AccelSTAR II User’s Guide 3-7
AccelSTAR II
Config uring the
Page 47

AccelSTAR II
AccelPanel Pages
The
Configu ring the
Direct3D
Page (Windows 95).
Figure 2-4. AccelSTAR II Windows 95 AccelPanel - Direct3D Page
Feature Title Description
Available Texture
Formats
Advan c ed Options
OK Saves changes and closes the AccelPanel.
Apply Saves changes but leaves the AccelPanel open.
Cancel Ignores changes and closes the AccelPanel.
Help Displays the on-line help for AccelPanel on the screen.
NOTE: W hen prompted to do so, you must restart Windows for changes made via the AccelPanel to
take effect.
AccelSTAR II User’s Guide
3-8
8 Bit RGB Textures - Enables 8-bit RGB textures. Sets Direct3D so that the
Direct3D Retained Mode chooses the texture format that best matches the
original file . However, this can cause applicati ons to use 8-bit RGB t extures
when a hi gher resol uti on te xture forma t woul d be b ett er, so 8-bit RGB textur es
are disabled b y default.
True Color Textures - Enables the use of true color textures in the Direct3D
HAL driver. This option will use more video memory if it is used by a Direct3D
application.
Don’t Force CopyMode - Allows the Direct3D driver to use texture modulation.
When turned off, it allows the original color of the texture map to be seen.
Disable Direct3D HAL - Disables Direct3D hardware acceleration
Sync DblBuffer with VBlank - Ensures no flickering or tearing during 3D
animat ion, but may decrease performance slightly.
Number of DMA Sub-Buffers - Sets the number of DMA Sub-buffers.
Filter Stretching - Filters all stretched blit operations. Set this option OFF by
default as it can slow the performance of stretch blit, but it is good for t
real-time anti-aliasing applications that stretch large images down with
filtering.
Rectangular Allocator - Changes the memory usage from linear to
rectangular.
Page 48

Windows NT 4.0
AccelPanel for Windows NT 4.0 contains four pages:
AccelPanel Pages
• The AccelPanel
information and allows you to select the default factory settings or
open the configuration pages described below.
• The OpenGL page displays OpenGL settings and allows you to
change them as desired.
• The Applications
allows you to change them as desired.
• The System S etup
allows you to change them as desired.
These are descsribed in detail in the following section.
page displays system hardware and software
page displays current 3D driver settings and
page displays current 3D driver settings and
Note
When prompted to do so , you must res tart Windows NT for changes made
via AccelPanel to take effect.
AccelSTAR II
Config uring the
AccelSTAR II User’s Guide 3-9
Page 49

AccelSTAR II
AccelPanel Pages
The
Configu ring the
AccelPanel
Page (Windows NT 4.0).
Figure 2-5. Windows NT 4.0 AccelPanel - AccelPanel Page
Feature Title Description
Miniport Version Displays the version of the miniport driver.
Driver Version Displays the version of the AccelGraphics driver.
Resolut ion Disp lays the current scre en resolution.
Pixel Depth
Refresh Rate Displays the cur rent refresh r ate.
Adapter Displays the name of the graphics board installed in the system.
Video Memory Displays the number of MB of SGRAM installed on the card.
OpenGL Version Displays the version of the installed OpenGL API.
Chip Type Displays the name of the Graphics processor on the graphics board.
DAC Displays the type of the Permedia II chip’s internal Digital to Analog Converter
Factory Settings Resets all the choices in the AccelPanel to the default factory settings.
Configure Opens the AccelPanel configuration pages and displays t hem on the screen
OK Saves changes and closes the AccelPanel.
Apply Saves changes but leaves t he AccelP anel open.
Cancel Ignores changes and closes the AccelPanel.
Help Displays the on-line help for AccelPanel on the screen.
AccelSTAR II User’s Guide
3-10
Displays the current pixel depth (Bits-Per-Pixel, or number of colors). See the
resolution table in chapter 1 for information on BPP and number of colors.
Page 50

The
OpenGL
AccelPanel Pages
Page (Windows NT 4.0).
Figure 2-6. Windows NT 4.0 AccelPan el, Page 2, Boot Options
Feature Title Description
Force Nearest Neighbor Filtering Setting this registry value will ensure that
OpenGL performs only nearest neighbor texturing operations. In some
applications , this can produce higher performance, though the video may be
slightly degraded. Note that textures will still be rendered with perspective
correction. Select this box if you are happy with the performance and/or
texturing qual ity that is achie v ed with your appli c ation.
Enable Texture Compression Setting this registry value will force OpenGL to
shrink 2D texture maps as they are loaded to reduce the memory needed to
store them. Texture maps are halved in both x and y dimensions so that they
require a quarter of the original memory. The setting has no effect on 1D or
Texture Configuration
Export
PFD_SUPPORT_GDI
paletted textu re maps. This setting appli es to all hardware configurations.
Perspective Correction The accuracy of the perspective-correction divide
performed during textured rendering can be varied in the following ways:
Force Nicest , the de fa ult op ti on , enf o rces th at t he m os t accu r ate d iv id e a lwa ys
operates, resulting in the best image quality.
Force Fastest switches to a reduced accuracy divide when Delta hardware is
present and no perspe cti ve-c orrec tion at all if Del ta is not pre sent. This result s
in best performance at the cost of lower image quality.
GLHint gives control of the divide accuracy to OpenGL applications through the
API. A smart application can vary the divide accuracy used on a per-primitive
basis, si nc e pri mit i ves tha t are he av ily p er spe ct ed req ui re h ig her ac cu racy for
good image quality than those that are not.
These two check-boxes control whet her the PFD _SUPPORT_GDI flags are
expor ted for single buffered and double buffered pixel formats.
AccelSTAR II User’s Guide3-11
AccelSTAR II
Config uring the
Page 51

AccelSTAR II
AccelPanel Pages
Configu ring the
Feature Title Description
Accelerate Op enG L - Select ing this box enable s hardware acceleration.
Disable MipMaps - Disables software levels of detail texturing mode.Disable
software levels of det ail texturing mode.This feature is used on.G lint 500 TX
3D Accele ration
Advanced Options
OK Saves changes and cl oses the AccelPanel.
Apply Saves changes but leaves the AccelPanel open.
Cancel Ignores changes and closes the AccelPanel.
Help Displays the on-line help fo r AccelPanel on the screen .
NOTE: When prompted to do so, you must restart Windows for changes made via the AccelPanel to
take effect.
and MX only.
Export Alpha - En sures that alpha blending is available to applications that
reques t it.
Use Fast Clear - Enables hardware aceleration of buffer initialization
(example: texture buffers). Disable software levels of detail texturing
mode.This feature is used on.Glint 500 TX and MX only.
Draw Line Endpoints - This option when set can improve the legibility of text
rendered by some applications using stroke fonts, such as Pro/ENGINEER.
Sync DblBuffer with VBlank - Ensures no flickering or tearing during 3D
animat ion, but may decrease performance slightly.
Number of DMA Sub-Buffers - Each DMA buffer is s ub-divided into
sub-buffers which are used in conjunction with an Interrupt DMA mechanism
to reduce latency in the system. The number of sub-buffers can be set here,
setting it to 2 will disable the interrupt mechanism.
AccelSTAR II User’s Guide
3-12
Page 52

The
Applications
Figure 2-7. Windows NT 4.0 AccelPanel, Applications Page
Feature Title Description
No Application
Selected
AutoCAD
AVS
Generic OpenGL
IDEAS Master Series
MicroStation
Pro/ENGINEER
SoftImage 3D
SolidWorks
Unigraphics
3D Studio MAX
OK Saves chan ges and closes the AccelPanel.
Apply Saves changes but leaves the AccelPanel open.
Cancel Ignores changes and closes the AccelPanel.
Help Displays the on-line help for AccelPanel on the screen.
AccelPanel Pages
Page (Windows NT 4.0).
No Appli c ation S elected (User Defined State) will be automatically selected
whenever you use either the Performance or the Advanced Settings dialog
boxes to change any AccelPanel settings.
No Application Selected (Default State) will be automatically selected when
AccelPanel pane l is first opened, and the sy stem is set so that on ly Gamma
and Stencils are enable d.
To return to the default state, select any other application and then select this
button.
Application Selected
Sets the Display parameters and the Windows Registry parameters for the
selected application.
NOTE: You must restart Windows for changes made to these settings to take
effect.
AccelSTAR II
Config uring the
AccelSTAR II User’s Guide3-13
Page 53

AccelSTAR II
AccelPanel Pages
The
Configu ring the
System Set u p
Page (Windows NT 4.0).
Figure 2-8. Windows NT 4.0 AccelPanel, System Setup Page
Feature Title Description
Force Single
Buffering
Gamma Adjustment
Gamma Value
Number of DMA
Buffers
DMA Buffer Size Sets the size of each DMA buffer.
Advanced Controls
OK Saves chan ges and closes the AccelPanel.
Apply Saves changes but leaves the AccelPanel open.
Cancel Ignores changes and closes the AccelPanel.
Help Displays the on-line help for AccelPanel on the screen.
NOTE: When prompted to do so, you must restart Windows for changes made via the AccelPanel to
take effect.
Turns off double buffering and sets single buffering on ly.
The gamm a adju st me nt af f ects t he en tir e sc ree n di sp lay. Th e de fau lt ga mma
value is 1.0 and the allowable range of floating point values is 0.3 to 4.0. Any
new user-defined value will take effect when the Apply or OK buttons are
selected.
Sets the number of DMA buffers that the driver will allocate. To disable DMA,
set to zero.
Export High Resolutio n, Single Buffered Formats - Select this option to run 2D
applications at the highest available resolutions. When this box is checked, it
will enable the driver to boot at resolutions where only single buffered pixel
formats are supported by GLINT acceleration, because at higher resolutions,
there is not enough VRAM to support double-buffered formats. By default, this
is not enabled and prevents you from unknowingly booting into unaccelerated
OpenGL mode with applications that use double buffering.
Off Screen bitmaps - Enables the use of offscreen bitmaps for faster
perfor mance.
Enable Auto Monitor Detect - uses the DDC2B function to test the monitor
and determine which resolutions and refresh rates it can accept.
Perfor mance - Enables performance over pixel accuracy.
AccelSTAR II User’s Guide
3-14
Page 54

Configu ring Applications
In This Appendix
This appendix describe s the procedures to set up the AccelSTAR
II and to configure the following applications to use the
AccelSTAR II hardware and software:
• Important Information
• AutoCAD
• Solidworks
• 3D Studio Max
• Photoshop
Note
This appendi x may not i nclude i nformation on all applications
that can be run with the AccelSTAR II card. Call your
authorized AccelGr aphi cs reseller for information about
applications which is not included here.
A
Configu ring
Applicat ions
AccelSTAR II User’ s Guide A-1
EASY MEDIUM MORE DIFFICULT MOST DIFFICULT
Task difficulty or complexity of information
Page 55

Important Information
Important Information
There are two main requirements to obtain optimum performance
from an application and a graphic s accelerator card such as the
AccelSTA R II.
• Set up the operating parameters of the card.
• Configure the application to use OpenGL
Setting Up the Card
Most applications are designed to provide optimum 3D
performance at specific resolutions, color depths, and numbers of
buffers. You can set the resolution and color depth by using either
the Windows Display applet or AccelGraphics’ control applet
called AccelPanel
for informatio n on AccelPanel and double-bu ffering. You can also
set the refresh rate (vertical scan rate) of the display. This
parameter affec ts the “flicker” of t he screen, but does not affect the
number of buffers used. In most cases, however, the best way to
set up the card is to use the
(see Chapter 3). See the following par agraphs
Applications pa ge in AccelPanel.
Applicat ions
Configu ring
Use AccelPanel (Applications - Windows NT only)
AccelPanel conta ins built- in settings for several popular CAD and
3D Animation applications. These settings are recommended by
the application manufacturers and many experie nced users. Using
them is a fast and easy way to ensure that you get the best
performance from your system, application, and AccelS TAR II
card. In some cases, you must use the built-in settings because
AccelPanel also makes necessary changes to the Windows
registry. To use the built-in settings:
Applications page.
OK.
AccelSTAR II User’s Guide
A-2
1. Display the AccelPanel and go to the
2. Sel ect the desired application and the n select
3. Go to the
Single Buffering” is NOT selected.
4. Restart Windows.
See Chapter 3 for a complete description of the AccelPanel
System Settings page and make sure that “Force
.
Page 56

Use a Double-Buffered Driver
Most OpenGL applications require that a double-buffered driver
be used for accelerating 3D shaded models. A single-buffered
driver will not implement the OpenGL accel eration and shaded
models will return to wireframe mode when you rotate them.
However, you cannot set the number of buffers directly. The
SGRAM holds the combination of resoluti on, color depth, and
number of buffer s. When you select the r esolution and color depth,
those factors are combined and stored in the SGRAM. If there is
enough SGRAM left, the driver will run double-buffered;
otherwise it runs singl e-buffered. See the table
details on resolution, color depth, and buffer depth.
Checking the SGRAM
To check the amount of SGRAM installed on the AccelSTAR
card, display the AccelPan el, g o to the 3D Settings p age, and l ook
in the upper right corner. See the description of AccelPanel
Chapter 3 for more information.
Important In fo r mation
in Chapter 1 for
in
AccelSTAR II User’ s Guide A-3
Configur ing
Applicat ions
Page 57

Configuring Applications
Configuring Applications
Many applications runni ng under Windows mus t be set up,
generally wit h a configuration file . Some applications simply use
OpenGL if it is running on the system, and will autom atically take
advantage of a n OpenGL-based graphics a ccelerator card suc h as
the AccelSTAR II if it is installed in the system.
AutoCAD
No specific configura tion is needed to run the Mechanical
Desktop or AutoCAD Rele ase R13C4 or late r under Windows NT
with the AccelSTAR II card. Note, however, tha t al though the
AccelSTAR II car d will s peed up 2D operatio ns, the ca rd by i tself
will not allow you to edit or manipulate (rotate, etc.) 3D rendered
objects because AutoCAD does not directly use OpenGL.
This function is accomplished by Accel
AccelGraphics. Call your authorized AccelGraphics reseller for
information about this product. To accelerate the rot ation with an
AccelSTAR II card, install a double-buffered driver. You can
choose any double-buffe red dr iver that has the color depth,
resolution, and refresh rate comp atibl e w ith you r application and
monitor. See the section on double-buffering
VIEW 3D from
in this appendix.
Solidworks
Configur ing
Applicat ions
Solidworks requi res a double-buffered dr iver. You can choose any
double-buffered driver that has the color depth, resolution, and
refresh rate compatible with your applic ation and mon itor. See the
section on double-bufferin g
in this appendix.
A-4
AccelSTAR II User’s Guide
Page 58

3D Studio Max
Note
Before running 3D Studio MAX, follow the instructions
below to set the recommended AccelSTAR II driver
configuration for running the application. Note that it may
“hang” if not set up properly.
1. Open the Display Properties applet.
2. Display the AccelGraphics Applications page (refer to
Chapter 3 for information on how to do this if needed).
3. Sel ect 3D Studio MAX.
4. Sel ect OK.
5. Close the Display Properties applet
6. Restart Windows NT to have this change take effect.
Software Configuration
Configuring Applications
3D Studio Max can use either OpenGL or Heidi drivers, in
addition to the software Z-buff er (not recommended).
AccelGraphics recommen ds the following procedures when
configuring the AccelP RO MX card to support 3D Studio MAX.
Using the H eidi Driver
You can use the Heidi driver that is distributed with 3D Studio
MAX if you have the optional VRAM on the AccelPRO MX
card. Insta ll the dr iver as instructed. If you ha ve an AccelPRO MX
card model 1000 or 2000 (no optional DRAM), see the
workaround listed on the previous page.
Using the OpenGL D riv er
OpenGL is usable with 3D Studio Max Release 2.0 and later. To
set the proper display and 3D settings, follow the instructions in
the procedure below.
AccelSTAR II User’ s Guide A-5
Configur ing
Applicat ions
Page 59

Configuring Applications
Known Problems and Workarounds
Errors in OpenGL Applications w hile running 3DS MA X.
When running 3D Studio MAX using the 3Dlabs GLINT Heidi
driver, OpenGL applications and Heidi exhibit context switch
conflicts and the OpenGL application does not run correctly in
accelerated mode. To run an OpenGL application, first close 3D
Studio MAX and then run the OpenGL application.
Workaround
Avoid running OpenGL applications while 3D Studio MAX is
running.
Incorrect rendering of th e grid lines
Incorrect ren dering of the gri d lines may be seen whe n an object is
rendered in faceted or smooth shaded mode. The incorrect lines
are visible onl y in those areas of the perspective window occupied
by the rendered object.
Workaround
Redraw the view from the pull-down menus to correct
inaccurately rendered grid lines.
Applicat ions
Configu ring
A-6
No 3D Acc eleration
Workaround
Configure 3D Studio MAX to use the "Glint Hardware" driver, not
the "software Z-buffer". When starting the program, you c an force
it to prompt for this option by executin g the program with the "-h"
switch.
AccelSTAR II User’s Guide
Page 60

Photoshop
Configuring Applications
To use 3D programs such as 3D Studio MAX or Lightwave 3D
and 2D applications such as Adobe Photos hop at the same time:
1. Open the NT Display window and set 1024x768 or 800x600
resolution and true color mode. All 2D windows (such as
those for Photoshop) will then run in 24-bit color. All 3D
windows such as those f or 3D Studio MAX or Lightwave will
run in 16-bit color mode which is usuall y adequa te for 3D
modeling purposes. Switch to the 24-bit mode to
view/playback your final renderings.
2. To run P hotoshop a t 1280x1024, us e the AccelPa nel
1280x1024 single buffered resolution. When you have
finished using Photos hop, set the display to 1280x1024 x 32K
colors, double bu ffered mode t o use with your Li ghtwave 3D,
3D Studio MAX or other 3D application.
to select
Configur ing
Applicat ions
AccelSTAR II User’ s Guide A-7
Page 61

Configuring Applications
Applicat ions
Configu ring
A-8
AccelSTAR II User’s Guide
Page 62

In This Appendix
This appendix include s technical information for the AccelSTAR II card.
• Hardwa re D escri ption an d J umper S etting s
• Mechani cal and Electrical S pecifica tions
• Enviro nmental an d Safety Sp ecificat ionsLK
B
Technical Information
EASY MEDIUM MORE DIFFICULT MOST DIFFICULT
Task difficulty or complexity of information
AccelSTAR II User’s Guide B-1
Technical
Information
Page 63

Hardware Description
Hardware Description
The AccelSTAR II is a single slot, short form factor card, with a 32 bit
slave PCI or AGP interface. The following illustration shows the major
components on the AccelSTAR II card. See Chapter 2 for information
about the differenc es in PCI and AGP edge connectors
below for jumper settings. The AGP version does not have jumpers.
Video Out
VideoIn
Video
Encoder
VGA BIOS
RGB Video
Out
VGA Jumper
Permedia II
Engine
. See Table B-1
JP1
JP2
JP3
SGRAM
(4MB on front,
4MB on back)
Figure B-1. The AccelSTAR II Card (PCI version)
Table B-1.
JUMPER/
PINS
JP1
321
Information
Technical
JP2
321
JP3
321
B-2
AccelSTAR II User’s Guide
FUNCTION DESCRIPTION FACTORY SETTING
SET BASE
CLASS
VGA
VGA FIXED
ADDRESS
AccelSTAR II Jumpe r Settings
SET BASE CLASS 3 WHEN INSTALLING THE
ACCELSTAR II IN NEWER SYSTEMS.
SET BASE CLASS 0 WHEN INSTALLING THE
ACCELSTAR II IN OLDER SYSTEMS
VGA MAY BE DISABLED WHEN ANOTHER VGA
SOURCE IS BEING USED IN THE SYSTEM.
SEE CHAPTER 2 FOR INFO ON
DUAL SCREEN
ENABLE FIXED ADDRESS TO OVERRIDE
SYSTEM BIOS SETTING (USES A000-BFFF).
DISABLE FIXED ADDRESS TO USE SYSTEM
BIOS SETTING.
INSTALLATIONS.
BASE CLASS 3
CONNECT PINS 1-2
TO SET BASE CLASS 0,
CONNECT PINS 2-3
ENABLED
CONNECT PINS 1-2
TO DISABLE VGA,
CONNECT PINS 2-3
ENABLED
CONNECT PINS 1-2
TO DISABLE FIXED ADDRESS,
CONNECT PINS 2-3
Page 64

Mechanical and Electrical Specifications
Mechanical and Electrical Sp ecification s
Mech anical Dimensions
Table B-2. AccelSTAR II Dimensions
Dimension Inches Millimeters
Length 8.661 220
Width 4.2 107
Height 0.065 1.7
Electrical Requirements
Table B-3. AccelSTAR II Power Requirements
Voltage +5.0 VDC +/- 5% +3.3 VDC +/- 5%
Current 5V : 550ma; 3.3V : 3.79A
Power 5V : 2.75W; 3.3V : 12.5W
AccelSTAR II User’s Guide B-3
Technical
Information
Page 65

Video Connectors and Pin Assignments
Video Connectors and Pin Assignments
This section describes the three video connectors on the AccelSTAR II.
RGB Video Conn ect or (out)
This 15-pin female miniature D-s hell connector provides st andard
RS-343 RGB video. The following table describes the connector
pin assignments.
Table B-4: VGA Pin Assignments
Pin Signal Pin Signal Pin Signal
1 Red* 6 Signal Ground 11 Not Connected
2 Green* 7 Signal Ground 12 Not Connected
3 Blue* 8 Signal Ground 13 H Sync (TTL)
4 Not Connected 9 Not Connected 14 V sync (TTL)
5 Signal Ground 10 Signal Ground 15 Not Connected
*RS-343A Compatible
Feature Connector - Video In
The 26-pin VESA video in connector has the following pin assignments.
Table B-5: Video In Pin Assign ments
Signal Pin Pin Signal
GND
GND
GND
VSCtl5
VSCtl1
VSCtl3
SBCLK
Information
Technical
B-4
AccelSTAR II User’s Guide
GND
GND
GND
GND
GND
SBData
1 2VSAData0
3 4VSAData1
5 6VSAData2
7 8VSAData3
9 10 VSAData4
11 12 VSAData5
13 14 VSAData6
15 16 VSAData7
17 18 VSAClk
19 20 HRef VSCtl7
21 22 Not connected
23 24 Not connected
25 26 GND
Page 66

Feature Connector - Video Out
The 40-pin VESA video out connector has the follo wing pin assignments.
Table B-6: Video Pi n Ass ign ments
Signal Pin Pin Signal
VDD 12V
VSBData1
GND
VSBData3
VCC
VSBData6
Not Connected
VSCtl1
VSCtl3
GND
VSGPChipSelectN
VSGPDataStrob eN
VDD_3V3
Not Connected
Not Connected
VCC
VSBClk
VSBResetN
Not Connected
Not Connected
1 2VSBData0
3 4GND
5 6VSBData2
7 8VSBData4
9 10 VSBData5
11 12 VSBData7
13 14 VSCtl0
15 16 VSCtl2
17 18 VCC
19 20 VSAResetN
21 22 GND
23 24 VSGReadWriteN
25 26 VSGPDataAckN
27 28 VSCtl4
29 30 Not Connected
31 32 VDD_3V3
33 34 GND
35 36 Not Connected
37 38 Not Connected
39 40 Not Connected
Video Connectors and Pin Assignments
AccelSTAR II User’s Guide B-5
Technical
Information
Page 67

Environmental and Safety Specifications
Environmental and Safety Spe c ifications
Mechanical Environment
The AccelSTAR II card has been certified to the following mechanical
specifications.
Table B-7: Mechanical Environment
Operating: Non-operating Shipping
Temperature
Altitude
Humidity
0
°C to 70°C
°F to 158°F)
(32
0 to 9,750 feet
(0 to 3000 M)
30 to 90%,
non-condensing
-10
°C to 70°C
°F to 158°F)
(14
0 to 32,500 feet
(0 to 10.000 M)
10-90%,
non-condensing
Product Safety
The AccelS TA R II card con fo rm s to the following product safety
specifications:
Table B-8: Product Safety
Electromagnetic Interference (EMI)
FCC FCC Part 15/Class B
CE EN 55022, Class B and EN50082-1
-10
°C to 70°C
°F to 158°F)
(14
0 to 32,500 feet
(0 to 10,000 M)
10 to 90%,
non-condensing
Information
Technical
B-6
AccelSTAR II User’s Guide
 Loading...