

PLEASE! DO NOT RETURN THIS
PLEASE! DO NOT RETURN THIS
PRODUCT TO ANY RETAIL STORE!
PRODUCT TO ANY RETAIL STORE!
TM
8+
Item# 44043
For any questions or problems with this product please contact us at:
Email: info@interactivetoy.com
Phone: Inside North America: +1-416-444-6873
Outside North America: 1-866-214-2220
Address: Interactive Toy Concepts,
1192 Martin Grove Road, Toronto, Ontario, Canada. M9W 5M9
Web site: www.interactivetoy.com
REPLACING GOOSE HUNTER MAIN WINGS
You can replace the original wings on your GOOSE HUNTER if they become damaged. A new set of wings can be purchased by
contacting Interactive Toy Concepts listed above.
To replace the wings, do the following:
1. Make sure the Goose and the Laser Blaster are turned off.
2. Gently remove the far corner of the wing that is tethered to the body by a ball joint.
3. The leading (front) edge of the wing is a thin carbon fiber rod. Gently pull this rod out of the gear box mechanism housing at
the front.
4. Installation of the new wing is the reverse of the wing removal procedure with the following minor difference.
5. The carbon fiber rod has a slight notch cut into its end so that it will only fit properly into gear box mechanism housing one way. Use
caution when inserting the carbon fiber rod. If it is not going in smoothly, it is misaligned.
IMPORTANT SAFETY INFORMATION
Do not modify your GOOSE HUNTER. Do not use in strong winds, use only in VERY mild conditions! Do not use in rain, snow or around heavy
debris! Do not use near electrical lines! Do not use around smoke or flames! Do not use around water! Do not use around electricity! Do not use
in crowded areas! Do not use around air conditioning! Do not use around air vents! Do not use around ceiling fans! Do not use around large
obstacles! Do not use in very small spaces! Do be conscious of changes in your area! Any changes or modifications to this product are strictly
prohibited and will void product warranty. Keep moving wings away from eyes, hands, hair and loose clothing. Always turn off your GOOSE
HUNTER and Infra-red Laser Blaster when not in use. Always remove batteries from Infra-red Laser Blaster during storage. Always replace
Infra-red Laser Blaster with NEW alkaline batteries for optimal performance. Keep your instruction manual in a safe place for future use. Only
use the provided Infra-red Laser Blaster included with the GOOSE HUNTER to charge the lithium polymer battery installed in the GOOSE
HUNTER.
FCC NOTE: U.S. ONLY
This device complies with Part 15 of the FCC Rules. Operation is subject to the following two conditions:
1) This device may not cause harmful interference.
2) This device must accept any interference received including interference that may cause undesired operation.
Warning: Changes or modifications to this unit not expressly approved by the party responsible for compliance could void the user's
authority to operate the equipment. Note: This equipment has been tested and found to comply with the limits for a Class B digital
device, pursuant to Part 15 of the FCC Rules. These Limits are designed to provide reasonable protection against harmful interference
in a residential installation. This generates, uses and can radiate radio frequency energy and if not installed and used in accordance
with the instructions, may cause harmful interference to radio communications. However, there is no guarantee that interference will not
occur in a particular installation. If this equipment does cause harmful interference to radio or television reception, which can be
determined by turning the equipment off and on, the user is encouraged to try and correct the interference by one or more of the
following measures: - Reorient or relocate the receiving antenna - Increase the separation between the equipment and receiver Connect the equipment to an outlet on a circuit different from that to which the receiver is connected - Consult the dealer or an
experienced radio/TV technician for help.
Limited 30-day warranty
Product is warranted by Interactive Toy Concepts Limited against manufacturing defects in material
and workmanship under normal use for (30) days from the date of purchase.
Warranty is validated upon receipt of proof or purchase
and confirmation of UPC code.
Goose Hunter is a registered trademarks of Interactive Toy Concepts.
© 2009. All Rights Reserved. Manufactured by and distributed by InteractiveToy Concepts Ltd.
Patent Information: EU: EP1958681 US: US2008191100 Canada: CA2607358 Aus: AU2007231617
Products and colors may vary. MADE IN CHINA.
Proof of Purchase
INS-44043-91116-US
INSTRUCTION
INSTRUCTION MANUAL
MANUAL
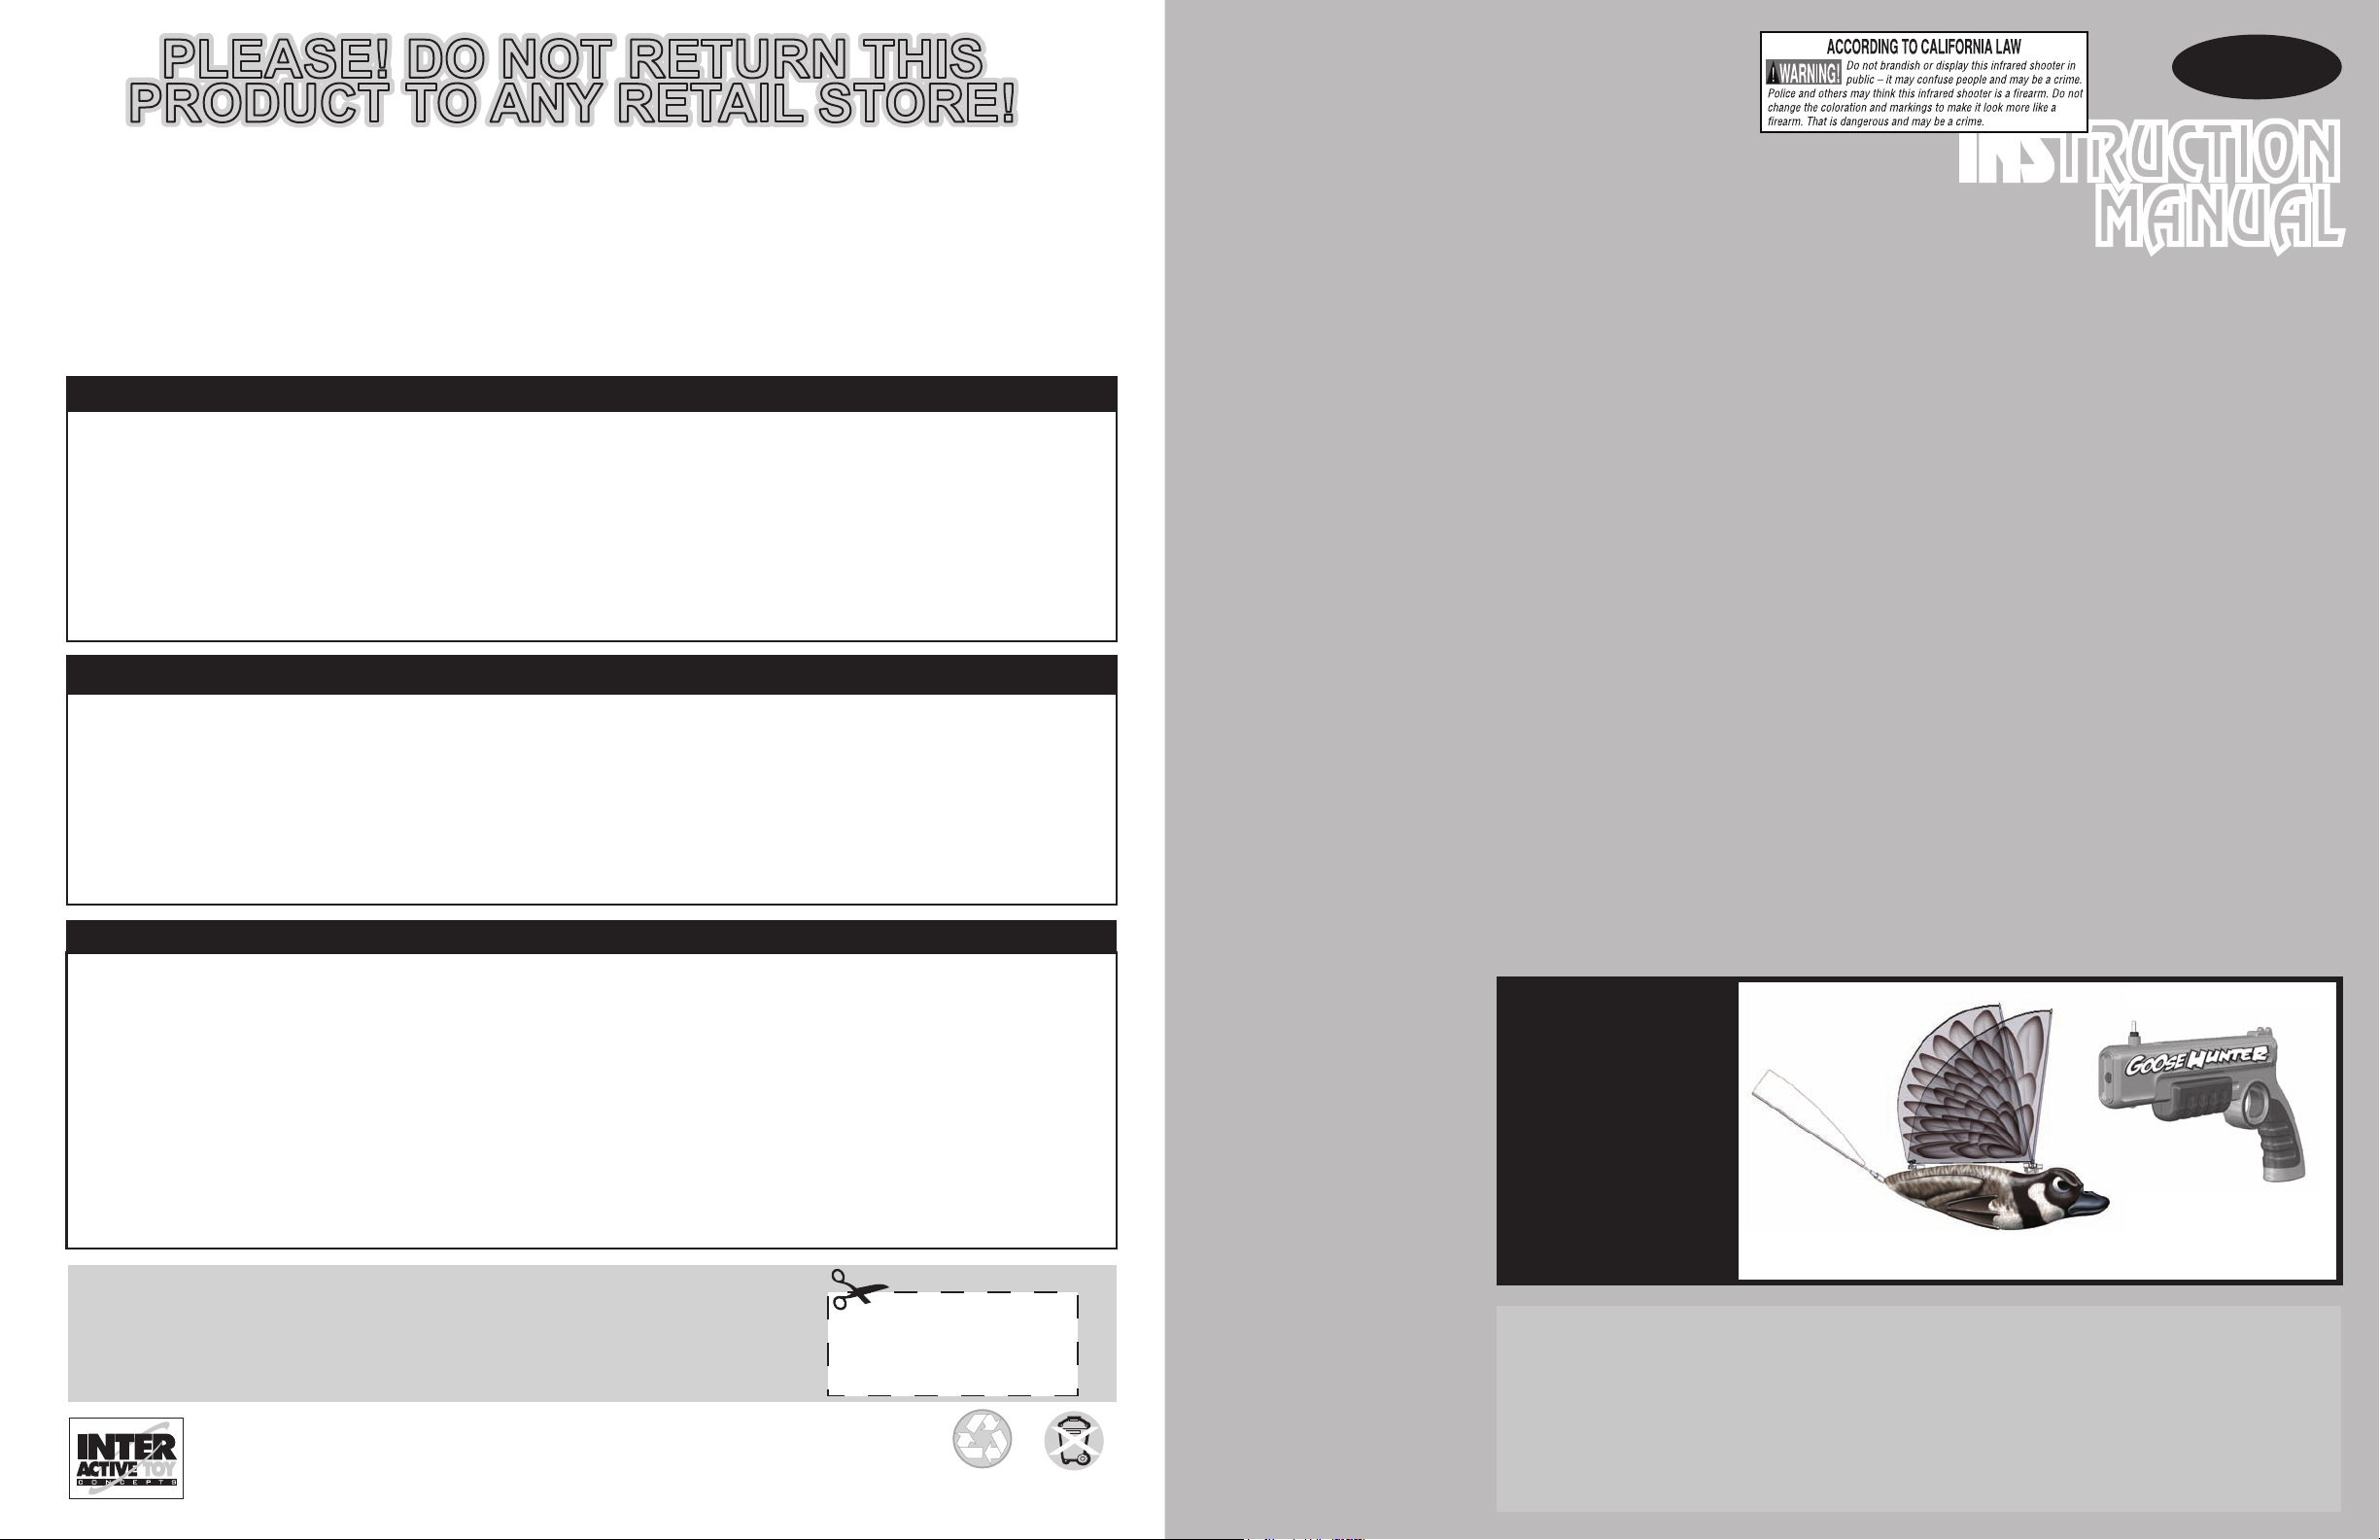
Congratulations on
your purchase of the
GOOSE HUNTER
The GOOSE HUNTER is a revolutionary new toy
that allows anyone to have the virtual learning experience of
hunting a Goose in complete safety.
The GOOSE HUNTER Laser Blaster uses a narrow infrared beam to shoot down
a fully functional, flying “ornithopter” Goose. An ornithopter is a device that flies by
flapping its wings. Thus, the ornithopter Goose’s flying pattern is very life-like. The
Goose will fly for 30-40 seconds from a 10 second charge. The body of the Goose
is made of an ultra-light and flexible foam which provides excellent structure and
resistance to damage. Since the flying direction of the Goose can be preset, it is
possible to play with the ifly GOOSE HUNTER indoors or outdoors. It takes 3 direct
hits from the infrared blaster to bring down the Goose. It is possible to have a
competitive game-play with any number of multiple players or to practice solo target
shooting accuracy.
A multiple player game-play consists of counting the number of shots fired to bring
down the Goose. The person who fires the least amount of shots is the winner.
The GOOSE HUNTER
has been carefully
packaged to avoid
damage during
shipping.
PLEASE USE
CAUTION WHEN
UNPACKING.
1 “GOOSE HUNTER” Flying Goose
IMPORTANT BATTERY INFORMATION:
Do not mix old and new batteries, different types of batteries, standard carbon zinc, alkaline or rechargeable of
different capacities. Rechargeable batteries are only to be charged under adult supervision. Please respect the
correct polarity (-) or (+). Do not try to recharge non-rechargeable batteries. Do not throw batteries into the fire.
Replace all batteries of the same type/brand at the same time. The supply terminals are not to be short-circuited.
Remove exhausted batteries from the toy. Batteries should be replaced by adults. Remove batteries if the toy is
not going to be played with for some time. The packaging should be kept since it contains important information.
1 Charger/
Display Stand
1 Infrared
Laser Blaster/
Portable Charger
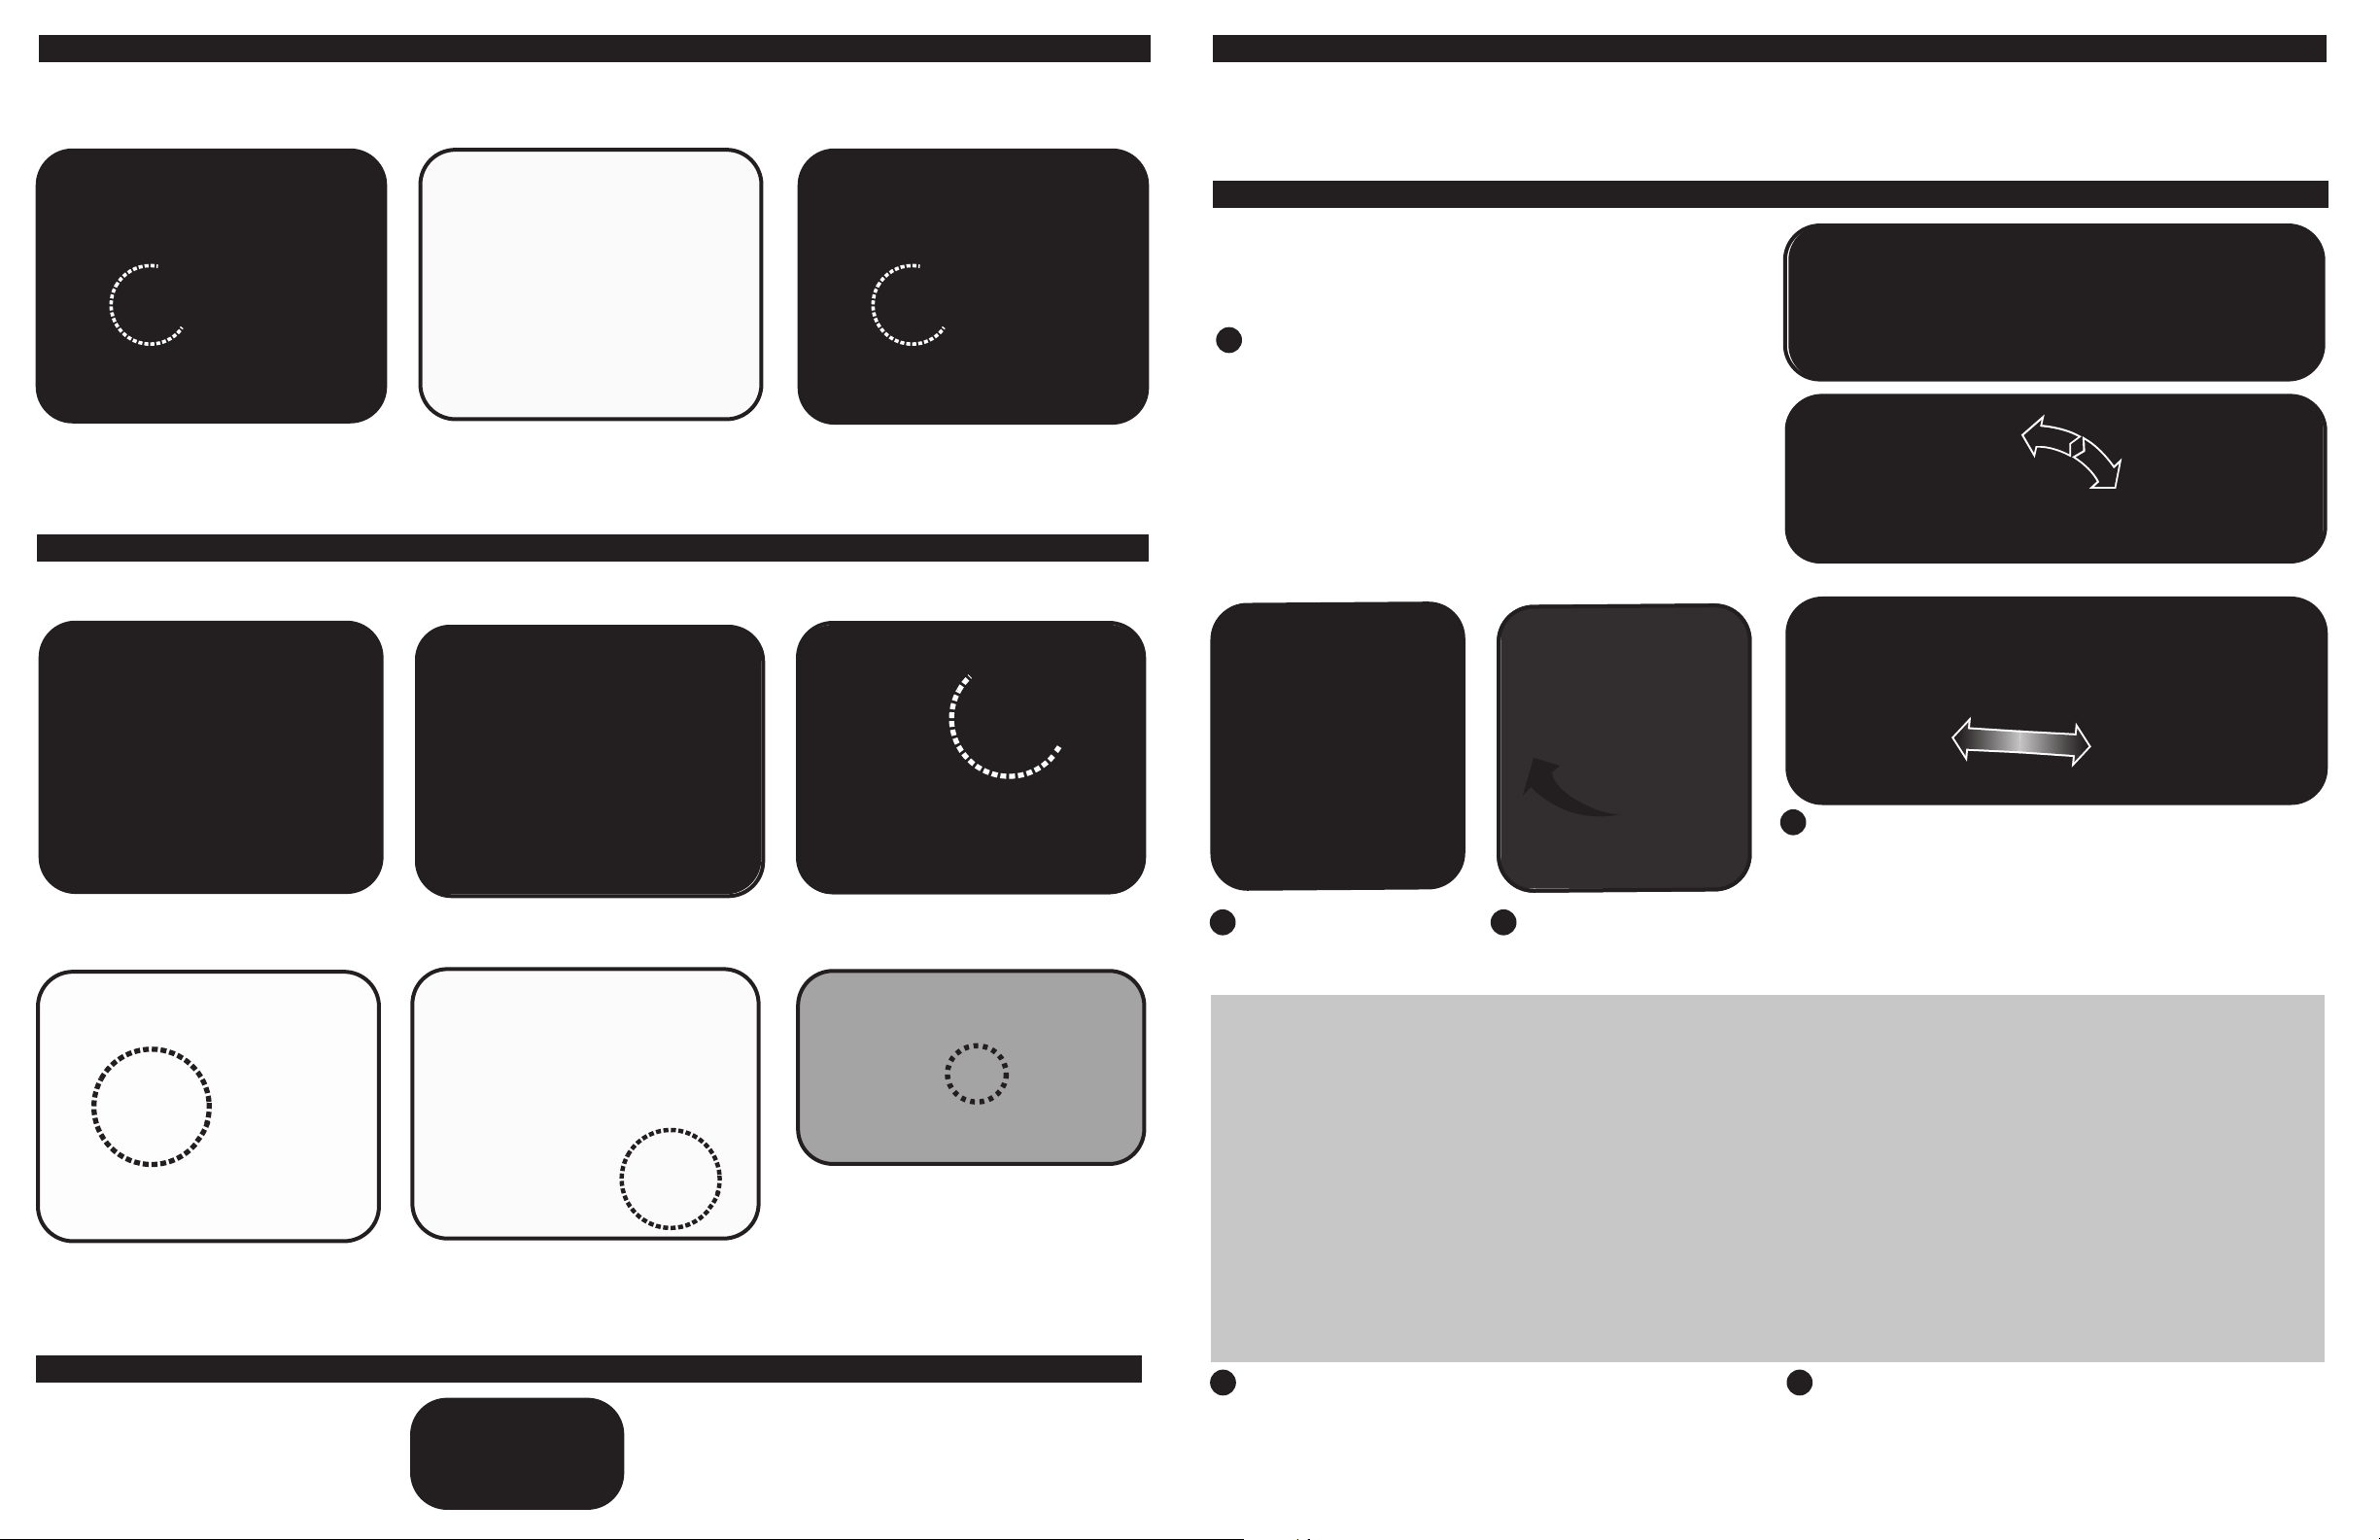
INSTALLING BATTERIES
The Goose has a built-in, non-removable, non-replaceable, rechargeable capacitor. The charger is built into the Laser Blaster and
requires 3 “AAA” alkaline batteries (sold separately). Use only the supplied charger provided in this GOOSE HUNTER package to charge
the Goose. DO NOT USE ANY OTHER SOURCE TO CHARGE THE GOOSE. Install the batteries as shown.
1. Open the battery compartment door
located at the upper rear of the Laser
Blaster by using a Philips screwdriver
(not included).
2. Insert the 3 AAA batteries according to
the picture (shown). Ensure that the +
and – polarities match the illustrations
inside the battery compartment.
3. Replace the battery compartment door
and tighten the screw using the
screwdriver. Do not over tighten.
CHARGING THE GOOSE HUNTER
The Goose requires 10 seconds of charging time for a flight-time of 30 to 40 seconds. Charging the Goose is a simple process as
outlined in the following steps.
CHOOSING YOUR FLYING LOCATION
Do not fly your Goose during windy conditions or harsh
weather. You can operate your GOOSE HUNTER toy indoors or
outdoors. The outdoor space should be roughly 32’ x 32’ (10m
x 10m) with a height allowance of about 19’ (6m). Avoid
operating your GOOSE HUNTER near power-lines, trees, or
roof-tops. If flying your Goose indoors, the area should be
roughly 16’ x 16’ (5m x 5m) and the standard household ceiling
height.
FLYING AND HUNTING YOUR IFLY GOOSE HUNTER
The Goose is ready to fly as soon as it is finished charging. The
objective of the iFly GOOSE HUNTER game using single or
multiple player mode is to shoot down the Goose with the Laser
Blaster within its 30 to 40 second flight time window. It takes 3
direct hits to bring down the Goose.
1. When you are ready to fly your fully charged Goose you
should first adjust the “direction of flight” setting to the fly pattern
of your choice. This is done by pivoting the directional control
tab to the left, center, or to the right. The directional control tab
is located at the dorsal (upper) rear end of the Goose’s body
and has the two main wings attached to it. By pivoting the
directional control tab to the left, the Goose will fly to the left and
by pivoting the directional control tab to the right, the Goose will
fly to the right. When the directional control tab is positioned in
the center, the Goose will fly straight. The farther the directional
control tab is pivoted towards a certain side, the more the
Goose will bank towards that direction during its flight.
DIRECTIONAL
CONTROL TAB
DIRECTIONAL
CONTROL TAB
OFF
ON
1. Turn the Goose’s ON/OFF switch to
the OFF position for charging.
4. Locate the charge hole on the bottom
side of the Goose and insert the Laser
Blaster’s charge rod completely. The
Goose will sit on the Laser Blaster snugly.
WARNING! DO NOT CHARGE FOR LONGER THAN 10 SECONDS. DAMAGE MAY OCCUR TO THE CAPACITOR INSIDE THE ifly GOOSE HUNTER.
7. The Goose is now ready to fly. The
charge is maintained until the ON/OFF
switch on the Goose is set to the ON
position. This handy feature allows you to
fly your Goose when YOU are ready!
2. Turn the Laser Blaster’s ON/OFF
switch to the ON position for charging.
5. Press and hold the charge button
located in the trigger area of the Laser
Blaster for about 10 seconds.
8. Leave the Laser Blaster’s ON/OFF switch in the ON
position after charging the Goose. Press the charge rod
down on the Laser Blaster after charging. In the down
position, the charge rod is an integral part of the target
sighting system.
3. Lift the charge-rod located at the top
front of the Laser Blaster to the up position.
LEC Light
The green LED charge light located near the
charge rod on the Laser Blaster will light up
during charging.
6. Release the charge button after 10 seconds
of charging the Goose. The green LED charge
light will turn off. Remove the Goose from the
charge rod on the Laser Blaster.
OFF
2. Move the Goose’s ON/OFF
switch to the ON position.
The wings will start to flap.
ON
3. Gently toss the Goose into
the air. It will fly for about 30
to 40 seconds.
4. To fire at the Goose, it is necessary to reload the Laser
Blaster. Reloading the Laser Blaster is done by sliding the
pump all the way backwards and forwards. A reloading sound is
heard if this process is done successfully. Note: it is necessary
to reload the Laser Blaster after each shot fired. Once the Laser
Blaster is reloaded, you can fire a narrow infrared beam at the
Goose by pressing the trigger button on the Shooter. A firing
sound is heard.
• If your shot misses the Goose, the Goose will continue to fly in it’s pre-determined path.
• If your shot hits the Goose, it will stop operating for a brief moment and appear to fall. This is meant to
simulate a glancing blow to the Goose. The Goose will resume its flight right away.
• Reload the Laser Blaster and shoot at the goose again.
• When you shoot the Goose directly for the second time, the Goose will appear to temporarily fall again.
Normal flight will resume again momentarily.
• Reload the Laser Blaster and shoot at the Goose again.
• When you shoot the Goose directly for the third time, it will fall from the sky.
Congratulations on your marksmanship!
• If you are unable to hit the Goose three times with the narrow infrared beam of your Laser Blaster the
Goose will land on the ground naturally.
5. When Goose has been shot down or has landed on its own,
turn it OFF to recharge it before playing again. Turning the
Goose OFF resets the system. It is not necessary to turn the
Laser Blaster OFF before recharging the Goose. To recharge
the Goose, follow the steps outlined under “Charging the
GOOSE HUNTER”.
6. If you are finished playing, make sure to turn the ON/OFF
switches on the Goose and on the Laser Blaster to the OFF
position for storing. It is best to remove the batteries from the
Laser Blaster if it will be stored for a longer period of time.
 Loading...