

Page 1

CueServer 2 User's
Manual
18.5.18 — Last update: 2018/05/18
Interactive Technologies, Inc.
Copyright © 2006-2018 Interactive Technologies, Inc. All rights reserved worldwide.
Page 2

Table of Contents
Getting Started ........................................................................................................................................... 6
CueServer Studio 2 .................................................................................................................................... 7
Navigator Window ................................................................................................................................... 8
Toolbar ............................................................................................................................................ 11
Working With Shows........................................................................................................................ 13
Working With Offline Shows............................................................................................................. 16
Working With Remote CueServers................................................................................................... 19
Setting Network Parameters ............................................................................................................ 21
Setting Clock Parameters ................................................................................................................ 25
Identifying CueServers..................................................................................................................... 31
Updating Firmware .......................................................................................................................... 32
Editor Window....................................................................................................................................... 34
Live ................................................................................................................................................. 36
Stage ......................................................................................................................................... 37
Playbacks................................................................................................................................... 40
Status......................................................................................................................................... 43
Front Panel ........................................................................................................................... 44
Variables............................................................................................................................... 45
CPU Info ............................................................................................................................... 46
System Log ........................................................................................................................... 47
Resources ....................................................................................................................................... 48
Cues .......................................................................................................................................... 49
Cue Types ............................................................................................................................ 51
Adding Cues ......................................................................................................................... 52
Cue Properties ...................................................................................................................... 53
Cue Contents ........................................................................................................................ 55
Capturing DMX Snapshots............................................................................................... 57
Capturing DMX Streams .................................................................................................. 59
Clearing Cue Contents..................................................................................................... 62
Cue Rules ............................................................................................................................. 63
Deleting Cues ....................................................................................................................... 64
Hardware................................................................................................................................................... 65
Models .................................................................................................................................................. 66
CS-900 CueServer 2 Pro ................................................................................................................. 68
CS-920 CueServer 2 Mini ................................................................................................................ 70
Page 3

CS-940 CueServer 2 DIN................................................................................................................. 72
Power Input........................................................................................................................................... 73
Ethernet Ports....................................................................................................................................... 75
Ethernet Protocols ........................................................................................................................... 77
sACN (Streaming ACN) Protocol ................................................................................................ 78
Art-Net Protocol.......................................................................................................................... 79
KiNET Protocol........................................................................................................................... 80
CueScript Protocol ..................................................................................................................... 81
CueStation Protocol.................................................................................................................... 82
HTTP Protocol............................................................................................................................ 83
DHCP Protocol ........................................................................................................................... 84
NTP Protocol.............................................................................................................................. 85
DMX Ports ............................................................................................................................................ 86
DMX Modules .................................................................................................................................. 88
Audio Ports ........................................................................................................................................... 90
Supported Audio File Formats ......................................................................................................... 91
WAV Sample Formats ................................................................................................................ 92
USB Ports ............................................................................................................................................. 94
LCD Display.......................................................................................................................................... 95
LCD Display Modes ......................................................................................................................... 96
LCD Status Options ......................................................................................................................... 97
LCD Menu Functions ....................................................................................................................... 99
Function Buttons ................................................................................................................................. 100
Contact Closures ................................................................................................................................ 101
Digital Outputs .................................................................................................................................... 102
Serial Ports ......................................................................................................................................... 104
Memory Card ...................................................................................................................................... 106
Reset Button ....................................................................................................................................... 108
Self-Test Function............................................................................................................................... 109
Using CueServer .................................................................................................................................... 117
DMX Triggers...................................................................................................................................... 118
Enter/Exit Range Trigger ............................................................................................................... 120
Submaster Control Trigger............................................................................................................. 122
Act on Changes Trigger ................................................................................................................. 124
CueScript Language............................................................................................................................... 126
CueScript Overview ............................................................................................................................ 127
Executing Commands .................................................................................................................... 128
CueScript via UDP.................................................................................................................... 130
Page 4

CueScript via HTTP.................................................................................................................. 131
CueScript via Serial.................................................................................................................. 132
Command Syntax .......................................................................................................................... 134
Expressions................................................................................................................................... 135
Operators ................................................................................................................................. 136
Variables .................................................................................................................................. 138
Grouping .................................................................................................................................. 140
Command Context ......................................................................................................................... 141
Levels............................................................................................................................................ 142
Strings ........................................................................................................................................... 144
Selection Commands .......................................................................................................................... 147
Button............................................................................................................................................ 149
Channel ......................................................................................................................................... 152
Contact.......................................................................................................................................... 155
Group ............................................................................................................................................ 157
Indicator ........................................................................................................................................ 159
Output ........................................................................................................................................... 162
Playback........................................................................................................................................ 164
Station ........................................................................................................................................... 167
Universe ........................................................................................................................................ 169
Selection Operators (+, -, >, ~) ...................................................................................................... 171
Using Wildcards............................................................................................................................. 173
Action Commands............................................................................................................................... 174
Assign (=) ...................................................................................................................................... 175
Audio ............................................................................................................................................. 177
At................................................................................................................................................... 179
Clear.............................................................................................................................................. 184
Cue................................................................................................................................................ 186
Disable .......................................................................................................................................... 188
Enable ........................................................................................................................................... 190
Fade .............................................................................................................................................. 192
Follow............................................................................................................................................ 194
Go ................................................................................................................................................. 196
Input .............................................................................................................................................. 198
Join ............................................................................................................................................... 199
Length ........................................................................................................................................... 202
Link ............................................................................................................................................... 204
Lock............................................................................................................................................... 206
Log ................................................................................................................................................ 208
Page 5

Macro ............................................................................................................................................ 209
Off ................................................................................................................................................. 211
Offset............................................................................................................................................. 212
On ................................................................................................................................................. 214
Park............................................................................................................................................... 215
Preset............................................................................................................................................ 217
Press ............................................................................................................................................. 220
Random......................................................................................................................................... 222
Reboot........................................................................................................................................... 224
Record........................................................................................................................................... 225
Record Cue .............................................................................................................................. 226
Record Group........................................................................................................................... 229
Record Stream ......................................................................................................................... 230
Record Stop ............................................................................................................................. 233
Release ......................................................................................................................................... 234
Reset............................................................................................................................................. 237
Set................................................................................................................................................. 238
SMPTE .......................................................................................................................................... 240
Stack ............................................................................................................................................. 243
Start .............................................................................................................................................. 245
Stop............................................................................................................................................... 246
Time .............................................................................................................................................. 247
Toggle ........................................................................................................................................... 249
Unpark........................................................................................................................................... 251
Update........................................................................................................................................... 253
Update Cue .............................................................................................................................. 254
Update Group........................................................................................................................... 257
Update Stream ......................................................................................................................... 259
Update Stop ............................................................................................................................. 262
Unlock ........................................................................................................................................... 263
Wait ............................................................................................................................................... 265
Write.............................................................................................................................................. 268
Zone .............................................................................................................................................. 270
Logic Commands ................................................................................................................................ 272
Break............................................................................................................................................. 273
If..Then..Else ................................................................................................................................. 274
System Variables ................................................................................................................................ 277
Internals .................................................................................................................................................. 283
Page 6

Web Server......................................................................................................................................... 284
Environment Variables................................................................................................................... 285
CGI API .............................................................................................................................................. 286
exe.cgi........................................................................................................................................... 287
get.cgi............................................................................................................................................ 289
Button Values [bv] .................................................................................................................... 290
Command Context [cc] ............................................................................................................. 291
CPU SysInfo [cpu] .................................................................................................................... 293
Cue Stack Info [csi] .................................................................................................................. 294
DMX Input [in] .......................................................................................................................... 296
DMX Output [out]...................................................................................................................... 298
Extended Command Context [ecc]............................................................................................ 300
Extended Playback Info [epi] .................................................................................................... 302
Fade Engine Data [fed]............................................................................................................. 304
Group Level [grp]...................................................................................................................... 307
Hardwired DMX Input [hdi]........................................................................................................ 308
Network Info [net] ..................................................................................................................... 309
Ping [ping] ................................................................................................................................ 311
Playback Info [pi]...................................................................................................................... 313
Playback Values [p*]................................................................................................................. 315
Preset Zone Info [pzi] ............................................................................................................... 317
Record Stream Info [rs] ............................................................................................................ 319
System Log [log]....................................................................................................................... 320
System Status [ss].................................................................................................................... 321
Time Info [ti] ............................................................................................................................. 323
Time Status [ts] ........................................................................................................................ 324
Variables [var] .......................................................................................................................... 326
Zone Data [zones] .................................................................................................................... 327
pcmd.cgi ........................................................................................................................................ 329
set.cgi............................................................................................................................................ 330
Audio Properties [audio] ........................................................................................................... 331
LCD Properties [lcd] ................................................................................................................. 332
Network Properties [net] ........................................................................................................... 334
Time Properties [time] .............................................................................................................. 336
Station Color Properties [stcol] ................................................................................................. 338
Show File Format................................................................................................................................ 340
Directory Structure......................................................................................................................... 341
Configuration Files......................................................................................................................... 344
show.cfg................................................................................................................................... 345
Page 7

Resource Structures ...................................................................................................................... 350
Cue Resource .......................................................................................................................... 351
DMXTrigger Resource .............................................................................................................. 355
Group Resource ....................................................................................................................... 357
Marco Resource ....................................................................................................................... 358
Hardware Model Identifiers ................................................................................................................. 359
Autodiscovery ..................................................................................................................................... 361
Release Notes......................................................................................................................................... 363
Release v2.1.1 [May 18, 2018]............................................................................................................ 364
Release v2.1.0 [May 16, 2018]............................................................................................................ 365
Release v2.0.4 [March 14, 2018]......................................................................................................... 367
Release v2.0.3 [February 14, 2018] .................................................................................................... 369
Release v2.0.2 [January 22, 2018] ...................................................................................................... 370
Release v2.0.1 [November 3, 2017] .................................................................................................... 372
Release v2.0.0 [October 24, 2017] ...................................................................................................... 373
Release v1.5.5 [October 28, 2016] ...................................................................................................... 381
Release v1.5.4 [September 8, 2016] ................................................................................................... 382
Release v1.5.3 [August 9, 2016] ......................................................................................................... 383
Release v1.5.2 [July 25, 2016] ............................................................................................................ 384
Release v1.5.1 [July 19, 2016] ............................................................................................................ 385
Release v1.5.0 [June 3, 2016]............................................................................................................. 386
Release v1.4.3 [April 18, 2016] ........................................................................................................... 389
Release v1.4.2 [March 17, 2016]......................................................................................................... 390
Release v1.4.1 [February 24, 2016] .................................................................................................... 392
Release v1.4.0 [January 21, 2016] ...................................................................................................... 393
Release v1.3.0 [November 11, 2015] .................................................................................................. 396
Release v1.2.0 [July 24, 2015] ............................................................................................................ 398
Release v1.1.0 [May 22, 2015]............................................................................................................ 400
Release v1.0.8 [April 27, 2015] ........................................................................................................... 401
Release v1.0.7 [April 7, 2015] ............................................................................................................. 403
Release v1.0.6 [March 13, 2015]......................................................................................................... 405
Release v1.0.5 [March 11, 2015]......................................................................................................... 406
Release v1.0.4 [February 9, 2015] ...................................................................................................... 408
Release v1.0.3 [January 22, 2015] ...................................................................................................... 410
Release v1.0.2 [January 9, 2015]........................................................................................................ 411
Release v1.0.1 [December 23, 2014] .................................................................................................. 412
Release v1.0.0 [December 18, 2014] .................................................................................................. 413
Legal Notices.......................................................................................................................................... 414
Page 8

Interactive Technologies, Inc. CueServer 2 User's Manual - 18.5.18
Getting Started
Welcome to CueServer 2.
Sections are being added to this User’s Manual on a regular basis.
Current Version
Note that on October 24, 2017, version 2.0.0 of CueServer Studio was released. Please download this latest
version here:
• CueServer 2 Downloads
CueServer Studio can be downloaded as a .dmg file for Macs and a .exe file for Windows.
Whenever you update to a new version of CueServer Studio, it is likely that you will also need to update the
firmware in your CueServer. If a firmware update is needed, a yellow caution icon ( ) will appear next to
the CueServer’s firmware version in the Navigator window. To update your CueServer, choose the Update
Firmware… menu command in the CueServer menu to update your device.
Page 6 of 429
Page 9

Interactive Technologies, Inc. CueServer 2 User's Manual - 18.5.18
CueServer Studio 2
CueServer Studio 2 is the desktop application used to program, configure, locate and
operate CueServer 2 devices. It is available for both Mac OS X and Windows. You
can download the current version of CueServer Studio 2 here:
• http://interactive-online.com/cueserver2/downloads
Page 7 of 429
Page 10

Interactive Technologies, Inc. CueServer 2 User's Manual - 18.5.18
Navigator Window
Overview
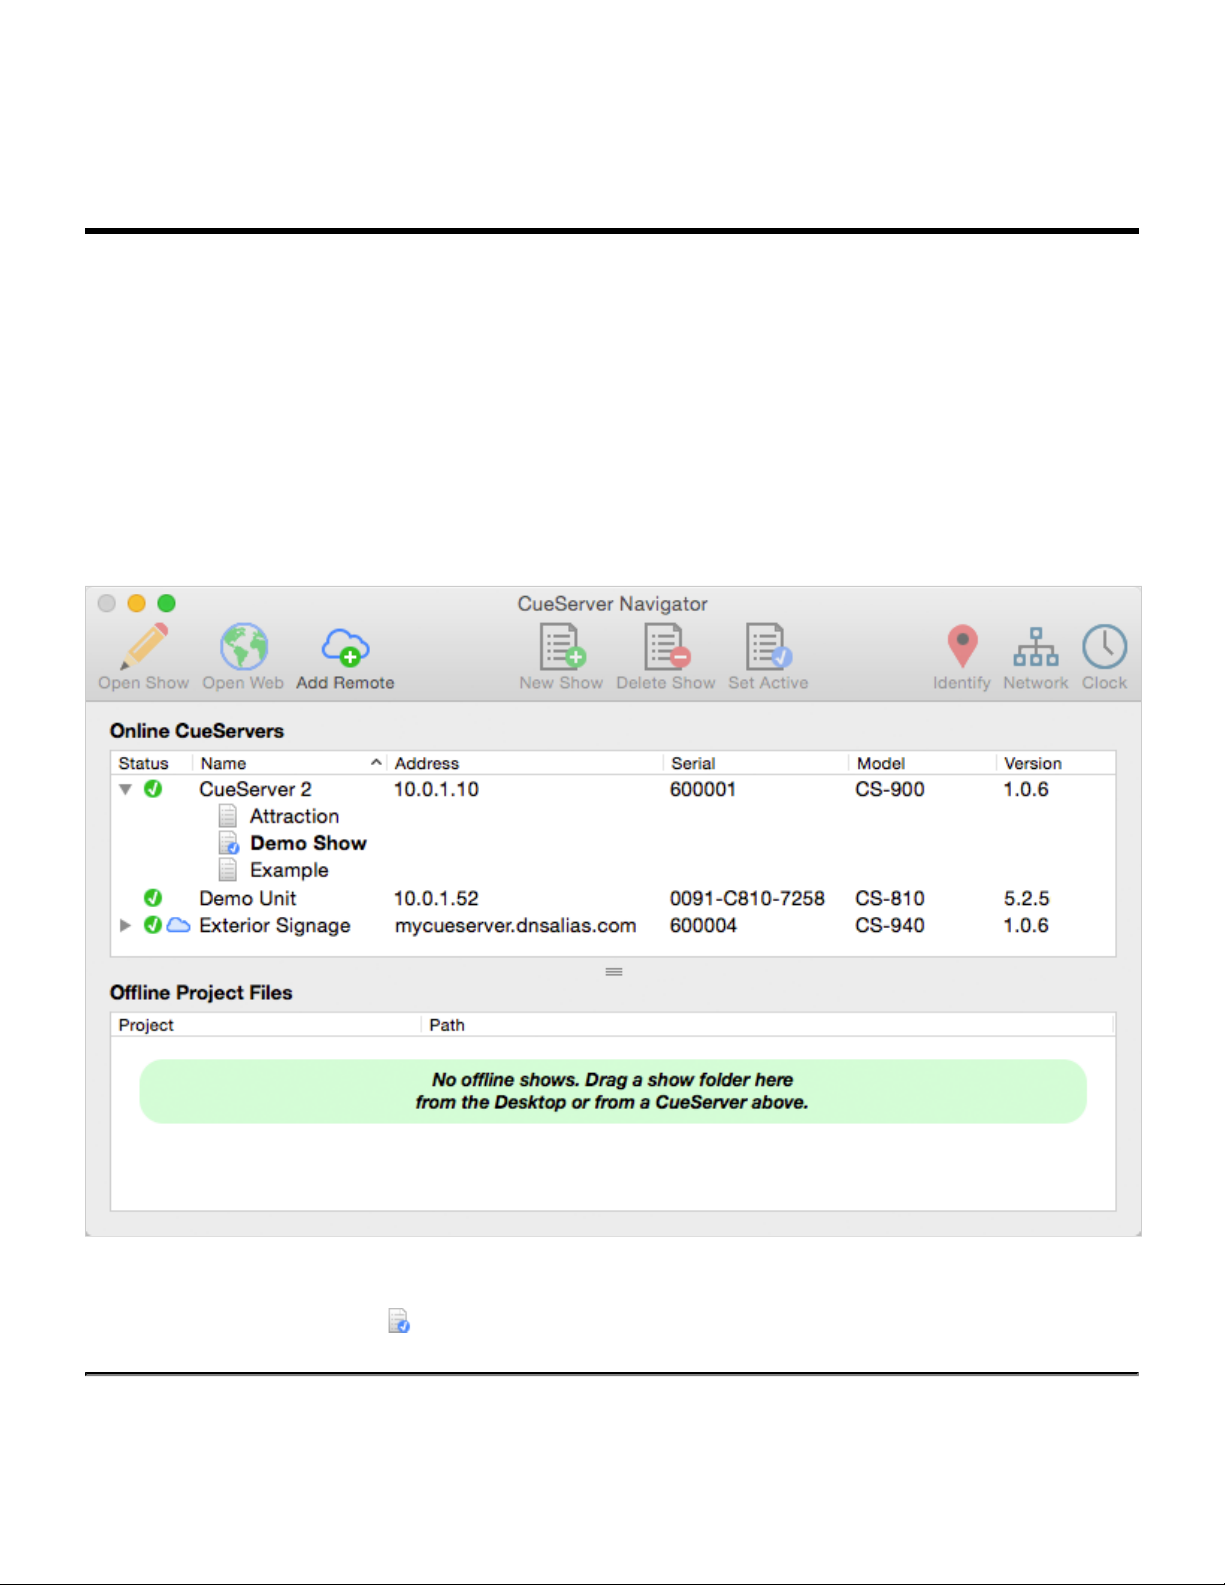
The Navigator Window appears when CueServer Studio opens. Use the Navigator Window to view available
CueServers, manage basic settings, change active shows, identify individual devices, update firmware and
more.
The top pane of this window displays both local and remote CueServers along with their online status,
name, address, model and firmware version. The bottom pane is used for working with offline project files.
Working With Online CueServer Devices
The Navigator Window constantly scans the local network and displays any CueServers that are available.
These devices will automatically appear in the upper list and will have a green status icon ( ).
Page 8 of 429
Page 11
Interactive Technologies, Inc. CueServer 2 User's Manual - 18.5.18
Remote CueServers can also be added to the upper list manually. These CueServers will appear with a
cloud icon ( ) as part of their status. See Working With Remote CueServers for more information.
The Status column shows various icons depending on the current state of a device in the list:
The CueServer is online.
The CueServer is being contacted.
The CueServer is offline.
For CueServer devices that are configured to use separate LANs for management and lighting data, the
Address column will show which LAN port on the CueServer was used to connect to the device. These icons
only appear when the CueServer is configured to use Dual-LANs:
LAN Interface A
LAN Interface B
If a CueServer is discovered, but it is not reachable on the local network because of a mismatch between
the computer’s local subnet and the CueServer’s IP address, then a warning icon ( ) will appear next to
its address. Try using Network Settings to change the CueServer’s IP address to one that is reachable on
the local network.
Older CS-800 series CueServers will also appear in the list of online devices. CueServer Studio 2 can not
directly edit these devices, and they appear in the list in gray text. If they are opened, CueServer Studio will
simply open the device’s web interface.
Editing Online CueServers
Double clicking a CueServer or clicking on the Open Show icon ( ) opens that CueServer’s Editor
Window, which is used to program and configure the CueServer. See the Editor Window section for more
information.
Opening the listbox under a CueServer reveals the available and active show file in the CueServer. Options
are available to manage the active show, and to create new, delete and rename shows. See Working With
Shows for more information.
Page 9 of 429
Page 12

Interactive Technologies, Inc. CueServer 2 User's Manual - 18.5.18
Working With Offline Show Files
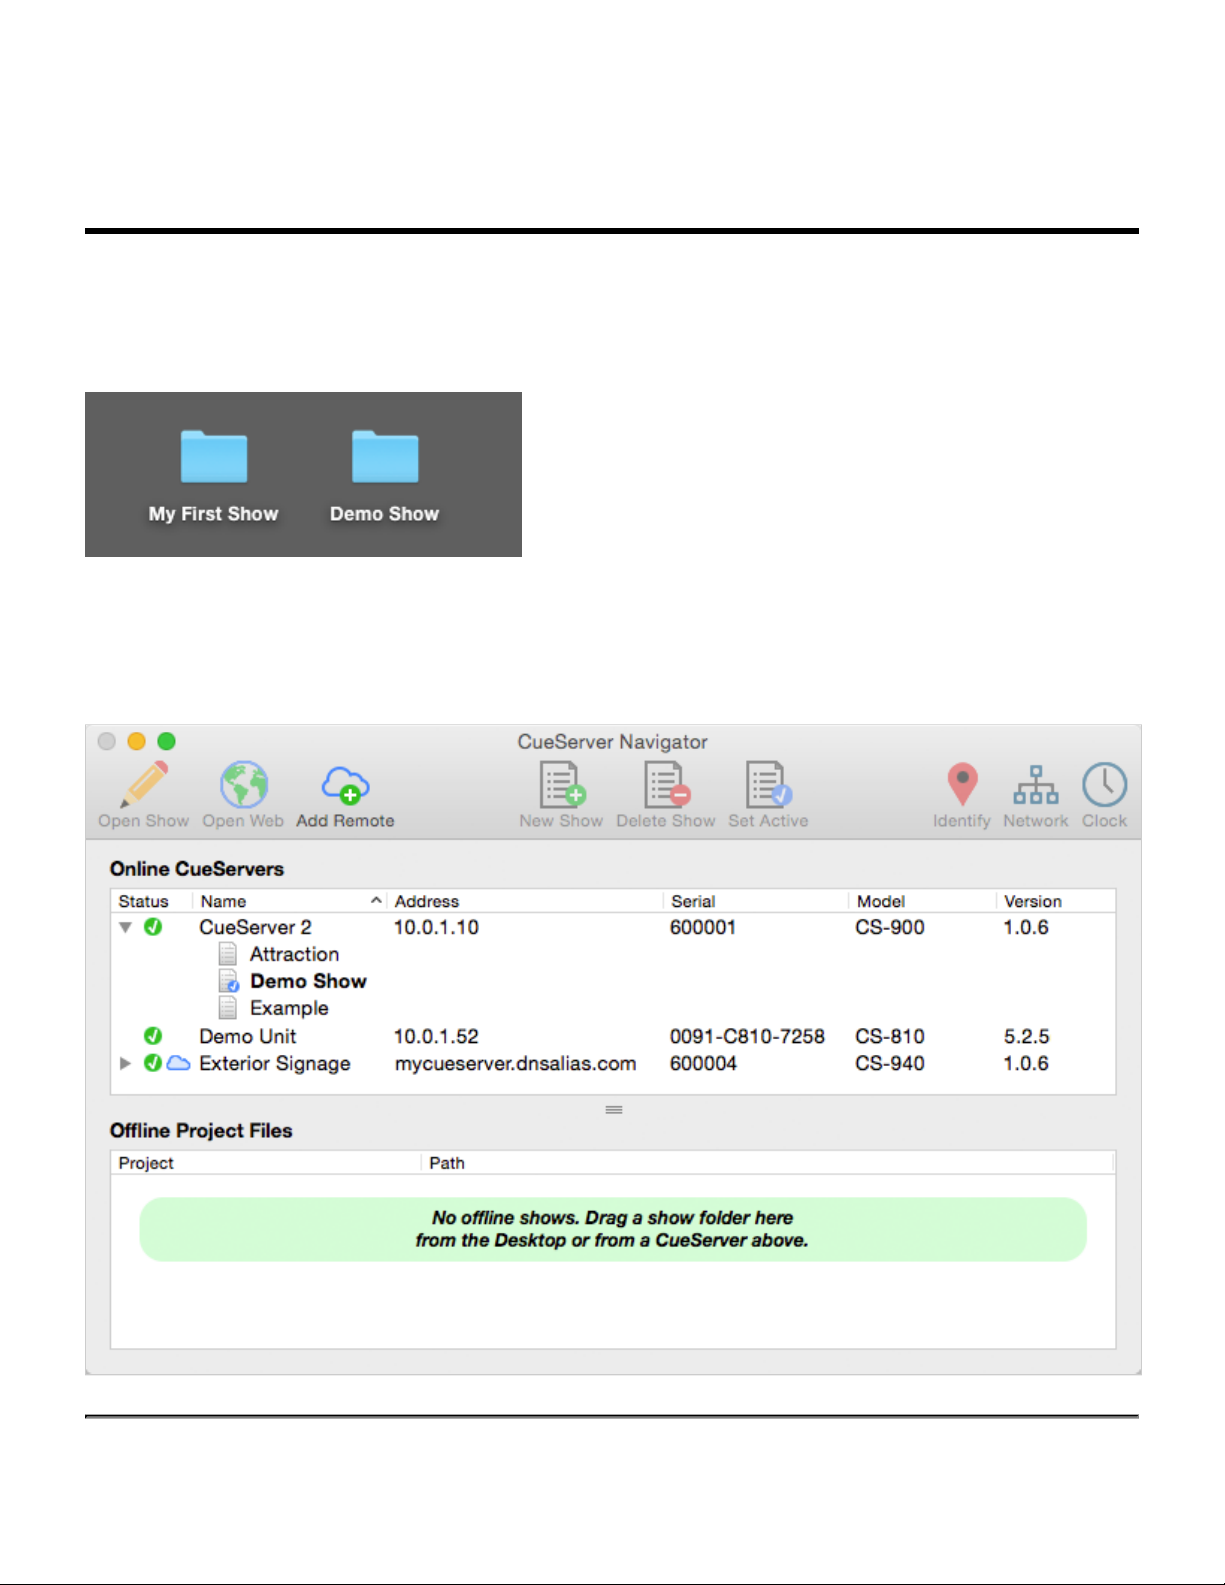
The bottom pane of the window is used as a working area to hold offline show files.
This pane makes it easy to open and edit show files that are on the local computer, or to copy shows
between a CueServer and the local computer.
See the section on Working With Offline Shows for more details.
Setting Network or Clock Parameters
When a CueServer is selected, its Network and Clock parameters can be set using options from the
CueServer menu, or by right-clicking (or control-clicking) the CueServer to get a contextual menu. Also, a
Network button ( ) and a Clock button ( ) are available in the toolbar for easy access to these
functions.
See the sections on Setting Network Parameters or Setting Clock Parameters for more information.
Maintenance
If the firmware of a CueServer is out-of-date, a warning icon ( ) will appear next to its firmware version.
See the Updating Firmware section for details.
If there are multiple CueServers on the network at the same time, it can sometimes be useful to identify
which CueServer is which. See the Identifying CueServers section to learn how to activate the Identify
function.
Page 10 of 429
Page 13

Interactive Technologies, Inc. CueServer 2 User's Manual - 18.5.18
Toolbar
The toolbar in the Navigator Window contains several controls for managing CueServers.
Each of the toolbar items are described below:
Open Show
Opens the currently selected CueServer’s Editor Window. The Editor Window is used for
programming and configuration of a CueServer.
Open Web
Opens the currently selected CueServer’s web page in the default web browser.
Add Remote
Displays a dialog window that allows a remote CueServer to be added to the Navigator Window.
This option is used to add CueServers that are not available on the local network, and are published
on the Internet via a router’s port-forwarding settings. See Working With Remote CueServers for more
information.
New Show
Creates a new show file for the selected CueServer.
Delete Show
Removes the selected show file from a CueServer. Please note that the currently active show file
cannot be deleted.
Set Active
Makes the selected show file the active show. The active show appears in the list in bold with a blue
checkmark besides it.
Identify
Activates the selected CueServer’s Identify Mode. When a CueServer is in Identify Mode, it’s LCD
Display and Power LED will flash. Use this feature to help identify which CueServer is which in a
complicated setup with multiple CueServer devices. See Identifying CueServers for more information.
Page 11 of 429
Page 14

Interactive Technologies, Inc. CueServer 2 User's Manual - 18.5.18
Network
Displays a dialog window that allows the network settings of the selected CueServer to be changed.
Use this option to change the IP Address, DHCP setting, and Device Name of a CueServer.
Clock
Displays a dialog window that allows the clock settings of the selected CueServer to be changed.
Use this option to change the time zone, automatic and/or manual time settings of a CueServer.
Page 12 of 429
Page 15
Interactive Technologies, Inc. CueServer 2 User's Manual - 18.5.18
Working With Shows
About Shows
All of the programming and configuration in a CueServer is stored in a show file. CueServer show files
contain Cues, Groups, Macros, Sounds, Web Pages, Stations, Timers, Rules, Configuration Data and more.
The memory card in CueServer can hold one or more show files, however only one show can be active at a
time.
The shows available on a CueServer’s memory card are displayed by opening the hierarchical list under the
CueServer in the Navigator Window.
In the above example, the device named CueServer 2 contains three shows. The show marked in bold and
with the blue checkmark icon ( ) next to it is the currently active show in the CueServer.
Page 13 of 429
Page 16
Interactive Technologies, Inc. CueServer 2 User's Manual - 18.5.18
Creating a New Show
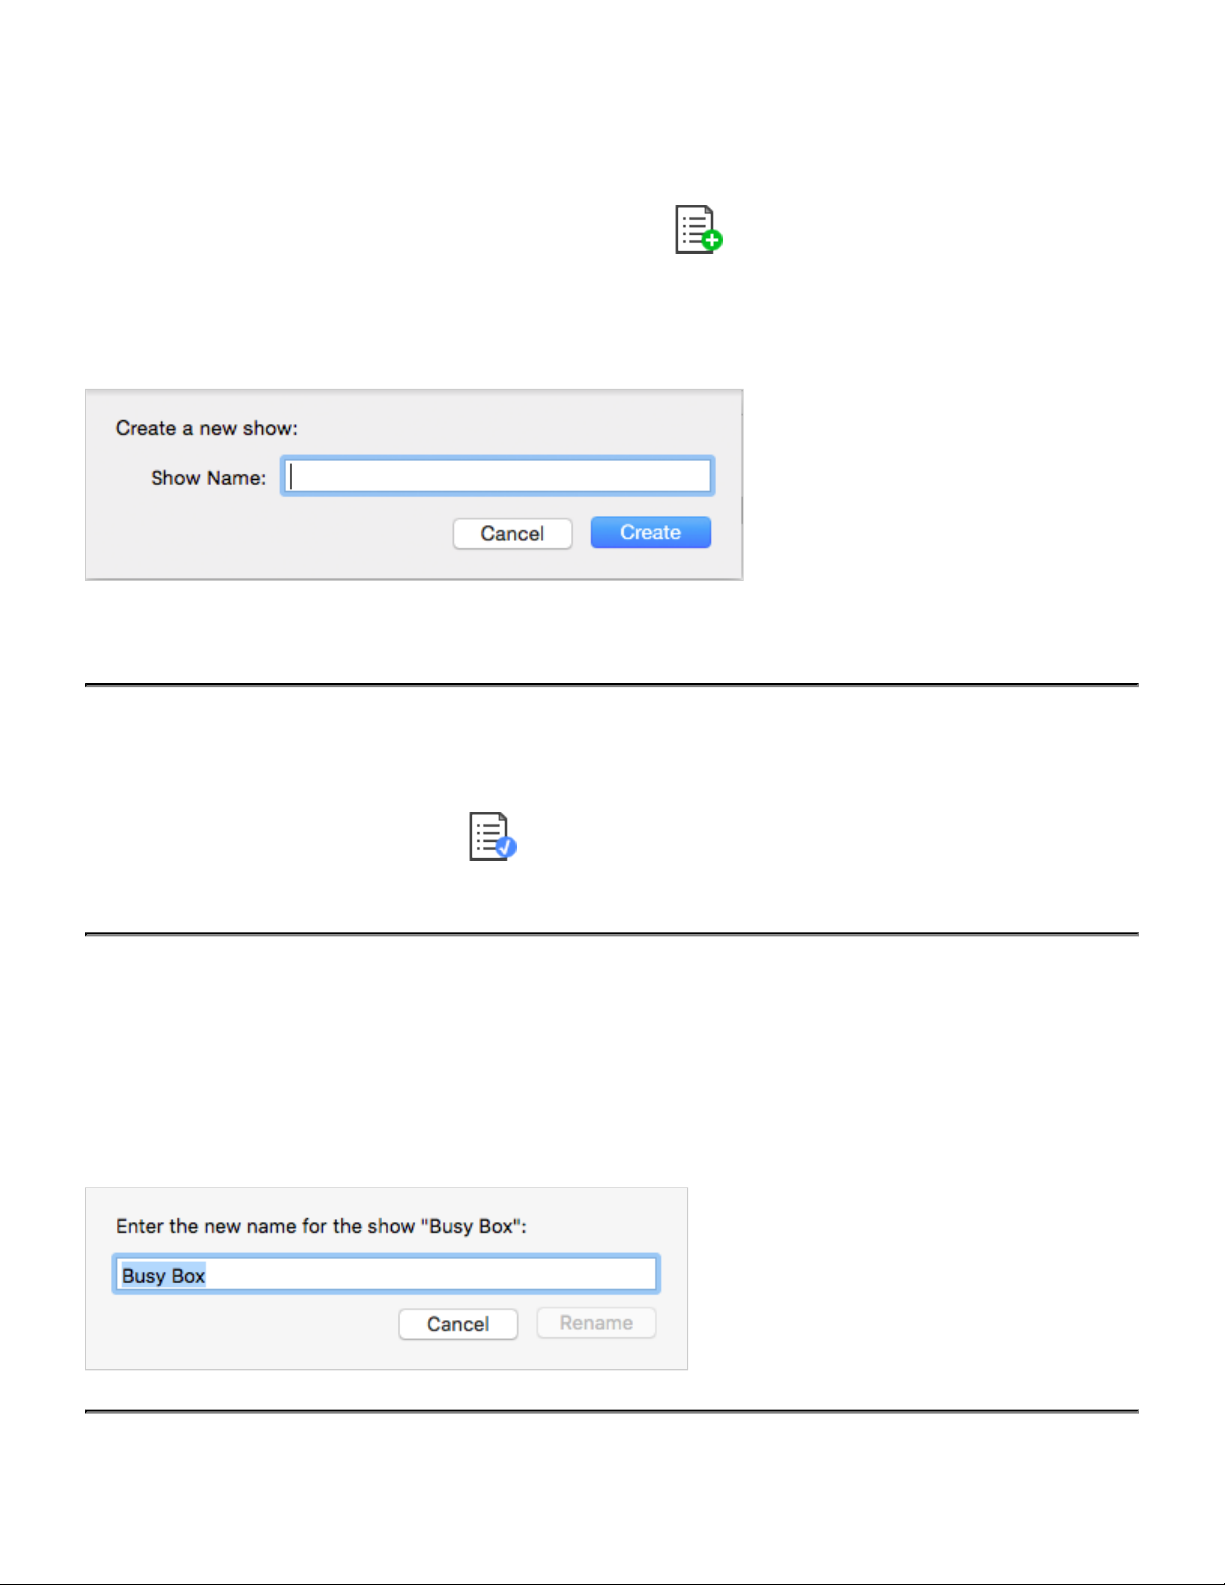
To create a new show, click on the New Show toolbar item ( ). You can also find the New Show
command in the contextual menu or the CueServer menu.
A window will appear asking for a new show name:
Enter a unique show name and press Create to create the new show.
Changing the Active Show
To change the currently active show, click on a show file and then choose the Set Active Show menu item
or click on the Set Active toolbar item ( ). You can also find the Set Active Show command in the
contextual menu or the CueServer menu.
Renaming a Show
To rename a show, right-click on the show and choose Rename Show from the contextual menu. You can
also find the Rename Show command in the CueServer menu.
A dialog window will appear that allows you to rename the show:
Page 14 of 429
Page 17
Interactive Technologies, Inc. CueServer 2 User's Manual - 18.5.18
Deleting a Show
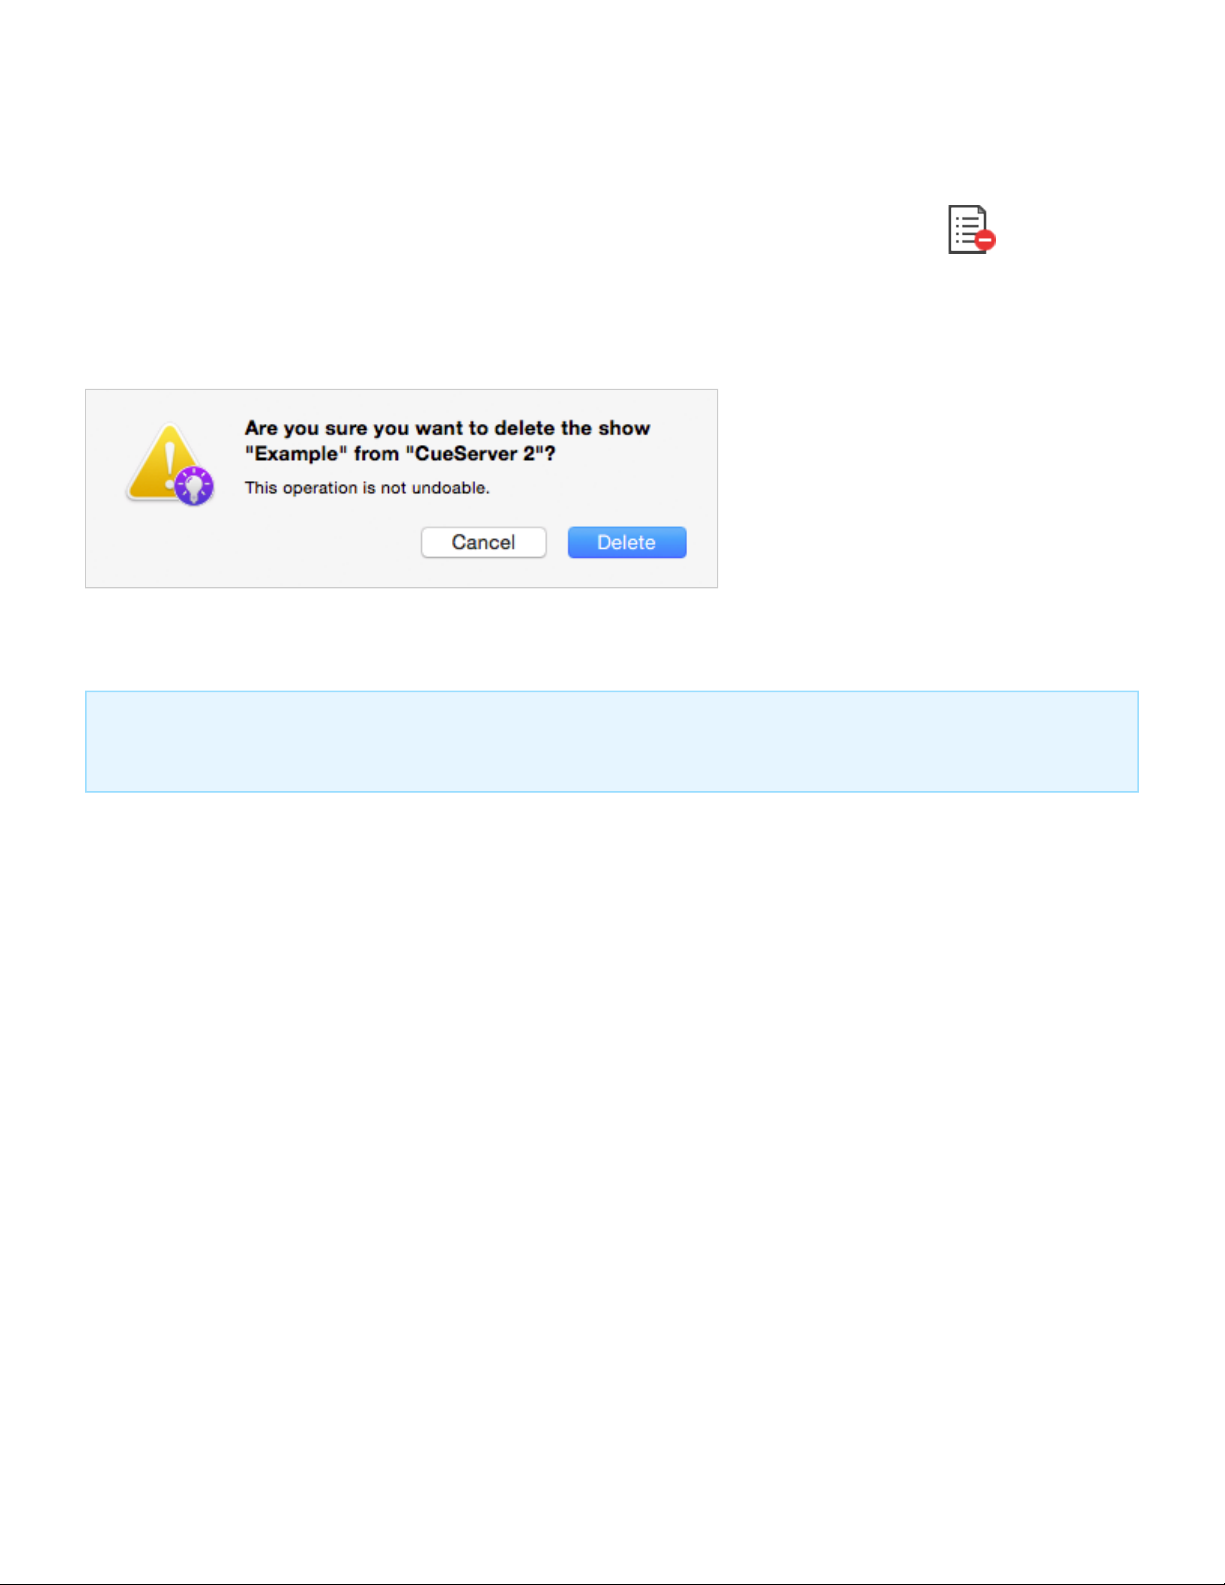
To delete a show, click on the show file and then click on the Delete Show toolbar item ( ). You can
also find the Delete Show command in the contextual menu or the CueServer menu.
A confirmation dialog will appear:
To proceed with deleting the show, choose the Delete button.
You cannot delete the currently active show. If you want to delete the active show, first switch to another
show (or create a new one).
*
Page 15 of 429
Page 18
Interactive Technologies, Inc. CueServer 2 User's Manual - 18.5.18
Working With Offline Shows
A Show File is a directory that contains the data stored in the show. The contents of the Show File directory
are individual binary files and subdirectories for each object in the show, including Cues, Macros, Rules,
Timers, Sounds, Web Content and more.
Since a Show File is actually a directory, it can’t be opened on the computer like a regular data file. If you
double-click on a Show File directory on your desktop, it will just open like any regular folder. Because of
this, CueServer Studio has tools for working with Show File directories that make it easier to edit them.
Page 16 of 429
Page 19

Interactive Technologies, Inc. CueServer 2 User's Manual - 18.5.18
Downloading a Show File from CueServer to Computer
There are several ways to download a show file
from a CueServer to the computer.
Option 1: Use the Download Show… menu item
available in the CueServer menu.
Option 2: Use the Download Show… contextual
menu item available by right clicking (or control-
clicking) on the show file in the CueServer.
When using either Option 1 or 2, a standard file
chooser dialog will appear asking where to place the
downloaded show file. Once a destination folder is
chosen, CueServer Studio will download the show
file into the location chosen.
Using the Download Show contextual menu item.
Option 3: Drag the show file directly from the CueServer in the top panel to the Offline Shows panel at the
bottom of the window.
When dragging a show from the online panel to the offline panel, CueServer Studio will automatically
download the show file from the CueServer to the computer’s desktop and add the item to the offline
projects list.
Uploading a Show File from Computer to CueServer
Page 17 of 429
Page 20

Interactive Technologies, Inc. CueServer 2 User's Manual - 18.5.18
There are several ways to upload a show file
from a computer to a CueServer.
Option 1: Use the Upload Show… menu item
available in the CueServer menu.
Option 2: Use the Upload Show… contextual
menu item available by right clicking (or control-
clicking) on a CueServer.
When using either Option 1 or 2, a standard file
chooser dialog will appear asking to choose the
show file to upload. Once a show file is chosen,
CueServer Studio will upload the show file to the
selected CueServer.
Using the Upload Show contextual menu item.
Option 3: Drag a show folder directly from the Offline Shows panel at the bottom of the window to an online
CueServer.
Option 4: Drag a show folder directly from the computer’s Desktop to an online CueServer.
When dragging a show from the offline panel or Desktop to an online CueServer, CueServer Studio will
automatically upload the show file from the computer to the CueServer device.
Creating An Offline Show
To create a show file for offline editing, first click in the Offline Project Files list to select it.
Then, click the New Show toolbar item ( ).
A standard file save dialog window will appear, asking for a name and location to save the new show file.
Once the name and location are given, CueServer Studio will create the new show file and add it to the
Offline Project Files list so the offline show file can be opened and edited.
Page 18 of 429
Page 21

Interactive Technologies, Inc. CueServer 2 User's Manual - 18.5.18
Working With Remote CueServers
Adding a Remote CueServer
To add a CueServer to the Navigator Window that is “across the Internet” (i.e., not on the local network),
choose Add Remote CueServer… from the CueServer Menu, or click the Add Remote button ( ) in
the toolbar.
The Add Remote CueServer window will appear:
The fields in this window are described below:
Address
This field can accept either an IP Address (for example: 50.167.102.1), or a domain name (such as:
mycueserver.dnsalias.com).
Port
This field is used to specify the port number of the remote CueServer. If left blank, the default port 80
will be used. Valid port numbers range from 1 to 65535.
To add a remote CueServer (after the fields are filled out properly), click Add.
Viewing Remote CueServers in the Navigator Window
Once a Remote CueServer has been added to the Navigator Window, it will appear in the CueServer list
with a small cloud icon ( ) next to the status icon. For example:
Page 19 of 429
Page 22

Interactive Technologies, Inc. CueServer 2 User's Manual - 18.5.18
The cloud icon shows that the CueServer in the list is a Remote CueServer.
The following icons can appear in the status column for Remote CueServers:
The CueServer is online.
The CueServer is being contacted.
The CueServer is offline.
Remote CueServers that connect properly are automatically saved in the application’s preferences. Each
time the application is launched, the added Remote CueServers will re-appear. If an added Remote
*
CueServer cannot be contacted, it will not be saved in the preferences.
Removing Remote CueServers from the Navigator Window
Simply select the Remote CueServer, and then press the Delete key on your keyboard.
Page 20 of 429
Page 23

Interactive Technologies, Inc. CueServer 2 User's Manual - 18.5.18
Setting Network Parameters
When a CueServer is selected in the Navigator Window, it’s various network parameters can be changed by
clicking on the Network Toolbar Item ( ), or by selecting the Network Settings… menu item in the
CueServer menu.
These parameters include the device’s network name, DHCP settings, IP Address, Subnet and Gateway
addresses.
A dialog window similar to the following will appear:
Device Name
This is the name of the device on the network (sometimes called the hostname). The device name can be
set to any practical name that can be used to identify the CueServer on the network.
Page 21 of 429
Page 24

Interactive Technologies, Inc. CueServer 2 User's Manual - 18.5.18
Network Mode
On CueServers with only a single Ethernet jack, this option is fixed to “Single LAN”.
On CueServers with two Ethernet jacks, two different options are available in this menu:
Option 1: Single LAN with Built-In Ethernet Switch
When this mode is selected (which is the factory default), the two Ethernet jacks are simply two ports of a
built-in Ethernet switch, both of which are connected to the CueServer. In this configuration, either one of
the two jacks can be connected to the local network, and the other jack can be used as an extra port for
connecting a laptop, DMX node, CueStation Hub or any other network device. All of the CueServer
management and lighting control data flows over this single LAN connection.
Option 2: Dual LANs with Separate IP Addresses
When this mode is selected, the two Ethernet jacks become two separate LAN ports, each of which have
their own network settings. The jack marked “A” is used to connect to a device management network. LAN
“A” can be used for device discovery, configuration editing, and has access to the web interface. The jack
marked “B” will have a different IP address and is used for lighting control data. LAN “B” is where DMX-
over-Ethernet protocols such as sACN, Art-Net, and KiNET are flowing. LAN “B” can also be used for device
discovery, configuration editing, and has access to the web interface.
Page 22 of 429
Page 25

Interactive Technologies, Inc. CueServer 2 User's Manual - 18.5.18
Please note that when changing the network mode, the device will need to reboot for the changes to take
!
effect. Please remember to reconfigure the physical network connections when changing modes, especially
if the mode is being changed from a Dual LAN to a Single LAN configuration. In this case, it’s likely that
there were two separate networks attached to the two ports on the CueServer and after the mode is
changed the built-in Ethernet switch would attempt to bridge these separate networks into one, which will
certainly cause unintended network problems.
Network Address
CueServer allows the Network Address to be set manually or automatically. If the CueServer is configured
for Dual LANs, then each network (A and B) can have it’s own network settings.
If the CueServer is on a network with a DHCP server or Router (which is common in buildings, offices and
home networks), this setting can be set to Using DHCP.
Using DHCP
When Using DHCP is chosen, the IP Address fields become disabled. This is because the CueServer will
fetch these address parameters from the network automatically. There is no need to set these parameters
manually when using DHCP.
Page 23 of 429
Page 26

Interactive Technologies, Inc. CueServer 2 User's Manual - 18.5.18
Manually
When Manually is chosen, the IP Address fields can be entered with a static IP Address, Subnet and
Gateway address.
It is best to use this option if the CueServer is not connected to a network, or if the network is known to not
have a DHCP server or Router, or if a specific network configuration is desired that uses a static address for
the CueServer.
Please note that if the CueServer is configured to use Dual LANs, the second network (LAN “B”) does not
have a field for setting a default gateway. This is because all network traffic that would need to use a
*
gateway to reach the external Internet will flow through LAN “A”.
Page 24 of 429
Page 27
Interactive Technologies, Inc. CueServer 2 User's Manual - 18.5.18
Setting Clock Parameters
When a CueServer is selected in the Navigator Window, it’s various clock parameters can be changed by
clicking on the Clock Toolbar Item ( ), or by selecting the Time Settings… menu item in the CueServer
menu.
These parameters include the timezone the unit is located within, network time protocol (NTP) server
configuration, and/or manual date and time settings.
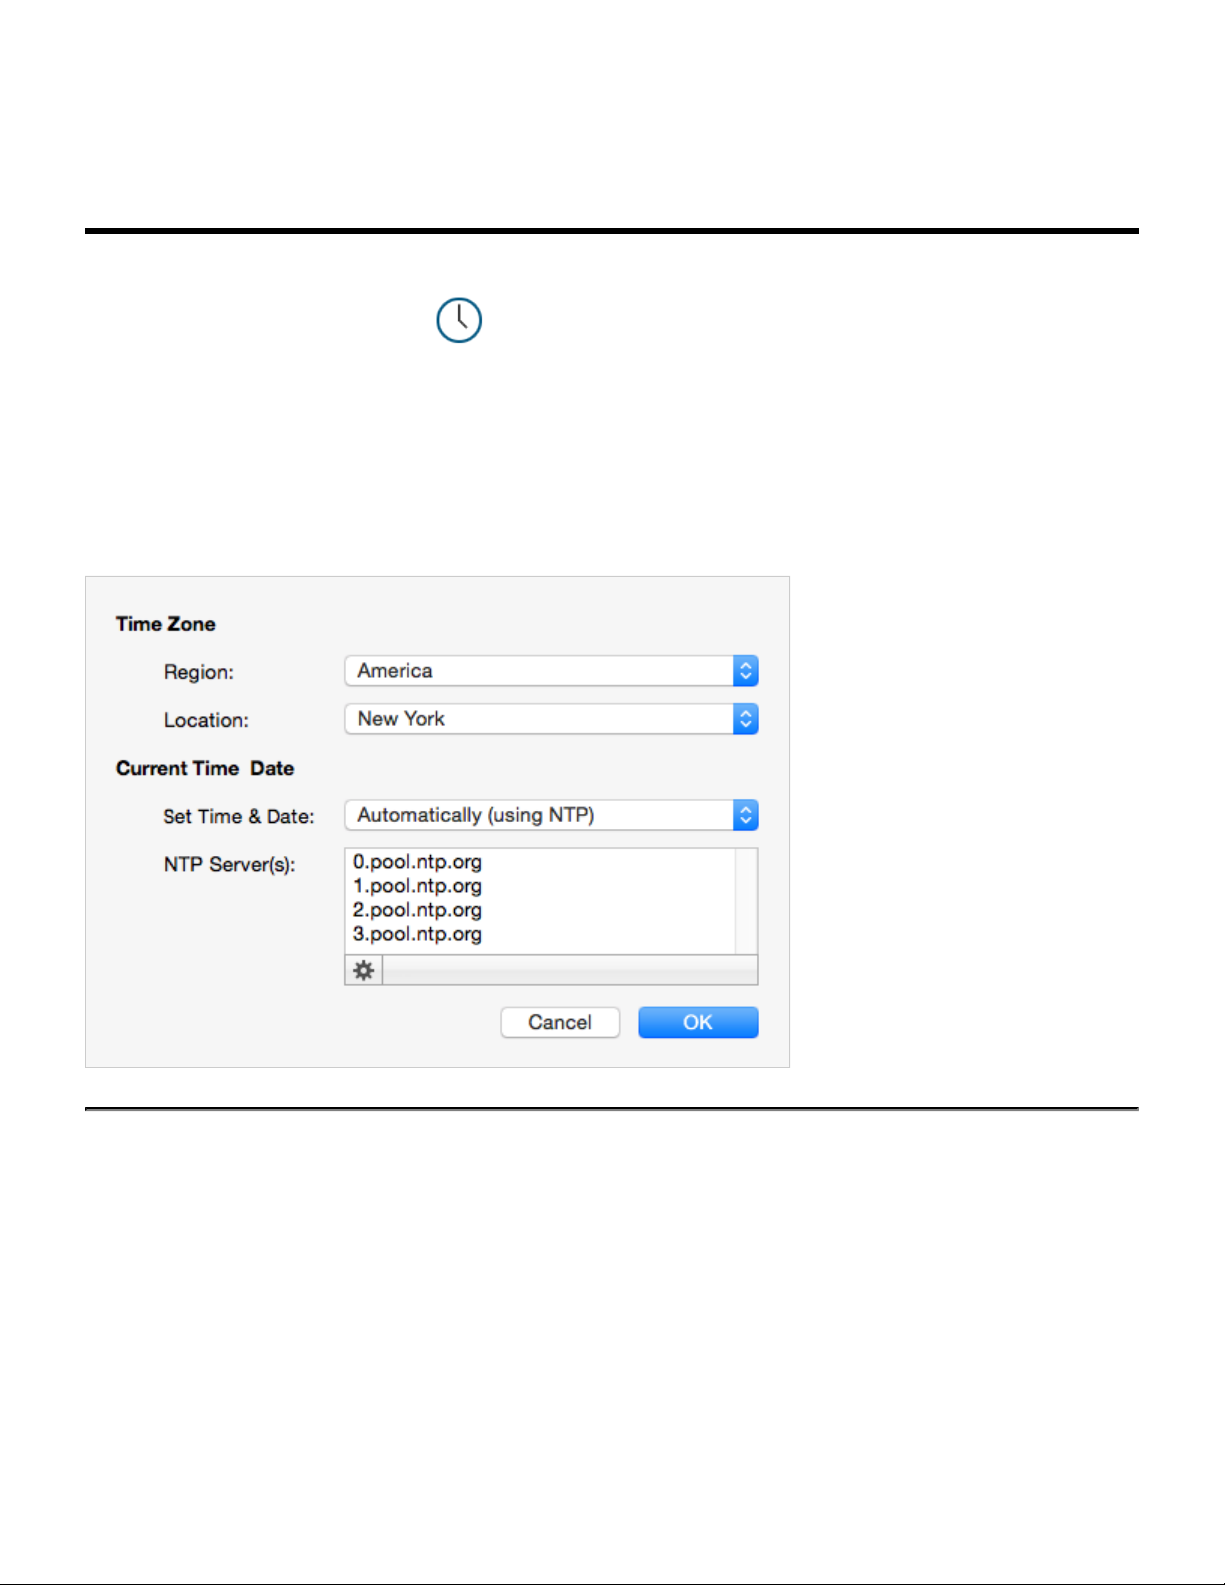
A dialog window similar to the following will appear:
Timezone
The top section of this window allows the timezone of the CueServer to be set. Use the Region menu first to
select a general region from around the globe. Options exist for America, Asia, Australia, Canada, Europe,
Pacific, US and others.
Once a region is chosen, use the Location menu to choose a specific timezone location within the region.
Page 25 of 429
Page 28

Interactive Technologies, Inc. CueServer 2 User's Manual - 18.5.18
CueServer’s timezone database is derived from the standard Linux distribution and includes over 400
distinct regional locations. See the timezone listing for a complete list of available timezones.
Current Time & Date
CueServer allows the Time and Date to be set manually or automatically. If the CueServer has a network
connection where it can reach the Internet, or if the network has a network time server, then the Set Time &
Date option can be set to Automatically.
Automatically Set Time & Date
When Automatically is chosen, a text field appears that allows one or more NTP time server addresses to be
entered. Put one time server per line.
The gear button ( ) can be clicked to pop up a menu that includes several popular choices of publicly
available Network Time (NTP) Servers. Choosing one of these options will automatically fill the server list
with one of these sets of options.
Manually Set Time & Date
When Manually is chosen, the time and date can be set manually.
Page 26 of 429
Page 29

Interactive Technologies, Inc. CueServer 2 User's Manual - 18.5.18
Use the popup menus to choose the Time and Date. Before any of the menus are clicked, they show the
current time of the computer. Once a menu is clicked, the time and date can be adjusted independently from
the computer. Once the desired time is chosen, click on the Set Time Now button to set the clock in the
CueServer.
Page 27 of 429
Page 30

Interactive Technologies, Inc. CueServer 2 User's Manual - 18.5.18
Available Timezones
The following list shows the time zones available for CueServer.
Africa/Abidjan
Africa/Accra
Africa/Addis Ababa
Africa/Algiers
Africa/Asmara
Africa/Asmera
Africa/Bamako
Africa/Bangui
Africa/Banjul
Africa/Bissau
Africa/Blantyre
Africa/Brazzaville
Africa/Bujumbura
Africa/Cairo
Africa/Casablanca
Africa/Ceuta
Africa/Conakry
Africa/Dakar
Africa/Dares Salaam
Africa/Djibouti
Africa/Douala
Africa/El Aaiun
Africa/Freetown
Africa/Gaborone
Africa/Harare
Africa/Johannesburg
Africa/Juba
Africa/Kampala
Africa/Khartoum
Africa/Kigali
Africa/Kinshasa
Africa/Lagos
Africa/Libreville
Africa/Lome
Africa/Luanda
Africa/Lubumbashi
Africa/Lusaka
Africa/Malabo
Africa/Maputo
Africa/Maseru
Africa/Mbabane
Africa/Mogadishu
Africa/Monrovia
Africa/Nairobi
Africa/Ndjamena
Africa/Niamey
Africa/Nouakchott
Africa/Ouagadougou
Africa/Porto-Novo
Africa/Sao Tome
Africa/Timbuktu
Africa/Tripoli
Africa/Tunis
Africa/Windhoek
America/Anchorage
America/Anguilla
America/Antigua
America/Aruba
America/Bahia
America/Barbados
America/Belize
America/Bogota
America/Boise
America/Buenos Aires
America/Cambridge Bay
America/Campo Grande
America/Cancun
America/Caracas
America/Catamarca
America/Cayenne
America/Cayman
America/Chicago
America/Chihuahua
America/Coral Harbour
America/Cordoba
America/Costa Rica
America/Cuiaba
America/Curacao
America/Danmarkshavn
America/Denver
America/Detroit
America/Dominica
America/Edmonton
America/Eirunepe
America/El Salvador
America/Fort Wayne
America/Grenada
America/Guadeloupe
America/Guatemala
America/Guyana
America/Halifax
America/Havana
America/Hermosillo
America/Indianapolis
America/Inuvik
America/Jamaica
America/Juneau
America/La Paz
America/Lima
America/Los Angeles
America/Louisville
America/Martinique
America/Mendoza
America/Mexico City
America/Monterrey
America/Montreal
America/Nassau
America/New York
America/Nome
America/Panama
America/Phoenix
America/Port-au-Prince
America/Puerto Rico
America/Regina
America/Santiago
America/Santo Domingo
America/Sao Paulo
America/St Johns
America/St Kitts
America/St Lucia
America/St Thomas
America/St Vincent
America/Tijuana
America/Toronto
America/Vancouver
America/Winnipeg
Antarctica/Casey
Antarctica/Davis
Antarctica/
DumontDUrville
Antarctica/Macquarie
Antarctica/Mawson
Antarctica/McMurdo
Antarctica/Palmer
Antarctica/Rothera
Antarctica/South Pole
Antarctica/Syowa
Antarctica/Troll
Antarctica/Vostok
Asia/Aden
Asia/Almaty
Asia/Amman
Asia/Anadyr
Asia/Aqtau
Asia/Aqtobe
Asia/Ashgabat
Asia/Ashkhabad
Asia/Baghdad
Asia/Bahrain
Asia/Baku
Asia/Bangkok
Asia/Beirut
Asia/Bishkek
Asia/Brunei
Asia/Calcutta
Asia/Choibalsan
Asia/Chongqing
Asia/Chungking
Asia/Colombo
Asia/Dacca
Asia/Damascus
Asia/Dhaka
Asia/Dili
Asia/Dubai
Asia/Dushanbe
Asia/Gaza
Asia/Harbin
Asia/Hebron
Asia/Ho Chi Minh
Asia/Hong Kong
Asia/Hovd
Asia/Irkutsk
Page 28 of 429
Page 31

Interactive Technologies, Inc. CueServer 2 User's Manual - 18.5.18
Asia/Istanbul
Asia/Jakarta
Asia/Jayapura
Asia/Jerusalem
Asia/Kabul
Asia/Kamchatka
Asia/Karachi
Asia/Kashgar
Asia/Kathmandu
Asia/Katmandu
Asia/Khandyga
Asia/Kolkata
Asia/Krasnoyarsk
Asia/Kuala Lumpur
Asia/Kuching
Asia/Kuwait
Asia/Macao
Asia/Macau
Asia/Magadan
Asia/Makassar
Asia/Manila
Asia/Muscat
Asia/Nicosia
Asia/Novokuznetsk
Asia/Novosibirsk
Asia/Omsk
Asia/Oral
Asia/Phnom Penh
Asia/Pontianak
Asia/Pyongyang
Asia/Qatar
Asia/Qyzylorda
Asia/Rangoon
Asia/Riyadh
Asia/Saigon
Asia/Sakhalin
Asia/Samarkand
Asia/Seoul
Asia/Shanghai
Asia/Singapore
Asia/Taipei
Asia/Tashkent
Asia/Tbilisi
Asia/Tehran
Asia/Tel Aviv
Asia/Thimbu
Asia/Thimphu
Asia/Tokyo
Asia/Ujung Pandang
Asia/Ulaanbaatar
Asia/Ulan Bator
Asia/Urumqi
Asia/Ust-Nera
Asia/Vientiane
Asia/Vladivostok
Asia/Yakutsk
Asia/Yekaterinburg
Asia/Yerevan
Atlantic/Azores
Atlantic/Bermuda
Atlantic/Canary
Atlantic/Cape Verde
Atlantic/Faeroe
Atlantic/Faroe
Atlantic/Jan Mayen
Atlantic/Madeira
Atlantic/Reykjavik
Atlantic/South Georgia
Atlantic/St Helena
Atlantic/Stanley
Australia/ACT
Australia/Adelaide
Australia/Brisbane
Australia/Broken Hill
Australia/Canberra
Australia/Currie
Australia/Darwin
Australia/Eucla
Australia/Hobart
Australia/LHI
Australia/Lindeman
Australia/Lord Howe
Australia/Melbourne
Australia/NSW
Australia/North
Australia/Perth
Australia/Queensland
Australia/South
Australia/Sydney
Australia/Tasmania
Australia/Victoria
Australia/West
Australia/Yancowinna
Brazil/Acre
Brazil/DeNoronha
Brazil/East
Brazil/West
Canada/Atlantic
Canada/Central
Canada/East-
Saskatchewan
Canada/Eastern
Canada/Mountain
Canada/Newfoundland
Canada/Pacific
Canada/Saskatchewan
Canada/Yukon
Chile/Continental
Chile/EasterIsland
Etc/GMT
Etc/GMT+1
Etc/GMT+2
Etc/GMT+3
Etc/GMT+4
Etc/GMT+5
Etc/GMT+6
Etc/GMT+7
Etc/GMT+8
Etc/GMT+9
Etc/GMT+10
Etc/GMT+11
Etc/GMT+12
Etc/GMT-1
Etc/GMT-2
Etc/GMT-3
Etc/GMT-4
Etc/GMT-5
Etc/GMT-6
Etc/GMT-7
Etc/GMT-8
Etc/GMT-9
Etc/GMT-10
Etc/GMT-11
Etc/GMT-12
Etc/Greenwich
Etc/UCT
Etc/UTC
Etc/Universal
Etc/Zulu
Europe/Amsterdam
Europe/Andorra
Europe/Athens
Europe/Belfast
Europe/Belgrade
Europe/Berlin
Europe/Bratislava
Europe/Brussels
Europe/Bucharest
Europe/Budapest
Europe/Busingen
Europe/Chisinau
Europe/Copenhagen
Europe/Dublin
Europe/Gibraltar
Europe/Guernsey
Europe/Helsinki
Europe/Isle of Man
Europe/Istanbul
Europe/Jersey
Europe/Kaliningrad
Europe/Kiev
Europe/Lisbon
Europe/Ljubljana
Europe/London
Europe/Luxembourg
Europe/Madrid
Europe/Malta
Europe/Mariehamn
Europe/Minsk
Europe/Monaco
Europe/Moscow
Europe/Nicosia
Europe/Oslo
Europe/Paris
Europe/Podgorica
Europe/Prague
Europe/Riga
Europe/Rome
Europe/Samara
Europe/San Marino
Europe/Sarajevo
Europe/Simferopol
Europe/Skopje
Europe/Sofia
Europe/Stockholm
Europe/Tallinn
Europe/Tirane
Europe/Tiraspol
Europe/Uzhgorod
Europe/Vaduz
Europe/Vatican
Europe/Vienna
Europe/Vilnius
Europe/Volgograd
Europe/Warsaw
Europe/Zagreb
Europe/Zaporozhye
Europe/Zurich
Indian/Antananarivo
Indian/Chagos
Page 29 of 429
Page 32

Interactive Technologies, Inc. CueServer 2 User's Manual - 18.5.18
Indian/Christmas
Indian/Cocos
Indian/Comoro
Indian/Kerguelen
Indian/Mahe
Indian/Maldives
Indian/Mauritius
Indian/Mayotte
Indian/Reunion
Mexico/BajaNorte
Mexico/BajaSur
Mexico/General
Pacific/Apia
Pacific/Auckland
Pacific/Chatham
Pacific/Chuuk
Pacific/Easter
Pacific/Efate
Pacific/Enderbury
Pacific/Fakaofo
Pacific/Fiji
Pacific/Funafuti
Pacific/Galapagos
Pacific/Gambier
Pacific/Guadalcanal
Pacific/Guam
Pacific/Honolulu
Pacific/Johnston
Pacific/Kiritimati
Pacific/Kosrae
Pacific/Kwajalein
Pacific/Majuro
Pacific/Marquesas
Pacific/Midway
Pacific/Nauru
Pacific/Niue
Pacific/Norfolk
Pacific/Noumea
Pacific/Pago Pago
Pacific/Palau
Pacific/Pitcairn
Pacific/Pohnpei
Pacific/Ponape
Pacific/Port Moresby
Pacific/Rarotonga
Pacific/Saipan
Pacific/Samoa
Pacific/Tahiti
Pacific/Tarawa
Pacific/Tongatapu
Pacific/Truk
Pacific/Wake
Pacific/Wallis
Pacific/Yap
US/Alaska
US/Aleutian
US/Arizona
US/Central
US/East-Indiana
US/Eastern
US/Hawaii
US/Indiana-Starke
US/Michigan
US/Mountain
US/Pacific
US/Pacific-New
US/Samoa
Page 30 of 429
Page 33

Interactive Technologies, Inc. CueServer 2 User's Manual - 18.5.18
Identifying CueServers
When working with multiple CueServers, sometimes it may be useful to be able to positively identify which
CueServer is which.
A CueServer’s Identify Mode can be activated, which causes it’s LCD Display and Power LED to flash. This
function makes it easy to match a CueServer listed in the Navigator Window with a physical device on the
network.
To activate the Identify Mode, select a CueServer in the list, then choose the Identify… item in the
CueServer Menu, or click on the Identify toolbar icon ( ).
The CueServer will begin flashing, and the following window will appear:
To exit the Identify Mode, click on the Stop button.
Page 31 of 429
Page 34

Interactive Technologies, Inc. CueServer 2 User's Manual - 18.5.18
Updating Firmware
When new features or bug fixes become available for CueServer 2, a new version of CueServer Studio will
be released. With each software release, CueServer Studio will check to make sure that the CueServer
devices have the most up-to-date software version.
If a CueServer’s firmware is out of date, it will appear in the Navigator Window with a warning icon ( ) in
front of the firmware version number.
CueServer Studio can update the firmware in connected CueServers by choosing the Update Firmware…
menu item in the CueServer menu.
The following dialog window appears:
In this example, CueServer Studio is recommending that the device be upgraded to version 1.0.3. This
firmware image is embedded in the CueServer Studio application itself. Simply click on the Update button to
perform the update.
If you want to update the CueServer to a different version of firmware, click on the Choose Other… button.
A file chooser window will appear that will allow a different firmware version to be loaded. CueServer
firmware files have the file extension .c2f.
When the firmware update process is running, a progress window appears:
Page 32 of 429
Page 35

Interactive Technologies, Inc. CueServer 2 User's Manual - 18.5.18
The progress of the update is shown in the window and on the LCD screen of the CueServer. When the
update is complete, the CueServer will reboot and the Done button can be clicked to dismiss the window.
Page 33 of 429
Page 36

Interactive Technologies, Inc. CueServer 2 User's Manual - 18.5.18
Editor Window
Overview
The Editor Window is the primary window used to interact with, program and configure CueServer.
Use the Editor Window to view the “live” operation, edit resources and triggers, and set various
configuration properties of a CueServer show.
The panel on the left of the window contains numerous views into the CueServer, such as Stage, Cues, and
Location. The following manual sections describe the details of each of these CueServer editor views:
Page 34 of 429
Page 37

Interactive Technologies, Inc. CueServer 2 User's Manual - 18.5.18
• Live – live views of CueServer operation
◦ Stage – for viewing DMX channels
◦ Playbacks – for viewing playback faders
◦ Status – for viewing the front-panel of the CueServer
• Resources – various content types for CueServer projects
◦ Cues – scenes and timeline based streams
◦ Groups – definitions of groups of channels
◦ Macros – user-defined scripts
◦ Sounds – audio clips
◦ Web Pages – custom web pages for the project
• Triggers – definitions for incoming system events
◦ Stations – setup for stations, buttons, contact-closures and more
◦ Timers – setup for timers
◦ Rules – a global list of rules
• Settings – system preferences
◦ General – general purpose settings
◦ DMX – DMX related settings
◦ LCD Display – customization of the LCD display
◦ Location – location settings for astronomical time
The panel at the bottom of the window is a live command line that allows the user to directly enter CueScript
commands to cause the CueServer to perform operations. Note that this command line is only visible if you
are editing the active show file in an “online” CueServer.
Page 35 of 429
Page 38

Interactive Technologies, Inc. CueServer 2 User's Manual - 18.5.18
Live
The Live section of the navigator contains views that show the Stage, Playback Operation, and System
Status of the CueServer. Each of these views show dynamic screens that are updating “live” as the
CueServer is performing it’s operations.
The following sections describe these views in more detail:
• Stage – for viewing DMX channels
• Playbacks – for viewing playback faders
• Status – for viewing the front-panel of the CueServer
Page 36 of 429
Page 39
Interactive Technologies, Inc. CueServer 2 User's Manual - 18.5.18
Stage
Overview
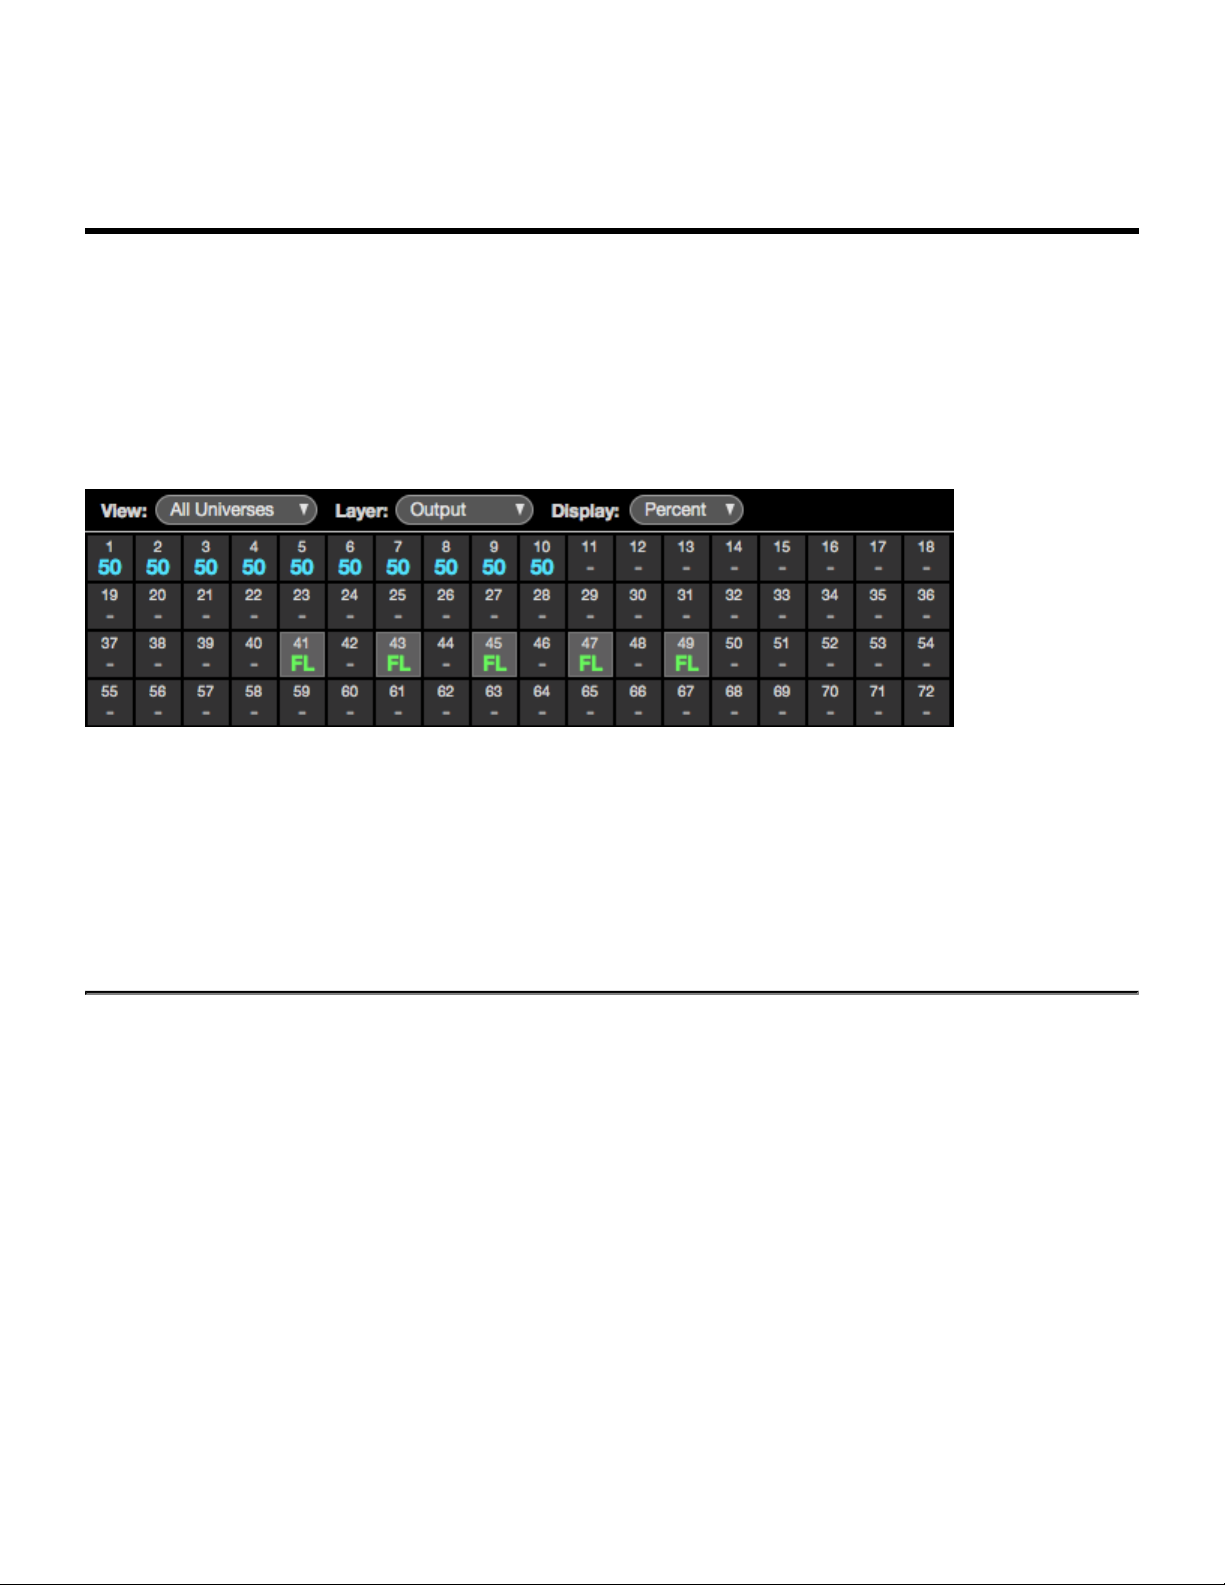
The Stage View shows the output channels of the CueServer. This view is arranged in a grid of channels.
Controls within the window change the visible layer of the channel grid between the device’s Output, one of
the Playbacks, or the Input. Various colors indicate the source of each channel value and/or the state of the
channel.
While cues are running and/or channels are fading, they will update live within this view. The channels are
colored to match the display color for each Playback Fader. In the example above, the Blue channels are
coming from Playback 1 and the Green channels are coming from Playback 2.
The area behind the odd-numbered channels from 41 through 49 are shaded in Gray to indicate that these
channels are currently selected.
Choosing the View Layer
Use the Layer popup menu to choose which layer of the DMX composition is being shown:
Page 37 of 429
Page 40

Interactive Technologies, Inc. CueServer 2 User's Manual - 18.5.18
The view options are:
• Input – This view shows any DMX values that are being input into the device.
• Playback – This view shows DMX values that are present in a specific Playback Fader. The colored
circle shows the color of the channels for the given Playback Fader.
• Output – This view shows the final composite DMX values that are being output from the device.
Choosing the Visible Universes
Use the View popup menu to choose which universe(s) are being shown:
The view options are:
• All Universes – This view shows all Universes in one continuous table.
Page 38 of 429
Page 41
Interactive Technologies, Inc. CueServer 2 User's Manual - 18.5.18
• Universe n – This view focuses the display on only the chosen Universe.
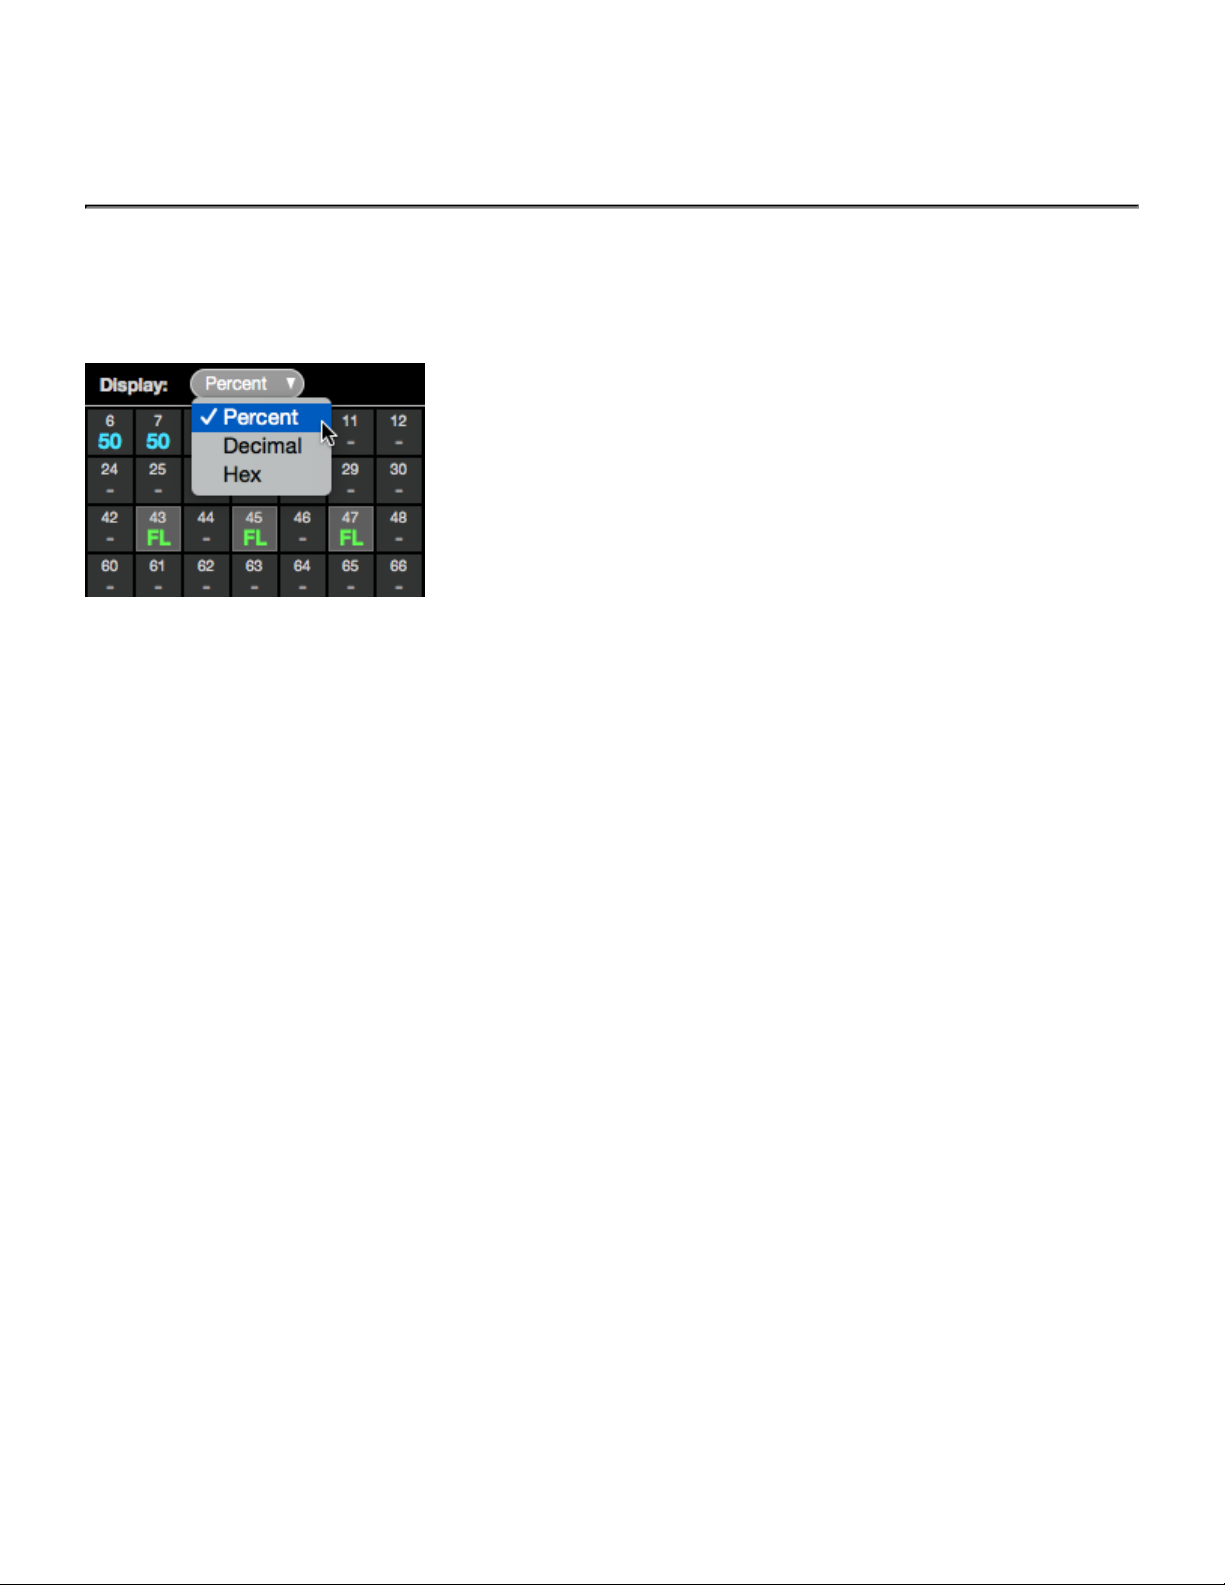
Choosing a Display Mode
Use the Display popup menu to choose how the values in the channel grid are shown:
The display options are:
• Percent – This mode shows channel levels as a percentage. Values range from 0 to 99, and then FL
(meaning Full, or 100%).
• Decimal – This mode shows channel levels in decimal format. Values range from 0 to 255.
• Hexadecimal – This mode shows channel levels in hexadecimal format. Values range from 00 to FF.
Page 39 of 429
Page 42

Interactive Technologies, Inc. CueServer 2 User's Manual - 18.5.18
Playbacks
Overview
The Playbacks View shows the current state and properties of the Playback Fader layers of the CueServer.
This view is arranged in a stack of Playbacks. Each Playback has three panes, the left-hand pane shows
what is currently loaded in the Playback, the center pane shows what’s coming up next, and the right-hand
pane shows additional properties for the Playback. While cues are running and/or channels are fading, bar
graphs appear that show the progress of the cues, fades, streams, etc.
In the example above, Playback 1 is currently playing back Cue 30, which is a streaming cue called
“Breakbeat”. It is currently 4.78 seconds into the stream. The next cue in Playback 1 is Cue 99, which is
called “Dim Blue”. Playback 2 is the active playback, it is currently fading into Cue 3 “Blue”. The fade has
1.5 seconds remaining, and a follow timer is running with 4.5 seconds remaining. The next cue in Playback
2 is Cue 1 “Red”, and that cue will have a Fade Time of 5 seconds, and a Follow Timer of 8 seconds. Also,
Playback 2’s submaster has been lowered to 75%. Finally, Playback 3 has manually set “active” DMX
channels in it and no next cue. Playback 2 is “stopped”, meaning that fade and follow timing is disabled, and
it’s layer mode is set to “Scale”.
The Current Pane (Left Side)
The pane on the left-hand side of each Playback shows what is currently loaded in the Playback.
Page 40 of 429
Page 43
Interactive Technologies, Inc. CueServer 2 User's Manual - 18.5.18
• Empty – Shown if the playback has no active channels. An empty Playback has no effect on the DMX
output.
• Active Channels – Shown when the Playback has active channels (not originating from a Cue).
• Cue (n) – Shown when the Playback is loaded with the channels from a particular Cue.
• Cue (n) + Changes – Shown when the Playback was loaded with a Cue, and then manual channel
values were changed.
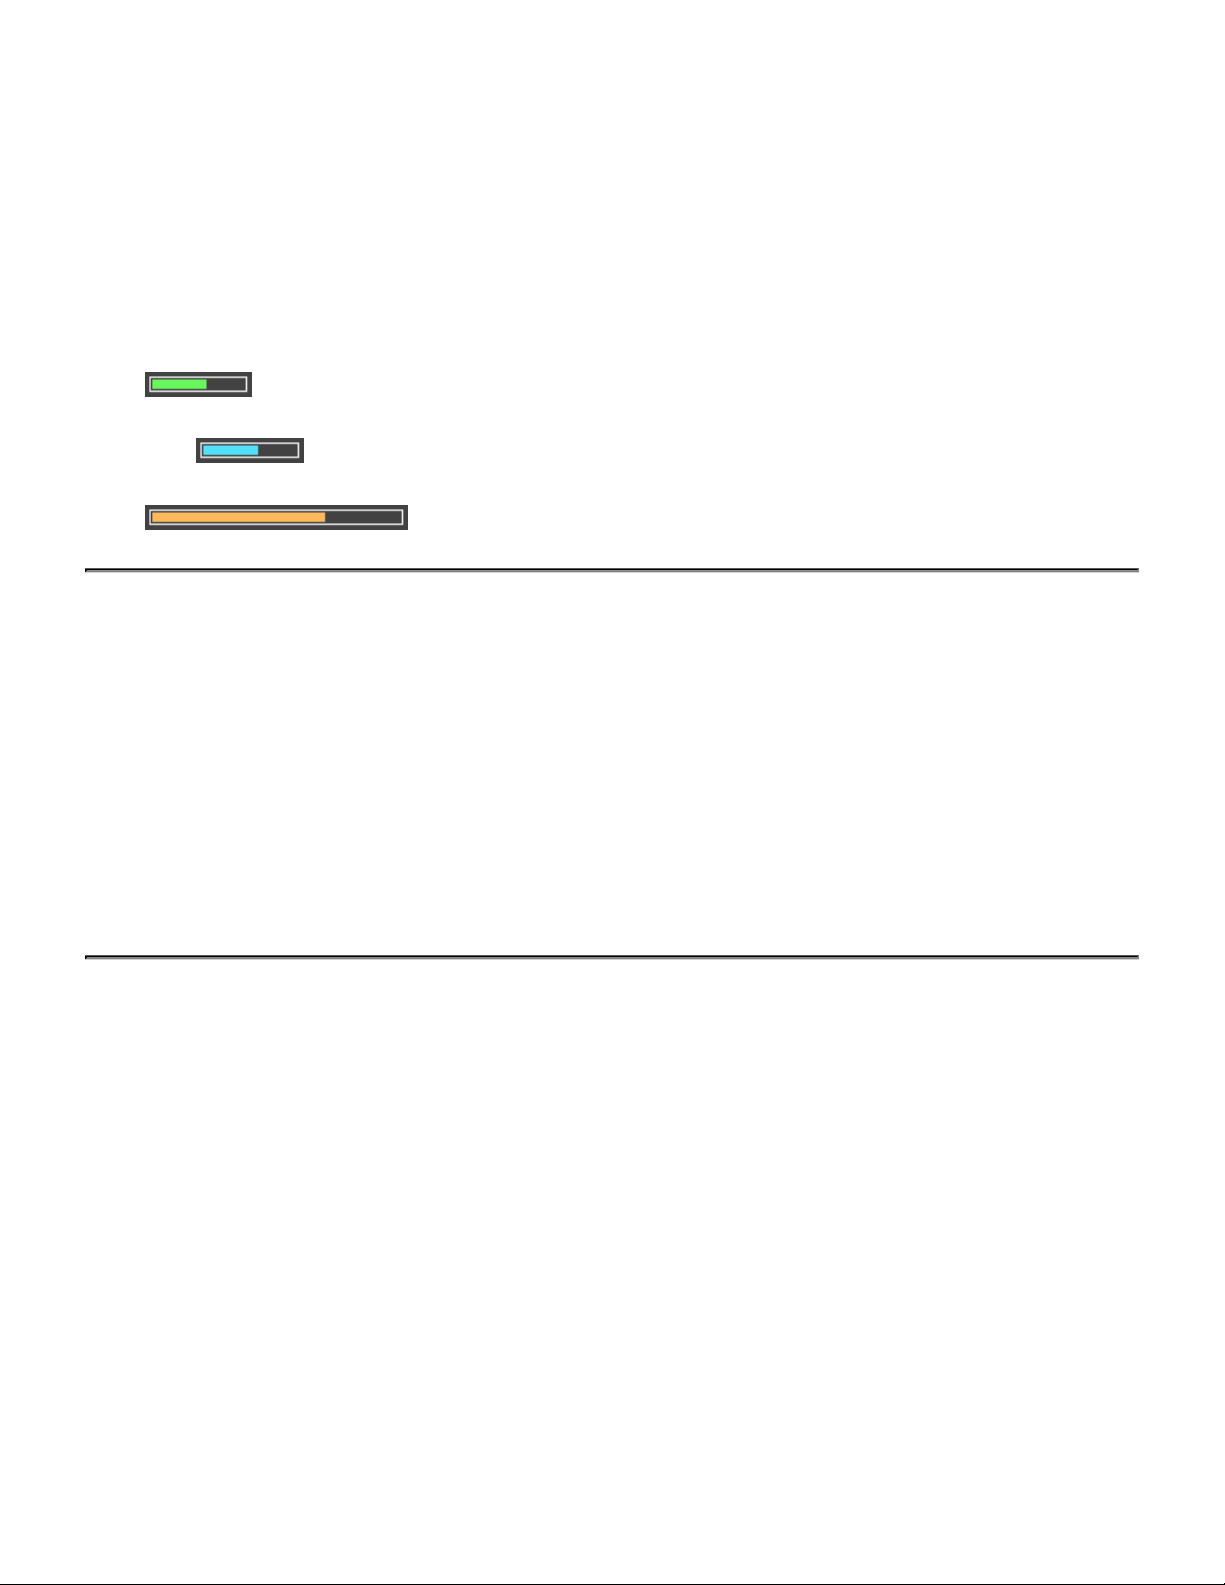
• Fade (time) – Shown when the Playback is actively fading channels. A green progress bar (
) shows the fade time remaining.
• Follow (time) – Shown when the Playback is counting down to an auto-follow event. A blue progress
bar ( ) shows the follow time remaining.
• Stream (time) – Shown when a Streaming Cue is being played back. An orange progress bar (
) shows the stream time remaining.
The Next Pane (Center)
The panel in the center of each Playback shows what is queued to be “next”.
• Next Cue (n) – Shown if the Playback has a next cue that will execute upon a Go command or auto-
follow.
• Fade (time) – Shown to indicate the fade time of the next cue.
• Follow (time) – Shown to indicate the follow time of the next cue.
• Link (n) – Shown to indicate the link of the next cue.
• No Next Cue – Shown if the Playback does not have a next cue.
The Properties Pane (Right Side)
The panel on the right-hand side of each Playback shows additional properties for the Playback Fader.
• Output Normal – Shown if the Playback has no overridden properties. All values are normal.
• Stack (name) – Shown if the Playback has a cue stack assigned to it.
• Fader Stopped – Shown in Red color when the Playback is stopped. A stopped Playback has it’s
timing overridden, meaning that setting channel levels or executing cues always appear immediately
(they do not fade), the follow timer does not run, and streaming cues are paused.
• Channels Parked – Shown in Red color when channels in the Playback are parked. Parked channels
retain their current values and cannot be modified by executing cues or by using the Channel, At,
Release, or Clear commands. Parked channels must either be Unparked, or the CueServer can be
Reset.
Page 41 of 429
Page 44

Interactive Technologies, Inc. CueServer 2 User's Manual - 18.5.18
• Submaster (level) – Shown when the Playback’s submaster level is not at 100%. A pink progress bar
( ) shows the submaster percentage.
• Mode (mode) – Shown if the Playback’s combine mode is set to anything other than the default
“Merge” mode. Options include Override, Scale, and Pin.
Page 42 of 429
Page 45

Interactive Technologies, Inc. CueServer 2 User's Manual - 18.5.18
Status
The Status page provides several views that show live status of various CueServer subsystems.
The following status views are available:
• Front Panel – a live view of the front-panel of the CueServer.
• Variables – a live listing of user-defined variables.
• CPU Info – a live view of the hardware status.
• System Log – the current system log.
Note that if any of the status views has an important condition that needs to be shown to the user, the
caution icon ( ) will appear to the right of the corresponding line in the list of status views.
Page 43 of 429
Page 46

Interactive Technologies, Inc. CueServer 2 User's Manual - 18.5.18
Front Panel
The Front Panel View shows the current state of the physical CueServer. The CueServer’s LCD display and
LED indicators are visible in this view.
As the LCD display and/or LED indicators on the physical CueServer changes, they are updated live on this
view.
Page 44 of 429
Page 47

Interactive Technologies, Inc. CueServer 2 User's Manual - 18.5.18
Variables
The Variables View shows any currently defined user variables.
Whenever any CueScript statements are used to define or update the value of a user variable, this view will
show those values “live”.
For more information about using variables in scripts, see the Variables section of the CueScript Language
chapter.
Page 45 of 429
Page 48
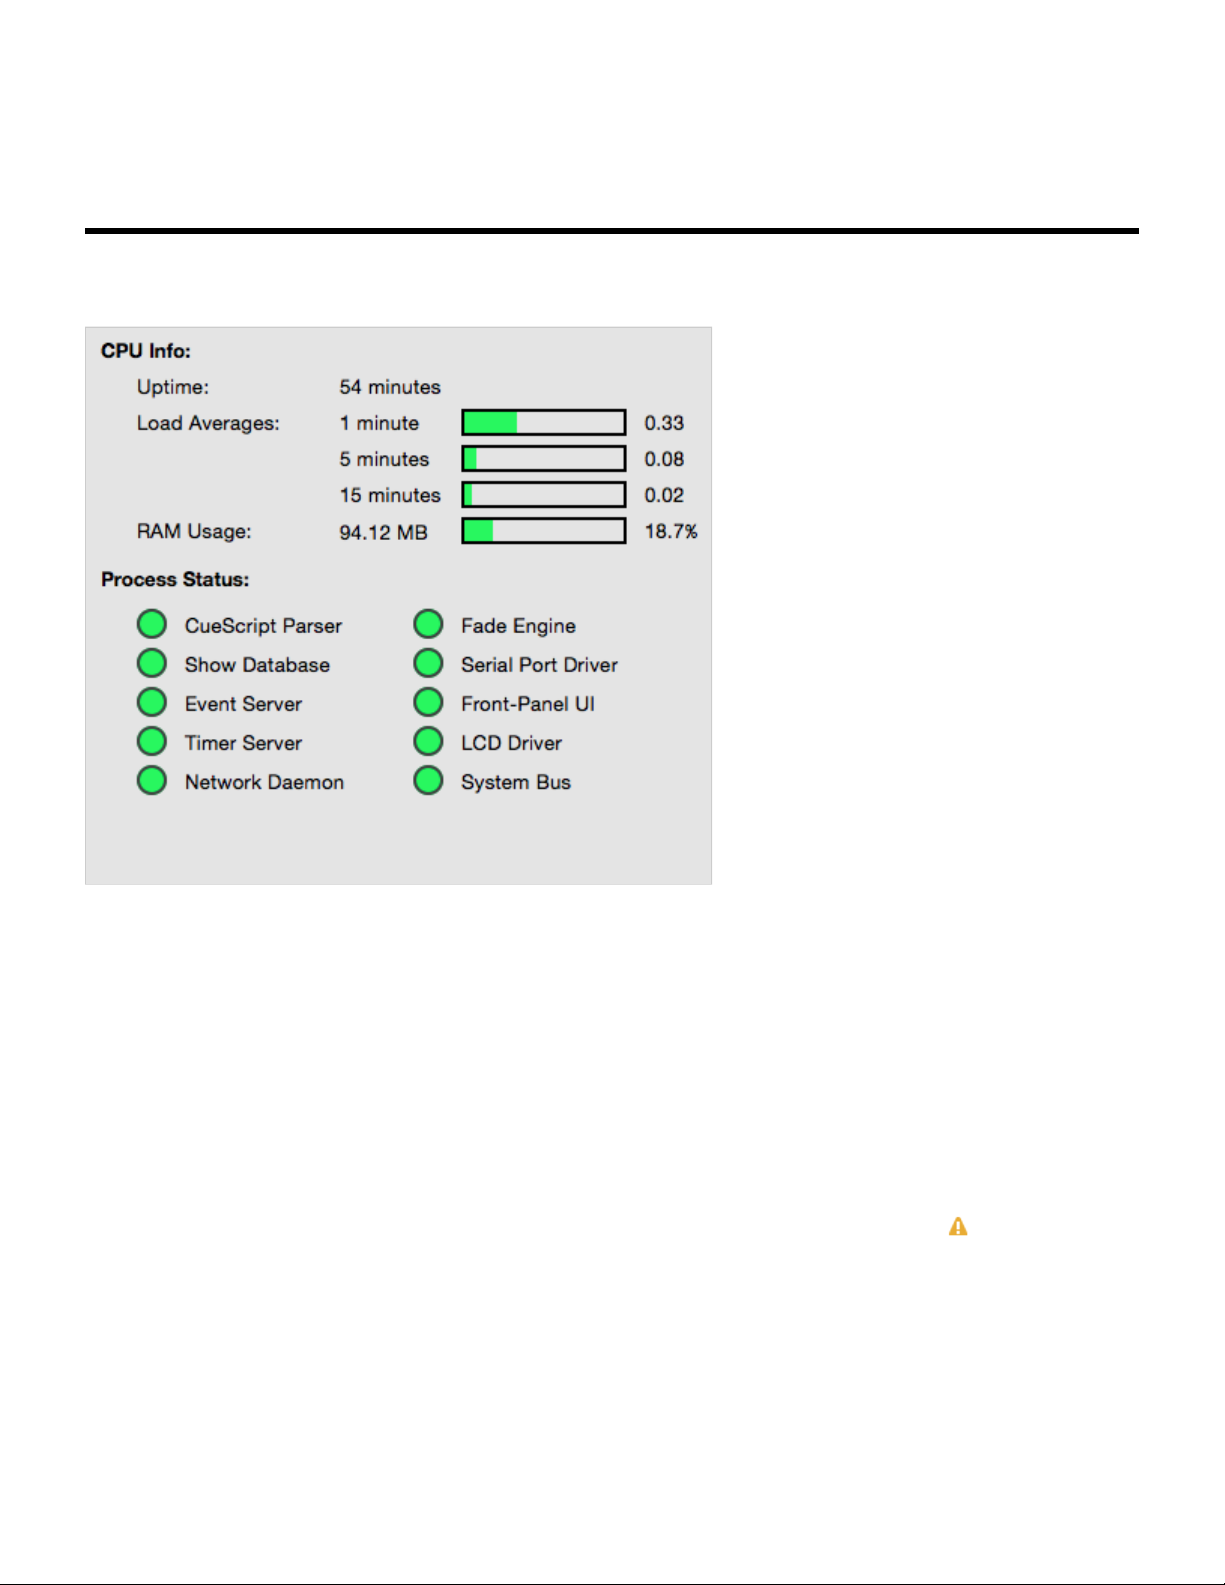
Interactive Technologies, Inc. CueServer 2 User's Manual - 18.5.18
CPU Info
The CPU Info View shows the status of the CueServer hardware.
The following information is displayed:
• Uptime – shows the number of days, hours, and minutes since the CueServer was powered-on.
• Load Averages – shows the CPU load, averaged over the last 1, 5 and 15 minutes.
• RAM Usage – shows how much system RAM is being used. Note that this is not the memory on the
SD Card.
• Process Status – shows the running state of each of CueServer’s internal processes. Green means
that the service is running, Red means that an error has occurred.
Note that if any of the processes in the CPU Info view require attention, a warning icon ( ) will appear
next to the CPU Info line in the status list.
Page 46 of 429
Page 49

Interactive Technologies, Inc. CueServer 2 User's Manual - 18.5.18
System Log
The System Log shows internal system messages posted by CueServer’s operating system and related
software.
Most messages in the System Log are only useful for diagnosing problems, however other informational
messages can appear in the System Log as well.
For instance, the System Log shows each time the system is rebooted.
Also, user-defined messages can be added to the System Log by using the Log CueScript command.
When a message is added to the System Log that indicates a serious condition, the Power LED will begin to
blink. This is called the “Message Indicator”. It means that the System Log contains an important message.
To clear this indication, click on the “Clear Message Indicator” button.
If a new important message is currently showing, a warning icon ( ) will appear next to the System Log
line in the status list.
Page 47 of 429
Page 50

Interactive Technologies, Inc. CueServer 2 User's Manual - 18.5.18
Resources
The Resources section of the navigator contains views that edit Cues, Groups, Macros, Sounds and Web
Pages in the CueServer project.
The following sections describe these views in more detail:
• Cues – scenes and timeline based streams
• Groups – definitions of groups of channels
• Macros – user-defined scripts
• Sounds – audio clips
• Web Pages – custom web pages for the project
Page 48 of 429
Page 51

Interactive Technologies, Inc. CueServer 2 User's Manual - 18.5.18
Cues
Overview
The Cues editor shows the Cue List, and allows for the creation, capture, modification and removal of cues
from the project.
Page 49 of 429
Page 52

Interactive Technologies, Inc. CueServer 2 User's Manual - 18.5.18
The Cues Editor is divided into several sections. The top panel shows the list of Cues. Click on a cue to
have it appear in the lower panel. Once selected, a Cue’s properties, rules, and contents can be viewed or
modified.
For details about different aspects of creating and modifying cues, see the following topics:
• Cue Types – discusses the differences between normal and streaming cues.
• Adding Cues – to learn how to add cues to a project.
• Cue Properties – for a description of the various properties of a cue.
• Cue Contents – to see how the contents of a cue are displayed.
• Cue Rules – for how to add automation rules to a cue.
Page 50 of 429
Page 53

Interactive Technologies, Inc. CueServer 2 User's Manual - 18.5.18
Cue Types
There are two cue types available to CueServer.
Normal Cues
A “normal” cue is similar to the type of cue used on traditional lighting consoles. A cue of this type stores a
single scene (or part of a scene).
In CueServer, a normal cue stores an array of DMX channel values, which will be recalled when the cue is
executed. The cue may contain all, some, or none of the available DMX channels in the system. Normal
cues have extra parameters such as fade and follow times, an optional linked cue, and automation rules.
Generally speaking, when playing back (executing) normal cues, the output of the CueServer will crossfade
to a new scene. Again, a normal cue may only include some of the DMX channels, so only part of a scene
may be affected by playing back a normal cue.
Streaming Cues
A “streaming” cue is a different type of cue that stores DMX channels and their changes over a period of
time.
An analogy can be made between a streaming cue in CueServer, and a “tape recorder” for audio. When a
streaming cue is captured in CueServer, every change to a DMX channel during the capture is saved. Then,
when the streaming cue is played back, the changes occur in real-time just the same way that it was
recorded.
Streaming cues have extra parameters such as playback mode, follow time, an optional linked cue, and
automation rules.
Page 51 of 429
Page 54

Interactive Technologies, Inc. CueServer 2 User's Manual - 18.5.18
Adding Cues
To add a new cue to the cue list, click the plus button ( ) at the lower-left corner of the cue list. Or,
choose the New Cue… item from the File menu.
A new empty cue will appear in the window:
CueServer Studio will automatically create the cue with the next available cue number already chosen. This
number can be changed before saving the cue to use a different cue number.
The cue’s name, fade and follow times, link and rules can all be set by clicking into these fields.
The newly created cue does not have any channels recorded into it. To add content to this cue, click on the
Capture button ( ). See the Cue Contents section for information about how to capture
scenes and/or streams into cues.
Page 52 of 429
Page 55
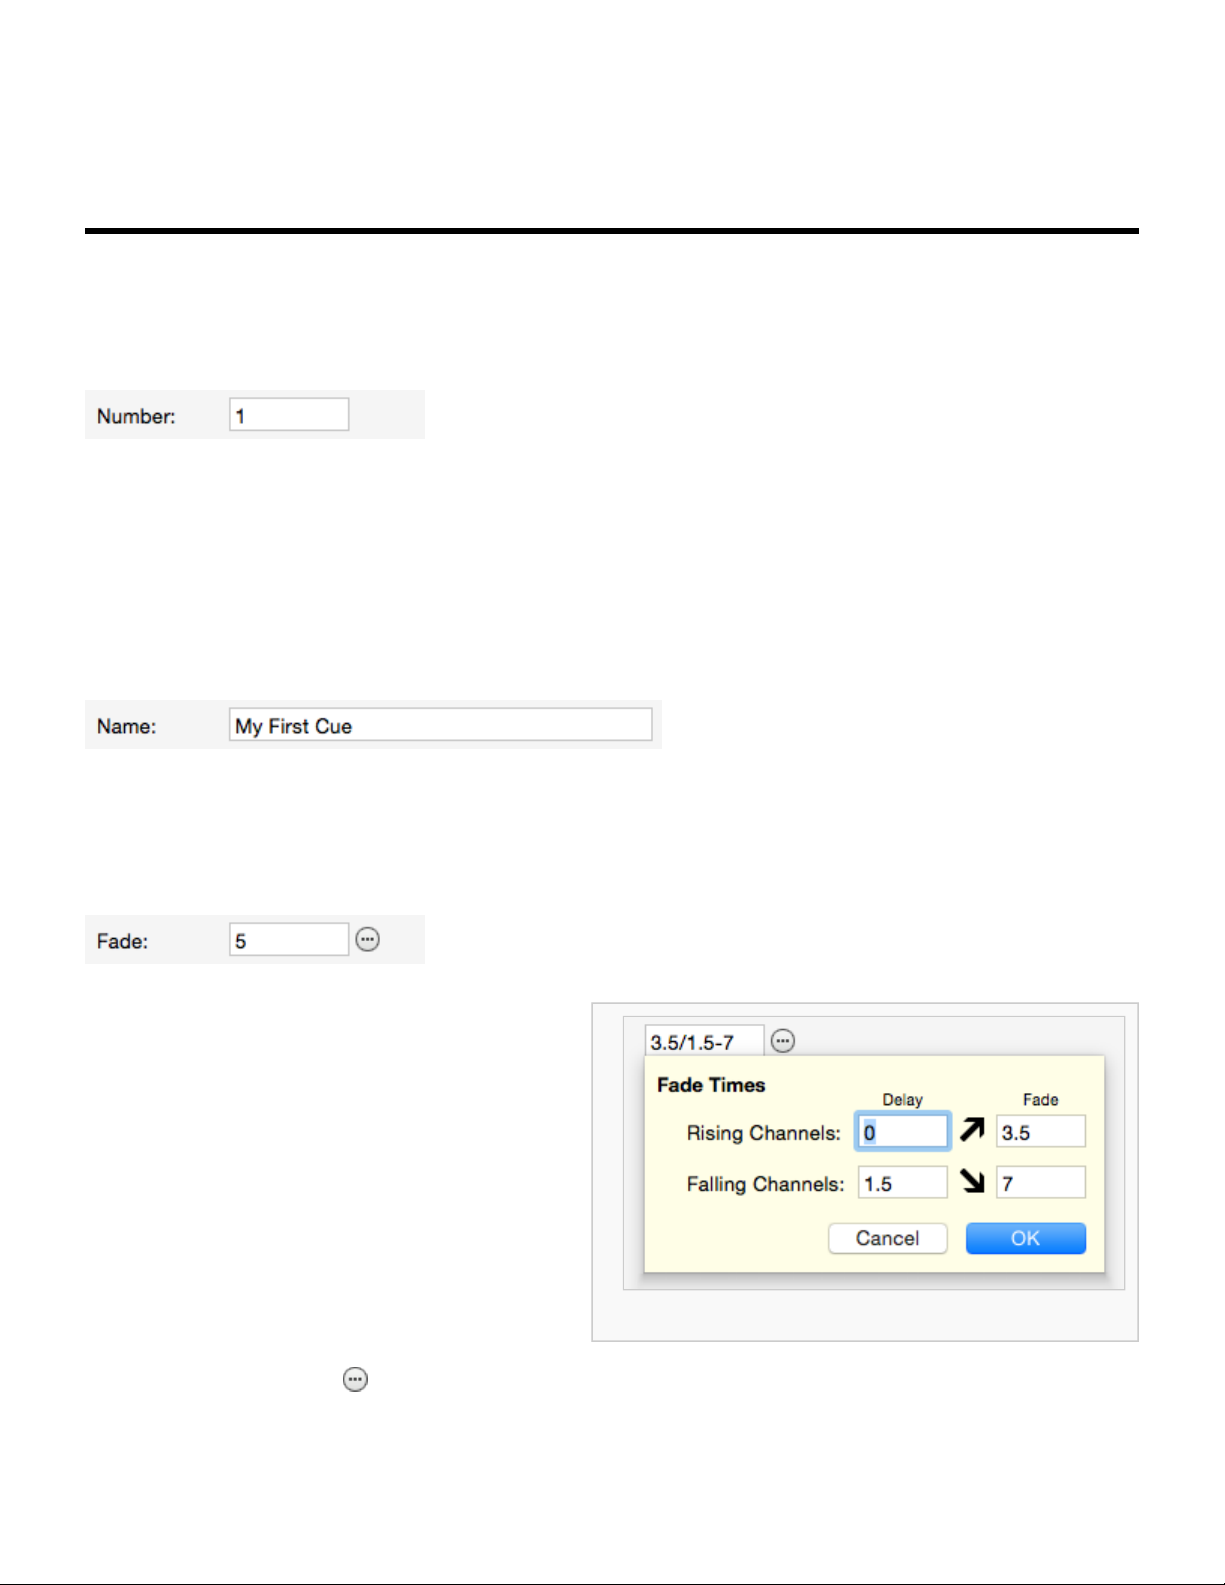
Interactive Technologies, Inc. CueServer 2 User's Manual - 18.5.18
Cue Properties
Each cue has a number of properties that may be edited:
Number
By convention, every cue in a cue list has a number. Valid cue numbers range from 0 through 999999.
Optionally, up to two digits can be used after a decimal point (for example, Cue 1.23).
Once a cue is recorded, it’s number can be changed by entering a new number into this field.
Name
A cue may be given a descriptive name.
Fade (normal cues only)
A normal cue has a fade time (expressed in
seconds) that is used to specify how quickly the
cue’s channels will crossfade from their
previous values to the ones recorded in the
cue. Fade times from 0 (no fade) to 86400
seconds (24 hours) may be specified.
Fade times can be split into separate times for
channels fading up and channels fading down, and
delays can be introduced to the up-fading and
down-fading channels.
Fade details window.
Click on the More button ( ) next to the fade field to display a window to enter advanced fade time
parameters.
Page 53 of 429
Page 56

Interactive Technologies, Inc. CueServer 2 User's Manual - 18.5.18
Mode (streaming cues only)
A streaming cue can be set to play back with one of four modes:
• None – When the stream finishes, playback stops and the last channel values remain active.
• Loop – When the stream reaches its last frame, it will seamlessly loop back to its beginning.
• Follow – When the stream finishes, the next cue automatically follows.
• Release – When the stream finishes, channels in the stream are released.
Follow
Cues have an auto follow timer that begins when the cue is executed, as specified by this field (in seconds).
When the timer expires, the playback fader automatically executes a Go to advance to the next cue in the
cue list (or whatever cue the current cue is linked to).
This field can be left blank to allow cues to advance in regular numerical order.
Page 54 of 429
Page 57

Interactive Technologies, Inc. CueServer 2 User's Manual - 18.5.18
Cue Contents
Each cue may contain DMX channels, or streaming data, or may be empty.
The contents of the cue is displayed in the Contents section of the Cue Editor panel.
One of three types of content will be displayed:
Normal DMX Channels
Normal cues contain a single snapshot of DMX channels. The cue might have been recorded with all DMX
channels in it, or only a subset of available channels (selected channels).
When a cue with DMX channels is executed, those channel values will appear in the active playback fader.
If the cue has a fade time of zero (no fade time), the channel values will appear immediately. If the cue has
a fade time, then the channels will crossfade from their previous values to the ones in the cue.
To capture a DMX snapshot, see the section Capturing DMX Snapshots.
Streaming Cue Data
A streaming cue contains a recording of DMX data over a period of time.
Page 55 of 429
Page 58
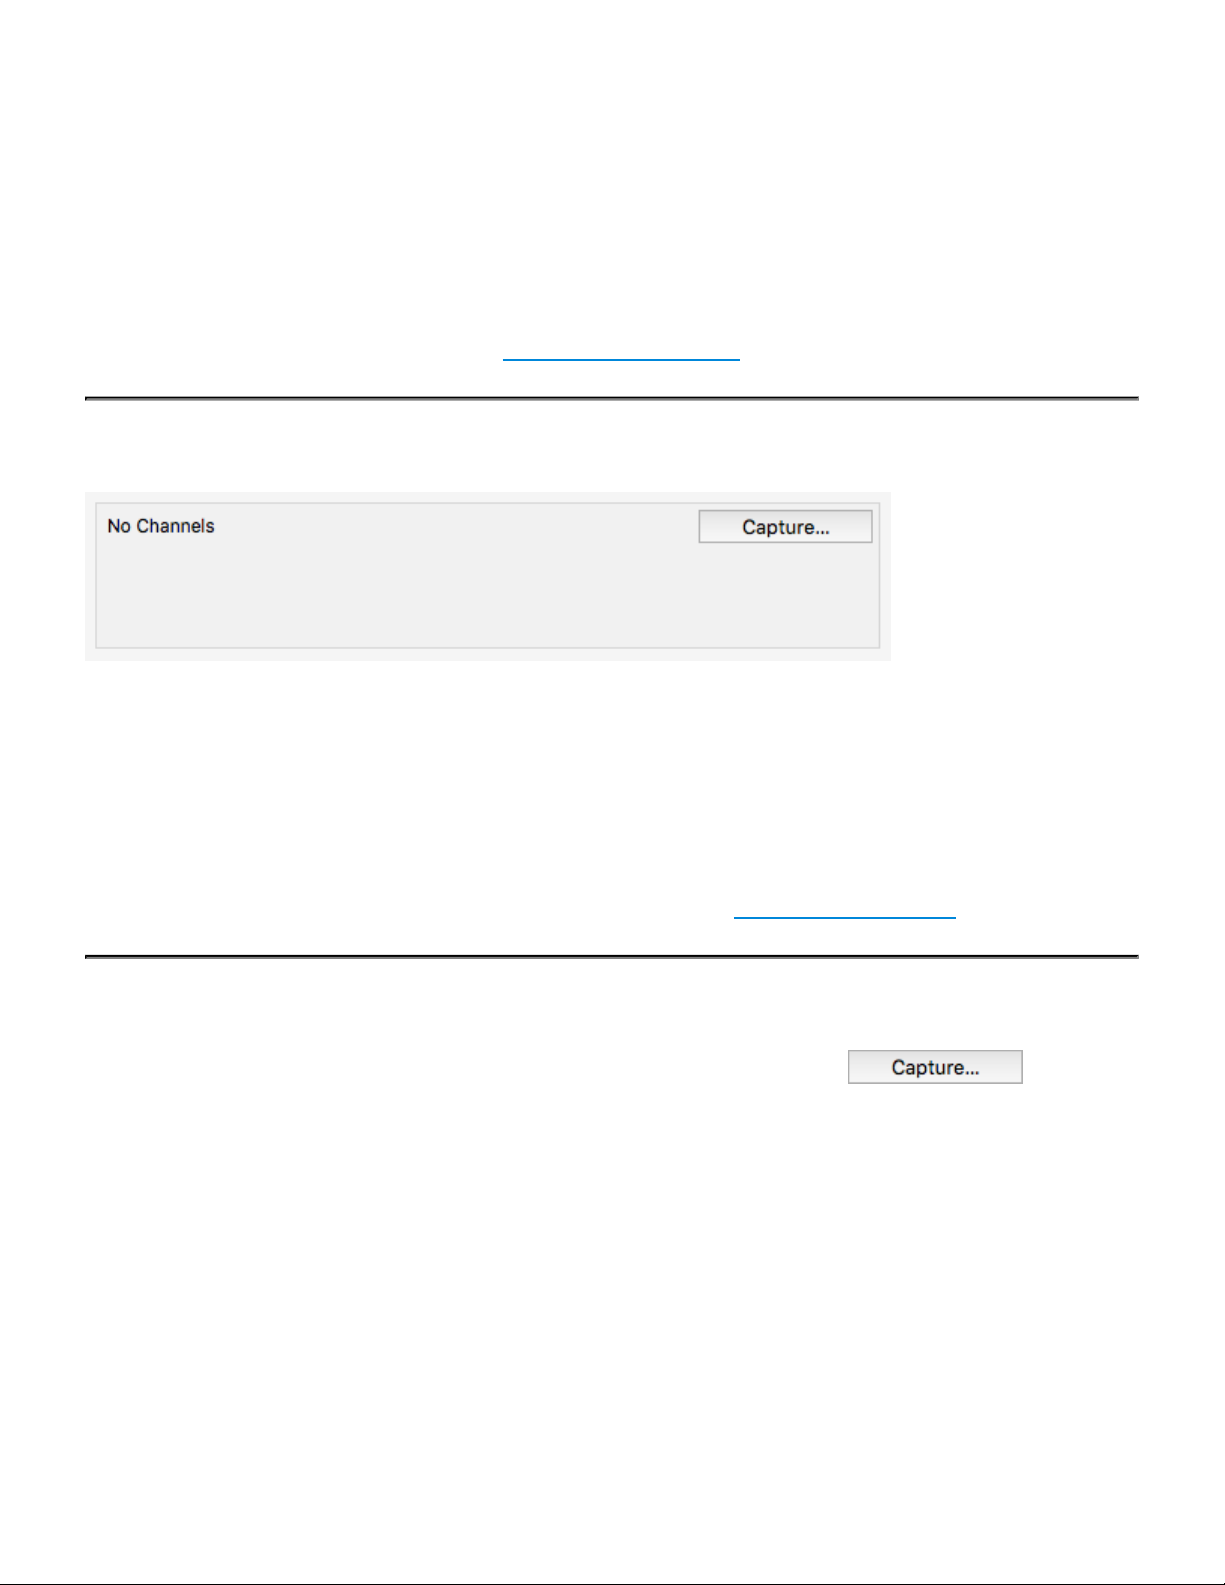
Interactive Technologies, Inc. CueServer 2 User's Manual - 18.5.18
When a cue with streaming DMX data is executed, the recorded channel data plays back over time
matching the changes that were occurring when it was recorded.
Recording and playing back streaming cues is similar to using a tape recorder to store and then play back
an audio recording. Streaming cues do a similar thing with DMX lighting data.
To capture a DMX stream, see the section Capturing DMX Streams.
Empty Cues
A cue can be recorded with no DMX channels. This type of cue does not directly affect any DMX channels
when it is executed.
An empty cue will still observe it’s follow timing and it will also evaluate any rules in the cue, but it will not
change any DMX channel values.
To clear a cue’s contents (creating an empty cue), see the section Clearing Cue Contents.
Capturing Content into a Cue
To record, change or clear the contents of a cue, click on the Capture button ( ).
Page 56 of 429
Page 59
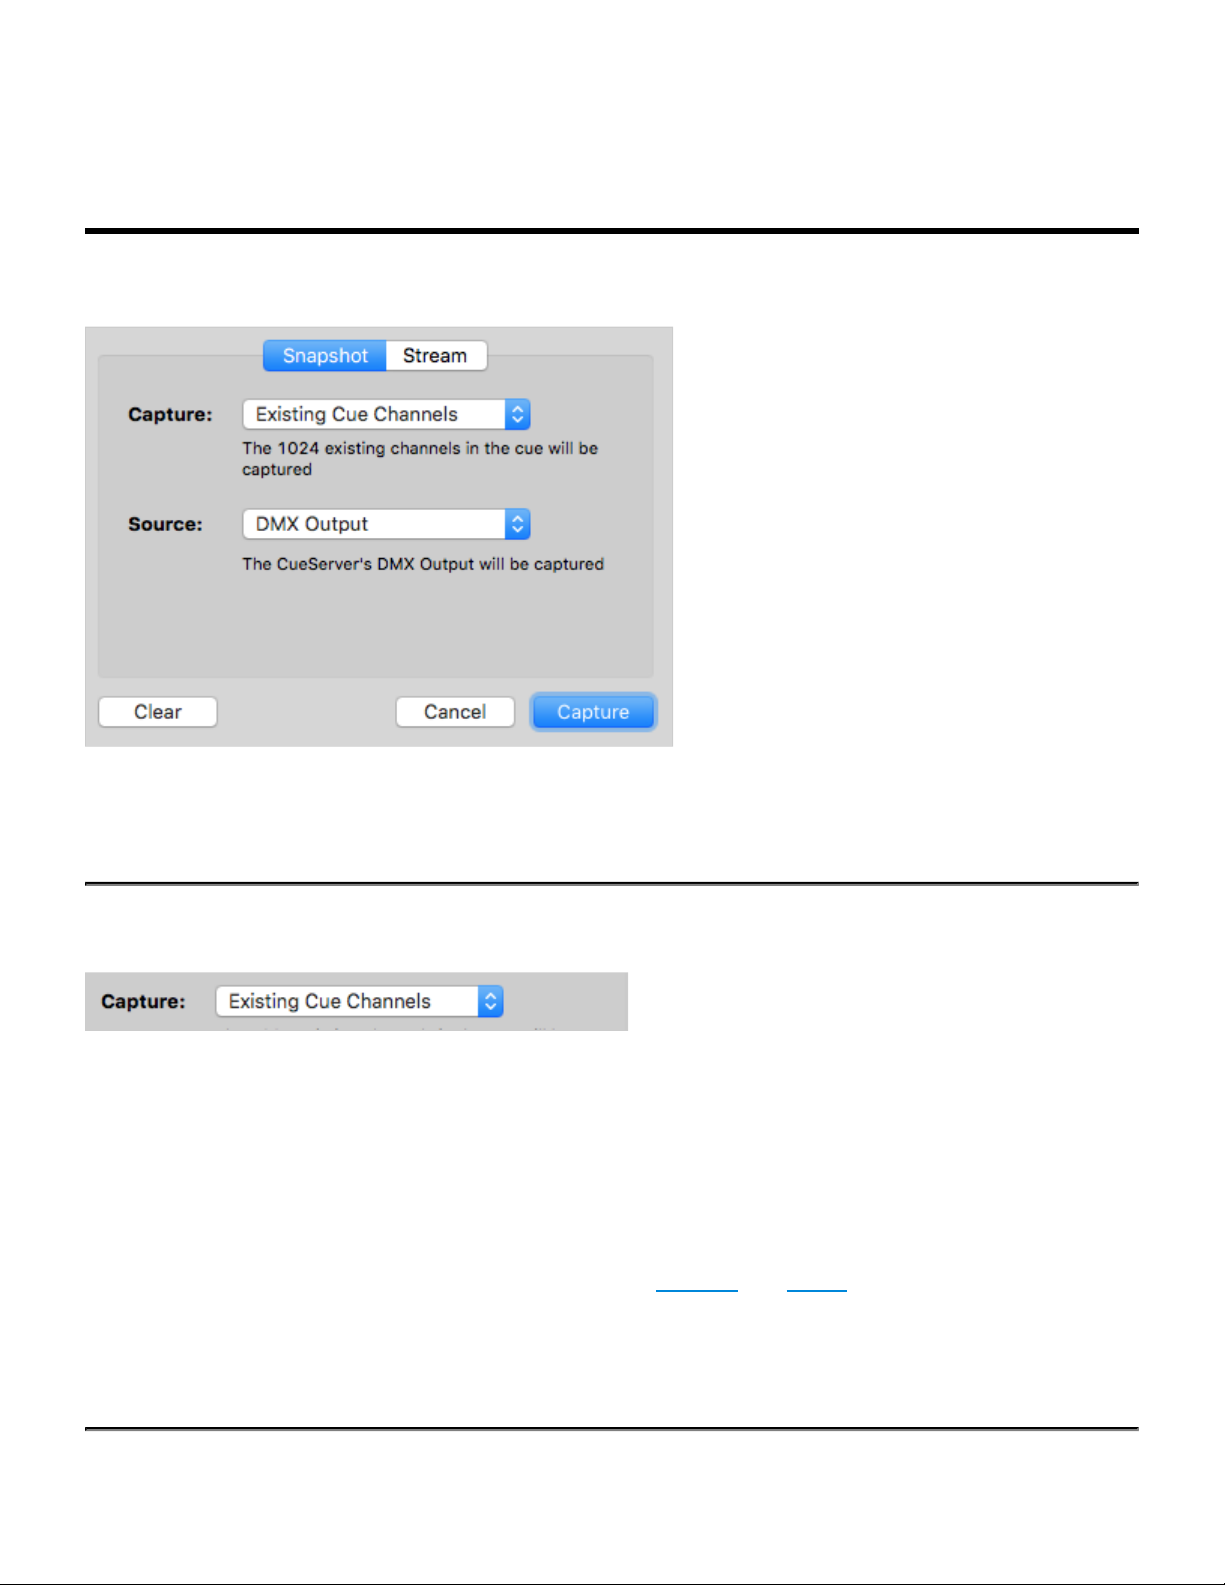
Interactive Technologies, Inc. CueServer 2 User's Manual - 18.5.18
Capturing DMX Snapshots
The Snapshot tab of the Capture window is used to capture a single snapshot of DMX channels into a cue:
This window has pop-up menus for choosing what DMX channels will be captured into the cue and from
what source the channels will be captured.
Capture Menu
This menu has several options to specify which channels will be recorded into the cue:
• All Channels – Every channel in the system will be recorded. If the CueServer is configured with two
universes of DMX then 1,024 channels will be captured.
• Active Channels – Only channels that have non-zero values will be recorded into the cue.
• Selected Channels – Only the currently selected channels will be recorded into the cue. The selected
channels are the ones previously selected using the Channel and Group commands.
• Existing Cue Channels – Only the channels that are currently recorded in the cue will be re-
recorded. If the cue previously contained channels 101 through 199, then those channels are the only
ones that will be re-recorded.
Page 57 of 429
Page 60

Interactive Technologies, Inc. CueServer 2 User's Manual - 18.5.18
Source Menu
This menu has several options to specify the source of the DMX channel values that will be recorded into
the cue:
• DMX Input – The DMX channel values being input into the CueServer will be recorded. None of the
values in the playbacks or being output will be recorded.
• Playback n – The DMX channel values in Playback n will be recorded. Neither the DMX input or
output will be recorded.
• DMX Output – The DMX channel values being output from the CueServer will be recorded. This is the
default option.
Capturing Channel Values
Once the appropriate options have been selected, click on the Capture button to record the current DMX
values into the cue. The Capture window will close and the cue will be updated to show the newly captured
channels.
Page 58 of 429
Page 61

Interactive Technologies, Inc. CueServer 2 User's Manual - 18.5.18
Capturing DMX Streams
The Stream tab of the Capture window is used to capture a stream of changing DMX channel values into
the cue.
This window has controls for starting/stopping the stream recording and additional advanced options for
controlling the length or external triggering of the stream recording.
Recording Controls
At the top of the window, there is a time display readout and a Record button.
The time display shows the current duration of stream recording that is in the cue. For new cues, this will
show 00:00:00.00. For cues with existing streaming data, the cue’s current duration will appear in this
display.
Page 59 of 429
Page 62

Interactive Technologies, Inc. CueServer 2 User's Manual - 18.5.18
To start recording, press the Record button. The button will change to Stop and the time display will begin
counting. Recording of DMX channel values will continue until the Stop button is pressed.
Record Length Option
This field can be used to limit the length of the recording to a specific number of seconds. Any number of
seconds may be entered down to 1/100th second precision.
When a Record Length has been specified, the stream recording will automatically stop after the length has
been reached.
If this field is empty, recording will continue until the Stop button is pressed.
Trigger Channel Option
This field can be used to specify a channel number that the CueServer should watch to automatically start
and stop the stream recording. When the input channel rises above zero, the recording will start. Then,
when the input channel falls back to zero, the recording will stop.
The typical use for this feature is to allow the external console that is sending DMX data to be able to start
and stop the CueServer’s recording by raising and lowering this “trigger channel”. Any channel can be
chosen, but it is typical to use a channel that is not being used by a dimmer or fixture.
When a trigger channel is specified, press the Record button to begin waiting for the trigger channel to rise
above zero. As long as the trigger channel is being received as zero, the time display will wait to start
recording:
Page 60 of 429
Page 63

Interactive Technologies, Inc. CueServer 2 User's Manual - 18.5.18
As soon as the external console raises the trigger channel above zero, the recording will begin
automatically. Then, when the trigger channel falls back to zero, recording will stop.
CueServer very precisely monitors the value of the trigger channel and will begin recording a stream on the
very first DMX frame that has a non-zero trigger channel value. The recording continues until the trigger
*
channel becomes zero again. The last frame recorded is the frame received just before a frame arrives with
a zero value trigger channel.
Page 61 of 429
Page 64

Interactive Technologies, Inc. CueServer 2 User's Manual - 18.5.18
Clearing Cue Contents
Sometimes it may be desirable to create a cue that does not have any DMX channel values recorded in it.
This is called an empty cue. An empty cue can be useful to provide additional timing steps in a list of cues,
or that may have automation rules without affecting DMX channels, etc.
A cue with channel values can be cleared by clicking on the Capture button, and then clicking on Clear in
the lower left corner of the capture window.
After Clear is clicked, the capture window will close and the cue will show that it no longer contains any
channel values:
Page 62 of 429
Page 65

Interactive Technologies, Inc. CueServer 2 User's Manual - 18.5.18
Cue Rules
Rules can be added to a cue to allow it to automate certain tasks when it is executed.
The rules for a cue might look like this:
To add a rule to a cue, click on the “plus” button ( ).
Then, click on the various “bubble” buttons ( ) in the rule to build an event, conditions and action
that the rule will execute.
For more information about building rules, see the Rules topic.
Page 63 of 429
Page 66

Interactive Technologies, Inc. CueServer 2 User's Manual - 18.5.18
Deleting Cues
To remove a cue from the cue list, click the minus button ( ) at the lower-left corner of the cue list.
A confirmation dialog will appear:
After confirmation of the delete operation, the cue will be removed from the cue list.
You can also use the Delete or Backspace keys on your keyboard. To avoid the confirmation dialog, you
can hold the Option or Alt key.
*
Page 64 of 429
Page 67

Interactive Technologies, Inc. CueServer 2 User's Manual - 18.5.18
Hardware
Overview
This chapter describes the models of CueServer 2 available along with the various physical features,
differences between models, specifications and explanation of indicators and displays.
For a description of the available models of CueServer 2, see these sections:
• Models
◦ CS-900 CueServer 2 Pro
◦ CS-940 CueServer 2 DIN
For explanations and specifications for the physical features of CueServer 2, see these sections:
• Power Input
• Ethernet Ports
• DMX Ports
• Audio Ports
• USB Ports
• LCD Display
• Function Buttons
• Contact Closures
• Digital Outputs
• Serial Ports
• Memory Card
• Reset Button
Page 65 of 429
Page 68

Interactive Technologies, Inc. CueServer 2 User's Manual - 18.5.18
Models
There are currently two CueServer 2 models available:
CS-900 CueServer 2 Pro
The CueServer 2 Pro is housed in an enclosure with removable brackets suitable for either 19” rack-
mounting or desktop use. It features dual LAN ports, four field-replaceable DMX module slots and
customizable front-panel button caps. See the CS-900 CueServer 2 Pro section for more details for this
model.
Page 66 of 429
Page 69

Interactive Technologies, Inc. CueServer 2 User's Manual - 18.5.18
CS-940 CueServer 2 DIN
The CueServer 2 DIN is housed in an enclosure with replaceable side brackets suitable for DIN-Rail or
surface mounting. It features a single LAN port, two DMX input ports and two DMX output ports. See the
CS-940 CueServer 2 DIN section for more details for this model.
Page 67 of 429
Page 70

Interactive Technologies, Inc. CueServer 2 User's Manual - 18.5.18
CS-900 CueServer 2 Pro
The CueServer 2 Pro (CS-900) is housed in a
sturdy 1U rack‑mount enclosure with removable
brackets.
CueServer 2 Pro features dual LAN ports for
splitting Ethernet-based lighting and management
data onto separate networks if desired.
CueServer 2 Pro boasts an innovative modular DMX port system. Four bi-directional DMX ports on the back
of the unit are user-configurable with any of seven available port modules. These interchangeable modules
allow CueServer 2 Pro to be customized for different installation environments eliminating the need for
external adaptors.
The front-panel of CueServer 2 Pro has eight customizable function buttons. Each button has fully
controllable RGB backlighting and field-replaceable legends for project personalization. A navigation keypad
is used to operate the onboard LCD menu for basic system settings, show selection, and macro execution.
Features
• Completely self-contained lighting playback, architectural processor, and DMX fade engine
• Seamless handling of Cue Lists, Presets, and Streams
• Control of up to 32 universes of DMX or 32 independent playback timelines
• Dynamic patching of up to 16,384 channels to 128 separate sACN, Art-Net, or KiNET universes
• Dual Ethernet ports for separate con gurable lighting data and management networks
• Flexible module-based bi-directional DMX ports for custom jack con gurations
• Front-panel con gurable function buttons with RGB backlighting and eld- replaceable legends
• Creation of lighting scenes directly or capture from external sources
• Powerful CueScript scripting language
• Real-Time clock with astronomical and calendar events
• Built-in web server for hosting custom interactive web pages
• Multi-show storage on removable microSD memory card
• System integration via Ethernet, Serial, Digital I/O, and Audio
• Compatible with CueStation buttons and CueTouch touchscreens
• Easy interfacing with Crestron, AMX, Vantage, Control 4, Medialon, Savant and other automation
systems
Page 68 of 429
Page 71

Interactive Technologies, Inc. CueServer 2 User's Manual - 18.5.18
• Native programming environment for both Mac and Windows
• 1U rack-mounted enclosure with removable brackets
Page 69 of 429
Page 72

Interactive Technologies, Inc. CueServer 2 User's Manual - 18.5.18
CS-920 CueServer 2 Mini
The CueSevrer 2 Mini (CS-920) is the smallest of
the CueServer 2 models and is housed in a rugged
anodized aluminum enclosure suitable for desktop
use or panel, DIN, or truss mounting using optional
bracket kits.
The CueServer 2 Mini can output shows utilizing
up to 16,384 channels and features two built-in
modular DMX slots that are user-con gurable with
any of seven available port modules. These
interchangeable modules allow CueServer 2 Mini
to be customized for different installation
environments eliminating the need for external
adapters.
CueServer 2 Mini also features two user-definable function buttons with RGB indicators, two contact closure
inputs, two low-voltage digital outputs, a serial port, and stereo audio output.
Features
• Completely self-contained lighting playback, architectural processor, and DMX fade engine
• Seamless handling of Cue Lists, Presets, and Streams
• Control of up to 32 universes of DMX or 32 independent playback timelines
• Dynamic patching of up to 16,384 channels to 128 separate sACN, Art-Net, or KiNET universes
• Flexible module-based bi-directional DMX ports for custom jack con gurations
• Front-panel con gurable function buttons with RGB indicator LEDs
• Creation of lighting scenes directly or capture from external sources
• Powerful CueScript scripting language
• Real-Time clock with astronomical and calendar events
• Built-in web server for hosting custom interactive web pages
• Multi-show storage on removable microSD memory card
• System integration via Ethernet, Serial, Digital I/O, and Audio
• Compatible with CueStation buttons and CueTouch touchscreens
• Easy interfacing with Crestron, AMX, Vantage, Control 4, Medialon, Savant and other automation
systems
Page 70 of 429
Page 73

Interactive Technologies, Inc. CueServer 2 User's Manual - 18.5.18
• Native programming environment for both Mac and Windows
• Small anodized aluminum enclosure with optional brackets
Page 71 of 429
Page 74
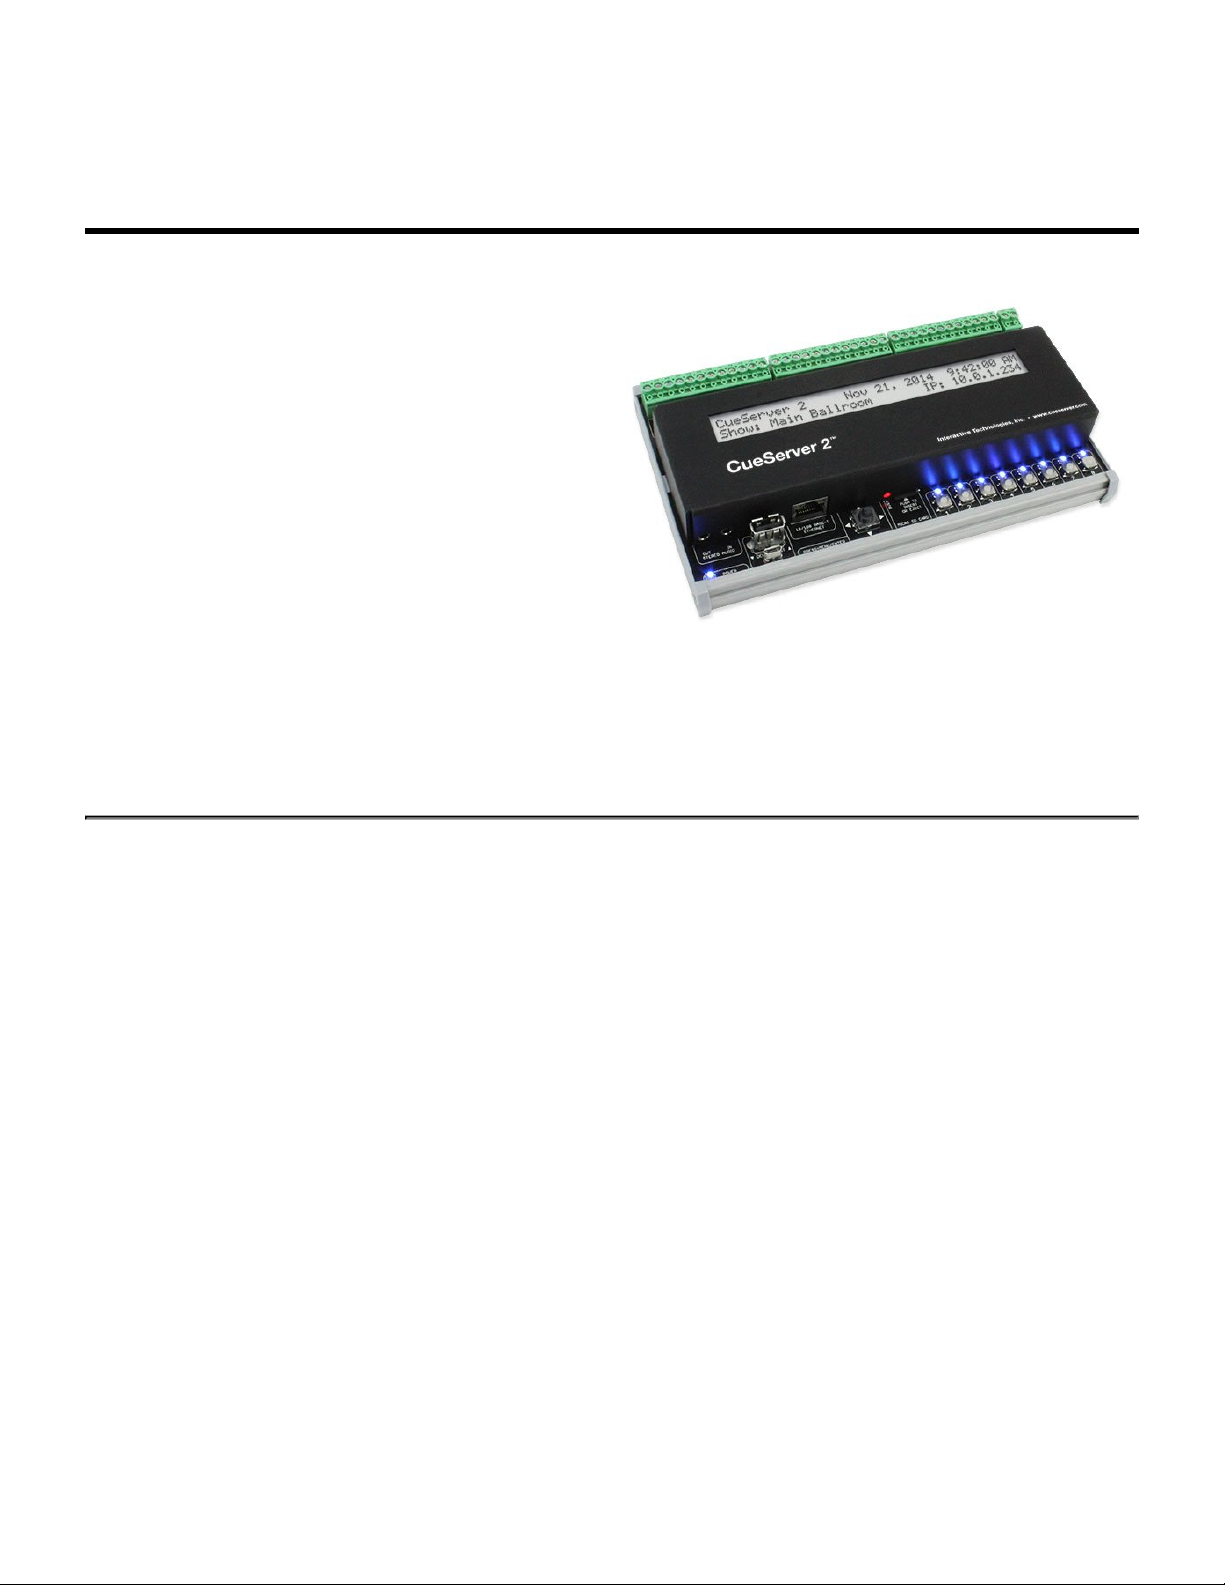
Interactive Technologies, Inc. CueServer 2 User's Manual - 18.5.18
CS-940 CueServer 2 DIN
The CueServer 2 DIN (CS-940) is housed in an
enclosure suitable for DIN rail, surface, or panel
mounting. The DIN rail brackets accomodate
standard 35mm rail. Mounting flanges are included
for surface or panel mounting.
Connections for power, DMX, contact closures,
and digital outputs are made using removable
terminal blocks across the top edge of the unit.
Ethernet, USB, and stereo audio are connected
along the bottom edge.
CueServer 2 DIN’s front panel has eight
customizable function buttons. Each button has a fully controllable
RGB indicator. A navigation joystick is used to operate
the onboard LCD menu for basic system settings, show selection, and macro execution.
Features
• Completely self-contained lighting playback, architectural processor, and DMX fade engine
• Seamless handling of Cue Lists, Presets, and Streams
• Control of up to 32 universes of DMX or 32 independent playback timelines
• Dynamic patching of up to 16,384 channels to 128 separate sACN, Art-Net, or KiNET universes
• Front-panel con gurable function buttons with RGB indicator LEDs
• Creation of lighting scenes directly or capture from external sources
• Powerful CueScript scripting language
• Real-Time clock with astronomical and calendar events
• Built-in web server for hosting custom interactive web pages
• Multi-show storage on removable microSD memory card
• System integration via Ethernet, Serial, Digital I/O, and Audio
• Compatible with CueStation buttons and CueTouch touchscreens
• Easy interfacing with Crestron, AMX, Vantage, Control 4, Medialon, Savant and other automation
systems
• Native programming environment for both Mac and Windows
• Standard DIN-Rail mounting or surface/panel mounting
Page 72 of 429
Page 75
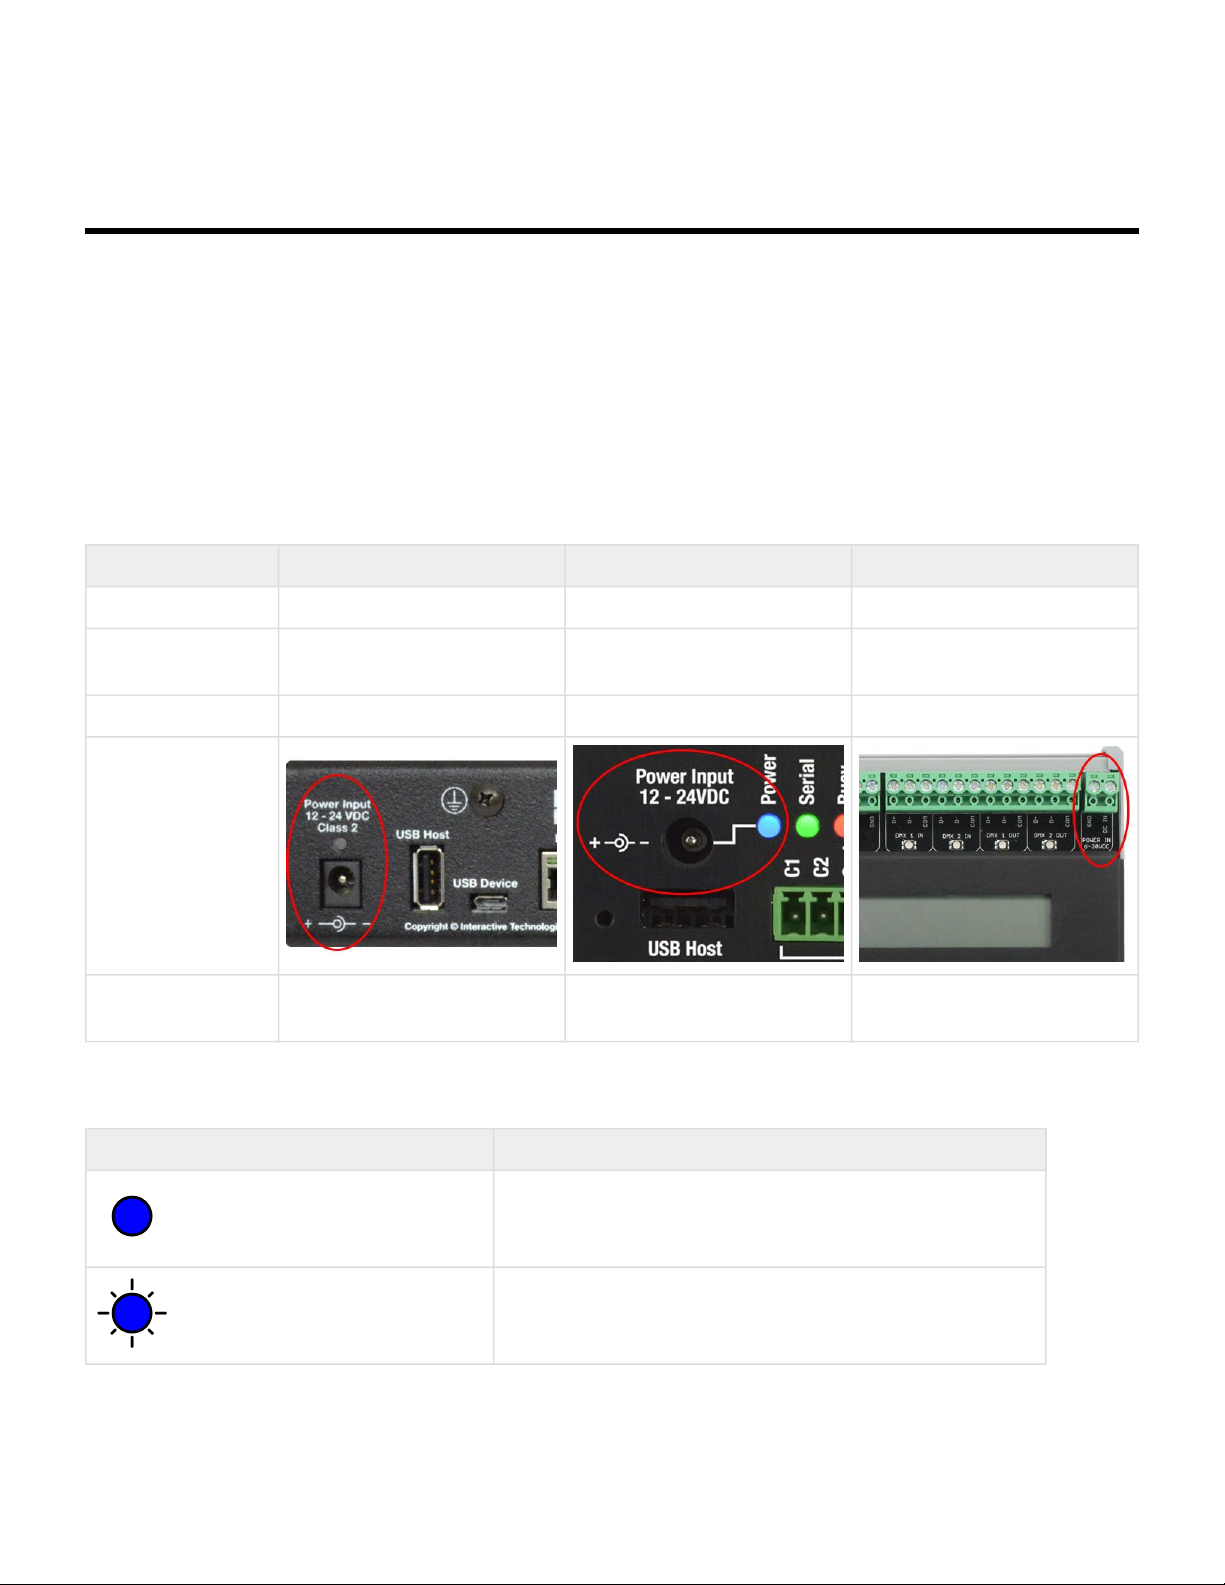
Interactive Technologies, Inc. CueServer 2 User's Manual - 18.5.18
Power Input
All models of CueServer 2 can be powered by a 12 to 24 VDC Class 2 input.
Although the power requirements are similar for the various models, their connectors and current
requirements are different. The rack-mounted CS-900 and the miniature CS-920 both have a standard DC
power input jack. The surface-mounted CS-940 uses screw terminals that are suitable for hardwire
connections to DC power.
Specifications
CS-900 CS-920 CS-940
Power Input 12-24 VDC 12-24 VDC 12-24 VDC
Minimum Power
Supply Wattage
Connector 2.1mm DC Power Jack 2.1mm DC Power Jack Screw Terminals
Pinout
9 Watts 7 Watts 8 Watts
Center = DC Input (V+)
Barrel = Ground
Center = DC Input (V+)
Barrel = Ground
1 = DC Input (V+)
2 = Ground
Indicators
Color & Pattern Description
Power in on, all systems normal
Solid Blue
Slowly Flashing Blue
Device is in the process of starting up
Page 73 of 429
Page 76

Interactive Technologies, Inc. CueServer 2 User's Manual - 18.5.18
Device is in Bootloader Mode (contact Technical Support)
Slowly Flashing Magenta
The System Log has a new message
Slowly Alternating Blue/Magenta
The System Log has an important new message
Quickly Alternating Blue/Magenta
Device has shut down (must power cycle to reboot)
Slowly Flashing Red
Device has no power
Off
Page 74 of 429
Page 77
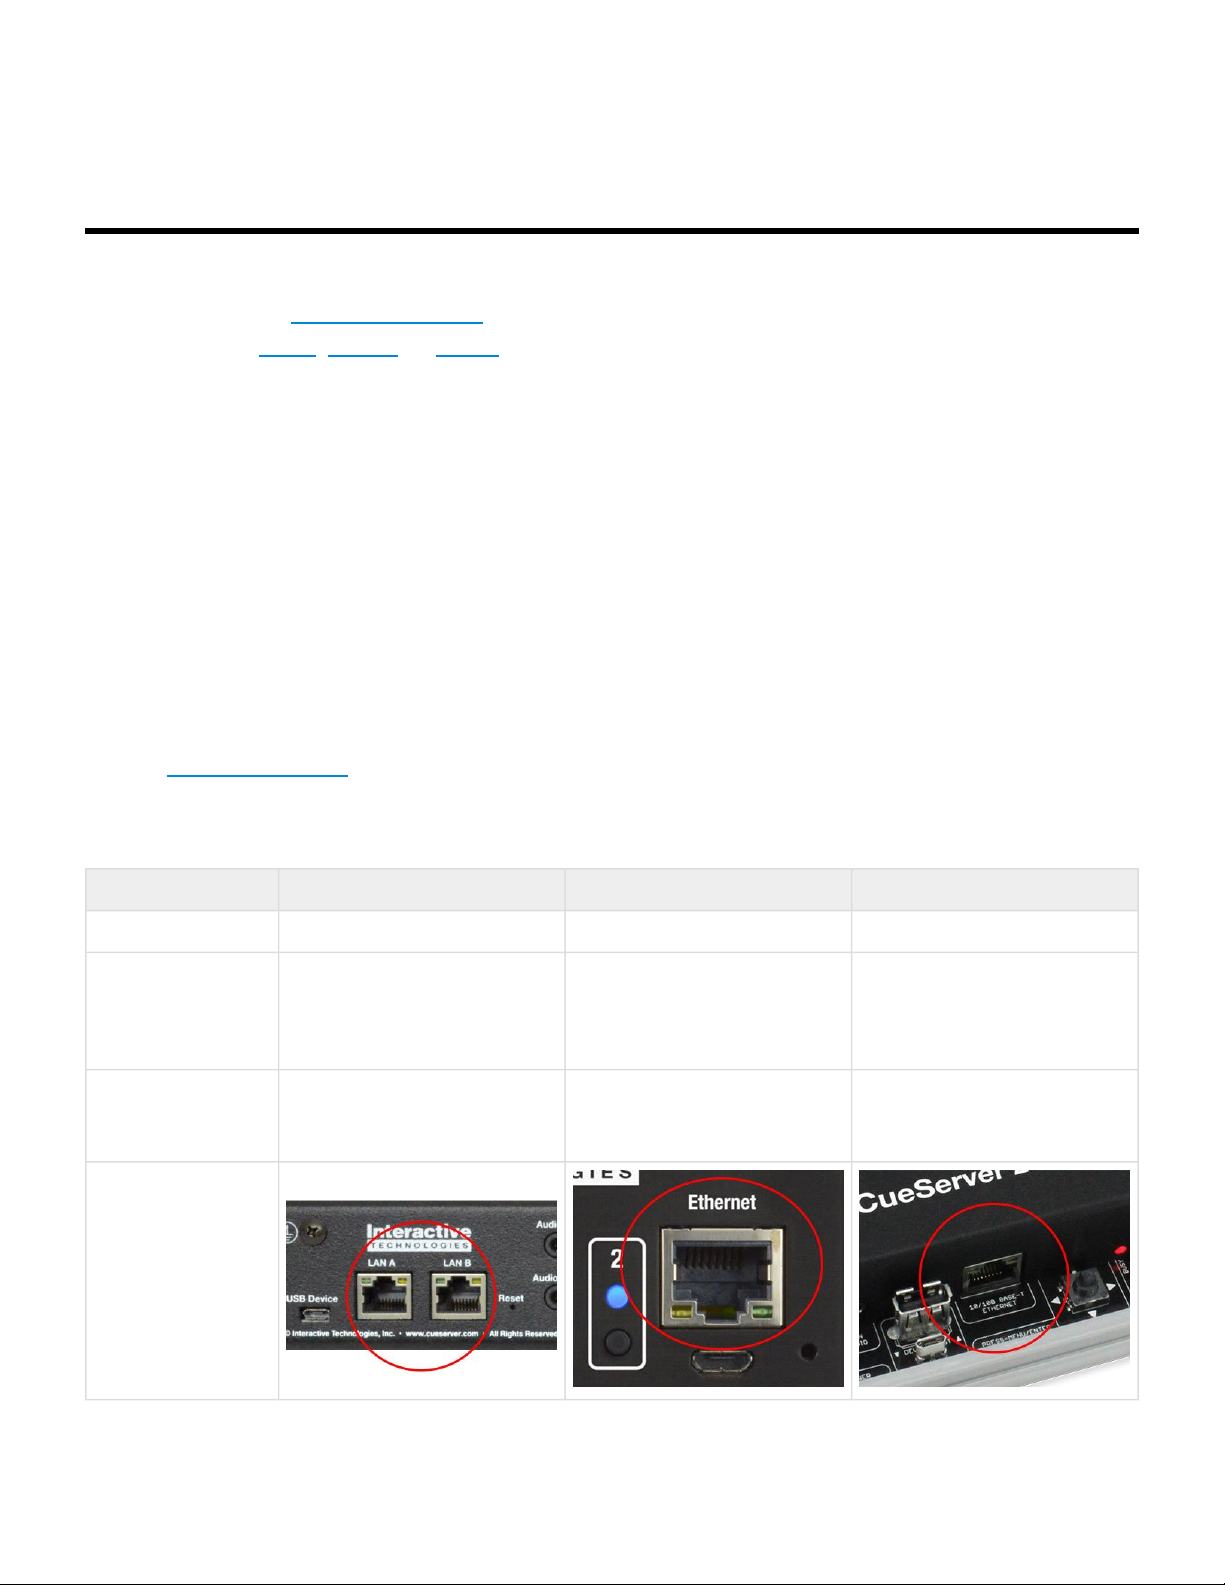
Interactive Technologies, Inc. CueServer 2 User's Manual - 18.5.18
Ethernet Ports
CueServer 2 is an Ethernet-based product. An Ethernet connection to a local network is required to program
CueServer using the CueServer Studio 2 software. Additionally, Ethernet is required if a DMX-over-Ethernet
protocol (such as sACN, Art-Net, or KiNET) is going to be used to input or output DMX over Ethernet, or to
connect to button stations, use the CuePad iOS application or to remotely manage the device. Only if the
CueServer has already been programmed and no Ethernet protocols are needed to run the show can the
CueServer be used without a network connection.
The rack-mounted CS-900 has two Ethernet ports, the miniature CS-920 and surface-mounted CS-940 only
have a single Ethernet port.
Units with two Ethernet ports can be configured in one of two modes. The first mode is to provide only a
single network on both ports using a built-in Ethernet Switch. The second mode is to separate the two ports
into different LANs, with management data on LAN A and lighting data on LAN B. In this second mode, each
port will have separate IP addresses.
See the Ethernet Protocols section for a description of the protocols supported by CueServer.
Specifications
CS-900 CS-920 CS-940
Ethernet Ports 2 1 1
Single Network with Built-In
Network Mode(s)
Factory Default
Settings
Switch
or
Two Separate LANs
Single Network
DHCP Enabled
Fallback IP 10.0.1.234
Single Network Single Network
DHCP Enabled
Fallback IP 10.0.1.234
DHCP Enabled
Fallback IP 10.0.1.234
Page 75 of 429
Page 78

Interactive Technologies, Inc. CueServer 2 User's Manual - 18.5.18
Indicators
Left LED Description
No Link, bad cable, or no connection on opposite end
Off
Ethernet link is established
Solid Green
Right LED Description
No Link, bad cable, or no connection on opposite end
Off
No data activity
Solid Amber
Flashing Amber
Data activity
Page 76 of 429
Page 79

Interactive Technologies, Inc. CueServer 2 User's Manual - 18.5.18
Ethernet Protocols
CueServer 2 supports several Ethernet Protocols for the transmission and reception of DMX lighting control
data, remote control of the CueServer, synchronization of network time, web services and more.
See the following sections for additional information about each Ethernet Protocol as implemented by
CueServer:
• sACN (Streaming ACN) Protocol
• Art-Net Protocol
• KiNET Protocol
• CueScript Protocol
• CueStation Protocol
• HTTP Protocol
• DHCP Protocol
• NTP Protocol
Page 77 of 429
Page 80

Interactive Technologies, Inc. CueServer 2 User's Manual - 18.5.18
sACN (Streaming ACN) Protocol
sACN (or Streaming ACN) is a preferred method of sending and receiving DMX-over-Ethernet to and/or from
a CueServer.
The following table lists the general specifications for the CueServer implementation of sACN:
• Compliant with ANSI Standard E1.31-2009 (sACN)
• May send and/or receive up to 128 universes of sACN simultaneously
• May send and/or receive sACN packets with an arbitrary universe number between 1 and 63999
• sACN is sent at a maximum rate of 40Hz for each universe when channel values are changing
• sACN is sent at a minimum rate of 1Hz for each universe when channel values are static
• Supports the sending of user-defined priority levels for each universe
• Received sACN is merged with hardwired DMX designated for the same universe
• Ignores incoming data marked as Preview Data
• Performs immediate stream termination when a Stream Terminated packet is received
• Maintains proper sequence number transmission separately for each output universe
• Sends the universe’s name as the sACN source name for each universe
• Ignores packets with start code 0xDD (used for slot-by-slot priority)
• Each universe times out after 2.5 seconds when no packets for that universe are not received
• CueServer does not receive its own sACN output
For more information about sACN, please visit the ESTA Technical Standards Program at tsp.esta.org.
Page 78 of 429
Page 81

Interactive Technologies, Inc. CueServer 2 User's Manual - 18.5.18
Art-Net Protocol
Art-Net is a method of sending and receiving DMX-over-Ethernet to and/or from a CueServer.
Art-Net is owned and copyright by Artistic Licence Holdings Ltd. Artistic Licence has published the
specification and made it available for anyone to use on a royalty-free basis.
The following table lists the general specifications for the CueServer implementation of Art-Net:
• Compliant with the Art-Net 3 Specification by Artistic License
• May send and/or receive up to 128 universes of Art-Net simultaneously
• May send and/or receive Art-Net packets with an arbitrary port address (network/sub-net/universe)
from 0:0:0 thru 127:F:F
• Art-Net is sent at a maximum rate of 40Hz for each universe when channel values are changing
• Art-Net is sent at a minimum rate of 1Hz for each universe when channel values are static
• Art-Net may be sent to the limited broadcast address, directed broadcast address or unicast to a
specific IP address
• Received Art-Net is merged with hardwired DMX designated for the same universe
• Maintains proper sequence number transmission separately for each output universe
• Each universe times out after 6 seconds when no packets for that universe are not received
• CueServer’s implementation of Art-Net does not yet support “automatic” IP configuration via the
ArtPoll method
• CueServer does not receive its own Art-Net output
For more information about Art-Net, please visit the Art-Net Home Page at art-net.org.uk.
Page 79 of 429
Page 82

Interactive Technologies, Inc. CueServer 2 User's Manual - 18.5.18
KiNET Protocol
KiNET is an alternate method of sending DMX lighting control values to from a CueServer to lighting fixtures
and/or power supplies that support the proprietary Philips/Color Kinetics KiNET protocol.
The following table lists the general specifications for the CueServer implementation of KiNET:
• Compliant with the v1 and v2 versions of the KiNET protocol
• May send and/or receive up to 128 universes of KiNET simultaneously
• A universe outputting KiNET v1 may be sent to any arbitrary IP address
• A universe outputting KiNET v2 may specify a port number and DMX range
• KiNET is sent at a maximum rate of 40Hz for each universe when channel values are changing
• KiNET is sent at a minimum rate of 1Hz for each universe when channel values are static
For more information about KiNET, please visit Color Kinetics at colorkinetics.com.
Interactive Technologies is a KiNET licensee by Philips/ColorKinetics.
Page 80 of 429
Page 83

Interactive Technologies, Inc. CueServer 2 User's Manual - 18.5.18
CueScript Protocol
CueScript Protocol is a method of sending CueScript commands to a CueServer over Ethernet.
CueServer listens for incoming UDP packets on port 52737 that contain a valid CueScript command string.
CueScript packets may be sent to CueServer by:
• Unicast to the CueServer’s IP Address
• Multicast to the CueServer group address 239.255.204.2
The payload of the packet can be any valid CueScript command, such as:
• Cue 1 Go
• Q1G
• Macro 7
• M7
• Channel 1>10 At FL
• C1>10AFL
• Button 1 On; Wait 3.5; Button 1 Off
• If (‘x’ = 1) Then Playback 7 Clear
Page 81 of 429
Page 84

Interactive Technologies, Inc. CueServer 2 User's Manual - 18.5.18
CueStation Protocol
CueStation Protocol is the method of communication between a CueServer and the CueStation Hub.
The following table lists the general specifications for the CueServer implementation of CueStation protocol:
• Can communicate with one or more CueStation Hubs
• Supports HUB IDs from 1..254 for unique identification of multiple hubs on a single network
• Uses the CueStation Multicast group 239.255.204.3
• Uses multicast traffic only for configuration-free setup
Page 82 of 429
Page 85

Interactive Technologies, Inc. CueServer 2 User's Manual - 18.5.18
HTTP Protocol
Hypertext Transfer Protocol (HTTP) is an network protocol for “hypermedia information systems”. HTTP is
the foundation of data communication for the World Wide Web.
CueServer uses HTTP for a variety of purposes.
CueServer uses its embedded HTTP web server to allow custom web pages to be served by the active
project file. This allows a project to be set up in CueServer that includes its own customized web based
content. A project in CueServer can host a “home page” that acts as a landing page for the project, and
nearly any other pages, images, documents, and other content as necessary. CueServer also has the ability
to interact with this web content, making the web pages interact live with the running CueServer lighting
control and automation.
CueServer uses HTTP to communicate with CueServer Studio. All of the transactions between CueServer
Studio and the CueServer device are occurring over HTTP. This allows CueServer Studio to be able to
remotely control a CueServer using nothing other than TCP Port 80 access over the Internet.
CueServer uses HTTP to communicate with various companion “apps”, such as CuePad and our
touchscreen options.
CueServer exposes an open Application Programming Interface (API) through HTTP for software
developers to use to interact with the device. Custom applications can be written in nearly any computer
language that communicates with CueServer via HTTP.
For more information about HTTP, please visit the * Hypertext Transfer Protocol Wikipedia Page* at
wikipedia.org/wiki/Hypertext_Transfer_Protocol.
Page 83 of 429
Page 86

Interactive Technologies, Inc. CueServer 2 User's Manual - 18.5.18
DHCP Protocol
Dynamic Host Configuration Protocol (DHCP) is a network protocol used to automatically configure devices
on the network. With DHCP, devices request IP addresses and networking parameters automatically from a
DHCP server, reducing the need for a network administrator or a user to configure these settings manually.
CueServer can optionally use DHCP to automatically set its network parameters (such as IP Address,
Subnet, Gateway, etc.) without requiring the user to adjust these settings manually.
By default from the factory, CueServer has DHCP turned on, which means that it will attempt to find a DHCP
server and automatically configure itself as the CueServer is powered on. CueServer can be configured to
have DHCP turned off, which would allow manually assigned (static) network parameters to be used.
Some CueServer models may be configured to have more than one LAN connection. On models configured
this way, DHCP may be used separately on each LAN.
For more information about DHCP, please visit the Dynamic Host Configuration Protocol Wikipedia
Page at wikipedia.org/wiki/Dynamic_Host_Configuration_Protocol.
Page 84 of 429
Page 87

Interactive Technologies, Inc. CueServer 2 User's Manual - 18.5.18
NTP Protocol
Network Time Protocol (NTP) is a networking protocol for clock synchronization between computer systems
over Ethernet.
CueServer uses NTP to keep its clock as accurate as possible without requiring the user to adjust the time
manually.
NTP is intended to synchronize computers to within a few milliseconds of Coordinated Universal Time
(UTC). It an algorithm to select accurate time servers and is designed to mitigate the effects of variable
network latency. NTP can usually maintain time to within tens of milliseconds over the public Internet, and
can achieve better than one millisecond accuracy in local area networks under ideal conditions. Asymmetric
routes and network congestion can cause errors of 100 ms or more.
Because a CueServer that intends to use NTP to synchronize its time must be able to reach a NTP Server
via Ethernet, this function can only work if the CueServer is on a network that has access to the Internet, or
the facility must have an NTP Server on its local network.
For more information about NTP, please visit the Network Time Protocol Wikipedia Page at wikipedia.org/
wiki/Network_Time_Protocol.
Page 85 of 429
Page 88

Interactive Technologies, Inc. CueServer 2 User's Manual - 18.5.18
DMX Ports
In addition to being able to transmit and receive DMX-over-Ethernet, CueServer also has built-in DMX ports
for hard-wired DMX connections to fixtures, dimmers, consoles and virtually any other DMX compatible
devices.
The rack-mounted CS-900 has four replaceable DMX module slots, and the miniature CS-920 has two
replaceable DMX module slots, each of which can accept any of seven available DMX modules for input or
output of DMX. The surface-mounted CS-940 has two DMX input ports and two DMX output ports that are
available on the unit’s pluggable terminal block strips.
Specifications
CS-900 CS-920 CS-940
DMX Ports 4 2 4
Bi-Directional
Ports
Fixed Input Ports – – 2
Fixed Output Ports – – 2
Replacable DMX
Modules
4 2 –
Yes Yes No
Indicators
Description CS-900 or CS-920 CS-940
Port Disabled
Off Off
Page 86 of 429
Page 89

Interactive Technologies, Inc. CueServer 2 User's Manual - 18.5.18
DMX Output (Active)
Solid Green Solid Green
DMX Input (Active)
Solid Blue Solid Green
DMX Input (No Input)
Solid Magenta Off
Bad Universe
Slowly Flashing Yellow Slowly Flashing Yellow
Bad Port Direction n/a
Quickly Flashing Red
Error Condition
Solid Red Solid Red
Page 87 of 429
Page 90

Interactive Technologies, Inc. CueServer 2 User's Manual - 18.5.18
DMX Modules
The CS-900 CueServer 2 Pro uses a unique field-replaceable DMX module system for allowing the DMX
ports to be customized for each individual project’s needs.
The CS-900 ships with four blank plates covering the module slots. Optional modules can be purchased and
installed into each of these slots. Using CueServer Studio, each slot can be configured as a DMX input or
output.
The following list shows the available modules:
Module Description DMX Pinout
MOD-X5F
5-Pin Female XLR
MOD-X5M
5-Pin Male XLR
MOD-X3F
3-Pin Female XLR
1 – Common
2 – Data 3 – Data +
4 – NC
5 – NC
1 – Common
2 – Data 3 – Data +
4 – NC
5 – NC
1 – Common
2 – Data 3 – Data +
Page 88 of 429
Page 91
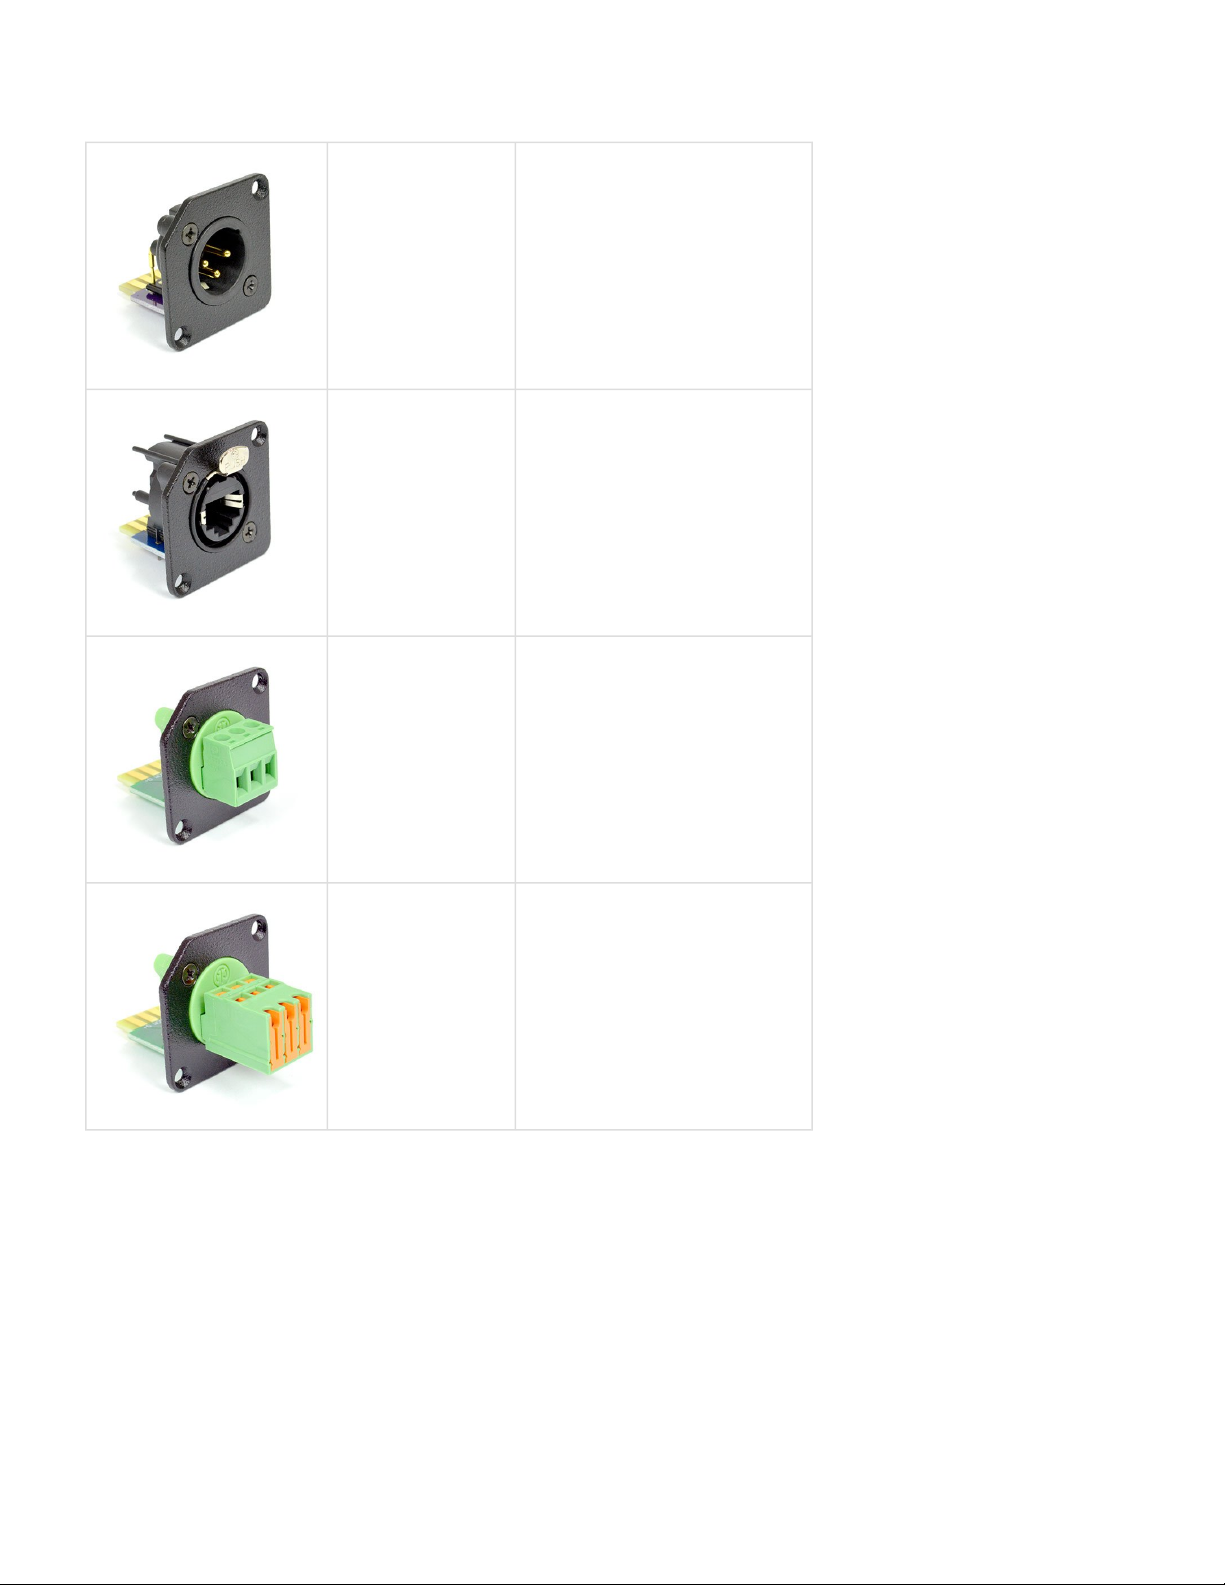
Interactive Technologies, Inc. CueServer 2 User's Manual - 18.5.18
MOD-X5M
3-Pin Male XLR
MOD-RJ45
Ethercon RJ45
MOD-TB-ST
Screw Terminals
1 – Common
2 – Data 3 – Data +
1 – Data + (White/Orange)
2 – Data – (Orange)
3 – NC (White/Green)
4 – NC (Blue)
5 – NC (White/Blue)
6 – NC (Green)
7 – Common (White/Brown)
8 – Common (Brown)
* Colors use T-568B Standard
1 – Data 2 – Data +
3 – Common
MOD-TB-IDC
IDC Terminals
1 – Data 2 – Data +
3 – Common
Page 89 of 429
Page 92

Interactive Technologies, Inc. CueServer 2 User's Manual - 18.5.18
Audio Ports
CueServer 2 has built-in stereo audio.
The stereo output is able to play sound effects, music and other audio clips in response to CueScript
commands triggered by the active show. At this time, the stereo input is not implemented in software and is
reserved for future use.
See the section Supported Audio File Formats for a listing of what types of audio files that CueServer 2 can
play.
Specifications
CS-900 CS-920 CS-940
Audio Input 1 – 1
Audio Output 1 1 1
Connector 1/8” Phono Plug 1/8” Phono Plug 1/8” Phono Plug
Page 90 of 429
Page 93

Interactive Technologies, Inc. CueServer 2 User's Manual - 18.5.18
Supported Audio File Formats
CueServer 2 supports the playback of the following common popular audio file formats:
File Extension Description
.aif .aifc .aiff .aiffc
.au .snd
.flac
.mp2 .mp3
.ogg .vorbis
.wav
CueServer 2 also contains partial support for the following formats (use cautiously as these have not been
tested):
8svx amb amr-nb amr-wb anb avr awb cdda cdr cvs cvsd cvu dat dvms gsm gsrt hcom htk ima
ircam lpc lpc10 maud nist prc sds sln smp sndfile sndr sndt sou sox sph txw vms voc vox
wavpcm wv wve xa
CueServer 2 DOES NOT support the following audio file formats:
File Extension Description
Audio Interchange File Format (Apple)
Unix Audio File (Sun, NeXT, UNIX)
Free Lossless Audio (Open-Source)
MPEG Audio File (MP3)
Ogg Vorbis Audio File (Open-Source)
Waveform Audio File (See WAV Sample Formats)
.m4a .m4p
iTunes Advanced Audio Coding (AAC)
Page 91 of 429
Page 94

Interactive Technologies, Inc. CueServer 2 User's Manual - 18.5.18
WAV Sample Formats
The following sample formats are supported by CueServer 2’s WAV audio playback:
• S8
• U8
• S16_LE
• S16_BE
• U16_LE
• U16_BE
• S24_LE
• S24_BE
• U24_LE
• U24_BE
• S32_LE
• S32_BE
• U32_LE
• U32_BE
• FLOAT_LE
• FLOAT_BE
• FLOAT64_LE
• FLOAT64_BE
• IEC958_SUBFRAME_LE
• IEC958_SUBFRAME_BE
• MU_LAW
• A_LAW
• IMA_ADPCM
• MPEG
• GSM
• SPECIAL
• S24_3LE
• S24_3BE
• U24_3LE
• U24_3BE
• S20_3LE
• S20_3BE
• U20_3LE
Page 92 of 429
Page 95

Interactive Technologies, Inc. CueServer 2 User's Manual - 18.5.18
• U20_3BE
• S18_3LE
• S18_3BE
• U18_3LE
Page 93 of 429
Page 96

Interactive Technologies, Inc. CueServer 2 User's Manual - 18.5.18
USB Ports
CueServer 2 has both USB Host and USB Device ports.
At this time, the USB Host port is only used as an alternative way to apply firmware updates to the device.
The USB Device port is not used and is reserved for future use.
Specifications
CS-900 CS-920 CS-940
USB Host Ports 1 (Type A) 1 (Type A) 1 (Type A)
USB Device Ports 1 (Micro B) 1 (Micro B) 1 (Micro B)
Page 94 of 429
Page 97

Interactive Technologies, Inc. CueServer 2 User's Manual - 18.5.18
LCD Display
Some CueServer 2 models have a front-panel LCD Display with navigation buttons. This display is used to
see the overall operational status of the device and can be used to adjust a small subset of settings and
perform basic diagnostics.
The LCD Display features include:
• System Status (Default)
• Main Menu
◦ Execute Macros
◦ Change the Active Show
◦ Adjust the Clock
◦ Adjust Network Settings
◦ View DMX Channels
◦ Display System Information
◦ Perform a Self Test
See the LCD Display Modes section for a complete description of the LCD functions available.
Specifications
CS-900 CS-920 CS-940
LCD Display
Navigation 5-Way Backlit Button Pad n/a 5-Way Micro Joystick
2-Line x 40 Character
Black on White
n/a
2-Line x 40 Character
Black on White
Page 95 of 429
Page 98

Interactive Technologies, Inc. CueServer 2 User's Manual - 18.5.18
LCD Display Modes
The LCD Display has two modes of operation, the Status Display and the Menu Display:
Status Display
By default, while the CueServer is running normally, the Status Display will be visible. This display typically
shows the device’s name, the current time, and the device’s IP address. Although this information is
typically shown, the Status Display is entirely customizable by the active show, so the Status Display might
appear differently.
CueServer 2 Jan 1, 2016 9:42:00 AM
IP: 10.0.1.5
For a list of available Status Display customizations, see the LCD Status Options section.
Menu Display
By pressing the Enter button of the navigation switch, the LCD will change to it’s Menu Display. This display
will show a list of Main Menu choices. Use the Up and Down buttons to scroll through the list of available
choices. To activate a choice, press Enter or Right. To return to the previous display, press the Left button.
Main > [1] Macros
[2] Shows
[3] Clock Settings
[4] Network Settings
[5] DMX Menu
[6] System Information
[7] Self Test
See the LCD Menu Functions section for details about each available menu function.
Page 96 of 429
Page 99

Interactive Technologies, Inc. CueServer 2 User's Manual - 18.5.18
LCD Status Options
The Status Display of the LCD is divided into four quadrants, the top-left, top-right, bottom-left, and bottom-
right. Each of these four quadrants can be customized to show a different piece of information about the
status of the device or show.
The default Status Display for CueServer 2 has the following quadrant layout:
Device Name Long Date + 12-Hour Time
Show Name IP Address
The following table shows the available options and how they appear on the LCD display:
Status Type Example Description
Device Name
Show Name
Show Directory
IP Address
Timecode
IO Status
CPU Load
Long Date + 12-Hour Time
CueServer 2
My First Show
/shows/My First Show/
IP: 10.0.1.234
TC: 00:00:00:00
[C:--*--*--][O:-----**-]
CPU: 7%
Feb 15, 2017 10:34:56 PM
The assigned name of the device.
The name of the active show.
The file system directory of the active show.
The IP Address of the device. If the device is
configured with multiple network LANs, the
display will alternate between both networks’ IP
Addresses. If the Ethernet jack is unplugged, a
∅ symbol will appear in front of the address.
The current timecode within the system.
The current status of the built-in contact
closures and digital outputs. A * symbol
indicates that a contact is closed or an output is
active.
The current 5-minute average CPU load
percentage.
The long date and 12-hour time combined.
Short Date + 12-Hour Time
Long Date + 24-Hour Time
Short Date + 24-Hour Time
Long Date
2/15/17 10:34:56 PM
Feb 15, 2017 22:34:56
2/15/17 22:34:56
Feb 15, 2017
The short date and 12-hour time combined.
The long date and 24-hour time combined.
The short date and 24-hour time combined.
The long date.
Page 97 of 429
Page 100

Interactive Technologies, Inc. CueServer 2 User's Manual - 18.5.18
Short Date
12-Hour Time
24-Hour Time
2/15/17
10:34:56 PM
22:34:56
The short date.
The 12-hour time.
The 24-hour time.
These settings can be changed by choosing the Settings > LCD Display from within CueServer Studio.
Page 98 of 429
 Loading...