

Page 1
Kurzanleitung
DEUTSCH
Quick Install Guide
Guía de instalación
rápida ESPAÑOL
Guide de demarrage
rapide FRANÇAIS
instalaciju HRVATSKI
guida all’installazione
rapida ITALIANO
Instrukcja szybkiej
instalacji POLSKI
Sprievodca rýchlou
inštaláciou SLOVENSKY
ENGLISH
upute za brzu
Page 2
DEUTSCH
Sicherheits- und Rechtshinweise
Dieses Gerät wurde geprüft und entspricht den Bestimmungen
für ein digitales Gerät der Klasse B gemäß Teil 15 der FCCSchutz vor schädlichen Störungen beim Betrieb des Geräts in
Beim Betrieb dieses Geräts in Wohngebieten sind Interferenzen wahrscheinlich.
In diesem Fall muss der Nutzer die Interferenzen auf eigene Kosten beseitigen.
R&TTE-Konformitätserklärung
Die R&TTE-Richtlinie ersetzt seit dem 08. April 2000 die Richtlinie 98/13/EEC
und hebt diese auf.
Elektro- & Elektronik-Altgeräte
Entsorgung von Elektro- und Elektronik-Geräten
(Anwendbar in der Europäischen Union und anderen europäischen
Ländern mit getrennten Sammelsystemen)
lokalen Bestimmungen Ihres Wohnorts. Das Materialrecycling trägt zur
Bewahrung natürlicher Rohstoffe bei. Für weitere Informationen über das
Recycling dieses Produkts wenden Sie sich an das zuständige Amt Ihrer Stadt,
Ihren lokalen Abfallbeseitigungsdienst oder den Händler, bei dem Sie dieses
Produkt erworben haben. Für Länder außerhalb der EU: Möchten Sie dieses
Produkt entsorgen, wenden Sie sich an Ihre lokalen Behörden und erkundigen
Sie sich über die ordnungsgemäße Art der Entsorgung.
Gewerbegebieten.
Dieses digitale Gerät erfüllt die Anforderungen zu
Strahlenausstoß gemäß Grenzwert B EN55022/1998 und die
Anforderungen zu Störfestigkeitseigenschaften gemäß
EN55024/1998 in Wohn-, Gewerbe, und
Leichtindustriegebieten.
Diese Anlage entspricht allen Anforderungen der Richtlinie
1999/5/EG des Europäischen Parlaments und des Rates vom 09.
März 1999 über Funkanlagen und
Telekommunikationsendeinrichtungen und die gegenseitige
Anerkennung ihrer Konformität (R&TTE).
Dieses Symbol auf dem Produkt oder der Verpackung bedeutet,
dass das Produkt nicht als Hausmüll zu behandeln ist.
Stattdessen sollte es zu einer geeigneten Rücknahmestelle zum
Recycling von Elektro- und Elektronik-Geräten gebracht werden.
Durch die Sicherstellung der ordnungsgemäßen Entsorgung, tragen
Sie dazu bei, negative Einflüsse auf Umwelt und Gesundheit zu
vermeiden. Wenn Ihr Gerät einfach zu entfernende Batterien oder
Akkus enthält, entsorgen Sie diese separat entsprechend der
- 2 -
Page 3
Mit der Kamera verbinden
Verbinden Sie den LAN-Anschluss über das RJ45-Netzwerkkabel mit Ihrem
Netzwerk; z. B. dem Router oder einem LAN-Switch, und schalten Sie dann
die Kamera ein. Der Startvorgang dauert ca. eine Minute. Zur
Stromversorgung müssen Sie das mitgelieferte Netzteil verwenden, es sei
denn, Ihr Kameramodell unterstützt PoE. In diesem Fall können Sie das
RJ45-Kabel einfach mit einem PoE-fähigen Switch oder Injektor verbinden,
um die Kamera mit Strom zu versorgen.
Standardmäßig sucht die Netzwerkkamera (oder der Videoserver) im
Netzwerk nach einem DHCP-Server und bekommt automatisch eine IP
Adresse zugewiesen. In den meisten Netzwerken dient ein Router als DHCPServer.
Ein DHCP-Server in Ihrem Netzwerk vereinfacht die Installation enorm. Selbst
Nutzer mit geringen TCP/IP-Netzwerkkenntnissen können eine Netzwerkkamera
in wenigen Minuten installieren. Sollte kein DHCP-Server gefunden werden,
wird die Kamera auf ihre Standard-IP-Adresse gesetzt: 192.168.1.221.
Auf Windows-Systemen empfiehlt sich die Nutzung der IP-Installer-Software
zur Identifikation der Kamera im Netzwerk und ihrer Konfiguration.
Ist die Kamera einmal korrekt eingerichtet, kann einfach mit dem
Internetbrowser des Computers auf sie zugegriffen werden. Der folgende
Abschnitt beschreibt diesen Vorgang auf Windows, MacOS und Linux.
Windows XP, Vista und Windows 7
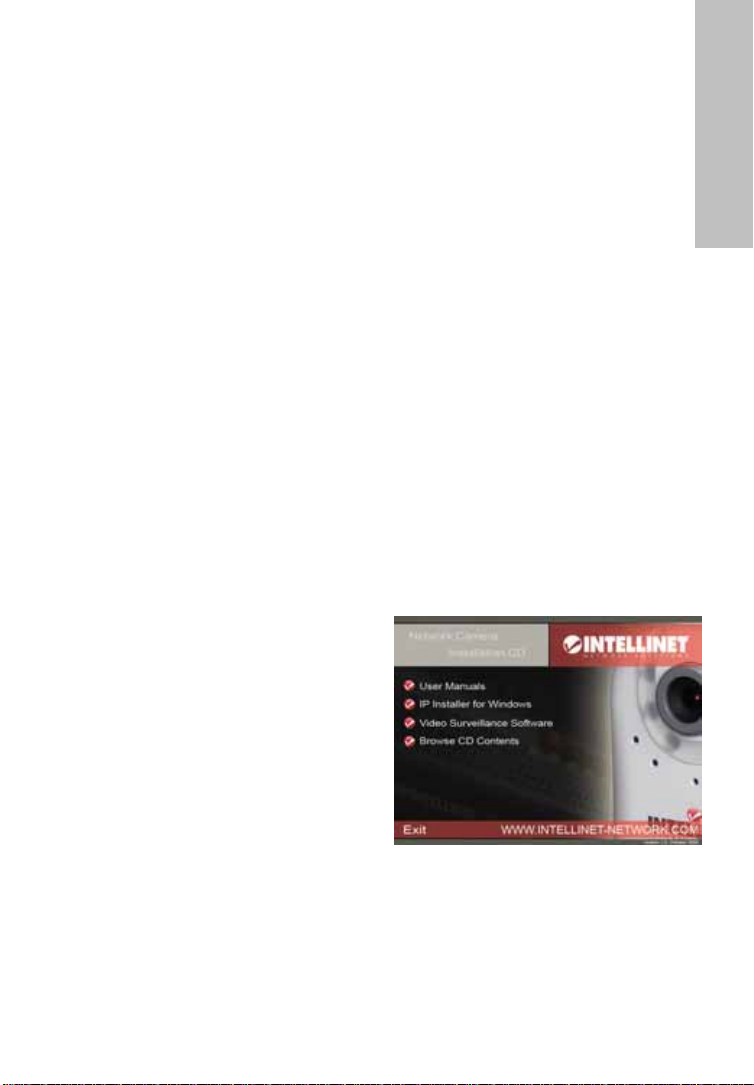
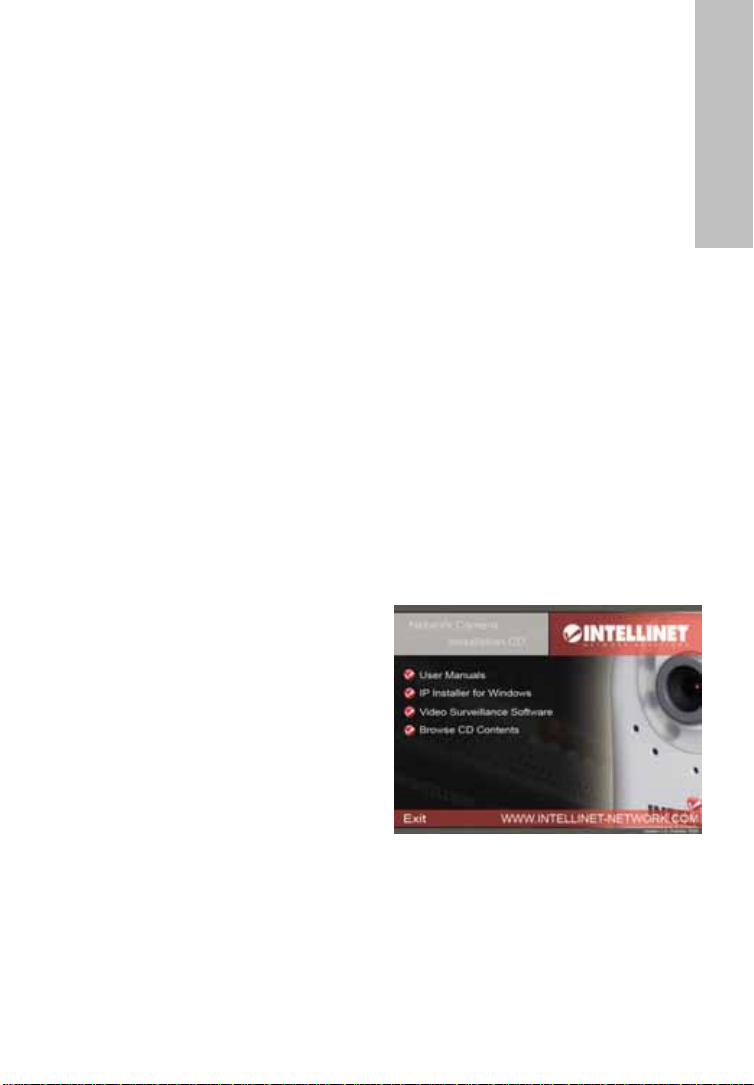
Legen Sie die Installations-CD in Ihr
CD/DVD-Laufwerk ein. Nach einigen
Augenblicken startet die CD
automatisch und zeigt das rechts
abgebildete Fenster an. Sollte dies
nicht der Fall sein, durchsuchen Sie mit
Ihrem Windows Explorer die CD nach
der Datei autorun.exe, und starten Sie
diese.
User Manuals [Handbücher]
1.
Das Handbuch der INTELLINET NETWORK SOLUTIONS Netzwerkkamera
befindet sich in mehreren Sprachen auf der Installations-CD.
Falls die Abbildungen im Handbuch nicht mit denen auf Ihrem Bildschirm
übereinstimmen, empfehlen wir Ihnen das Handbuch der CD zu nutzen, da
es möglicherweise aktueller ist, als die gedruckte Version.
DEUTSCH
- 3 -
Page 4
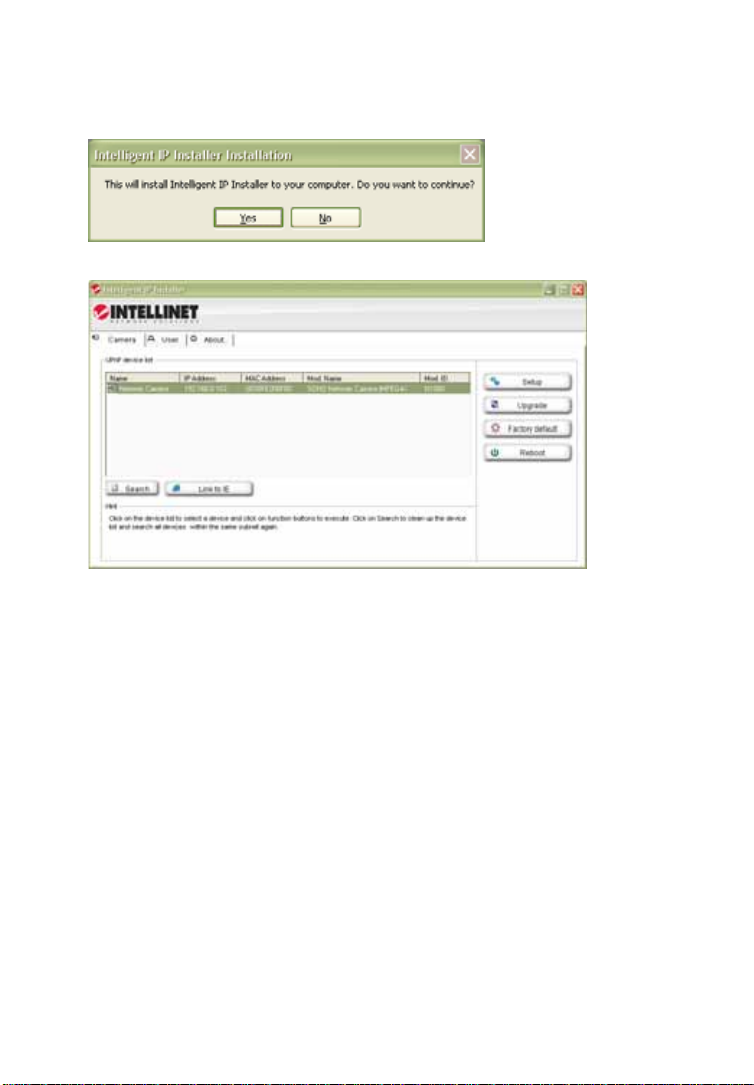
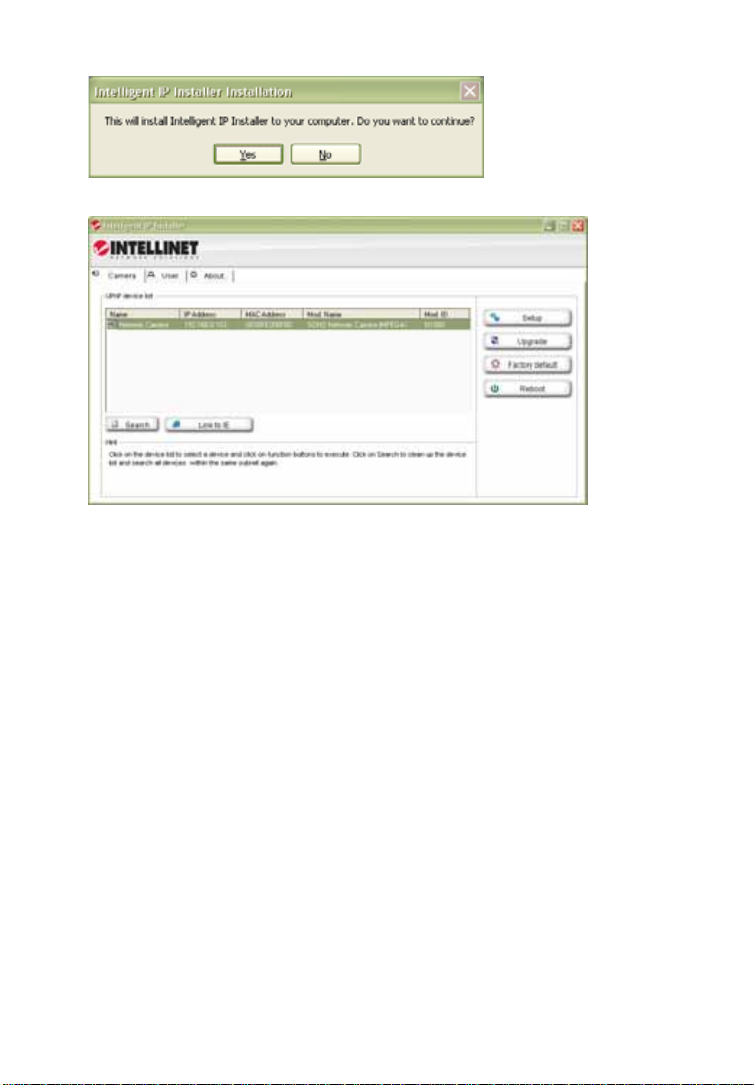
2. IP Installer for Windows
Diese Software dient der Identifikation der Kamera im Netzwerk und ihrer
Identifikation.
Klicken Sie auf “Yes”, um die Installation zu starten.
Bei Programmstart wird obiges Fenster eingeblendet. Die IP-InstallerSoftware listet alle Kameras auf, die in Ihrem Netzwerk gefunden werden
konnten. Mit dieser Software können Sie Einstellungen ändern, die
Firmware aktualisieren, auf die Werkseinstellungen der Kamera
zurücksetzen und die Kamera neu starten. Hinweis: Es kann bis zu drei
Minuten dauern, bis der IP Installer eine Kamera anzeigt, die gerade
(neu)gestartet wurde.
Für genauere Hinweise zur Einrichtung der Kamera, lesen Sie bitte das
Handbuch auf der Installations-CD.
3. Video Surveillance Software [Videoüberwachungssoftware]
Um den 16-Kanal-NVR (Netzwerk-Videorekorder) zu nutzen, lesen Sie bitte
das Handbuch auf der Installations-CD.
MacOS
Für die Installation auf Apple-Systemen mit MacOS X wird die Installations-CD
nicht benötigt. Die INTELLINET NETWORK SOLUTIONS Netzwerkkamera
unterstützt Apples „Bonjour“-Dienst.
Öffnen Sie den Safari-Browser und dort die Favoritenleiste, wo Sie die BonjourVerknüpfung finden.
- 4 -
Page 5
Die Netzwerkkamera wird in der
Kategorie Webseiten angezeigt. Zur
Verbindung mit der Kamera,
doppelklicken Sie einfach auf den
eingekreisten Link. Safari verbindet
sich dann mit der Kamera und Sie
erhalten evtl. folgende Meldung:
„Applet von „xxxxx“ fordert
uneingeschränkten Zugriff auf Ihren
Computer“.
Klicken Sie auf „Zulassen“ worauf
Ihnen das Live-Bild der Kamera wenige
Augenblicke später angezeigt wird.
Für genauere Hinweise zur Einrichtung
Handbuch auf der Installations-CD.
Linux
Für die Installation auf Linux-Systemen wird keine spezielle Software benötigt.
Die Netzwerkkamera ist kompatibel zu Internetbrowsern wie Firefox und
Konqueror.
Für die erste Installation müssen Sie die IP-Adresse der Kamera einrichten.
Standardmäßig erhält die Kamera ihre IP-Adresse von einem DHCP-Server im
Netzwerk (z. B. einem Router). Sie können auf die Kamera zugreifen, nachdem
Sie die IP-Adresse der Kamera aus dem „DHCP Client Log“ des DHCP- Servers
erhalten haben. Alternativ können Sie auch Bonjour (mDNSResponder)
benutzen, das ebenfalls für Linux verfügbar ist.
Sollte sich in Ihrem Netzwerk kein DHCP-Server befinden, erhält die Kamera
standardmäßig die IP-Adresse 192.168.1.221. Um auf die Kamera zugreifen zu
können, müssen Sie die IP -Einstellungen Ihres Systems manuell anpassen.
Stellen Sie die IP-Adresse so ein, dass Sie sich im Adressbereich von
192.168.1.xxx (wobei xxx nicht 221 sein darf) befinden. Öffnen Sie danach
Ihren Browser und verbinden Sie sich mit der Adresse http://192.168.1.221.
Melden Sie sich auf der Kamera an und klicken Sie auf “Settings“
[Einstellungen], um das Administratormenü zu öffnen. Weitere Informationen
zu den Einstellungen finden Sie im Kapitel 5.2. des Handbuchs.
Hardware-Installation und weitere Informationen
Für weitere Informationen zu Installation, Konfigurierung und Funktionen der
Kamera oder dem Netzwerk-Videoserver, lesen Sie bitte das Handbuch auf der
INTELLINET Installations-CD.
der Kamera, lesen Sie bitte das
DEUTSCH
- 5 -
Page 6
ENGLISH
Safety and Regulatory Notices
commercial environment.
EN55022/1998, and the requirements for immunity according to EN55024/1998
residential, commercial and
R&TTE Compliance Statement
Earth Station Equipment) as of April 8, 2000.
Waste Electrical & Electronic Equipment
Disposal of Electric and Electronic Equipment
(Applicable in the European Union and other European countries with
separate collection systems)
batteries or accumulators, dispose of these separately according to your local
requirements. The recycling of materials will help to conserve natural
resources. For more detailed information about recycling of this product,
contact your local city office, your household waste disposal service or the shop
where you purchased this product. In countries outside of the EU: If you wish
to discard this product, contact your local authorities and ask for the correct
manner of disposal.
This equipment has been tested and found to comply with the
limits for a Class B computing device pursuant to Subpart B of
Part 15 of FCC rules, which are designed to provide reasonable
protection against such interference when operated in a
Operation of this equipment in a residential area is likely to
cause interference, in which case the user, at his own expense,
will be required to take whatever measures may be required to
correct the interference. This digital equipment fulfills the
requirements for radiated emission according to limit B of
light industry.
This equipment complies with all the requirements of DIRECTIVE
1999/5/EC OF THE EUROPEAN PARLIAMENT AND THE COUNCIL of
March 9, 1999, on radio equipment and telecommunication
terminal equipment and the mutual recognition of their conformity
(R&TTE). The R&TTE Directive repeals and replaces Directive
98/13/EEC (Telecommunications Terminal Equipment and Satellite
This symbol on the product or its packaging indicates that this
product shall not be treated as household waste.
Instead, it should be taken to an applicable collection point for the
recycling of electrical and electronic equipment. By ensuring this
product is disposed of correctly, you will help prevent potential
negative consequences to the environment and human health,
which could otherwise be caused by inappropriate waste handling
of this product. If your equipment contains easily removable
- 6 -
Page 7
Connecting to the Camera
Connect the RJ45 network cable from the camera’s LAN port to your
network; e.g., the router or a LAN switch, then power on the camera. The
boot sequence will take about one minute. You will need to use the camera’s
power adapter, unless your camera supports PoE. In that case you can
connect the RJ45 cable to a PoE-enabled switch or injector to power the
camera.
By default, the network camera (or video server) searches for a DHCP server
on the network and obtains an IP address automatically. A very common
DHCP server is a router, a device that is found on most networks.
The presence of a DHCP server on your network simplifies the installation and
users with limited knowledge of TCP/IP networks can install the network
camera in minutes. If no DHCP server is found, the network camera will revert
to its default IP address: 192.168.1.221.
On Windows systems, you want to use the IP Installer utility that finds the
camera on the network and lets you make changes to the configuration.
Once the camera is set up properly, it can be accessed with the computer’s
Web browser. The following sections describe the procedure for Windows,
MacOS and Linux users.
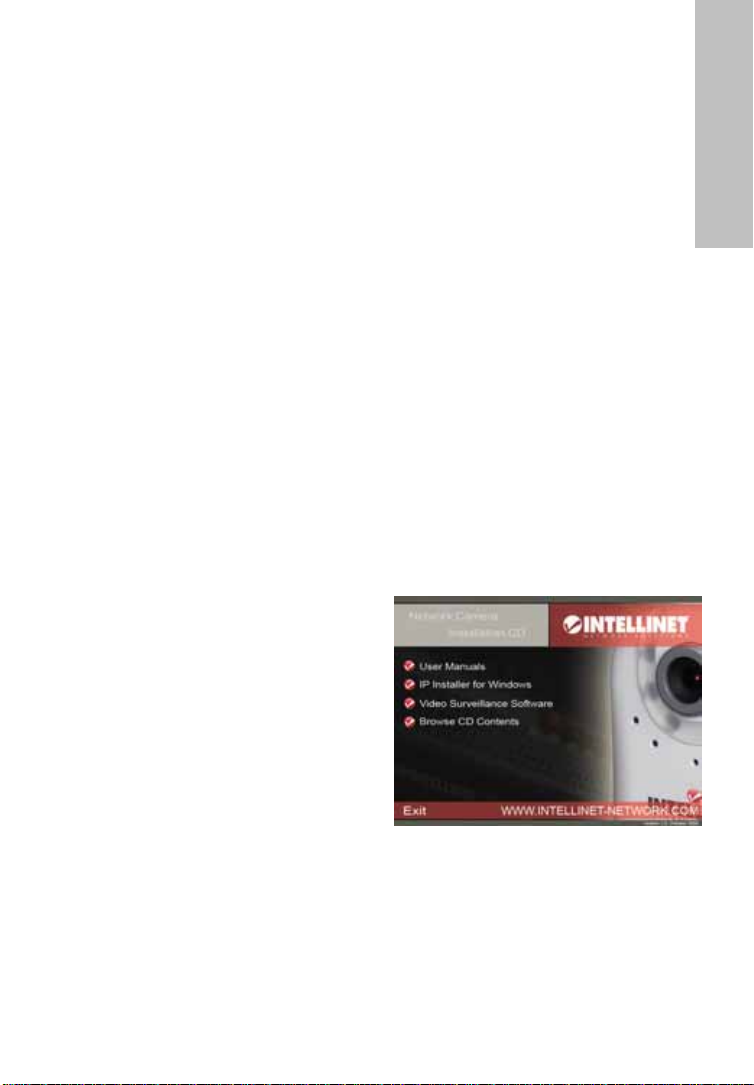
Windows XP, Vista and Windows 7
Insert the Installation CD into the CD
or DVD drive. After a few moments, the
CD will automatically start and display
the screen to the right. If that does not
happen, you need to browse the CD
with Windows Explorer and double-click
the autorun.exe file.
1. User Manuals
The user manual for the
INTELLINET NETWORK SOLUTIONS Network Camera is available in
electronic form on the installation CD, along with user manuals in different
languages.
If you encounter differences between the screen shots shown in the user
manual and the actual screen contents, it is recommended that you open
the manual from the CD, as it may be a newer edition than the printed
version.
ENGLISH
- 7 -
Page 8
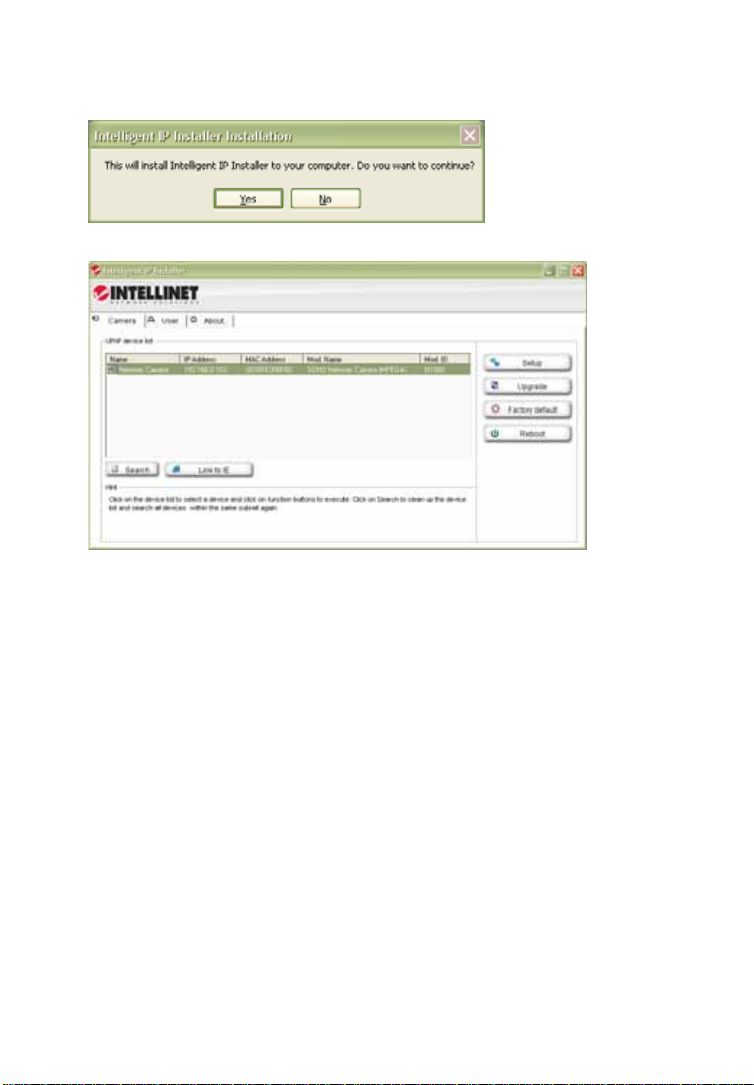
2. IP Installer for Windows
This utility is designed to find the network camera on your network and lets
you make changes to the configuration.
Click on “Yes” to begin the installation.
When the program starts, you are presented with the screen shown above.
The IP Installer utility lists all cameras that can be found on your network.
With this utility you can make changes to the configuration, perform a
firmware upgrade, restore the camera to factory default values, and reboot
the camera. Note: It may take up to three minutes for IP Installer to show
a camera that has been recently (re-)started.
Refer to the user manual for more detailed instructions on the camera
setup.
3. Video Surveillance Software
Refer to user manual on the CD for the 16-channel NVR (network video
recorder).
MacOS
The installation on Apple systems running MacOS X does not involve the
INTELLINET installation CD. The INTELLINET NETWORK SOLUTIONS network
camera supports Apple’s Bonjour service.
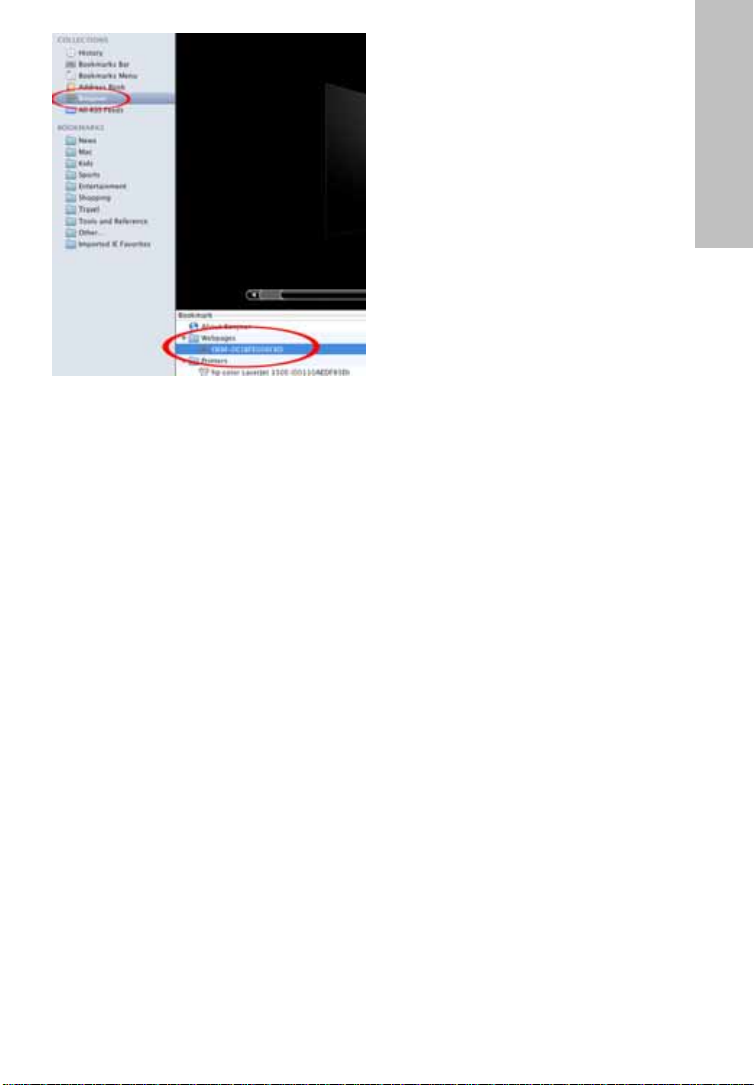
Open the Safari Web browser and open the Bookmarks toolbar, where you will
find the Bonjour link.
- 8 -
Page 9

The Network Camera is shown in
the category Webpages. In order to
connect to the camera, double-click
the circled link.
Safari then connects to the camera
and a message may appear: “An
applet from “xxxxx” is requesting
unrestricted access to your
computer.”
Click on “Allow” and you will see the
camera live image a few moments
later.
Refer to the user manual for more
detailed instructions on the camera
setup.
Linux
The installation on Linux systems does not require any special software. The
network camera is compatible to Web browsers such as Firefox and Konqueror.
The initial installation requires the setup of the camera’s IP address. As the
camera by default obtains an IP address from a DHCP server in the network
(e.g., a router), you can access the camera as soon as you have obtained the
IP address from the router’s DHCP client log. Alternatively, you may use
Bonjour (mDNSResponder), which is also available for Linux.
If no DHCP server is connected to your network, the camera reverts to its
default IP address: 192.168.1.221. In order to gain access to the camera, you
need to change the IP settings of your system manually. Set up the IP address
to be in range of 192.168.1.xxx (where xxx is not 221). Then open your Web
browser and connect to address http://192.168.1.221. Log in to the camera
and click on the Settings link to open the administrator menu. Refer to section
5.2 Settings Page in the user manual for more details.
Hardware Installation and Additional Information
For additional information about the installation process, the configuration and
functions of the camera or network video server, please refer to the user
manual on the INTELLINET installation CD.
ENGLISH
- 9 -
Page 10
ESPAÑOL
Avisos de Seguridad y Regulatorios
Este equipo ha sido probado y se encontró que cumple con los límites
establecidos para los dispositivos de cómputo Clase B según lo acordado en la
Sub-parte B de la Parte 15 de las reglas de la FCC, la cual está diseñada para
operadas en un ambiente comercial. La operación de este equipo en un área residencial es
probable que cause cierta interferencia, en tal caso el usuario, según su experiencia,
Declaración de Conformidad R&TTE
Desperdicios de Equipo Eléctrico y Electrónico
Eliminación de Equipo Eléctrico y Electrónico
(Válido en la unión europea y en otros países europeos con sistemas de
recolección por separado)
Este símbolo en el producto en su empaque indica que éste no deberá ser tratado como un
producto. Si su equipo contiene baterías o acumuladores fáciles de remover, deséchelos
por separado de acuerdo a las leyes de su localidad. El reciclado de los materiales ayudará
a conservar los recursos naturales. Para mayor información acerca del reciclado de los
materials de este producto, póngase en contacto con su oficina local en su ciudad, el
servicio de limpia o en donde ha comprador este equipo. En países fuera de los EE. UU.: Si
desea desechar este producto, póngase en contacto con sus autoridades locales y pregunte
por la forma correcta de manejar éstos residuos.
Advertencias
No exponga el producto a:
a)Instalaciones inadecuadas, servicios o alteraciones, uso de suministros o partes que no
cumplan nuestras especificaciones, modificaciones no autorizadas.
b)Uso inapropiado, desastres y accidentes, incluyendo fuego, agua, truenos, rayos,
descargas eléctricas, variaciones en el voltaje, golpes accidentales o intencionales y otros
factores naturales similares o análogos.
No se cubren afectaciones que ocurran durante el traslado al domicilio donde va hacer
efectiva la garantía, perdida de datos, pérdida de tiempo, afectaciones en software,
perdida de ventas o utilidades, perdidas cubiertas por su aseguradora, costos y gastos
operativos, averías incidentales o de consecuencia que no hayan sido listados previamente.
proporcionar una protección razonable contra todas aquellas interferencias
tendrá que realizar las mediciones requeridas para corregir la mencionada
interferencia. Este equipo digital cumple en su totalidad con los
requerimientos en materia de emisiones radiadas de acuerdo con el límite B
de EN55022/1998, y los requerimientos de inmunidad residenciales,
comerciales y de industria ligera de acuerdo con EN55024/1998.
Este equipo cumple con todos los requerimientos de la DIRECTIVA 1999/5/EC
DEL PARLAMENTO EUROPEO Y EL CONSEJO de marzo 9 de 1999, en material
de equipos de radio y terminales de telecomunicaciones y el reconocimiento
mutuo de su conformidad (R&TTE). La Directiva R&TTE revoca y reemplaza la
Directiva 98/13/EEC (Equipo Terminal de Telecomunicaciones y Equipo de
Estación Terrestre Satelital) a partir del 8 de Abril del 2000.
desperdicio del hogar. En vez de ello, deberá ser llevado a un punto de
recolección para reciclaje de equipo eléctrico y electrónico. Para asegurar que
este producto ha sido correctamente desechado, usted ayudará a prevenir las
consecuencias potenciales negativas hacia el ambiente y la salud humana, que de
otra forma se puede causar al manejar inapropiadamente los desechos de este
- 10 -
Page 11
Conectando la cámara
Conecte el cable de red RJ45 al Puerto LAN de la cámara a su red; por
ejemplo, al ruteador o al switch, después encienda la cámara. La secuencia
de arranque puede tomar más de un minuto. Necesitará también el
adaptador de corriente de la cámara, a menos que ésta soporte PoE. En tal
caso conecte el cable RJ45 a un switch o inyector de corriente PoE y a la
cámara.
De fábrica, la cámara de red (o servidor de video) buscan que un servidor
DHCP les asignen una dirección IP de manera automática. Un ejemplo de
servidor DHCP puede ser el ruteador, dispositivo que se encuentra en la
mayoría de las redes.
La presencia de un servidor DHCP en su red simplifica la instalación y los
usuarios con conocimiento limitado en redes TCP/IP podrán instalar la cámara
de red en minutos. Si no cuenta con servidor DHCP, la cámara de red tomará
su dirección IP de fábrica: 192.168.1.221.
En sistemas con Windows, podrá usar la aplicación IP Installer que viene
incluida en el disco y podrá buscar y cambiar los parámetros de red de la
cámara para su configuración.
Una vez que la cámara ha sido instalada correctamente, puede ser direccionada
a través del Navegador de Internet de su computadora. Las siguientes
secciones describen el procedimiento de instalación para los usuarios de
Windows, MacOS y Linux.
Windows XP, Vista y Windows 7
Inserte el CD de instalación en la
unidad de lectura. Después de un rato,
el CD arrancará de forma automática la
pantalla de la derecha. Si esto no
ocurriese, revise el contenido del CD en
el explorador de Windows y de doble
clic sobre el archivo autorun.exe.
1. Manuales del usuario
El manual del usuario para la
Cámara de Red INTELLINET
NETWORK SOLUTIONS se encuentra disponible en forma electrónica en el
CD de instalación, además de incluirlo en diferentes idiomas.
Si usted encuentra diferencias entre las pantallas mostradas en el presente
manual y las que ve en la cámara, le recomendamos abrir el manual del
CD, que puede tener una versión más actual que la impresa.
2. IP Installer para Windows
Esta utilería está diseñada para encontrar la cámara un su red y permitirle
- 11 -
ESPAÑOL
Page 12
realizar cambios en su configuración.
De clic en “Si” para iniciar la instalación.
Cuando el programa arranca, se presenta la pantalla arriba mostrada. La
utilería IP Installer lista todas las cámaras que se encuentren conectadas a
su red. Con esta utilería podrá realizar cambios a la configuración,
actualizar el firmware, reestablecer los valores de fábrica y reiniciar la
cámara. Nota: Podrá tomar hasta tres minutos el mostrar la cámara que ha
sido recientemente reiniciada.
Refiérase al manual del usuario para obtener más instrucciones detalladas
de la puesta en marcha de la cámara.
3. Software de Vídeovigilancia
Refiérase al manual del usuario en el CD para instalar y configurar el
Grabador de Vídeo en Red de 16 canales (NVR).
MacOS
La instalación en sistemas MacOS X no necesita del disco de instalación
INTELLINET. La cámara de red INTELLINET NETWORK SOLUTIONS soporta el
servicio Bonjour de Apple.
Ejecute el Navegador de Internet Safari y abra la barra de herramientas,
encontrará el enlace hacia el servicio Bonjour.
- 12 -
Page 13

La Cámara de Red es mostrada en la
categoría de páginas Web. Para poder
conectar la cámara, de doble clic
sobre el enlace indicado en la imagen
de la izquierda.
Safari entonces conectará a la cámara
y un mensaje puede aparecer
diciendo: “Un applet desde “xxxxx”
require acceso ilimitado hacia su
computadora.”
De clic en “Permitir” y verá la imagen
de la cámara en vivo después de un
instante.
Refiérase al manual del usuario para
obtener mayor detalle de las
Linux
La instalación en sistemas Linux no requiere de ningún software en especial. La
Cámara de Red es compatible con los Navegadores de Internet Firefox y
Konqueror.
La instalación inicial requiere de asignar una dirección IP a la cámara. Como la
cámara obtiene una dirección IP directamente del servidor DHCP en la red (por
ejemplo de un ruteador), podrá acceder a la cámara tan pronto como ésta haya
obtenido una dirección IP. Desafortunadamente, deberá usar en servicio
Bonjour (mDNSResponder), el cual también está disponible para Linux.
Si no cuenta con servidor DHCP en su red, la cámara, despúes de un tiempo,
toma su dirección IP de fábrica: 192.168.1.221. Para poder accede a la cámara,
tendrá que cambiar su dirección IP de forma manual. Establezca una dirección
para su computadora en el segmento 192.168.1.xxx (donde xxx es cualquier
número entre 1 y 254, excepto el 221). Abra entonces el Navegador de
Internet y teclee la dirección http://192.168.1.221. Ingrese a la cámara y de
clic en el enlace de Configuraciones para abrir el menú de Administrador.
Refiérase a la sección 5.2 Página de Configuraciones en el manual del usuario
para más detalles.
Montaje de la cámara e Información Adicional
Para obtener información adicional acerca del proceso de montaje, la
configuración y las funciones de la cámara o del servidor de vídeo, refiérase al
manual del usuario en el disco de instalación INTELLINET.
instrucciones de configuración.
ESPAÑOL
- 13 -
Page 14

FRANÇAIS
Instructions juridiques et de sécurité
Cet appareil a été testé et déclaré conforme aux exigences de
la classe B pour appareils numériques, selon l’article 15 de la
norme européenne. Conçu pour apporter une protection
commercial. Si cet équipement cause des interférences à la réception de vos
ondes radio ou TV, ce qui peut être vérifié en allumant et éteignant l’appareil
R&TTE Compliance Statement
depuis le 8 avril 2000.
Waste Electrical & Electronic Equipment
Disposal of Electric and Electronic Equipment
(Applicable in the European Union and other European countries with
separate collection systems)
dans votre municipalité, à des fins de recyclage.
raisonnable contre les interférences dangereuses en milieu
successivement, l’utilisateur est invité à prendre les mesures
nécessaires. This digital equipment fulfills the requirements for
radiated emission according to limit B of EN55022/1998, and
the requirements for immunity according to EN55024/1998
residential, commercial and light industry.
Cet appareil satisfait aux exigences de la DIRECTIVE 1999/5/CE
de la Commission au Conseil et au Parlement européen du 9 mars 1999
concernant les équipements hertziens et les équipements terminaux de
télécommunications et la reconnaissance mutuelle de leur conformité
(R&TTE). La Directive R&TTE remplace la Directive 98/13/EEC
Ce symbole sur Ie produit ou son emballage signifie que ce produit
ne doit pas être traité comme un déchet ménager. Conformément
à la Directive 2002/96/EC sur les déchets d’équipements
électriques et électroniques (DEEE), ce produit électrique ne doit
en aucun cas être mis au rebut sous forme de déchet
municipal non trié. Veuillez vous débarrasser de ce produit en le
renvoyant à son point de vente ou au point de ramassage local
- 14 -
Page 15

Connecter à la caméra
Connectez le port LAN via le câble RJ45 à votre réseau; p. ex. le routeur ou
un switch LAN, puis allumez la caméra. Le démarrage dure env. une minute.
Vous devez utiliser le secteur d’alimentation de la caméra, sauf si votre
caméra est compatible avec PoE. À ce cas, vous pouvez connecter le câble
RJ45 à un switch ou injecteur compatible avec PoE, afin d’alimenter la
caméra.
Par défaut, la caméra (ou le serveur vidéo) recherche un serveur DHCP sur
le réseau et obtient une adresse IP automatiquement. Un serveur DHCP très
commun est un routeur, un appareil qui se trouve sur la plupart des réseaux.
La présence d’un serveur DHCP sur votre réseau simplifie l’installation
énormément et même des utilisateurs avec des connaissances limitées en
réseaux TCP/IP peuvent installer la caméra en quelques minutes. Si la caméra
ne peut pas trouver de serveurs DHCP, elle est attribuée son adresse IP
standard: 192.168.1.221.
Sur des systèmes Windows, utilisez le logiciel « IP Installer » qui identifie la
caméra sur le réseau et vous permet à modifier sa configuration.
Dès que la caméra est configurée proprement, elle peut être accédée via le
navigateur Internet. Les paragraphes suivants décrivent le processus pour les
utilisateurs de Windows, MacOS et Linux.
Windows XP, Vista et Windows 7
Insérez le CD d’installation. Après
quelques moments, le CD démarre
automatiquement et l’écran à droite
s’ouvre. Si cela n’est pas le cas, il faut
que vous recherchiez-le avec
l’explorateur Windows et doublecliquiez le fichier « autorun.exe ».
1. User Manuals
[manuels de l’utilisateur]
Le manuel de l’utilisateur
INTELLINET NETWORK SOLUTIONS caméra réseau est disponible en forme
électronique sur le CD d’installation avec des manuels de l’utilisateur en
des langues différentes.
Si vous remarquez des différences entre les captures d’écran dans le
manuel de l’utilisateur et celles sur votre écran, nous vous recommandons
d’utiliser le manuel sur le CD comme il peut être une version plus actuelle
que la version imprimée.
FRANÇAIS
- 15 -
Page 16

2. IP Installer for Windows
Ce logiciel sert à trouver la caméra sur votre réseau et à modifier la
configuration.
Cliquez sur “Yes” pour lancer l’installation.
Quand le programme démarre, l’écran en haut s’ouvre. Le logiciel IP
Installer montre toutes les caméras qui ont été trouvées sur votre réseau.
Vous pouvez modifier la configuration, faire une mise à jour du firmware,
restaurer les paramètres d’usine et redémarrer la caméra. Note: Ça
pourrait durer jusqu’à trois minutes avant l’ IP Installer montre une caméra
qui a été redémarrée récemment.
Pour des informations plus détaillées sur la configuration, veuillez lire le
manuel de l’utilisateur sur le CD inclus.
3. Video Surveillance Software
Veuillez lire le manuel de l’utilisateur sur le CD inclus pour le 16-canal NVR
(magnetoscope réseau).
MacOS
Pour l’installation sur des systèmes Apple avec MacOS X, il ne faut pas le CD
d’installation. L’INTELLINET NETWORK SOLUTIONS caméra réseau est
compatible avec le service Bonjour d’Apple.
- 16 -
Page 17

Démarrez le navigateur Internet
Safari et ouvrez les favoris où vous
trouvez le lien Bonjour. La caméra
réseau se trouve dans la catégorie
pages Web. Afin de connecter à la
caméra, double-cliquez le lien
encerclé.
Safari puis connecte à la caméra et
un message apparaît: “An applet
from “xxxxx” is requesting unrestricted
access to your computer.”
Cliquez sur “Allow” [autoriser] et vous
voyez l’image live quelques moments
après.
Pour des informations plus détaillées sur la configuration, veuillez lire le manuel
de l’utilisateur sur le CD inclus.
Linux
Pour l’installation sur des systèmes Linux, il ne faut pas de logiciel spécial. La
caméra réseau est compatible avec des navigateurs internet comme Firefox et
Konqueror.
Pour l’installation sur des systèmes Linux, il faut l’adresse IP de la caméra. Par
défaut, la caméra obtient l’adresse IP du serveur DHCP (p. ex. un routeur),
vous pouvez accéder la caméra dès que vous obtenez l’adresse IP du « client
log » du serveur DHCP. Alternativement, vous pouvez utiliser Bonjour
(mDNSResponder), qui est aussi disponible pour Linux.
Si la caméra ne peut pas trouver de serveurs DHCP, elle est attribuée son
adresse IP standard: 192.168.1.221. Afin de pouvoir accéder la caméra, il faut
modifier la configuration IP de votre système manuellement. Configurez
l’adresse IP of 192.168.1.xxx (where xxx is not 221). Puis, démarrez votre
navigateur Internet et connectez à l’adresse http://192.168.1.221. Connectez à
la caméra et cliquez sur le lien « Settings » afin d’ouvrir le menu
d’administrateur. Veuillez lire la section 5.2 dans le manuel de l’utilisateur pour
plus de détails.
Installation matérielle et des informations complémentaires
Pour des informations complémentaires sur l’installation, la configuration et les
fonctions de la caméra ou le serveur vidéo, veuillez lire le manuel de
l’utilisateur sur le CD inclus.
FRANÇAIS
- 17 -
Page 18

HRVATSKI
Sigurnosne i regulatorne obavijesti
Ova oprema je testirana i testiranjem je utvrđeno da odgovara
limitima klase B digitalnih uređaja te da odgovara odjeklju B iz
dijela 15 FCC pravilnika. Oprema je dizajnirana da bi osigurala
EN55024/1998 za kućnu, komercijalnu i laku industrijsku uporabu.
R&TTE suglasnost
Otpad elektroničke opreme
Odlaganje elektroničke i električne opreme
(Prisutno u Europskoj uniji i drugim europskim zemljama s odvojenim
sistemom odlaganja otpada)
resursa. Za više informacija o reciklaži ovog proizvoda, konaktirajte lokalne
vlasti, komunalana poduzeća ili trgovinu gdje ste kupili proizvod. U zemljama
izvan EU: Ako želite odložiti ovaj proizvod, kontaktirajte lokalne vlasti i pitajte
za ispavne mjere odlaganja.
zaštitu od smetnji kada se koristi u komercijalne svrhe.
Uporaba ove opreme u kućnim instalacijama može izazvati
smetnje. U tom slučaju korisnik će, na vlasititi trošak, morati
poduzeti mjere potrebne za popravak nastale štete. Ova
digitalna oprema ispunjava uvjete za emisiju zračenja prema
limitima B od EN55022/1998, i zahtjeve imunosti prema
Ova oprema odgovara svim zahtjevima odredbe 1999/5/EC
europskog parlamenta 9. ožujaka, 1999. radijske i
telekomunikacijske opreme i zajedničko priznanje usklađenosti s
pravilima i standardima (R&TTE).
R&TTE odredba mijenja odredbu 98/13/EEC (telekomunikacijska i
satelitska oprema) 8. travnja, 2000.
Ovaj simbol na proizvodu ili pakiranju označava da se taj proizvod
ne tretira kao kućni otpad, već bi trebao biti odnesen na posebno
odlagalište za reciklažu električne i elektroničke opreme.
Osiguravanjem da je oprema odložena ispravno, spriječit ćete
potencijalne posljedice na okolinu i ljudsko zdravlje, koje bi inače
bilo ugroženo neadekvatnim odlaganjem otpada. Ako oprema
sadrži odvojive baterije ili akumulatore, odvojite ih od uređaja prije
odlaganja. Recikliranje materijala će pomoći pri zaštiti prirodnih
- 18 -
Page 19

Spajanje kamere
Spojite RJ45 mrežni kabel na kamerin LAN port i na mrežu; npr., ruter ili
LAN switch, nakon toga upalite kameru. Uključenje će trajati oko jednu
minutu. Potrebno je korištenje punjača kamere, osim ako kamera ne
podržava PoE. Ako podržava, možete spojiti RJ45 kabel na PoE prekidač za
napajanje kamere.
Prema zadanom, mrežna kamera (ili video server) traži DHCP server na
mreži i dodjeljuje IP adresu automatski. Zajednički DHCP server je ruter,
uređaj koji se može pronaći na većini mreža.
Prisutnost DHCP servera na mreži pojednostavljuje instalaciju i korisnici s
slabijim poznavanjem TCP/IP mreža mogu instalirati mrežnu kameru u
nekoliko minuta. Ako DHCP server nije pronađen, mrežna kamera će se vratiti
na zadanu IP adresu: 192.168.1.221.
Na Windows sistemima, možete koristiti IP Installer program koji pronalazi
kameru na mreži i omogućava promjene postavki konfiguracije.
Kada je kamera pravilno instalirana, možete joj pristupiti preko Web
preglednika. Naredna procedura opisuje instalaciju za Windows, MacOS i Linux
korisnike.
Windows XP, Vista i Windows 7
Umetnite instalacijski CD u CD ili DVD
uređaj. Nakon nekoliko trenutaka, CD
će se pokrenuti automatski i pojavit će
se ekran kao na slici desno. Ako se to
ne dogodi, potrebno je otvoriti CD s
Windows Explorerom i kliknuti na
autorun.exe.
1. Upute za uporabu
Upute za uporabu za INTELLINET NETWORK SOLUTIONS mrežnu kameru
su dostupne u elektronskom obliku na instalacijskom CD-u, zajedno s
uputama na ostalim jezicima.
Ako primjetite razliku između slika prikazanih u ovim uputama i stvarnih
slika na ekranu, preporučljivo je da otvorite upute s CD-a, jer mogu biti
novije nego tiskana verzija.
- 19 -
HRVATSKI
Page 20

2. IP Installer za Windowse
Ovaj program je dizajniran za pronalazak kamere na mreži i omogućava
promjene postavki konfiguracije.
Kliknite “Yes” za početak instalacije.
Kada se program pokrene, pojavit će se ekran kao na slici iznad. IP
Installer prikazuje sve kamere koje se nalaze na mreži. Možete promijeniti
postavke konfiguracije, nadograditi firmware, vratiti kameru na tvorničke
postavke i ponovno pokrenuti kameru. Napomena: IP Installeru može
trebati do tri minute da prikaže kameru koja je bila nedavno ponovno
pokrenuta.
Pogledajte upute za uporabu za detaljnije pojašnjenje postavki kamere.
3. Software za video nadzor
Pogledajte upute za uporabu na CD-u za 16-kanalni NVR (mrežni video
snimač).
MacOS
Na Apple uređajima koji koriste MacOS X, INTELLINET instalacijski CD ne
sadrži instalacijski postupak. INTELLINET NETWORK SOLUTIONS mrežna
kamera podržava Apple’s Bonjour servis.
Otvorite Safari Web preglednik i otvorite Bookmarks alatnu traku, gdje ćete
pronaći Bonjour poveznicu.
- 20 -
Page 21

Mrežna kamera je prikazana u
kategoriji “Webpages”. Za spajanje
na kameru, dvostruki klik na
zaokruženu poveznicu.
Safari se priključuje na kameru i
pojavljuje se poruka: “An applet
from “xxxxx” is requesting
unrestricted access to your
computer.”
Kliknite “Allow” i vidjet ćete sliku uživo
s kamere nakon nekoliko trenutaka.
Pogledajte upute za uporabu za više
detalja postavki kamere.
Linux
Instalacija na Linux sistemima ne zahtjeva nikakav dodatni software. Mrežna
kamera je kompatibilna s Web preglednicima kao što su Firefox i Konqueror.
Početna instalacija zahtjeva podešavanje IP adrese kamere. Prema zadanom,
kameri se dodjeljuje IP adresa od DHCP servera na mreži (npr., ruter). Kameri
možete pristupiti i dok god je dodjeljena IP adresa iz ruterovog DHCP klijent
loga. Alternativno, možete koristiti Bonjour (mDNSResponder), koji je dostupan
na Linuxu.
Ako DHCP server nije pronađen na mreži, kamera će se vratiti na zadanu IP
adresu: 192.168.1.221. Za pristup kameri, IP postavke morate promijeniti
ručno. Postavite IP adresu kao 192.168.1.xxx (gdje xxx nije 221). Otvorite Web
preglednik i unesite adresu http://192.168.1.221. Logirajte se na kameru i
kliknite na Settings poveznicu da biste pristupili administratorskom izborniku.
Pogledajte odjeljak 5.2 u uputama za više detalja.
Hardware instalacija i dodatne informacije
Za dodatne informacije o instalaciji, konfiguraciji i funkcijama kamere ili
mrežnog video servera, molimo pogledajte upute za uporabu na INTELLINET
instalacijskom CD-u.
HRVATSKI
- 21 -
Page 22

ITALIANO
Sicurezza e Informazioni Normative
Questa apparecchiatura è stata testata e risulta conforme ai
limiti indicati per periferiche di classe B conformemente al
Sottosezione B della Parte 15 dell’ordinamento FCC, che sono
interferenze quando si opera in ambienti commerciali. L’impiego si questa
apparecchiatura in un’area residenziale potrebbe causare interferenza, nel qual
caso l’utente, a proprie spese, dovrà approntare le misure necessarie che
potrebbero essere richieste per correggere tali interferenze.
Dichiarazione di conformità R&TTE
ha abrogato e sostituito la Direttiva 98/13/EEC (Apparecchiature Terminali di
Telecomunicazione e Apparecchiature di stazioni terrestri di comunicazione via
satellite) a partire dall’ 8 Aprile 2000.
Smaltimento delle apparecchiature elettriche ed
elettroniche
europei con sistemi di smaltimento differenziato della spazzatura)
Questo simbolo sul prodotto o sul relativo imballo indica che il prodotto, al termine
o accumulatori che possono essere facilmente rimossi, preoccupati di smaltirli
separatamente, in conformità alle norme locali. Il riciclaggio dei materiali aiuterà a
tutelare l’ambiente preservando le risorse naturali. Per ulteriori dettagli in merito allo
smaltimento di questo prodotto, contatta l’ente responsabile o il servizio disposto al
ritiro dei rifiuti domestici della tua città o il rivenditore dove hai acquistato il
prodotto. Nei paesi non appartenenti all’Unione Europea: se desideri buttare questo
prodotto, contatta le autorità locali e chiedi informazione per il corretto smaltimento.
destinate a fornire una protezione ragionevole contro tali
Questa apparecchiatura soddisfa i requisiti relativi ai disturbi
radio in accordo alle limitazioni previste per le
apparecchiatura di classe B previsti della Normativa
EN55022/1998, e le condizioni di immunità ai disturbi in
conformità alla norma EN55024/1998.
Questa apparecchiatura è conforme a i requisiti richiesti dalla
DIRETTIVA 1999/5/EC del Parlamento Europeo e del Consiglio
emanata il 9 Marzo, 1999, riguardante le apparecchiature radio, le
apparecchiature terminali di telecomunicazione ed il reciproco
riconoscimento della loro conformità (R&TTE). La Direttiva R&TTE
(Applicabile nell’Unione Europea e negli altri paesi
della sua vita, non potrà essere conferito nella spazzatura domestica.
Esso deve essere, invece, conferito presso i punti di raccolta
differenziati per il riciclaggio delle apparecchiature elettriche ed
elettroniche. Assicurandoti che questo prodotto venga smaltito
correttamente, contribuirai a prevenire le possibili conseguenze
negative sull’ambiente e sulla salute umana conseguenti ad un’
inappropriata gestione del rifiuto. Se l’apparecchiatura contiene batterie
- 22 -
Page 23

Collegare la telecamera
Collegare il cavo di rete RJ45 dalla porta LAN della telecamera alla rete; ad
esempio, il router o uno switch LAN, quindi alimentare la telecamera. La
sequenza di avvio del sistema richiederà qualche minuto. Sarà necessario
l’utilizzo di un alimentatore, a meno che la telecamera non supporti la
funzione PoE. In quel caso si può collegare il cavo RJ45 ad uno switch o ad
un iniettore abilitato PoE per alimentare la telecamera.
Per impostazione predefinita, la telecamera di rete (o il video server) cerca
un server DHCP nella rete e ottiene automaticamente un indirizzo IP. Un
server DHCP molto comune è un router, una periferica che è trovata nella
maggior parte delle reti.
La presenza di un server DHCP nella rete semplifica l’installazione e anche gli
utenti con limitate conoscenze di reti TCP/IP possono installare la telecamera di
rete in pochi minuti. Se non viene rilevato alcun server DHCP, la telecamera di
rete ritornerà all’ indirizzo IP predefinito: 192.168.1.221.
Nei sistemi Windows, è possibile usare l’eseguibile IP installer che rileva la
telecamera nella rete e permette di effettuare le modificazioni alla
configurazione.
Non appena la telecamera è stata settata correttamente, è possibile accedervi
tramite il Web browser del computer. Le seguenti sezioni descrivono la
procedura per gli utenti di Windows, MacOS e Linux.
Windows XP, Vista e Windows 7
Inserire il CD di installazione nel lettore
CD o DVD. Dopo qualche istante, il CD
verrà avviato automaticamente e si
visualizzerà la schermata a destra. Se
ciò non dovesse accadere, è necessario
sfogliare il CD con Windows Explorer e
fare doppio click sul file autorun.exe.
1. Manuali utente
Il manuale utente della telecamera
di rete INTELLINET NETWORK SOLUTIONS è disponibile in formato
elettronico sul CD di installazione, assieme ai manuali d’istruzione in
diverse lingue.
Se si riscontrano differenze tra le schermate mostrate sul manuale utente e
il contenuto reale delle schermate, si raccomanda di aprire il manuale dal
CD, poiché potrebbe esserci una versione più recente rispetto a quella
stampata.
ITALIANO
- 23 -
Page 24

2. IP Installer per Windows
Questa utilità è realizzata per trovare la telecamera nella rete e permettere
di effettuare le modifiche alla configurazione.
Clicca su “Si “ (Yes) per iniziare l’installazione.
All’avvio del programma, compare la videata sopra riportata. L’utilità IP
Installer elenca tutte le telecamere che possono essere rilevate nella rete.
Con questa utilità è possibile effettuare dei cambiamenti alla
configurazione, eseguire un aggiornamento del firmware, ripristinare i
valori di fabbrica predefiniti e riavviare la telecamera. Nota: Potrebbero
essere necessari fino a tre minuti perché l’IP Installer mostri una
telecamera che è stata recentemente (ri-) avviata.
Far riferimento al manuale utente per istruzioni maggiormente dettagliate
in merito al settaggio della telecamera.
3. Software per la Video Sorveglianza
Far riferimento al manuale utente presente sul CD per NVR a 16 canali
(network video recorder).
MacOS
L’installazione su sistemi Apple con MacOS X non implica l’utilizzo del CD di
installazione INTELLINET. La telecamera di rete INTELLINET NETWORK
SOLUTIONS supporta il servizio Apple’s Bonjour.
- 24 -
Page 25

Aprite il Web browser Safari e quindi la barra dei Segnalibri (Bookmarks
toolbar), dove si trova il collegamento a Bonjour.
settaggio della telecamera.
Linux
L’installazione su sistemi Linux non richiede alcun software speciale. La
telecamera di rete è compatibile con Web browser come Firefox e Konqueror.
L’installazione iniziale richiede la configurazione dell’indirizzo IP della
telecamera. Siccome la telecamera ottiene per impostazione predefinita un
indirizzo IP da un server DHCP nella rete (ad esempio un router), si può
accedere alla telecamera non appena ottenuto l’indirizzo IP dal registro del
client DHCP del router. In alternativa, si può utilizzare Bonjour
(mDNSResponder), disponibile anche per Linux.
Se nessun server DHCP è connesso alla rete, la telecamera ritorna al suo
indirizzo IP predefinito: 192.168.1.221. Per ottenere l’accesso alla telecamera,
è necessario modificare manualmente le impostazioni IP del sistema. Settare
l’indirizzo IP affinché sia in un intervallo di 192.168.1.xxx (dove xxx non è
221). Quindi aprire il Web browser e collegarsi all’indirizzo
http://192.168.1.221. Accedere alla telecamera e cliccare sul collegamento
Impostazioni (Settings) per aprire il menu di amministratore. Far riferimento
alla sezione 5.2 Pagina Impostazioni (Settings Page) del manuale d’istruzioni
per ulteriori dettagli.
Installazione dell’Hardware e informazioni aggiuntive
Per ulteriori informazioni in merito al processo di installazione, la configurazione
e le funzioni della telecamera o del video server di rete, fate cortesemente
riferimento al manuale d’istruzione sul CD INTELLINET di installazione.
La telecamera di rete viene mostrata
nella categoria Pagine Web (Web
pages). Per collegare la telecamera,
fare doppio click sul collegamento
cerchiato.
Safari quindi si connette alla
telecamera e potrebbe apparire il
seguente messaggio: “Un applet da
“xxxxx” sta richiedendo l’accesso
senza restrizione al tuo computer.”
Cliccate su Consenti (Allow) per vedere
l’immagine dal vivo della telecamera
entro pochi istanti.
Fare riferimento al manuale d’istruzioni
per istruzioni più dettagliate sul
ITALIANO
- 25 -
Page 26

POLSKI
Bezpieczeństwo i normy
Kamery sieciowe IP przeznaczone są do użytku w środowiskach
klasy B. Jednak wyposażenie w pewne funkcje opcjonalne
może spowodować zmianę kategorii urządzenia na klasę A. Aby
szukać informacji w punktach dotyczących poszczególnych instytucji
normalizacyjnych. Każdy z punktów zawiera informacje dotyczące standardów
bezpieczeństwa, zgodności elektromagnetycznej i zakłóceń
Deklaracja zgodności R&TTE
Pozbycie się zużytego sprzętu
Zagadnienia ochrony środowiska są dla naszej firmy bardzo ważne.
Unia Europejska (UE) opracowała dyrektywę WEEE (on Waste Electrical
and Electronic Equipment – o zużytym sprzęcie elektronicznym), aby
zapewnić wdrożenie jednolitych systemów zbiórki, przeróbki i
recyklingu odpadów elektronicznych w całej Unii Europejskiej.
Intellinet Network Solutions przestrzega postanowień dyrektywy WEEE
ze sprzętu elektrycznego i elektronicznego. Osobna zbiórka oraz recykling
zużytego sprzętu pomogą w ochronie zasobów naturalnych i zapewnią ponowne
wprowadzenie go do obiegu w sposób chroniący zdrowie człowieka i
środowisko. Aby uzyskać więcej informacji o tym, gdzie można przekazać
zużyty sprzęt do recyklingu, należy się skontaktować z urzędem miasta,
zakładem gospodarki odpadami lub sklepem, w którym zakupiono produkt.
ustalić klasyfikację elektromagnetyczną urządzenia, należy
elektromagnetycznych, obowiązujących w poszczególnych
krajach.
Niniejsze urządzenie zostało zakwalifikowane do klasy B
zawartej w normie EN55022/1998, dotyczącej zakłóceń w
odbiorze fal radiowych oraz spełnia normy EN5024/1998,
dotyczące charakterystyki odporności sprzętu komputerowego.
Urządzenie pracuje zgodnie z wymaganiami zawartymi w
dyrektywie europejskiej opisującej urządzenia radiowe, terminale
telekomunikacyjne oraz ich wzajemne rozpoznawanie i zgodność
(Dyrektywa 1999/5/CE wydana przez Parlament Eurepjski oraz
Radę Europy).
oraz ustawodawstwa obowiązującego w Polsce.
Ten symbol na produkcie lub jego opakowaniu oznacza, że produktu
nie wolno wyrzucać do zwykłych pojemników na odpady.
Obowiązkiem użytkownika jest przekazanie zużytego sprzętu do
wyznaczonego punktu zbiórki w celu recyklingu odpadów powstałych
- 26 -
Page 27

Intellinet Network Solutions finansuje przetwarzanie i recykling odpadów
zwracanych w wyznaczonych punktach zbiórki
Podłączanie kamery
Podłącz kamerę kablem Ethernet RJ45 do sieci LAN a następnie podłącz
zasilanie do kamery. Sekwencja „bootowania” może zająć kilkadziesiąt
sekund. W przypadku podłączania kamery w technologii PoE nie wymagany
jest zasilacz – urządzenie zasilane jest kablem Ethernet. Należy pamiętać, że
do tego celu musimy użyć odpowiedniego switcha/routera/adaptera
podającego napięcie w tym standardzie.
Domyślnie kamera (serwer video) ustawione są w trybie pozyskiwania
adresu IP z serwera DHCP. Jeśli w Twojej sieci LAN nie działa żaden aktywny
serwer DHCP kamera ustawi się na fabryczny adres IP: 192.168.1.221 .
Użytkownicy systemów Windows mają do dyspozycji aplikację „IP Installer”,
która po uruchomieniu automatycznie wykrywa wszystkie podłączone do Sieci
LAN kamery i pozwala dokonać wstępnej konfiguracji urządzeń .
Do prawidłowo skonfigurowanej kamery możemy zalogować się z poziomu
przeglądarki Internetowej. Poniżej opisano tę procedurę dla systemów
Windows, MacOS oraz Linux.
Windows XP, Vista oraz Windows 7
Umieść płytę instalacyjną w napędzie
CD/DVD. Po chwili powinno
automatycznie wyświetlić się poniższe
okienko. W przeciwnym wypadku
przeszukaj zawartość płyty i uruchom
aplikację autorun.exe.
1. User Manuals – Instrukcje
użytkownika
Na płycie dostępne są instrukcje
użytkownika w formie elektronicznej w kilku językach.
2. IP Installer for Windows – Aplikacja IP Installer
Aplikacja dla systemów Windows pozwalająca wykryć i wstępnie
skonfigurować wszystkie kamery Intellinet podłączone do Sieci LAN.
POLSKI
- 27 -
Page 28

Kliknij “Yes” aby rozpocząć proces instalacji.
Po uruchomieniu program pojawi się poniższe okno. Może ono różnic się
nieznacznie w zależności od modelu kamery. IP Installer wykryje i wylistuje
wszystkie kamery IP dostępne w Twojej sieci lokalnej. Z poziomu tej aplikacji
możemy dokonywać zmian w konfiguracji kamery, przeprowadzić aktualizację
firmware’u, przywrócić kamerę do ustawień fabrycznych oraz zrestartować
urządzenie. Uwaga: Gdy kamera zostanie zrestartowana lub uruchomiona
może upłynąć kilkadziesiąt sekund zanim IP Installer wykryje kamerę.
3. Video Surveillance Software – Aplikacja monitoringowa
Bezpłatne 16-kanałowe oprogramowanie NVR. Patrz instrukcja na płycie CD.
MacOS
Instalacja na komputerach Apple z systemem operacyjnym MacOS X nie
wymaga użycia płyty instalacyjnej. Kamery IP INTELLINET obsługują protokół
„Apple’s Bonjour”.
Uruchom przeglądarkę Safari a następnie otwórz pasek „Zakładki”. Znajdziesz
tam link do usługi Bonjour.
- 28 -
Page 29

Kamery sieciowe IP INTELLINET
zostaną wyświetlone w kategorii
„Webpages” (strony Internetowe).
Aby połączyć się z kamerą kliknij
dwukrotnie na właściwy link.
Safari połączy się z kamerą i może
pojawić się następujący komunikat:
“An applet from “xxxxx” is
requesting unrestricted access to
your computer.”
Kliknij “Allow” (zezwalaj) aby przejść
do okna podglądu obrazu z kamery.
Więcej szczegółów dotyczących
konfiguracji kamery znajdziesz w
Linux
Instalacja w systemach Linux nie wymaga dodatkowego oprogramowania.
Kamera obsługuje przeglądarki Internetowe takie jak Firefox czy Konqueror.
Wstępna konfiguracja wymaga ustawienia adresu IP kamery. Ponieważ kamera
domyślnie ustawiona jest w trybie pobierania adresu IP z serwera DHCP,
możesz połączyć sie z kamerą tak szybko jak zostaną jej przydzielone
odpowiednie parametry sieciowe (pod warunkiem, że w Twojej sieci lokalnej
działa aktywny serwer DHCP). Można również skorzystać z usługi Bonjour
(mDNSResponder), która jest również dostępna w systemach Linux.
Jeśli w sieci lokalnej nie działa żaden serwer DHCP kamera automatycznie
ustawi się na swój domyślny adres IP 192.168.1.221. Aby połączyć się z
kamerą należy zmienić ustawienia karty sieciowej komputera przypisując
ręcznie adres IP z tej samej podklasy co adres kamery, czyli: 192.168.1.xxx
(gdzie xxx jest różne od 221). Następnie należy uruchomić przeglądarkę i
wpisać adres kamery http://192.168.1.221. Domyślne parametry logowania dla
administratora to: użytkownik: admin;hasło: admin.
Szczegółowa konfiguracja i dodatkowe informacje
Opis szczegółowej konfiguracji kamery oraz wszelkie dodatkowe informacje
znajdują się w pełnej instrukcji użytkownika na CD.
pełnej instrukcji użytkownika.
POLSKI
- 29 -
Page 30

SLOVENSKY
Bezpečnosť a právne normy
Zariadenie bolo testované a uznané za vyhovujúce limitom pre
ktoré sú navrhnuté tak, aby poskytovali primeranú ochranu
proti škodlivým rušeniam pri prevádzke v komerčnom
Prevádzka tohto zariadenia v obytnej zóne pravdepodobne spôsobí rušenie,
kedy može byť používateľ na vlastné náklady požiadaný, aby prijal potrebné
R&TTE Vyhlásenie o zhode
telekomunikačných zariadeniach a zariadeniach družicových zemských staníc) z
8.apríla 2000.
Elektrický odpad a elektronické príslušenstvo
Likvidáciu elektrických a elektronických zariadení
(Platné v Európskej únii a ďalších európskych krajinách so systémami
separovaného zberu)
likvidujte ich oddelene podľa miestnych požiadaviek. Recykláciou materiálov
pomôžete zachovať prírodné zdroje. Pre podrobnejšie informácie o recyklácii
tohoto výrobku sa prosím obráťte na miestny obecný úrad, komunálne služby
alebo na obchod, kde ste zakúpili tento produkt. V krajinách mimo EÚ: Ak sa
chcete zbaviť tohoto výrobku, obráťte sa na miestne úrady a vyžiadajte si
informácie o správnom spôsobe likvidácie.
prostredí.
opatrenia na úpravu alebo odstránenie rušenia. Toto digitálne
zariadenie spĺňa požiadavky na vyžarované emisie podľa limitu
B EN55022/1998 a požiadavky na odolnosť proti rušeniu podľa
EN55024/1998 pre obytné a obchodné oblasti
a ľahký priemysel.
Toto zariadenie vyhovuje všetkým požiadavkám smernice
1999/5/ES Európskeho parlamentu a Rady z 9. marca 1999 o
rádiovom zariadení a koncových telekomunikačných zariadeniach
a vzájomnom uznávaní ich zhody (R & TTE).
R & TTE ruší a nahrádza smernicu 98/13/EEC (o koncových
Tento symbol na výrobku alebo jeho balení udáva, že s týmto
výrobkom nesmie byť nakladané ako s domovým odpadom.
Namiesto toho by malo byť vzaté do zberného miesta pre
recykláciu elektrických a elektronických zariadení. Zabezpečením
správnej likvidácie tohto výrobku pomôžete zabrániť negatívnym
dopadom na životné prostredie a ľudské zdravie, ktoré by inak boli
spôsobené nevhodnou likvidáciou tohoto výrobku. Ak vaše
zariadenie obsahuje ľahko vymeniteľné batérie alebo akumulátory,
- 30 -
Page 31

Pripojenie ku kamere
Pripojte sieťový kábel RJ45 z LAN portu kamery do vašej siete, napr do
routru alebo LAN prepínača a potom zapnite kameru. Bootovacia sekvencia
bude trvať asi jednu minútu. Budete musieť použiť napájací adaptér kamery,
ak vaša kamera nepodporuje PoE. V takom prípade môžete pripojiť kábel
RJ45 do prepínača alebo injektora s funkciou PoE pre napájanie kamery.
V primárnom nastavení sieťová kamera (alebo video server) hľadá server
DHCP v sieti a získa IP adresu automaticky. Veľmi častým DHCP serverom je
router, zariadenie, ktoré sa nachádza vo väčšine sietí.
Prítomnosť DHCP servera v sieti zjednodušuje inštaláciu a užívatelia s
obmedzenými technickými znalosťami o TCP / IP sieťach dokážu sieťovú kameru
nainštalovať v priebehu niekoľkých minút. Ak nie je server DHCP nájdený, vráti
sa sieťová kamera do východiskovej adresy IP: 192.168.1.221.
Na systémoch Windows použite IP inštalačnú utilitu, ktorá zistí prítomnosť
kamery na sieti a umožňuje vykonávať zmeny v konfigurácii.
Akonáhle je kamera správne nastavená, je možné k nej pristupovať pomocou
webového prehliadača na počítači. Nasledujúce body popisujú postup pre
užívateľov Windows, MacOS a Linux.
Windows XP, Vista a Windows 7
Vložte inštalačné CD do jednotky CD
alebo DVD. Po niekoľkých okamihoch sa
CD automaticky spustí a inštalačné
okno sa zobrazí na obrazovke vpravo.
Ak k tomu nedôjde, budete musieť
prechádzať CD pomocou Windows
Explorer a dvojklikom kliknite na súbor
autorun.exe.
1. Užívateľská príručka
Užívateľská príručka pre INTELLINET NETWORK SOLUTIONS Sieťovú
kameru je k dispozícii v elektronickej forme na inštalačnom CD spolu s
používateľskými príručkami v rôznych jazykoch.
Ak narazíte na rozdiely medzi snímkami obrazoviek uvedenými v
užívateľskej príručke a skutočným obsahom obrazovky, odporúča sa, aby
ste si otvorili manuál z CD, pretože môže byť novšieho vydania ako tlačená
SLOVENSKY
- 31 -
Page 32

verzia.
2. IP Installer pre Windows
Tento nástroj je navrhnutý tak, aby našiel sieťovú kameru v sieti a
umožňuje vykonávať zmeny v konfigurácii.
Kliknite na “Yes” pre začiatok inštalácie.
Keď sa program spustí, zobrazí sa na obrazovke okno ako je uvedené
vyššie. IP installer utilita zobrazí zoznam všetkých kamier, ktoré je možné
nájsť na sieti. Pomocou tohoto nástroja môžete robiť zmeny v konfigurácii,
uskutočniť upgrade firmwaru, obnoviť kameru na hodnoty výrobného
nastavenia a reštartovať kameru. Poznámka: Môže trvať až tri minúty, kým
IP installer ukáže kameru, ktorá bola nedávno reštartovaná.
Podrobnejšie pokyny na nastavenie kamery nájdete v užívateľskej príručke.
3. Video softvér stáleho pozorovania
Pozrite časť užívateľskej príručky na CD pre 16 kanálový NVR (Network
Video Recorder).
MacOS
Inštalácia na systémoch Apple so systémom Mac OS X nezahŕňa INTELLINET
inštalačné CD. INTELLINET NETWORK SOLUTIONS Sieťová kamera podporuje
Apple Bonjour service.
- 32 -
Page 33

Otvorte webový prehliadač Safari a otvorte panel Záložky, kde nájdete odkaz
Bonjour.
- 33 -
Page 34

Sieťová kamera je zobrazená v
kategórii web stránok. Aby bolo
možné pripojiť sa ku kamere,
dvojklikom kliknite na zakrúžkovaný odkaz.
Safari sa potom pripojí ku kamere
a správa sa môže zobraziť: "applet
z" xxxxx "vyžaduje neobmedzený
prístup k vášmu počítaču.”
Kliknite na "Povoliť" a o niekoľko
okamihov neskôr uvidíte živý obraz z
kamery.
Podrobnejšie pokyny na nastavenie
kamery nájdete v užívateľskej
príručke.
Linux
Inštalácia na systémoch Linux nevyžaduje žiaden dodatočný softvér. Sieťová
kamera je kompatibilná pre webové prehliadače ako napr. Firefox a Konqueror.
Prvá inštalácia vyžaduje nastavenie IP adresy kamery. Ak kamere pridelí IP
adresu DHCP server v sieti (napr, router), možete pracovať s kamerou od
okamihu pridelenia tejto IP adresy. Alternatívne môžete použiť Bonjour
(mDNSResponder), ktorý je k dispozícii aj pre Linux.
V pripade, že vo Vašej sieti nemáte aktivovaný DHCP server, kamera sa vráti
na svoju predvolenú IP adresu: 192.168.1.221. Ak budete chcieť získať prístup
ku kamere, budete musieť zmeniť nastavenie IP vášho systému ručne. Nastavte
IP adresu, ktorá má byť v rozsahu 192.168.1.xxx (kde xxx nie je 221). Potom
otvorte webový prehliadač a pripojte sa na adresu http://192.168.1.221.
Prihláste sa do kamery a kliknite na odkaz Nastavenia pre otvorenie
administrátorského menu. Pre viac informácii pozrite bod 5.2 Nastavenia v
užívateľskej príručke.
Inštalácia hardvéru a ďalšie informácie
Ďalšie informácie o inštalácii, konfigurácii a funkciách kamery alebo sieťového
video serveru nájdete v užívateľskej príručke na inštalačnom CD INTELLINET.
SLOVENSKY
- 34 -
Page 35

WARRANTY INFORMATION
Deutsch Garantieinformationen finden Sie hier unter
English For warranty information, go to
Español Si desea obtener información sobre la garantía, visite
Français Pour consulter les informations sur la garantie, rendezvous à
Italiano Per informazioni sulla garanzia, accedere a
Polski Informacje dotyczące gwarancji znajdują się na stronie
www.intellinet-network.com/warranty.
México Poliza de Garantia INTELLINET — Datos del importador y
responsable ante el consumidor IC Intracom México, S.A. de C.V. • Av.
Interceptor Poniente # 73, Col. Parque Industrial La Joya, Cuautitlan Izcalli,
Estado de México, C.P. 54730, México. • Tel. (55)1500-4500
La presente garantía cubre los siguientes productos contra cualquier defecto de
fabricación en sus materiales y mano de obra.
A. Garantizamos cámaras IP y productos con partes moviles por 3 años.
B. Garantizamos los demas productos por 5 años (productos sin partes
moviles), bajo las siguientes condiciones:
1. Todos los productos a que se refiere esta garantía, ampara su cambio físico,
sin ningún cargo para el consumidor.
2. El comercializador no tiene talleres de servicio, debido a que los productos
que se garantizan no cuentan con reparaciones, ni refacciones, ya que su
garantía es de cambio físico.
3. La garantía cubre exclusivamente aquellas partes, equipos o sub-ensambles
que hayan sido instaladas efábrica y no incluye en ningún caso el equipo
adicional o cualesquiera que hayan sido adicionados al mismo por el usuario o
distribuidor.
Para hacer efectiva esta garantía bastara con presentar el producto al
distribuidor en el domicilio donde ue adquirido o en el domicilio de IC Intracom
México, S.A. de C.V., junto con los accesorios contenidos n su empaque,
acompañado de su póliza debidamente llenada y sellada por la casa vendedora
indispensable el sello y fecha de compra) donde lo adquirió, o bien, la factura o
ticket de ompra original donde se mencione claramente el modelo, numero de
serie (cuando aplique) yfecha de adquisición. Esta garantia no es valida en los
siguientes casos: Si el producto se hubiese tilizado en condiciones distintas a
las normales; si el producto no ha sido operado conforme a los nstructivos de
uso; ó si el producto ha sido alterado o tratado de ser reparado por el
consumidor ó erceras personas.
www.intellinet-network.com/warranty.
www.intellinet-network.com/warranty.
www.intellinet-network.com/warranty.
l’adresse www.intellinet-network.com/warranty.
www.intellinet-network.com/warranty.
- 35 -
Page 36

- 36 -
Page 37

INTELLINET NETWORK SOLUTIONS™ offers a complete line
of active and passive networking products.
Ask your local computer dealer for more information or visit
www.intellinet-network.com
Copyright © INTELLINET NETWORK
All products mentioned are trademarks or registered trademarks of their
respective owners.
SOLUTIONS
 Loading...