

Intellinet 525688 Quick Install Manual
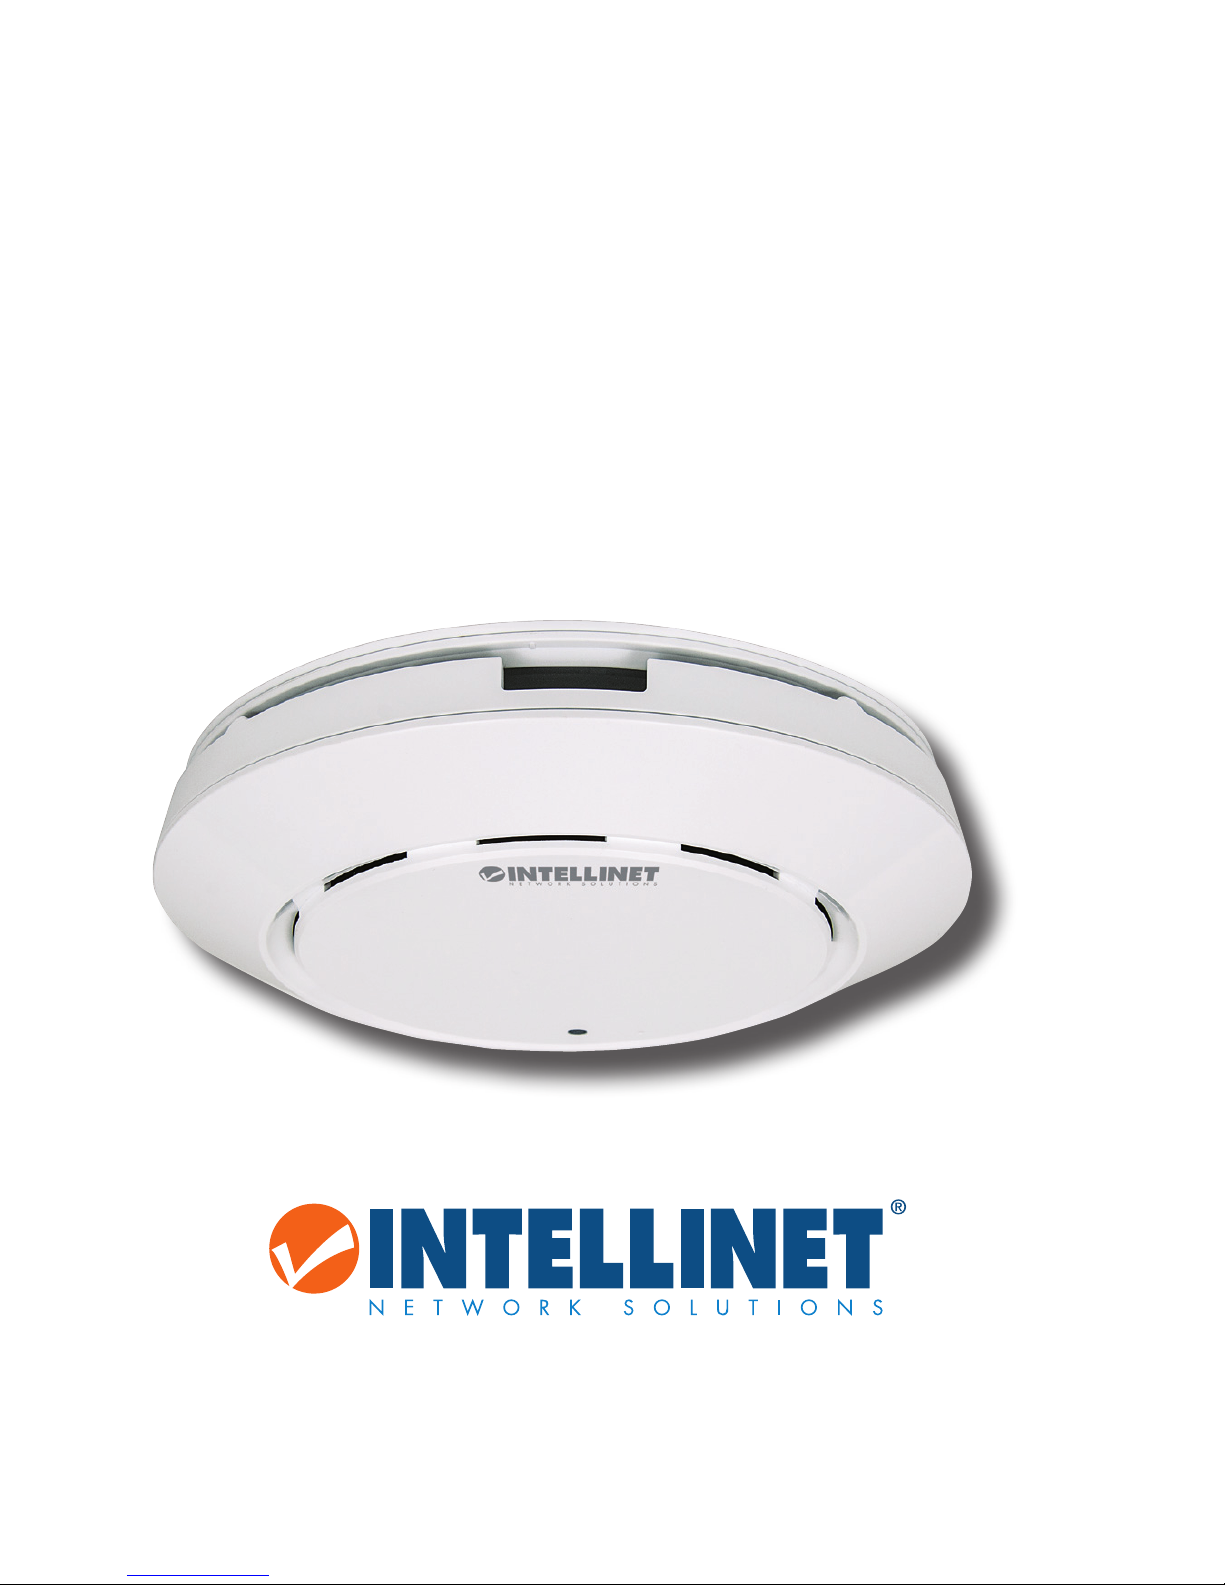
HIGH-POWER
CEILING MOUNT
WIRELESS AC1200
DUAL-BAND GIGABIT
P
o
E ACCESS POINT
QUICK INSTALL GUIDE
MODEL 525688
INT-525688-QIG-ML1-0415-01
intellinetnetwork.com
2
ENGLISH
Wireless AC1200 PoE Access Point • Quick Install Guide English
A
B
D
C
This quick install guide presents basic installation steps. For operation
details and specications, refer to the user manual on the included CD or
at intellinetnetwork.com.
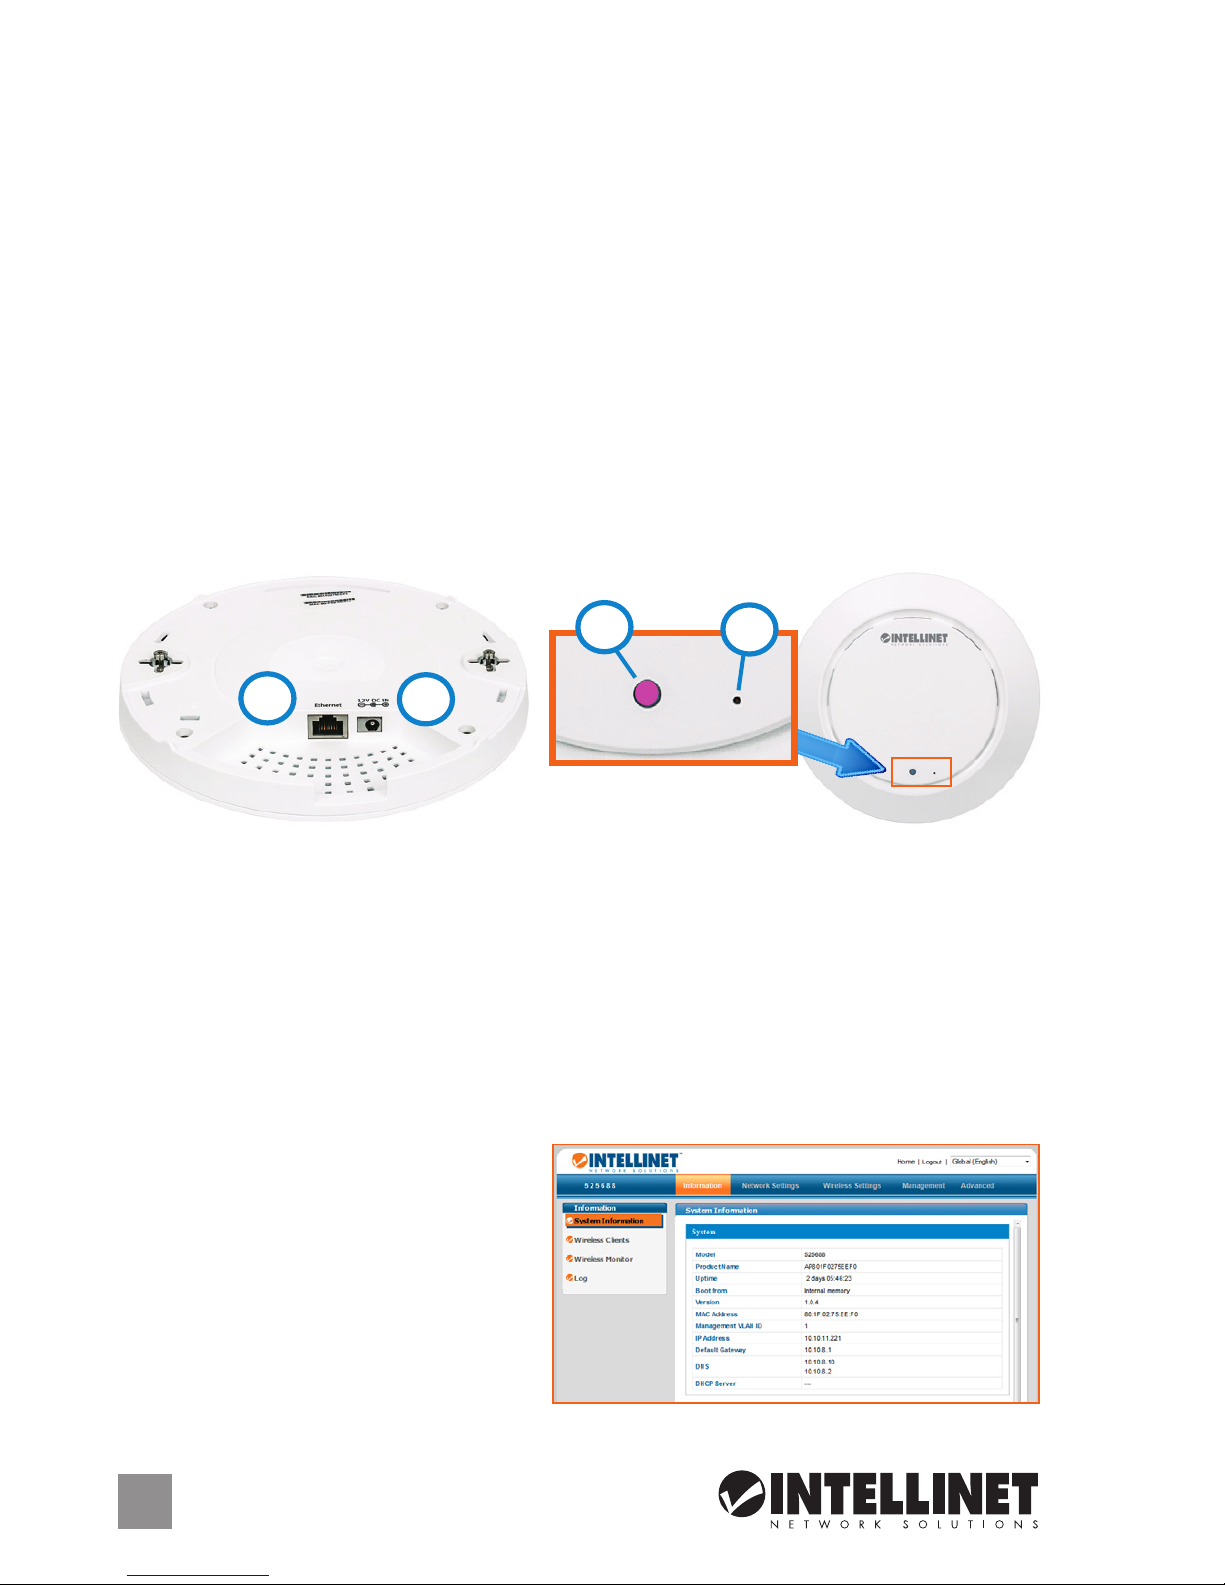
CONNECTIONS
1. Refer to Section III of the user manual to mount this device (ceiling,
wall, post, etc.) where the cables will reach. Note: Placing the access
point out of easy reach may require that you use the Web management
interface for the Reset function.
2. Connect your Ethernet cable (A) and the power adapter (B) to the main
chassis of the access point and connect the other end of the two cables.
Note: You can connect the access point to an IEEE802.3af PoE-compliant
source instead of an AC wall outlet.
• Once the access point is connected, the LED (D) will light blue to indicate
it’s powered on, then it will light purple to indicate it’s ready for use. If it
blinks yellow, there is an error or bad network connection.
OPERATION
1. Enter http://192.168.2.1 on your Web browser to display a login
window for the Web management interface, where all functions and
settings for the access point are congured.
2. Enter “admin” for username and “1234” for password, then click “OK” to
display the System Information
screen of the interface. Refer to
the user manual for further
instructions.
• Use a pin or other narrow object
to press the Reset button (C)
when needed.
DEUTSCH
3
Wireless AC1200 PoE Access Point • Kurzanleitung Deutsch
A
B
D
C
Diese Kurzanleitung zeigt die grundlegenden Installationsschritte. Details
zur Anwendung sowie die Spezikationen nden Sie im Benutzerhandbuch
auf der beiliegenden CD und auf intellinetnetwork.com.
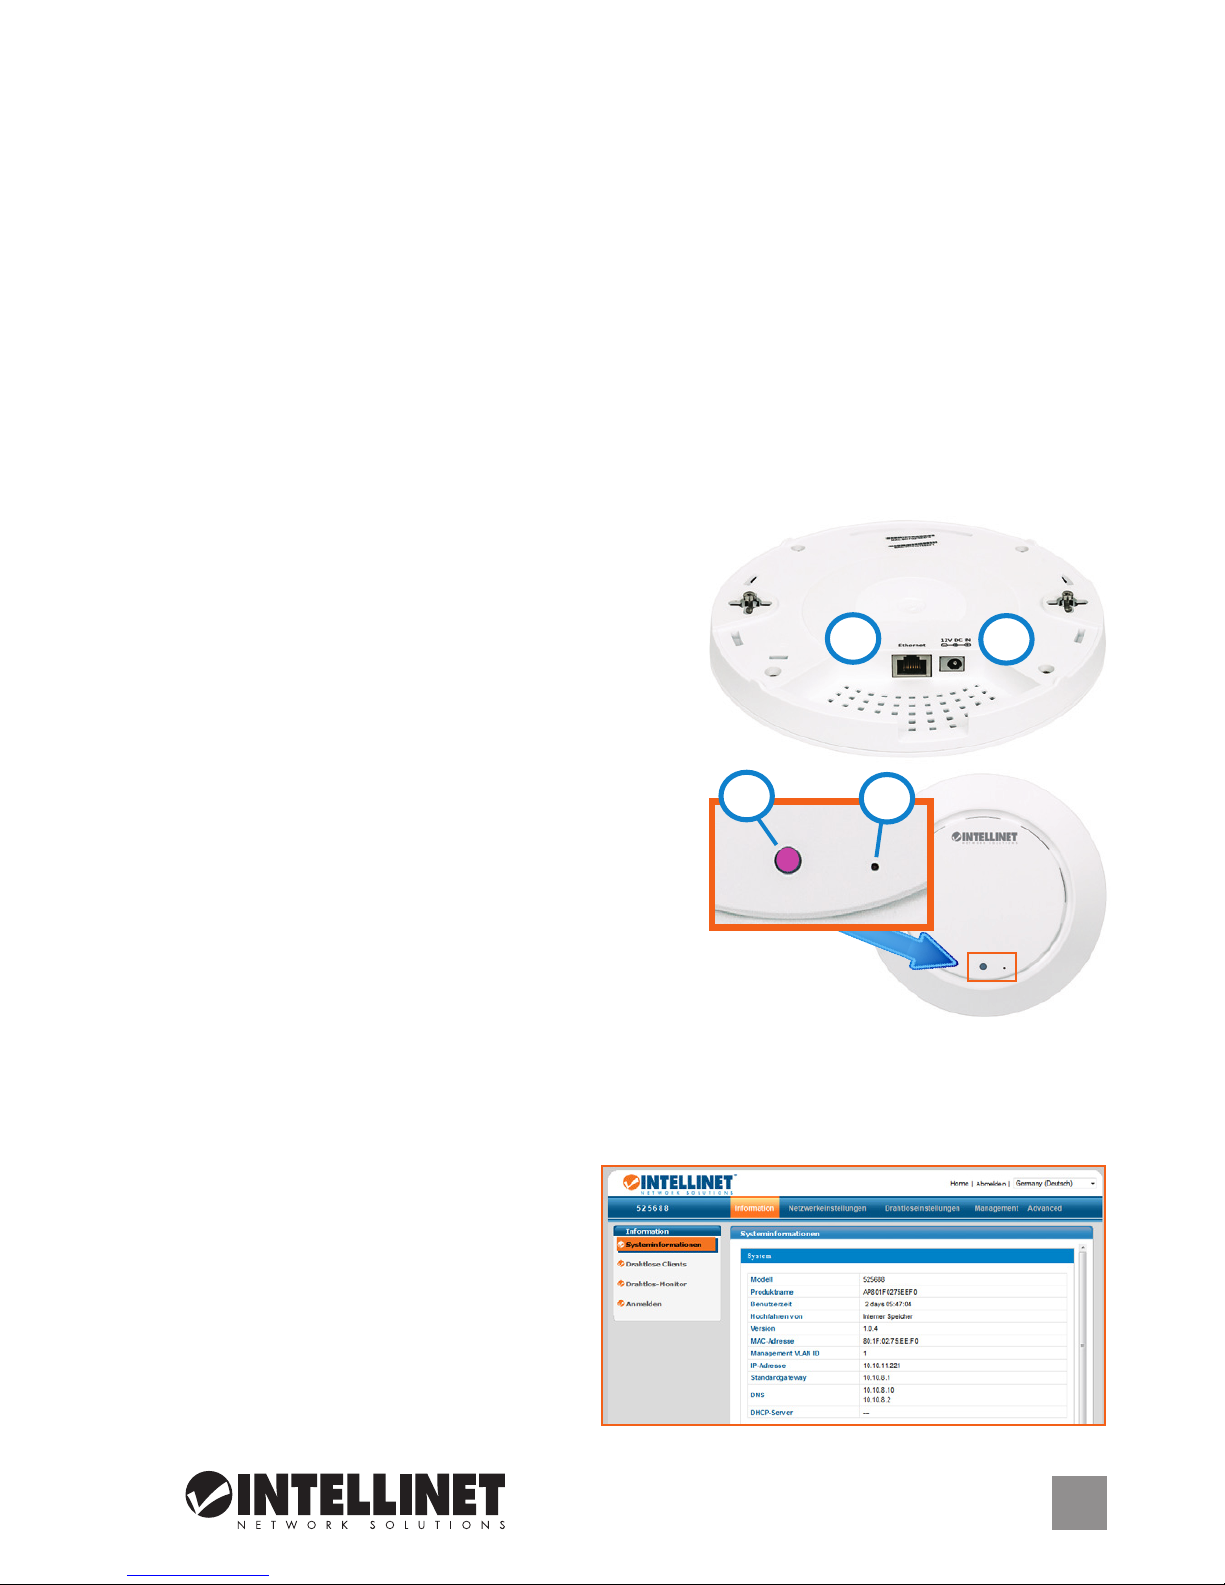
ANSCHLÜSSE
1. In Abschnitt III des Handbuchs nden Sie Informationen, um dieses Gerät
zu montieren (Decke, Wand, Mast, etc.) wo die Kabel angeschlossen
werden sollen. Hinweis: Wenn Sie den Access Point an einer schwer
zugänglichen Stelle platzieren, müssen Sie eventuell das Web Interface
für die Reset-Funktion verwenden.
2.
Schließen Sie Ihr Ethernet-Kabel
(A)
und das Netzteil
(B)
an den Access
Point an und verbinden Sie die Kabel für Strom- und Netzwerkanschluss.
Hinweis:
Statt an eine Wandsteckdose
können Sie den Access Point auch
über
das Netzwerkkabel an eine IEEE802.3af
PoE-kompatible Stromquelle anschließen.
• Sobald der Access Point verbunden ist,
leuchtet die LED (D) blau auf und zeigt
damit an, dass das Gerät eingeschaltet ist.
Dann leuchtet sie violett und zeigt damit,
dass es betriebsbereit ist. Sollte sie gelb
blinken, liegt eine Störung oder eine
schlechte Netzwerkverbindung vor.
BETRIEB
1.
Geben Sie http://192.168.2.1 in die Adresszeile
Ihres Webbrowsers ein, um
ein Login-Fenster
aufzurufen. Über dieses gelangen Sie zur Benutzer oberäche, auf der Sie
alle Funktionen und Einstelllungen des Access Points zugreifen können.
2. Geben Sie “admin” als Benutzernamen und “1234” als Passwort ein und
klicken Sie dann auf “OK”, um die Systeminformationen in der Benutzer oberäche aufzurufen.
• Verwenden Sie eine
Büroklammer oder einen
anderen schmalen Gegenstand,
um die Reset-Taste (C) zu
betätigen, falls notwendig.
4
ESPAÑOL
Access Point AC1200 con PoE • Guía de Instalación Rápida Español
En esta guía de instalación rápida se presentan los pasos básicos para su
instalación. Para detalles de operación y más especicaciones, reérase al
manual de usuario incluido en el CD o visite intellinetnetwork.com.
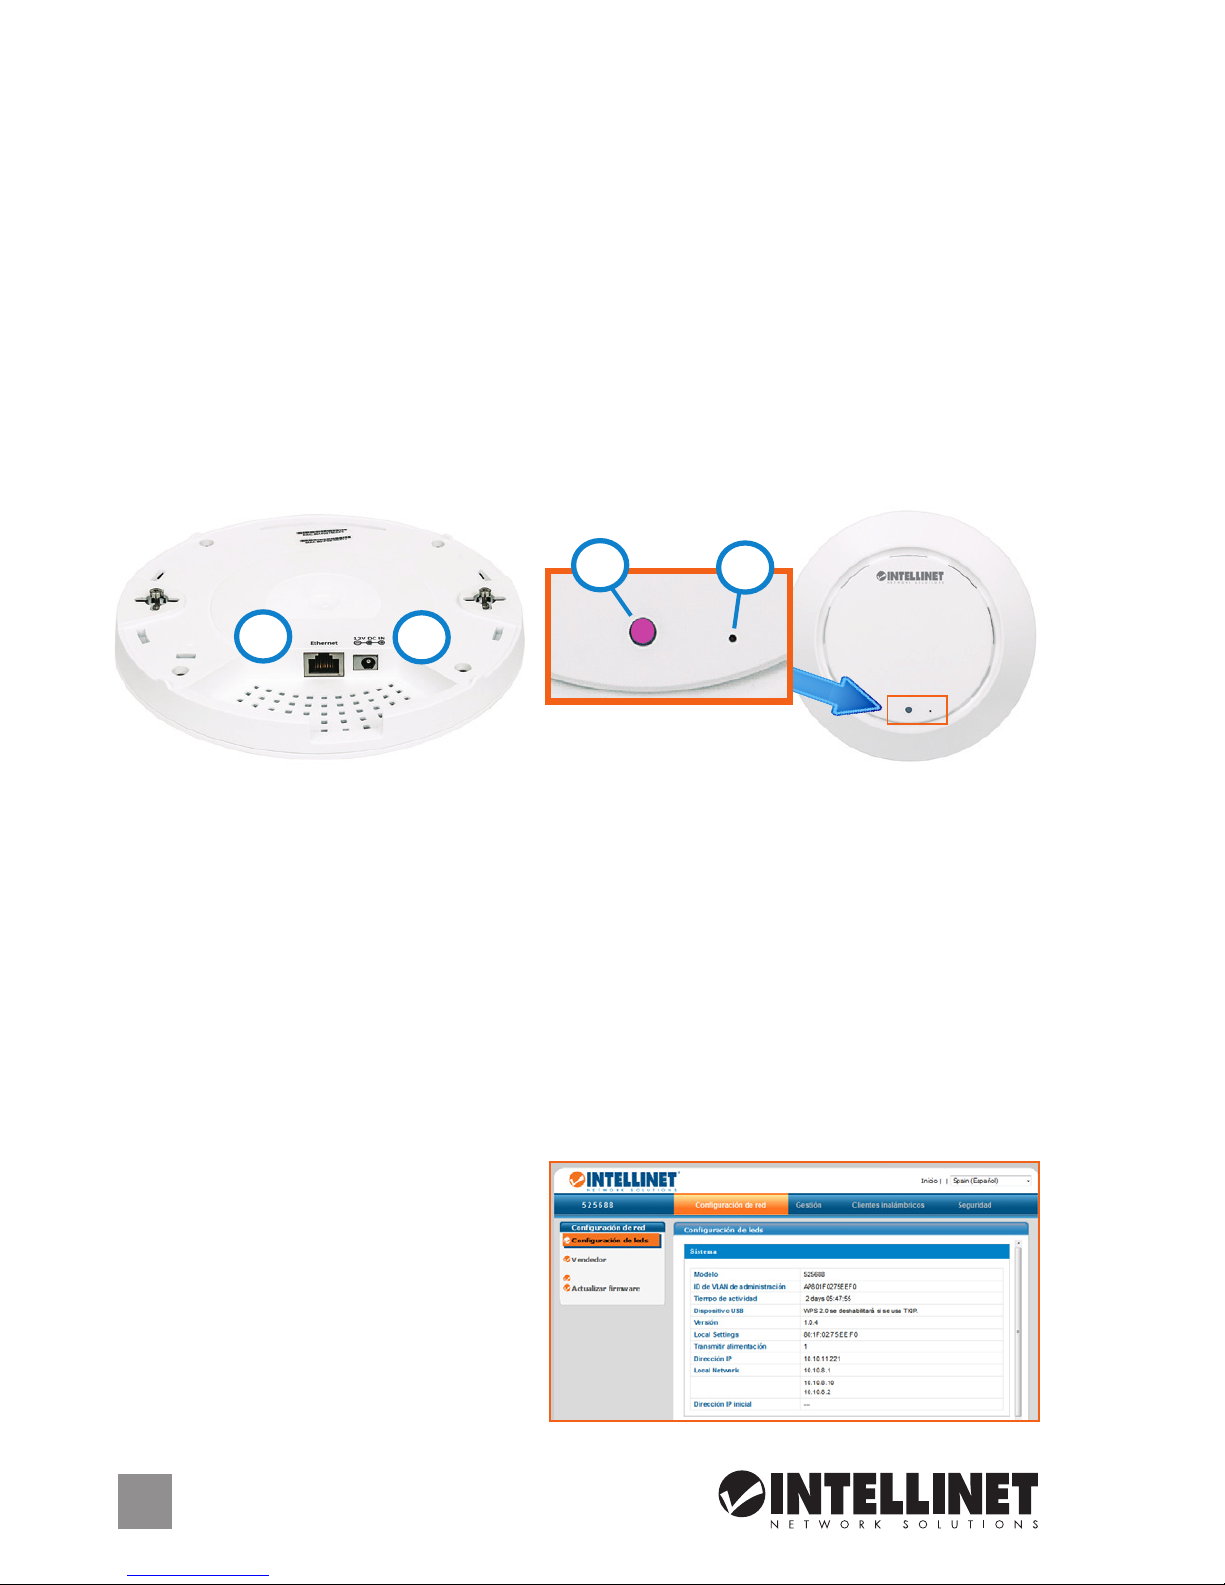
CONEXIONES
1.
Consulte el manual de usuario la Sección III para montar este dispositivo
(pared, techo, columna, etc.) donde los cables se alcancen. Nota: Coloque
el Access Point de tal forma que le sea fácil alcanzar la función de Reset.
2.
Conecte el cable Ethernet (A) y el cargador (B) al Access Point y conecte el
otro extremo de los dos cables. Nota: Puede conectar el Access Point en un
inyector de corriente PoE IEEE802.3af en lugar de una toma de corriente.
• Una vez que el Access Ponit esté conectado, el LED (
D
) se iluminara en
azul indicando que esta encendido. A continuación, se iluminara en
púrpura para indicar que está listo para usarse. Si se ilumina en amarillo,
hay un error o una mala conexión de la red.
OPERACIÓN
1. En su navegador web entre a http://192.168.2.1 para abrir la ventana de
inicio de sesión del Administrador Web, donde puede congurar todas
las funciones y ajustes del Access Point.
2. Ingrese usuario: “admin” y contraseña: “1234” haga clic en “Ok” mostrará
la pantalla de Información del Sistema. Consulte el manual de usuario
para obtener más instrucciones.
• Use un aller u otro objeto
delgado para presionar el botón
Reset (C) cuando sea necesario.
A
B
D
C
 Loading...