

Intellinet 525657 ISTREAM HD User Manual
I
S
TREAM
HD
Wireless Range Extender
USER MANUAL
MODEL 525657
INT-525657-UM-0614-01

TABLE OF CONTENTS
INTRODUCTION ......................................................................................... 3
What Is the iStream HD Wireless Range Extender? ........................................ 3
Package Contents ..................................................................................... 3
HARDWARE OVERVIEW ............................................................................. 4
Device Status LEDs ................................................................................... 5
RJ45 Network Port .................................................................................... 6
WPS Push-Button ..................................................................................... 6
Power On / Off Switch ............................................................................... 6
Power Outlet Connector ............................................................................. 6
INSTALLATION .......................................................................................... 7
Installation Using WPS .............................................................................. 7
Manual Installation ................................................................................... 9
ADVANCED CONFIGURATION MENU ......................................................... 14
Setting Up Your Computer’s Network Adapter ............................................. 14
Accessing the Advanced Configuration Menu .............................................. 18
Advanced Configuration Menu Options ....................................................... 20
TROUBLESHOOTING ................................................................................ 27
SPECIFICATIONS .....................................................................................29
SAFETY AND REGULATORY NOTICES........................................................ 30
WARRANTY INFORMATION ...................................................................... 31
- 2 -

INTRODUCTION
What Is the iStream HD Wireless Range Extender?
Thank you for purchasing the Intellinet Network Solutions iStream HD™ Wireless
Range Extender. The iStream HD is the ideal solution for boosting your WiFi signal
and eliminating dead spots. Better wireless signal strength means you stay
connected longer and reduce your 3G/4G mobile data bill. Better wireless signal
strength also means that your wireless connection speed will be faster over a
larger area.
Enjoy a lag-free online gaming experience or watch streaming video in full HD.
Even better, the iStream HD is quick and easy to set up.
Package Contents
- iStream HD Wireless Range Extender
- Ethernet Cat5 RJ45 cable
- Quick installation guide
- 3 -
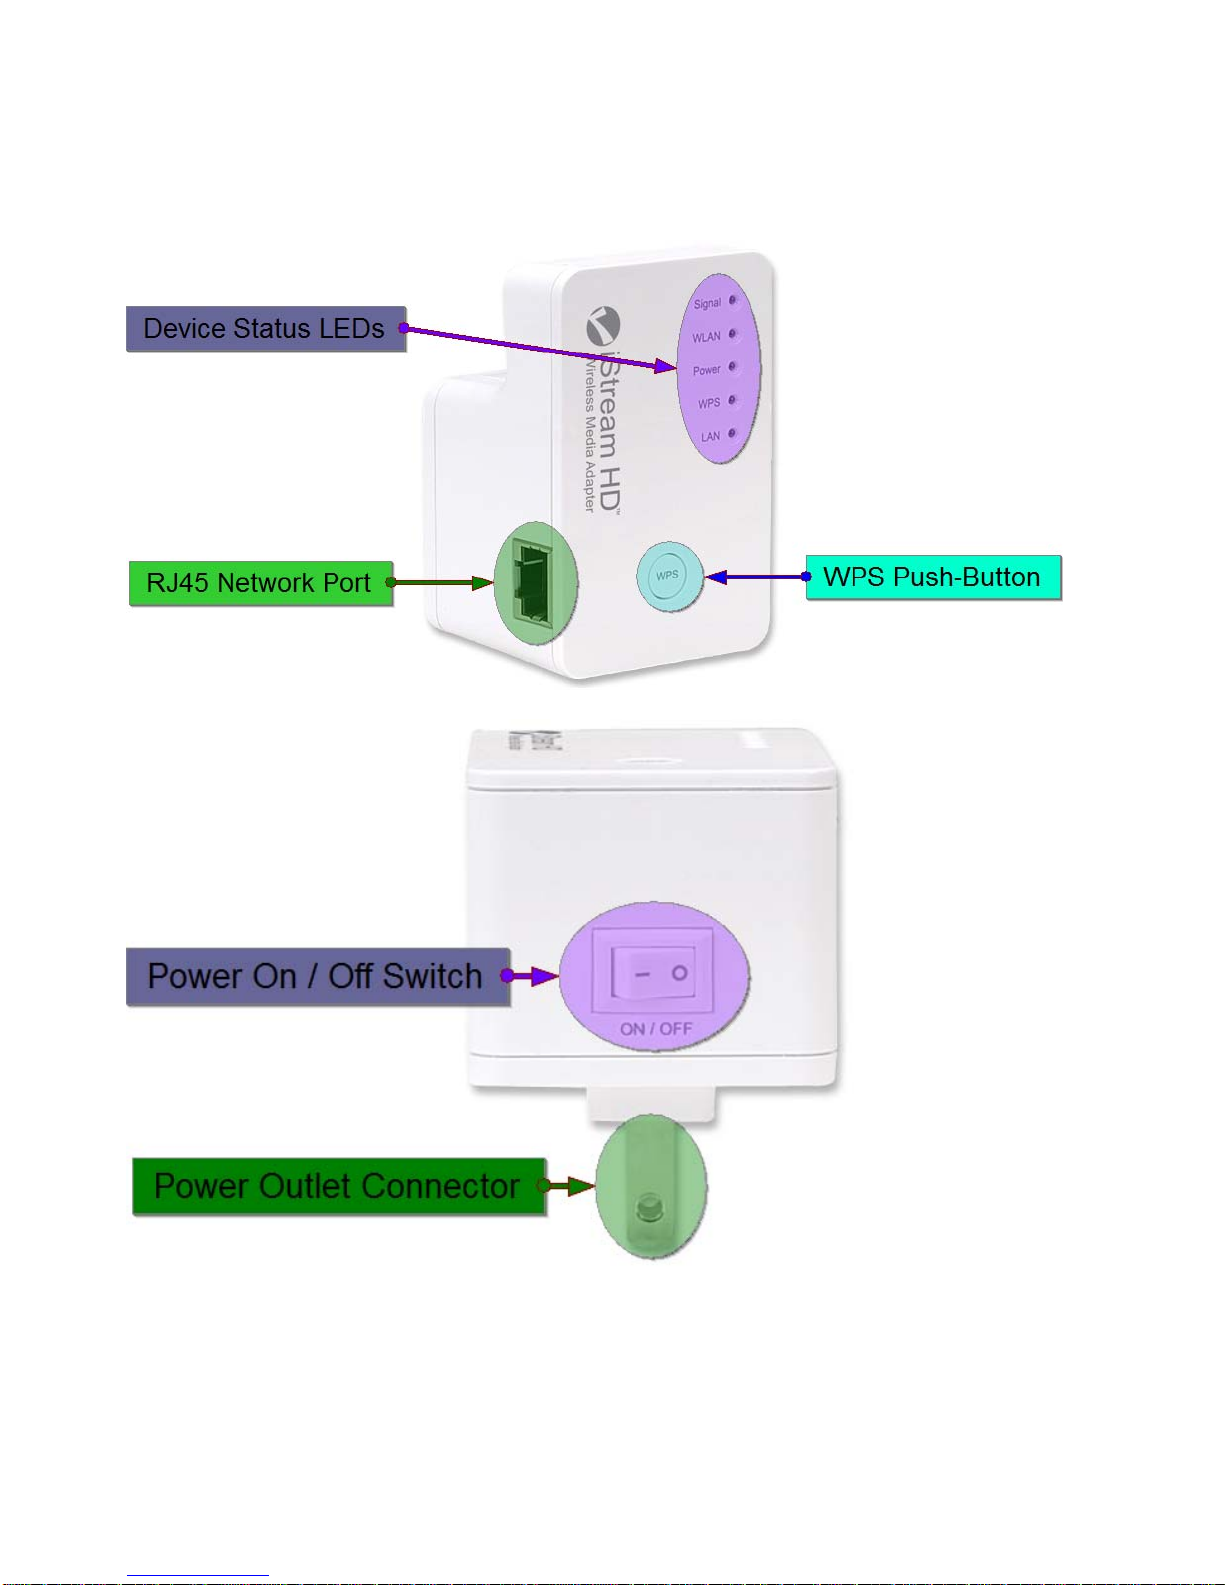
HARDWARE OVERVIEW
- 4 -

Device Status LEDs
The iStream range extender allows disabling the LEDs completely via the
configuration interface. See “Advanced Configuration Menu Options”
for details. So, if the LEDs do not light up there is no need to
panic; it may be because they have been disabled.
Signal:
This LED indicates the status of the current wireless
connection.
Steady on: Good signal reception (better than 50%).
Flashing slowly: Low signal reception.
The quality of the wireless signal is so low that the connection is subject to slowdowns and lag. If you want to stream media or play online games, then this
represents a problem.
Flashing quickly: Poor signal reception.
The signal quality is too low. The iStream range extender cannot properly
communicate with your wireless network. If there is any communication at all, it
will be intermittent at best.
Off: The iStream isn’t connected to any wireless network.
WLAN:
When this LED flashes, it means that the wireless radio of the iStream range
extender is operating normally. The LED will flash, regardless of whether or not
the iStream range extender is connected to a network.
Power:
The Power LED is on during normal operation. When you perform a hardware
reset, the Power LED starts flashing briefly.
WPS:
If this LED is lit, it means that the iStream range extender is connected to a
wireless network via WPS (Wi-Fi Protected Setup. Read more on this below).
LAN:
This LED must light up when the iStream range extender is connected to the
network port of a Web-ready TV, Blu-ray player or gaming console.
- 5 -

RJ45 Network Port
The iStream range extender is equipped with a high-speed network port, to which
you can connect your computer for the initial setup, in case your wireless router
does not support WPS - for example Verizon FIOS® wireless routers. You can use
the included network cable for that purpose, but it is no problem to use any
standard Ethernet network cable that meets or exceeds the Cat5 specification. If
you are not sure about this, don’t worry. Any standard network cable purchased
from various retailers or online shops will work just fine.
WPS Push-Button
Wi-Fi Protected Setup (WPS) is a computing standard that attempts to allow easy
establishment of secure wireless home-network connections. Created by the Wi-Fi
Alliance and introduced in 2007, the goal of the protocol is to allow home users
who know little of wireless security and may be intimidated by the available
security options to set up the encryption method WPA2, as well as making it easy
to add new devices to an existing network without entering long passphrases.
So, what does this all mean for you? If your wireless router is a newer device,
there is a good chance that it is equipped with a WPS push-button, in which case
you are in luck, because adding the iStream range extender to your network will
just be a matter of a couple of minutes. If the router is a little bit older and does
not support WPS, it will take a little bit longer.
Power On / Off Switch
When it’s not in use, you can power down the iStream range extender to save
energy. Since the connection to your wireless network is re-established in less
than a minute after startup, there are no downsides to powering down the iStream
range extender when it is not in use.
Power Outlet Connector
The iStream range extender plugs directly into a power wall outlet. It supports
110V 60 Hz for U.S. and 230V 50 Hz for European power outlets. The plug type
will vary, depending on your location. The illustration below depicts the U.S.
version of the iStream adapter.
- 6 -
INSTALLATION
The iStream HD Wireless Range Extender can be installed in one of two ways. The
first way involves the aforementioned WPS, while the second (we call it the
manual method) uses a more traditional setup process. Both ways lead to the
same result, and it is only a matter of convenience as to why you would use WPS
over the manual method, provided your router supports WPS.
Installation Using WPS
If your wireless router is equipped with a WPS button (sometimes referred to as
N-connect), then you can connect the iStream HD to your network literally just by
pushing two buttons.
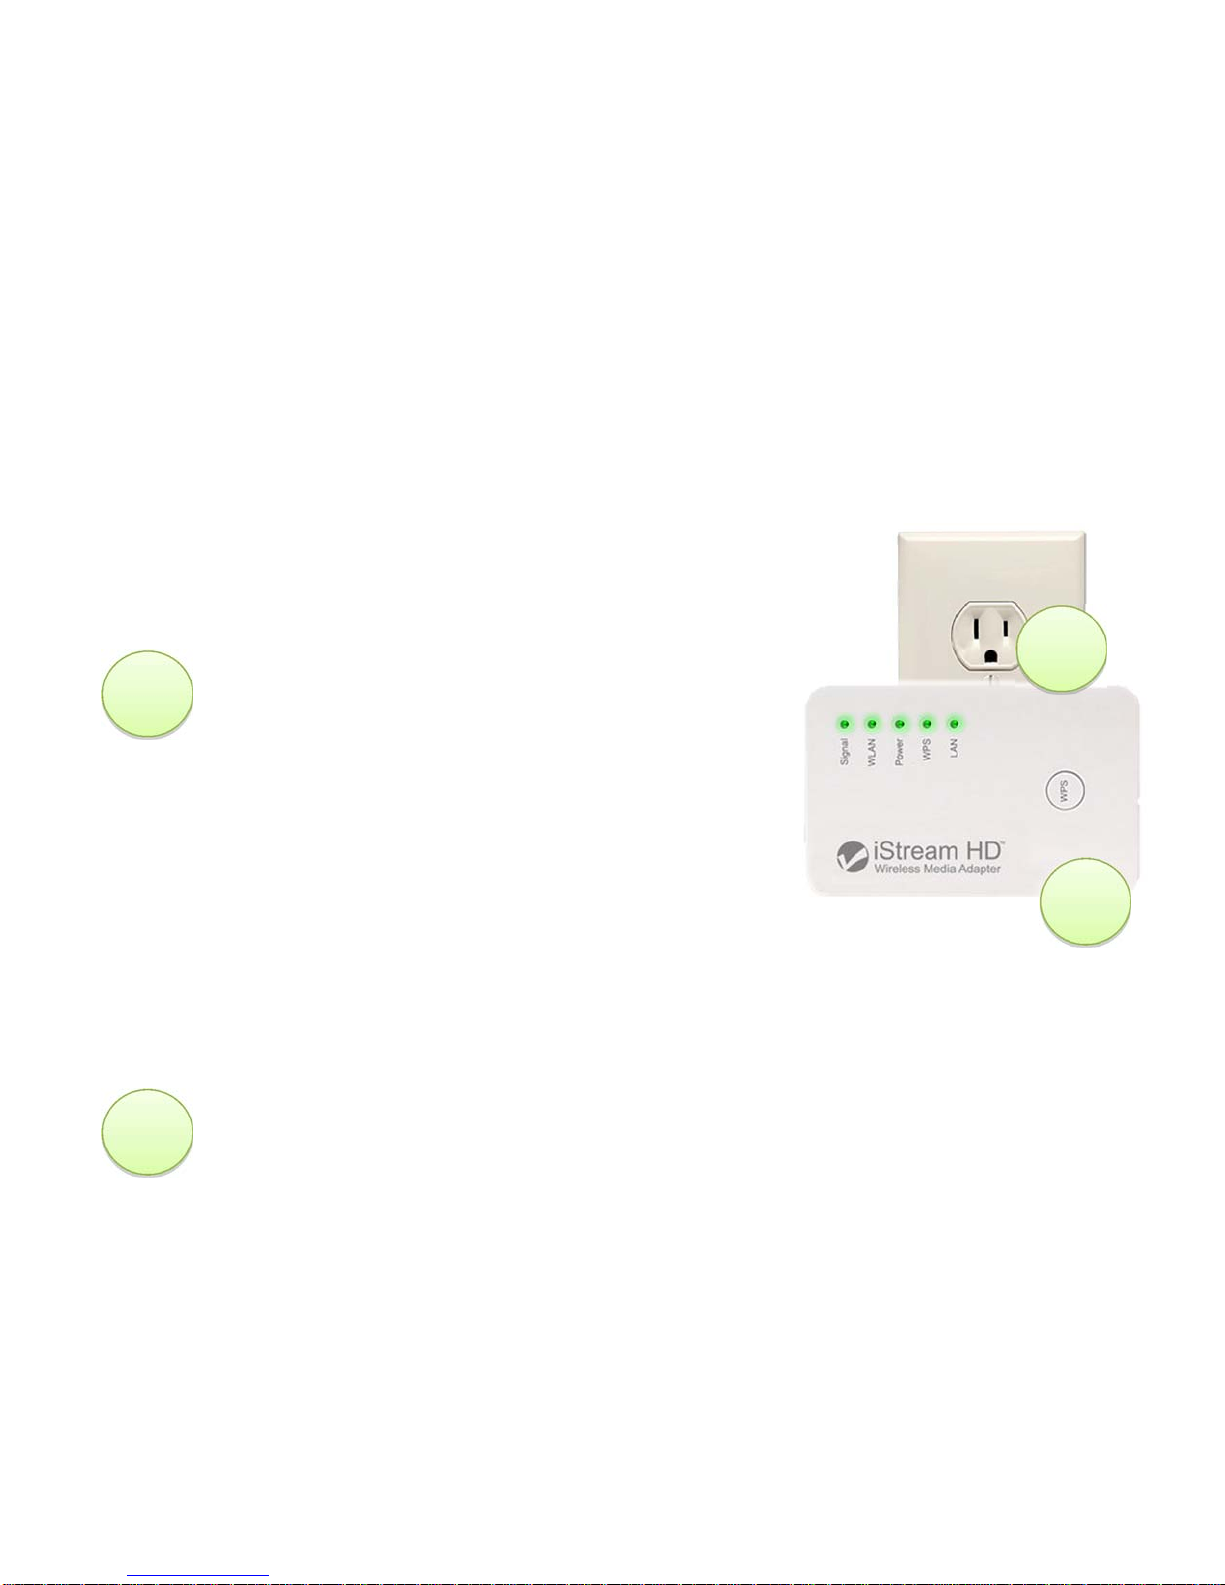
Plug the iStream range extender into the wall
1
2
outlet. The position of the wall outlet must be
chosen carefully: Make sure that it's close
enough to your wireless router that the
wireless signal is still relatively strong. If you
move too far away from the wireless router
and the wireless signal is already quite weak
in that location, you will not be able to
achieve good results. Use a wireless device
and check the signal strength in the location where
you plan to install the iStream HD. If the signal strength is below
50%, you should move closer to the wireless router.
Set the power switch to the “On” position, and wait for about one minute.
1
2
- 7 -
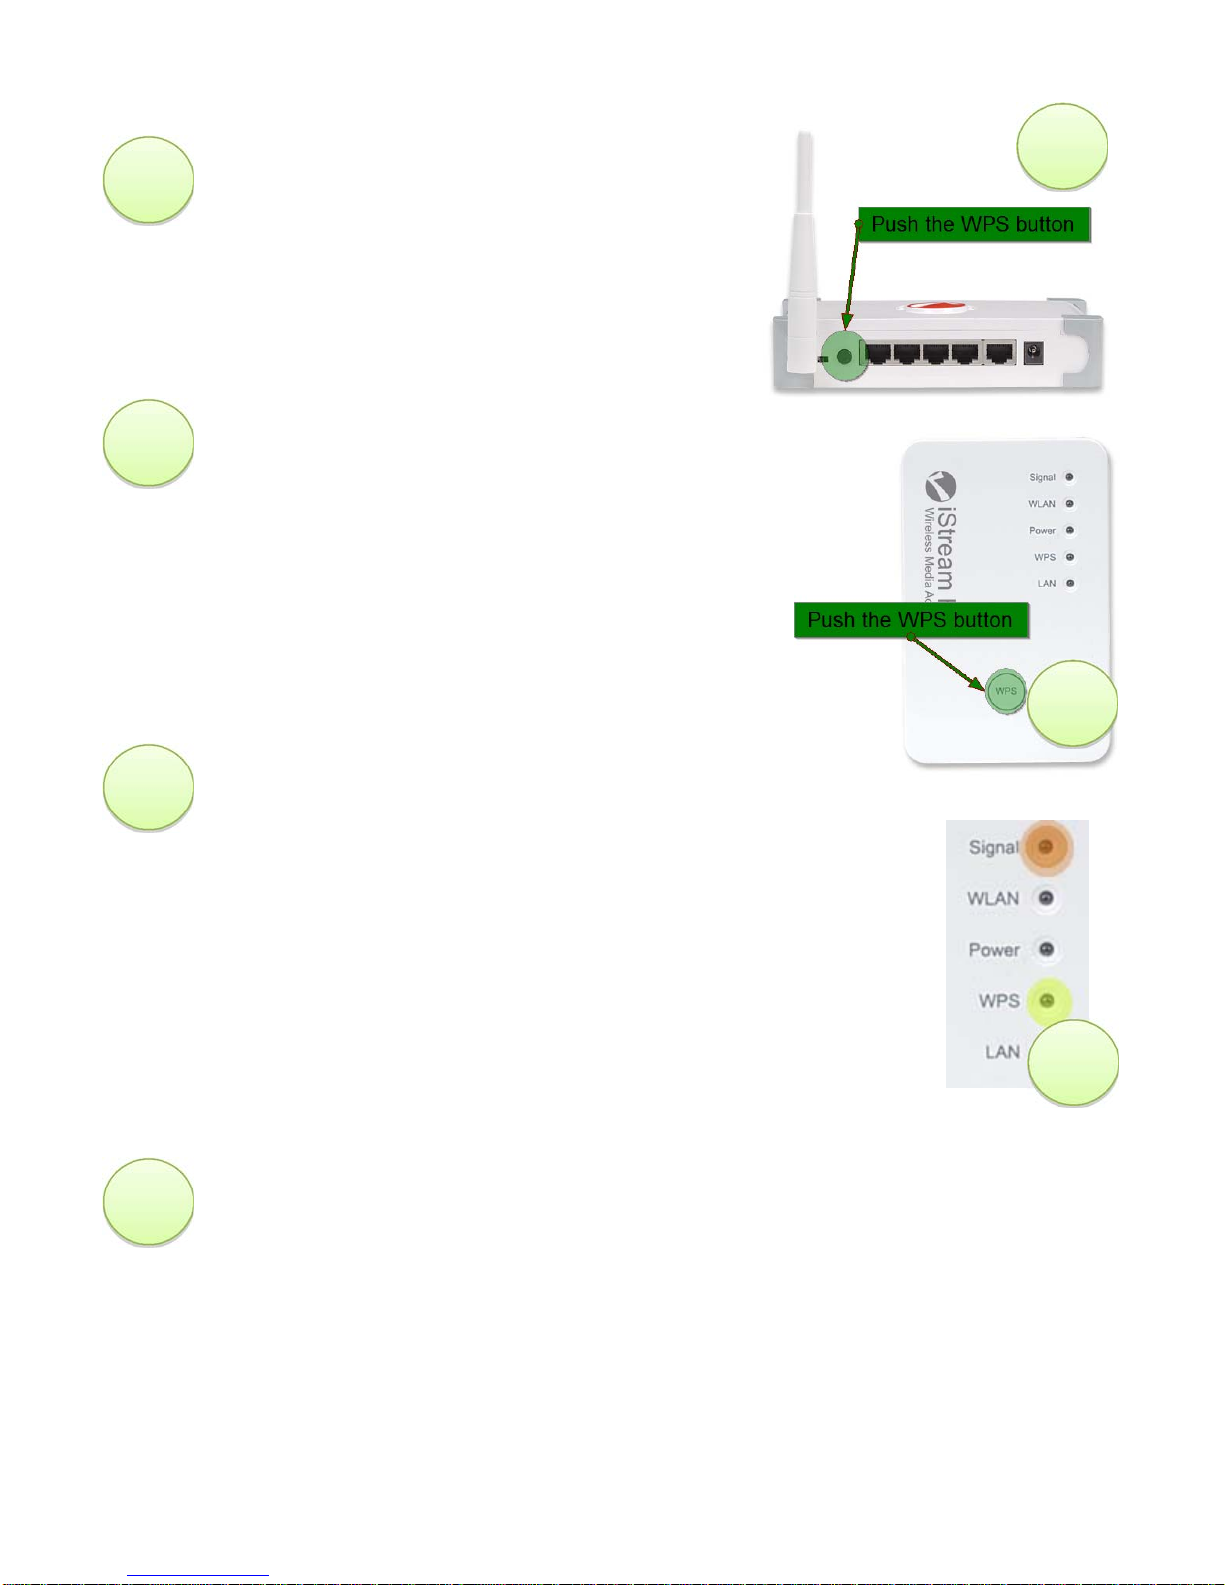
3
4
5
6
On your router, locate and press the WPS
button. The picture illustrates the location
of the WPS button on an Intellinet wireless
router.
Press the WPS button on the iStream HD for
two seconds. You have two minutes to
complete Step 4 after finishing Step 3.
Once Steps 3 and 4 are complete, the following things will happen.
The WPS LED will flash briefly.
The signal LED will come on.
The WPS LED will stay on.
After a few seconds, both the Signal and WPS LEDs
will go out.
About 10 to 15 seconds later, both the Signal and
WPS LEDs will come back on and stay on, indicating
that the wireless connection to your network has
been successfully established.
That concludes the setup. You can now connect to the wireless network and
enjoy the improved signal strength.
3
4
5
- 8 -

Manual Installation
If you need to install the iStream HD Wireless Range Extender manually, you will
need to have the following items before you can begin.
1. You need to know the name of your wireless network (it is also referred to
as the SSID).
2. If your wireless network is protected by an encryption key, you need to
know what that password is.
Hint: It is the same password you need to enter on your laptop or tablet
when you connect to your wireless network for the first time.
3. A desktop or laptop computer running Microsoft Windows, Mac OS or Linux
that has a standard Web browser installed (Firefox, Safari, Chrome or
Internet Explorer).
Plug the iStream HD Wireless Range Extender into
1
2
the wall outlet. Make sure that the power switch is
set to the “On” position.
Note: Your computer should be shut down at this
point.
Connect the iStream HD Wireless Range Extender to your computer’s LAN
using the included network cable. Start the computer and allow it to finish
booting.
- 9 -
3
4
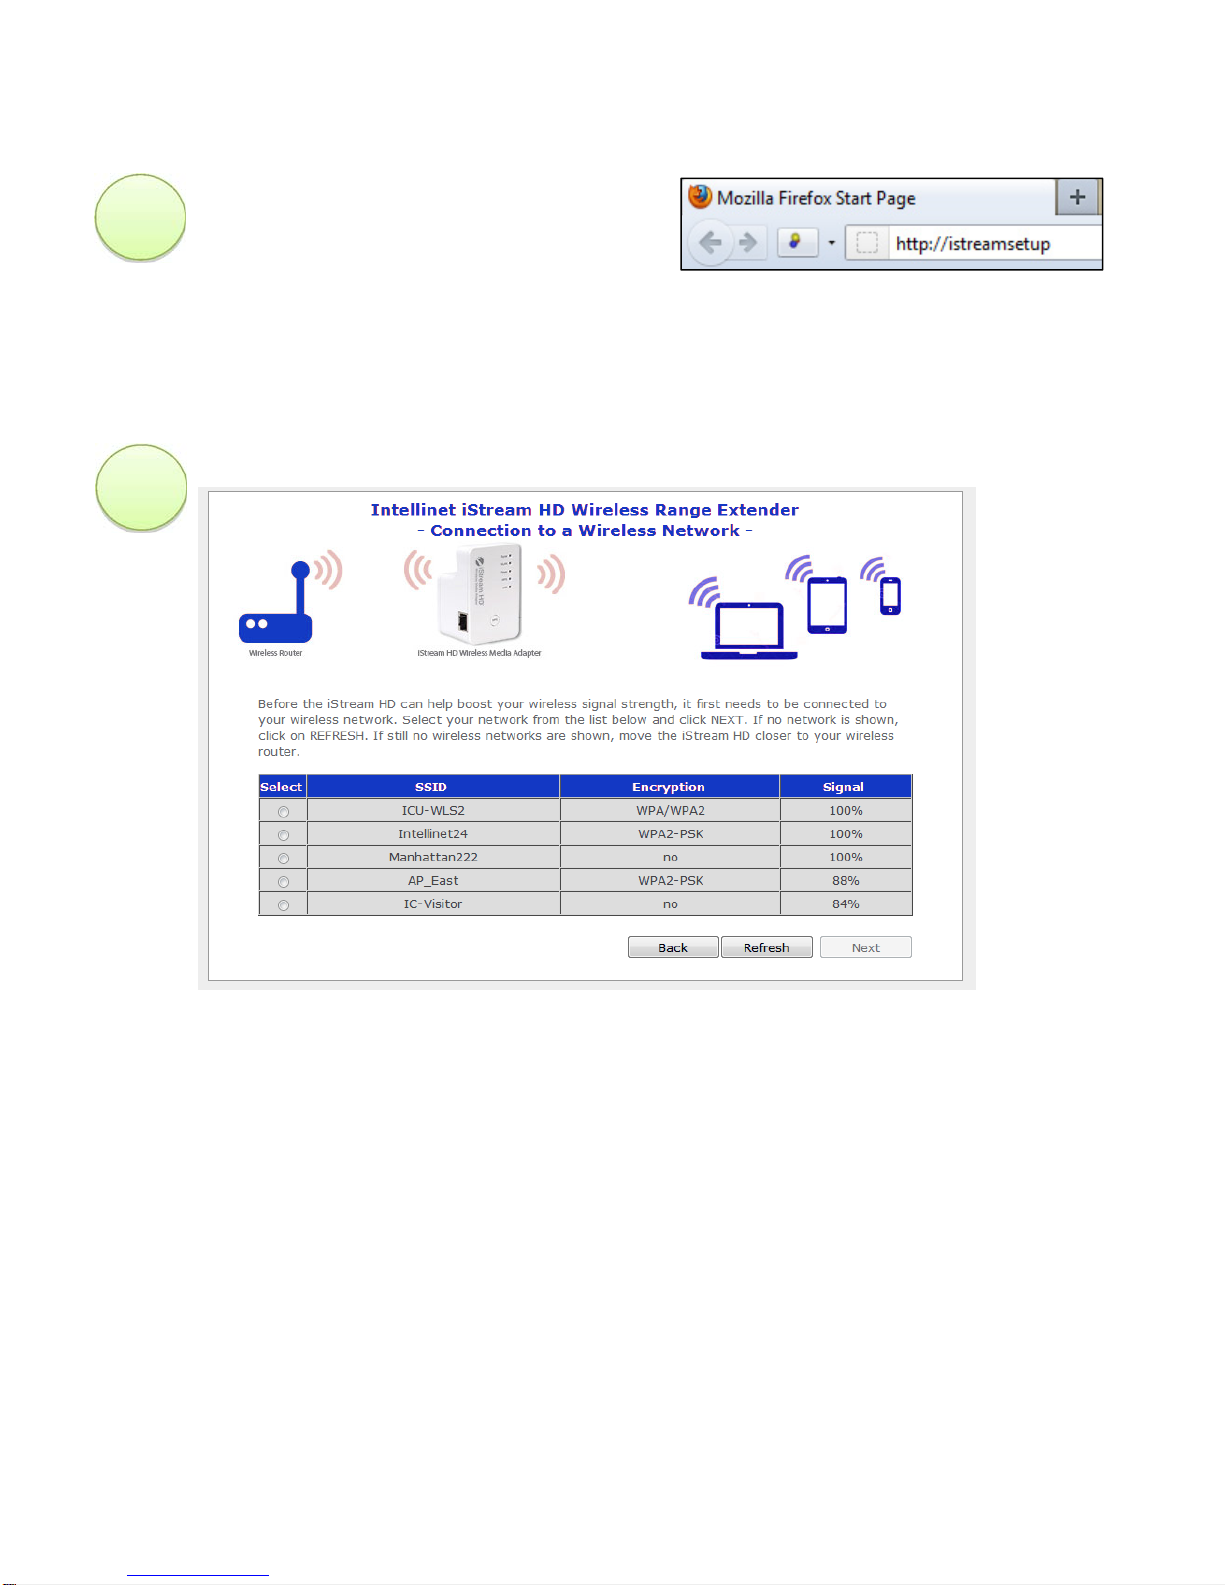
Launch your Web browser and direct
it to http://istreamsetup. In case this
fails, you can also enter
http://192.168.2.254.
A password window will be displayed. Key in user name “admin” and “1234”
as the password.
You will be presented with the first page of the wireless connection wizard.
The page shows all wireless networks currently in range. You need to select
the network you wish to connect to, and then click “Next.”
- 10 -
 Loading...