

Intellinet 524773 User Manual

Wireless
150N UsB
MiNi
AdApter
User
MANUAl
MODEL 524773
INT-524773-UM-1009-01

2
INTRODUCTION
Thank you for purchasing the INTELLINET NETWORK SOLUTIONS™ Wireless
150N USB Mini Adapter, Model 524773.
This ultra-compact high-speed adapter lets you connect your notebook or desktop
PC to wireless networks faster than ever before, with link speeds of up to 150 Mbps.
This adapter is also compatible with 802.11b and 802.11g wireless access points
and wireless routers, giving you the exibility to start upgrading your wireless
network without the need to replace your existing equipment.
The easy-to-follow instructions in this user manual help make setup and operation
relatively simple, so you’ll soon be enjoying the benets of these additional features:
• Supports WMM (Wi-Fi Multimedia) for increased multimedia data throughput
• Supports WEP (64/128 bit), WPA and WPA2 data encryption
• Supports Cisco CCX
• Supports the most popular operating systems: Windows XP, Vista and Windows 7
• Supports Hi-Speed USB 2.0/1.1 interface
• Supports Software AP (turns your wireless client into a wireless access point)
• Three-Year Warranty
NOTE: For a quick install procedure, refer to the printed quick install guide enclosed
with this product.

3
CONTENTS
CoNteNts
sAfety & CoMpliANCe stAteMeNts
Federal Communications Commission (FCC) Statements
FCC PART 15
This equipment has been tested and found to comply with the limits for a Class B
digital device, pursuant to Part 15 of Federal Communications Commission (FCC)
Rules. These limits are designed to provide reasonable protection against harmful
interference in a residential installation. This equipment generates, uses and can
radiate radio frequency energy and, if not installed and used in accordance with the
instructions, may cause harmful interference to radio communications. However,
there is no guarantee that interference will not occur in a particular installation. If
this equipment does cause harmful interference to radio or television reception, which
can be determined by turning the equipment off and on, the user is encouraged to
try to correct the interference by one or more of the following measures:
• Reorient or relocate the receiving antenna.
• Increase the separation between the equipment and the receiver.
• Connect the equipment to an outlet on a circuit different from the receiver.
• Consult the dealer or an experienced radio/TV technician for help.
1 INSTALLATION ...............................................................................................5
1.1 Installing the Driver and Utility ................................................................5
1.2 Connecting to a Wireless Access Point ..................................................7
2 CONFIGURATION UTILITY .......................................................................... 10
2.1 General ...............................................................................................11
2.2 Prole ...............................................................................................12
2.3 Available Network ................................................................................16
2.4 Status ...............................................................................................17
2.5 Statistics ...............................................................................................18
2.6 Wi-Fi Protected Setup ..........................................................................18
2.6.1 Network Setup Using PIN Input Cong ..................................18
2.6.2 Network Setup Using Push Button Cong .............................20
2.7 SoftAP ...............................................................................................21
2.7.1 AP General / Properties Settings ...........................................21
2.7.2 AP Advanced ..........................................................................22
2.7.3 AP Statistics ...........................................................................24
2.7.4 ICS .........................................................................................24
3 SPECIFICATIONS .........................................................................................25

4
RE GUL ATORY STATEM ENTS
FCC CAUTION
This device and its antenna must not be co-located or operated in conjunction with
any other antenna or transmitter.
This device complies with Part 15 of the FCC Rules. Operation is subject to the
following two conditions: (1) This device may not cause harmful interference, and
(2) This device must accept any interference received, including interference that
may cause undesired operation.
Any changes or modications not expressly approved by the party responsible for
compliance could void the authority to operate equipment.
FCC RADIATION EXPOSURE STATEMENT
This EUT complies with SAR for general population / uncontrolled exposure limits in
ANSI/IEEE C95.1-1999 and has been tested in accordance with the measurement
methods and procedures specied in OET Bulletin 65 Supplement C. The version
marketed in the U.S. is restricted to usage of channels 1 through 11.
R&TTE Compliance Statement
This equipment complies with all the requirements of Directive 1999/5/EC of the
European Parliament and the Council of March 9, 1999, on radio equipment and
telecommunication terminal equipment and the mutual recognition of their conformity
(R&TTE). The R&TTE directive repeals and replaces Directive 98/13/EEC
(Telecommunications Terminal Equipment and Satellite Earth Station Equipment)
as of April 8, 2000.
SAFETY
This equipment is designed with the utmost care for the safety of those who install
and use it. However, special attention must be paid to the dangers of electric shock
and static electricity when working with electrical equipment. All guidelines must,
therefore, be followed at all times to ensure the safe use of the equipment.
EU COUNTRIES INTENDED FOR USE
T
he ETSI version of this device is intended for home and ofce use in Austria,
Belgium, Denmark, Finland, France, Germany, Greece, Ireland, Italy, Luxembourg,
the Netherlands, Portugal, Spain, Sweden and the United Kingdom. The ETSI
version of this device is also authorized for use in EFTA member states Iceland,
Liechtenstein, Norway and Switzerland.
EU COUNTRIES NOT INTENDED FOR USE
None.
5
IN STALL ATIO N
1 iNstAllAtioN
NOTE: The following installation represents Windows XP procedures and screen
images, but both are similar for Windows 2000, Vista and 7. Some screen images
have been modied to t the format of this manual.
Prior to installation, un-install any previously installed versions of this adapter’s
driver or utility.
1.1 Installing the Driver and Utility
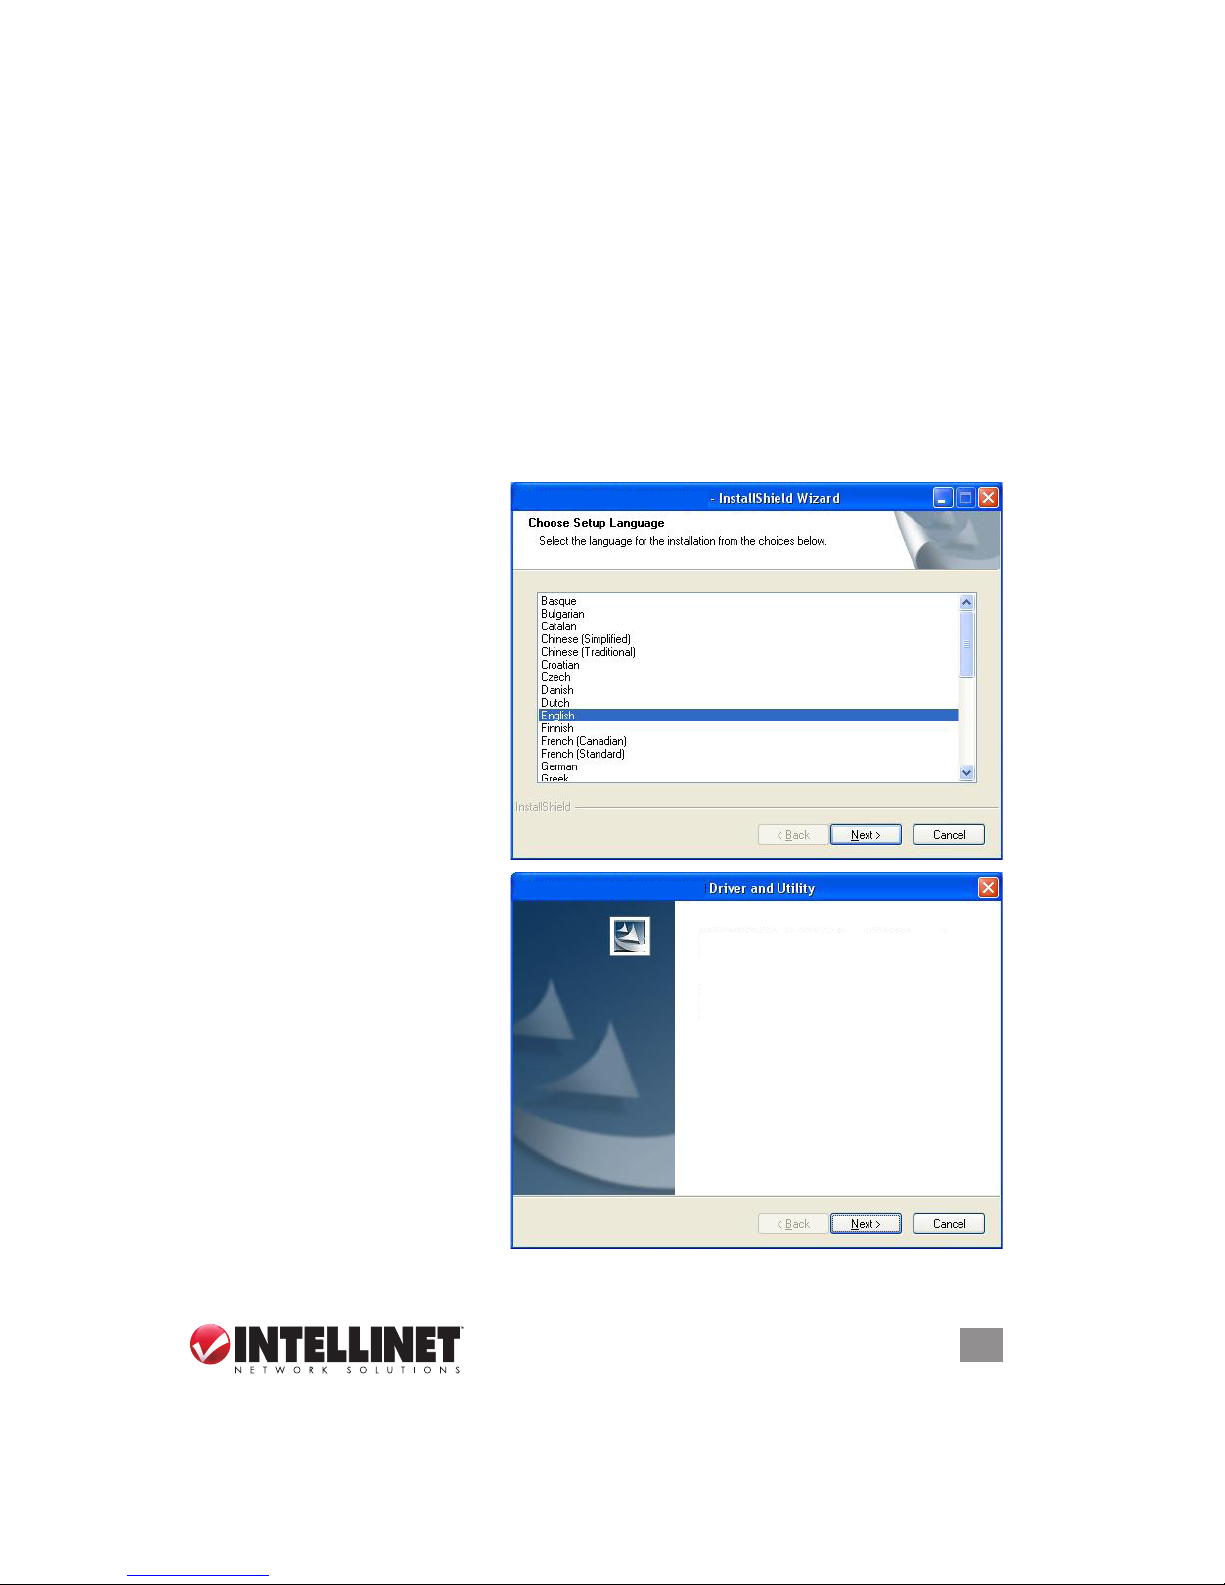
1 . Insert the included setup/installation CD into your CD-ROM drive and run the
“Setup.exe” program.
2. When the Choose Setup
Language screen displays,
highlight your preference
a nd click “Next” to proceed.
3. When the rst of the Driver
and Utility screens displays,
click “Next.”
INTELLINET NETWORK SOLUTIONS
INTELLINET NETWORK SOLUTIONS
INTELLINET NETWORK SOLUTIONS Wireless
150N USB Mini Adapter Driver and Utility
The InstallShield Wizard will install the INTELLINET
NETWORK SOLUTIONS Wireless 150N USB Mini
Adapter Driver and Utility on your computer. To
continue, click “Next.”
6
IN STALL ATIO N
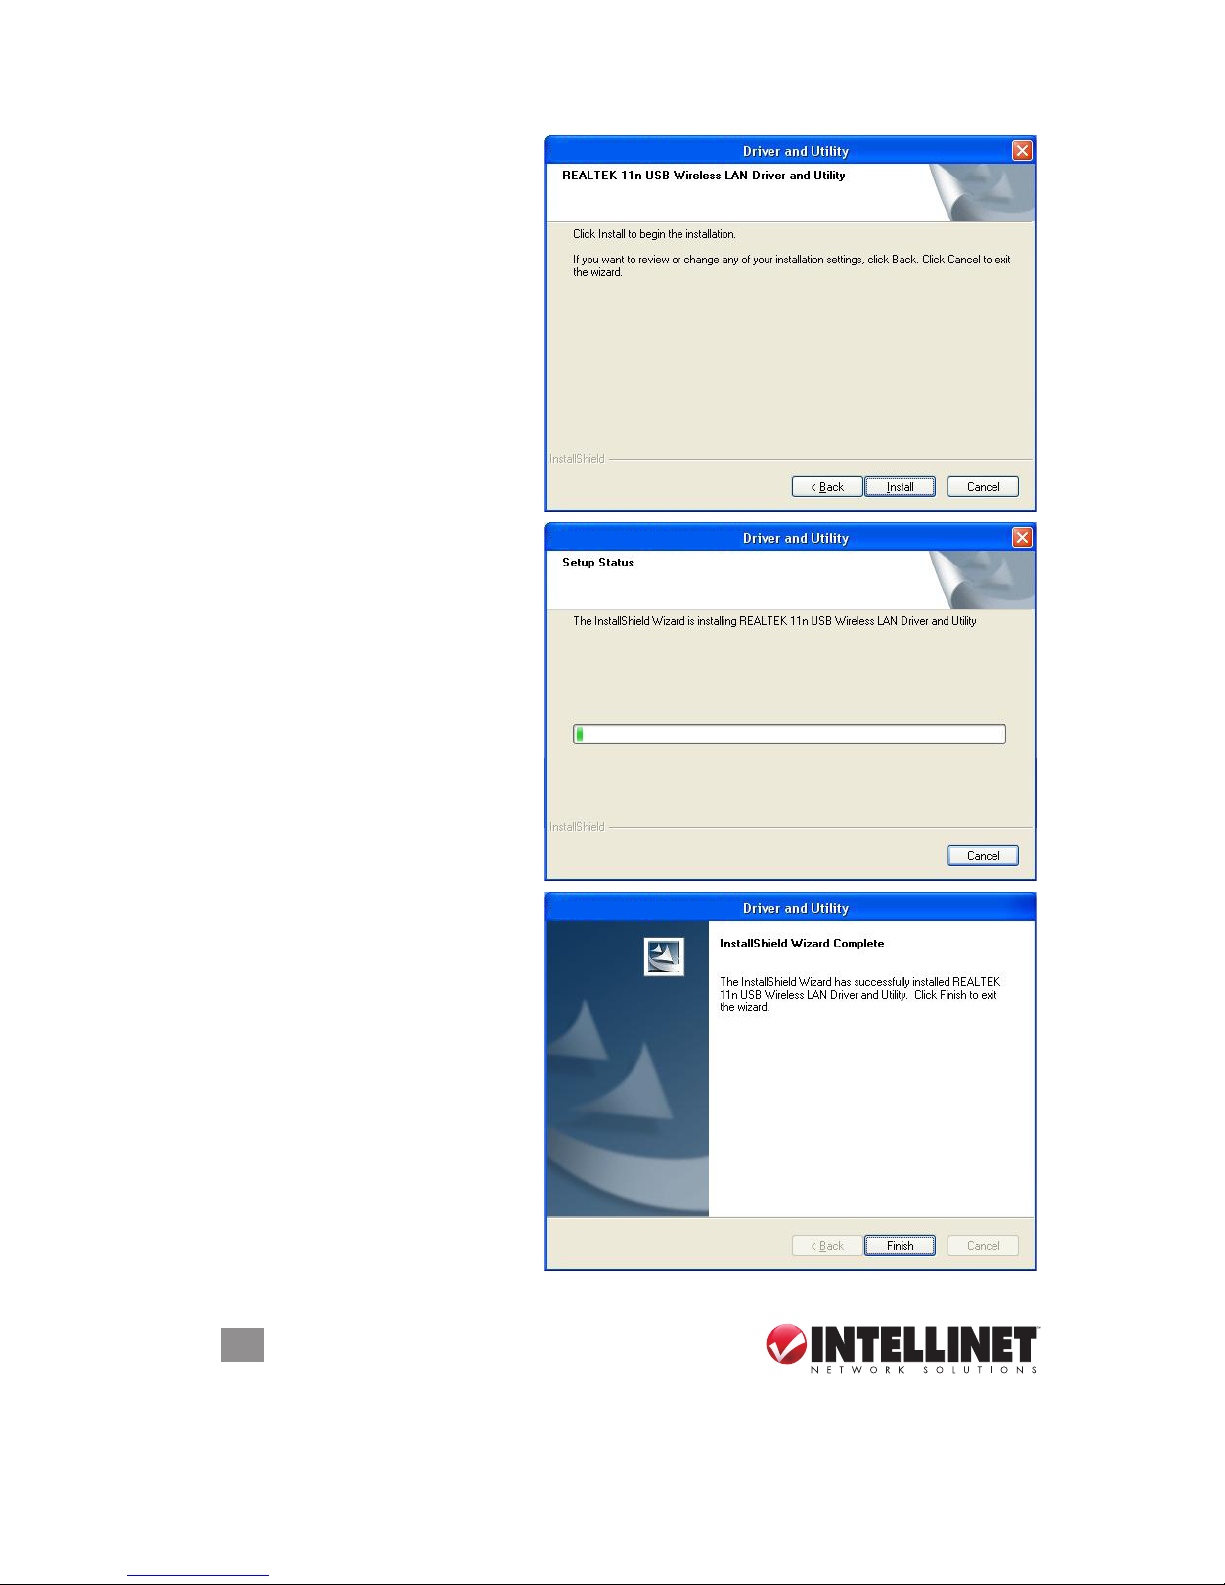
4. When the next screen
displays, click “Install” to
begin the installation. On
any of the screens where
they appear, click “Back” to
return to a previous screen;
click “Cancel” to exit the
w i z a r d .
5. The Setup Status screen
will display, presenting a
status bar that indicates the
progress of the installation.
6. When the InstallShield
Wizard Complete screen
displays, click “Finish.”
INTELLINET NETWORK SOLUTIONS
INTELLINET NETWORK SOLUTIONS
INTELLINET NETWORK SOLUTIONS
7
IN STALL ATIO N
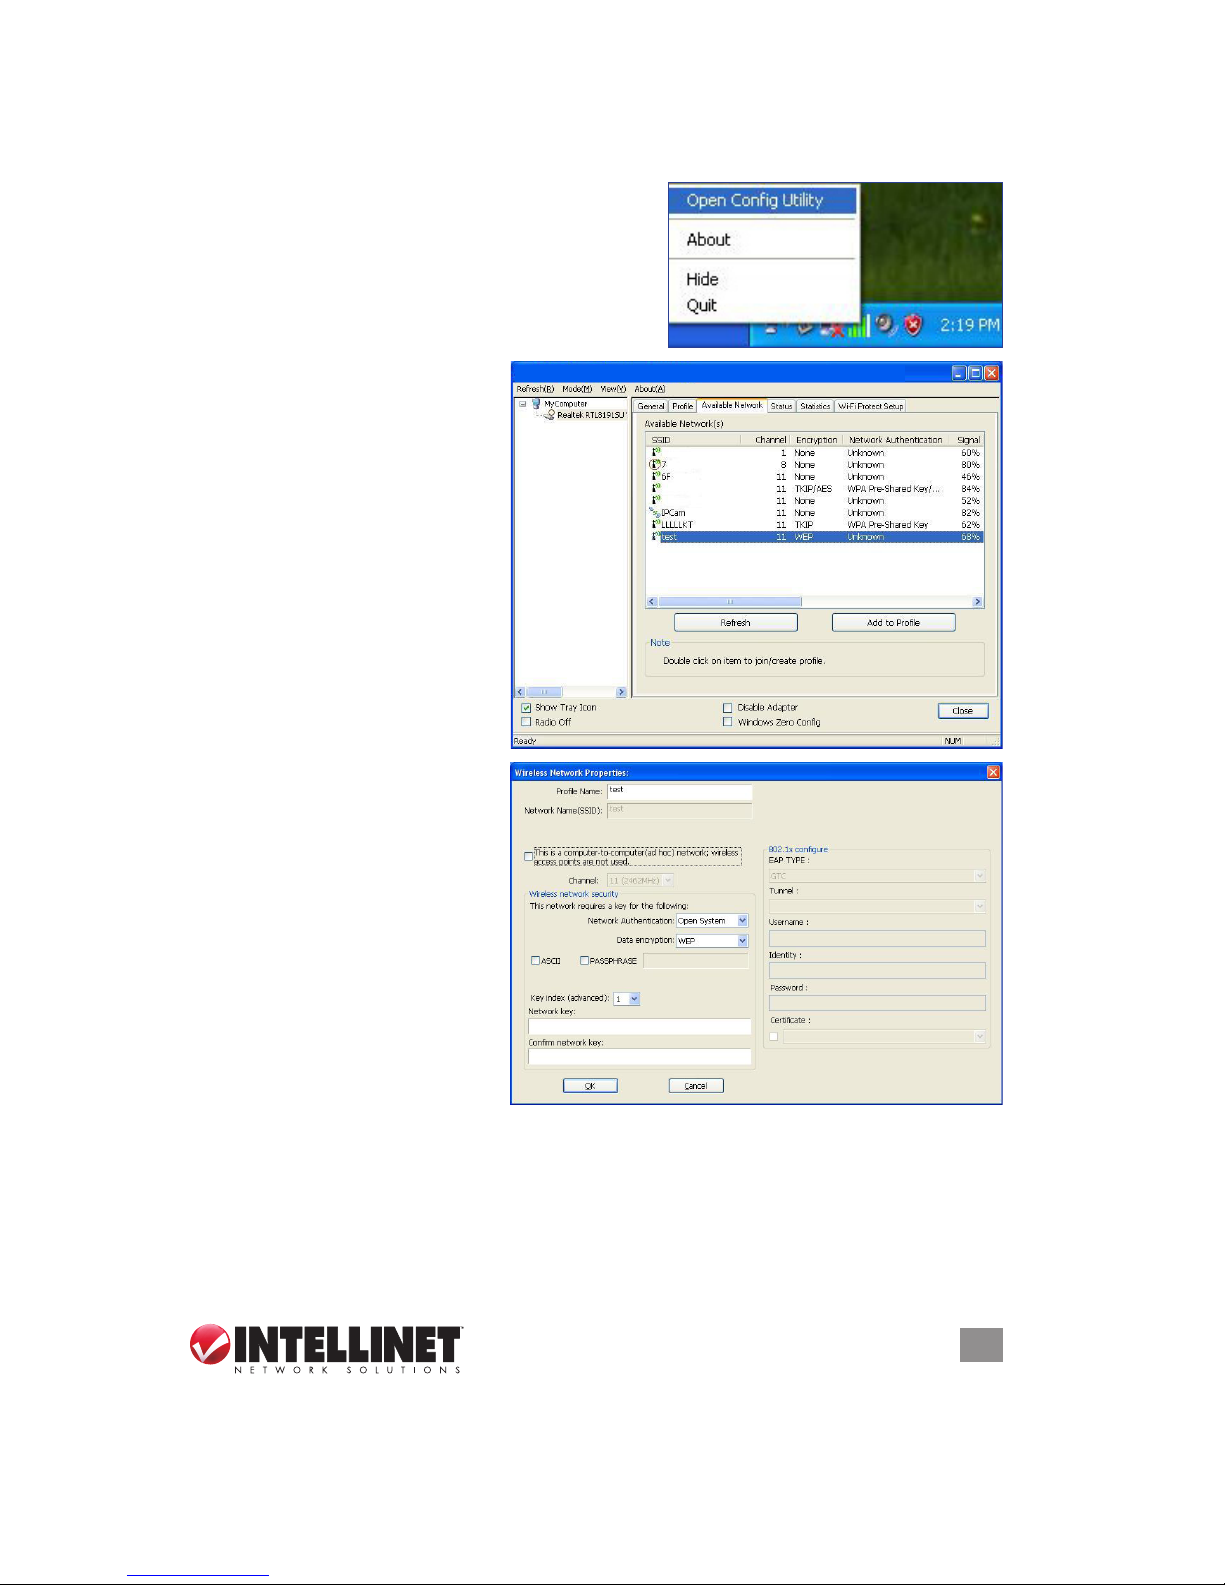
1.2 Connecting to a Wireless Access Point
1 . To begin the adapter conguration by
connecting to a wireless AP, double-click
the utility icon in the system tray (or right-
click the one that automatically appears on
the desktop), then select the “Open Cong
Utility” option from the popup menu.
2. When the Utility screen
displays, click on the
Available Network menu
tab, then double-click the
wireless access point you
want to connect to from
among those that appear
in the Available Network(s)
table, as shown at right.
3. When the Wireless Network
Properties screen displays,
enter your security settings
and click “OK” to initiate the
network connection.
INTELLINET NETWORK SOLUTIONS Wireless 150N USB Mini Adapter Utility
8
IN STALL ATIO N
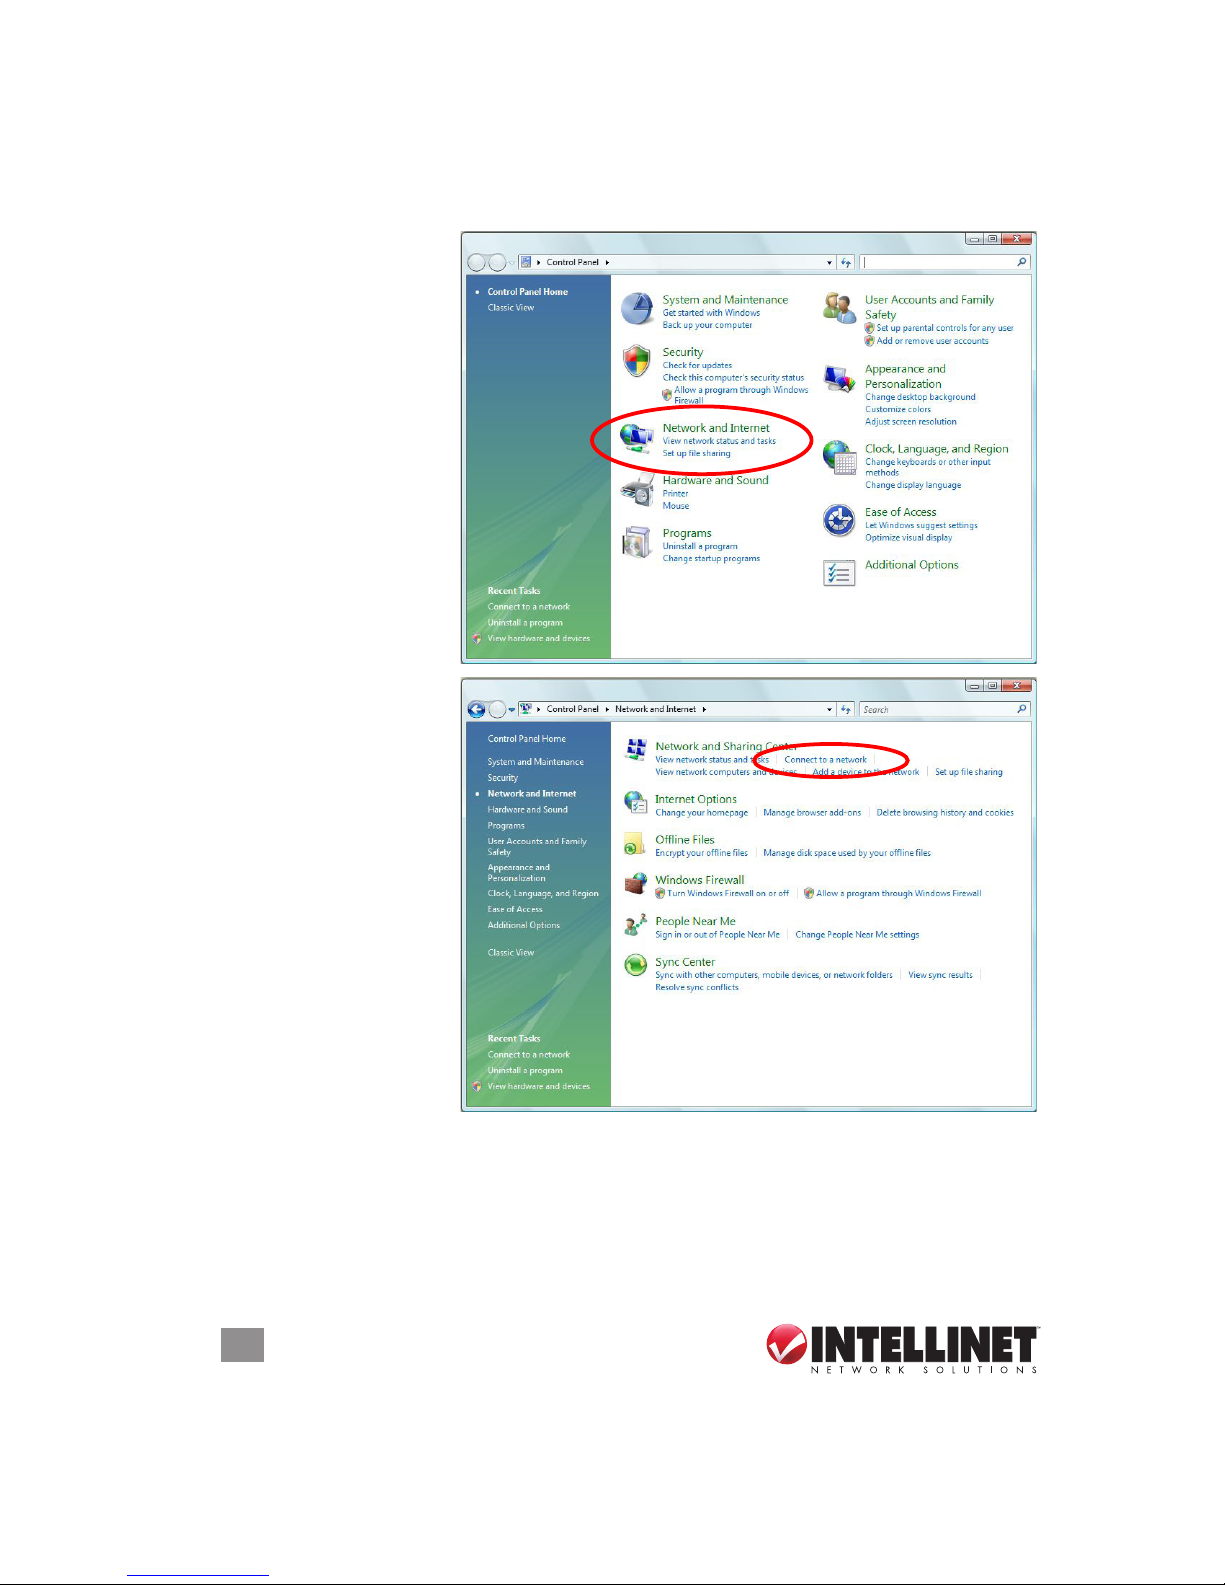
Windows Zero Conguration Option for Vista
Windows Vista users can connect to a wireless access point using the Windows
Zero Conguration option.
1. Go to Start, then
Control Panel on
the desktop, then
select Network and
Internet.
2. With the Network
and Internet screen
displayed, select
“Connect to a
network” under the
Network and
Sharing Center
heading.
 Loading...