

Intellinet 523783 User Manual
8 PORT FAST
ETHERNET
WEB-SMART
SWITCH
USER
MANUAL
MODEL 523783
INT-523783-UM-0407-01


INTRODUCTION
Thank you for purchasing the INTELLINET NETWORK SOLUTIONS™ 8-Port Fast Ethernet
Web-Smart Switch, Model 523783.
This device is designed for growing businesses that want control over their network without
the cost and complexity of a full Layer 2/Layer 3 management implementation. This highperforming switch features a non-blocking wire-speed architecture for maximum data
throughput. All RJ-45 ports automatically negotiate to the highest speed and support Auto
Uplink™ technology to make the right link. In addition, an intuitive, Web-browser interface
offers the simple Smart Switch management, making it a snap to monitor switch performance,
congure ports, even set up port trunks, VLANs and trafc prioritization.
Shipped ready for use straight out of the box, INTELLINET NETWORK SOLUTIONS WebSmart Switches are ideal for adding basic management to your unmanaged networks and
extending your managed networks. The easy-to-follow instructions in this user manual help
make setup and operation quick and simple, so you’ll also soon be enjoying the benets of
these additional features:
• 10/100 Mbps auto-sensing Auto-MDIX RJ-45 ports automatically detecting optimal network
speeds
• Conguration via Web browser
• Supports NWAY Auto-Negotiation
• Store and forward switching architecture
• Full/half duplex operation
• IEEE 802.3x ow control for full duplex
• Zero packet loss back-pressure ow control for half duplex
• Packet ltering/forwarding rates: 148,800 pps (100 Mbps), 14,880 pps (10 Mbps)
• Supports port-based VLAN, 4 groups
• Supports three types of QoS: port-based, 802.1p and DiffServ
• Supports Spanning Tree protocol
• Bandwidth control for all ports with 8 levels
• Broadcast storm control
• Supports MAC address port security
• Supports user-dened maximum forwarding packet size (1536 or 1552)
• Supports up to 1024 MAC address entries
• 128 kBytes buffer memory
• Lifetime Warranty
3
INTRO DUCTION
CONFIGURATION
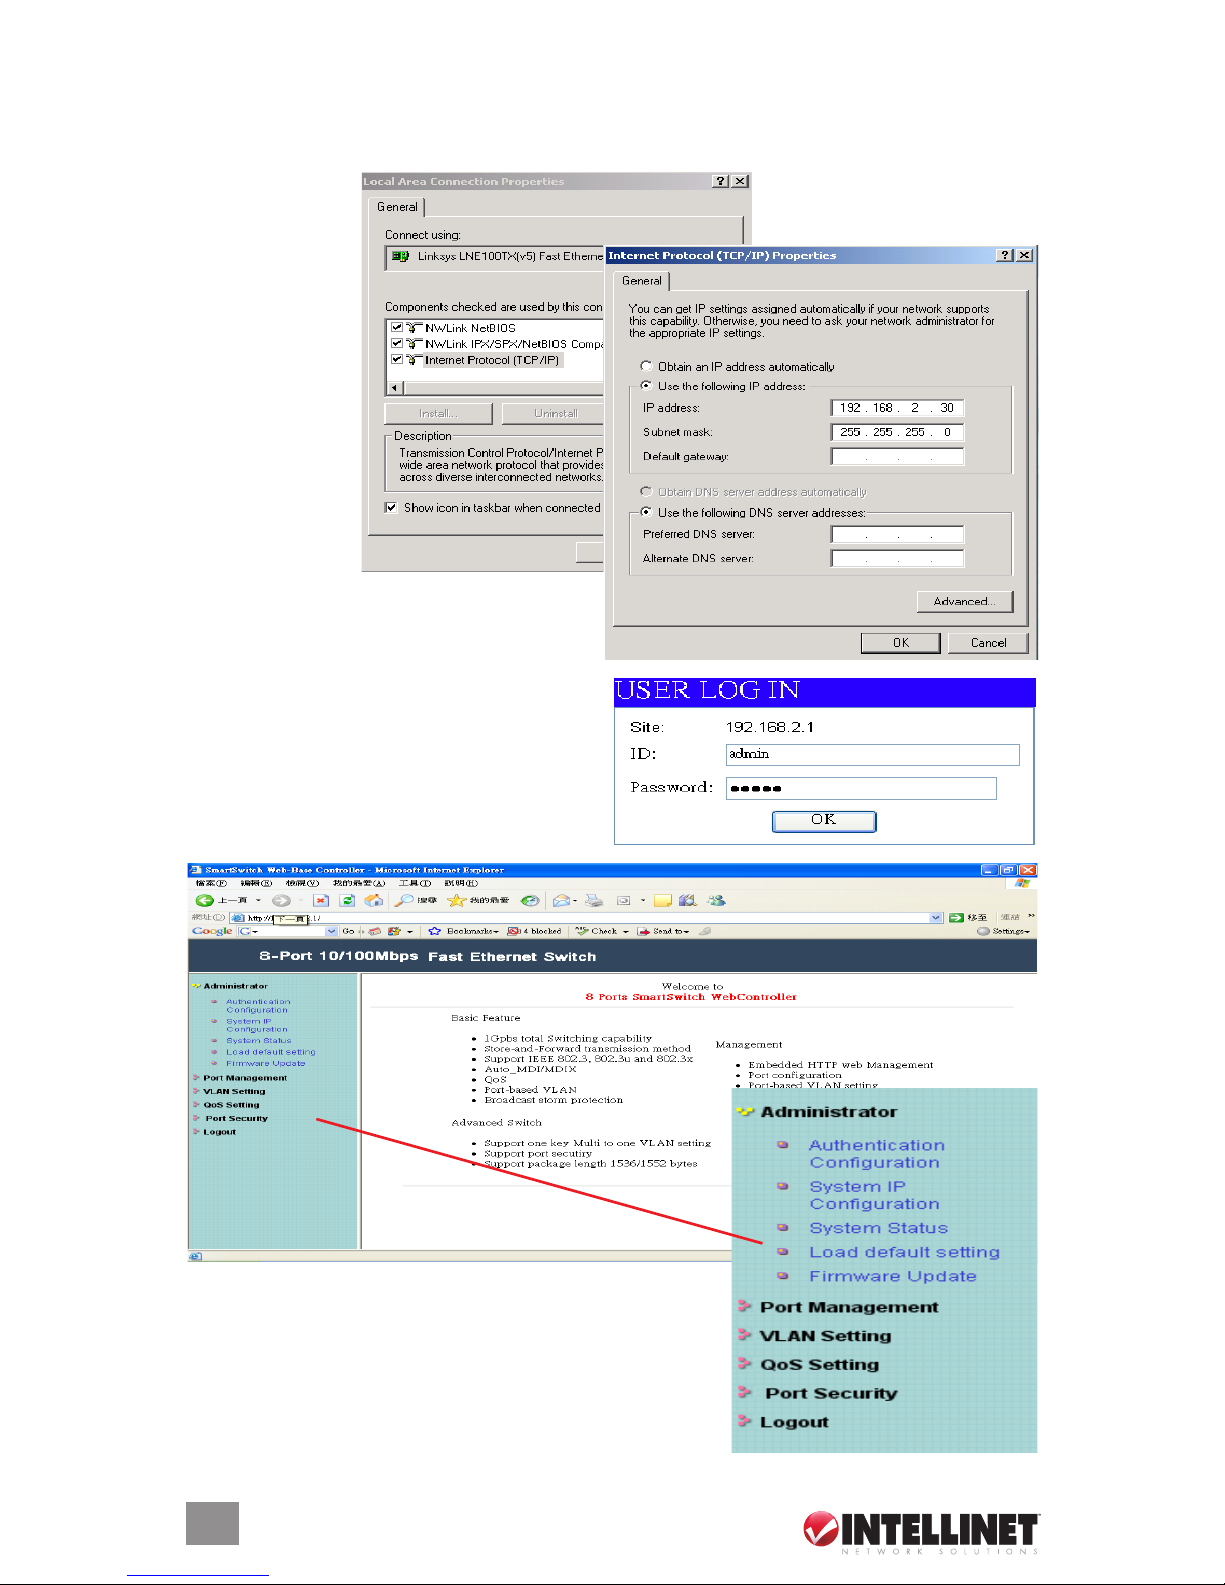
1. Use a twisted pair cable to connect the Web-Smart Switch to your PC, then turn on power to
the switch.
2. Set your PC’s IP
to 192.168.2.xx.
3. Open your Web browser, then go to the
192.168.2.1 site to display the login screen
(right). Key in the username and password
(the factory defaults are “admin” for both).
Click “OK” to continue to the Web-Smart
Switch’s Welcome screen.
The Welcome screen presents the conguration menu
options for the Web-Smart Switch settings in the left-hand
column, as shown at right: Administrator, Port Management,
VLAN Setting, QoS Setting, Port Security and Logout.
4
CONFIGUR ATION
 Loading...