

If you know the name of the NAS device,
you can type it directly into an Internet
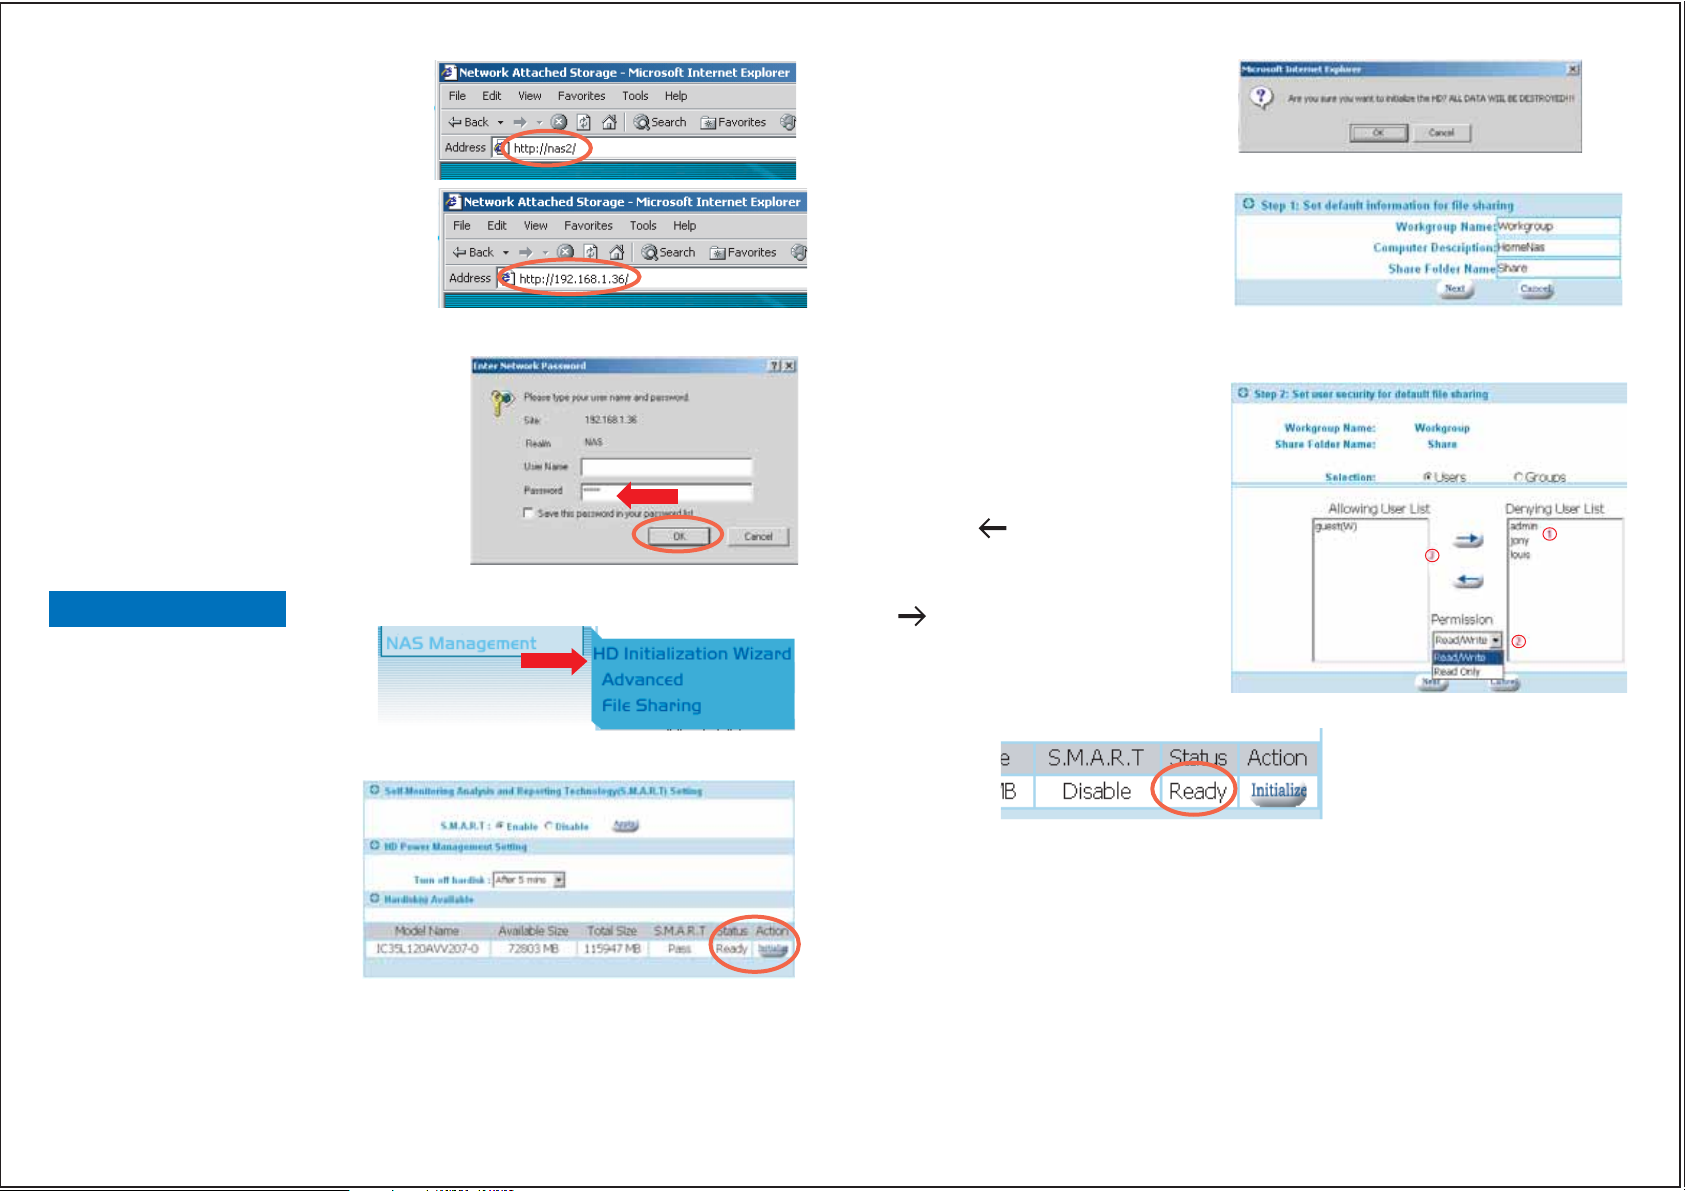
Explorer browser. Note: Some network
configurations or versions of IE may not
find the device correctly.
User who have changed the default setting
to a fixed IP address can directly access
the configuration page by typing the NAS's
fixed IP address into the browser.
A window should appear asking
for user name and password. Tab pass
the user name and enter 'admin' in the
password field. You will be taken to
the system information screen.
Click OK to the warning message to
continue the process.
Enter the workgroup name, description
and initial share folder name. The
workgroup name should be the same
one that the computers accessing the
NAS are on. Windows 2000/XP users
can use a different workgroup name if
desired.
Click NEXT to continue.
You must assign at least one user to this
share folder.
(1) Highlight the user on the list to the
right
(2) Select the permission you want them
to have: Read/Write or Read Only
(3) Click the button to move the user
over the Allowing User List.
HD Initialization Wizard
The first time you use the
NAS, you may have to
initialize the hard disk. The
wizard provides an easy way
to initialize the hard disk.
By enabling SMART, the NAS will
report when the hard drive is
about to fail. Your hard drive must
support this feature.
The HD power management
should be enabled to prolong the
life of the hard drive. When there
is no activity for the set time
period, the hard drive will power down to conserve power, save wear and tear, and
prevent the unit from building up unnecessary heat. When a user wants to access
the storage, the NAS will automatically wake up.
Click on the Initialize button to begin the initialization process.
Highlight users on the left list and select
the button to remove them from the
share or change their permissions.
Click Next to continue.
Once the initialization is complete, the status will change to Ready.
Refer to the NAS Manual located on the CD for additional information and
configuration options.
 Loading...