

Intellinet 503662 User Manual
Gigabit SATA NAS
503662
User Manual
INT-503662-UM-0208-1

Table of Content
Table of Content...................................................................................................................... 1
1. Introduction......................................................................................................................... 3
1.1. Product Features....................................................................................................... 4
1.2. System Requirements............................................................................................... 4
1.3. Package Contents..................................................................................................... 5
1.4. Physical Parts/Connectors/LEDs ............................................................................. 5
2. NAS Quick Start Installation .............................................................................................. 7
2.1. Hardware Installation............................................................................................... 7
2.2. Accessing the Gigabit SATA NAS........................................................................... 9
2.3. Configuring the Gigabit SATA NAS...................................................................... 14
3. Configuration .................................................................................................................... 16
3.1. Overview of Configuration Menu.......................................................................... 16
3.2. Basic Settings......................................................................................................... 17
3.3. System Management.............................................................................................. 19
3.4. System Reports ...................................................................................................... 24
3.5. User Management .................................................................................................. 26
3.6. NAS Management.................................................................................................. 28
3.7. P2P Settings ........................................................................................................... 34
4. FTP Server ........................................................................................................................ 37
5. UPnP™ Setting............................................................................................................... 386
Appendix A ........................................................................................................................... 40
2

1. Introduction
The Gigabit SATA NAS addresses the growing need for shared network storage in the
home and small/medium sized business environments. NAS has the advantage of being
easy to use, manage and simple in design. Files can be shared between computers
regardless of the operating system they are using or the network server they are
attached to. This solution provides a convenient common storage resource. Networked
storage can be used in the following ways:
At the home:
- Store media files for networked MP3/Media players and computers
- Backup your home computers
- Share files, media, and pictures with all of your networked computers
- Make files available when you are away from home
- Run an FTP server without leaving your computer on
- Have personal/private storage for each family member
In the office:
- Provide personal/private storage for employees
- Run an FTP server for file upload and download
- Share files between different operating systems
- Backup data from networked PCs and Macs
- Backup data from other servers
3

1.1. Product Features
- Windows, Mac, and Linux NFSv2 file systems supported
- Create and assign users with passwords for security
- Assign users and groups to shared folders
- No maintenance required
- Built in FTP server for file upload and downloading via the internet
- No user licenses to purchase
- Firmware updates via user interface
- Share your USB storage on the network
1.2. System Requirements
For Accessing Files:
Network adapter installed and functioning properly
For configuration:
For PC Users:
Internet Explorer 5.5 and newer or latest Opera browser with Java support
For Mac Users:
Internet Explorer 5.2 or latest Opera browser with Java support
For Linux Users:
Latest Opera browser with Java support
4

1.3. Package Contents
z Gigabit SATA NAS Device
z Power Adapter and power Cord
z Ethernet cable
z User Manual CD
z Quick Start Installation Guide
1.4. Physical Parts/Connectors/LEDs
z Ethernet port: 10/100/1000 Mbps
z Reset Button
z Power Button
z Power Jack – DC 12V
z LEDs: Link/Activity LED, Ethernet 10/100/1000Mbps LED, HB (Heart-Beat)
LED, HD (Hard Disk) LED, Power LED
Ethernet Port
The Ethernet port is used to connect to a PC, server, hub, switch or other network
device on the LAN.
Reset Button
If you forget your password and/or unit IP address, you will not be able to access the
Gigabit SATA NAS. You can use the Reset Button to restore the factory settings. To
initiate a reset, you must hold the button for at least 5 seconds or until the unit stop
beeping.
The primary default settings are listed in the following table.
Configuration Item Default Settings
Administrator Username <empty>
Administrator Password admin
Internal IP address Dynamically Assigned (DHCP Client)
5
Power Button
This button can turn the unit on/off. Press lightly once. The unit will write all data into
the drive and safely power down. To force the unit to power down immediately, press
and hold the button until the power is off.
Description of LEDs
LED Status Meaning
Power
On Power On
Off Power Off
Solid/Off System is not ready
Heart-Beat
Flashing System is ready
Access Indicator Flash HD is reading/writing data
On The network link is 1000 Mbps
1000 Mbps
Off Link down
Link/Activity
Flashing Transmitting/receiving packets
On The network link is 10/100 Mbps
10/100 Mbps
Off Link down
Link/Activity
Flashing Transmitting/receiving packets
6
2. NAS Quick Start Installation
In order to facilitate the use of the Gigabit SATA NAS, the product comes with default
settings that most users can install without any modification. If the network manager
needs to modify any of the settings, the Gigabit SATA NAS provides an intuitive
Web-based user interface.
NOTE: Make sure that the TCP/IP protocol is installed on the networked computers
that wish to access the Gigabit SATA NAS.
2.1. Hardware Installation
HD Installation Note
To install the HDD, please follow the step listed below:
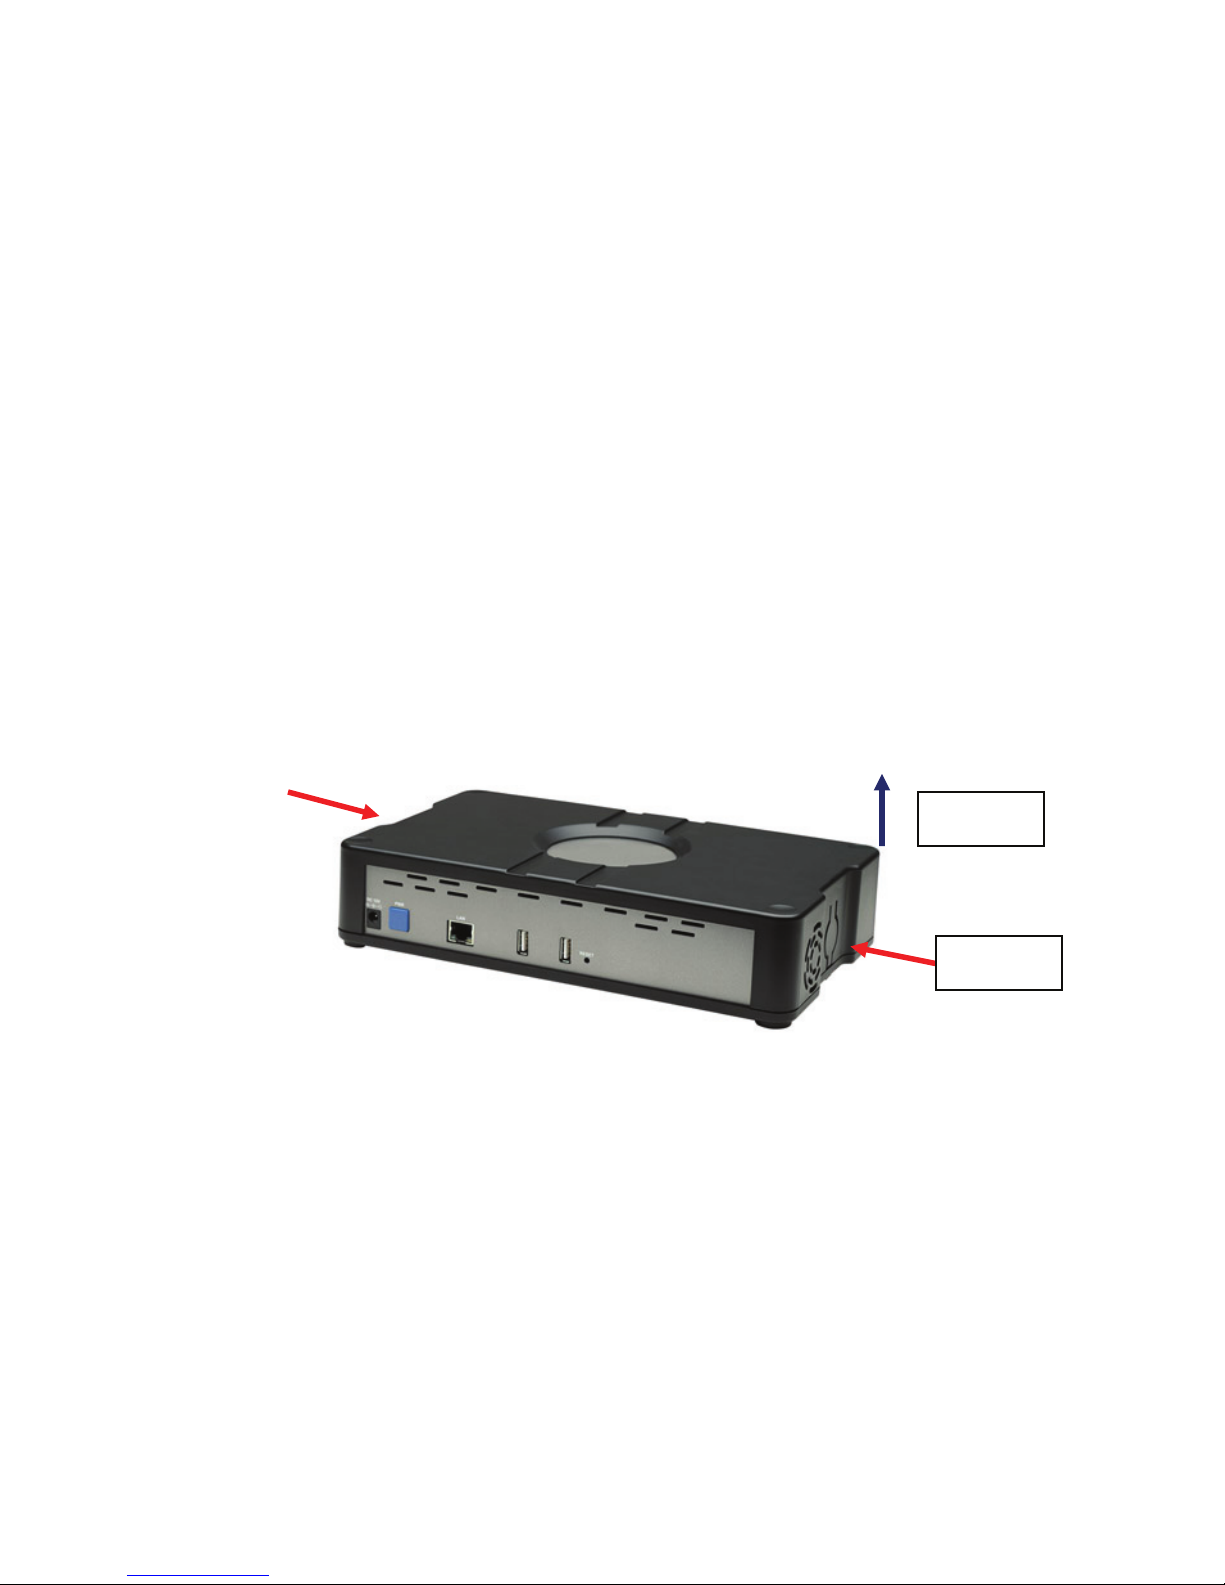
1. Shutdown the server, unplug the power cord and open the housing by pressing on
the side panels of the housing (left side and right side).
2. Lift up
1. push in
2. Take off the HDD cover, then fasten the HHD onto the cover using the provided
screws.
3. Connect the SATA data cable and the HDD power cord to the HDD.
4. Place the HDD into the server and fasten it using the provided screws.
5. Put the housing back together.
6. The HDD installation is now complete.
7
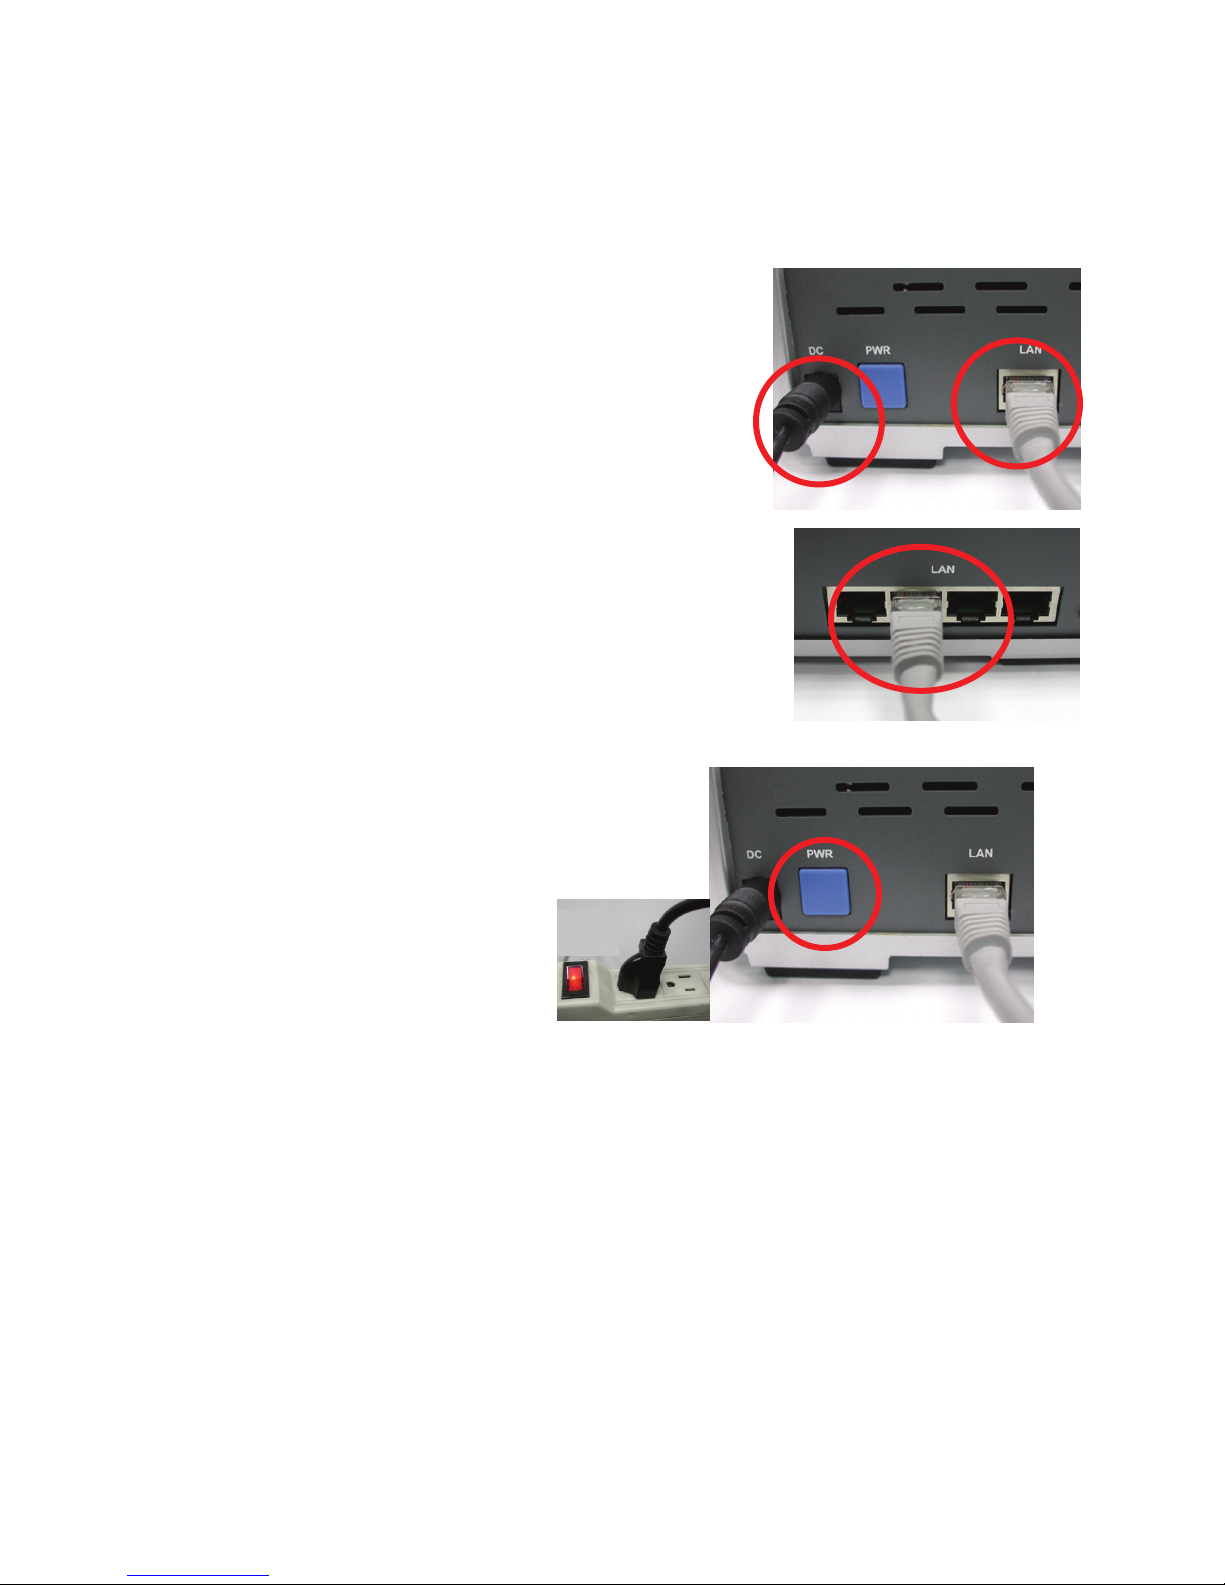
Connect the included Ethernet cable and power adapter to the back of the Gigabit
SATA NAS.
Connect the other end of the Ethernet cable to an
available port on a network switch, router or computer’s
LAN port.
Plug the AC adapter into a surge protector.
Turn on the power on the Gigabit SATA NAS.
8

2.2. Accessing the Gigabit
SATA NAS
If your unit shipped with a preformatted hard
drive, you can find the new share folder by
double clicking My Network Places and the
Gigabit SATA NAS device name.
Mapping a share folder
Mapping your shared folder(s) to your computer makes accessing them easier. When a
shared folder is mapped, it will appear as a drive letter like D: or E: on your computer.
When you want to access that shared folder, you can simply go to My Computer and
double click on the drive letter. You can also have the computer log into the shared folder
at startup so you do not have to manually do it each time.
You can map the Gigabit SATA NAS’s
share folder to a drive letter under My
Computer.
Select Map Network Drive from the
Tools menu.
Select a drive letter you wish to map your shared folder.
Select Browse and locate the shared
folder from under Entire Network. Click
OK once your have located the shared
folder.
9
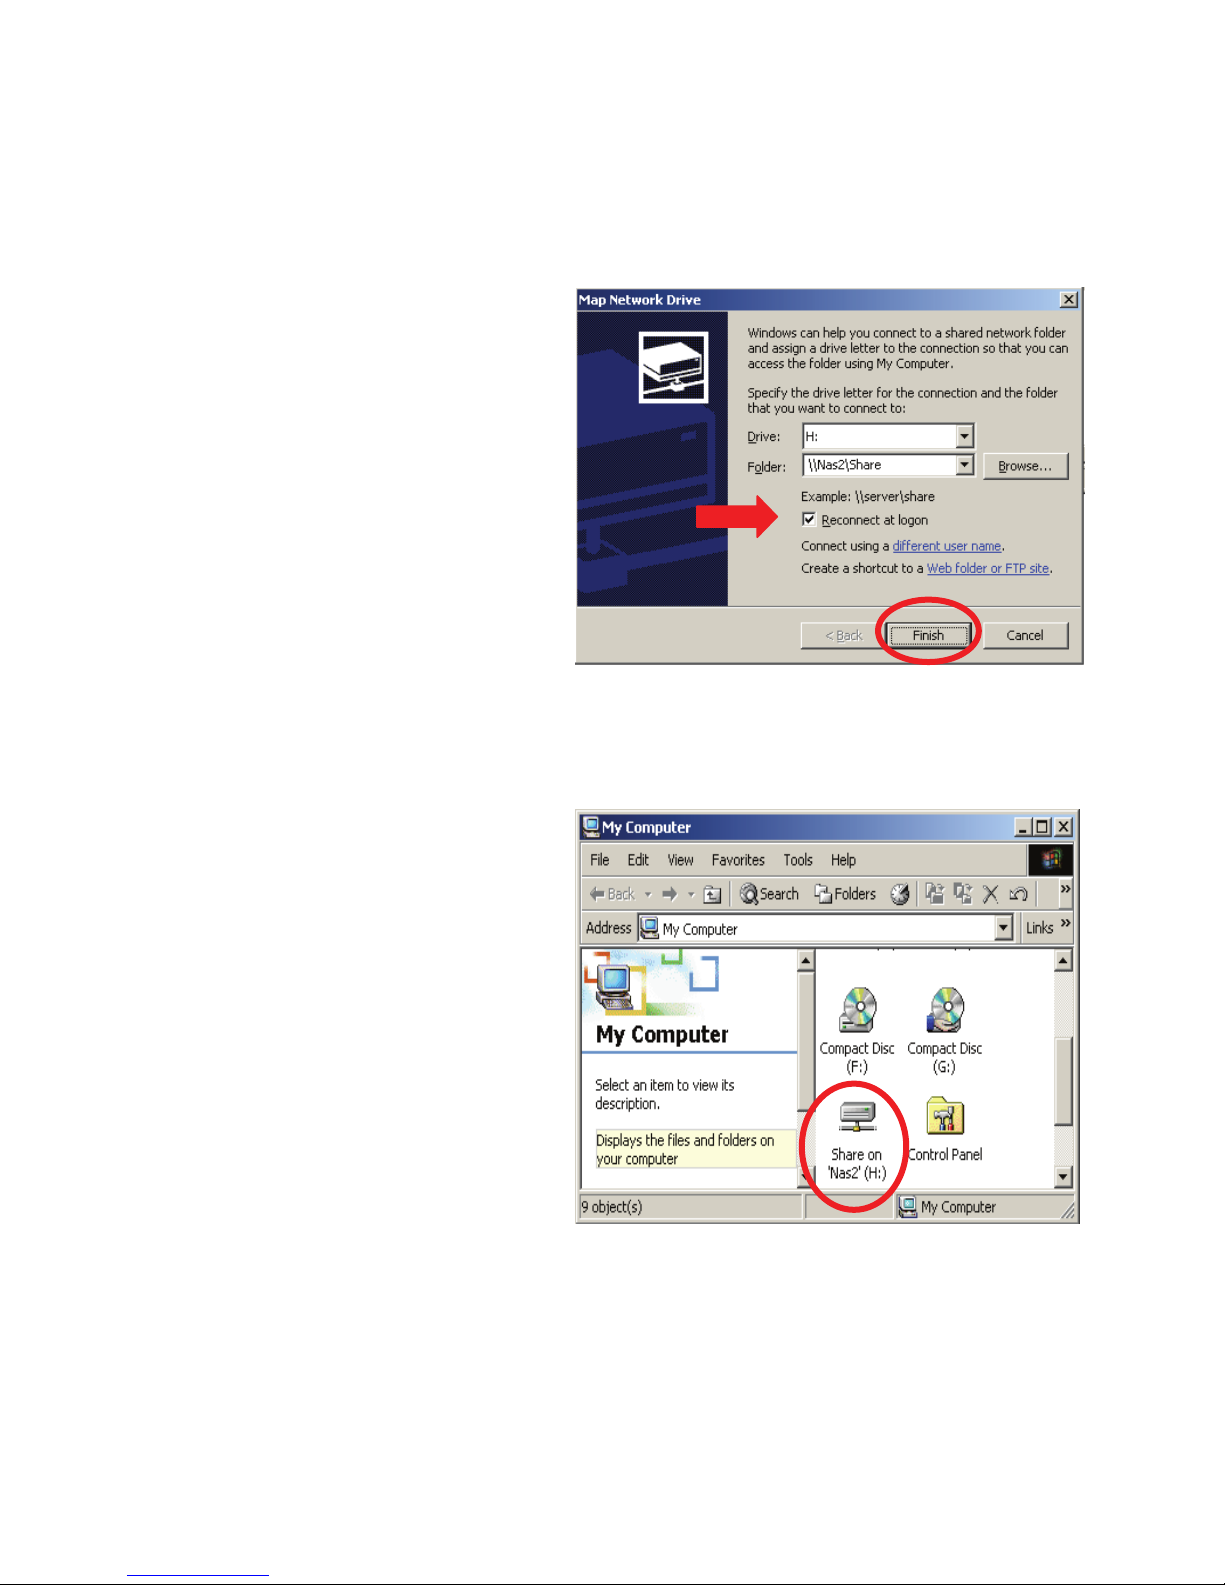
Select Reconnect at logon so you do not have to repeat this process in the future.
Click on Finish.
You will now see the Share as a drive under My Computer. You can access it by double
clicking on the drive.
10
Enabling UPnP™
Note: UPnP™ is only available in Windows XP and Vista. We recommend that this is
enabled for ease of configuration, but it is not required.
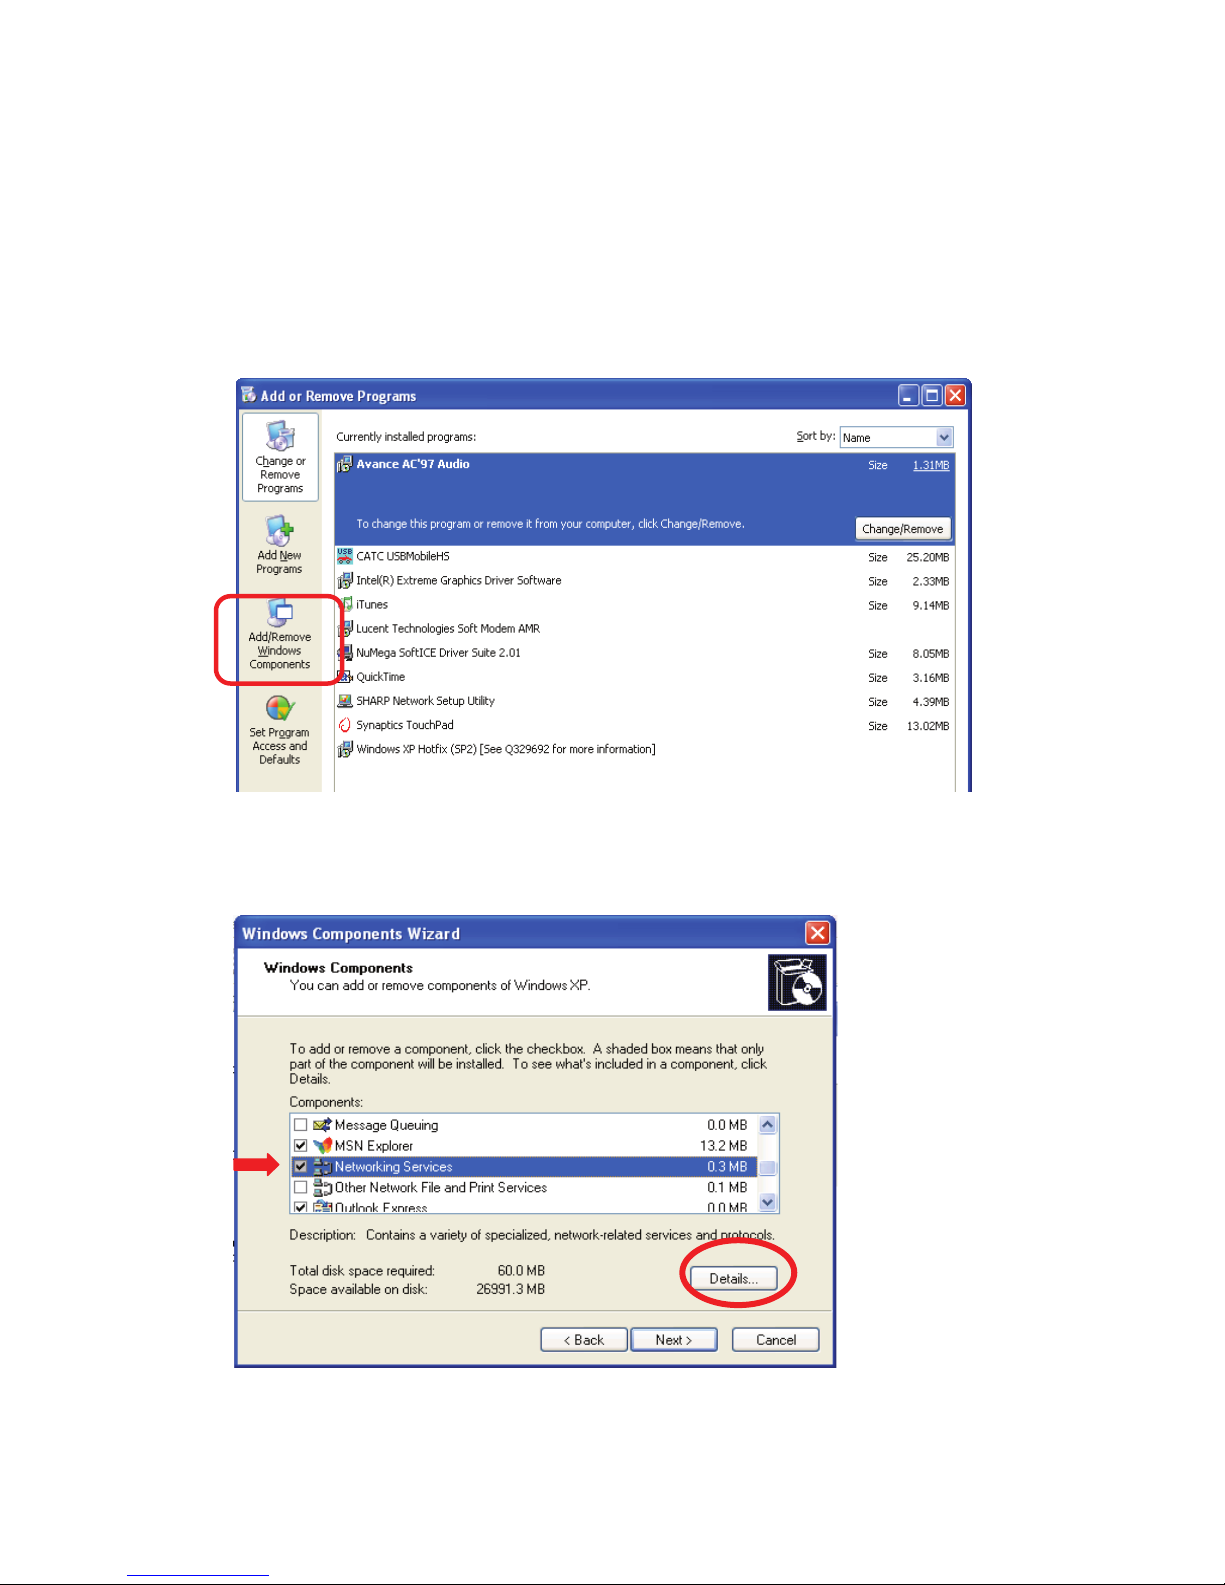
To enable UPnP™, go to the Start menu and select the Control Panel. Select
Add/Remove Programs.
Click Add/Remove Windows Components on the left hand side.
The Windows Components Wizard screen will appear. Highlight Network Services
and click Details.
11

Select Universal Plug and Play and click OK.
Select Next to continue.
12
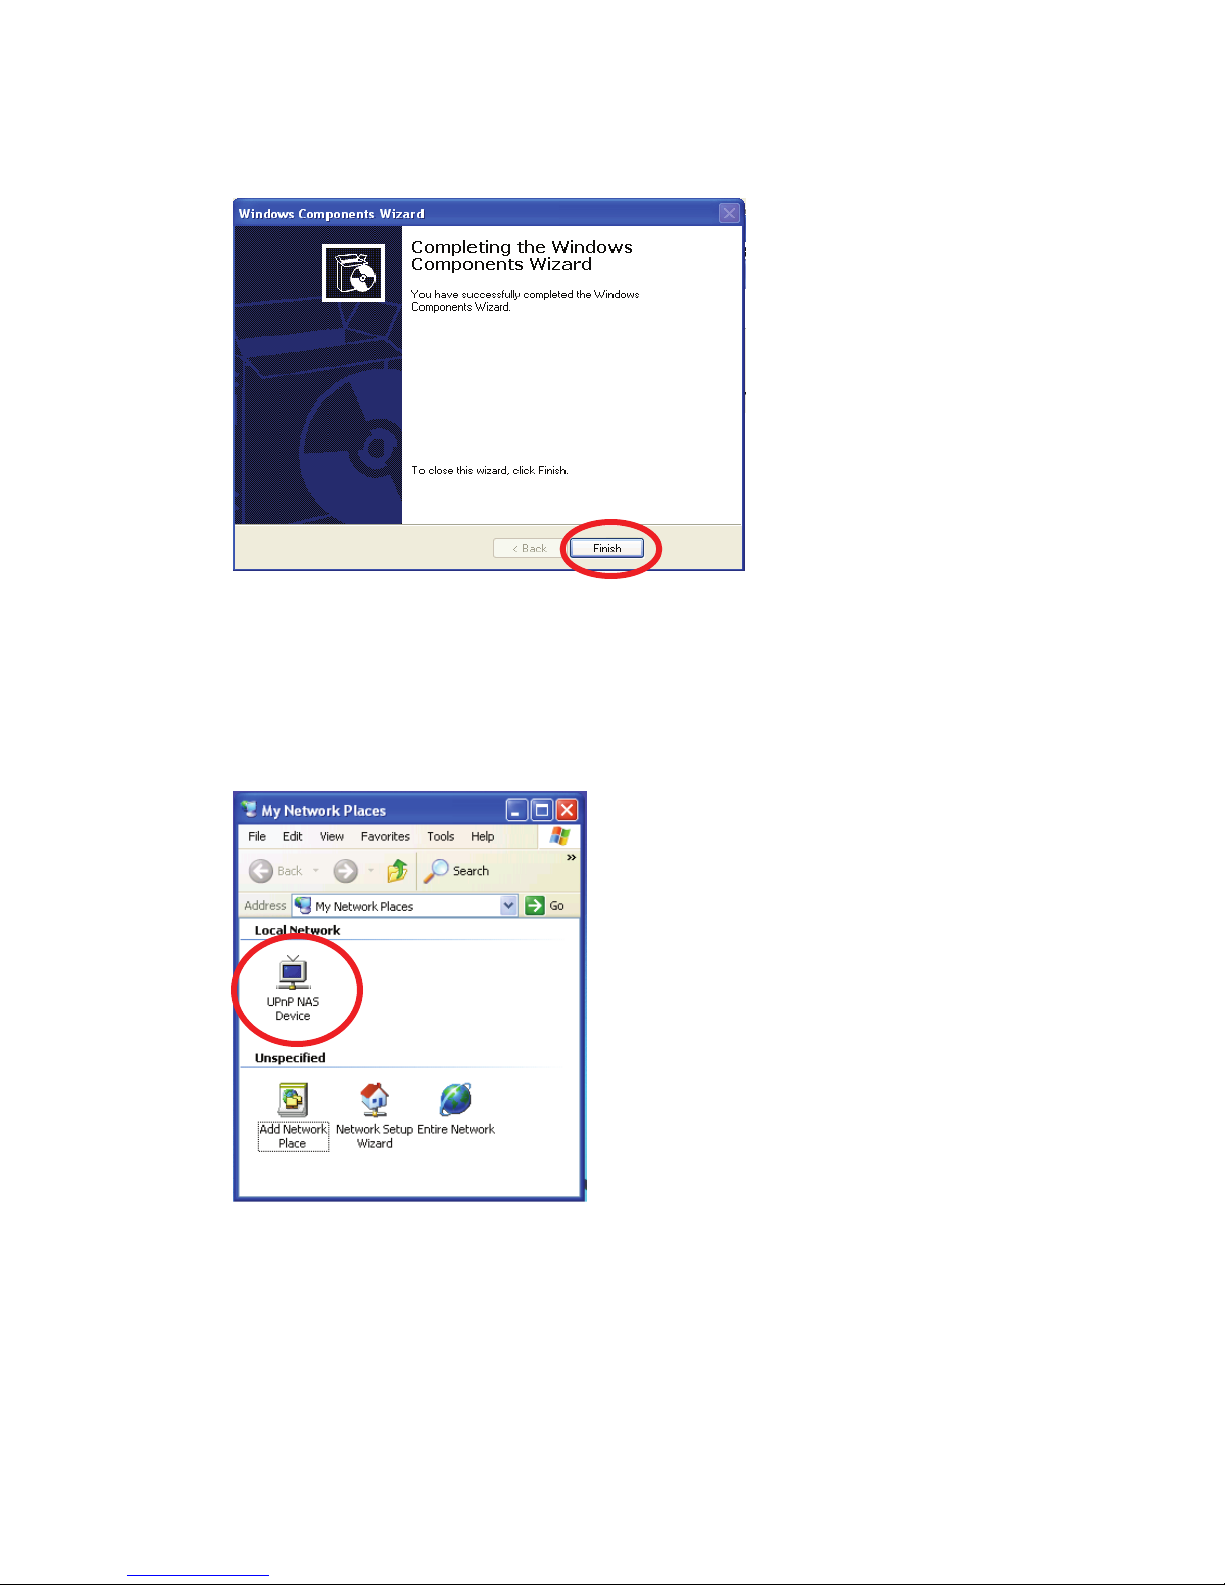
After all the components are installed, click Finish.
You can access the configuration user interface by double clicking on My Network
Places on your desktop. Double click on the UPnP device to gain access to the
configuration page. Note: You may need to restart your computer and/or refresh the view
for the device to appear.
13
 Loading...