

Intellinet 503273, 506564, 506571, 503280, 506557 User Manual

POWERLINE AV
ETHERNET
ADAPTER
USER
MANUAL
MODELS 503273, 503280,
506557, 506564, 506571
INT-503273/503280/506557/506564/506571-UM-0408-05
Model 506571:
AV200 / 3-Port
Model 506557:
AV500 / 1-Port

2
INTRODUCTION
Thank you for purchasing the INTELLINET NETWORK SOLUTIONS™ Powerline
AV200 Ethernet Switch, Model 506571 (3-port) or Powerline AV200 Ethernet
Adapter, Model 503273; or Powerline AV500 Ethernet Adapter, Model 506557.
The Starter Kits — Models 503280 (AV200) and 506564 (AV500) — feature a pair
of units, the minimum number required to operate the devices.
These Powerline AV200 and AV500 Ethernet devices allow you to create a high-
speed network for your home or ofce by simply plugging them into any electrical
outlet. You immediately create a network using the existing AC power lines that
enables high-speed, crystal-clear streaming of 1080p high-denition (HD) video —
great for such popular items as network-enabled gaming consoles and digital media
devices.
Detailed instructions in this user manual make installation reasonably quick and
simple, so you’ll soon be enjoying the benets of all these additional features:
• The latest generation of Powerline technology with higher throughput and
enhanced security
• Up to 500 Mbps network data rates (up to 200 Mbps for Models 503273 and
506571) and data security through 128-bit encryption
• Enables high-quality video streaming, VoIP and gaming over a home network
• Plug and Play (no drivers required)
• Software-free security conguration with a simple push of a button
• HomePlug AV compliant
• Compatible with Intellinet Powerline AV/HD200 Ethernet Adapters
• Can co-exist with HomePlug 1.0*
• Three-Year Warranty
* The Powerline AV200 and AV500 Ethernet Adapters/Switches are not
compatible with the Powerline Turbo Ethernet Bridge, but the products can
co-exist on the same power line without interfering with one another.
3
INITIAL SETUP
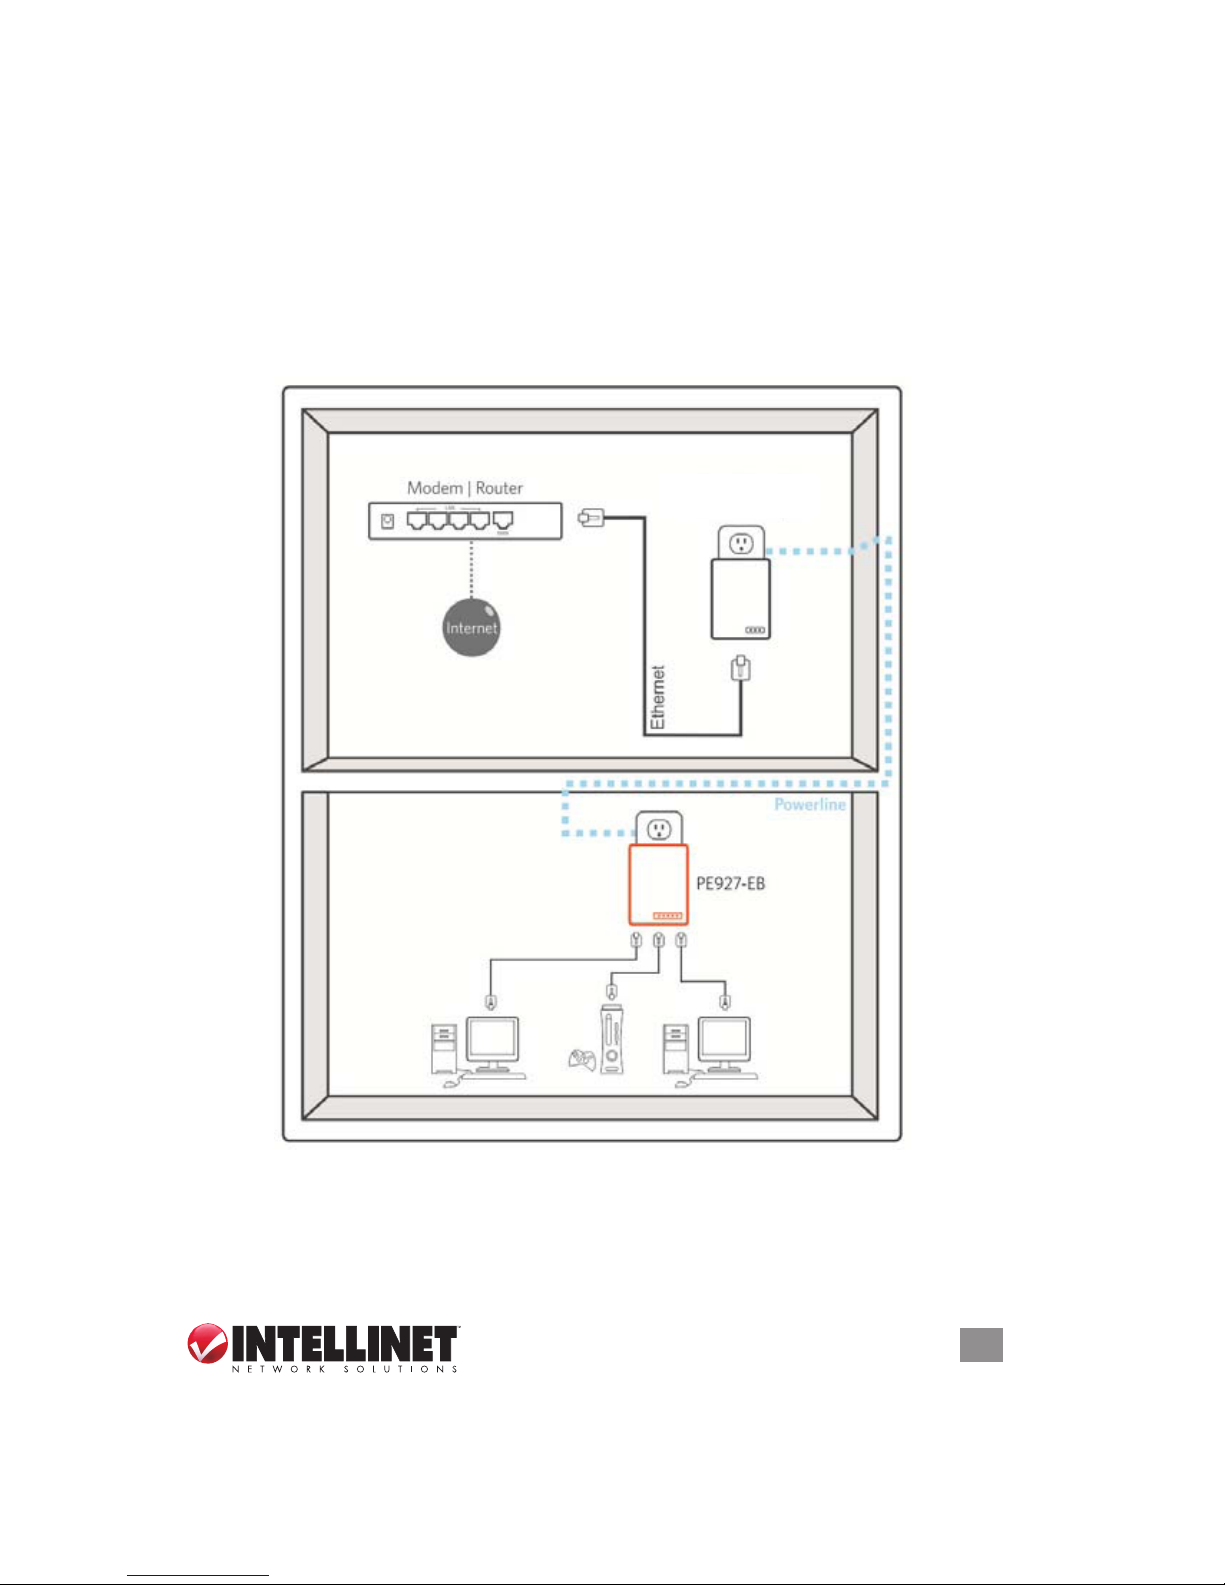
Each Powerline AV Ethernet Adapter/Switch (or “Bridge”) allows you to connect one
device (or three devices, with Model 506571) that has an Ethernet port to a power
line network. In operation, the bridge is completely transparent: It simply passes
data from the Ethernet port along the power line network. In turn, any Ethernetenabled device may be connected to that bridge’s Ethernet port, as in the
examples below.
NOTE: Each Powerline Adapter/Switch/Bridge needs to pair with at least one
other such device in order to create a working system.
Powerline AV
Ethernet device
4
Connections
1. Connect one end of the included Ethernet cable
to the Ethernet port on the bottom of the device.
2. Plug the adapter/switch into an AC power outlet.
CAUTION: Do not plug the device into a power
strip or wall outlet that uses surge protection,
as this may prevent the device from working
properly.
3. Connect the other end of the Ethernet cable to an Ethernet port on your modem
or router.
4. Repeat Steps 1-3 for a computer, a network-enabled gaming console, a digital
media device, etc. Use additional cables (not included) for Model 506571.
5. Conrm that the LEDs on the front panel are lit, as explained below.
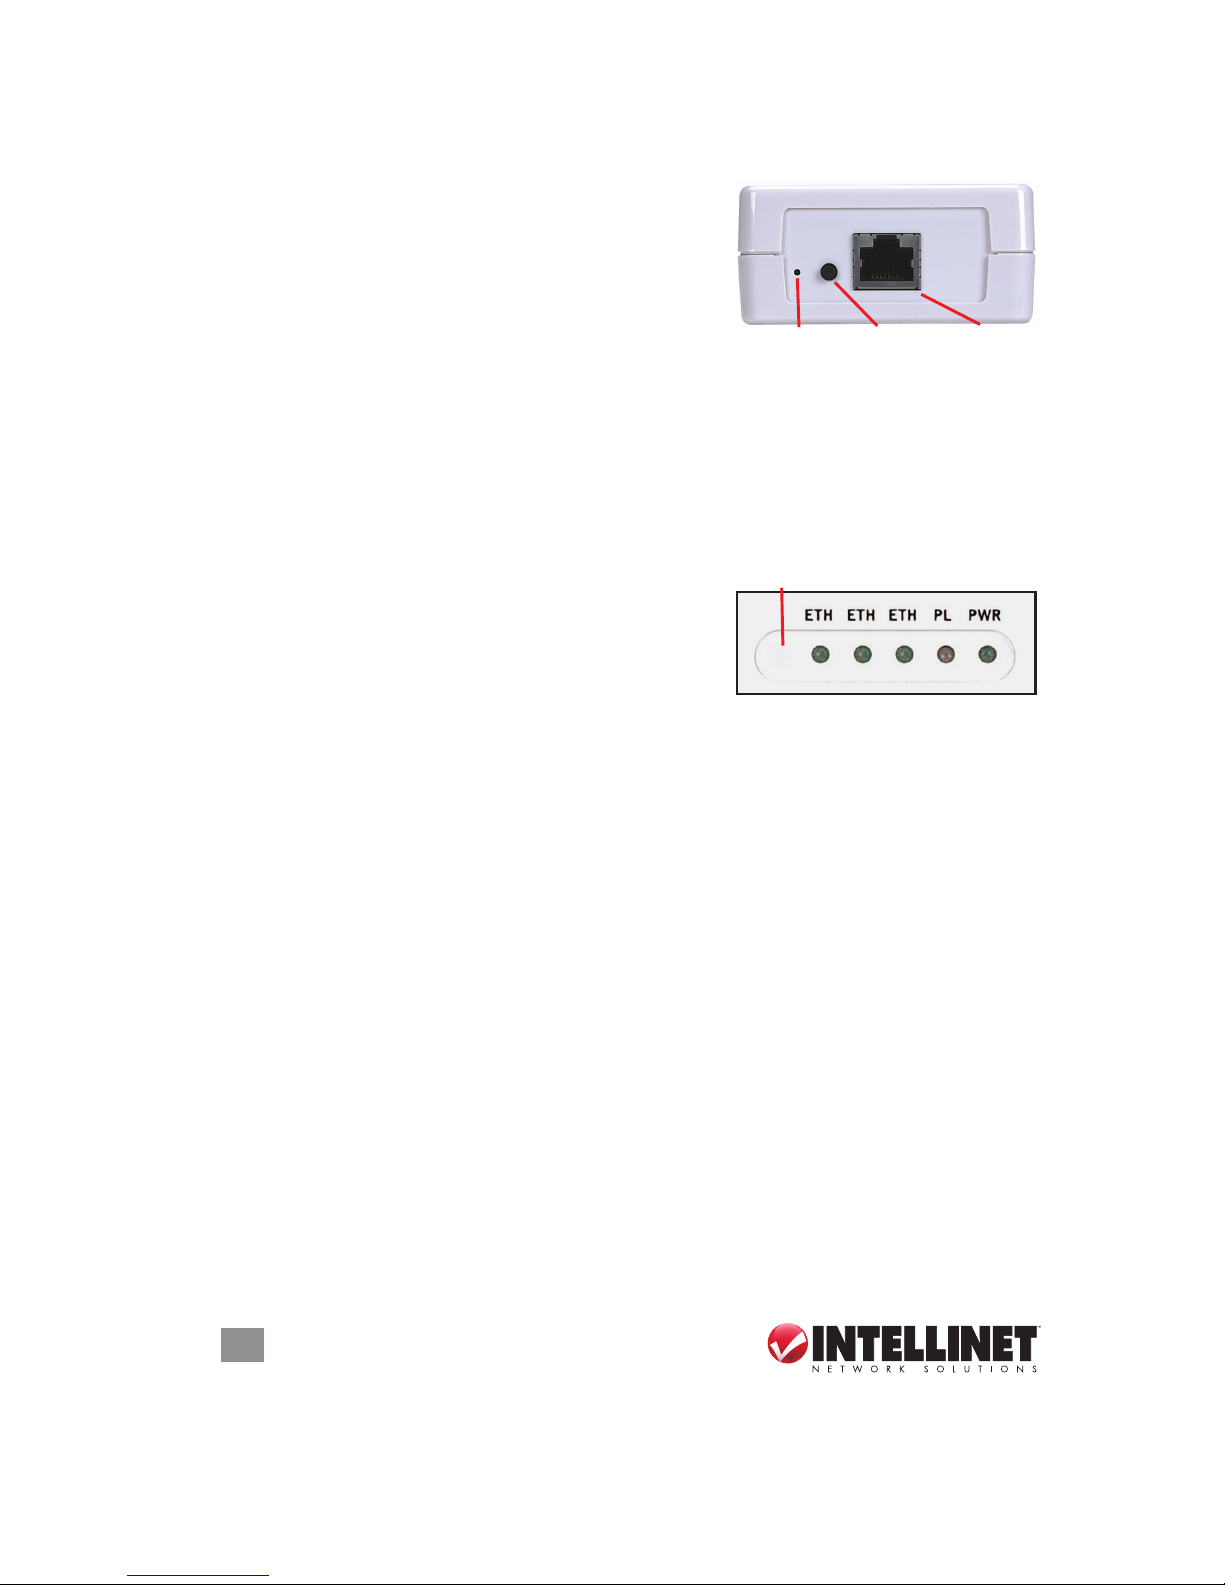
Indicators and Buttons
Power LED: Lights to indicate the unit is receiving
electrical power.
PL LED: The Powerline (PL) LED indicates the
overall network speed.
• Red = weak signal; slow network speed below 50 Mbps
• Orange = normal signal; standard network speed of 50-100 Mbps
• Green = excellent signal; optimal network speed above 100 Mbps
• Off = No activity/connection
ETH LED: Lights green to indicate the corresponding 10/100Mbps port (3 ports and
LEDs on Model 506571) is linked; blinks to indicate the port is transmitting or
receiving; remains off when inactive.
Reset: To clear all data and restore settings to their factory default values — a
Troubleshooting suggestion should you have difculty communicating between
devices — use a pin to press and hold this recessed button for 2 seconds while
the device is plugged in. (Do this with each unit you are trying to connect.) The
Reset indicator will ash as the device resets and attempts to link using default
settings.
Security: Press as directed in the Network Setup instructions below.
Reset
button
Security
button
Ethernet
port
Reset
indicator
 Loading...