

Page 1
SD-400 Reference Manual
Installation Guide
Software Reference Guide
August 2011
www.usbcallrecord.com
Copyright © Intelligent Recording 2011
Page 2
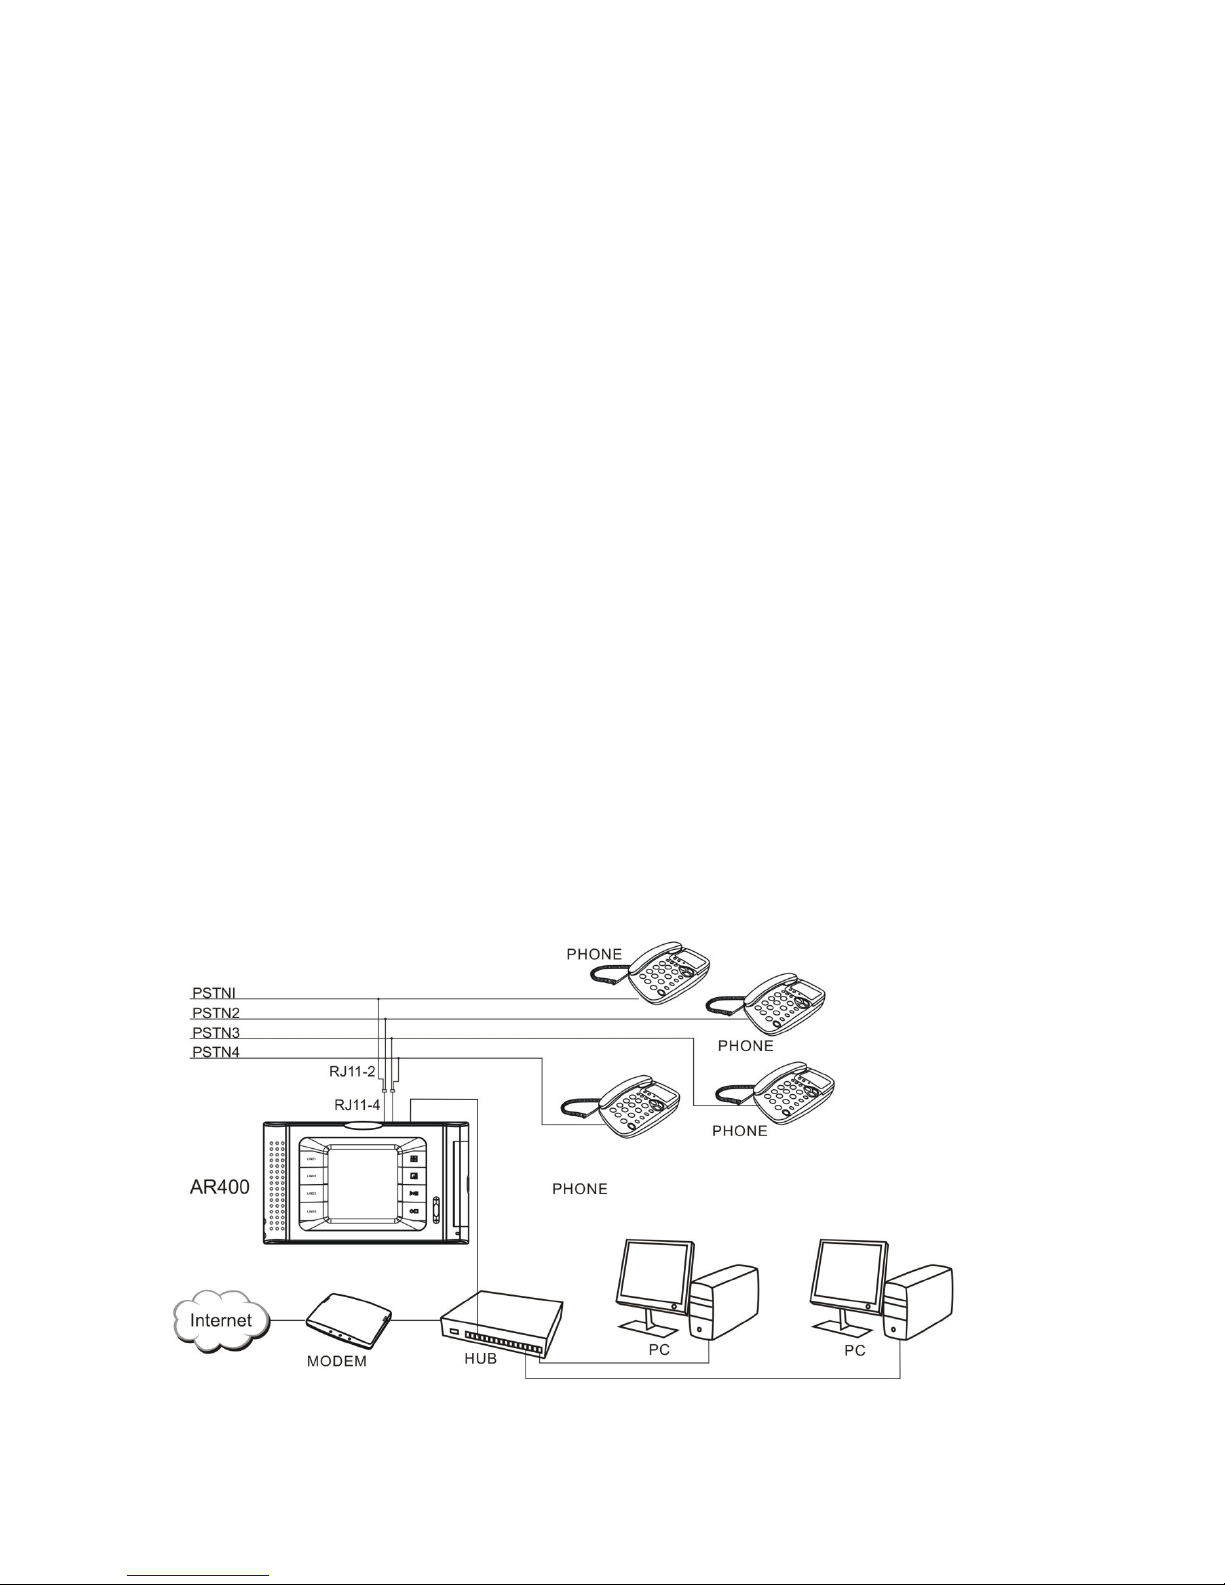
SD-400 General Description
The SD-400 provides the ability to record up to four analog telephone lines and store the calls
on an internal SD memory card. The SD-400 employs a user friendly touch screen color display
for easy installation and configuration of the device. The provided 8 GB SD memory card will
store up to 1,300 hours of voice recording. Calls can be monitored and reviewed on the SD-400
using the built-in speaker or headset interface. Software is provided that allows the user to
review and manage the call records. The SD-400 can be connected to a Local Area Network
(LAN) that will allow the calls to be reviewed and managed from a remote PC.
Packaging
The SD-400 comes complete with:
• SD-400 Recorder
• Installation CD which includes:
o Installation Manual
o Management Software
• (2) Twin-Jack connector cables & (2) RJ-11 Cables
• Power Adapter
• 8 GB SD Memory Card
• Ethernet Cable
SD-400 Overview
Page 3
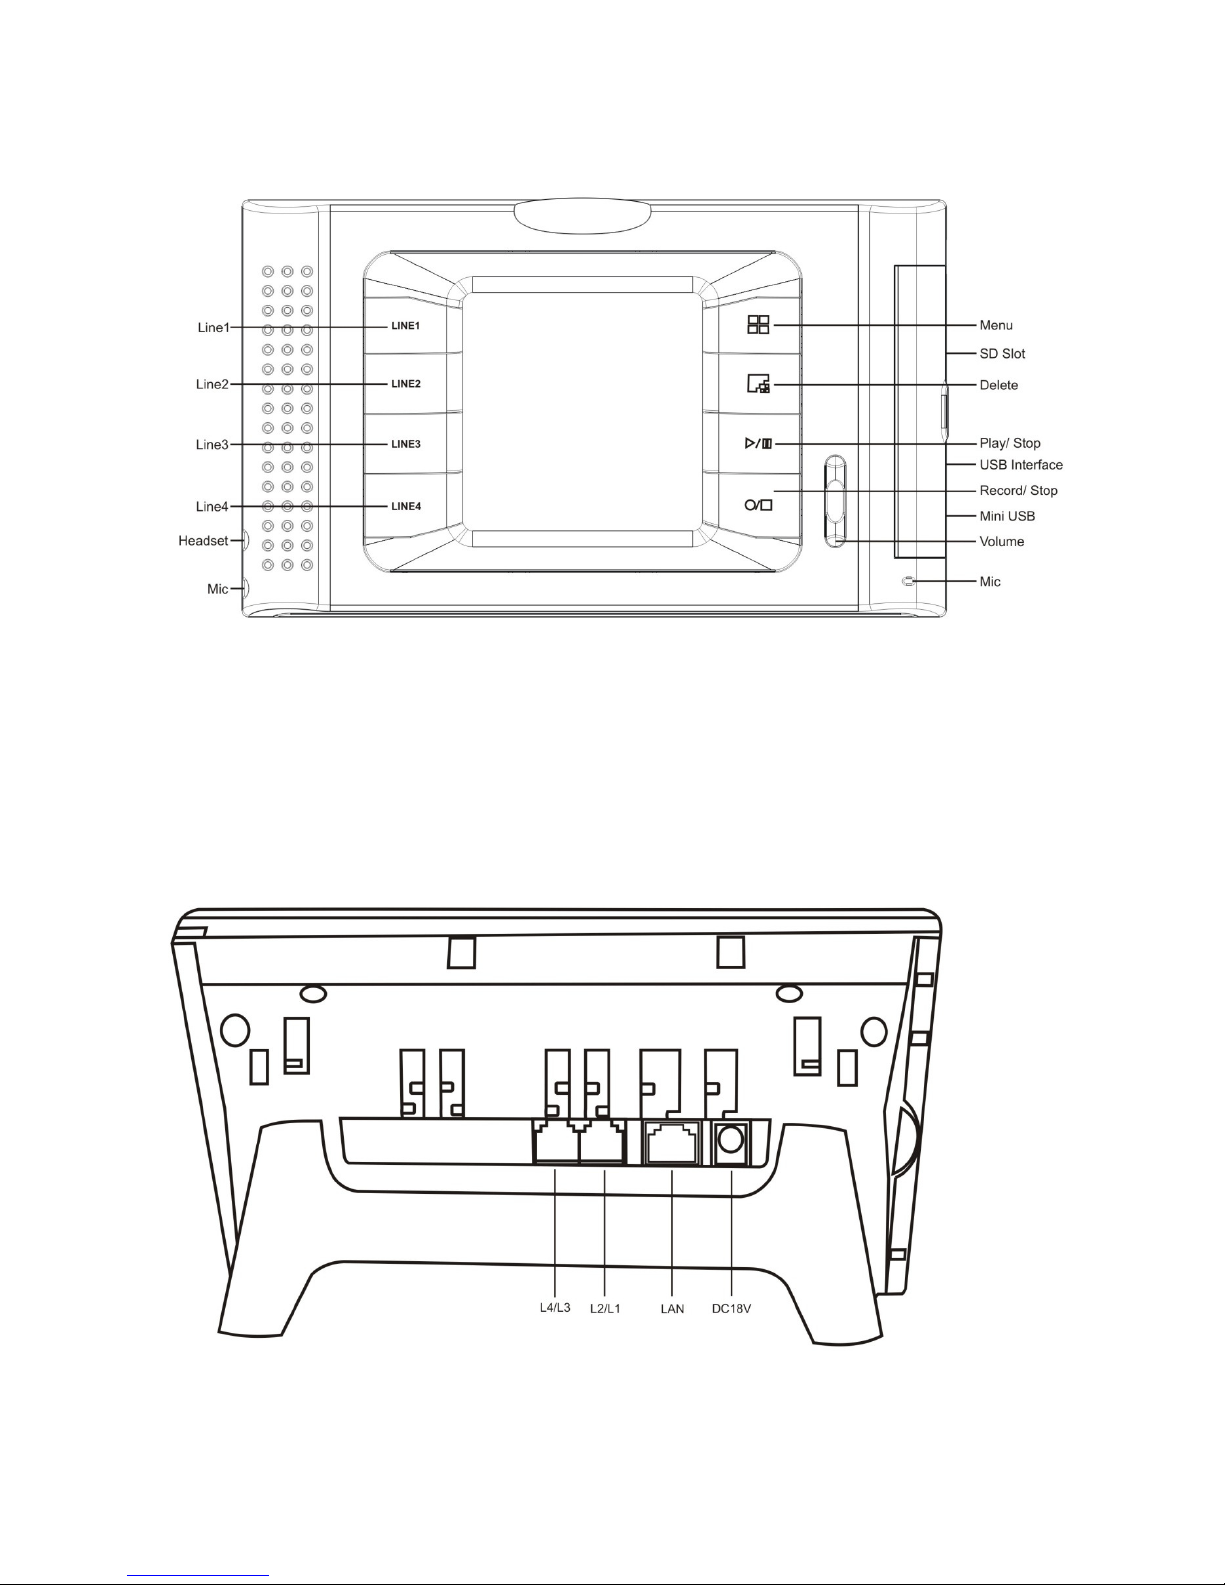
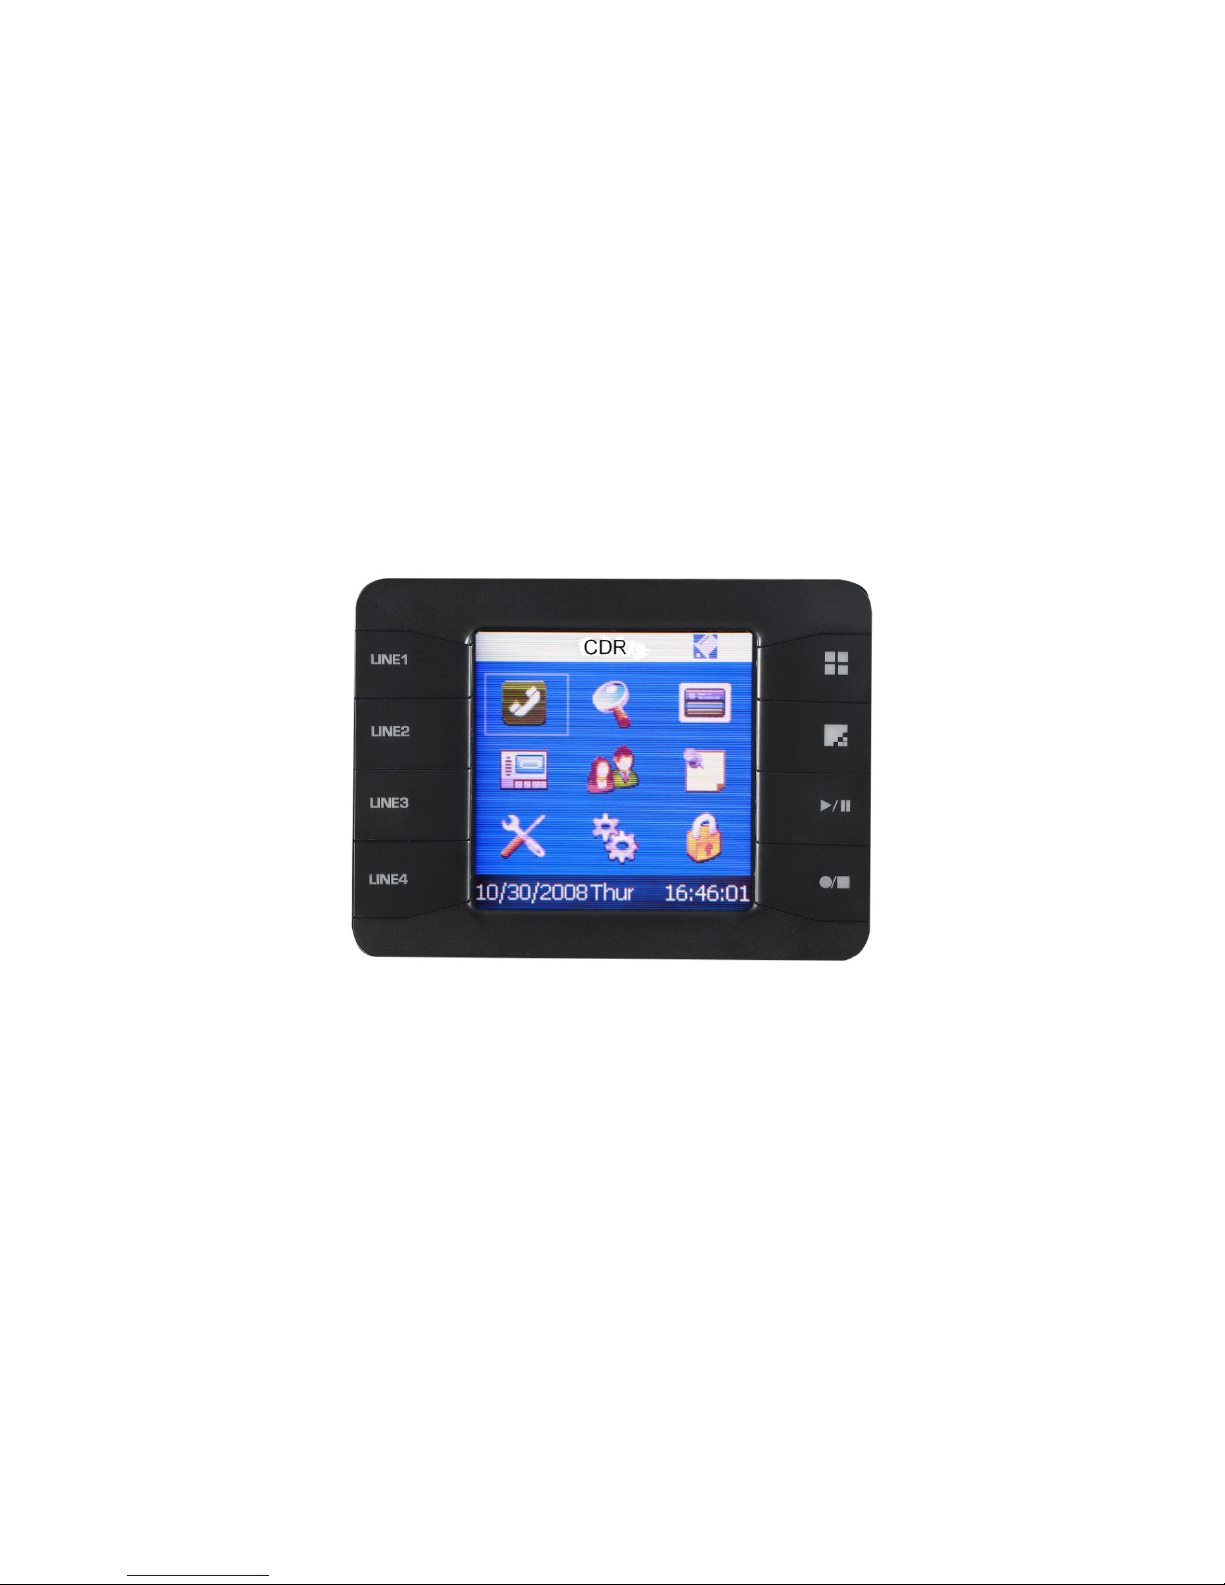
Front View of SD-400
Notes:
Line 1-4: When lit yellow indicates an incoming call. When lit Red indicates recording active call.
USB Port: Connects to external hard drive or USB storage device
Mini USB: Not available for use
LCD Screen: Double-tap on icon to select
Rear View of SD-400
Page 4
Installation Overview
The SD-400 is designed for easy installation and comes complete with all cables required in a
typical installation environment.
1. Remove the SD-400 and all components from packaging
2. Verify that the SD memory card is in the card slot – located under the black cover door
on right hand side of device.
3. Connect the AC power to the device and then to the wall socket.
4. Slide the power switch on the back/bottom of device to the on position
5. Wait for the device to initialize and show the main menu screen
Line Connection:
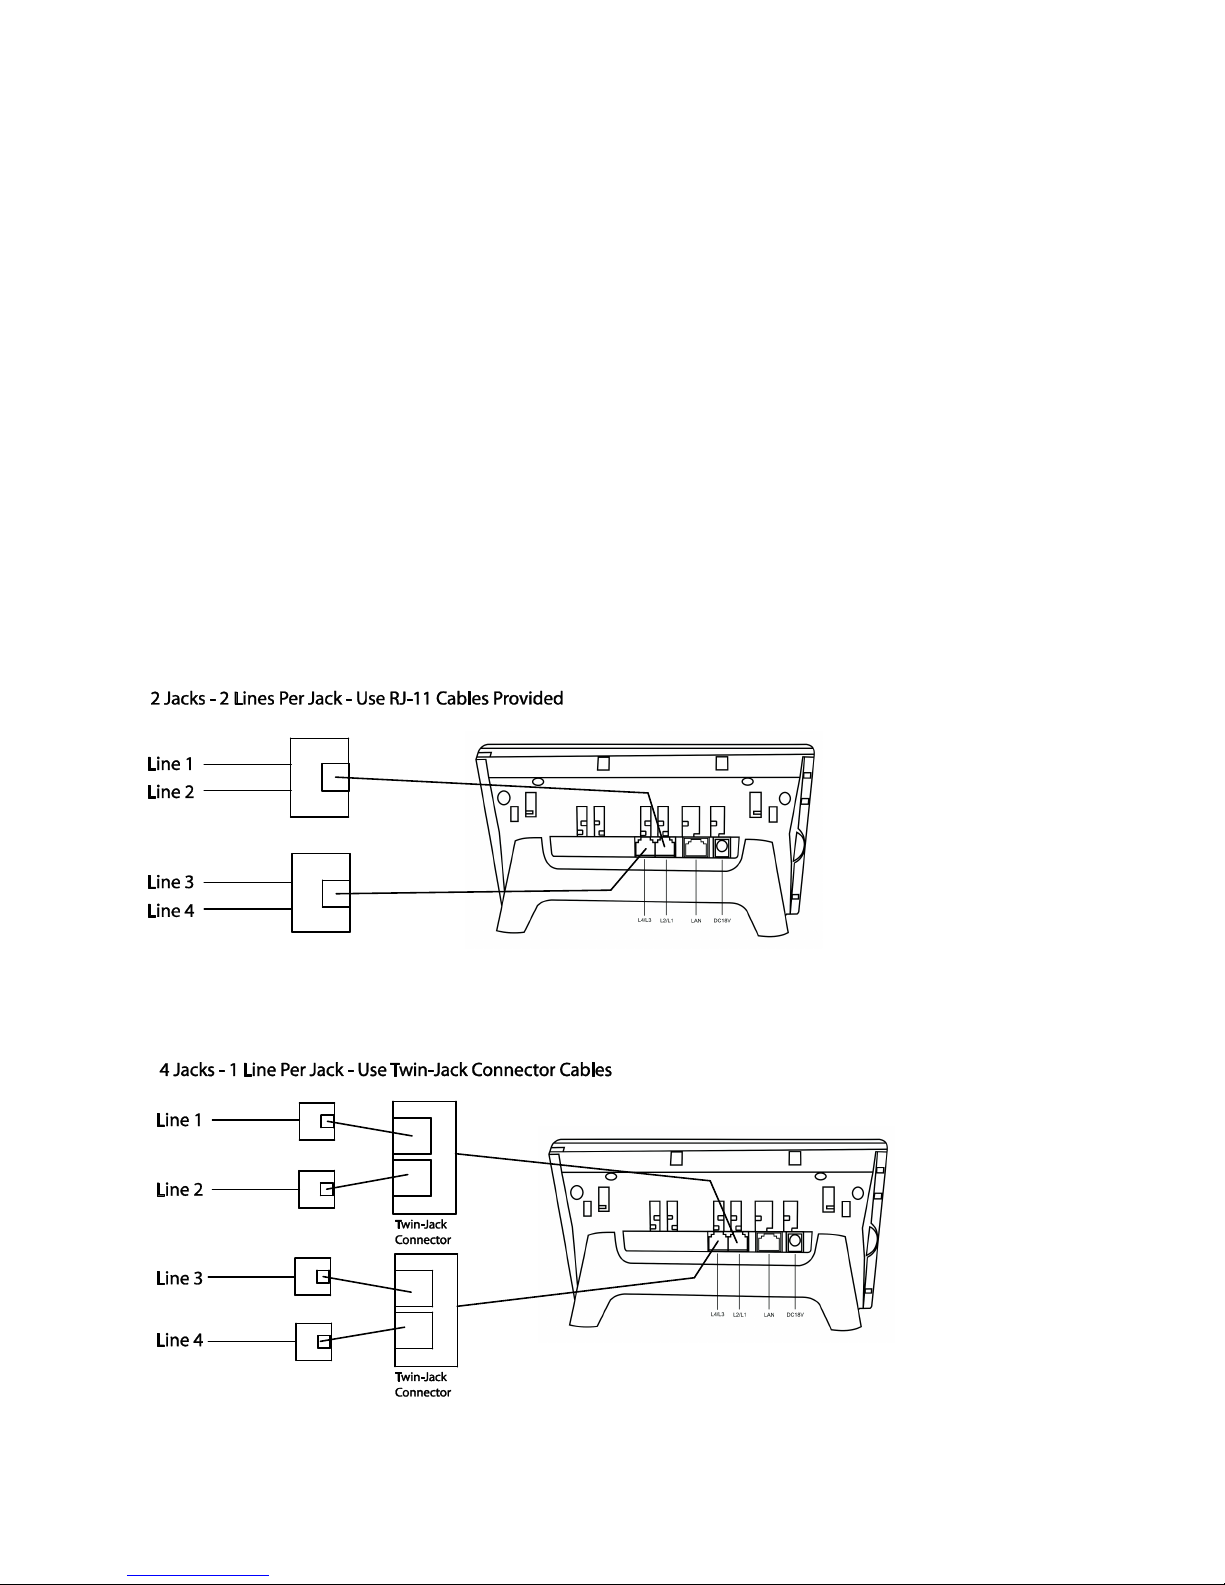
Analog telephone lines are connected to the SD-400 via the two RJ-11 interface jacks on the
back of the device. Each RJ-11 interface jack supports two phone lines. Reference the two
diagrams below to determine how to connect your SD-400 to your telephone lines.
Page 5
Network Connection
Connect the SD-400 to your Local Area Network using the LAN connector on the back of the
device if you intend to manage and review the calls from a remote PC.
SD-400 Setup
The default settings for the SD-400 enable four analog lines to record and store on the local 8
GB SD memory card. The device is also enabled in default settings to allow LAN access. The only
configuration changes required are to set the date and time. No other changes are required in
the setup of the SD-400 unless changes are required from the default settings of the SD-400.
Setting The Date/Time on the SD-400
Double-Click on the Setup Icon to access system options.
Select Option 3 – Date/Time
Option 1 – Set the Date (Select the Return icon after setting date to return to main screen)
Option 2 – Time Setting (Select the Return icon after setting date to return to main screen)
Option 3 – No Changes Required
Option 4 – No Changes Required
Option 5 – Set your time zone +/- in reference to GMT
Page 6
Software Reference Guide
There are two options for reviewing the calls on the SD-400:
SD-400 is connected to your network – Install SD-400 Network Software
The SD-400 Network Software will find the SD-400 on your Local Area Network and allow you to
transfer the calls to your local PC for playback.
SD-400 is NOT connected to your network – Install Desktop Player Software
You will need to transfer the calls to your PC via the SD card and use the Desktop Player
software for playback.
SD-400 Network Software
To Install the SD-400 Network Software:
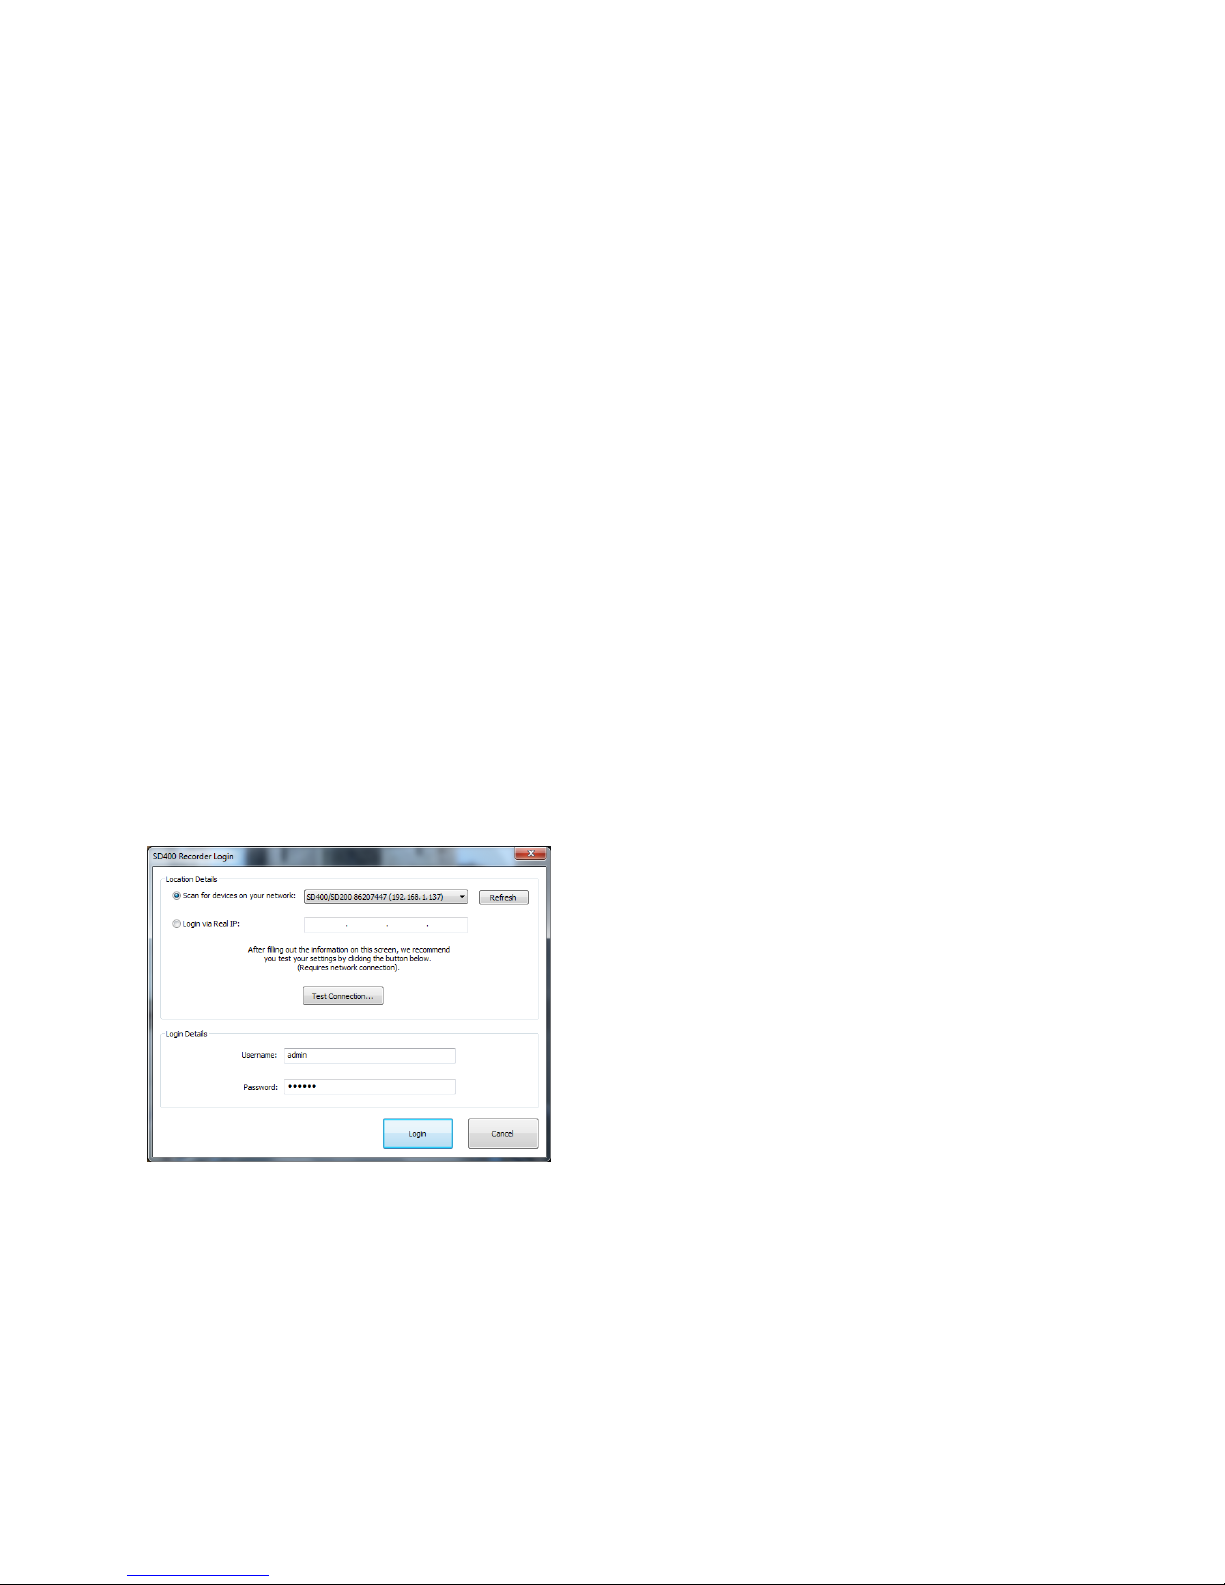
Insert the included CD into your PC. From the main interface screen (launches automatically)
select “Install SD-400 Network Software”. Follow instructions on the screen.
Once the software is installed – Double Click the XtRSD400 icon on the desktop to launch the
application.
Enter the User Name – default user name is: admin
Enter Password – default password is: 1111
Select the option for “Scan for devices on your network”. The SD-400 Network Software will
search your network for the SD-400 device. Once the data field shows the device – click the
Login button on the control panel.
Page 7
Call Log Window
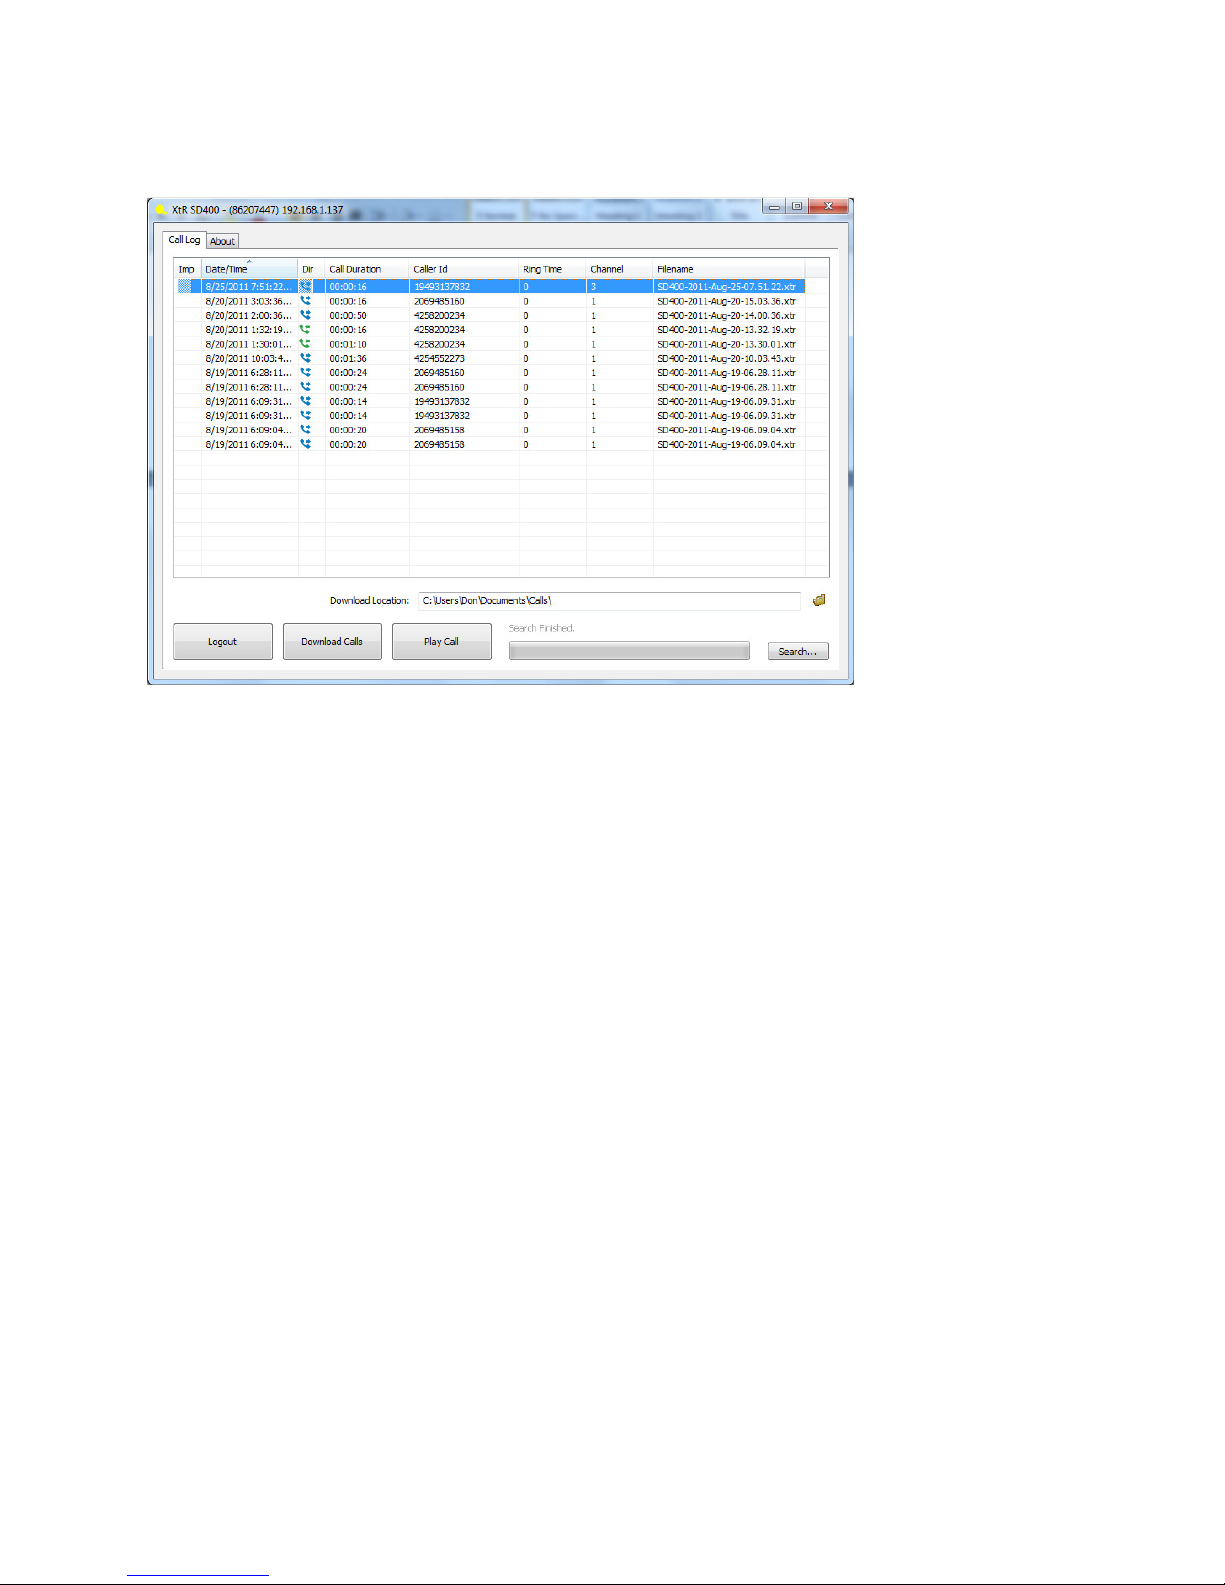
The calls stored on the SD card in the SD-400 will be displayed on the Call Log window. You can
select and play a call from this window or download the calls to your local pc.
To play a call directly from the device select the call from the list and click the Play Call button.
The call will be downloaded and will be displayed in the player panel.
To download the calls to your local pc – select the calls that you wish to transfer and click the
Download Calls button in the control panel. The default folder for downloads was created when
the software was installed and can be found at your My Documents/My Calls folder. You can
change the download location by selecting the folder icon for “Download Location” and
browsing to the alternative folder you would like to store the calls. If a change is made to the
calls storage location you will also need to change the location on the Player software.
You can select multiple files by holding the Control button and selecting multiple calls for
download. You can select a range of calls by selecting a call and holding down the Shift key and
selecting the call at the bottom of the range you wish to transfer.
Once the calls have been transferred to your local pc you can use the XtR Desktop Player
software to play and manage the calls.
Page 8
Desktop Player Software
The Desktop Player Software is used to manage and review the calls that have been
downloaded to your local PC (either via transfer with the SD Card or SD-400 Network Software).
Launch the Desktop Player Software by double-clicking on the XtR Desktop software icon that
was created on your desktop.
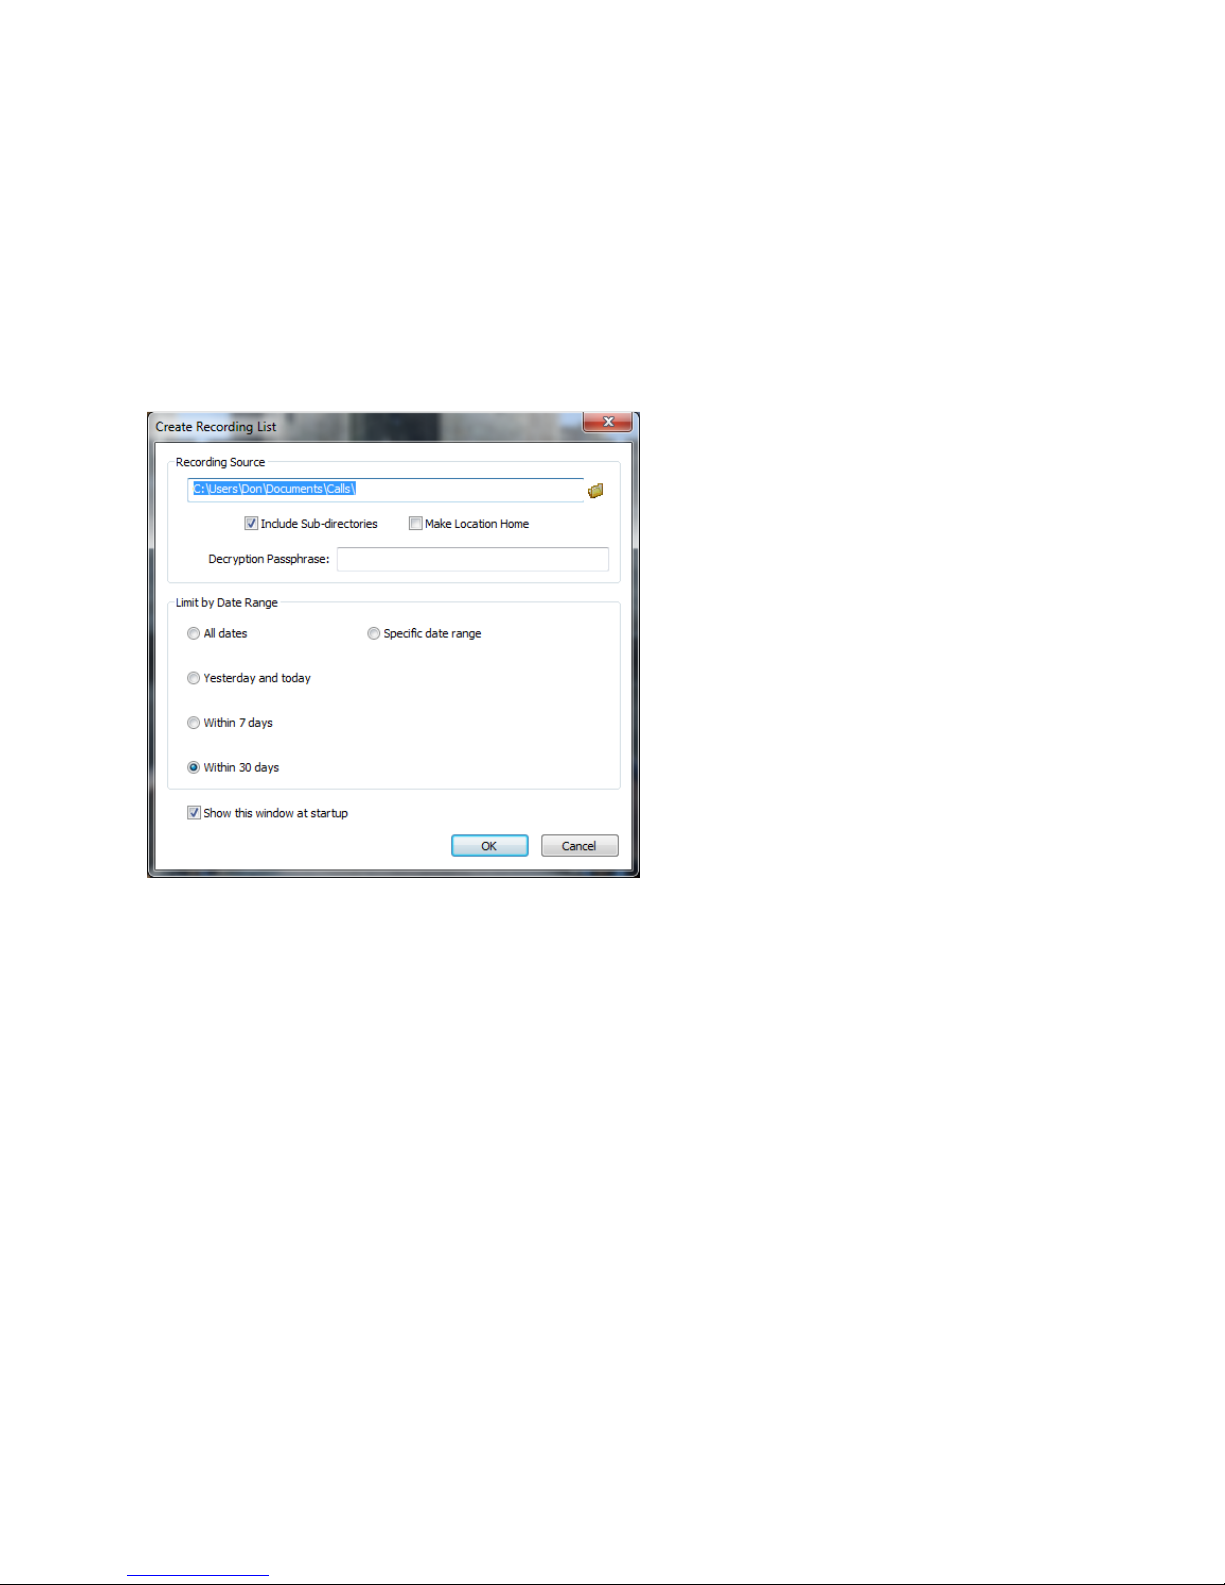
When the Player is launched the “Create Recording List” panel will be shown:
Verify that the Recording Source location is the location where you have downloaded/stored
your calls. If you changed the storage location in the SD-400 Network Software you will need to
change the location to where you are storing your calls. Default location is My Documents/My
Calls. If you have not made any changes to the storage location this will be the default option.
Select the date range for which you would like to create the recording list in the “Limit by Date
Range” panel and click OK.
The Player will open with the call date based on the date range selected.
Page 9
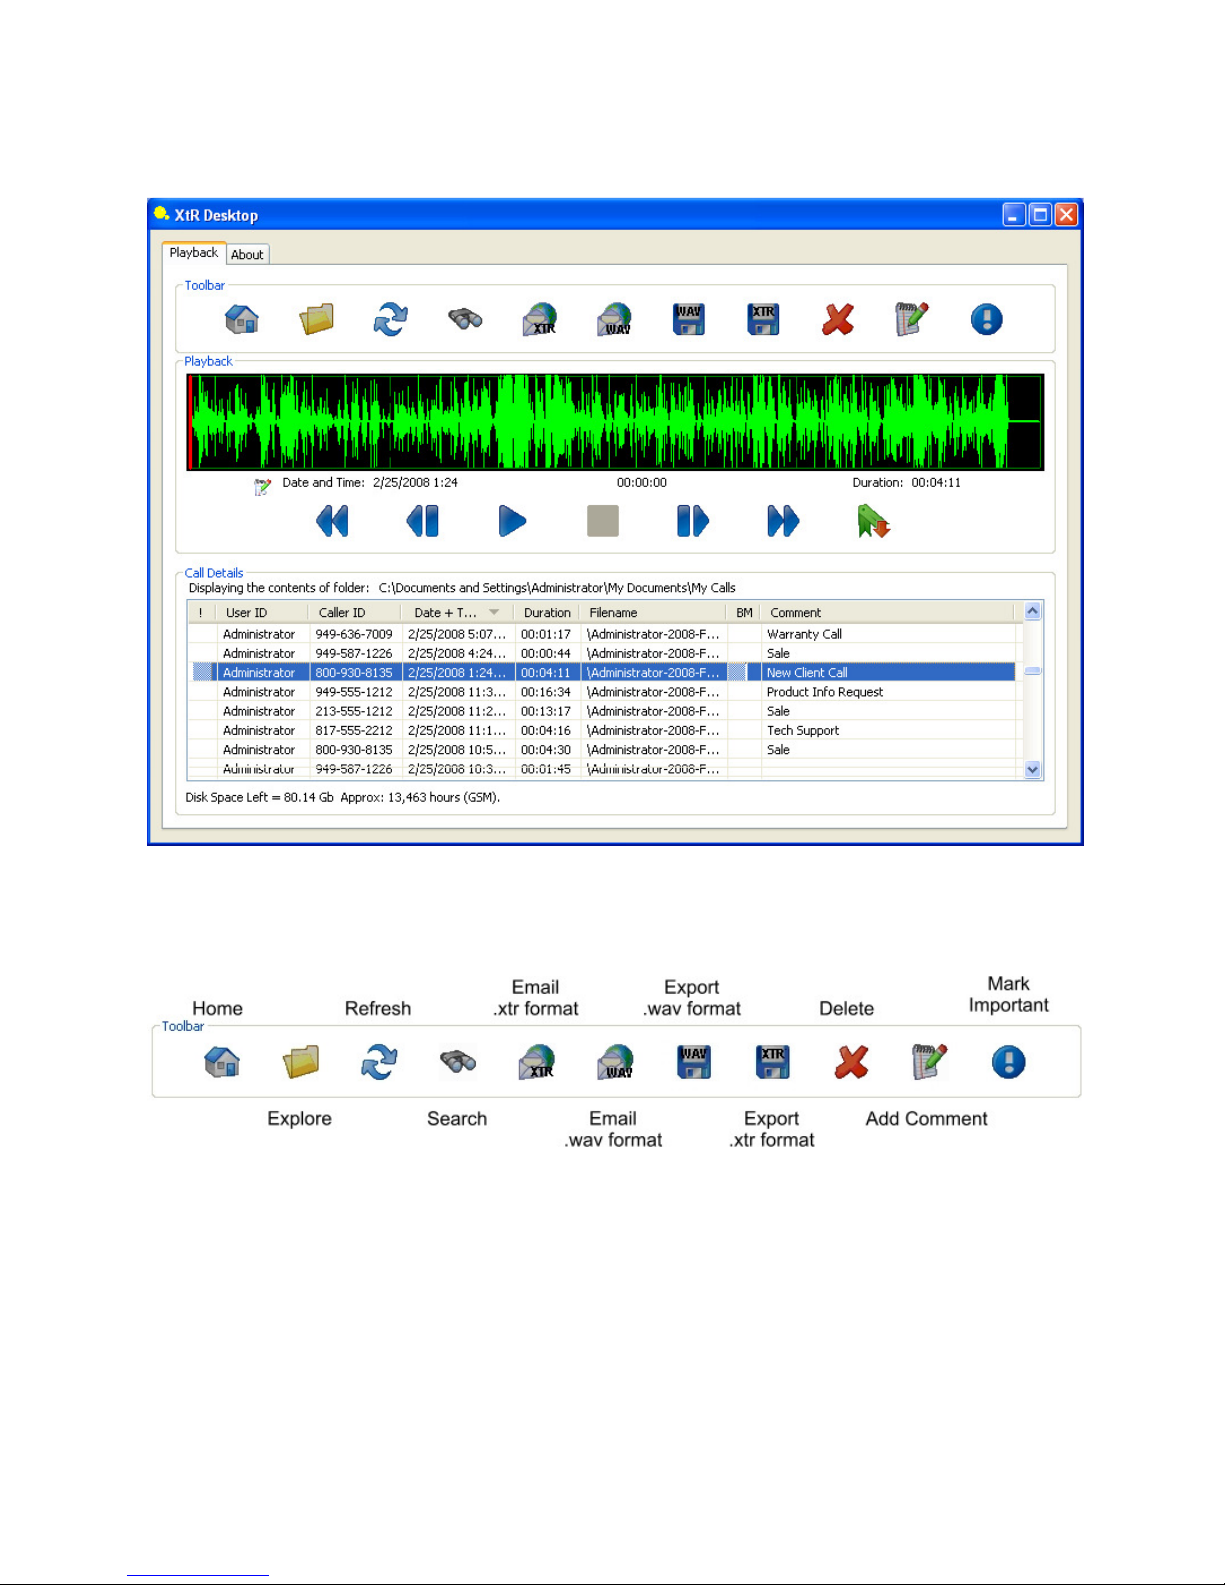
Desktop Player
Toolbar:
Home: use to set the location where the player looks for calls on startup
Explore: Change directory where you want to search for calls
Refresh: Refreshes the current call compilation
Search: Searches data fields for specific data
Emai-XtR Format: Interfaces with email and allows you to email calls in proprietary .xtr format.
Can only be used with installed email clients – not functional with web based email.
Email- .wav format: Interfaces with email and allows you to email calls in .wav format. Can only
be used with installed email clients – not functional with web based email.
Page 10
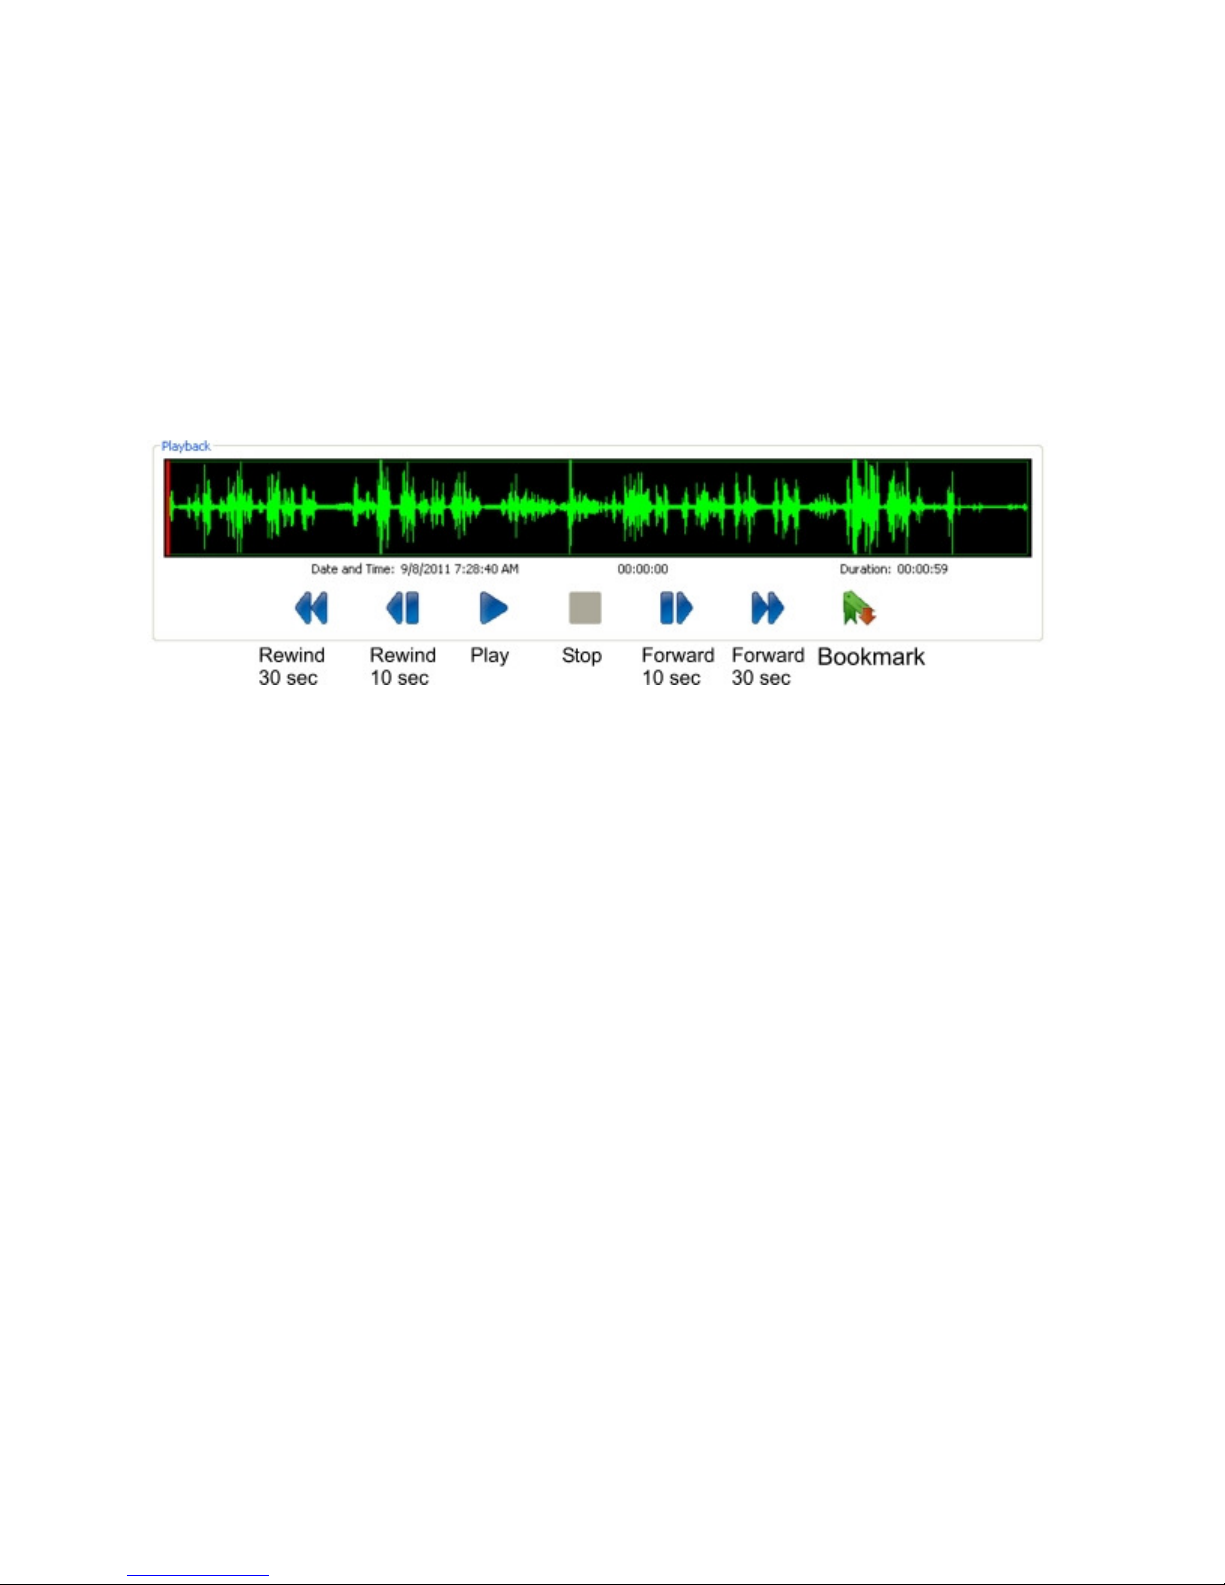
Export - .wav Format: Converts to .wav format and allows for export of call records.
Export - .xtr Format: Allows for export of call records in .xtr format
Delete: Delete call records
Add Comment: Allows user to add comments to file records
Mark Important: Allows user to mark a call as Important
Player Window:
 Loading...