

Page 1
YOUR PACKAGE
CONTAINS:
• Print Station
• Power Adapter
• Quick Installation
Poster
• Installation CD-ROM
Start By Learning About the
Intel
®
InBusiness
™
Print Station
The Intel
®
InBusiness
™
Print Station easily connects one or two printers to your network.
You can locate printers anywhere in your office and print to them from any networked
computer running Windows* 98, Windows 95, or Windows NT* 4.0.
The software from the CD-ROM installs quickly and easily on each PC on the network.
The Setup program detects each printer connected to a Print Station, lets each user specify
which printer to use, and installs the drivers for that printer.
Gather Equipment
• Printer cables from the Print Station to your printers must not exceed 6 feet or 1.83
meters and must be marked “IEEE 1284 compliant”.
• Use Category 5 network cable to connect the Print Station to the hub or switch. Cable
length must not exceed 100 meters (328 feet).
• If you want to connect a printer that is currently connected to a computer, remove the
printer cable from the computer and move the printer to the location of the Print Station.
TIP: To wall-mount this product, use two # 4 pan head screws and the template in the
center of the Doing Business with Intel book.
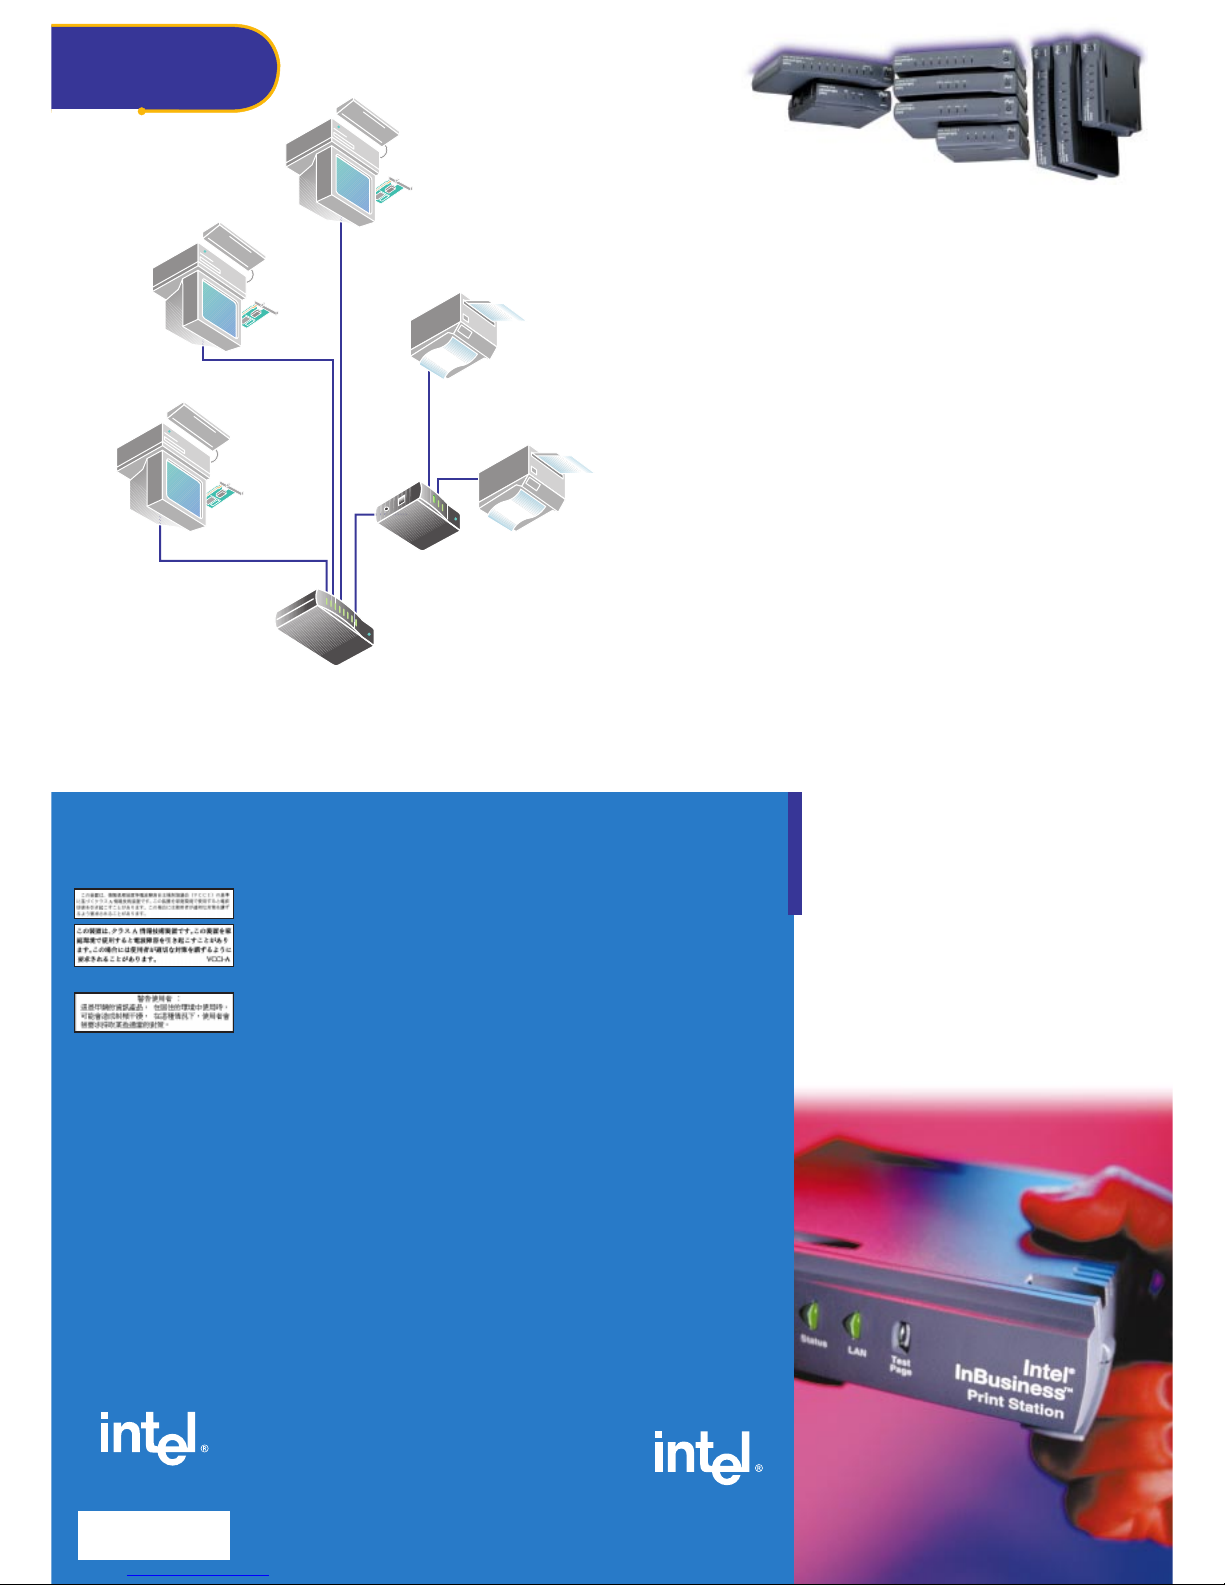
How the Intel
®
InBusiness
™
Print Station fits into your network
Certifications:
CE Class A
Class A Part 15 FCC Rule
VCCI
BCIQ
AC adapter safety:
UL, Dentori, NEMKO, Australia
3 Year Limited Warranty
Intel®InBusiness
™
Print Station
Quick
Installation
Poster
Now, open your
poster for
easy-to-follow
setup directions.
Copyright © 1998,
Intel Corporation
All rights reserved.
Intel Corporation assumes no
responsibility for errors or
omissions in this installation guide,
nor does Intel make any commitment to update the information
contained herein.
*Other party trademarks and
brands are the property of their
respective owners.
Intel Corporation
2111 NE 25th. Ave.
Hillsboro OR 97124-6497
http://www.intel.com
First Edition Febuary 1999
*000000-001*
Intel
®
InBusiness
™
Products
Intel InBusiness networking products provide everything that small
businesses need to share resources and increase productivity. Designed
specifically for small networks, these products include
hubs, fast hubs, switches, and simple network
appliances, perfect for sharing information
over a small network.
10 or 100 Mbps Hub or switch
Printer
PC with
Adapter Card
PC with
Adapter Card
Printer
PC with
Adapter Card
Intel
®
InBusiness
™
Print Station
737546-001
Page 2
Easy
Expansion
To add more printers to your network, simply add another Print Station to your network
hub or switch and connect the printers.
If you can’t print...
✓ Printer is offline. Check the printer to see if it is out of paper or jammed.
✓ Printer cable is too long or defective. Make sure the printer cable is stamped “1284
compliant” and does not exceed six feet or 1.83 meters in length.
✓ Your computer is not configured correctly. Run the Print Station Add Printer wizard
again and make sure that you select the correct printer driver. For information, see
your printer documentation.
✓ Print Station is not functioning. Check the Status light on the Print Station.
For more troubleshooting help, click the Start menu, Programs, Intel InBusiness Print Station,
and Troubleshooting.
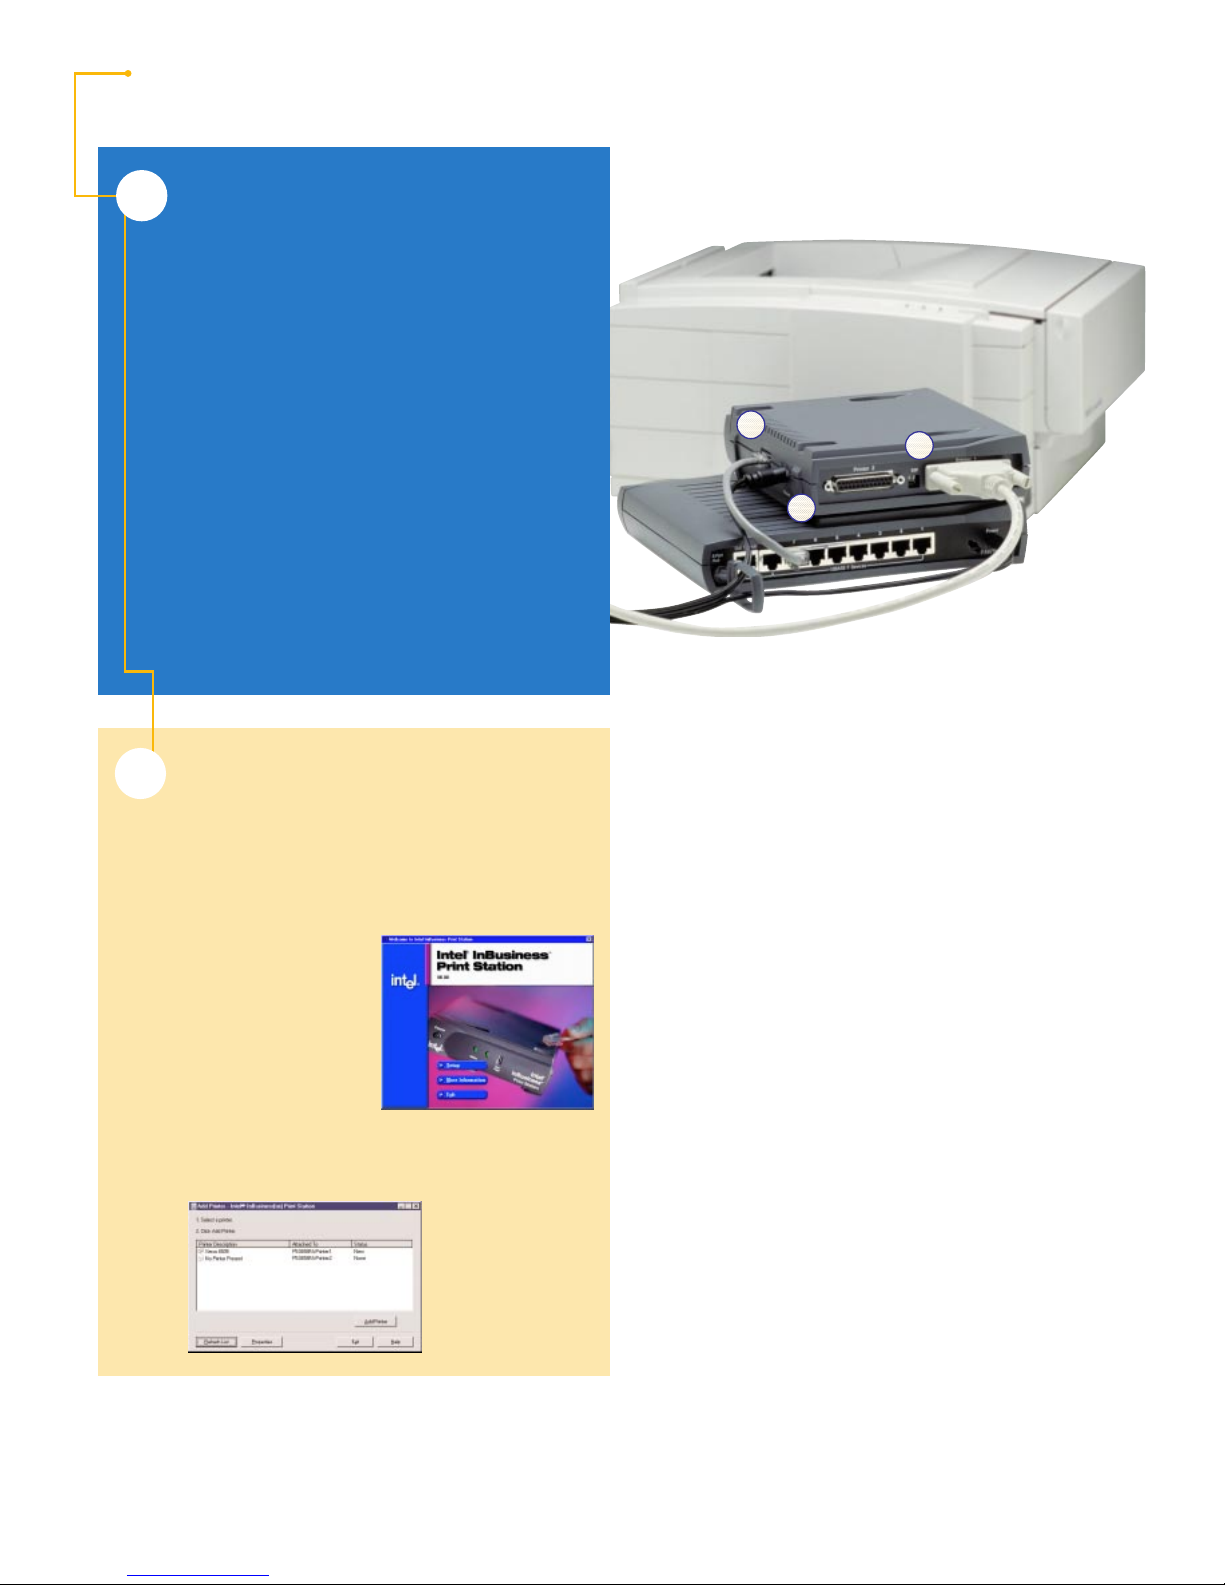
Install the Print Station
1. Connect a network cable between
the Print Station and your 10 or
100Mbps hub or switch.
Use Category 5 cable with RJ-45 network
connectors. Cable length must not exceed 328
feet (100 meters). Use a standard numbered port
on the hub or switch, not a port labeled Out to
Hub, Uplink, Daisy Chain, X, or Crossover.
2. Connect the printer cables.
Connect the first printer to the Printer 1 port on the
Print Station using a parallel printer cable.
3. Connect the Print Station’s power
adapter to the power connector and a
power source.
Turn on the power to the Print Station and printers.
When the Status light turns green, the
Print Station is ready to print.
The Print Station hardware
installation is complete!
Easy
Steps
1
Set up each computer
to print
Use the Print Station CD-ROM to install
the printing software on each computer.
Do not install printers using the Windows*
Add New Hardware or Add Printer wizards.
1. Insert the Intel
InBusiness Print
Station CD into a
Windows* computer.
If the setup program
doesn’t automatically
start, run setup.exe
from the CD. Click the
Start menu, click Run
and browse to
setup.exe on your
CD-ROM drive.
2. Click the Setup button.
3. Follow the instructions in the Setup program.
Tip
: After you use the
CD to set up one printer,
you can set up another
from the Intel InBusiness
Print Station program
folder on your computer.
Click Start, Programs,
Intel InBusiness Print
Station and Add Printer.
2
Need More Help?
You can reach Intel’s product support site on the Web at http://support.intel.com. A trained
technical specialist will take your call Monday through Friday between 7 a.m. and
8 p.m., and Saturday between 7 a.m. and 3 p.m., Pacific time. Call 1-916-377-7000.
In Europe, support hours are Monday through Friday between 08:30 and 16:00 (UK time) and
09:30 and 17:00 (Continental Europe).
Call: UK +44 (0) 1793 404900
Germany +49 (0) 69 9509 6099
Italy +39 (0) 2 696 33276
France +33 (0) 1 41 91 85 29
Intel®InBusiness
™
Print Station
3
Register Your
Print Station
Registering your Intel®InBusiness™ Print Station authorizes you to receive free installation
assistance for 90 days. You can register your Print Station using the registration card in
Doing Business with Intel. More information on technical service and the three year
limited warranty is included in Doing Business with Intel.
What the lights on the
Print Station mean
Status light: Green indicates normal operation. Blinking green indicates printing activity.
Red indicates a problem. The light blinks amber during startup. If the light blinks red, you
can count the blinks and use the following to solve most problems:
6 Blinks: Disconnect the power and printers from the Print Station and then reconnect them.
7 Blinks: Check the network connection to the hub or switch.
9 Blinks: Turn off the power on the Print Station and turn it on again.
If the light blinks in any other pattern, contact your supplier or Intel’s Customer Support.
LAN light: Green indicates a network connection at 10 Mbps. Amber indicates a network
connection at 100 Mbps. Blinking indicates network activity.
Test Page: Press this button to send a test page to each printer.
2
2
1
 Loading...