

Page 1
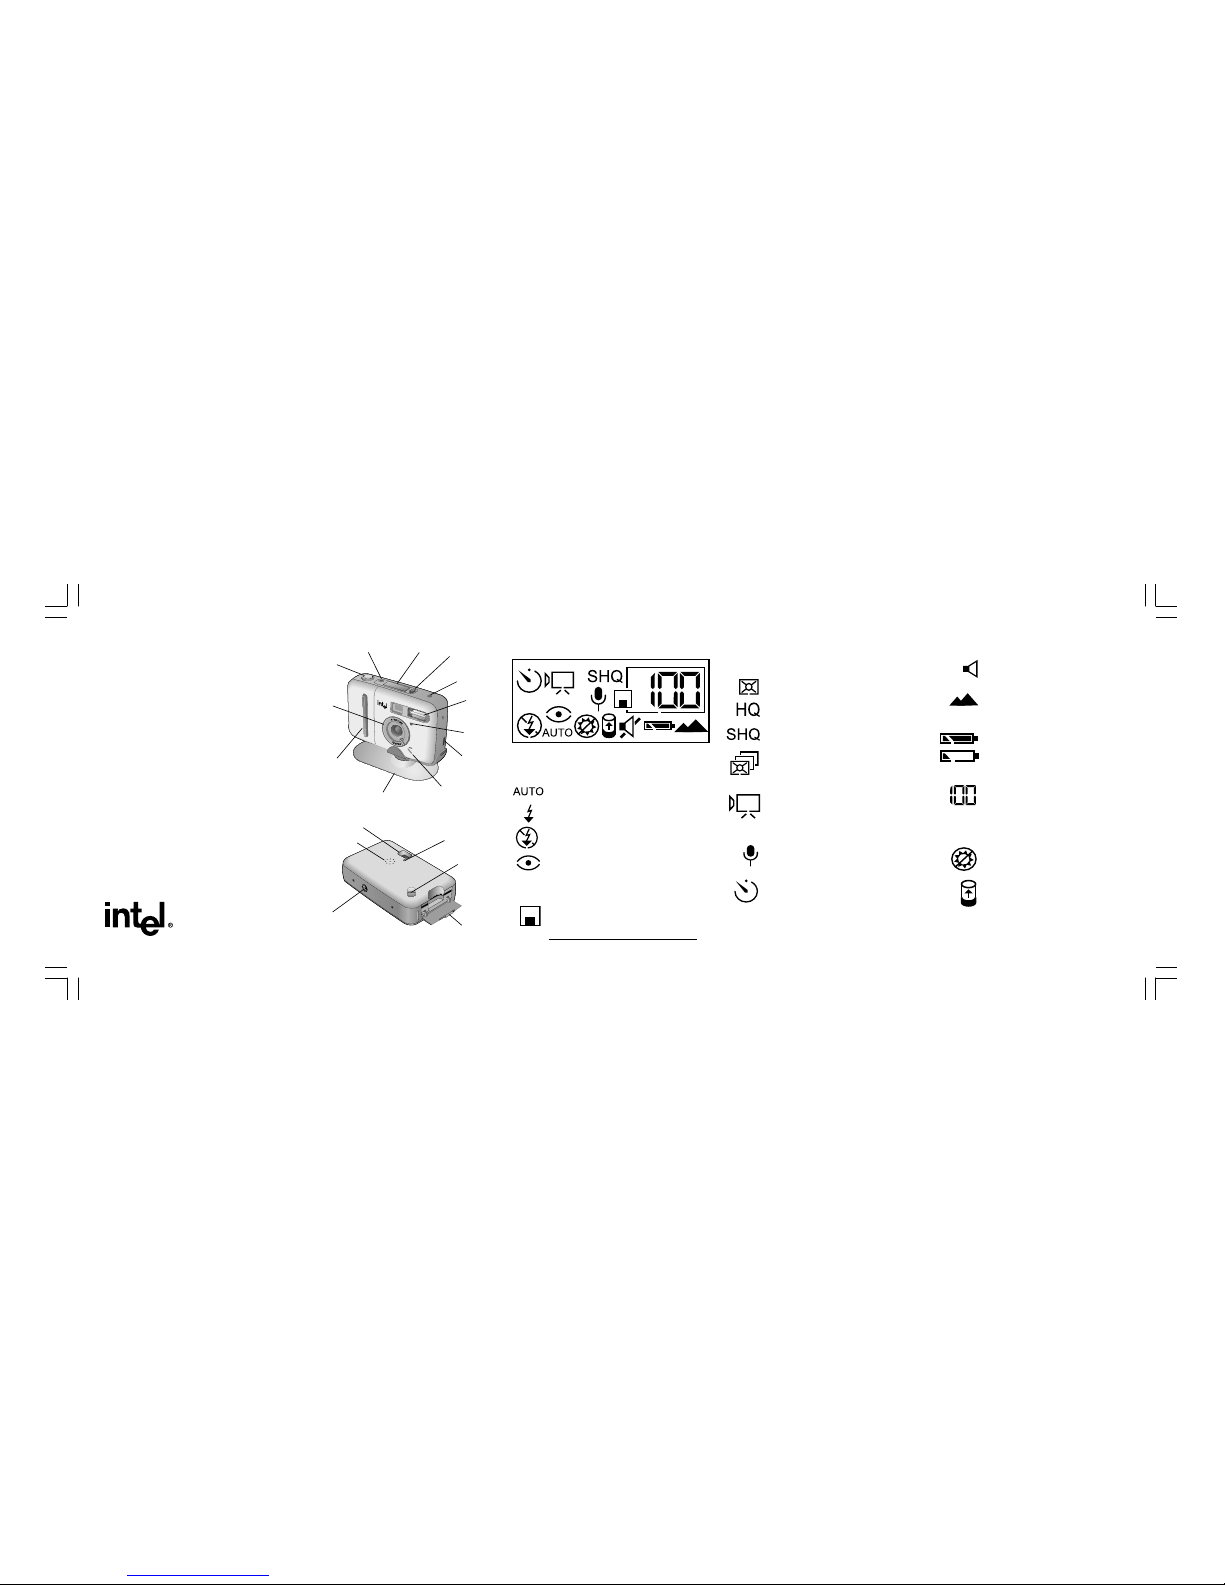
Wrist Strap
Hook
SmartMedia*
Card Door
Flash Mode
Button
Snapshot
Button
Display Panel
Ready Light
Focus
Ring
Timer
Light
Power Button
Capture
Mode Button
Speaker
Viewfinder
Flash
Cradle
USB
Connection
Tripod
Receptacle
Battery
Compartment
Microphone/
Infinity-focus
Indicator
Intel® Pocket
Digital PC
Camera
YY
YY
Y
our Quick Referenceour Quick Reference
our Quick Referenceour Quick Reference
our Quick Reference
Field GuideField Guide
Field GuideField Guide
Field Guide
A27590-001
Display Panel
SmartMedia* Card (Optional)
Card Inserted – All snapshots and audio/
video recordings will be saved on the
SmartMedia* card, if one is inserted.
Auto Flash – Only use flash when needed.
Flash On – Always use flash.
Flash Off – Never use flash.
Red-eye Reduction – Use extra flashes to
reduce red-eye effect.
Flash Modes
Press Flash Mode button to change modes.
* Other names and brands may be claimed as
property of others.
Normal Quality Mode – Takes a snapshot
at 640x480 resolution.
High Quality Mode – Tak es a snapshot at
1024x768 resolution.
Super High Quality Mode – Takes a
snapshot at 1280x960 resolution.
Multi-Snap Mode – Takes five normal
quality snapshots in rapid succession.
Press Snapshot button to start. Flash not
available.
Video Clip Mode – Captures continuous
video with corresponding audio. Press
Snapshot button to begin recording video.
Press again to stop recording. Flash not
available.
Voice Recorder Mode – Records audio
only. Press Snapshot b utton once to
begin, and again to stop recording.
Self-timer Mode – Waits 10 seconds
before taking snapshot. Can be used
with any snapshot mode, including MultiSnap. Press Snapshot button to start.
Timer light on front of camera shows
countdown before snapshot is taken.
Capture Modes
Press Capture Mode button to change modes.
Speaker On – Press and hold Capture
Mode button 3 seconds to turn camera
sounds off or back on.
Focus Indicator – Flashes when out of
focus. Turn focus ring until it clicks into
infinite-focus position. Other positions
used only when connected to computer.
Full Battery – Indicates strong battery.
Low Battery – Flashes when batteries
are low. Turns camera off after a short
time.
Snapshot Indicator – Shows number of
snapshots and audio/video recordings in
the camera. Press Snapshot button
halfway to see remaining capacity.
Displays REC when recording video or
audio. Flashes when memory is full.
Low Light Indicator – Appears when
Snapshot button is pressed halfway if
there is not enough light.
Remaining Memory – Press Snapshot
button halfway . The Snapshot Indicator
shows how many times you can press
Snapshot button in the current mode.
Shows available recording time for Video
Clip (in seconds) and Voice Recorder (in
minutes), up to 999.
Other Display Icons
Page 2
Need more information?
The online help and manual contain complete information on connecting your camera and downloading snapshots, audio and video clips to your computer.
• To open program help , run Intel
®
Create & Share™ Software and click Help.
• To open online manual, click Start > Programs > Intel Create & Share Software > PC Camera
Software > Manual.
Camera Buttons
Power – Turns camera on and off. If camera beeps
twice when you turn it on, it means the camera is
out of focus, batteries are low, or memory is full.
Capture Mode – Sets the current camera mode:
Normal Quality, High Quality , Super High Quality,
Multi-Snap, Video Clip, Voice Recorder, Normal
Quality Timer, High Quality Timer, Super High
Quality Timer, Multi-Snap Timer.
Flash Mode – Sets the current flash mode: Auto
Flash, Flash On, Auto Flash with Red-Eye
Reduction, Flash On with Red-Eye Reduction,
Flash Off. Camera beeps if you try to set flash in a
mode that does not use flash (Video Clip, V oice
Recorder, or Multi-Snap modes).
Snapshot – Begins capturing in the current mode or
starts the self-timer. Press halfway to see how
many more snapshots you can take, or how much
video/audio recording time is available.
How to:
Take Snapshots – Chec k green Ready light on bac k
of camera. Wait until it stops blinking to take
pictures. Press Snapshot button all the way down.
To av oid blurry images, hold camer a still f or a
second after shutter sound, especially under low
light conditions.
© 2001 Intel Corporation All rights reserved.
Change Modes – Press Capture Mode button to
cycle through the capture modes.
Use Flash – Press Flash Mode button to cycle
through the flash modes. When flash is on,
Flash indicator blinks until it is ready to use.
Turn On/off Sounds – Press and hold Capture
Mode button for 3 seconds.
Use SmartMedia* Card – Insert a SmartMedia card
to begin storing images and recordings on the card
instead of the built-in memory. When the card is
full, remove it to begin using the built-in memory.
Never remove the SmartMedia card while the green
Ready light is blinking, or while downloading or
deleting card content.
Erase Memory – Press and hold Capture Mode and
Snapshot buttons together for 3 seconds. If
inserted, SmartMedia card will be erased. If no
card is inserted, the built-in memory will be erased.
Check Light Level when not Using Flash – Press
Snapshot button halfway . If low-light warning
appears, adjust lighting or turn on flash.
Check Memory – Press Snapshot button halfway
and check Snapshot Indicator. Number shows ho w
many times Snapshot button can be
pressed in current mode. In Video Clip or
Voice Recorder mode, it shows av ailable
seconds of recording time, up to 999 seconds.
Camera Warnings
The following error conditions indicate a problem
with the camera:
Focus Indicator is Flashing: Turn focus ring until it
clicks into infinity-focus position.
Snapshot Indicator is Flashing: The camera’s
memory is full. Download your snapshots and
recordings to the computer and erase the camera’s
memory. If a SmartMedia* card is inserted, remove
it to begin using the built-in memory.
Battery Icon is Flashing: The camera is about to
shut down due to low battery condition. Batteries
must be replaced.
Low Light Warning: If you press Snapshot button
halfway and hear a beep, adjust lighting, turn on
flash, or use a tripod.
Note: Erasing a SmartMedia card removes all data
stored on that card, including information recorded
from other SmartMedia card devices.
Auto Shutoff
The camera will shut itself off to conserve battery life
if you leave it on without pressing any buttons for
about 3 minutes. Press the Pow er b utton to turn the
camera back on.
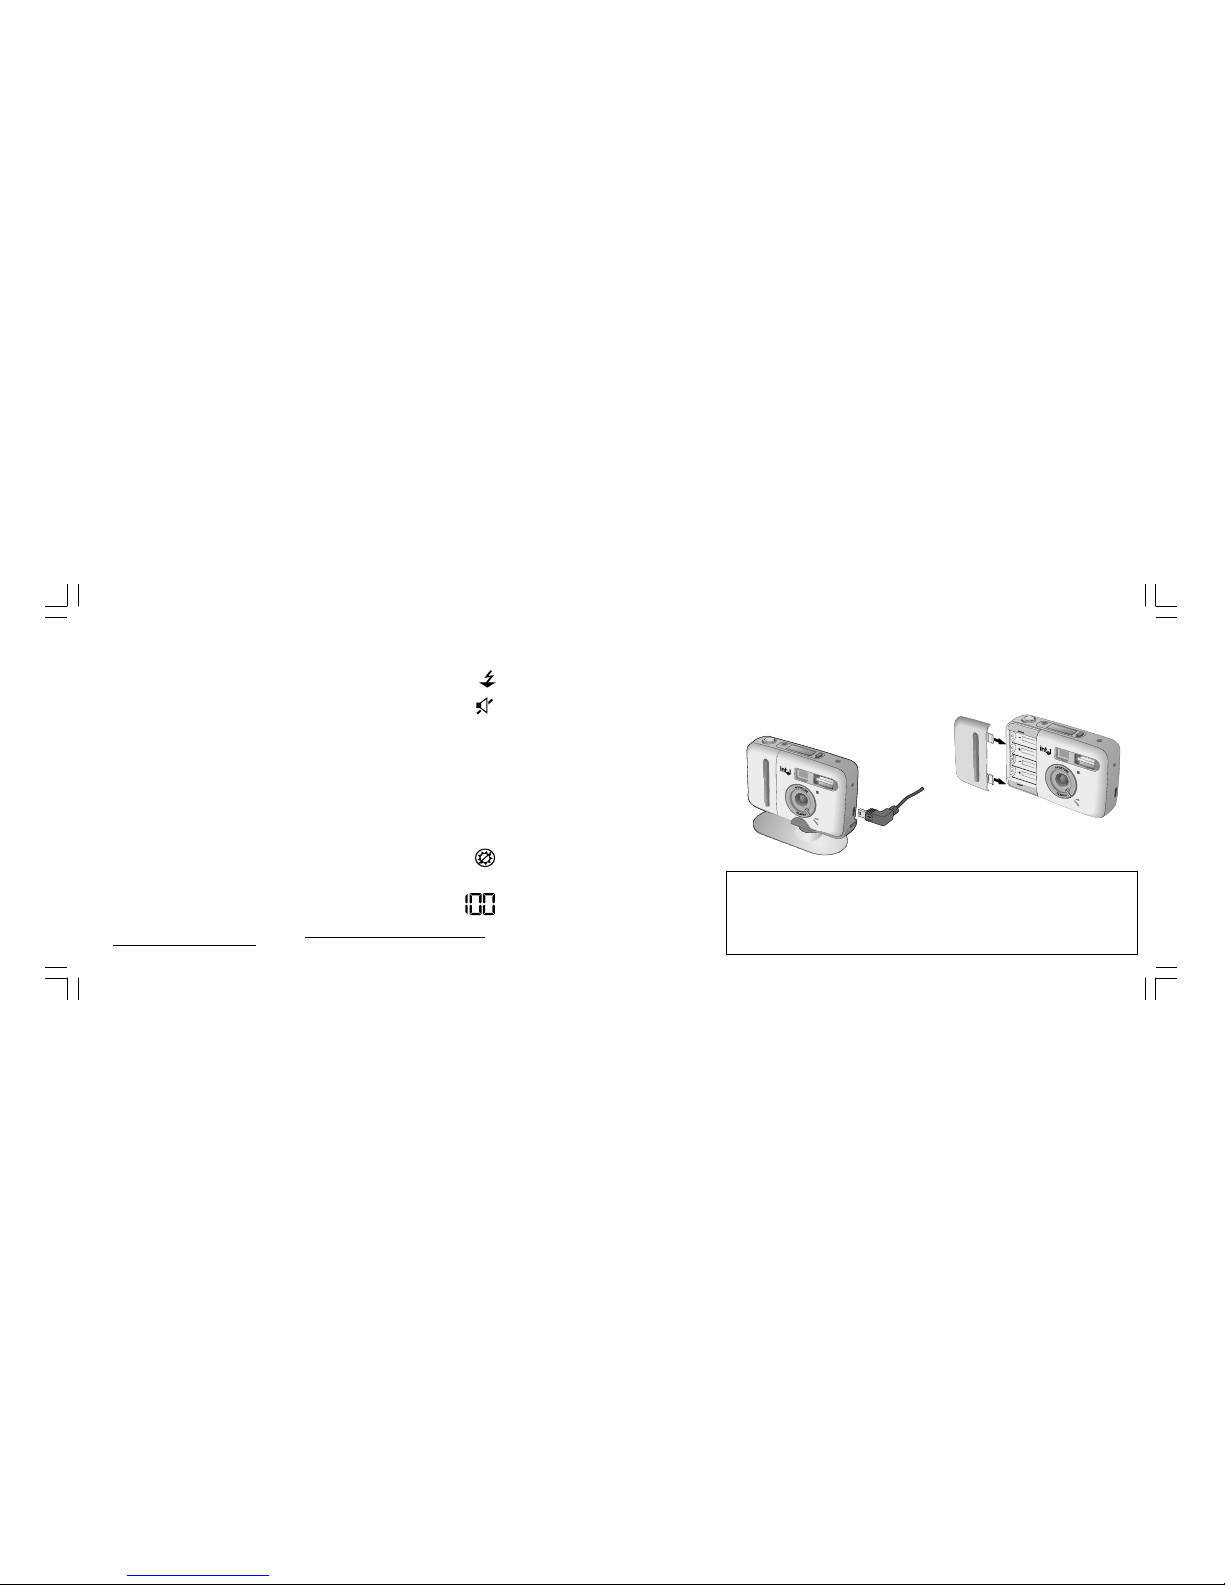
Connecting to your
Computer
Download camera content by attaching the camera
to your computer. Connect one end of the supplied
USB connection cable to the camera as shown
below. Connect the other end of the cable to a USB
port on your computer.
Changing Batteries
Slide the battery cover open as shown below. Insert
4 AAA batteries into the compartment. Be sure to
insert all batteries with their polarity matching the +
and – symbols marked inside the compartment.
Intel is a registered trademark of Intel Corporation or its
subsidiaries in the United States and other countries.
 Loading...