

Page 1
INSTRUCTION MANUAL
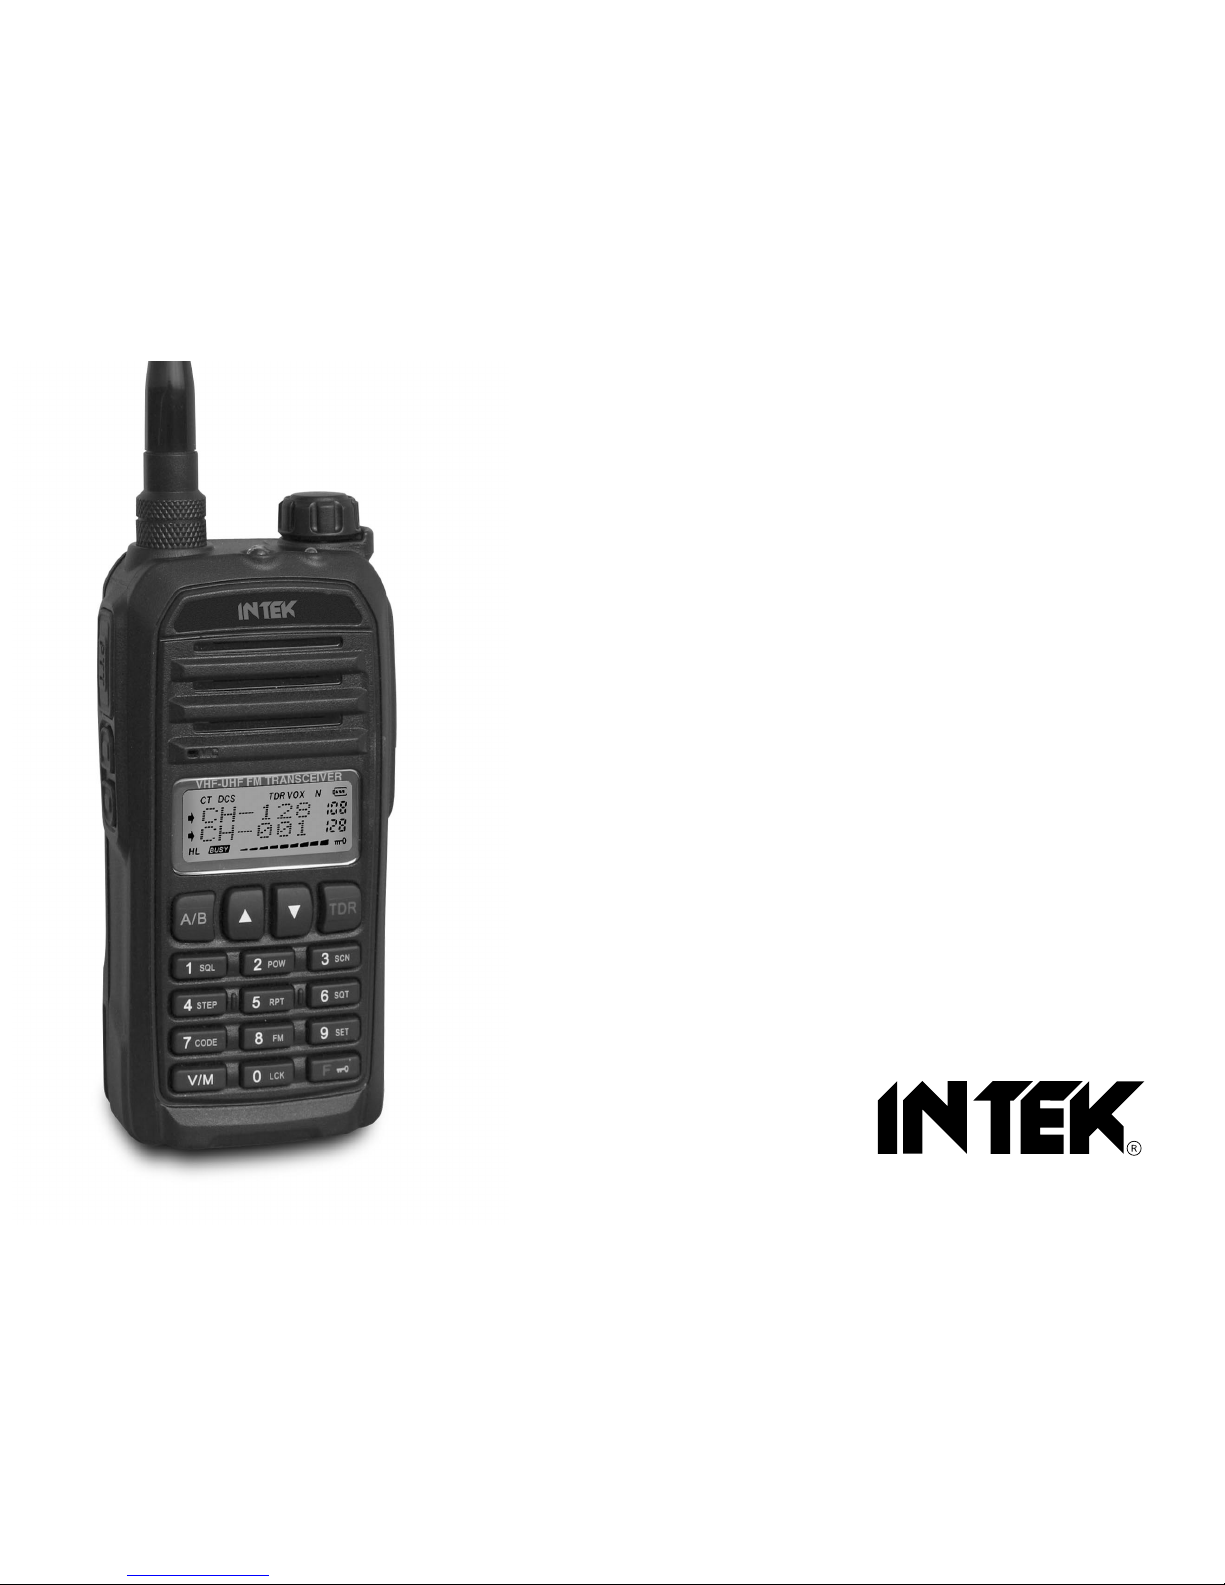
DUAL BAND VHF / UHF FM
PROFESSIONAL 2-WAY RADIO
136-174 MHz / 128CH / 5W
400-470 MHz / 128CH / 4W
PC PROGRAMMABLE
DX-930S
Page 2

With the present declaration, we certify that the following products :
INTEK DX-930S
comply with all the technical regulations applicable to the above mentioned products
in accordance with the EC Directives 2006/95/EC, 2004/108/EC, 99/5/EC.
Type of product : VHF/UHF PMR Transceiver
Details of applied standards : EN 300 086-1 V1.4.1, EN 300-086-2 V1.3.1
EN 301 489-1 V1.8.1, EN 301 489-5 V1.3.1
EN 60950-1+A11
Manufacturer : INTEK S.R.L.
16, Via G. Marconi
20090 Segrate, Italy
Tel. 39-02-26950451 / Fax. 39-02-26952185
E-mail : info@intek-radios.com
Notified Body : EMCCert Dr. Rasek
Boelwiese 5, 91320 Ebermannstadt
Germany
Identification Number : 0678
Contact Reference : Armando Zanni
Tel. 39-02-26950451 / Fax. 39-02-26952185
E-mail : info@intek-radios.com
Segrate, 09/11/2011 dr. Vittorio Zanetti
(C.E.O.)
DECLARATION OF CONFORMITY
EC Certificate of Conformity
(to EC Directive 2006/95, 2004/108, 99/5)
Declaration of Conformity
Page 3
RoHS
2002/95/EC
0678
NOTICE !
It is recommended to carefully read this owner’s manual before using the product. This will also help the user to prevent using the radio in
violation of the regulations valid in the country where the product is used, as well as to avoid any possible interferences with other services.
NOTICE !
This transceiver is programmable via PC, using the dedicated software and the PC interface cable (optional items). Any
programming or modification of the original default setting must be made by a specialised technician or by an authorised service
centre. Some functions of this transceiver might be programmed in violation of the technical rules in force for the use of the VHF
and UHF FM bands. It is the user’s responsibility to check that any modification to the programming will be done in compliance
with the current regulations. Any modification to the product, alteration of the internal circuit, of the external structure of the radio or
any programming in violation of the current regulations will automatically void the product certification and your right to use the
product. INTEK S.R.L. declines any responsibility concerning any modification of the product, made by the user or by a third party,
after delivery of the product.
NOTICE !
This transceiver has been factory pre-programmed, in order for the user to test it right after purchase. It is the user' s responsibility
to re-program the radio, in accordance with the specifications for the frequency channels assigned by the local authority.
Page 4

General Information
Thank you !
Thank you for choosing INTEK for your two-way business radios applications. This user friendly transceiver will provide
you with clear and reliable communications and will keep your professional activities at peak efficiency. This transceiver
incorporates the latest and most advanced technology, so you will be pleased with its quality and its technical features.
Important notice !
The use of VHF and UHF FM transceivers is subject to the regulations applied in the country where the product has to be
used. As regulations are usually subject to possible modifications, please check the current regulations in your country
with your dealer or local supplier. INTEK does not take any responsibility for illegal use and operation of this product not
in accordance with the regulation of the country where the product is used.
Safety notice
The user must know and understand the common risks related to the use of transceivers. Do not use the transceiver in
environments at risk of explosion (where there are gas, dusts, smokes, etc.). Do not use the transceiver in service areas
or fuel stations, on board aircrafts, etc.
Cautions
Please observe the following precautions, in order to avoid causing fire, personal injuries or damage to the radio:
It is suggested that each transmitted message lasts a few minutes only, since very long transmissions at the
maximum transmitter RF output power may overheat the transmitter.
Page 5

General Information
Do not alter or modify in any way your transceiver.
Do not expose the transceiver for a long time to direct sunlight and do not place it close to heat sources.
Do not expose the transceiver to excessively dusty or damp places, do not place it on unstable surfaces.
In case of anomalous smell or smoke that leaks out from the transceiver, turn it off immediately and remove the
battery pack. Please contact an authorised service center.
Please do not dispose off used battery with common garbage. Please use the dedicated disposal containers.
Important notice !
The use of VHF and UHF FM transceivers is subject to the regulations applied in the country where the product has to be used.
As regulations are usually subject to possible modifications, please check the current regulations in your country with your dealer
or local supplier. INTEK does not take any responsibility for illegal use and operation of this product not in accordance with the
regulation of the country where the product is used.
User Information
in accordance with art. 13 of the Legislative Decree of 25th July 2005, no. 15 ”Implementation of Directives 2002/95/EC, 2002/96/EC and 2003/108/EC, relative to
reduction of the use of hazardous substances in electrical and electronic equipment, in addition to waste disposal”.
The crossed bin symbol shown on the equipment indicates that at the end of its working life the product must be collected separately from other waste.
The user must therefore take the above equipment to the appropriate differentiated collection centres for electronic and electro technical waste, or
return it to the dealer when purchasing a new appliance of equivalent type, in a ratio of one to one.
Appropriate differentiated waste collection for subsequent recycling, treatment and environment-friendly disposal of the discarded equipment helps to prevent
possible negative environmental and health effects and encourages recycling of the component materials of the equipment.
Illegal disposal of the product by the user will be punished by application of the administrative fines provided for by the legislative decree no. 22/1997 (article 50
and following of the legislative decree no. 22/1997).
Page 6

User Safety, Training, and General Information
READ THIS IMPORTANT INFORMATION ON SAFE AND EFFICIENT OPERATION BEFORE USING YOUR
PORTABLE TWO WAY RADIO-.
Operational Instructions and Training Guidelines
To ensure optimal performance and compliance with the occupationa controlled environment RF energy
exposure limits in the aboves standards and guidelines users should transmit no more than 50% of the
time and always adhere to the following procedures/:
Transmit and Receive
To transmit talk push the Push To Talk PTT button to receive, release the PTT button.(), -- ( ) ;
Hand-held Radio Operation
Hold
farther away from your head.
the radio in a vertical position with the microphone 5 cm away from the lips and let the antenna
NOTE
The approved batteries supplied with this radio are rated for a 5-5-90 duty cycle.
(5% talk, 5% listen, 90% stand-by).
General Information
Page 7

14
14-24
7-13
5-6
4
4-7
2-3
1
1
14
14
15
15
16
16
16-17
Unpacking and checking the equipment
Supplied accessories
Features
Getting Started
LCD Display
Controls and Indicators
Shortcut Operation
How to Operate
Timing Shutdown (APO)
Adding Scanning Channel (SCNADD)
Power Saver Mode (SAVE)
Busy Channel Lock-Out (BCLO)
Beep Prompt Function (BEEP)
FM Radio Scanning (FM AUTO)
Voltage Display (DC VLT)
FM Radio Dual Watch (DW)
Contents
Page 8

17
17
18
18
19
19
19
20
20
21
21
21-22
22
22
Auto Backlight (LAMP)
Keypad Lock (LOCK)
Power on Message (MSGSET)
Power-On Display (OPNMSG)
Power-On Password (PSWD)
Power-On Password Setting (PSWD W)
Roger Beep (ROGER)
Scan Mode (SCN MD)
Squelch Tail Elimination (STE)
Transmit Overtime Alarm (TOT)
Transmit Prohibit (TXSTOP)
VOX (VOX)
VOX Delay (VOX D)
VOX Sensitivity (VOX S)
Contents
Page 9

23
23
23
23
23
24-25
24
25
26
27
Wide Narrow Band (WN) (*)
Low Power Warning
Transmit Overtime Prompt
How to use Intelligent Charger
Technical parameter
CTCSS Tone Frequency Chart
DCS Tone Frequency Chart
Technical specification
Optional accessories
1750 Hz Repeater Tone
28-29
Trouble shooting
30
Notes
Contents
(*) This feature is subject to the regulations applied in the country where the product is used
Page 10
12
3
4
5
6
7
89
0
F
SQL POW
SCN
SETP
RPT SQT
CODE
FM
SET
LCK
MIC
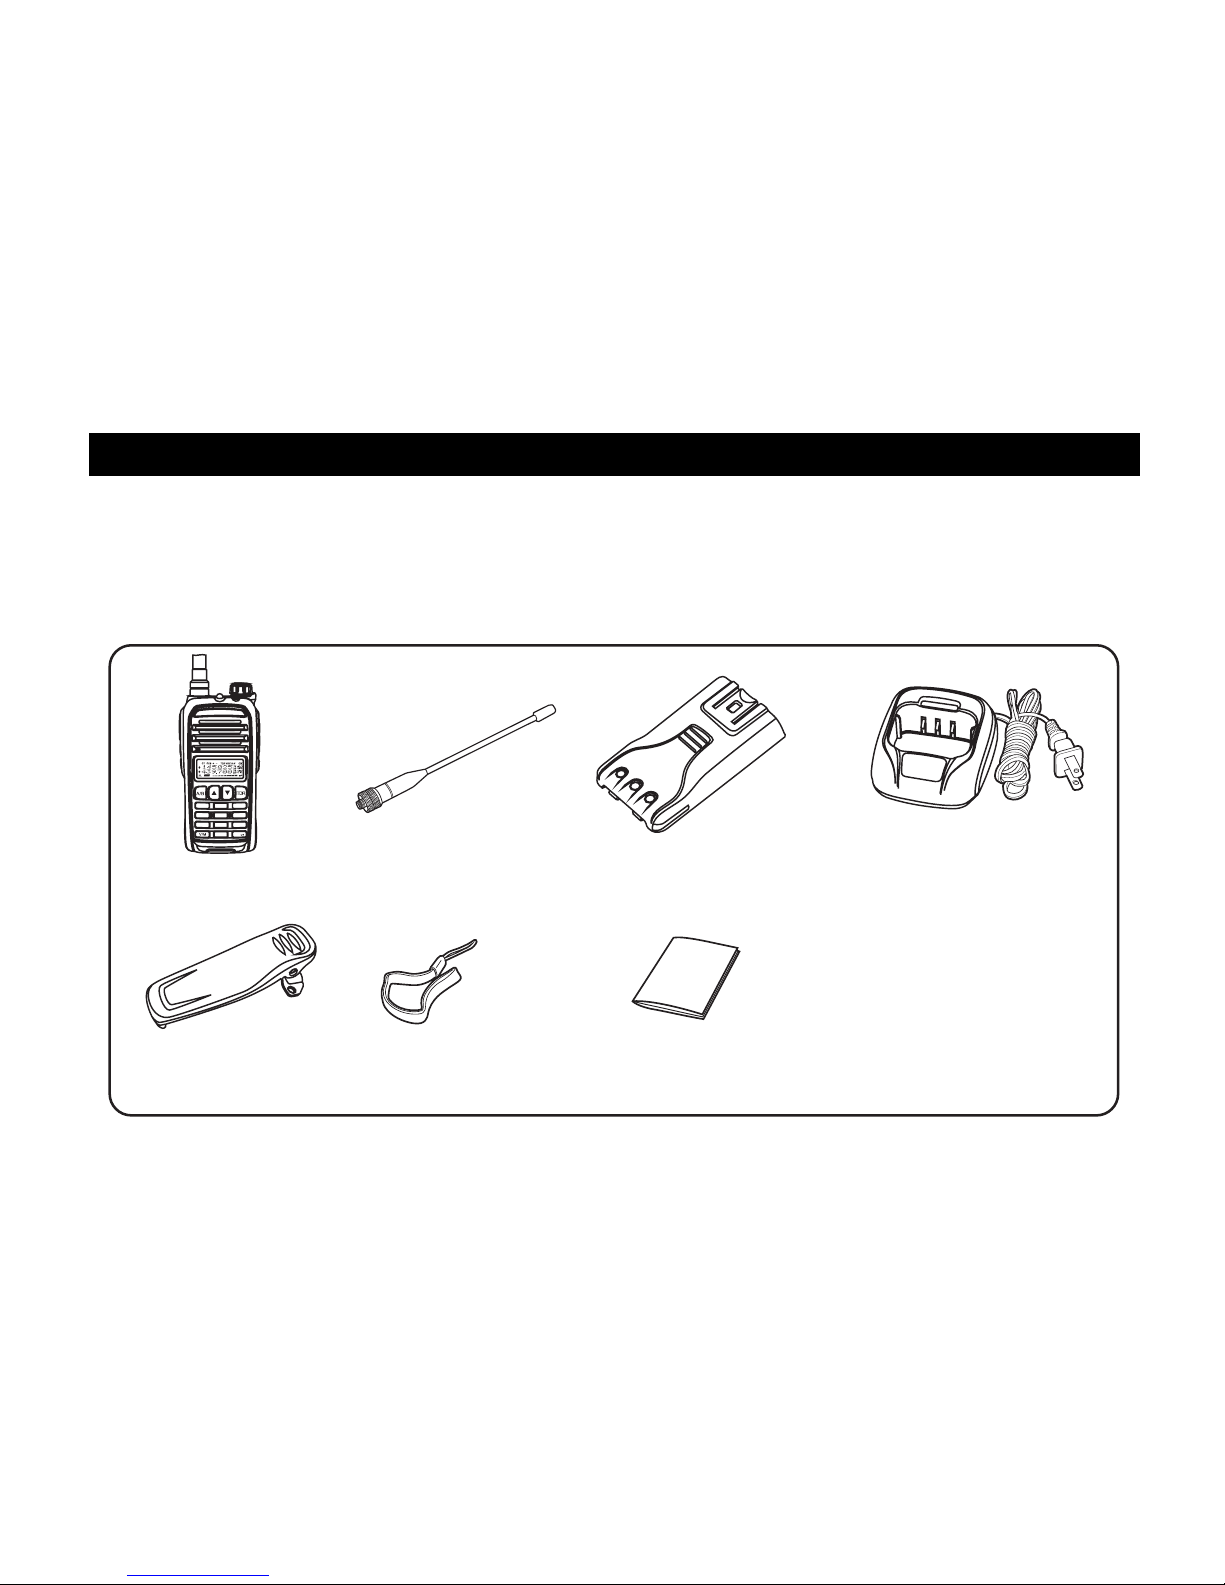
Carefully unpack the product. Please identify all the parts listed below, before wasting the packaging.
If any part is missing or if the packaging shows any damage, please contact your dealer immediately.
Supplied accessories
Transceiver
SMA Antenna Li-ion battery pack Intelligent charger
Beltclip Handstrap
User’s manual
- 1 -
Unpacking and Checking Parts
Page 11

1. Dual Band, Dual Channel, Dual Display and Dual Standby
2. Frequency Range : 136-174 MHz / 400-470MHz
FM Radio (88-108MHz)
3. Work Mode: V-U, U-V, V-V, U-U
4. Digital FM Radio (88-108MHz)
5. VOX (Handsfree Operation)
6. Power Output: 5W VHF / 4W UHF
7. CTCSS (50 Groups), DCS (105 groups)
8. Wide/Narrow Bandwidth Selection (25KHz / 12.5KHz) (*)
10. Multi-function Scan
11. 128 Channels
12. Bright LED Flashlight
13. High / Medium / Low Power Selectable (5W/2.5W/1W)
14. High Capacity Li-ion Battery
15. Intelligent Charger
9. 1750 Hz Tone
- 2 -
Features
(*) This feature is subject to the regulations applied in the country where the product is used
Page 12

17. Power-on Message Display (Battery Voltage/Full Screen/Other Message)
18. Roger Beep
19. Low Power Alert
20. Keypad Lock
21. Adding Scanning Channel
22. Wire Clone Function
23. Programmable by Computer
24. Squelch Tail Elimination
25. Timing Shutdown
26. Power On Password
16. Busy Channel Lock-Out(BCLO)
- 3 -
Features
Page 13

LCD Display
There are various indicators displaying on the screen when powing on. Please refer the below
table to learn what the indicators stand for accordingly.
DCS
CTCSS
arrow indicating the
master channel
High/Low power
transmission
BCL indicator
Dual Band
VOX Function
Bandwidth indicator
Battery capacity indicator
Menu Order/Channel Order
Menu Order/Channel Order
Keypad Lock
Note:
Full indicator for battery capacity
Low indicator for battery capacity
Exhausted indicator for battery capacity
Receiving signal meter
- 4 -
Getting Started
Page 14

12
3
4
5
6
789
0
F
SQL POW
SCN
SETP
RPT SQT
CODE
FM
SET
LCK
MIC
LED Indicator
Antenna
Screen/LCD Display
Main Channel Switch Key
Number Keys
Up/Down Keys
Power Knob/Volume Control
Receiving/Tansmitting Indicator
Single/Dual Band Switch Key
Keypad Lock / Function Key
Controls and Indicators
- 5 -
Getting Started
Page 15

PTT Key
Side Key 1
(Monitor)
Side Key 2
(LED Flashlight)
Earphone/Microphone Jacks
Controls and Indicators
- 6 -
Getting Started
Page 16

Speed Search
Press or key to set each Function or Parameter, it can search quickly.
Single/Dual Band Switch
Press to switch the Radio between Single/Dual Band Modes.
A/B Switch
Press to select the master channel. The channel displaying arrowhead is master
channel; the channel without displaying arrowhead is vice channel.
Side Key 2
Press Side Key 2 to Turn On/Off the LED Flashlight.
- 7 -
Getting Started
Page 17

F
0
LCK
F
1
SQL
F
F
2
POW
F
F
3
SCN
Scan Adding Switch
Press + to enter the Scan Adding Switch.
Squelch Level Setting
Press + to enter the Squelch Level Setting.
Press / to select the level and Press to exit.
High/Medium/Low Power Setting
Press + to enter the High/Medium/Low Power Setting.
Press / to select the power and Press to exit.
Scan Function Setting
Press + to enter Scan Function Setting.
Press / to Forward/Backward Scan and press any key to exit.
- 8 -
Shortcut Operation
Page 18

F
6
SQT
F
F
7
CODE
F
F
CTCSS/DCS Modes Setting
Press + to enter CTCSS/DCS Setting.
Press / to select the following settings and Press to exit.
1.OFF: Turn off CTCSS/DCS
2.TONE: ONLY Transmit with CTCSS Code
3.CTCSS: Tx/Rx both with CTCSS Code
4.D CODE: ONLY Transmit with DCS Code
5.DCS: Tx/Rx both with DCS Code
6.TDCS: Tx with CTCSS, Rx with DCS
7.D TSQL: Tx with DCS, Rx with CTCSS
CTCSS/DCS Codes Setting
Press + to enter CTCSS/DCS Codes Setting.
Press / to select the Rx CTCSS/DCS Codes,
then Press to select Tx CTCSS/DCS Codes,
And Press again to exit.
- 9 -
Shortcut Operation
Page 19

F
8
FM
F
8
FM
F
FM Radio
Press + to enter FM Radio.
1. NOTE :
A. use “0-9” to directly enter the FM Radio Frequency.
B. Press / to Adjust or Scan the FM Radio Frequency and Press + to exit.
2. How to Save the FM Radio Frequency:
When you find the right Frequency, Press and use / to choose the
Channel No.(Max. 25 Channels), then press to Save.
3. FM Radio Channel Mode:
A. On FM Radio Mode, Press to switch FM Radio Frequency Mode or Channel Mode.
B. On FM Radio Channel Mode, Press / to choose the Channel you saved.
- 10 -
Shortcut Operation
Page 20

1
2
3
4
5
6
7
8
SCNADD
BATSAV
BCLO
BEEP
FMAUTO
DC VLT
DW
F
9
SET
F
F
F
F
F
F
F
F
F
F
F
F
F
F
F
F
P14
P14
P14
P15
P15
P16
P16
P16-17
Press + to enter Menu Mode, use / for Data Settings.
Function
order
Function
name
Select
display
Select
parameter
Selectable
parameter
explanation
Confirm
Return
to
standby
See
page
Auto Shutdown
Press /
for Data Settings
any keys
Up
Down
16 Options:
1-15Hours,
OFF
Scan Adding
ON:Turn on Scan Adding
OFF:Turn off Scan Adding
Power Saving
ON:Turn on Power Saving
OFF:Turn off Power Saving
Busy Channel Lock-Out
ON:Turn on Busy Channel Lock-Out
OFF:Turn off Busy Channel Lock-Out
Beep Prompt
ON:Turn on Beep Prompt
OFF:Turn off Beep Prompt
FM Radio Scan
ON:Turn on FM Radio Scan
OFF:Turn off FM Radio Scan
Voltage Display
Display the present
Voltage
FM Radio Dual Watch
ON:Turn on FM Radio Dual Watch
OFF:Turn off FM Radio Dual Watch
Up
Down
Up
Down
Up
Down
Up
Down
Up
Down
Up
Down
Up
Down
Press /
for Data Settings
Press /
for Data Settings
Press /
for Data Settings
Press /
for Data Settings
Press /
for Data Settings
Press /
for Data Settings
Press /
for Data Settings
any keys
any keys
any keys
any keys
any keys
any keys
any keys
- 11 -
Shortcut Operation Sheet
Page 21

9
10
11
LAMP
LOCK
MSGSET
F
F
F
F
F
F
P17
P17-18
P18
Function
order
Function
name
Select
display
Select
parameter
Selectable
parameter
explanation
Confirm
Return
to
standby
See
page
any keys
any keys
any keys
Up
Down
Up
Down
Up
Down
Auto Backlight
KEY: Auto backlight when press any keys
OFF: Turn off backlight
CONT: Constant Backlight
Keypad Lock
PTT: Lock PTT
KEY: Lock Keypad+Up/Down
ALL: Lock All Keys
K+S: Lock Keypad
Power-on Message
Input the Message
With Keypad
Press /
for Data Settings
Press /
for Data Settings
Press /
for Data Settings
15
16
17
OPNMSG
PSWD
PSWD W
F
F
F
F
P19
F
P20
F
P20
any keys
any keys
any keys
Up
Down
Up
Down
Up
Down
Power-On Display
OFF: NO Display
DC: Display Voltage
MSG: Display Message
Power-On Password
ON:Turn on Password Function
OFF:Turn off FM Password Function
Power-On Password Setting
Input 4 passwords With Keypad
Press /
for Data Settings
Press /
for Data Settings
18
ROGER
F
F
P20-21
explanation
Roger Beep
ON:Turn on Roger Beep
OFF:Turn off Roger Beep
Up
Down
Press /
for Data Settings
any keys
- 12 -
Shortcut Operation Sheet
Page 22

19
20
21
22
23
24
25
26
SCN MD
STE
TOT
TXSTOP
VOX
VOX D
VOX S
WIDNAR
F
F
F
F
F
F
F
F
F
F
F
F
F
F
P21
P21
P22
P22
P22-23
P23
F
P23-24
F
P20
Function
order
Function
name
Select
display
Select
parameter
Selectable
parameter
Confirm
Return
to
standby
See
page
Scan Mode
TO: Time Mode Scan
CO: Carrier Mode Scan
Squelch Tail Elimination
ON:Turn on Squelch Tail Elimination
OFF:Turn off Squelch Tail Elimination
Transmit Overtime Alarm
Time Out Timer
1Min -7 Min
Transmit Prohibit
ON:Turn on Transmit Prohibit
OFF:Turn off Transmit Prohibit
VOX
ON:Turn on VOX
OFF:Turn off VOX
VOX Delay
1S – 4S VOX Delay
VOX Sensitivity
VOX Level: 1-8
Wide/Narrow Band (*)
WIDE: Wide Band(25K)
NARR: Narrow Band (12.5K)
Up
Down
Up
Down
Up
Down
Up
Down
Up
Down
Up
Down
Up
Down
Up
Down
Press /
for Data Settings
Press /
for Data Settings
Press /
for Data Settings
Press /
for Data Settings
Press /
for Data Settings
Press /
for Data Settings
Press /
for Data Settings
Press /
for Data Settings
any keys
any keys
any keys
any keys
any keys
any keys
any keys
any keys
- 13 -
Shortcut Operation Sheet
(*) This feature is subject to the regulations applied in the country where the product is used
Page 23

SCNADD
BATSAV
F
9
SET
Timing Shutdown (APO) - Menu 1
In Standby, Press + toenter the Menu, press / to enter Menu 1, Screen Display
Press to enter and / to choose the time, Press to confirm and return to Main Menu.
(Now you can Press / to enter other menu or press any keys to Standby Mode).
Scan Adding (SCNADD) - Menu 2
Press to enter and / to choose 1 ON: Turn on Scan Adding or 2 OFF: Turn off Scan Adding.
Press
to confirm and return to Main Menu.
Power Saving (BATSAV) - Menu 3
Press to enter and / to choose 1 ON: Turn on Power Saving or 2 OFF: Turn off Power Saving.
Press to confirm and return to Main Menu.
F
F
9
SET
In Standby, Press + to enter the Menu, press / to enter Menu 2, Screen Display
F
(Now you can Press / to enter other menu or press any keys to Standby Mode).
F
9
SET
In Standby, Press + to enter the Menu, press / to enter Menu 3, Screen Display
F
(Now you can Press / to enter other menu or press any keys to Standby Mode).
F
F
F
- 14 -
How to Operate
Page 24

BCLO
BEEP
This function is to prevent the interference of other communicating channels, If the selected channel
was occupied, press”PTT”, the transceiver can not transmit.
Beep prompting function is prompting the confirmed operation wrong operation or malfunction
We kindly suggest you to turn on this function to avoid any possible malfunction
,.
.
Busy Channel Lock-Out (BCLO) - Menu 4
Press enter and / to Turn On/Off this Function, Press to confirm and return to Main Menu.
BEEP Prompt (BEEP) - Menu 5
F
9
SET
In Standby, Press + to enter the Menu, press / to enter Menu 4, Screen Display
F
(Now you can Press / to enter other menu or press any keys to Standby Mode).
F
9
SET
In Standby, Press + to enter the Menu, press / to enter Menu 5, Screen Display
Press enter and / to Turn On/Off this Function, Press to confirm and return to Main Menu.
F
(Now you can Press / to enter other menu or press any keys to Standby Mode).
F
F
- 15 -
How to Operate
Page 25

DC VLT
DW
FMAUTO
FM Scan Mode (FMAUTO) - Menu 6
Press to enter and / to Turn On/Off this Function, Press to confirm and return to Main Menu.
Voltage Display (DC VLT) - Menu 7
Press to enter and / will show the present battery voltage, Press to confirm and return to
Main Menu.
FM Radio Dual Watch (DW) - Menu 8
You can still receive the signals in FM Radio Mode with this function.
Turn on this function is Recommended so that Transceiver can always standby.
F
9
SET
In Standby, Press + to enter the Menu, press / to enter Menu 6, Screen Display
F
(Now you can Press / to enter other menu or press any keys to Standby Mode).
F
9
SET
In Standby, Press + to enter the Menu, press / to enter Menu 7, Screen Display
F
(Now you can Press / to enter other menu or press any keys to Standby Mode).
F
9
SET
In Standby, Press + to enter the Menu, press / to enter Menu 8, Screen Display
F
F
- 16 -
How to Operate
Page 26

Press to enter and / to Turn On/Off this Function, Press to confirm and return to Main Menu.
Auto Backlight (LAMP) - Menu 9
Press to enter and / to choose 1 KEY: Auto Backlight (Auto Backlight for 3 seconds when press
any keys) or 2 CONT: Constant Backlight or 3 OFF: Turn off Backlight, Press to confirm and return
to Main Menu.
Keypad Lock (LOCK) - Menu 10
Press to enter and / to choose 1 PTT: ONLY PTT Lock or 2 K+S: Lock Keypad + Up/Down
or 3 ALL: Lock all keys or 4 KEY: Lock Keypad
F
(Now you can Press / to enter other menu or press any keys to Standby Mode).
F
9
In Standby, Press + to enter the Menu, press / to enter Menu 9, Screen Display
9
SET
F
(Now you can Press / to enter other menu or press any keys to Standby Mode).
F
9
In Standby, Press + to enter the Menu, press / to enter Menu 10, Screen Display
9
SET
F
Press to confirm and return to Main Menu.
F
(Now you can Press / to enter other menu or press any keys to Standby Mode).
F
F
- 17 -
How to Operate
Page 27

MSGSET
Power-on Message Setting (MSGSET) - Menu 11
Press to enter and / to choose "0-9, A-Z, -, +, * , Press to edit next Character or
to delete the Character.(This is also available with Programming Software)
"
After Input the message, Press to confirm and return to Main Menu.
F
In Standby, Press + to enter the Menu, press / to enter Menu 11, Screen Display
9
9
SET
F
9
9
SET
7
CODE
F
(Now you can Press / to enter other menu or press any keys to Standby Mode)
Power-On Message Display (OPNMSG) - Menu 15
Press to enter and / to choose 1 OFF: No display or 2 DC: Display Battery Voltage or 3 MSG:
Display Message Edited, Press to confirm and return to Main Menu.
F
In Standby, Press + toenter the Menu, press / to enter Menu 15, Screen Display
9
9
SET
F
F
(Now you can Press / to enter other menu or press any keys to Standby Mode).
- 18 -
How to Operate
Page 28

PSWD
PSWD W
ROGER
Power-on Password Function (PSWD) - Menu 16
Press to enter and / to Turn On/Off this Function, Press to confirm and return to Main Menu.
Power-on Password Setting (PSWD W) - Menu 17
Press to enter and input the 4 Passwords with keypad.
Press to confirm and return to Main Menu.
Roger Beep (ROGER) - Menu 18
Press to enter and / to Turn On/Off this Function, Press to confirm and return to Main Menu.
F
In Standby, Press + to enter the Menu, press / to enter Menu 16, Screen Display
9
9
SET
F
F
(Now you can Press / to enter other menu or press any keys to Standby Mode).
F
In Standby, Press + to enter the Menu, press / to enter Menu 17, Screen Display
9
9
SET
F
F
(Now you can Press / to enter other menu or press any keys to Standby Mode).
F
In Standby, Press + to enter the Menu, press / to enter Menu 18, Screen Display
9
9
SET
F F
(Now you can Press / to enter other menu or press any keys to Standby Mode).
- 19 -
How to Operate
Page 29

SCN MD
STE
Scan Mode (SCN MD) - Menu 19
Press to enter and / to choose 1 TO: When receiving signals, it will go on scanning without any
operation with 5 seconds. or 2 CO: It will stop scanning when receiving signals, while go on scanning
after signal disappeared 3 seconds.
F
In Standby, Press + to enter the Menu, press / to enter Menu 19, Screen Display
9
9
SET
F
Press to confirm and return to Main Menu.
Squelch Tail Elimination (STE) - Menu 20
Press to enter and / to Turn On/Off this Function, Press to confirm and return to Main Menu.
F
(Now you can Press / to enter other menu or press any keys to Standby Mode).
F
In Standby, Press + to enter the Menu, press / to enter Menu 20, Screen Display
9
9
SET
F F
(Now you can Press / to enter other menu or press any keys to Standby Mode).
- 20 -
How to Operate
Page 30

TOT
Transmit Overtime Alarm (TOT) - Menu 21
TOT is designed to prevent transmitting the transceivers too long. When operating exceed the preset
time, it will stop transmitting and a warning sound can be heard.
Press to enter and / to choose time from “1min – 7min”.
Press to confirm and return to Main Menu.
Transmit Prohibit (TXSTOP) - Menu 22
Press to enter and / to Turn On/Off this Function, Press to confirm and return to Main Menu.
VOX (VOX) - Menu 23
F
In Standby, Press + o to enter the Menu, press / to enter Menu 21, Screen Display
9
9
SET
F
F
F
In Standby, Press + o to enter the Menu, press / to enter Menu 22, Screen Display
9
9
SET
F F
When the voice shows, the transceiver will switch to transmit mode automatically.
As the VOX should check the voice, transmitting will be a little delaying, and the beginning voice may
not be transmitted.
TXSTOP
(Now you can Press / to enter other menu or press any keys to Standby Mode).
(Now you can Press / to enter other menu or press any keys to Standby Mode).
- 21 -
How to Operate
Page 31

VOX D
VOX S
VOX
Press to enter and / to Turn On/Off this Function, Press to confirm and return to Main Menu.
VOX Delay (VOX D) - Menu 24
Press to enter and / to choose time from “1s – 4s”, Press to confirm and return to Main Menu.
VOX Sensitivity (VOX S) - Menu 25
Press to enter and / to choose level from “1 – 8” (Level 1 is the highest sensitivity while Level 8
is the lowest).
F
In Standby, Press + to to enter the Menu, press / to enter Menu 23, Screen Display
9
9
SET
F F
(Now you can Press / to enter other menu or press any keys to Standby Mode).
F
In Standby, Press + to to enter the Menu, press / to enter Menu 24, Screen Display
9
9
SET
F
F
(Now you can Press / to enter other menu or press any keys to Standby Mode).
F
In Standby, Press + to to enter the Menu, press / to enter Menu 25, Screen Display
9
9
SET
F
(Now you can Press / to enter other menu or press any keys to Standby Mode).
Press to confirm and return to Main Menu.
F
- 22 -
How to Operate
Page 32

WIDNAR
Wide Narrow Band (WN) - Menu 26 (*)
Press to enter and / to choose 1 WIDE: Wide Band(25KHz) or 2 NARROW: Narrow
Band(12.5KHz) , Press to confirm and return to Main Menu.
Low Power Warning
When the Battery is low power, the transceiver will sound “DiDi” , LED Indicator flashing Red and
Flashing on Screen.
1750 Hz Repeater Tone
Press and hold the "PTT" key then press the "LED Flashlight" key to transmit the 1750 Hz Tone.
Transmit Overtime Prompt
F
In Standby, Press + o to enter the Menu, press / to enter Menu 24, Screen Display
9
9
SET
F
F
(Now you can Press / to enter other menu or press any keys to Standby Mode)
When transceiver transmits beyond the limited time, there will be a sound warning “DU DU” and stop
transmitting. Press PTT to transmit again. (Setting Transmit Over Timer, pls see page 22).
How to use Intelligent Charger
1. Insert the AC plug into the outlet (AC:90-240V), the charger indicator flashes, it means enter charging standby.
2. Insert the battery into the charger, the RED indicator turns on, it means charging, while GREEN indicator
turns on, it means fully charged.
- 23 -
How to Operate
(*) This feature is subject to the regulations applied in the country where the product is used
Page 33

- 24 -
CTCSS Tone Frequency Chart
Page 34

- 25 -
DCS Tone Frequency Chart
Page 35

- 26 -
General
Frequency VHF 136-174.995 MHz
UHF 400-470.995 MHz
Channels 128
Channel spacing 12.5, 25 KHz (*)
DC input voltage 7.2 VDC
Standard Battery 7.2V 2200mAh
Operating temperature -10° / +60°
Dimensions / Weight mm 116 x 53 x 35 (main body) / 250 gr.
Receiver
Sensitivity (12dB Sinad) < 0.2 µV
Audio output ≥ 500mW
Transmitter
RF output power 5W (VHF) / 4W (UHF)
Modulation F3E
Spurious & Harmonics in compliance with the R&TTE regulations
Maximum deviation ≤ +/- 5KHz
FM Radio
Frequency range 88-108 MHz WFM
(*) This feature is subject to the regulations applied in the country where the product is used
Specifications
Page 36

- 27 -
Optional Accessories
OPTIONAL ACCESSORIES
- KME-315 External Earset-Microphone with tie clip
- KME-614 External Earset-Microphone with adjustable ear hook
- KME-801 External Earset-Microphone for security and bodyguard
- KME-100A External Earset-Microphone with tie clip
- KME-200A External Earset-Microphone with flexible boom mic and tie clip
- KME-H115 External Speaker-Microphone (light duty)
- KST-301 External Speaker-Microphone (heavy duty)
- KPG-33 USB Type PC Interface Cable
Page 37

Please check cardfully if your transceiver has problems by following this chart.
If you maintain to have trouble you can reset your transceiver and very often this will eliminate your problem.
- 28 -
Troubleshooting
Page 38

- 29 -
Troubleshooting
Page 39

- 30 -
Notes
Page 40

 Loading...