

Page 1

Integrated Media Center
NVS-7.7
Media Center
Instruction Manual
Page 2
Starting Media Center
Starting Media Center
Using the mouse and keyboard Using the remote controller
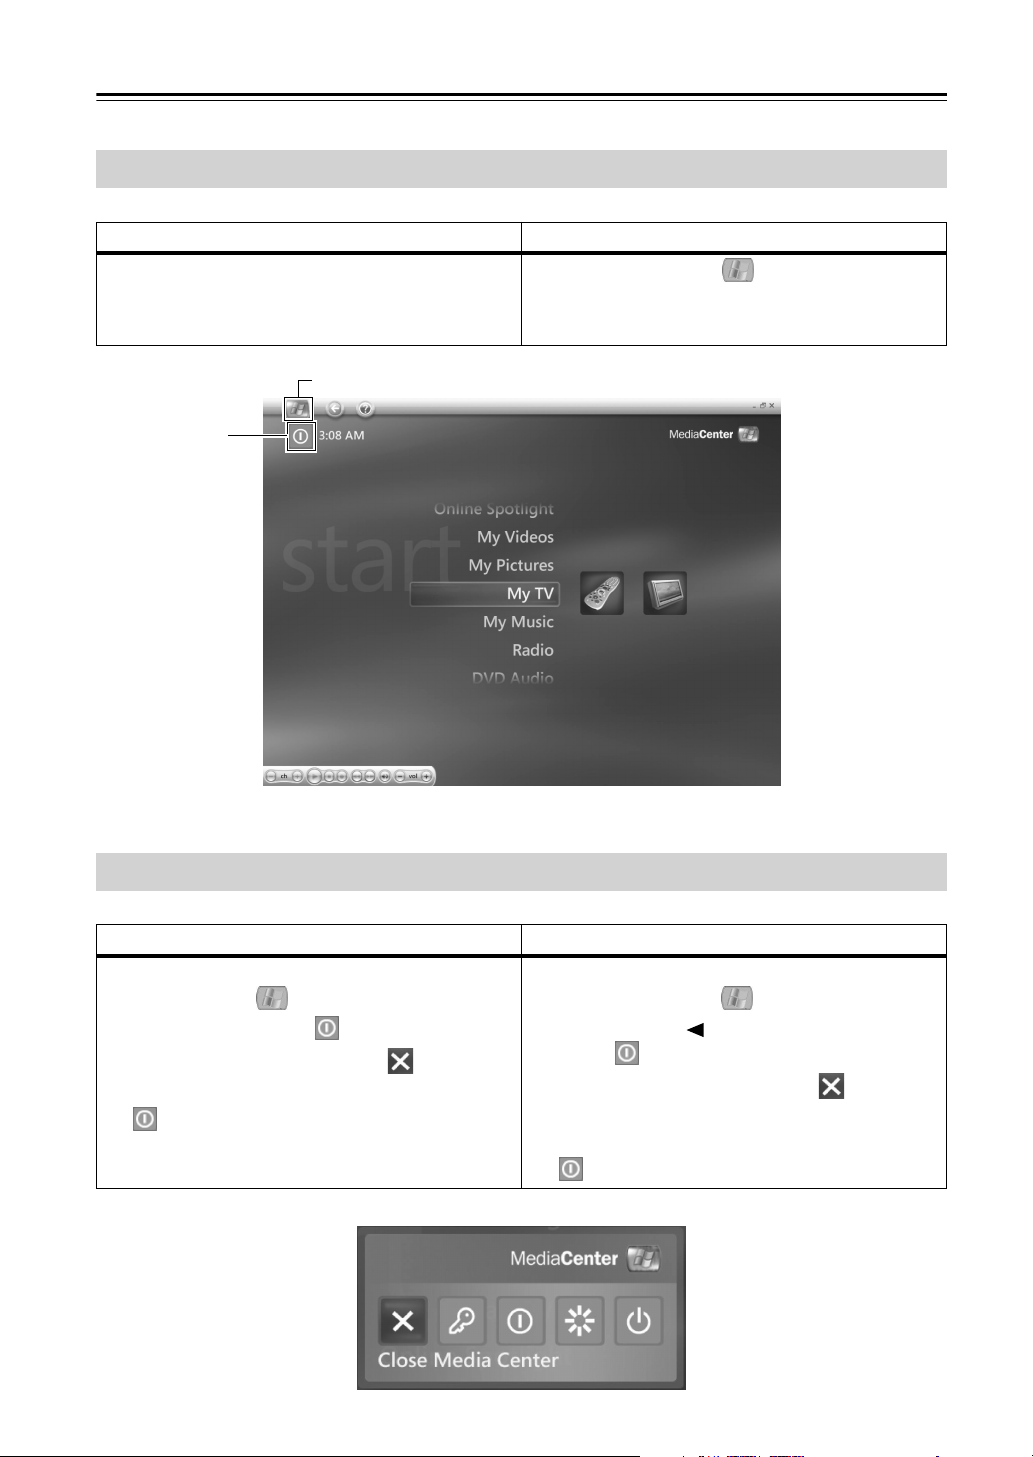
1 From the Windows® desktop, click the Start
button, and then click Media Center.
The Media Center Start menu appears.
Start button
Shut Down
1 Press the [START] button.
The Media Center Start menu appears.
Media Center Start Menu
Exiting Media Center
Using the mouse and keyboard Using the remote controller
1To go back to the Media Center Start menu,
click the Start button in the left corner.
2 Click the Shut Down button.
3 Click the Close Media Center button.
To turn off the NVS-7.7, click the Shutdown
button.
1To go back to the Media Center Start menu,
press the [START] button.
2 Press the Left [ ] button to select Shut
Down , and then press [OK].
3 Select the Close Media Center button,
and then press [OK].
To turn off the NVS-7.7, select the Shutdown
button, and then press [OK].
2
Page 3

Contents
Starting Media Center - - - - - - - - - - - - - - - - - - - - - - - - - - - - 2
Starting Media Center - - - - - - - - - - - - - - - - - - - - - - - - - - - - - - - - - - 2
Exiting Media Center - - - - - - - - - - - - - - - - - - - - - - - - - - - - - - - - - - - 2
Remote Controller Button Operation - - - - - - - - - - - - - - - - - - - - - - - - 4
Playing DVDs (Play DVD) - - - - - - - - - - - - - - - - - - - - - - - - - - 6
Playing a DVD with Media Center - - - - - - - - - - - - - - - - - - - - - - - - - - 6
Watching a DVD in a Resized Window - - - - - - - - - - - - - - - - - - - - - - 7
Displaying the Media Center Start Menu During Playback - - - - - - - - - - 7
Playing Music (My Music) - - - - - - - - - - - - - - - - - - - - - - - - - 8
Organizing Your Music - - - - - - - - - - - - - - - - - - - - - - - - - - - - - - - - - 8
Copying a CD to the Media Library - - - - - - - - - - - - - - - - - - - - - - - - - 9
Playing Music - - - - - - - - - - - - - - - - - - - - - - - - - - - - - - - - - - - - - - - 10
Creating a Queue and Saving it as a Playlist - - - - - - - - - - - - - - - - - - 11
Playing Videos (My Video) - - - - - - - - - - - - - - - - - - - - - - - - 12
Organizing Your Videos - - - - - - - - - - - - - - - - - - - - - - - - - - - - - - - - 12
Playing Your Videos - - - - - - - - - - - - - - - - - - - - - - - - - - - - - - - - - - 13
Displaying the Media Center Start Menu During Playback - - - - - - - - - 13
Viewing Your Photos (My Pictures) - - - - - - - - - - - - - - - - - 14
Organizing Your Pictures - - - - - - - - - - - - - - - - - - - - - - - - - - - - - - - 14
Viewing Your Photos with Media Center - - - - - - - - - - - - - - - - - - - - 15
Viewing Your Photos as a Slideshow - - - - - - - - - - - - - - - - - - - - - - - 15
Viewing a Slideshow with Music - - - - - - - - - - - - - - - - - - - - - - - - - - 16
Sorting Your Photos - - - - - - - - - - - - - - - - - - - - - - - - - - - - - - - - - - 17
Changing Slideshow Settings - - - - - - - - - - - - - - - - - - - - - - - - - - - - 17
Watching TV (My TV) - - - - - - - - - - - - - - - - - - - - - - - - - - - - 18
Watching a TV Program - - - - - - - - - - - - - - - - - - - - - - - - - - - - - - - - 18
Displaying the Media Center Start Menu During Playback - - - - - - - - - 19
Pausing and Replaying Live TV - - - - - - - - - - - - - - - - - - - - - - - - - - 19
TV Program Guide - - - - - - - - - - - - - - - - - - - - - - - - - - - - - - - - - - - 20
Recording TV Programs - - - - - - - - - - - - - - - - - - - - - - - - - - - - - - - - 22
Watching Recorded TV Programs - - - - - - - - - - - - - - - - - - - - - - - - - 26
Changing TV Settings - - - - - - - - - - - - - - - - - - - - - - - - - - - - - - - - - 27
Listening to the Radio (Radio) - - - - - - - - - - - - - - - - - - - - - 28
Listening to FM Radio - - - - - - - - - - - - - - - - - - - - - - - - - - - - - - - - - 28
Presetting Radio Stations - - - - - - - - - - - - - - - - - - - - - - - - - - - - - - - 29
Pausing and Replaying Live Radio - - - - - - - - - - - - - - - - - - - - - - - - - 29
Playing DVD-Audio Discs (CyberLink PowerDVD 6) - - - - - 30
Editing Video with NeroVision Express 3 - - - - - - - - - - - - - 31
About Security - - - - - - - - - - - - - - - - - - - - - - - - - - - - - - - - 32
What’s a Computer Virus? - - - - - - - - - - - - - - - - - - - - - - - - - - - - - - 32
How To Protect Your Computer - - - - - - - - - - - - - - - - - - - - - - - - - - 32
* Microsoft product screen shots reprinted with permission from Microsoft Corporation.
3
Page 4
Starting Media Center—Continued
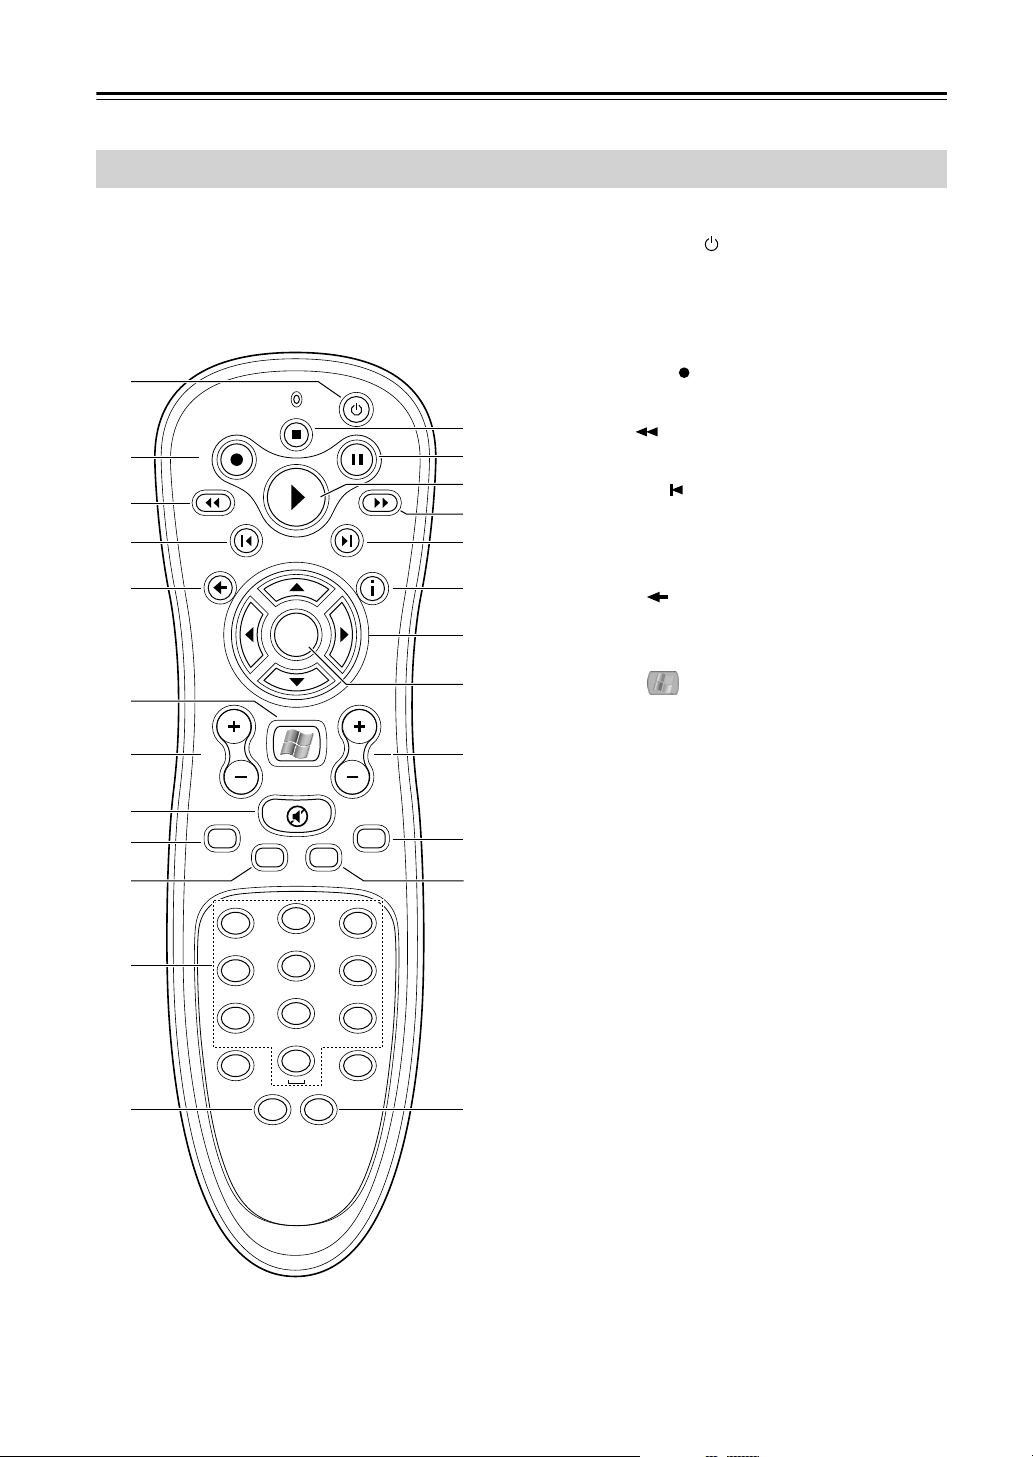
Remote Controller Button Operation
A Standby/On [ ] button
1
2
3
4
5
O
P
T
D
R
O
C
E
R
REW FWD
BACK MORE
S
OK
P
A
U
S
SKIPREPLAY
E
M
N
O
P
Q
R
S
B RECORD [ ] button
C REW [ ] button
D REPLAY [ ] button
E BACK [ ] button
Sets the Media Center to On or Standby. The
Media Center will still perform scheduled
activities such as TV recording in Standby
mode.
Starts TV recording.
Rewinds movies, music, or other media.
Selects the previous track or chapter. During
playback it selects the beginning of the current track or chapter.
Goes back to the previous Media Center
screen.
6
7
8
9
J
K
L
VOI.
RECORDED
TV
1
4
GHI
7
PQRS
*
START
MUTE
LIVE TVGUIDE
2
ABC
5
JKL
8
TUV
0
CLEAR ENTER
3
DEF
6
MNO
9
WXYZ
#
DVD
MENU
T
F START button
Displays the Media Center Start menu.
CH
PG
U
Note: You can also display this menu from
the Windows
®
desktop by clicking the green
Media Center icon in the Start menu.
G VOL +/– button
V
W
Adjusts the volume level.
Note: If your AV receiver is connected to the
2CH AUDIO OUT L/R jacks or a DIGITAL
AUDIO OUT jack, this button has no effect
and you must adjust the volume level on the
AV receiver.
H MUTE button
Mutes or unmutes the sound. The note for
the VOL button above also applies to this
button.
X
I RECORDED TV button
Displays the Recorded TV menu.
J GUIDE button
Displays the TV guide.
4
Page 5

Starting Media Center—Continued
K Number buttons
Used to enter numbers to select TV channels
or enter text in a Media Center search or text
box.
L CLEAR button
Cancels your previous selection (works like
the backspace key on a computer keyboard).
M STOP [ ] button
Stops playback or recording.
N PAUSE [ ] button
Pauses playback or recording.
O Play [ ] button
Starts playback.
P FWD [ ] button
Fast forwards movies, music, or other
media.
Q SKIP [ ] button
Selects the next track or chapter.
R MORE information button
Displays information about the selected
item.
S Arrow [ ]/[ ]/[ ]/[ ] buttons
Used to move the cursor and navigate the
Media Center menus.
T OK button
Confirms the desired action or selection.
U CH/PG +/– button
Changes the TV channel or selects the next
(+) or previous (–) page.
V DVD MENU button
Displays the menu of the DVD currently
playing.
W LIVE TV button
Displays full-screen live TV.
X ENTER button
Confirms the desired action or selection
(works like the [OK] button).
5
Page 6
Playing DVDs (Play DVD)
With Media Center, you can watch DVD movies and use the remote controller or mouse to control
playback.
Before playing a DVD in Media Center, you must enter your CD key in the CyberLink PowerDVD program. See page 37 of the NVS-7.7 Instruction Manual for details.
Playing a DVD with Media Center
• Media Center supports closed captioning, subtitles, and foreign language soundtracks, although
these options are only available if the DVD movie includes them.
• If a DVD includes its own playback software, Media Center may not start when you insert the DVD.
To watch such a DVD in Media Center, cancel the messages on the screen to use the DVD player
software, and then start Media Center.
Using the mouse and keyboard Using the remote controller
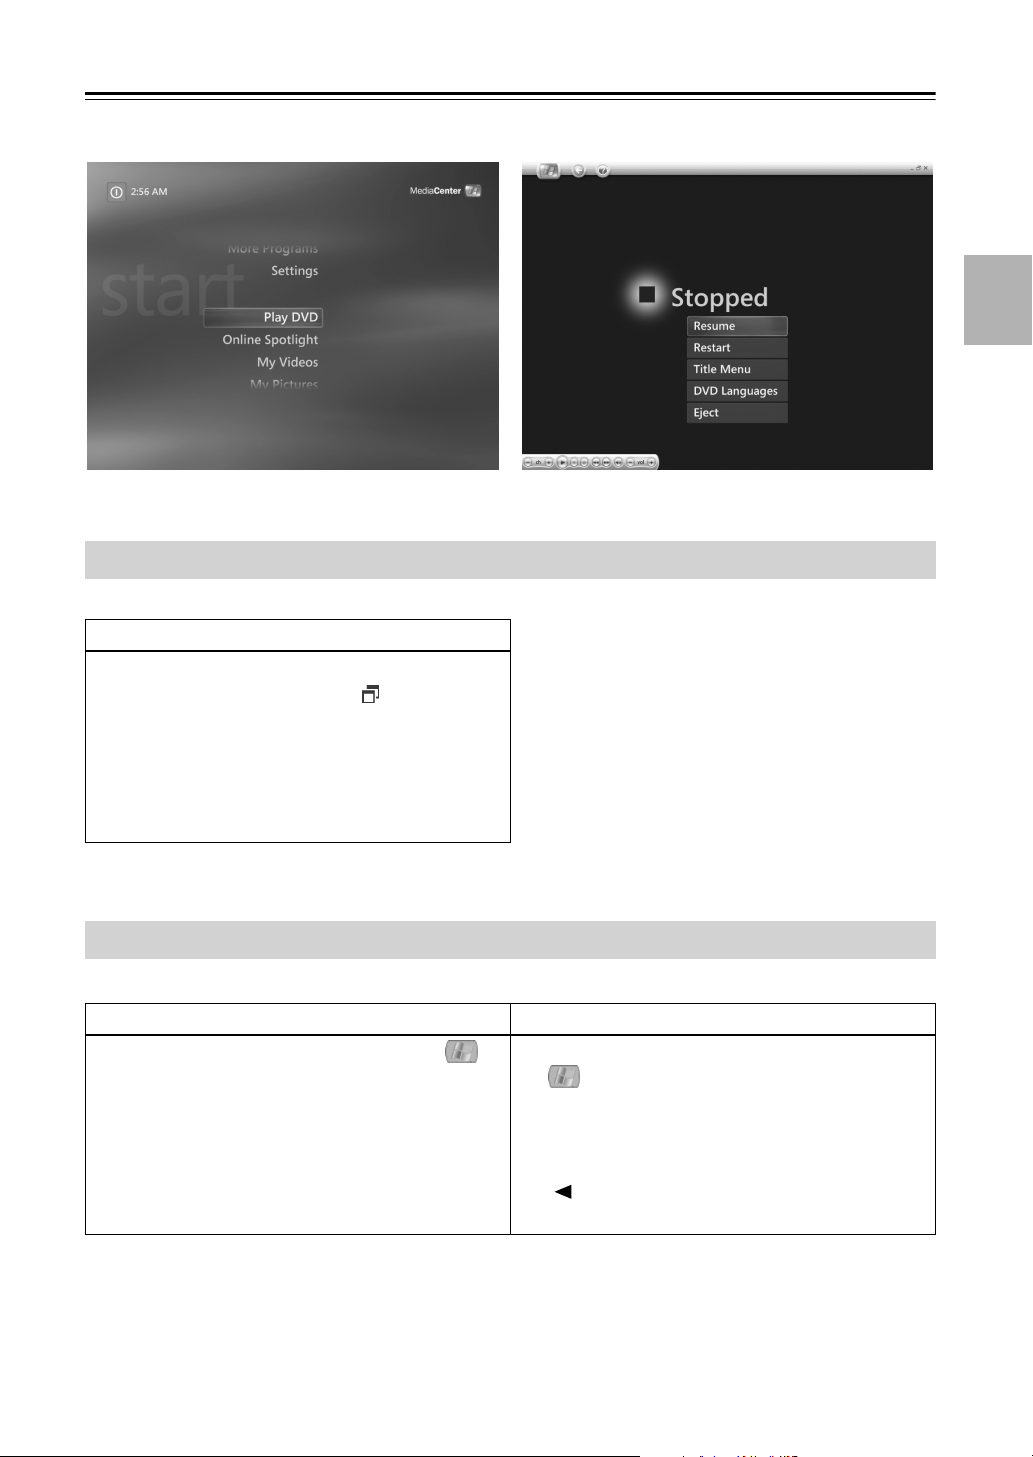
1 Start Media Center (see page 2).
2 When the Media Center Start menu appears,
insert the DVD into the drive.
Playback starts automatically.
If another media is already playing, a message
asking if you want to play the DVD appears.
If you don’t want to play it, click the message’s Close button. If you don’t select an
option, DVD playback will start automatically in full-screen mode.
3 If a DVD menu appears, click the menu items
to start playback.
4 To stop playback, move the mouse to display
the media control toolbar, and then click the
Stop button.
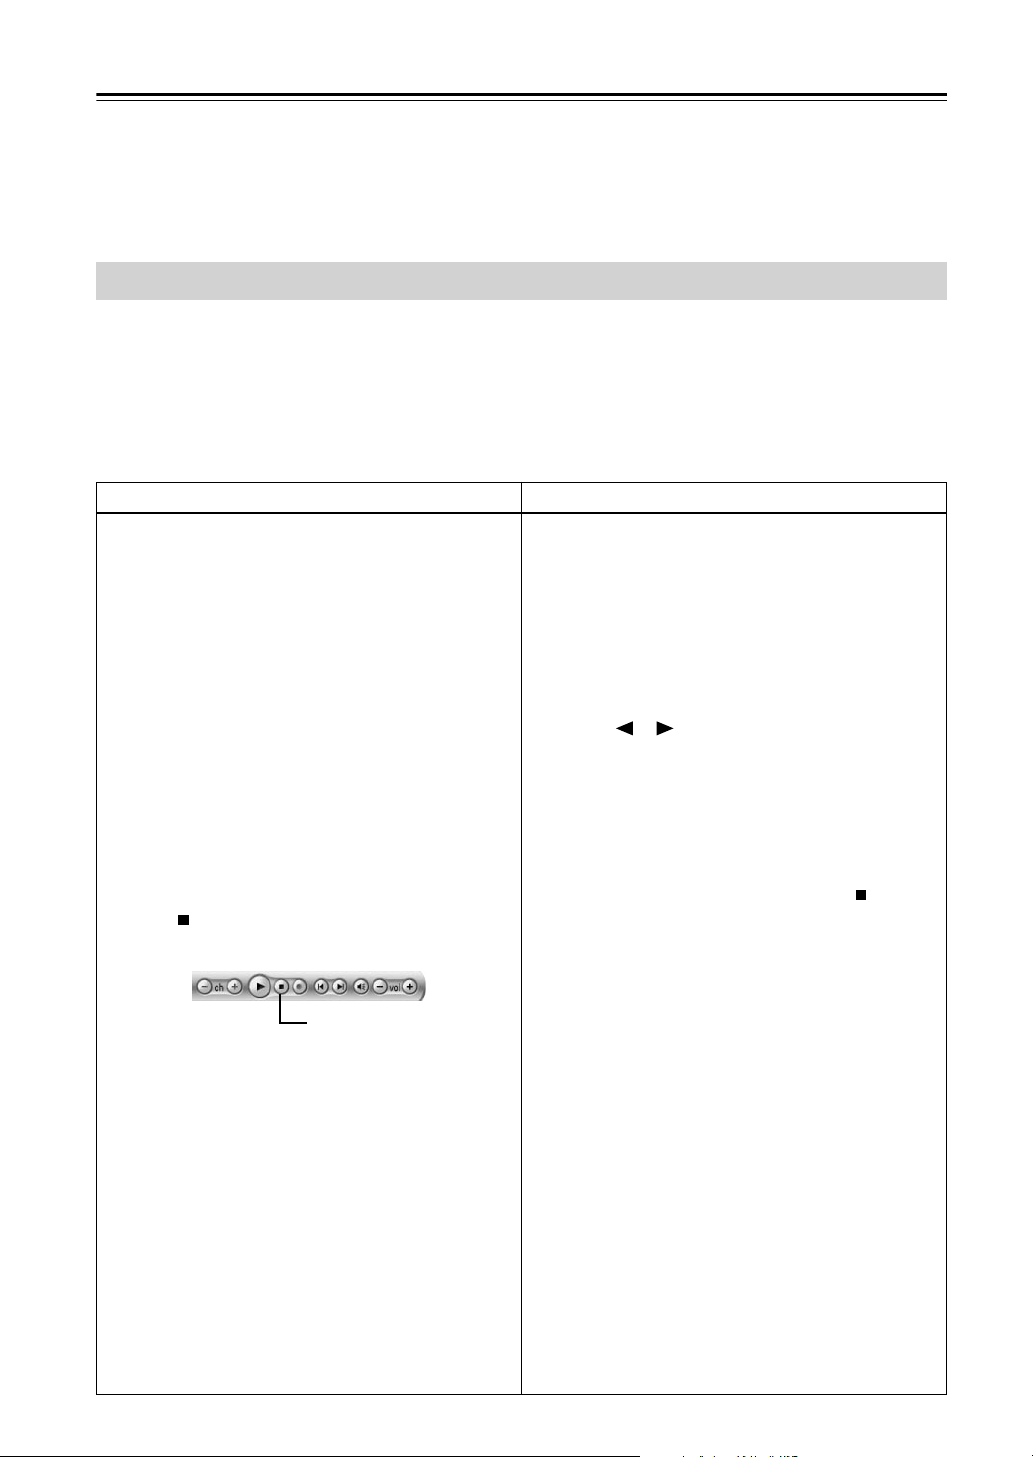
Media control toolbar
Stop button
The Stopped menu appears with the following
options:
• Resume: Resume playback from the point
at which it was stopped.
• Restart: Restart playback from the begin-
ning of the disc.
• Title Menu: Display the DVD menu, if
available.
• DVD Languages: Allows you to select
foreign language soundtracks and subtitles, if available.
• Eject: Eject the disc.
1 Start Media Center (see page 2).
2 When the Media Center Start menu appears,
insert the DVD into the drive.
Playback starts automatically.
If another media is already playing, a message
asking if you want to play the DVD appears.
If you don’t want to play it, use the Left and
Right [ ]/[ ] buttons to select the message’s
Close button, and then press [OK]. If you
don’t select an option, DVD playback will
start automatically in full-screen mode.
3 If a DVD menu appears, use the menu items
to start playback.
4 To stop playback, press the STOP [ ] button.
The Stopped menu appears with the following
options:
• Resume: Resume playback from the point
at which it was stopped.
• Restart: Restart playback from the begin-
ning of the disc.
• Title Menu: Display the DVD menu, if
available.
• DVD Languages: Allows you to select
foreign language soundtracks and subtitles, if available.
• Eject: Eject the disc.
6
Page 7
Playing DVDs (Play DVD)—Continued
Watching a DVD in a Resized Window
Using the mouse and keyboard
To adjust the size of the window, you must use
the mouse. Click the Resize button on the
taskbar, and then drag the bottom right corner
of the window to adjust.
Note: If you adjust the size of the Media Center window, the DVD plays in the same window size.
Displaying the Media Center Start Menu During Playback
You can access other areas of Media Center during playback.
Using the mouse and keyboard Using the remote controller
1 During DVD playback, click the Start
button.
The Media Center Start menu appears with
the DVD playing in the view port window.
2 To return to full-screen mode, click the view
port window.
1 During DVD playback, press the [START]
button.
The Media Center Start menu appears with
the DVD playing in the view port window.
2 To return to full-screen mode, use the Left
[] button to select the view port window,
and then press [OK].
7
Page 8

Playing Music (My Music)
With Media Center, you can copy, organize, and play your CDs and digital music files. Media Center
is designed to work with Windows
Media Library by using either Media Center or Windows
Center and Windows
®
Media Player.
®
Media Player and shares its Media Library. Music added to the
®
Media Player is available to both Media
Organizing Your Music
To play your music in Media Center, your digital music files must be in the My Music or Shared
Music folder. Digital music files copied from a CD or downloaded from the Internet and saved else-
where will have to be moved manually to the My Music or Shared Music folder. When you have put
all of your digital music files into the My Music or Shared Music folder, you can rename, add, delete,
and organize them into folders as you like.
To organize and store your digital music files in the My Music folder:
1 From the Windows
2 Double-click the My Music folder.
If you want to share your digital music files with other users, you must put them in the Shared Music
folder. To organize and store your digital music files in the Shared Music folder:
1 From the Windows
2 Under Other Places, click Shared Documents.
3 Double-click the Shared Music folder.
®
desktop, click the Start button, and then click My Documents.
®
desktop, click the Start button, and then click My Documents.
8
Page 9

Playing Music (My Music)—Continued
Copying a CD to the Media Library
Using the mouse and keyboard Using the remote controller
1 Insert a CD.
2 Start Media Center (see page 2).
3 Click My Music.
Media Center displays the title of the CD and
all available music in your Media Library.
4 Click the CD that you want to copy, and then
click Copy CD.
The first time you copy a CD, the copy
options appear, including one that allows you
to add copy protection to your music.
5 Select the desired copy protection option.
6 When asked if you want to copy the CD to
your Media Library, click Yes .
A message appears when copying is complete.
1 Insert a CD.
2 Start Media Center (see page 2).
3 Select My Music, and then press [OK].
Media Center displays the title of the CD and
all available music in your Media Library.
4 Select the CD that you want to copy, and then
press [OK].
5 Select Copy CD, and then press [OK].
The first time you copy a CD, the copy
options appear, including one that allows you
to add copy protection to your music.
6 Select the desired copy protection option.
7 When asked if you want to copy the CD to
your Media Library, select Yes , and then
press [OK].
A message appears when copying is complete.
9
Page 10

Playing Music (My Music)—Continued
Playing Music
With Media Center, you can play your music by album, artist, song, playlist, or genre. The following
procedure explains the options available when playing albums.
Using the mouse and keyboard Using the remote controller
1 Start Media Center (see page 2).
2 Click My Music.
3 Click Albums.
Icons of all available albums in your Media
Library are displayed with cover art and title.
4 Click the album you want to play.
The following options appear:
• Play: Plays the selected album.
• Add to Queue: Adds the selected album
to the queue.
• Create CD/DVD: Burn your digital music
files to CD or DVD.
• Edit Info: Edit album information.
• Delete: Delete an album.
5 Click Play to play the album.
Playback starts and the following options
appear:
• View Cover: Display the album cover,
album title, and song title.
• View Queue: Display the list of songs
waiting in the queue to be played.
• Shuffle: Play the album’s songs in a ran-
dom order.
• Repeat: Play the album repeatedly.
• Buy Music: Connect to the Internet and
buy more music by your favorite artists.
• Visualize: Display a full-screen visualiza-
tion while your music plays.
• Edit Queue: Add, delete, or change the
order of songs in the queue.
1 Start Media Center (see page 2).
2 Select My Music, and then press [OK].
3 Select Albums, and then press [OK].
Icons of all available albums in your Media
Library are displayed with cover art and title.
4 Select the album you want to play, and then
press [OK].
The following options appear:
• Play: Plays the selected album.
• Add to Queue: Adds the selected album
to the queue.
• Create CD/DVD: Burn your digital music
files to CD or DVD.
• Edit Info: Edit album information.
• Delete: Delete an album.
5 Select Play, and then press [OK].
Playback starts and the following options
appear:
• View Cover: Display the album cover,
album title, and song title.
• View Queue: Display a list of songs in the
queue.
• Shuffle: Play the album’s songs in a ran-
dom order.
• Repeat: Play the album repeatedly.
• Buy Music: Connect to the Internet and
buy more music by your favorite artists.
• Visualize: Display a full-screen visualiza-
tion while your music plays.
• Edit Queue: Add, delete, or change the
order of songs in the queue.
10
Page 11

Playing Music (My Music)—Continued
Creating a Queue and Saving it as a Playlist
The queue is a temporary list of songs to be played in Media Center. A playlist is a permanent list of
songs that you can save for future use. You can create a queue and then save it as a permanent playlist.
To create a queue and save it as a playlist, follow the steps below:
Using the mouse and keyboard Using the remote controller
1 Start Media Center (see page 2).
2 Click My Music.
3 Click Albums, Artists, Playlists, Songs, or
Genres.
4 Click the song, album, artist, playlist, or
genre that you want to add to the queue.
5 Click Add To Queue.
A confirmation message appears.
6 Repeat steps 4 and 5 to add further songs to
the queue.
7 Click the view port window in the lower-left
corner of the screen to go to the Queue
screen.
8 On the Queue screen, click Edit Queue.
9 Click Save As Playlist.
10 Use the keyboard to enter a name for the
playlist, and then click Save.
The new playlist is saved along with your
other playlists.
1 Start Media Center (see page 2).
2 Select My Music, and then press [OK].
3 Select Albums, Artists, Playlists, Songs, or
Genres, and then press [OK].
4 Select the song, album, artist, playlist, or
genre that you want to add to the queue, and
then press [OK].
5 Select Add To Queue, and then press [OK].
A confirmation message appears.
6 Repeat steps 4 and 5 to add further songs to
the queue.
7 Use the arrow buttons to navigate to the view
port window in the lower-left corner of the
screen, and then press [OK] to go to the
Queue screen.
8 On the Queue screen, select Edit Queue,
and then press [OK].
9 Select Save As Playlist, and then press [OK].
10 Use the number buttons to enter a name for
the playlist, select Save, and then press [OK].
The new playlist is saved along with your
other playlists.
11
Page 12

Playing Videos (My Video)
With Media Center, you can organize and play digital videos on your computer.
Organizing Your Videos
When you connect your digital camcorder to your computer, a message appears asking if you want to
capture the video to your computer. Several programs allow you to capture and edit video and most
will automatically store the video files in the My Videos folder. If the video files are saved elsewhere,
to play them in Media Center, you’ll need to move them manually to the My Videos or Shared Video
folder. When you have put all of your videos into the My Videos or Shared Video folder, you can
rename, add, delete, and organize them into folders as you like.
To organize and store your videos in the My Videos folder:
1 From the Windows
2 Double-click the My Videos folder.
If you want to share your videos with other users, you must put them in the Shared Video folder. To
organize and store your videos in the Shared Video folder:
1 From the Windows
2 Under Other Places, click Shared Documents.
3 Double-click the Shared Video folder.
®
desktop, click the Start button, and then click My Documents.
®
desktop, click the Start button, and then click My Documents.
12
Page 13

Playing Videos (My Video)—Continued
Playing Your Videos
Using the mouse and keyboard Using the remote controller
1 Start Media Center (see page 2).
2 Click My Videos.
Thumbnail images of all available videos are
displayed and folder icons if you’ve organized your videos into folders.
3 Click the arrow buttons or use the key-
boards [ ]/[ ]/[ ]/[ ] arrow keys to scroll
through the available videos.
4 Click the video that you want to play.
The video plays in full-screen mode. If you
click a folder, its contents are displayed.
1 Start Media Center (see page 2).
2 Select My Videos, and then press [OK].
Thumbnail images of all available videos are
displayed and folder icons if you’ve organized your videos into folder.
3 Use the arrow buttons to scroll through the
available videos.
4 Select the video you want to play, and then
press [OK].
The video plays in full-screen mode. If you
select a folder, its contents are displayed.
Displaying the Media Center Start Menu During Playback
You can access other areas of Media Center during playback.
Using the mouse and keyboard Using the remote controller
1 During video playback, click the Start
button.
The Media Center Start menu appears with
the video playing in the view port window.
2 To return to full-screen mode, click the view
port window.
1 During video playback, press the [START]
button.
The Media Center Start menu appears with
the video playing in the view port window.
2 To return to full-screen mode, use the Left
[] button to select the view port window,
and then press [OK].
13
Page 14

Viewing Your Photos (My Pictures)
With Media Center, you can view your digital photos individually, as a slideshow, or as a slideshow
with music.
Organizing Your Pictures
To view your photos in Media Center, your photo files must be in the My Pictures or Shared Pictures
folder. Photos downloaded from a digital camera and saved elsewhere will have to be moved manually
to the My Pictures or Shared Pictures folder. When you have put all of your photos into the My
Pictures or Shared Pictures folder, you can rename, add, delete, and organize them into folders as
you like.
To organize and store your photos in the My Pictures folder:
1 From the Windows
2 Double-click the My Pictures folder.
If you want to share your photos with other users, you must put them in the Shared Pictures folder.
To organize and store your photos in the Shared Pictures folder:
1 From the Windows
2 Under Other Places, click Shared Documents.
3 Double-click the Shared Pictures folder.
®
desktop, click the Start button, and then click My Documents.
®
desktop, click the Start button, and then click My Documents.
14
Page 15

Viewing Your Photos (My Pictures)—Continued
Viewing Your Photos with Media Center
Using the mouse and keyboard Using the remote controller
1 Start Media Center (see page 2).
2 Click My Pictures.
Note: If the My Pictures option is not shown,
use the keyboard’s Up and Down [ ]/[ ]
arrow keys to scroll through the list.
Thumbnail images of all available photos are
displayed and folder icons if you’ve organized your photos into folders.
3 Click the arrow buttons or use the key-
board’s [ ]/[ ]/[ ]/[ ] arrow keys to scroll
through the available photos and folders.
4 Click the photo that you want to view.
The photo opens in full-screen mode.
If you click a folder, its contents are displayed.
1 Start Media Center (see page 2).
2 Select My Pictures, and then press [OK].
Thumbnail images of all available photos are
displayed and folder icons if you’ve organized your photos into folders.
3 Use the arrow buttons to scroll through the
available photos and folders.
4 Select the photo you want to view, and then
press [OK].
The photo opens in full-screen mode.
If you select a folder, its contents are displayed.
Viewing Your Photos as a Slideshow
Using the mouse and keyboard Using the remote controller
1 Start Media Center (see page 2).
2 Click My Pictures.
Note: If the My Pictures option is not shown,
use the keyboard’s Up and Down [ ]/[ ]
arrow keys to scroll through the list.
3 Click the folder containing the photos that
you want to view as a slideshow.
4 Click Play Slide Show to start the slideshow.
During the slideshow, you can press the keyboard’s arrow keys [ ]/[ ]/[ ]/[ ] to select
the next or previous photo manually.
5 To stop the slideshow, click the Stop button
on the media control toolbar.
1 Start Media Center (see page 2).
2 Select My Pictures, and then press [OK].
3 Select the folder containing the photos that
you want to view as a slideshow.
4 Select Play Slide Show, and then press [OK]
to start the slideshow.
During the slideshow, you can press the arrow
buttons to select the next or previous photo
manually.
5 To stop the slideshow, press the STOP [ ]
button.
15
Page 16

Viewing Your Photos (My Pictures)—Continued
Viewing a Slideshow with Music
Using the mouse and keyboard Using the remote controller
1 Start Media Center (see page 2).
2 Click My Music.
Note: If the My Music option is not shown,
use the keyboard’s Up and Down [ ]/[ ]
arrow keys to scroll through the list.
3 Click the song that you want to play.
4 If the music doesn’t start automatically, click
Play.
5 Click the Start button.
6 Click My Pictures.
7 Click the folder containing the photos that
you want to view as a slideshow.
8 Click Play Slide Show to start the slideshow.
When Media Center switches to full-screen
mode, the view port window closes and the
music continues to play.
9 To stop the slideshow, move the mouse to
display the media control toolbar, and then
click the Stop button. To stop the music,
click the Stop button again.
Media control toolbar
1 Start Media Center (see page 2).
2 Select My Music, and then press [OK].
3 Select the song that you want to play, and
then press [OK].
4 If the music doesn’t start automatically, press
the Play [ ] button.
5 Press the [START] button.
6 Select My Pictures, and then press [OK].
7 Select the folder containing the photos that
you want to view as a slideshow, and then
press [OK].
8 Select Play Slide Show, and then press [OK].
When Media Center switches to full-screen
mode, the view port window closes and the
music continues to play.
9 To stop the slideshow, press the STOP [ ]
button. Press it again to stop the music.
16
Stop button
Page 17

Viewing Your Photos (My Pictures)—Continued
Sorting Your Photos
Using the mouse and keyboard Using the remote controller
1 Start Media Center (see page 2).
2 Click My Pictures.
Note: If the My Pictures option is not shown,
use the keyboard’s Up and Down [ ]/[ ]
arrow keys to scroll through the list.
To sort the contents of a folder, click the
folder.
3 Click Sort by Name or Sort by Date.
1 Start Media Center (see page 2).
2 Select My Pictures, and then press [OK].
To sort the contents of a folder, select the
folder, and then press [OK].
3 Select Sort by Name or Sort by Date, and
then press [OK].
Changing Slideshow Settings
You change the way you view a slideshow.
Using the mouse and keyboard Using the remote controller
1 Start Media Center (see page 2).
2 Click Settings.
3 Click Pictures.
4 Change the settings as you like.
1 Start Media Center (see page 2).
2 Select Settings, and then press [OK].
3 Select Pictures, and then press [OK].
4 Change the settings as you like.
17
Page 18

Watching TV (My TV)
With Media Center, you can watch and record your favorite TV shows on your computer. Before you
can do this, however, you must connect CATV, a TV antenna, or TV signal source (cable, satellite, etc)
and complete the setup on the Settings menu.
Note:
On the NVS-7.7, you can’t watch both TV received via antenna (CATV, TV (NTSC), TV (ATSC)) and
TV received via a cable or satellite set-top box. The very first time you start Media Center, you must
chose one or the other as the TV Signal Source in the Media Center Setup Wizard.
Watching a TV Program
Using the mouse and keyboard Using the remote controller
1 Start Media Center (see page 2).
2 Click My TV.
3 Click Live TV.
4 To change channels, click the Channel
buttons on the media control toolbar, or enter
the channel number with your keyboard.
Note: The media control toolbar appears
when you move the mouse.
1 Press the [LIVE TV] button.
You can watch live TV at any time, even
when Media Center is not running.
2 To change channels, press the [CH/PG] but-
tons, or enter the channel number by using
the number buttons.
18
Page 19

Watching TV (My TV)—Continued
Displaying the Media Center Start Menu During Playback
You can access other areas of Media Center during playback.
Using the mouse and keyboard Using the remote controller
1 While watching TV, click the Start but-
ton.
The Media Center Start menu appears with
the TV picture in the view port window.
2 To return to full-screen mode, click the view
port window.
1 While watching TV, press the [START]
button.
The Media Center Start menu appears with
the TV picture in the view port window.
2 To return to full-screen mode, use the Left
[] button to select the view port window,
and then press [OK].
Pausing and Replaying Live TV
While watching TV, Media Center records up to 30 minutes of the TV program in the background,
allowing you to pause live TV and replay items that you miss.
Use the following buttons on the remote controller or media control toolbar.
Button Action
Pause [ ]
Stop [ ]
Play [ ] Resume TV playback from where you left off.
Replay [ ]
REW [ ]
Skip [ ]
FWD [ ]
LIVE TV Resume live TV.
Note: When you change TV channels, content recorded from the previous channel is deleted from the
recording buffer and background recording starts again with the new channel.
Pause or stop TV playback. While paused or stopped, Media Center records up to
30 minutes of the TV program in the background.
Rewind the recorded TV program. You can rewind up to 30 minutes.
Fast forward the recorded TV program. You can fast forward up to 30 minutes.
19
Page 20

Watching TV (My TV)—Continued
TV Program Guide
Media Center includes an onscreen TV guide that allows you to scroll through a list of the TV programs and channels available from your TV provider. The very first time you start Media Center, the
setup wizard will ask, “Do you want to use the Guide?,” to which you should answer Yes. The TV guide
shows the channel, program title, and scheduled time for current programs and upcoming programs.
The number of days shown in the guide depends on your TV service provider. When you select a
program, further information is displayed at the bottom of the screen. You can also use the TV guide
to schedule recordings.
Using the TV Program Guide
• If the TV guide is not updated, the number of days displayed decreases each day.
•You can set Media Center to automatically connect to the Internet and update the TV guide. Note
that not all Internet Service Providers (ISPs) support this feature. Check with your ISP.
• If your ISP does not support automatic TV guide updates, you must update the guide manually on
the Settings screen. You can manually update the TV guide at any time even if you have set it to
update automatically.
• If the TV guide is not updated, the message “No data available” appears next to each channel.
• The number of channels and days that appear in the TV guide depends on your TV service provider.
• The TV guide does not show past TV programs.
• If you attempt to schedule a recording that overlaps with an already scheduled recording, a message
appears explaining the conflict.
20
Page 21

Watching TV (My TV)—Continued
Using the mouse and keyboard Using the remote controller
1 Start Media Center (see page 2).
2 Click My TV.
3 Click Guide.
4 For more information about a particular pro-
gram, move your mouse over it.
The information appears at the bottom of the
screen. If you want to see more information,
right-click the program, and then click Pro-
gram Info.
5 To navigate through the channels, click the
arrow buttons or press the Up and
Down [ ]/[ ] arrow keys on the keyboard.
To get to a specific channel, enter the channel
number.
6 To watch a TV program that currently being
broadcast, click the program.
7 To view upcoming programs on a specific
channel, move the mouse over the channel
number and station name. Upcoming programs appear at the bottom of the screen.
By clicking the arrow button, you can
scroll through upcoming programs on the currently displayed channels.
1 Press the [GUIDE] button.
You can view the TV guide at any time, even
when Media Center is not running.
2 For more information about a particular pro-
gram, select it. The information appears at
the bottom of the screen. If you want to see
more information, press the [MORE] button,
and then select Program Info.
3 To navigate through the channels, use the Up
and Down [ ]/[ ] buttons. To get to a specific channel, use the number buttons to enter
the channel number.
4 To watch a TV program that’s currently
being broadcast, select the program, and then
press [OK].
5 To view upcoming programs on a specific
channel, select the channel number and station name. Upcoming programs appear at the
bottom of the screen.
By pressing the Right arrow [ ] button, you
can scroll through upcoming programs on the
currently displayed channels.
21
Page 22

Watching TV (My TV)—Continued
Recording TV Programs
With Media Center, you can record your favorite TV programs so that you can watch them when you
like. You can record the program that you are watching, an upcoming program, or an entire program
series by using the TV guide, Search function, or manually. If you schedule several programs or an
entire program series for recording, you can prioritize programs that you definitely want to record. See
“Changing the TV Recording Settings” on page 25 for more information.
Recording a TV Program Using the TV Guide
Notes:
• Before scheduling a recording, you may need to update the TV guide manually.
•To record a TV program, the NVS-7.7 must be turned on or in Standby mode.
• Since the same tuner is used for both TV and FM, you cannot listen to FM radio while recording
a TV program.
• While a scheduled recording is in progress, you can only watch the program that’s being
recorded. If you select another channel while recording, recording will stop.
•To use the TV guide, you must answer Yes when the setup wizard asks, “Do you want to use the
Guide?”
Using the mouse and keyboard Using the remote controller
1 Start Media Center (see page 2).
2 Click My TV.
3 Click Guide.
4 To navigate to the program that you want to
record, click the arrow buttons or
press the Up and Down [ ]/[ ] arrow keys
on the keyboard. If the program is at a time
not yet shown, click the arrow button or
press the Right [ ] arrow key on the keyboard.
5 Click the program.
6 Click Record to record the program or click
Record Series to record the entire program
series.
The Record or Record Series icon
appears next to the program.
1 Start Media Center (see page 2).
2 Select My TV, and then press [OK].
3 Select Guide, and then press [OK].
4 To navigate to the program that you want to
record, use the Up and Down [ ]/[ ] buttons. If the program is at a time not yet
shown, press the Right arrow [ ] button.
5 Select the program, and then press [OK].
6 To record the program, select Record, and
then press [OK]. To record the entire program series, select Record Series, and then
press [OK].
The Record or Record Series icon
appears next to the program.
Note: When you schedule a recording in the
TV guide, you can press the RECORD [ ]
button once to record the program, twice to
record the entire program series, or three
times to cancel the recording.
22
Page 23

Watching TV (My TV)—Continued
Recording a TV Program Using the Search Function
Using the mouse and keyboard Using the remote controller
1 Start Media Center (see page 2).
2 Click My TV.
3 Click Search.
The following options appear:
• Categories: Search for programs by cate-
gory, such as Educational, Kids, or Sports.
• Title: Search for a program by entering its
name. The more characters you enter, the
more accurate the search results will be.
• Keyword: Search for a program by enter-
ing a keyword. Media Center searches the
program titles and descriptions for the
word you enter. The more characters you
enter, the more accurate the search results
will be.
When the search is complete, a list of programs is displayed.
4 To navigate through the search results and
find the program that you want to record,
click the arrow buttons or press the Up
and Down [ ]/[ ] arrow keys on the keyboard.
5 Click the program that you want to record. If
an entire program series is listed, click the
specific episode that you want to record.
6 Click Record to record the program or click
Record Series to record the entire program
series.
The Record or Record Series icon
appears next to the program.
Note: If there’s a recording conflict, Media
Center displays a message and allows you to
choose which program you want to record.
7 Click the Start button to return to the
Media Center Start menu.
1 Start Media Center (see page 2).
2 Select My TV, and then press [OK].
3 Select Search, and then press [OK].
The following options appear:
• Categories: Search for programs by cate-
gory, such as Educational, Kids, or Sports.
• Title: Search for a program by entering its
name. The more characters you enter, the
more accurate the search results will be.
• Keyword: Search for a program by enter-
ing a keyword. Media Center searches the
program titles and descriptions for the
word you enter. The more characters you
enter, the more accurate the search results
will be.
When the search is complete, a list of programs is displayed.
4 To navigate through the search results and
find the program that you want to record, use
the Up and Down [ ]/[ ] buttons.
5 Select the program, and then press [OK]. If
an entire program series is listed, select the
specific episode that you want to record, and
then press [OK].
6 To record the program, select Record, and
then press [OK]. To record the entire program series, select Record Series, and then
press [OK].
The Record or Record Series icon
appears next to the program.
Note: If there’s a recording conflict, Media
Center displays a message and allows you to
choose which program you want to record.
7 Press the [START] button to return to the
Media Center Start menu.
Note:
The Search function uses the TV guide for searching, so you must answer Yes when the setup wizard
asks, “Do you want to use the Guide?”
23
Page 24

Watching TV (My TV)—Continued
Recording a TV Program Manually
Using the mouse and keyboard Using the remote controller
1 Start Media Center (see page 2).
2 Click My TV.
3 Click Recorded TV.
4 Click Add Recording.
5 In the Create a custom recording section,
click Channel and Time or Keyword.
• If you selected Channel and Time, use
the keyboard’s number buttons to enter the
Channel. Click the Minus and Plus
buttons to set the Date, Start Time, and
Stop Time. You can also specify the Frequency of the recording, such as record
once, every day, every weekday, and so on.
• If you selected Keyword, use the key-
board to enter an actor’s name, a director’s
name, a movie title, or a generic keyword.
This option will record all of the programs
whose title or description contains the
word you enter.
6 When you’ve entered all of the details, click
Record.
Note: If there’s a recording conflict, Media
Center displays a message and allows you to
choose which program you want to record.
7 Click the Start button to return to the
Media Center Start menu.
1 Start Media Center (see page 2).
2 Select My TV, and then press [OK].
3 Select Recorded TV, and then press [OK].
4 Select Add Recording, and then press [OK].
5 In the Create a custom recording section,
select Channel and Time or Keyword, and
then press [OK].
• If you selected Channel and Time, use
the number buttons to enter the Channel.
Select the Minus and Plus buttons
and press [OK] to set the Date, Start
Time, and Stop Time. You can also specify the Frequency of the recording, such as
record once, every day, every weekday,
and so on.
• If you selected Keyword, use the number
buttons and [OK] button to enter an actor’s
name, a director’s name, a movie title, or a
generic keyword. This option will record
all of the programs whose title or description contains the word you enter.
6 When you’ve entered all of the details, select
Record, and then press [OK].
Note: If there’s a recording conflict, Media
Center displays a message and allows you to
choose which program you want to record.
7 Press the [START] button to return to the
Media Center Start menu.
24
Page 25

Watching TV (My TV)—Continued
Changing the TV Recording Settings
With Media Center, you can change various settings for recorded TV programs and programs scheduled for recording. If you set up a program recording that conflicts with another scheduled recording,
you can set Media Center so that it automatically manages the conflict.
Using the mouse and keyboard Using the remote controller
1 Start Media Center (see page 2).
2 Click My TV.
3 Click Recorded TV.
4 Click Scheduled.
The following options appear: Sort by Date,
Sort by Title, Series, and History.
5 Click one of the options to find the program
that you want to change.
6 Click the program that you want to change.
The following options appear:
• Record Settings: Display the recording
start and stop times and other related settings.
• Do not Record: Cancel the scheduled
recording.
• Keep Until: Specify a keep until date for
the program once it’s been recorded.
• Other Showings: Display alternate show-
ings of the program.
7 Click the Start button to return to the
Media Center Start menu.
1 Start Media Center (see page 2).
2 Select My TV, and then press [OK].
3 Select Recorded TV, and then press [OK].
4 Select Scheduled, and then press [OK].
The following options appear: Sort by Date,
Sort by Title, Series, and History.
5 Select one of the options to find the program
that you want to change, and then press
[OK].
6 Select the program that you want to change,
and then press [OK].
The following options appear:
• Record Settings: Display the recording
start and stop times and other related settings.
• Do not Record: Cancel the scheduled
recording.
• Keep Until: Specify a keep until date for
the program once it’s been recorded.
• Other Showings: Display alternate show-
ings of the program.
7 Press the [START] button to return to the
Media Center Start menu.
25
Page 26

Watching TV (My TV)—Continued
Watching Recorded TV Programs
You can access all of your recorded TV programs from the Recorded TV menu. You can sort the
programs by name, date, or category. You can also delete recorded programs or program series and
check for any recording errors.
Using the mouse and keyboard Using the remote controller
1 Start Media Center (see page 2).
2 Click My TV.
3 Click Recorded TV.
The following options appear:
• Sort by Date: Display all recorded pro-
grams in date order.
• Sort by Title: Display all recorded pro-
grams in title order.
• Scheduled: Display all programs sched-
uled to be recorded.
• Add Recording: Add a program or entire
program series that you want to record.
4 Click either Sort by Date or Sort by Title,
and then click the program that you want to
watch.
5 Click Play.
1 Press the [RECORDED TV] button.
The following options appear:
• Sort by Date: Display all recorded programs in date order.
• Sort by Title: Display all recorded programs in title order.
• Scheduled: Display all programs scheduled to be recorded.
• Add Recording: Add a program or entire
program series that you want to record.
2 Select either Sort by Date or Sort by Title,
and then press [OK].
3 Select the program that you want to watch,
and then press [OK].
4 Select Play, and then press [OK].
26
Page 27

Watching TV (My TV)—Continued
Changing TV Settings
You can change the TV input settings, manually update the TV guide, and change other TV settings on
the TV Settings menu.
Using the mouse and keyboard Using the remote controller
1 Start Media Center (see page 2).
2 Click Settings.
3 Click TV.
The following options appear:
• Recorder: Display a history of recorded
programs or change the recording settings.
• Guide: Manually update the TV guide or
change the TV guide settings.
• Setup TV Signal: Change the TV input
settings. If you’ve connected a satellite or
cable set-top box with an AV cable, make
the necessary settings here.
• Configure your TV or Monitor: Config-
ure the display settings for your TV or
monitor.
• Audio: Change the TV audio settings.
• Captions: Change the TV captioning set-
tings.
4 Change the settings as you like.
1 Start Media Center (see page 2).
2 Select Settings, and then press [OK].
3 Select TV, and then press [OK].
The following options appear:
• Recorder: Display a history of recorded
programs or change the recording settings.
• Guide: Manually update the TV guide or
change the TV guide settings.
• Setup TV Signal: Change the TV input
settings. If you’ve connected a satellite or
cable set-top box with an AV cable, make
the necessary settings here.
• Configure your TV or Monitor: Config-
ure the display settings for your TV or
monitor.
• Audio: Change the TV audio settings.
• Captions: Change the TV captioning set-
tings.
4 Change the settings as you like.
27
Page 28

Listening to the Radio (Radio)
Listening to FM Radio
With an FM antenna connected to the NVS-7.7, Media Center allows you to enjoy FM radio. There are
three methods of tuning the radio: Auto Tuning, Manual Tuning, and Direct Tuning, where you enter
the station’s radio frequency directly.
Auto Tuning
Media Center can tune into radio stations automatically.
Using the mouse and keyboard Using the remote controller
1 Start Media Center (see page 2).
2 Click Radio.
3 Click the Seek or Seek button.
Media Center automatically finds the next
available radio station.
Manual Tuning
You can tune into a radio station manually.
1 Start Media Center (see page 2).
2 Select Radio, and then press [OK].
3 Select the Seek or Seek button, and
then press [OK].
Media Center automatically finds the next
available radio station.
Using the mouse and keyboard Using the remote controller
1 Start Media Center (see page 2).
2 Click Radio.
3 Click the Tune or Tune button.
The frequency changes in steps of 0.2 MHz
each time you click a button.
1 Start Media Center (see page 2).
2 Select Radio, and then press [OK].
3 Select the Tune or Tune button, and
then press [OK].
The frequency changes in steps of 0.2 MHz
each time you press [OK].
Direct Tuning
If you know the frequency of the radio station that you want to listen to, you can enter it directly.
Using the mouse and keyboard Using the remote controller
1 Start Media Center (see page 2).
2 Click Radio.
3 Click in the radio frequency box, and then
use the keyboard to enter the frequency of the
radio station.
1 Start Media Center (see page 2).
2 Select Radio, and then press [OK].
3 Select the radio frequency box, and then use
the number buttons to enter the frequency of
the radio station.
28
Page 29

Listening to the Radio (Radio)—Continued
Presetting Radio Stations
You can store up to nine of your favorite FM radio stations as presets, for easy selection.
Using the mouse and keyboard Using the remote controller
1 Start Media Center (see page 2).
2 Click Radio.
3 Tune to a radio station (see page 28).
4 Click the Save button.
5 Repeat steps 3 and 4 to store your other
favorite stations as presets.
1 Start Media Center (see page 2).
2 Select Radio, and then press [OK].
3 Tune to a radio station (see page 28).
4 Select the Save button, and then press [OK].
5 Repeat steps 3 and 4 to store your other
favorite stations as presets.
Deleting Radio Presets
To delete a radio preset, select the preset that you want to delete, and then press the remote controller’s
[CLEAR] button. A confirmation message appears. Select Yes , and then press [OK].
Pausing and Replaying Live Radio
While listening to the radio, Media Center records up to 30 minutes of the radio program in the background, allowing you to pause live radio and replay items that you miss.
Use the following buttons on the remote controller or media control toolbar.
Button Action
Pause [ ]
Stop [ ]
Play [ ] Resume radio playback from where you left off.
Replay [ ]
REW [ ]
Skip [ ]
FWD [ ]
Note: When you tune to another radio station, content recorded from the previous station is deleted
from the recording buffer and background recording starts again with the new station.
Pause or stop radio playback. While paused or stopped, Media Center records up
to 30 minutes of the radio program in the background.
Rewind the recorded radio program. You can rewind up to 30 minutes.
Fast forward the recorded radio program. You can fast forward up to 30 minutes.
29
Page 30

Playing DVD-Audio Discs (CyberLink PowerDVD 6)
Media Center does not support DVD-Audio discs directly. However, you can play them by using the
included CyberLink PowerDVD 6 program, which can also be used to play DTS CD and Video CD
discs. Refer to the online help for more information on using PowerDVD.
*To play a DTS CD, the Enable S/PDIF option must be deselected (see page 38 of the NVS-7.7
Instruction Manual).
Important: Before using PowerDVD with Media Center, you must enter the PowerDVD CD key and
obtain a CPPM key. Refer to the NVS-7.7 Instruction Manual for details.
Playing DVD-Audio Discs
Using the mouse and keyboard Using the remote controller
1 Start Media Center (see page 2).
2 Click DVD Audio.
The PowerDVD program starts.
3 When PowerDVD has started, insert a
DVD-Audio disc into the drive.
Playback starts automatically.
If playback does not start automatically, start
playback by using the playback controls in
PowerDVD.
1 Start Media Center (see page 2).
2 Select DVD Audio, and then press [OK].
The PowerDVD program starts.
3 When PowerDVD has started, insert a
DVD-Audio disc into the drive.
Playback starts automatically.
If playback does not start automatically, press
the Play [ ] button.
Note: You can also start PowerDVD from the Windows® desktop. Click the Start button, click All
Programs, and then click PowerDVD.
Click for help
Note:
Although PowerDVD can play DVD-Audio discs, due to restrictions, digital audio with a sampling rate
above 48 kHz, for example, 192 kHz, will be played at 48 kHz.
30
Page 31

Editing Video with NeroVision Express 3
With the installed NeroVision Express 3 software, you can edit your videos and create DVDs. NeroVision Express 3 is a complete DVD authoring suite that includes everything you need to edit video
captured from your DV camcorder or imported from disc right through to burning your very own DVD.
Refer to the online help for more information on using NeroVision Express 3.
End User Agreement
The end user agreement for NeroVision Express 3 can be found on the NVS-7.7’s hard disk drive at:
C:\Program Files\Ahead\NeroVision\Eula_eng.txt
Starting NeroVision Express
To start NeroVision Express, on the Windows
and then click NeroVision Express.
®
desktop, click the Start button, click All Programs,
Click for help
Note:
The NVS-7.7’s TV tuner does not support NeroVision Express. Although it may appear in NeroVision
Express as capture device “Aver TVHD A180 Video Capture” or “AverMedia AverTV Video Capture
(M104),” selecting it will not allow you to capture video.
31
Page 32

About Security
What’s a Computer Virus?
A computer virus is a self-replicating, malicious program that spreads by inserting itself into other files
and infects a computer without the user’s knowledge. Infected files are easily spread across the Internet
as downloadable files or e-mail attachments. Once on your computer, a virus may delete important
files, make your computer unstable, or automatically send copies of itself to all of your e-mail contacts.
Other types of virus include worms, trojan horses, and spyware. It’s very important that you take steps
to protect your computer against these viruses.
How To Protect Your Computer
■ Patching Security Holes
One of the most important protective measures you can take is to patch any security holes by updating
your Windows
that take advantage of security holes is increasing. Even if you are using antivirus software, your
computer is still vulnerable to viruses if you have not patched these security holes. Software manufacturers regularly discover new security holes and release patches and updates to fix them.
Check the Web regularly for Windows
update your computer as necessary.
■ Symantec Norton Internet Security
The NVS-7.7 comes with Symantec Norton Internet Security antivirus software (bundle version) preinstalled. Because new viruses are discovered all the time, it needs to be updated regularly, which can
be done automatically by using the LiveUpdate function. The preinstalled software comes with a free
90-day subscription to LiveUpdate. After 90 days, you’ll need to renew your subscription, which you
can do online at the Symantec Web site (http://www.symantec.com/).
■ Always Check Mail Attachments and Downloaded Files for Viruses
Never open an e-mail attachment you weren’t expecting, especially one from someone you don’t know,
as it may contain a virus. Always check attachments and downloaded files for viruses before you open
them.
®
operating system and other programs. These days, the number of computer viruses
®
updates and news from security software manufacturers and
Integra Division of
ONKYO U.S.A. CORPORATION
18 park Way, Upper Saddle River, N.J. 07458, U.S.A.
Tel: 201-785-2600 Fax: 201-785-2650 http://www.integrahometheater.com
Integra Division of
ONKYO CORPORATION
Sales & Product Planning Div.: 2-1, Nisshin-cho, Neyagawa-shi, OSAKA 572-8540, JAPAN
Tel: 072-831-8023 Fax: 072-831-8124
SN 29344296
(C) Copyright 2006 ONKYO CORPORATION Japan. All rights reserved.
32
En
Printed in Japan
I0604-1
* 2 9 3 4 4 2 9 6 *
 Loading...