

Page 1
Integra Music Center
OVERVIEW
Integra Music Center controls monitors and programs an MZA4.7 amplifier or stack of
amplifiers.
MAIN WINDOW
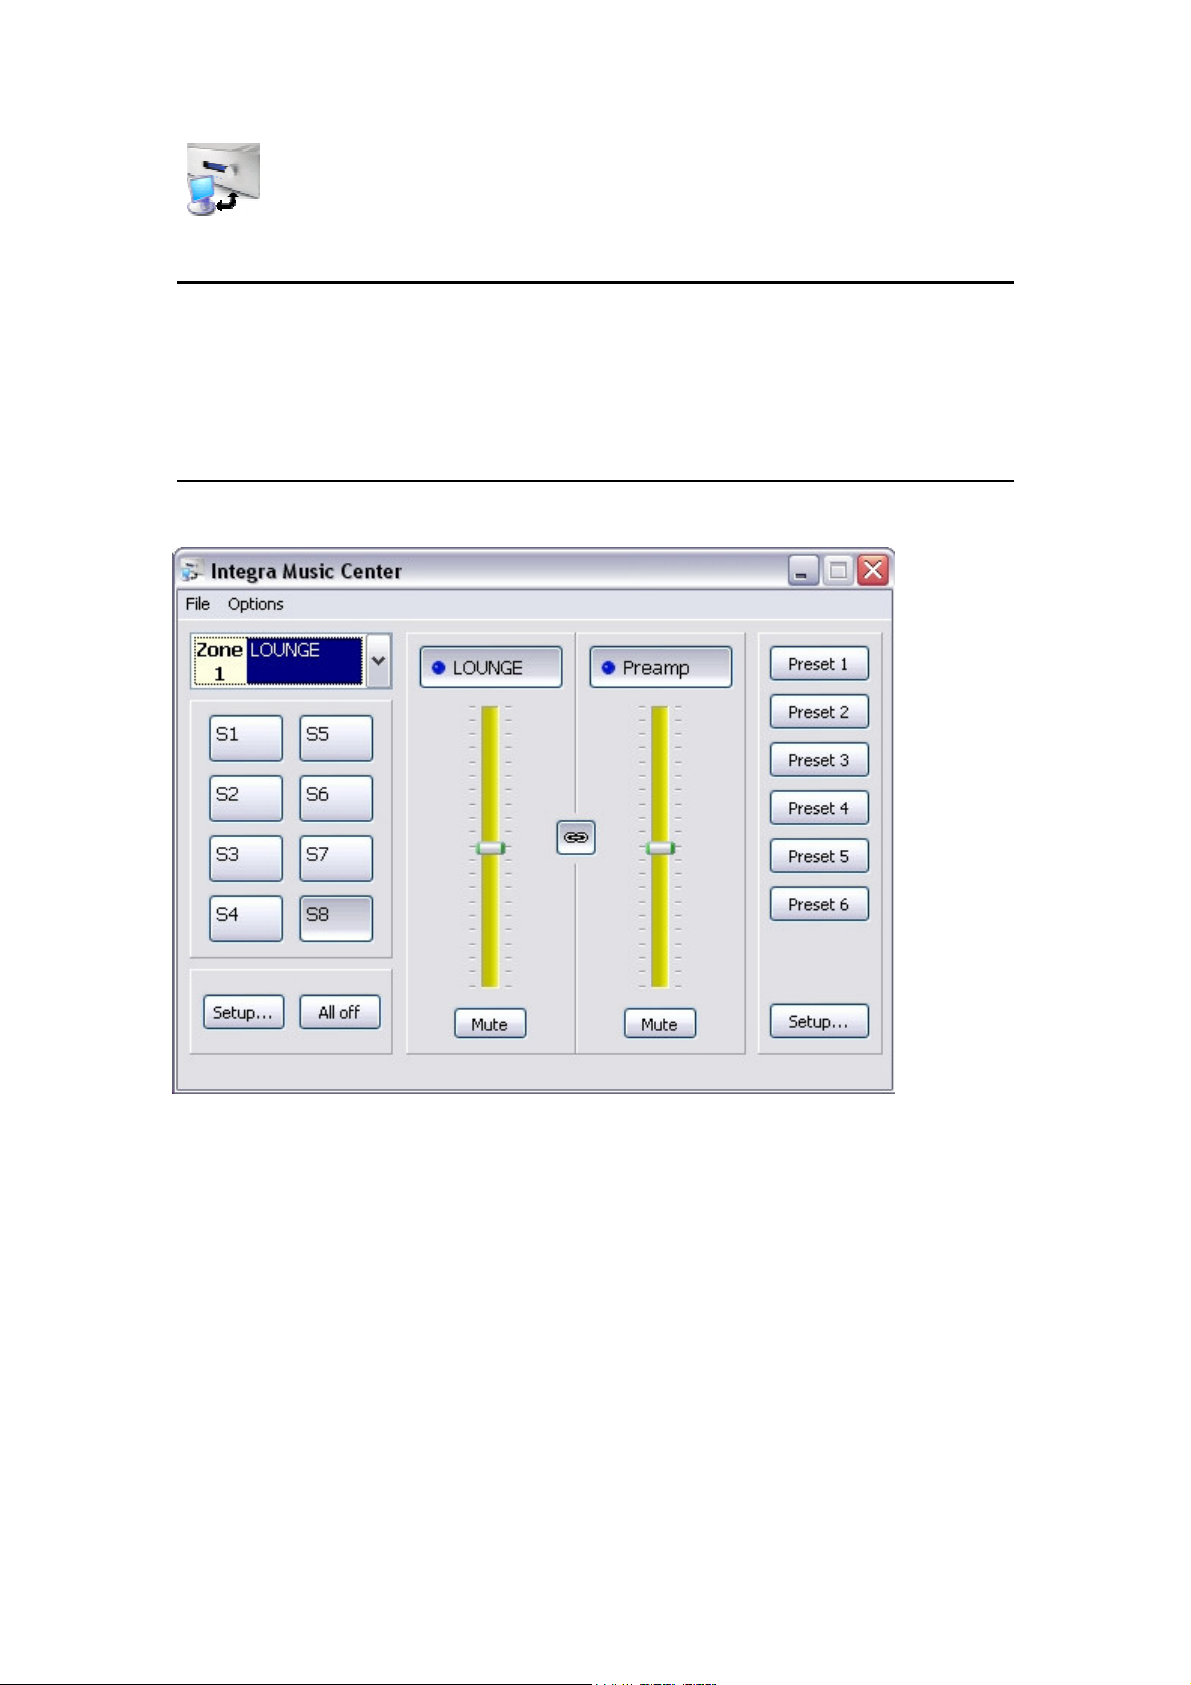
The main window provides most of the control and monitoring functionality of Integra Music
Center. It contains a menu, zone selection tab, amplifier functions & preset buttons.
Further amplifier control functions are accessed via the Setup button.
The Preset Setup opens a page for preset programming.
Page 2
FILE MENU
New Window: Opens another or multiple main windows.
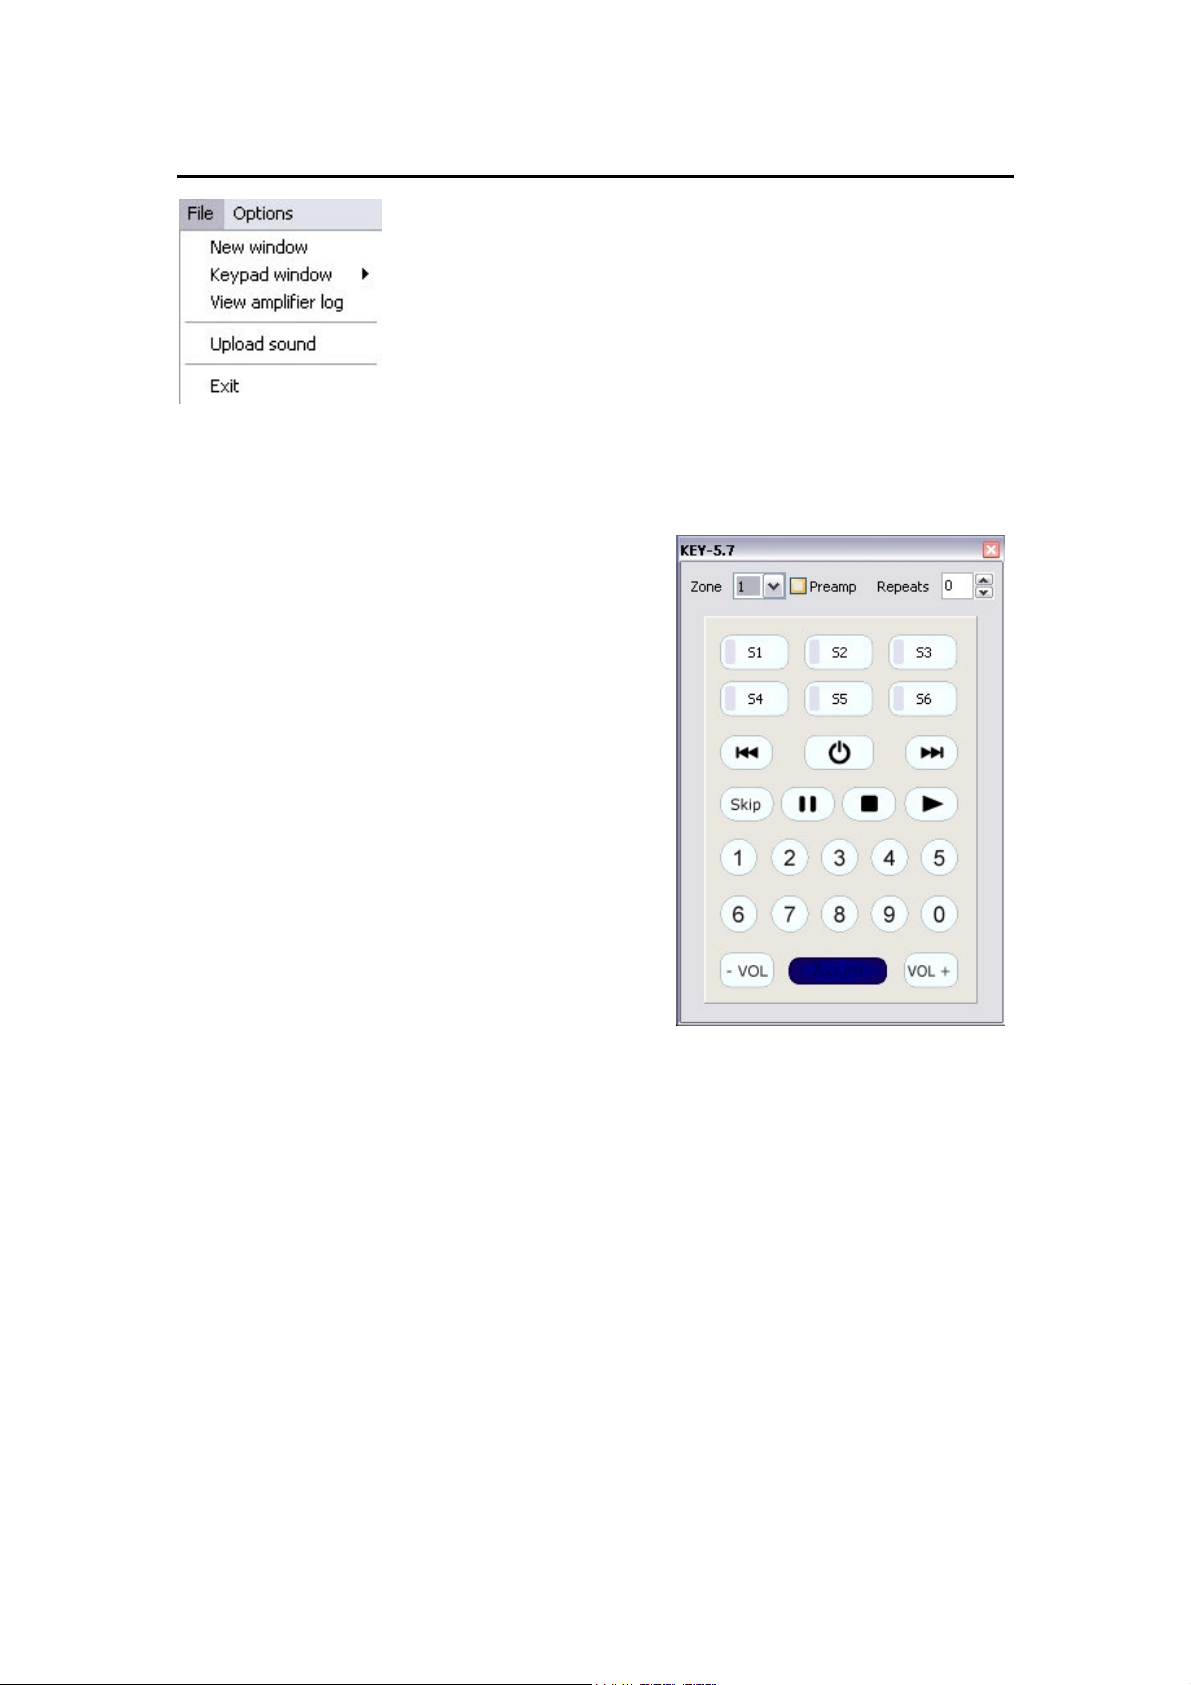
Keypad window: Opens a window representing
an Integra KEY-5.7 keypad.
If a keypad is connected to the MZA-4.7 then
selecting a key on the keypad using a left mouse click
will cause the specific zoned keypad to emit the key’s
IR command.
View amplifier log: Displays the amplifier log for the connected Integra MZA4.7 amplifier.
The log records thermal protection events, date and Restore Default changes.
Upload sound: Opens a directory where a suitable .wav file may be selected and uploaded
to the amplifier doorbell memory. The maximum size is 1.5 seconds.
Exit: Closes Integra Music Center.
Page 3
OPTIONS MENU
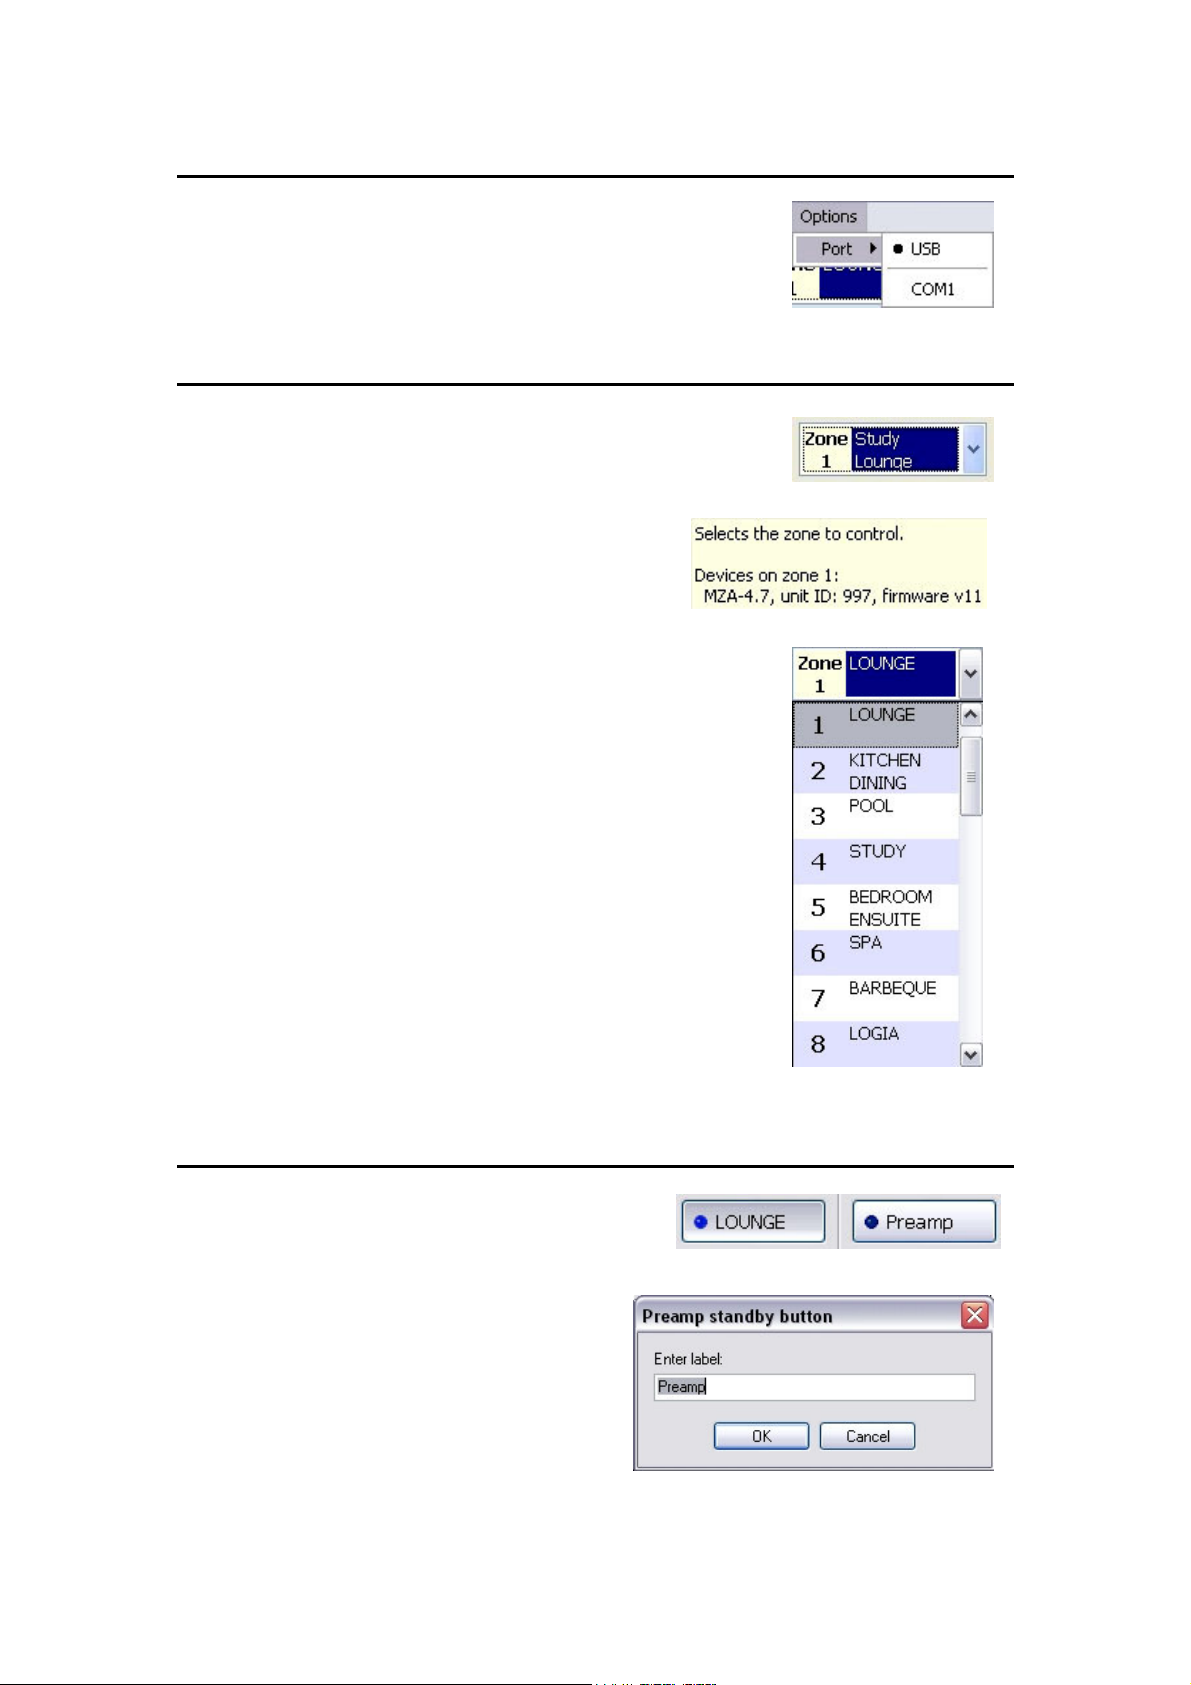
Select the appropriate communication port.
If connecting via USB to an Integra MZA4.7 amplifier for the first
time, windows may require directing to the appropriate driver.
See: “USB driver setup”
ZONE SELECTION TAB
The currently selected Integra zone is displayed in the tab.
Moving the cursor over the tab displays details of the
connected Integra amplifier.
To select a different zone, select the down arrow.
A zone list is displayed. Make the required selection.
The main window displays the settings of the selected zone.
STANDBY
When a zone is ‘On’ the standby button is depressed
and the button’s blue indicator is illuminated.
Both the Amplifier and Preamplifier standby
buttons may be labelled with room names.
Right mouse click on the standby button opens
the label edit window. Change the text and
Click OK to save and exit.
The text is transferred to the multi-zone
amplifier.
Page 4

VOLUME SLIDERS, MUTE & PREAMP MODE
The volume slider is adjusted using a left mouse click
& hold, dragging the slider to the required level.
A volume offset between amplifier and preamplifier
may be programmed: Move the cursor above a
volume slider, hold down the keyboard ‘Ctrl’ key and
increment or decrement the slider using the keyboard
‘Up’ or ‘Down’ keys.
When an amplifier or preamplifier is muted the Mute
button is depressed. Select the Mute button to toggle
the mute function.
The preamplifier defaults to ‘Tracking’ mode indicated
by the link icon on the preamplifier mode select
button. Selecting the button toggles the mode.
The broken link icon indicates Independent mode
where the preamplifier functions operate
independently of the amplifier functions.
A volume slider may be programmed to have a
maximum volume limit. Move the cursor above the
volume slider, hold down the keyboard ‘Shift” key and
increment or decrement the slider using the keyboard
‘Up’ or ‘Down’ keys. A dark blue bar above the slider
indicates the volume limit.
AMPLIFIER SOURCE SELECTS
There are eight source selects, the selected source is shown
depressed. Selecting a source on IMC changes the source for the
current zone on the connected MZA4.7 amplifier.
The source selects may be re-named using a right
mouse click on the source key; a label edit window
opens.
The Short Label is for the MZA4.7 Front Panel LCD and
has a maximum of three characters.
Text entered into the Label field is displayed on the IMC
source select key. Click OK to save and exit.
Page 5

SETTINGS & ALL OFF
Selecting the ‘All off’ button will turn all connected amplifier Zones off.
Selecting the “Setup’ button
opens the setup window, Where
further amplifier and preamplifier
functions are accessed
Sliders for Bass, Treble, Amplifier
and Preamplifier Balance may be
adjusted using a Left mouse click
& hold while dragging the slider
to the required
Level.
The loudness control defaults Off.
When independent mode is
selected loudness is disabled.
Loudness and Preamplifier
Independence is mutually
exclusive.
Any zone may be linked to one other zone.
The zone may be assigned by selecting the Link Zone when linked, source selection will
be the same for both zones. ‘Link Volume’ and ‘Link Standby’ may optionally be selected
where the volume levels and standby status will be the same for the linked zones.
The ‘Ampon’ selection defaults to the preamplifier.
The assignment determines which device (Amp or Preamplifier) the Ampon output trigger
tracks.
PRESETS
Six momentary preset buttons are provided.
Momentary presets cause an Integra MZA4.7 amplifier or a stack of
amplifiers to be set to predetermined states, i.e: source selection, volume
level, standby status etc.
If a Preset has not been programmed then nothing will happen when it is
selected.
The Presets may be re-named
using a right mouse click on the
Preset key opens a label edit
window. Enter the required label
text, Click OK to save and exit.
The Preset ‘Setup’ button opens the Preset Setup window.
Page 6

PRESET SETUP
Momentary Presets: Preset programming effects all connected zones.
There are six momentary presets; Preset 1 – Preset 6.
The preset definitions are stored in the multi-zone amplifiers.
To program Preset 1, left mouse click over the ‘Set up preset 1’ and change all amplifier
functions as required in the main window and amplifier setup menu. To modify / access other
zone amplifier functions simply change the zone in the zone selection tab, or open multiple
main windows in the file menu, setting each window to the appropriate zone.
Once setup, select ‘Default’ to exit. Preset 1 is programmed.
The process is the same for the other presets.
Page Preset: ‘Force page preset’ is selected when programming the page preset.
When selected, change the amplifier functions of the required zones. Check the Sound tab if
the doorbell generator is required – this automatically selects the utility input for the
connected zones. Once setup, select ‘Default’ to exit.
Whenever a contact across the multi-zone amplifiers PG & 0V terminal is closed the amplifier
will go to the Page preset settings.
If the Sound tab was selected the down loaded wave file is played in a continuous loop for
the duration of the contact closure.
When the contact is opened the multi-zone amplifier will return to its previous setting.
Page 7

Alarm Clock programming:
An alarm clock event may be included in a preset. It utilises the ‘Schedule’ panel.
As shown below; Mon – Fri are selected and the time set @ 6:15am.
The preset 3 command will then be invoked at 6:15 in the morning Monday – Friday.
The Amp Zones that are scheduled to be included in the alarm clock are checked.
Source control included in Alarm clock programming: If a KEY5.7 keypad is connected
to the MZA4.7 amplifier then the Keypad can be made to emit it’s learnt IR commands as part
of a Alarm clock macro. Open the Keypad window, and in the Preset setup window select the
‘Macro’ tab. Using left mouse click over the keypads keys select the required functions: i.e.
‘S1 select’, ‘1’, ‘2’, ‘Play’. The sequence is entered into the macro window.
Exit ‘Set up Preset 6’ by selecting ‘Default’. The Integra system is now programmed to select
the Source 1 (a CD player) and play disc 12 every Mon – Friday at 6:15am.
Page 8

USB DRIVER SETUP
If the software has been installed using the Integra Suite setup application, the PC will detect and install
the correct USB driver for the Integra amplifier.
If installing the software discretely or should the PC encounter a setup problem follow the following
driver installation procedure:
When first connecting USB to an Integra amplifier, Windows XP finds new hardware and the “New
Hardware Wizard” is displayed:
Select “No, not this time” click “Next” to continue
Select “Install from a list or Specific location (Advanced)”. Click “Next” to continue
Click “Search for the best driver in these locations”, “Include this location in the Search” and “Browse”.
Direct the wizard to driver located on the Integra CD: MZA47.inf
Click “Next” and agree to install the driver.
 Loading...