

Page 1
Shock
Shock
Repair
Guide
Repair
Guide
Series
310-401XX
and
310-402XX
Page 2
Special Precautions!
! !
1. Integra Shocks are nitrogen gas charged for proper operation. Discharge the nitrogen gas in the unit
prior to working on your shock.
2. Keep hands clean and free of dirt, dust, or other loose debris that could become lodged in the tiny
passages located in the damper.
3. Rebuilding of your dampers can be done at the track. Be sure to perform any rebuilds in an enclosed
space where dirt and dust are at a minimum.
4. Clean any oil spills from the fl oor immediately to reduce the chance of a slip or fall.
5. Always use safety glasses to reduce the chances of serious eye injury.
6. Be cautious when working over the damper when the nitrogen gas has not been discharged.
7. Read complete manual prior to beginning any work in your shocks.
BE SURE TO READ AND FOLLOW ALL PRECAUTIONS LISTED BELOW
PRIOR TO BEGINNING WORK ON YOUR SHOCKS.
Failure to do so could cause serious injury or death.
Part #
310-30202
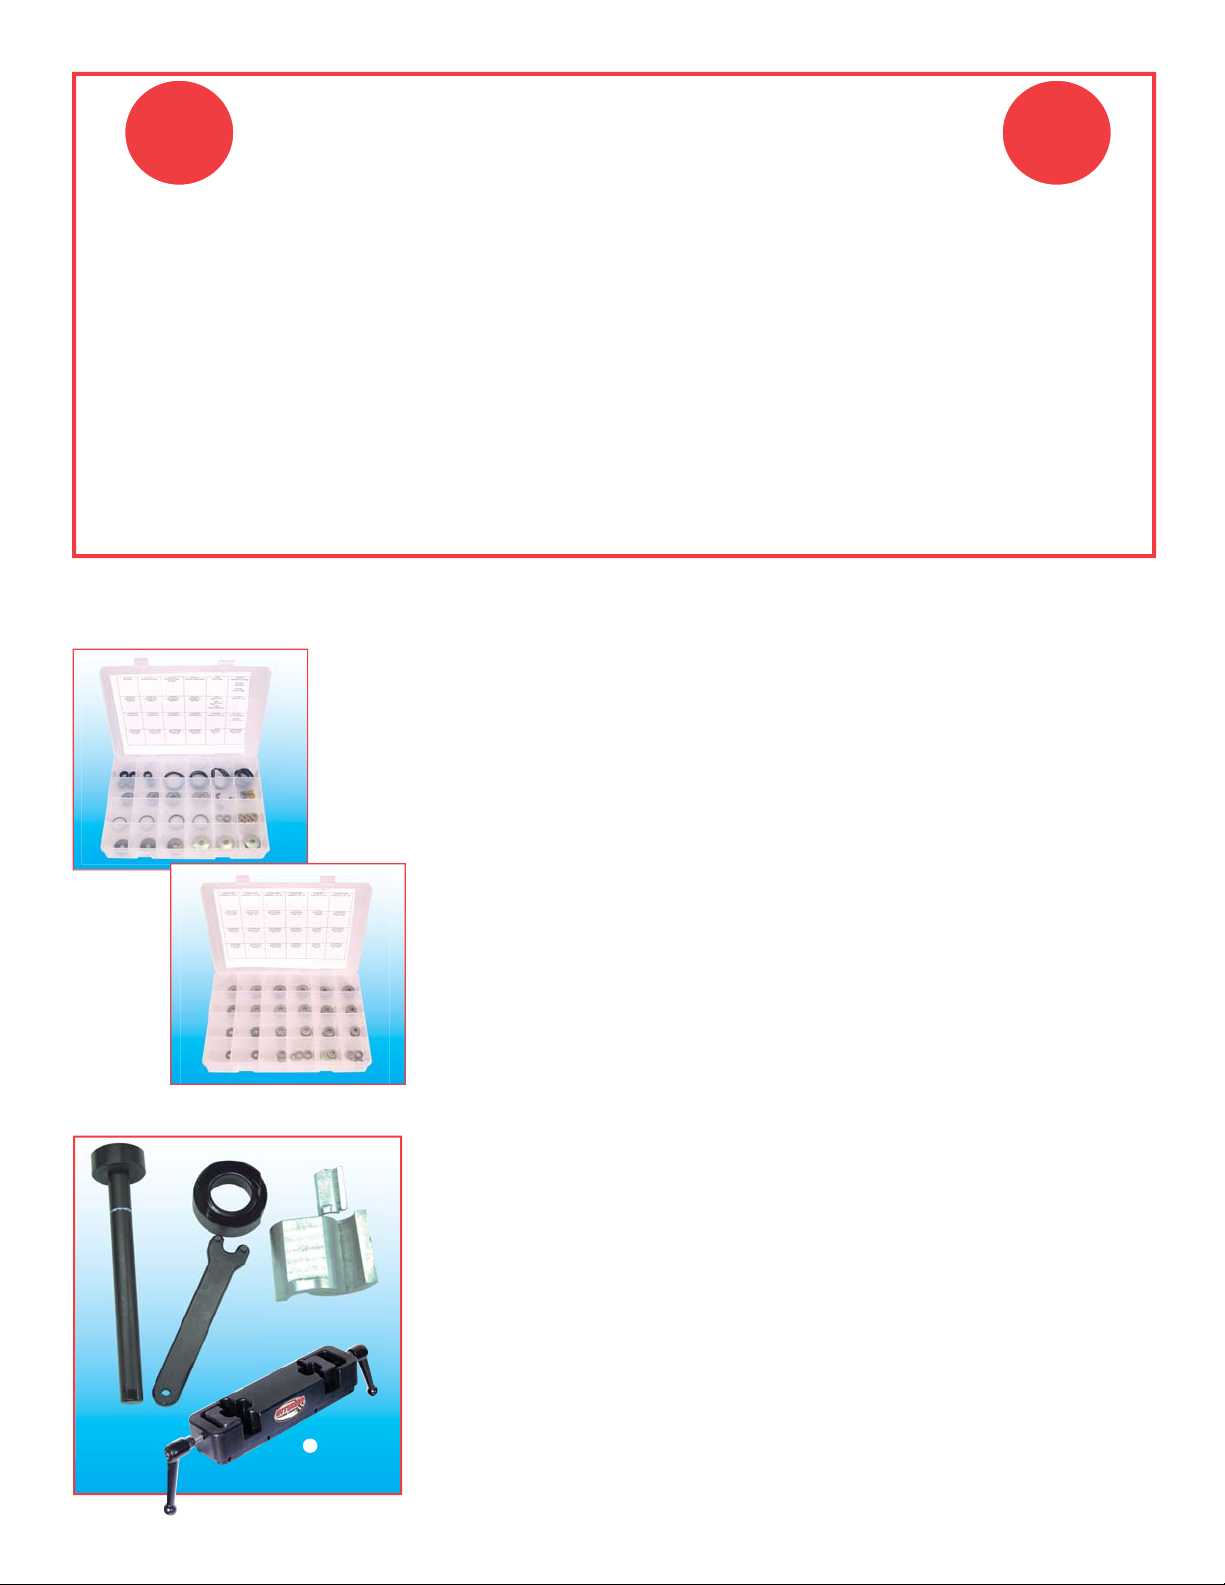
Kit Contents
The following parts are supplied with your Integra shocks valving kit:
Part #
310-30202
r
o
n
s
Valve disc storage case
Misc. valve discs
Bleed discs
Spare piston bands
Spare rod seals
Spare rod guide seals
Spare end cap seals
Spare fl oating piston seals
Spare nitrogen fi ll valves
Spare poppet parts
Integra Shock Tools
q
1. Overfl ow ring Part # 310-30313
2. Rod guide Wrench Part # 310-30312
3. Shock Vise Part # 310-30204
4. Set of rod clamps Part # 310-30206
p
5. Floating piston locator Part # 310-30207
6. Body Clamp Part # 310-30311
Page 3
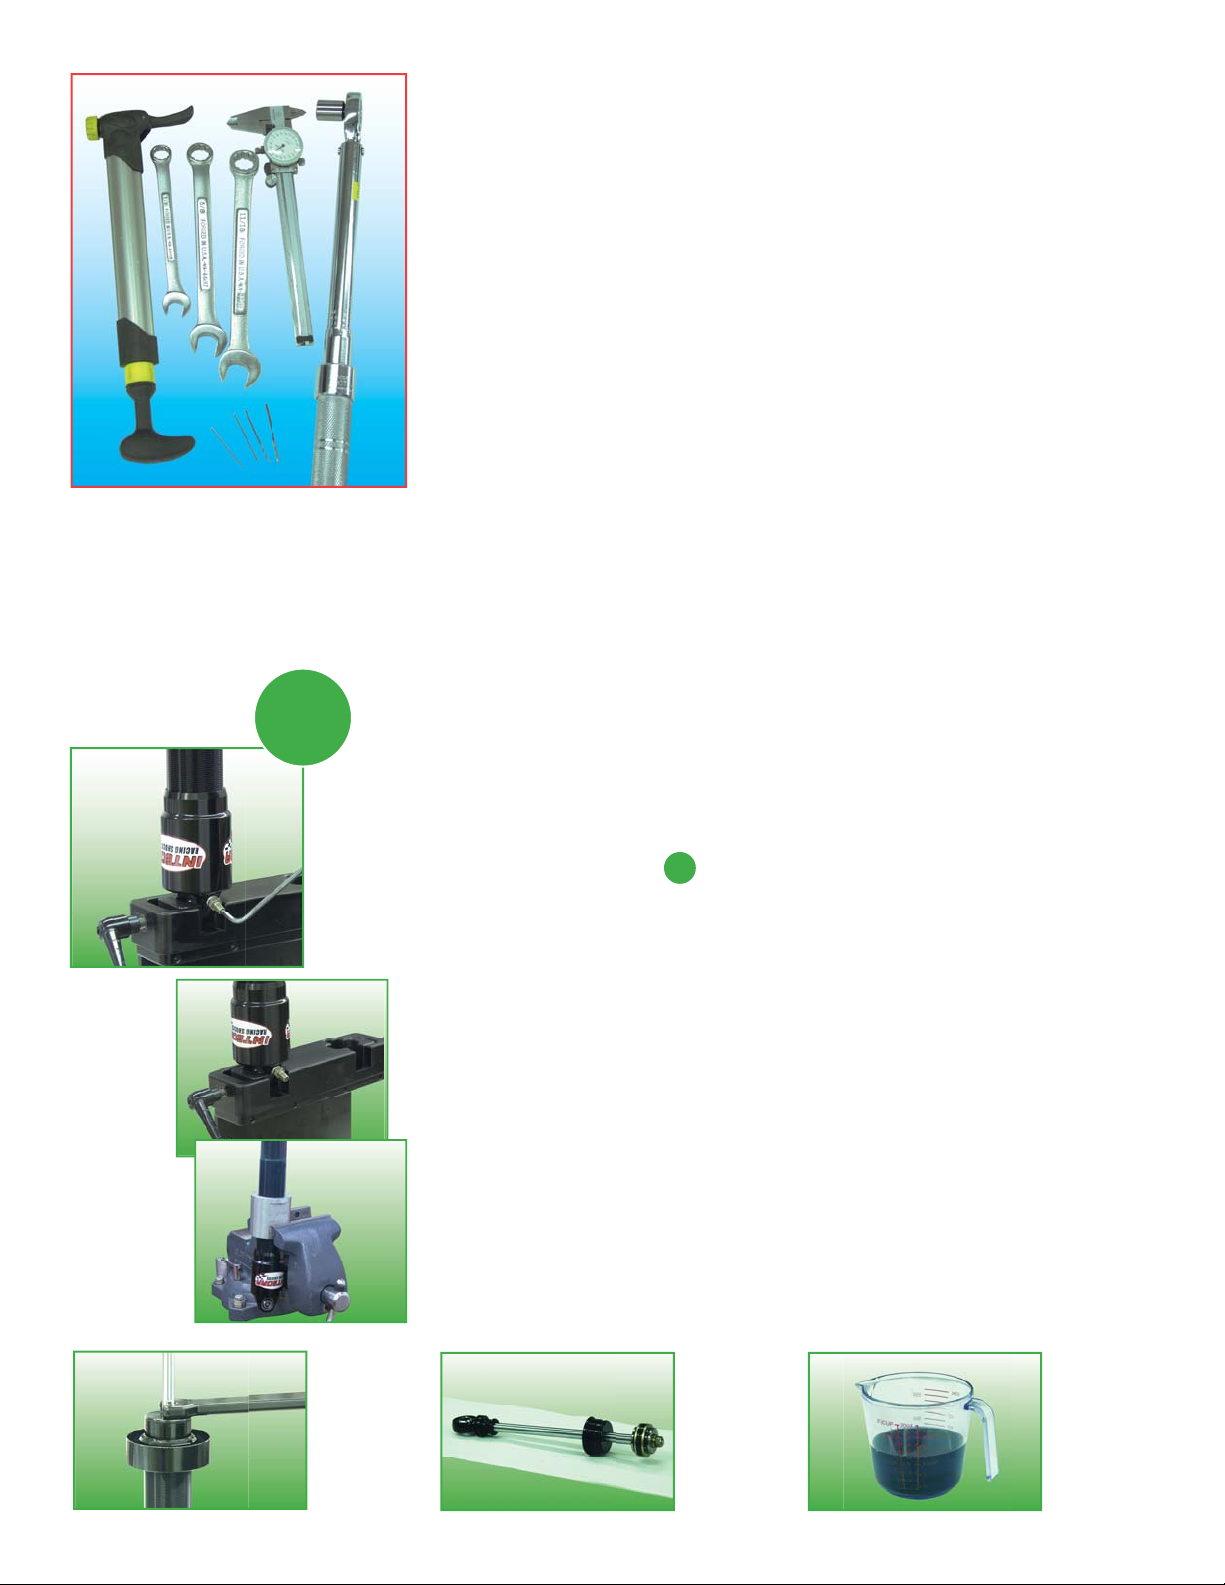
Tools You Will Need
You will need to have the following additional tools/equipment to re-valve
our dampers:
1. Nitrogen tank. The tank can be purchased at a local gas supply
store. A small 40 lb. tank will likely last you for a full season.
2. 350 PSI pressure regulator. Be sure that the regulator is compatible
with the nitrogen gas.
3. High pressure hose to interface with pressure regulator and the
charging valve assembly
4. 0-6" calipers with English (imperial) units of measurements
5. Torque wrench with a minimum of 216 in-lb. capacity
6. 1/2" socket for above torque wrench
7. 11/16" open-end wrench
8. 1/2" boxed end wrench
9. Charging valve assembly
10. Assorted drill bits - .025” dia., .031” dia., .040” dia., .055” dia.,
.062” dia., .076” dia., and .094” dia.
A2
Clamp
the body
of the shock
A
A1
Discharge
nitrogen
gas prior to
disassembly
11. Paint strainers
12. Tire valve core removal tool
13. Bicycle style tire pump
14. Graduated Cylinder
Disassembly
A
• Clean the exterior of the shock prior to disassembly.
• Discharge nitrogen gas prior to disassembly (A1).
• Clamp the body of the shock (rod end up)
(A2) using the Integra Shock
Vise (part # 310-30204). Alternately, you can use a standard vise, using
body clamps (part # 310-30311, purchased separately). Do not overtighten clamps. Permanent deformation of the tube will occur if the
clamps are over-tightened.
• Be sure the rod is completely extended.
• Using the rod guide wrench provided, loosen the rod guide and slowly
remove the head assembly
(A3).
• Place the head assembly you have just removed on a clean, low lint
paper towel
(A4).
• Pour the oil into a measuring cup, or similar graduated cylinder. Use a
paint strainer to ensure that any large, foreign particles are removed
from the oil
(A5).
A3
Loosen the
rod guide and
slowly remove
the head
assembly
A4
Place head
assembly on
low lint paper
towel
A5
Place oil into
a measuring
cup
Page 4

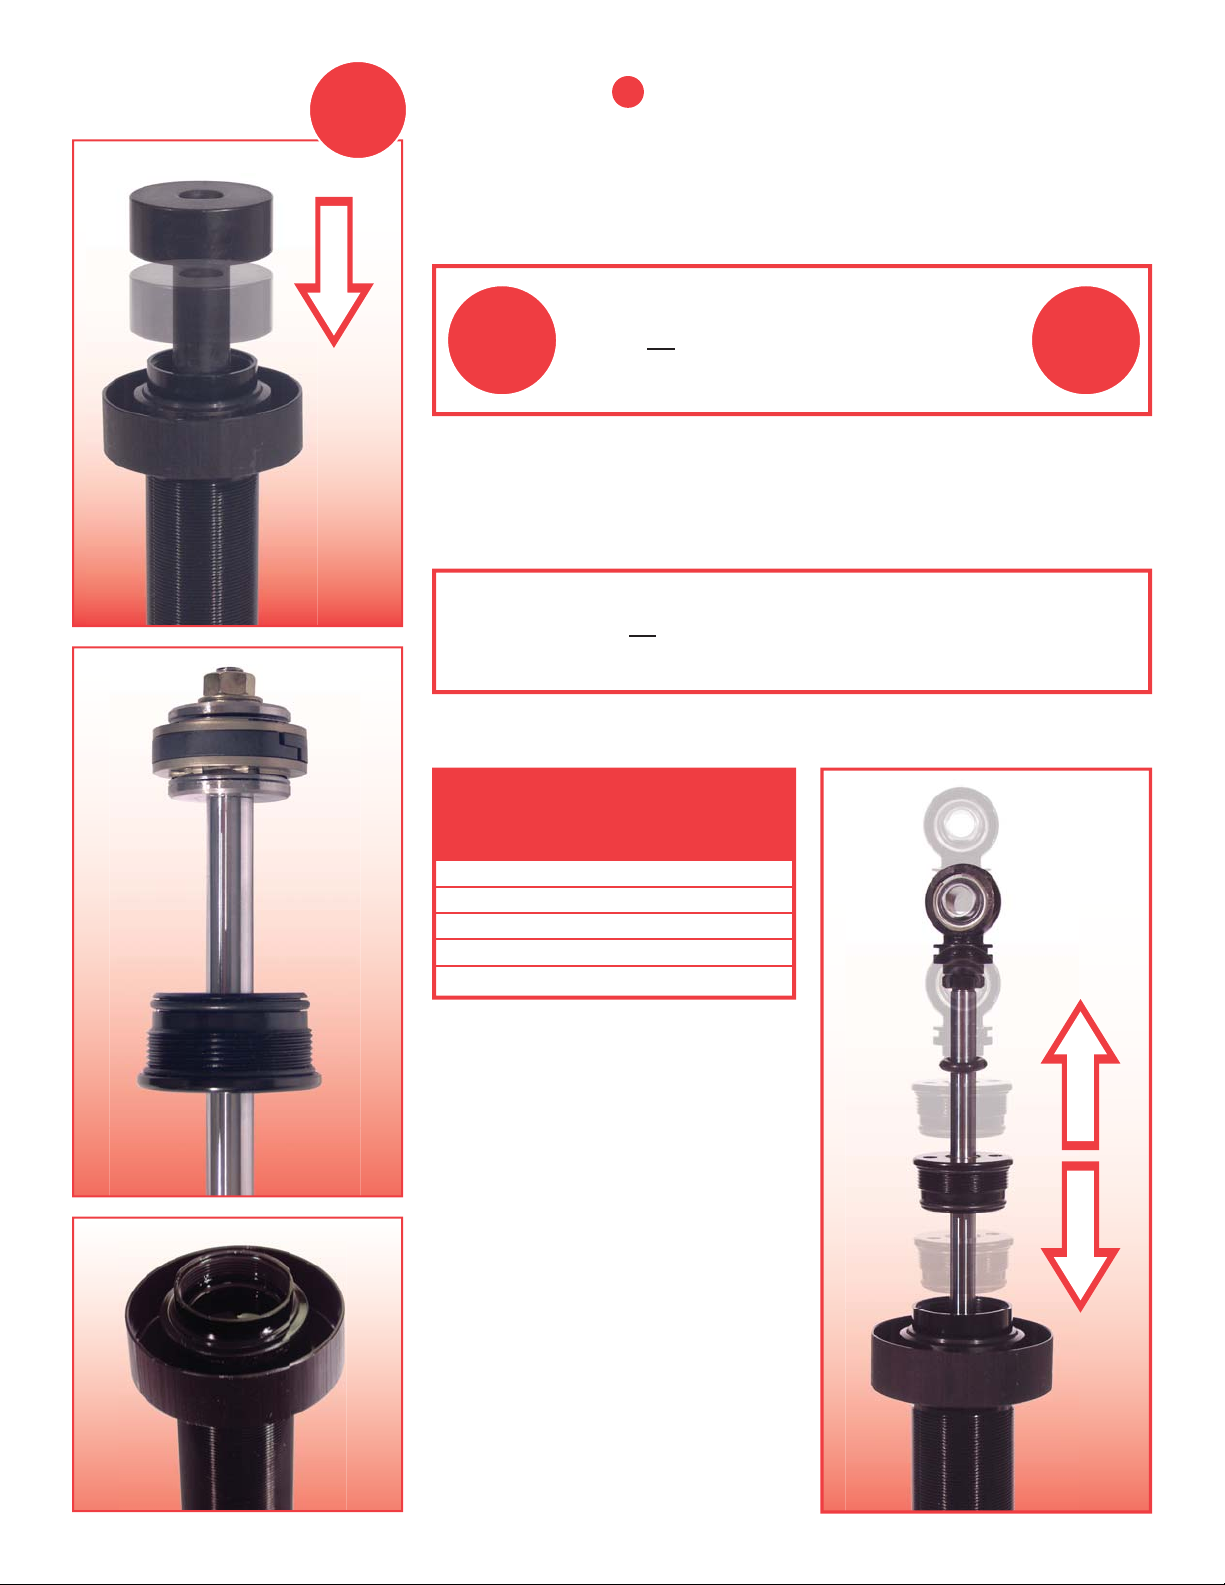
Valving The Head Assembly
B
B
1. Clamp the head assembly in the vice (B1).
2. Set up a clean, low lint paper towel on the bench next to the vice.
B1
Clamp
the head
assembly
into the vice
3. Using a marker, label the upper right hand corner of the paper towel
with an “R” (rebound) and the lower right hand corner of the paper
towel with a “C” (compression).
4. Using a 1/2“ boxed end wrench, remove the piston nut and washer
from the head assembly
(B2). Place the nut and washer between the
“R” and “C” on the paper towel.
B2
Remove
piston nut
and washer
from the head
assembly
5. Remove the rebound disc travel limiter along with the rebound disc
stack.
6. Remove all of the discs from the travel limiter &set the rebound disc
travel limiter directly across from the “R” on the paper towel
(B3).
7. Remove the piston and place on the paper towel across from the piston nut and washer (B4).
8. Remove the compression travel limiter along with the disc stack from the rod.
9. Remove all of the discs from the travel limiter & set the compression disc travel limiter directly across from
the “C” on the paper towel
(B5).
10. Using dial calipers, carefully measure each shim’s diameter and thickness. For rebuilds, replace each shim
with same size new shim. For revalving, refer to Valve Code Sheet. *Note: .594 OD x .020 shim is constant,
and remains on travel limiter at all times.
11. Remove shims from paper towel
(B6).
12. Place the new rebound valve discs on the paper towel directly across from the “R”, and the new
compression discs directly across from the “C”. Put the discs in order from top to bottom starting with the
disc that will be placed closest to the face of the disc travel limiter
B3 B4
B6B5
(B5).
Page 5

13. Stack the compression discs onto the disc travel limiter. Place the disc stack/travel limiter on the
piston rod. (B7).
14. Place the piston on top of the compression stack. Be sure to orient the piston properly. Face the piston side
marked with a “C” towards the compression valve stack.
(B8)
15. Stack the rebound discs onto the rebound disc travel limiter. Place the disc stack/travel limiter on top of the
piston.
(B9)
16. Place the piston washer and nut on the piston rod, (B10) and torque to 216 in-lbs. (18 Ft-lbs.).
17. Remove the head assembly from the vice.
B7
Stack compression discs onto disc travel limeter
B9
B8
Piston
Marked
“R”
Piston
Marked
“C”
Place piston onto the compression stack
B10
Stack rebound discs onto rebound disc travel limiter
& place on piston
Place piston washer & nut on piston rod
Page 6
C1
C2
C
Assembly
• Be sure all seals are lubricated with O-ring lube prior to assembling the
unit.
• Once the head assembly has been completely built, the damper can be
assembled as follows:
1. Clamp the body of the shock in the vice.
C
NOTE:
When setting the fl oating piston to the proper height,
be sure not to use a high volume pressure source
! !
2. Using the fl oating piston height tool, set the fl oating piston to the
proper setting. Remove valve core from tank valve. Use a bicycle
style tire pump to “bump” the fl oating piston approximately half way up
into the tube. Set the fl oating piston height tool for the proper damper
length. See chart for proper setting.
such as an air compressor or compressed air bottle.
SERIOUS INJURY COULD OCCUR !!!!!!!!
NOTE:
Be sure not to use a hard device to measure or adjust
the fl oating piston height, as this may cause scratches in the I.D.
of the shock body that could alter the proper performance of the shock.
C3
3. Seat the tool fully into the fl oating piston from the top of the
disassembled shock body. (C1)
Body Distance from
Length top of tube to Center
of fl oating piston
9” 10 5/8”
8” 9 13/16”
7” 8 15/16”
6” 8”
5” 7 1/8”
4. Press the tool into the shock body
until the fl oating piston reaches the
proper height. Reinstall the valve
core into the tank valve. (C1)
5. Pull the rod guide approximately
half way down the piston rod (C2).
6. Fill shock body with oil to the
bottom of the internal threads
(C3).
7. Slowly install the head assembly
into the shock body. Allow time for
the air below the piston assembly
to “bleed” past.
C4
8. Stroke the head assembly until
the air below the piston has
completely vented to the top of the
shock body. Be sure the fl oating
piston does not move.
(C4)
Page 7

C5
Assembly
9. Slide the rod guide down the shaft into the shock body. Be sure to
keep the piston submerged in oil the entire time.
10. Tighten the rod guide into the shock body with the rod in the fully
extended position. Do this slowly so that the air below the rod guide
has an opportunity to escape past the threads
11. Compress the rod to verify full travel, and to be certain the fl oating
piston has not moved during assembly. (If fl oating piston has
moved, piston rod will not fully compress into shock body.)
C
(Continued)
(C5).
D
Part #
310-30310
D1
D2
Damper Recharging
Once the damper has been completely reassembled and the rod guide
properly tightened, the damper must be charged with nitrogen gas:
1. Be sure the valve on top of the nitrogen tank is closed. Secure the
charging valve assembly to the nitrogen tank/regulator.
2. Back the pressure regulator on the nitrogen tank completely off.
3. Compress the rod into the damper completely.
4. Open the valve on the top of the nitrogen tank to approximately
200 PSI.
5. Back the wing nut all the way off (counter clockwise) on the infl ation
unit (part # 310-30310).
6. Screw the infl ation unit onto the damper fi ll valve. Do not over tighten.
Tighten the valve assembly only enough to eliminate any air leakage
(D1).
7. Turn the wing nut clockwise until it stops. This will push in the valve
core of the Schrader valve and allow gas to enter the shock.
8. Pressurize the shock to the desired pressure through the valve stem
on the infl ation unit. ***use nitrogen gas only***
D
(D2)
9. Back the wing nut all the way off (counter clockwise) on the infl ation
unit.
10. Remove infl ation unit from the shock. *** You may hear a small
amount of gas escape when the unit is removed from the shock. If the
wing nut was completely backed off, this is gas that was stored in the
unit and will not affect the setting. ***
11. Compress the rod to verify full travel in the damper without
interference. The pressure inside the damper should extend the rod
without any assistance.
IF YOU HAVE ACCESS TO A DAMPER DYNAMOMETER,
BE SURE TO TEST THE DAMPER FOR PROPER OPERATION.
Page 8

1
Shock
Parts
2
3
27
5
6
7
8
9
10
REBOUND VALVE STACK
28
30
29
26
4
25
24
22
21
20
19
Shock
23
Parts
To order parts, call
Integra / Port City Racing
11
31
12
32
16
13
COMPRESSION VALVE STACK
33
12
34
14
35
15
36
PRELOAD VALVE
STACK
18
17
Item No. Description Part No.
1 Retaining Ring - Spherical Bearing . . . . . . . . 310-30328
2 Spherical Bearing - .500" I.D. . . . . . . . . . . . . . 310-30327
3 Fill Valve - N2 . . . . . . . . . . . . . . . . . . . . . . . . . 310-30337
4 End Cap . . . . . . . . . . . . . . . . . . . . . . . . . . . . . 310-30301
5 O-Ring - End Cap. . . . . . . . . . . . . . . . . . . . . . 310-30212
6 O-Ring - Floating Piston . . . . . . . . . . . . . . . . . 310-30213
7 Floating Piston . . . . . . . . . . . . . . . . . . . . . . . . 310-30334
8 Adjusting Nut . . . . . . . . . . . . . . . . . . . . . . . . . 310-30298
9 Pressure Tube-(5",6",7",8" & 9"). . . . . . . . . . . . . . Specify
10 Piston Nut. . . . . . . . . . . . . . . . . . . . . . . . . . . . 310-30216
11 Piston Washer . . . . . . . . . . . . . . . . . . . . . . . . 310-30217
12 Travel Limiter - Disk . . . . . . . . . . . . . . . . . . . . 310-30335
13 Piston,Digressive,Linear,High Flow Linear. . . . . . Specify
14 O-Ring - Piston Band Energizing . . . . . . . . . . 310-30215
15 Piston Band . . . . . . . . . . . . . . . . . . . . . . . . . . 310-30214
16 Piston Rod(5",6",7",8" & 9") . . . . . . . . . . . . . . . . . Specify
17 O-Ring - Rod Guide Primary . . . . . . . . . . . . . 310-30211
18 Bearing - DU. . . . . . . . . . . . . . . . . . . . . . . . 310-30300-1
19 Rod Guide . . . . . . . . . . . . . . . . . . . . . . . . . . . 310-30300
20 O-Ring - Rod Guide Secondary . . . . . . . . . . . 310-30210
21 Rod Seal - Quad Ring . . . . . . . . . . . . . . . . . . 310-30209
22 Rod Wiper . . . . . . . . . . . . . . . . . . . . . . . . . . . 310-30208
23 Pin - Spring Seat Retainer . . . . . . . . . . . . . 310-30200-4
24 Spring Seat. . . . . . . . . . . . . . . . . . . . . . . . . . . 310-30299
25 Travel Indicator - Compression . . . . . . . . . . . 310-30218
26 Piston Rod Jam Nut . . . . . . . . . . . . . . . . . . . . 310-30338
27 Rod End Housing . . . . . . . . . . . . . . . . . . . . . . 310-30402
28 Backup Disk . . . . . . . . . . . . . . . . . . . . . 310-MVD594020
29 Valve Disk - .70" O.D.. . . . . . . . . . . . . . . . 310-MVD7010
30 Valve Disk - .85" O.D.. . . . . . . . . . . . . . . 310-MVD85010
31 Valve Disk - 1.00" O.D.. . . . . . . . . . . . . . . 310-MVD1010
32 Valve Disk - 1.16" O.D.. . . . . . . . . . . . . 310-MVD116010
33 Valve Disk - 1.28" O.D.. . . . . . . . . . . . . 310-MVD128010
34 Preload Pilot Disk . . . . . . . . . . . . . . . . . 310-MVD116010
35 Preload Ring Disk. . . . . . . . . . . . . . . . . . 310-PR128010
36 Bleed Disk . . . . . . . . . . . . . . . . . . . . . . . . . 310-BD4-004
(800) 472-2464
Page 9

Shock Rebuild
Shock Rebuild
Parts
Parts
Order TOLL FREE 1-800-472-2464
Integra’s complete line of parts makes it easy for you to rebuild and repair your shocks.
All Integra shocks are ●Owner Serviceable ●Repairable ●Revalvable
SHOCK VISE
INTEGRA SHOCK
new
DESCRIPTION PART # PRICE
Shock Vise 310-30204 $169.95
Shock Vise Bench Mount
DESCRIPTION PART # PRICE
Shock Valving Kit
310-30205 $39.95
310-30202 $315.00
VALVING KIT
INTEGRA
DESCRIPTION PART # PRICE
Shock Oil 310-30900-1 $9.95
SHOCK OIL
INFLATION UNIT
BODY CLAMP
DESCRIPTION PART # PRICE
Inflation Unit
DESCRIPTION PART # PRICE
Shock Body Clamp
310-30310 $82.50
310-30311 $49.99
WRENCH
OVER FLOW RING
SPANNER WRENCH
PISTON VISE
BASE VALVE TOOL
• Allows valve changing of base valve without removal
from pressure tube
BASE VALVE SNAP RING SLEEVE
• For installation of snap ring without damaging pressure tube
FLOATING PISTON LOCATOR
DESCRIPTION PART # PRICE
Rod Guide Wrench
DESCRIPTION PART # PRICE
Over Flow Ring
DESCRIPTION PART # PRICE
C/O Nut Spanner Wrench 310-30314 $15.95
DESCRIPTION PART # PRICE
Piston Vise
DESCRIPTION PART # PRICE
Base Valve Tool
DESCRIPTION PART # PRICE
Snap Ring sleeve
DESCRIPTION PART # PRICE
Floating Piston Locator
310-30312 $27.99
310-30313 $38.50
310-30329 $39.95
310-30901 $49.95
310-30331 $29.95
310-30207 $43.99
FLOATING PISTON TOOL
• Used for air bleeding double adjustable shocks
PISTON ROD CLAMP
DESCRIPTION PART # PRICE
Floating Piston Tool 310-30330 $39.99
DESCRIPTION PART # PRICE
Piston Rod Clamp
310-30206 $39.99
Page 10

3
5
6
7
4
5
5
3
5
6
XXX96-2 XXX
7
0
4
XXX
XXX5.
XXX5-
XXX
1/25/07
XXX4.
Standard Monotube Valving
XXX
XXX3-
XXX3-
XXX3-
XXX2 XXX
Rebound Rebound Rebound Rebound Rebound Rebound Rebound Rebound Rebound Rebound Rebound Rebound Rebound
.006-.700 .008-.700 .006-.700 .012-.700 .012-.700 .010-.700 .010-.700 .006-.700 .008-.700 .006-.700 .012-.700 .006-.700 .012-.700
.006-.850 .008-.850 .006-1.16 .012-0850 .012-.850 .010-.850 .010-.850 .006-1.16 .008-.850 .006-1.16 .012-.850 .006-1.000 .012-0850
.006-1.16 .010-1.16 .010-1.16 .012-1.16 .012-1.16 .012-1.16 .012-1.16 .010-1.16 .008-1.16 .012-1.16 .012-1.16 .012-1.16
.006-1.000 .008-1.000 .010-1.16 .012-1.000 .012-1.000 .0008-1.000 .010-.1.000 .010-1.16 .008-1.000 .010-1.16 .012-1.000 .006-1.28 .012-1.000
.012-1.28 .012-1.28 .010-1.28 .008-1.28 .012-1.28 .012-1.28 .012-1.28 .012-1.28 .015-1.28
.006-1.28 .008-1.28 .008-1.28 .006-1.28 .006-1.28 .008-1.28 .010-1.28
.006-1.28 .008-1.28 .012-1.28 .010-1.16 .015-1.28 .012-1.28 .008-1.16 .012-1.28 .008-1.28 .012-1.28 .010-1.16 .010-1.16
Piston Piston Piston Piston Piston Piston Piston Piston Piston Piston Piston Piston Piston
LHF-.094 LHF-.094 LHF-.040 LHF-.031 LHF-.031 LHF-.076 LHF-.055 LHF-.040 LHF-.040 LHF-.031 LHF-.031 LHF-.062 LHF-.031
.006-1.28 .008-1.28 .008-1.28 .008-1.28 .008-1.28 .006-1.28 .008-1.28 .008-1.28 .008-1.28 .008-1.28 .006-1.28 .008-1.28 .012-1.28
.0006-1.16 .008-1.16 .006-1.16 .008-1.000 .008-1.000 .006-1.16 .008-1.16 .010-1.16 .010-1.16 .012-1.16 .015-1.28 .015-1.28 .012-1.28
.006-1.000 .006-1.000 .008-1.000 .008-.700 .008-.700 .008-1.16 .010-1.000 .010-1.000 .010-1.000 .010-1.000 .010-1.16 .010-1.16 .012-1.16
Compression Compression Compression Compression Compression Compression Compression Compression Compression Compression Compression Compression Compression
.008-.700 .010-.700 .010-.700 .012-.700
.006-.850 .008-.850 .008-.700 .010-1.000 .010-.850 .010-.850 .010-.850 .010-.850 .010-1.000 .010-1.000 .012-1.000
.006-.700 .008-.700 .008-.850 .010-.700 .010-.700 .010-.700 .010-.700 .010-.850 .010-.850 .012-.850
XXX98-2 XXX9-1 XXX1-1
XXX96-2 XXX98-
Rebound Rebound Rebound Rebound Rebound
.006-.700 .004-1.28 .006-1.28 .004-1.28 .015-.700
.006-1.000 .006-1.000 .006-1.000 .006-1.000 .015-.850
.015-1.16
.015-1.28
.006-1.28 .006-.700 .015-1.000
.020-1.28
(.010-1.16 .020PR)
Piston Piston Piston Piston Piston
Inverted Piston
LHF-.062 LHF-.031 LHF-.031 LHF-.031 L-.024
Compression Compression Compression Compression Compression
.006-1.28 .020-1.28 .020-1.28 .008-1.28 .004-1.28
.015-1.28 .015-1.16 .015-1.16 .015-1.28 .006-1.000
.010-1.16 .012-1.000 .012-1.000 .012-1.16
.010-700 .012-.700
.010-1.00 .012-.850 .012-.850 .012-1.000
.010-.850 .012-.700 .012-.700 .012-.850
 Loading...