

Page 1
DBS-30.2
Page 2

2
N
.
.
.
.
acturer’s
uctions.
f
y
y
y
y
p
0.
hed
y
pp
.
f
.
pp
pp
y
.
f
d wh
l
ll
e
f
:
,
h
,
y by
y
j
y
y
pp
,
d
f
6.
y
h
ltag
ectric shock.
f
hall b
j
t.
atteries
f
.
,
q
.
g
s
WARNING
:
OCK, DO NO
O
.
(
O Q
O
.
G
S
T
Th
.
cabinet.
T
TO REDUCE THE RISK OF FIRE OR ELECTRIC
SH
T
RAIN OR MOISTURE
T EXPOSE THIS APPARATUS
AUTION:
TO REDUCE THE RISK OF ELECTRIC SHOCK,
DO NOT REMOVE COVER
USER-SERVICEABLE PARTS INSIDE. REFER
SERVICING T
PERS
NNEL
UALIFIED SERVICE
OR BACK). NO
ARNIN
RISK OF ELECTRIC SHOCK
DO NOT OPEN
he lightning flash with arrowhead symbol, within an equilateral
riangle, is intended to alert the user to the presence of uninsulated
angerous voltage” within the product’s enclosure that may be
sufficient magnitude to constitute a risk of electric shock to
e exclamation point within an equilateral triangle is intended to
lert the user to the presence of important operating and mainte-
ance (servicing) instructions in the literature accompanying the
ppliance
AVI
RISQUE DE CHOC ELECTRIQUE
NE PAS OUVRIR
The caution marking is located on the rear or bottom of
he
he symbol for CLASS ll (Double Insulation)
Important Safety Instruction
. Read these instructions
. Keep these instructions
Heed all warnings
. Follow all instructions.
. Do not use this apparatus near water.
Clean only with dry cloth.
Do not block any ventilation openings. Install in
7
rdance with the manuf
. Do not install near any heat sources such as radiators,
eat registers, stoves, or other apparatus (including
ampli
iers) that produce heat.
Do not defeat the safety purpose of the polarized or
grounding-t
with one wider than the other. A grounding t
as two blades and a third grounding prong. The wide
blade or the third prong are provided for
the provided plug does not fit into
an electrician for re
rotect the power cord from being walked on
1
or pinc
receptacles, and the point where the
a
aratus
.
nly use attachments / accessories specified by the
manu
Use only with the cart, stand, tripod, bracket, or table
12
pecified by the manufacturer, or sold
with the a
sed, use caution when moving the
cart / a
injur
13. Unplug this apparatus during lightning storms or
when unused
.
efer all servicing to qualified service personnel.
Servicing is require
amaged in any way, such as power-supply cord or
p
ug is damaged, liquid has been spilled or objects
ave fallen into the apparatus, the apparatus has
een exposed to rain or moisture, does not operate
norma
pe plug. A polarized plug has two blades
lacement of the obsolete outlet.
particularly at plugs, convenience
acturer.
aratus. When a cart is
aratus combination to avoid
from tip-over
or long periods of time.
en the apparatus has been
y, or has been dropped.
instr
pe plug
our safety. If
our outlet, consult
exit from the
. Damage Requiring Servic
Unplug the apparatus from the wall outlet and refer
servicing to quali
ollowing conditions
A. When the power-supply cord or plug is damaged
B. If liquid has been spilled, or objects have fallen into
t
e apparatus
C. If the apparatus has been exposed to rain or water,
D. If the apparatus does not operate normall
following the operating instructions. Adjust onl
those controls that are covered by the operating
instructions as an improper ad
controls ma
require extensive work b
restore the a
E. If the apparatus has been dropped or damaged in
any way, an
F. When the apparatus exhibits a distinct change in
per
ormance this indicates a need for service.
Object and Liquid Entr
1
Never push objects of any kind into the apparatus
t
rough openings as they may touch dangerous
vo
e points or short-out parts that could result in a
ire or el
The apparatus shall not be exposed to dripping or
splashing and no objects
vases s
Don’t put candles or other burning ob
his uni
17. B
Always consider the environmental issues and follow
local regulations when disposing o
18. If you install the apparatus in a built-in installation,
such as a bookcase or rack
ade
Leave 20 cm (8”) of free space at the top and sides
and 10 cm (4”) at the rear. The rear ed
or board above the apparatus shall be set 10 cm (4”)
away from the rear panel or wall, creating a flue-like
ap for warm air to escape.
e placed on the apparatus.
uate ventilation
ied service personnel under the
ustment of other
result in damage and will often
a qualified technician to
aratus to its normal operation
illed with liquids, such as
ects on top of
batteries
ensure that there is
e of the shelf
E
Page 3

N
l
.
use
use
use
.
3. Care
lly y
ll
use abrasive
. Power
G
T
y
h
P
dby
dby
s
Cautio
p
.
g
.
g
s
the case.
lling th
t
.
.
VC
0.
Obta
cture
-
.
sture Condensation
.
y:
.
sture condensation can occu
.
.
.
.
PRECAUTIONS
Do not place the unit on the furniture that is capable of being tilted by a child and an adult leaning, pulling, standing
r climbing on it. A falling unit can cause serious injury or even death.
1. Recording CopyrightUnless it’s for personal
se only, recording copyrighted material is illega
without the permission of the copyright holder.
2
AC F
serviceable. If you cannot turn on the unit, contact
the dealer from whom you purchased this unit
over with a soft cloth. For stubborn stains, use a
soft cloth dampened with a weak solution of mild
detergent and water. Dry the unit immediately
cloths, thinners, alcohol, or other chemical
solvents, because they may damage the finish or
remove the panel lettering.
4
WARN IN
BEFORE PLUGGING IN THE UNIT FOR THE FIRST
IME, READ THE FOLLOWING SECTION CAREFULLY.
AC outlet voltages var
Make sure that the voltage in your area meets the
voltage requirements printed on the unit’s rear
anel (AC 120 V, 60 Hz).
T
rom the AC power source. Make sure that the plug
s readily operable (easily accessible) at all times.
ressing
mode does not fully shutdown the unit. If you do
not intend to use the unit for an extended period,
remove the power cord from the AC outlet.
. Preventing Hearing Los
Excessive sound
eadphones can cause hearing loss
6. Batteries and Heat Exposure
Warnin
Batteries (battery pack or batteries installed) shall
not be exposed to excessive heat as sunshine, fire
or the like
7. Never To u ch this Unit with Wet Hands
Never handle this unit or its power cord while your
ands are wet or damp. If water or any other liquid
gets inside this unit, have it checked by the dealer
rom whom you purchased this unit.
8. Handlin
If you need to transport this unit, use the original
Do not leave rubber or plastic items on this unit
—The AC f
Occasiona
rwards with a clean cloth. Don’t
e power cord plug is used to disconnect this unit
I /
On / Stan
n
Note
packaging to pack it how it was when you
riginally bought it.
or a long time, because they may leave marks
n
inside the unit is not
ou should dust the unit a
from country to country.
] to select Stan
ressure from earphones and
r-
This unit’s top and rear panels may get warm
ter prolonged use. This is normal.
If you do not use this unit for a long time, it may
ot work properly the next time you turn it on,
o be sure to use it occasionally.
W h e n you’ve finished using this unit, remove all
discs and turn off the power.
9. Insta
I n s t all this unit in a well-ventilated location.
E n s u r e that there’s adequate ventilation all
round this unit, especially if it’s installed in an
udio rack. If the ventilation is inadequate, the
nit may overheat, leading to malfunction.
Do not expose this unit to direct sunlight or heat
ources, because its internal temperature may
ise, shortening the life of the optical pickup.
A v o id damp and dusty places, and places subject
o vibrations from loudspeakers.
Never put the unit on top of, or directly above a
oud-speaker
Install this unit horizontally. Never use it on its
ide or on a sloping surface, because it may
If you install this unit near a TV, radio, or VCR, the
icture and sound quality may be affected. If this
ccurs, move this unit away from the TV, radio, or
R.
1
To
tech, precision device. If the lens on the optical
pickup, or the disc drive mechanism becomes dirty
or worn, the picture quality may be affected. To
maintain the best picture quality, we recommend
regular inspection and maintenance (cleaning or
worn part replacement). Contact the dealer from
whom you purchased this unit
11. Moi
Moisture condensation may damage this unit
Read the following carefull
Moisture may condense on the lens of the optical
pickup, one of the most important parts inside this
unit
Moi
ollowing situations:
The unit is moved from a cold place to a warm
lace
A heater is turned on, or cold air from an air
conditioner is hitting the unit
In the summer, when this unit is moved from an
air conditioned room to a hot and humid place
The unit is used in a humid place
is Uni
a malfunction
in a Clear Pi
—This unit is a high
r in the
E
Page 4

N
PRECAUTIONS
t.
y
g
).
Th
y
.
T
:
VIS
.
T
.
T
.
.
.
U.S. Models
r
:
y
OTE:
y
stallation.
:
.
.
eceive
ected.
p.
odels
S
003.
n
003 DU C
.
o not use this unit when there’s the possibility
f moisture condensation occurring. Doing so
ay damage your discs and certain parts inside
is uni
f condensation does occur, remove all discs and
leave this unit turned on for two to three hours. By
is time, the unit will have warmed up and an
condensation will have evaporated.
12. Re
13. About this Manual—This manual explains how
classified as a “CLASS 1 LASER PRODUCT”. So, to use this
model properly, read this Instruction Manual carefully.
ion Codes—The BD / DVD standard uses
region codes to control how discs can be played
around the world, the world being divided into
hree regions (BD) or six regions (DVD). This unit
ill only play BD / DVD discs that match its region
code, which can be found on its rear panel (
o use all of this unit’s functions. Although the
BD / DVD standard offers many special features,
not all discs use them all, so depending on the disc
eing played, this unit may not respond to certain
unctions. See the disc’s sleeve notes for supported
eatures.
is unit contains a semiconductor laser system and is
n case of any trouble, please contact the store where
ou purchased the unit
o prevent being exposed to the laser beam, do not try
o open the enclosure.
AUTION
IBLE AND INVISIBLE LASER RADIATION WHEN OPEN
ND INTERLOCK FAILED OR DEFEATED. DO NOT STARE
NTO BEAM
HIS PRODUCT UTILIZES A LASER. USE OF CONTROLS
R ADJUSTMENTS OR PERFORMANCE OF PROCEDURES
THER THAN THOSE SPECIFIED HEREIN MAY RESULT IN
AZARDOUS RADIATION EXPOSURE
For
FCC Information for Use
AUTION
The user changes or modifications not expressly
approved b
could void the user’s authority to operate the
equipment.
N
This equipment has been tested and found to compl
with the limits for a Class B digital device, pursuant
to Part 15 of the FCC Rules. These limits are designed
to provide reasonable protection against harmful
interference in a residential in
This equipment generates, uses and can radiate radio
frequency energy and, if not installed and used in
accordance with the instructions, may cause harmful
interference to radio communications. However, there
is no guarantee that interference will not occur in a
articular installation. If this equipment does cause
harmful interference to radio or television reception,
which can be determined by turning the equipment
off and on, the user is encouraged to try to correct the
interference by one or more of the following measures
Reorient or relocate the receiving antenna
Increase the separation between the equipment and
receiver
Connect the equipment into an outlet on a
ircuit different from that to which the r
nn
Consult the dealer or an experienced radio / TV
technician for hel
the party responsible for compliance
r is
For Canadian M
NOTE:THIS CLASS B DIGITAL APPARATUS COMPLIE
WITH CANADIAN ICES-
on the rear panel
1. This unit is a CLASS 1 LASER
2. To prevent the laser from being exposed, do not
he label on the right is applied
PRODUCT and employs a laser inside
the cabinet
emove the cover. Refer servicing to qualified
ersonnel
Modèle pour les Canadie
REMARQUE: CET APPAREIL NUMÉRIQUE DE LA CLASSE
B EST CONFORME À LA NORME NMB-
ANADA
E
Page 5

N
k
g
t
ese discs
storted.
d
ote Contro
b
d
uctio
ual
t
y
d
.
e
g
g
g
f
dby
l
f
y
g
g
f
.
y
y
.
PRECAUTIONS
Supplied Accessories
Rem
AA (1.5 V)
Instr
attery x 2
n Man
Instruction Manual
l with
CA audio / video cables
C cor
flix Box-inser
Netflix
Box-insert
ote about Recycling
• This unit’s packaging materials are recyclable and
can be reused. Please dispose of an
accor
ance with your local recycling regulations
atteries should never be thrown away or
ncinerated but disposed of in accordance with your
ocal regulations concerning chemical wastes.
materials in
Maintenanc
Servicin
lease refer to relevant topics on “TROUBLESHOOTING” on
pa
e 57 before returning the product.
this unit becomes inoperative, do not try to correct the
problem by yoursel
nside. Turn the unit to the stan
power p
ug, and please contact the dealer
. There are no user-serviceable parts
mode, unplug the
rom whom
ou purchased this unit
Disc handlin
For best results, keep your discs clean. Fingerprints and dust
an affect the sound and picture quality and should be
removed as
enter outwards, as shown. Never wipe in a circular direction.
ollows. Using a clean, soft cloth, wipe from the
R signal chec
the remote control is not working properly, you can use
digital camera (including a cellular phone with built-in
amera) to see if it is sending out an infrared signal.
ith a digital camera
including built-in cell phone
ameras):
oint a digital camera towards the
emote control. Push any button on
he remote control and look through
he digital camera. If the infrared light
ppears through the camera, the
emote control is working.
Copyrigh
t is forbidden by law to copy, broadcast, show,
roadcast on cable, play in public, or rent copyrighted
aterial without permission. Commercial BD-video/
VD-video discs are copy-protected, and any recordings
from th
ncorporates copy protection technology that is
rotected by U.S. patents and other intellectual
roperty rights of Rovi Corporation. Reverse engineering
nd disassembly are prohibited.
will be di
This item
Note about AC Cor
se only the supplied AC cord.
o not use the supplied AC cord to other units.
To remove stubborn dust or dirt, wipe the disc with a
amp, soft cloth, and then dry it with a dry cloth
•
ever use solvent-based cleaning fluids, such as thinner
or benzine, commerciall
spra
s intended for vinyl records, because they may
amage the disc
E
available cleaners, or antistatic
Page 6

N
PRECAUTIONS
.
adema
ssociation.
.
s.
ted
.
d
.
d
f
f
h
d
other countries.
lby
lby
380
392,19
333,929
.Colo
.Colo
Java and a
ademarks of Su
es.
rademark Information
HDMI, the HDMI Logo, an
High-Definition Multimedia
Inter
registered trademarks o
Licensing LLC in t
ace are trademarks or
HDMI
e Unite
and
anufactured under license
rom Dolby Laboratories.
o
and the double-D
mbol are trademarks of
o
Laboratories.
anufactured under license
nder U.S. Patent #’s:
,451,942; 5,956,674; 5,974,
,978,762; 6,226,616; 6,487,535;
,
5; 7,272,567; 7,
,212,872 & other U.S. and
orldwide patents issued &
ending. DTS and the Symbol
re registered trademarks, &
TS-HD, DTS-HD Master Audio
Essential and the DTS logos
re trademarks of DTS, Inc.
roduct includes software.
DTS, Inc. All Rights Reserved.
x.v
r” and “x.v
ogo are trademarks of Sony
orporation.
ll other Java
rademarks and logos are
rademarks or registered
r
icrosystems, Inc. in the
nited States and/or other
ntri
r”
n
;
;
“Blu-ray Disc“ an
“AVCHD” and the “AVCHD”
logo are trademarks of
Panasonic Corporation and
Sony Corporation
“BONUSVIEW” is tr
of Blu-ray Disc Association.
"BD-Live" and "BD-Live" logo
are trademarks of Blu-ray
Disc A
DLNA®, the DLNA Logo and
DLNA CERTIFIED® are
trademarks, service marks, or
certification marks of the
Digital Living Network
Alliance.
Netflix and the Netflix logo are
trademarks or registered
trademarks of Netflix, Inc
© 2010 Sonic Solution
Roxio, CinemaNow, Roxio
inemaNow and the Roxio
CinemaNow logos are
trademarks or registered
trademarks owned by Sonic
lutions in the Uni
States and other jurisdictions.
BLOCKBUSTER name, design
and related marks are
trademarks of Blockbuster Inc
are trademarks.
is a trademark of DVD Format / Logo Licensing
rk
orporation
indows Media and the
indows logo are trademarks
r registered trademarks of
icrosoft Corporation in the
nited States and/or other
ountries.
E
Page 7

N
CONTENTS
eatures
.
.
.
ote Control
.
.
.
ection to the TV
.
.
ectio
. . . . . . . . . . . . . . . . . . .
. . . . . . . . . . . . . . . . . . . . . . . . . . . . . . .
d
y
/
.
f
.
. . . . . . . . . . . . . . . . . . . . . . . . . . . . .
.
.
.
(
layback
. . . . . . . . . . . . . . . . . . . . . . . . . . . . . . . . .
d Playback
.
y
.
.
.
g
h
OW /
lockb
/ Blockb
.
.
.
p
.
ectio
p
.
.
O
C
.
Introduction
PRECAUTIONS . . . . . . . . . . . . . . . . . . . . . . . . . . . . . . . . . . .
FEATURES . . . . . . . . . . . . . . . . . . . . . . . . . . . . . . . . . . . . . . .
F
Symbols Used in this Manual . . . . . . . . . . . . . . . . . . . . . . .
FUNCTIONAL OVERVIEW . . . . . . . . . . . . . . . . . . . . . . .
Front Panel . . . . . . . . . . . . . . . . . . . . . . . . . . . . . . . . . . . . . . .
Rear Panel . . . . . . . . . . . . . . . . . . . . . . . . . . . . . . . . . . . . . . . .
Rem
Front Panel Display
. . . . . . . . . . . . . . . . . . . . . . . . . . . . . . . . . . . . . . . . . . .
. . . . . . . . . . . . . . . . . . . . . . . . . . . . . . . . .
pening Screen
. . . . . . . . . . . . . . . . . . . . . . . . . . . . . . . . .
. . . . . . . . . . . . . . . . . . . . . . . . . . . . . .
Connections
NNECTIONS
nn
onnection to an Audio System . . . . . . . . . . . . . . . . . . .
onnecting the AC Cord . . . . . . . . . . . . . . . . . . . . . . . . .
Network Conn
ontrolling AV Components that are Out of Range
. . . . . . . . . . . . . . . . . . . . . . . . . . . . . . . . .
. . . . . . . . . . . . . . . . . . . . . . . . . . . .
n with LAN . . . . . . . . . . . . . . . . . . . .
Playback
Playing Back a BD, DVD or a Disc with AVCHD Files .4
perations Using Title Menu, Disc Menu,
Pop-up Menu . . . . . . . . . . . . . . . . . . . . . . . . . . . . . . .5
an
ing Back an Audio CD or a Disc with
Pla
WMA / JPEG Files . . . . . . . . . . . . . . . . . . . . . . . . . .
MP3
Reading the SD Memory Card . . . . . . . . . . . . . . . . . . . . .
Playing Video / Music / Photo Files from
DLNA Certi
ied Home Media Servers . . . . . . . . . . . .
NETFLIX OPERATIONS
Before Activatin
Activating the Connection to Netflix
Watc
ing Streaming Movies
CINEMAN
Before Activating the Connection to
CinemaNow / B
Activating the Connection to
CinemaNow
Guide to CinemaNow / Blockbuster Menu Screen
Renting or Purchasing Movies / TV Episodes
Searching Movies / TV Episodes
Watching Rented or Purchased
Movies / TV E
4
Function Setup
FUNCTION SETUP . . . . . . . . . . . . . . . . . . . . . . . . . . . . . . .
Using the Setup Menu
Network Conn
Software U
BLOCKBUSTER OPERATIONS
date
. . . . . . . . . . . . . . . . . . . . . . . . . .
the Connection to Netflix
. . . . . . . . . . . . . . . . . . . . . .7
uster . . . . . . . . . . . . . . . . . . . . . . . .
uster . . . . . . . . . . . . . . . . . . . . . . . .
. . . . . . . . . . . . . . . . . .
isodes . . . . . . . . . . . . . . . . . . . . . . . . . . . . .9
. . . . . . . . . . . . . . . . . . . . . . . . . . .
n . . . . . . . . . . . . . . . . . . . . . . . . . . . . . .
. . . . . . . . . . . . . . . . . . . . . . . . . . . . . . . .
. . . . . . .7
. . . . . . . . . . . . . .7
. . . . . .
.
. . . . . .
7
8
2
Others
TROUBLESHOOTING . . . . . . . . . . . . . . . . . . . . . . . . . . .
GLOSSARY . . . . . . . . . . . . . . . . . . . . . . . . . . . . . . . . . . . . .
LANGUAGE C
IFICATIONS . . . . . . . . . . . . . . . . . . . . . . . . . . . . . . .
SPE
NETWORK SERVICE DISCLAIMER . . . . . . . . . . . . . . . . .
DE. . . . . . . . . . . . . . . . . . . . . . . . . . . . . . .
9
1
Fast Forward / Fast Reverse . . . . . . . . . . . . . . . . . . . . . . . .
Slow Forward Playback . . . . . . . . . . . . . . . . . . . . . . . . . .
Step by Step Playback . . . . . . . . . . . . . . . . . . . . . . . . . . .
. . . . . . . . . . . . . . . . . . . . . . . . . . . . . . . . .
-B Repeat
PIP
Program P
Rapi
amera Angle
Enjo
EARCH . . . . . . . . . . . . . . . . . . . . . . . . . . . . . . . . . . . . . . . .
PECIAL SETTINGS . . . . . . . . . . . . . . . . . . . . . . . . . . . . . .
Switching Subtitles
Setting the BD Audio Mode . . . . . . . . . . . . . . . . . . . . . . .
djusting the Picture
E
. . . . . . . . . . . . . . . . . . . . . . . . . . . . . . . . . . . . . . .1
Picture in Picture) (BONUSVIEW) Setting
. . . . . . . . . . . . . . . . . . . . . . . . . . . . . . . .1
. . . . . . . . . . . . . . . . . . . . . . . . . . . . . . . . . .
. . . . . . . . . . . . . . . . . . . . . . . . . . . . . . . . . . . .3
ing BD-Live Discs with Internet
. . . . . . . . . . . . . . . . . . . . . . . . . . . . . .
. . . . . .1
. . . . . . . . . . . . .
. . . . . . . . . . . . . . . . . . . . . .
. . . . . . . . . . . . . . . . . . . . . . . . . . . .
2
4
6
Page 8

N
FEATURES
s
p
f
our current
better than before
j
y, y
f
sound
y
g
y
y
l)
y
dard
f
ces.
)
]
i
(
used
ected to the
ternet
addition to the BONUS
ous
p-up
g
ll
h
y
y
y
3
ly
T
f f
d b
)
deo Resolutio
g
y
y
y
T
n
x.v.Colo
T
h th
f
g
.
rs
T
h th
y f
f
g
.
y
lockbuste
.
g
buster :
g
eature
ull high-definition video playback
atch movies in the highest picture quality available for
your HDTV. This unit offers full high-definition video
playback up to 1080p resolution for an amazing viewing
xperience. A highly detailed picture and increased
ness delivers a more true-to-life picture.
shar
DVD upscaling
Y
hanks to video upconversion. Upconversion will increase
he resolution of standard definition DVD to high
efinition up to 1080p over an HDMI connection. The
picture will be less
igh-definition experience.
njoy your content on different kinds of media
Full backwards compatibility with DVD, CD and SD card
nsures that you can continue to enjoy your current audiovideo collection. Additionall
pictures or listen to MP3 or Windows Media™ Audio music
isten to the rich multi-channel surround
ulti-channel surround sound, which recognizes real-to-
ife sound and makes you feel like you are really there.
asy and simple connection to your HDTV via HDMI
Connect this unit to
High-Definition Multimedia Interface) cable. It is
recommended to use a Hi
ompatibility. The high definition video output signal will
be transferred to
nalog signals, so you will get excellent picture and
sound qualit
Thanks to other multiple outputs, you can also easily
onnect to your home theater system or amplifier.
DMI CEC (Consumer Electronics Contro
This unit supports HDMI CEC, which allows integrated
stem control over HDMI and is part of the HDMI
s
stan
interoperability with other brands o
PIP (BONUSVIEW
Some BD-videos have the PIP function which enables you
BD-L
BD-Live
In
Po
Some BD-videos have a pop-up menu which is a
navi
Contents in t
. The company does not guarantee 100%
vi
o display the secondary video in the primary video. You
an call up the secondary video by pressing
enever the scene contains the secondary video.
ve
BD-ROM version 2 Profile 2.0) that allows interactive
nctions to be
in
unctions differ depending on the disc.
menu
ation menu that can be called up and be operated on
e TV screen without interrupting playback. You can ca
p the pop-up menu by pressing
or enhanced picture quality
DVD will look even
agged and more realistic for a near
ou can view JPEG digital
our HDTV with one single HDMI
h Speed HDMI cable for better
our HDTV without conversion to
, completely free from noise.
HDMI CEC compliant
when this unit is conn
VIEW function. The vari
Pop Up Menu / Menu]
e pop-up menu vary depending on the disc.
PIP
iles.
HDMI Deep Color
Deep Color reduces posterization effect of the pla
mage. Refer to “HDMI Deep Color” in “FUNCTION SETUP”
on page 4
HDMI 1080p24 output (BD on
his unit is equipped with the feature which can provide
smooth movement during playback o
aterial with the frame rate of 24 frames per second with
rogressive. (Available only when the display device is
connecte
Refer to “HDMI Vi
on pa
laying back the contents from an SD Memory Card
You can play back AVCHD / MP3 / WMA / JPEG stored in an SD
Memor
discs sometimes store picture-in-picture commentar
subtitles or other extras in the SD Memor
ayback with the BD-video.
laying back AVCHD files
his unit supports playback of AVCHD format files (new
ormat for high definition video camcorders) recorded o
disc / SD card. Your high definition personal archive is
layable in HD quality.
his unit supports playback of video contents on discs
ecorded with “x.v.Color” technology. To watch this video
content wit
evice supporting both video image reproduction using
“x.v.Color” standard and capability o
color space settin
anual of your display device for further information
Enjoy contents stored on DLNA certified home media
erve
his unit is a DLNA certified media player that can play video,
usic and photo files stored on DLNA certified home media
servers connected to your home network.
Wit
streamed instantl
to use this
on your PC and become a Netflix member
(This feature is available only in the United States.)
CinemaNow / Blockbuster
ith this unit, you can enjoy movies and TV episodes
streamed instantl
nternet. In order to use this feature, you must visit
ollowing website on your PC and become a CinemaNow /
B
- CinemaNow :
- Block
.
)
ilm originated
y an HDMI cable.
e 43.
Card. BD-ROM Profile 2.0 (BD-Live) and Profile 1.1
r
e “x.v.Color” space, a TV or other display
is required. Please refer to the owner’s
flix
is unit, you can enjoy movies and TV episodes
rom Netflix via the Internet. In order
eature, you must visit
from CinemaNow / Blockbuster via the
r member
ww.cinemanow.com/Login
ww.blockbuster.com/auth/login
n” in “FUNCTION SETUP”
Card for use during
manual switching of its
etflix.com/Integra
back
,
Rapid playback
Playback in slightly faster speed while keeping the sound
utput.
Rapid pla
Dolb
back is available only on discs recorded in the
Digital format.
E
Page 9
N
l
(
f
t
s
f
s
ome serve
f
FEATURES
Symbols Used in this Manua
To specify for which media type each function is, we put
the following symbols at the beginning of each item to
erate.
Symbol Description
BD-V
DVD-V
Description refers to BD-video and
ver. 2.1) / BD-R (ver. 1.1 / 1.2 / 1.3)
BD-RE
recorded in BDMV
Description refers to DVD-video
ormat
CD
AVCHD
MP3
you do not find any of the symbols listed above under the
I
unction heading, the operation is applicable to all media.
Description refers to audio CD / DTS-CD
Description refers to DVD-RW/-R and SD card
h AVCHD files
wi
Description refers to BD-RE/-R, DVD-RW/-R,
D-RW/-R and SD card with MP3 file
Description refers to BD-RE/-R, DVD-RW/-R,
D-RW/-R and SD card with Windows
Media™ Audio
Description refers to BD-RE/-R, DVD-RW/-R,
D-RW/-R and SD card with JPEG file
Description refers to video files in the DLNA
ome server
Description refers to music files in the DLNA
h
Description refers to photo files in the DLNA
me server
iles
r
E
Page 10

0
N
FUNCTIONAL OVERVIEW
db
l
db
r
ff
y
i
y.
y
.
on
.
slo
t.
k
b
n
on
y
on
.
/
. AC
ect the AC outlet
d.
.
h
jack
th a
deo cable.
k
y
y
stalled
cabinet.
k
lly
l
)
l
s
audio cable.
k
cable.
al
does not have the
odulator.
l
l
Front Pane
4216*75 8 9 10* 113
The unit can also be turned on by pressing these buttons.
.
/
n / Standby button
ress to turn on the unit, or to turn the unit into the
y mode. (To completely shut down the unit,
stan
you must unp
2. Stan
This indicator lights up in red when the unit is in
standby mode and turns o
Infrared sensor window
eceive signals from your remote control so that
•
ou can control the unit from a distance.
sc tray
4. D
lace a disc when opening the disc tra
5. Displa
efer to “Front Panel Display” on page 13
ug the AC power cord)
y indicato
when the unit is active.
. Open / Close A butt
Press to open or close the disc tray.
SD Card
7
Insert an SD Memory Card, and play back the
ntents in i
8. Pause
Press to pause playback.
. Stop C butt
Press to stop playback.
10. Pla
11
B butt
Press to start or resume playback.
H
Press to skip to the previous or next title / chapter /
track
t
utto
G (skip down / up) buttons
file.
Rear Pane
1
INLET terminal
1
2. AUDIO OUTPUT (DIGITAL OPTICAL / COAXIAL) jacks
4. VIDEO OUTPUT (VIDEO)
5. IR IN jac
to conn
•
Use to connect an AV receiver / amplifier, Dolby
igital / DTS decoder or other device with a digital
audio optical / coaxial input jack with a digital audio
optical / coaxial cable
. VIDEO OUTPUT (COMPONENT) jacks
Use to connect a TV with component video inputs
an RCA component video cable.
wit
• Use to connect a TV, an AV receiver or other device
n RCA vi
wi
• A commercially available IR receiver can be
connected to the IR IN jack, allowing
the BD pla
n
. IR OUT jac
A commercia
connected to the IR OUT jack to pass IR (infrared)
remote contro
er when it’s out of sight, for example,
in a
available IR emitter can be
signals along to other components.
with the AC cor
1
2
9
10
ou to control
34
5
67
. CONTROL CONNECTOR (RS-232
This bidirectional RS-232 port can be connected to
an externa
. AUDIO OUTPUT (ANALOG L / R) jack
• Use to connect a TV, an AV receiver / amplifier or
her device with an RCA
. HDMI OUT jac
• Use to connect a TV, an AV receiver / amplifier or
other device with an HDMI compatible port with an
HDMI
ETHERNET termin
Use to connect a network equipment with LAN cable.
8
controller.
ote
• Do not touch the inner pins of the jacks on the rear
panel. Electrostatic discharge may cause permanent
damage to the unit.
• This unit
RF m
E
Page 11
N
.
y
dby
/
,
h
dby
y
s
.
.
n
ess to select items on some
us.
y
g
.
/
L
/
/
B
s
on
B
button*
on
g
.
f
f
.
n
dly
f
A
butto
y
f
.
ess to clear the
g
0.
d
dly.
b
3.
.
d
n
.
S
n
p
on
p
8. Mode butto
y
j
y
pp
g
y
y
ging
g
Remote Contr
ol
1
2
3
4
5
6
7
8
9
10
11*
12
13
The unit can also be turned on by pressing these buttons
. Display button
• Press to displa
On / Stan
• Press to turn on the unit
e stan
t
ou must unplug the AC power cord)
unit,
Number button
Press to enter the title, chapter, track or file number
Press to enter values in the input field
Search button
Press to display the search menu.
. A / B / C / D butto
•Pr
• When file list / thumbnail list is shown, press to
witch between pages.
. Top Menu button
• Press to displa
• Durin
K
7
• Press to select items or settings.
. Setup button
. Subtitle button
Rev E butt
• During playback, press to fast reverse the playback.
1. Play
E
DLNA home media server, Netflix /
inemaNow / Blockbuster feature screen is
displayed (except during playback), press to exit.
Press to display the setup menu.
Press to display the subtitle menu.
Press to start playback or resume playback.
FUNCTIONAL OVERVIEW
14
15*
16
17
18
19
20
21
22
23
24
25
27
28
the on-screen display menu.
tton
mode. (To completely shut down the
the top menu.
button
or to turn the unit into
BD men
26
2. Skip H butt
During playback, press once to return to the
inning of the current title, chapter, track or file
be
During playback, press twice to return to the
previous title, chapter, track or
During the JPEG playback, press to return to the
previous
3. Pause F butto
Press to pause playback.
When playback is in pause mode, press repeate
to
4. Resolution button
Press to set the HDMI output mode.
en / Close
Press to open or close the disc tray.
IP button
During BD playback, Press to display the setting for
picture-in-picture (onl
which supports the PIP
7. Angle button
Press to access various camera angles on the disc.
Press to rotate the JPEG files clockwise by 90 degrees
8. Repeat button
Press to toggle between various repeat modes.
9. Clear button
Pr
cancel the pro
A-B button
2
Press to play back a defined section between point
A an
21. Pop Up Menu / Menu button
Press to display the pop-up menu / disc menu.
22. Enter
Press to confirm or select menu items.
Return button
2
Press to return to the previously displayed menu
24. Audio button
Press to display the audio menu.
25. Fw
During playback, press to fast forward the playback
In pause mode, press to slow forward the playback.
top C butto
26.
Press to stop playback.
27. Ski
During playback, press to skip to the next title,
cha
2
During BD, DVD or AVCHD files playback, press to
displa
picture ad
During BD playback, press to display the setting for
the picture-in-picture (onl
which su
In stop mode with BD inserted, press to display a
menu for settin
In stop mode with audio CD, or a disc with MP3 /
WMA / JPEG files inserted, press to displa
for program and random pla
During the JPEG playback, press to display menus
for chan
ima
ile
orward the playback step by step.
n*
applicable to BD-video
information once entered or to
ramming for audio CD, etc.
B repeate
utton
reen
D butto
G butt
ter, track or file.
n
the setting for the rapid playback and the
ustment.
orts the PIP function).
the BD audio mode.
the visual effect for switching the
e or changing the size of the image.
ile.
unction).
applicable to BD-video
back.
menus
Page 12
N
FUNCTIONAL OVERVIEW
.
2
2
.
Clos
.
as
y
.
sassemble batteries.
l
that there are no obstacles between the
t.
ote control for different devices ca
T
s.
n
y
n
n
access the Blockbuste
een
Installing the Batteries in the Remote Control
nstall 2 AA (1.5 V) batteries matching the polarity
ndicated inside battery compartment of the remote
ontrol.
Open the cover
Insert batteries
ake sure to match + and - on the batteries to the
marks indicated in the battery compartment.
e the cover
Using a Remote Control
Keep in mind the following when using the remote
contro
:
sure
emote control and the infrared sensor window on the
ni
emote operation may become unreliable if strong
unlight or fluorescent light is shining on the infrared
ensor window of the unit.
m
ach other. Avoid using remote control for other device
ocated close to the unit.
eplace the batteries when you notice a fall off in the
perating range of the remote control.
he maximum operable ranges from the unit are as
llow
Remote control sensor
30˚
30˚
n interfere with
DBS-30.2
x. 16 ft. (5 m)
Appro
Incorrect use of batteries can result in hazards such
leakage and bursting. Please observe the following:
Do not mix new and old batteries together.
• Do not use different kinds of batteries together.
lthough they may look similar, different batteries
may have different voltages.
•
ake sure that the + and - ends of each batter
match the indications in the battery compartment.
Remove batteries from battery compartment that is
not going to be used for a month or more
•
hen disposing of used batteries, please comply with
overnmental regulations or environmental public
nstruction’s rules that apply in your country or area.
• Do not recharge, short-circuit, heat, burn or
i
pening Scree
n stop mode and
opening screen is displa
NETFLIX“: To access the Netflix scree
CinemaNow“: To access the CinemaNow menu scree
BLOCKBUSTER“:To
Home Network“: To access the list of DLNA home server
Mode Select“ is set to “Network“,
ed
Home Network
r menu scr
E
Page 13

3
N
FUNCTIONAL OVERVIEW
y
.
n
d
ause mode
ast forward mode
ode
e
.
b
i
h
.
lby
Front Panel Display
1 2
•
rightness of the display can be adjusted. Refer to “Panel Display” in “FUNCTION SETUP” on page 50.
1. Displa
. Displays various kinds of information such as title number, elapsed time, repeat mode, etc
s playback status icon. Refer to the table below.
Playback status ico
Disc
D Memory Car
Stop mode
P
F
low forward m
Appears while repeat function is set
e
xample of Display Messag
E
Appears when DLNA home media server is active
Title is being played back
Indicating the current title
num
er and the elapsed
t
me.
Current chapter is in
c
apter repeat mode
DTS audio is being played
oading a disc.
o
Digital audio is
eing played back.
1
Page 14
N
CONNECTIONS
TV
d
2
dard
CAaud
ON
O
ON
hod 3
ON
hod
e
V
)
hod 2
*
deo cable
d)
)
)
)
)
T
)
f
d
y.
TV
because of “HDMI Video Resolution” or “Component Output” setting,
nnection to the
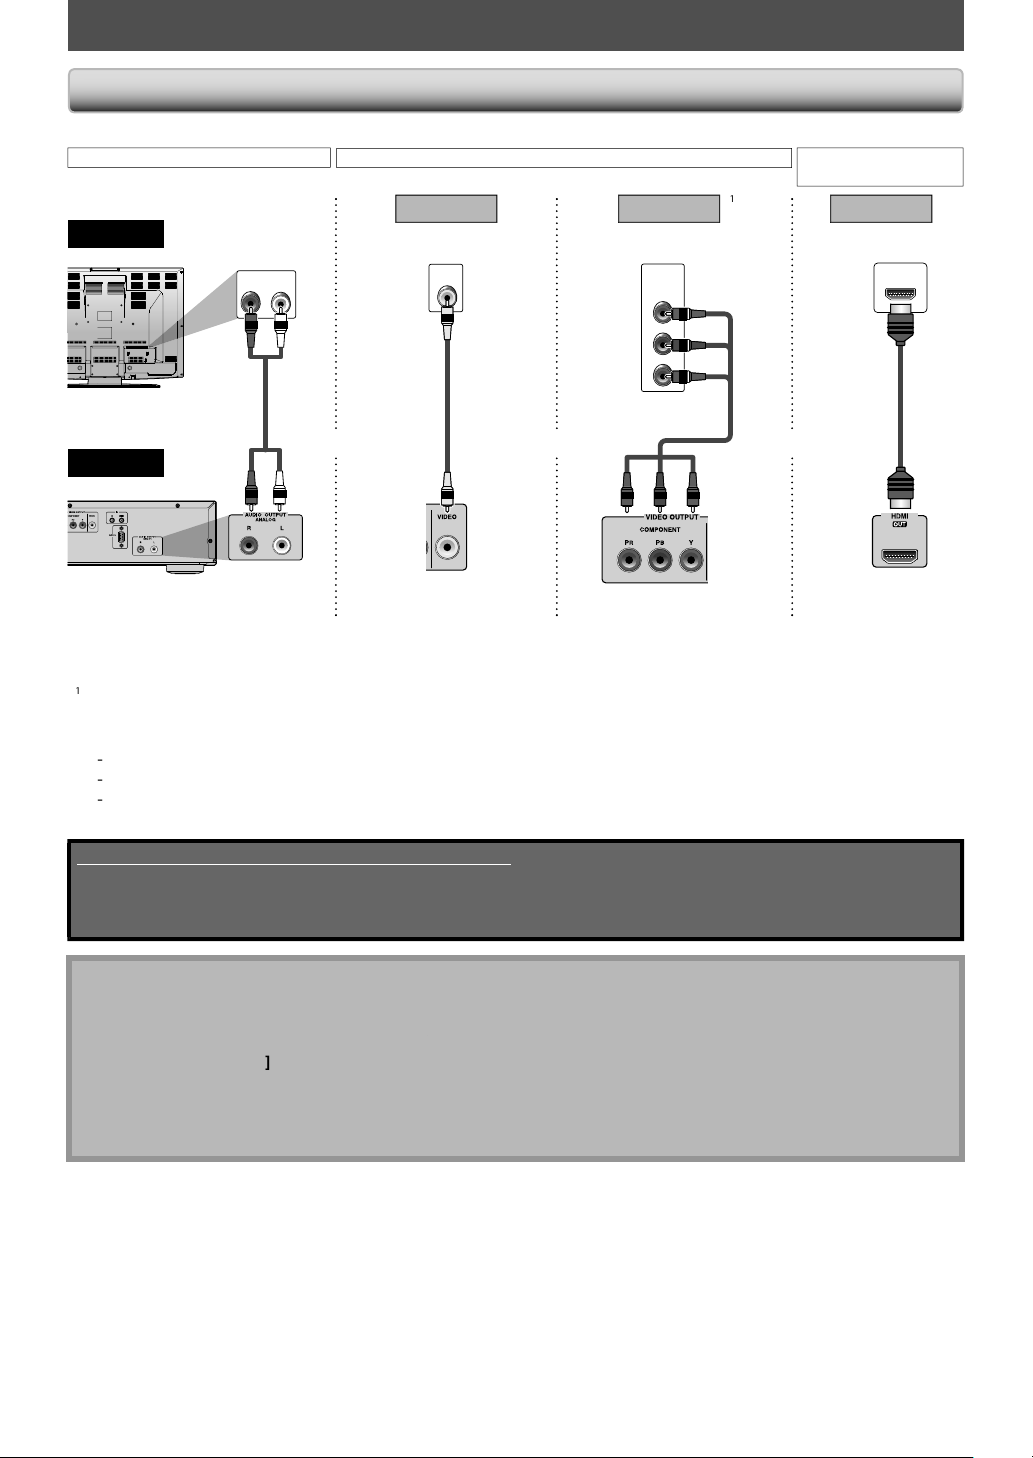
ake one of the following connections, depending on the capabilities of your existing device.
TV
this unit
DIO CONNECTI
stan
R
io cable
AUDIO IN
audio
LR
Met
tandard picture
n
VIDEO CONNECTI
1
VIDEO
IN
A
ideo
able
Met
etter pictur
COMPONENT
VIDEO IN
Y
Green
PB
Blue
PR
(Re
A component
i
r
Red)Blue)Green
AUDIO / VIDE
CONNECTI
et
*
est audio / picture
HDMI IN
MI
AUDIO OUTPU
ANALOG L / R
VIDEO OUTPUT
VIDEO
IDEO OUTPUT
COMPONENT
HDMI OUT
* This unit is compatible with the progressive scan system. The feature provides you with the higher quality pictures
than traditional output system does. To utilize this
to “HDMI Vi
*
Analog audio connection is not required for this connection.
eo Resolution” or “Component Output” setting on page 43 to set the video resolution.
eature, a component or an HDMI connection is required. Refer
igh Speed HDMI cable (also known as HDMI category 2 cable) is recommended for better compatibilit
se an HDMI cable with the HDMI logo (a certified HDMI cable) for this connection.
Supplied cables used in this connection are as follows:
• RCA audio cable (L / R) x 1
• RCA video cable x 1
Please purchase the rest of the necessary cables at your local store.
Connect this unit directly to the TV. If the RCA audio / video cables are connected to a VCR, pictures may be
istorted due to the copy-protection system.
If the picture is not output properly to the
ress and hold [Play Bon the front panel for more than 5 seconds. “HDMI Video Resolution” and “Component
Output” setting will be reset to the default automatically. You cannot change the video resolution during Blu-ray
Disc playback. To change the resolution, stop playback.
A simple 1-cable connection with a device having an HDMI (High-Definition Multimedia Interface) jack allows
igital transfer of both digital video signals and multi-channel audio signals.
E
Page 15

5
N
ess
f
e
0
e
d
e
080
e
e
T
TV
f y
TV
(or AV receiver) for more information.
T
V
.
y
TV
is compatible with 1080p24 frame input.
the
g
g
.
g
)
T
p
T
)
.
ch
d d
l
.
CONNECTIONS
HDMI Output Mode and Actual Output Signals
Pr
Resolution] to change the resolution of the video signal being output from HDMI OUT jack. The video
resolution changes as
Front Panel
Display
HDMI Video
Resolution
Progressiv
Copyright protection system
o play back the digital video images of a BD / DVD via an HDMI connection, it is necessary that both the unit and the
(or an AV receiver) support a copyright protection system called HDCP (high-bandwidth digital content protection
ystem). HDCP is copy protection technology that comprises data encryption and authentication of the connected AV
device. This unit supports HDCP. Please read the operating instructions o
en using HDCP-incompatible TV the image will not be viewed properly.
he audio signals from HDMI OUT jack (including the sampling frequency, the number of channels and bit length)
aybe limited by the device that is connected.
Among the devices that support HDMI, some do not support audio output (e.g. projectors). In connections with
device such as this unit, audio signals are not output from HDMI OUT jack.
ideo and audio signals may be distorted temporarily when switching to / from the HDMI output mode
ou can change the HDMI output mode with [Resolution] during playback as well. (This is not available during
BD /AVCHD playback.)
ou can also change the HDMI output mode from “HDMI Video Resolution” setting in “Video” menu. In this menu,
ou can confirm what HDMI video resolutions are supported by connected TV Refer to page 43.
In order to get natural and high quality film reproduction of 24-frame film material, use an HDMI cable (High Speed
HDMI cable is recommended) and select “1080p24” if the connected
If the disc contains 1080p24 frame material, 60-frame or 50-frame image will be output unless “1080p24” is selected.
For AVCHD, 24-frame film material will be output as 60 frame, even if the connected device is compatible with
1080p24 frame input and “HDMI Video Resolution” is set to “1080p24”or “Auto”.
If the video is not properly from HDMI OUT jack after you set the “HDMI Video Resolution” setting, change the
HDMI video resolution to the compatible resolution by pressing
ront panel for more than 5 seconds to reset the setting.
”HDMI Deep Color” is available only when the display device is connected by HDMI cable and supports HDMI Deep Color.
For “Auto” in “HDMI Deep Color”, using the High Speed HDMI cable is recommended.
ollows every time
2
rogressiv
Resolution]is pressed.
nterlace
Progressiv
1
Progressiv
4 fram
our
Resolution]or press and hold [Play B on
HDMI Audio Settin
When using HDMI connections make “HDMI Audio Out” setting in “Audio” menu according to the specifications of the
device to be connected. Refer to pa
Device to be connected “HDMI Audio Out” setting Output HDMI audio signal
Device compatible with Dolby Digital,
Dolby Digital Plus, Dolby TrueHD, DTS or
DTS-HD decodin
Device com
channels of audio inputs (not Dolby
Digital, Dolby Digital Plus, Dolby
rueHD, DTS® or DTS-HD® compatible)
Device compatible with 2-channel audio
nput or device not compatible with
audio input
HDMI connection to a TV an
audio connection (optical / coaxial) to an
AV receiver
E
atible with 3 or more
igita
e 45
HDMI Multi (Normal
Dolby Digital, Dolby Digital Plus, Dolby
rueHD, DTS, or DTS-HD bitstream are
output from HDMI OUT jack. Make the
speaker settings on the connected AV
receiver, etc.
HDMI Multi (LPCM
ulti-channel audio signals are output
rom HDMI OUT jack. Make the speaker
settings with the speaker setting items
appear after you select “HDMI
ulti(LPCM)”. Refer to page 45
HDMI 2
Down-mixed 2-channel audio signals
are output from HDMI OUT jack.
Audio Mute HDMI audio will be mute, and Dolby
Digital / DTS bitstream or LPCM will be
output from AUDIO OUTPUT (DIGITAL
OPTICAL / COAXIAL) jacks depending on
“Digital Out” setting. Refer to page 46
1
Page 16
6
N
CONNECTIONS
ode
”
”
”
”
”
”
aio Source
.
o
l
l
CM
CM
CM
lby
l
lus
*
lby
D
lby
lby
*
4
4
S®TS
*
CMDTS
®
®
S®ul
6
6
CMul
M
M
M
M
o
l
l
M
M
S®DTS®ul
M
M
CM2ch
M
M
CM2ch
M
M
CDDTS®DTS®ul
M
M
lb
l
l
M
M
CMMul
M
M
P32ch
M
M
CM
CM
Video
l
l
CM
CM
CM
CM
CMMult
CM
CM
c
CM
CM
x2c
CM
CM
CAC
CM
buste
CAC
CM
decoded.
p
g
.
ected device.
p
.
Audio signals output from HDMI OUT jack
“HDMI Audio Out”
setting “HDMI Multi (Normal)” “HDMI Multi (LPCM)” “HDMI 2ch”
BD Audio M
i
Dolby Digita
Dolby Digital Plus
BD-vide
DVD-vide
Audio CD P
DTS-
AVCHD
LNA
LNA
i
Netfli
inemaNow
Block
Do
Dolby Digita
Do
Dolby Digita
MP3 / WMA / LPCM 2ch P
r
etting
TrueH
DT
-HD
LP
DT
LP
y Digita
LP
M
LP
AA
AA
”
“HD Audio
Output
Which audio format can be output depends on the compatibility of the connected device
olby DigitalDolby Digita
o
Digita
P
o
TrueHDDo
®DTS®Multi PCM
DTS-HD
ti PC
“Mix Audio
Output
Dolby DigitalMulti PCM
DigitalMulti PCM
DT
Multi PCM
olby Digita
PC
PC
olby Digita
ti PCM
PC
2ch P
olby Digita
2ch P
i PCM
h P
HD Audio
Output
lti P
ti PCM*
ulti PC
1,
ulti PC
ti PC
ch PC
ch PC
ti PC
ulti PC
ulti PC
ch PC
h P
lti P
h P
lti P
h P
h P
h P
h P
“Mix Audio
utput
Multi P
ulti PCM*
ulti PCM*
ulti PCM*
ulti PCM*
Multi PC
“HD Audio
Output
Downmix 2ch MDownmix 2ch
Downmix 2ch MDownmix 2ch
Downmix 2ch MDownmix 2ch
Downmix 2ch MDownmix 2ch
Downmix 2ch CMDownmix 2ch
,
Downmix 2ch CMDownmix 2ch
ownmix 2ch PC
ownmix 2ch PC
ownmix 2ch PC
ownmix 2ch PC
ownmix 2ch PC
wnmix 2ch P
wnmix 2ch P
Mix Audio
Output
P
M
M
P
CM
PC
2ch PCM
2ch PCM
2ch PCM
2ch PCM
2ch PCM
2ch PCM
2ch PCM
2ch PCM
2ch PCM
1
ll
nly the independent substream is decoded.
olby TrueHD stream is decoded.
nly the Dolby Digital substream is decoded.
nly the core substream is decoded.
hen audio source is multi-channel, decoded as 7.1ch. However, number of the output audio channel will depend
on the number of the connected s
eakers.
• If the connected device is not compatible with the HDMI BITSTREAM, audio will be output as multi LPCM or 2-channel
down-mixed LPCM depending on the capability of the connected device even if you select “HDMI Multi(Normal)” in
“HDMI Audio Out” settin
. Refer to page 45
If the connected device is not compatible with AAC, audio will be output as PCM depending on the capability of the
nn
• When playing back a BD-video which only contains the primary audio, the audio output will be the same case as the
“HD Audio Out
ut” even if the “BD Audio Mode” is set to “Mix Audio Output”.
The audio signals from HDMI OUT jack (including the sampling frequency, the number of channels and bit length)
maybe limited by the device that is connected.
Among the devices that support HDMI, some do not support audio output (e.g. projectors). In connections with
evice such as this unit, audio signals are not output from HDMI OUT jack.
Video and audio signals may be distorted temporarily when switching to / from the HDMI output mode
E
Page 17

N
CONNECTIONS
m
.
audio cable
(
)
)
r
l
l
k
.
.
.
Connection to an Audio Syste
hen you change the connections, all devices should be turned off
Refer to the manual accompanying external devices for more information.
-Channel Analog Audio Connection
stereo system
AUDIO IN
audio
analog audio input jacks
LR
this unit
Digital Audio Connection
audio
AUDIO OUTPUT
AV receiver / amplifie
igital audio
ptical input jack
igital audio
optica
A
DIGITAL AUDIO INPUT
OPTICAL
cable
ANALOG L / R
DIGITAL AUDIO INPUT
COAXIAL
or
oaxial cable
igital audio
coaxia
input jac
E
this unit
UDIO OUTPUT (DIGITAL OPTICAL / COAXIAL
Supplied cables used in this connection are as follows:
• RCA audio cable (L / R) x 1
Please purchase the rest of the necessary cables at your local store.
ote for Digital Audio Optical Cable
Digital audio optical cable may be damaged when bent at sharp angles. Endure cables are coiled in loops with a
diameter of 6 inches (15cm) or more when storing them
Use a cable which is 9.8 feet (3m) or shorter
Insert cable plugs firmly into the connectors when making connections.
If a plug has dust or is dirty, clean it with a soft cloth before inserting it into a connector
Page 18

8
CONNECTIONS
s
j
f
”
aio Source
.
deo
l
l
l
CM
y
s
l
l
CM
CM
D
l
l
M
M
4
S®TS®TS
o
CM
®
S®TS
CM
CM
CMDo
CM
CM
deo
l
l
M
S®DTS®
CM
CM2c
c
D
h
CDTS®DTS®
CM
D
lby
l
lby
l
CM
CM
CM
P3MP32ch PC
ch PC
AWMA
ch PC
y
l
CM
P2
M
M
usic
M
ch PC
x2ch
w
CAAC2ch
r
CAAC2ch
4
d d
ote
udio signals output from AUDIO OUTPUT (DIGITAL OPTICAL / COAXIAL) jack
or the settings in the “Digital Out” to take effect, “HDMI Audio Out” should be set to “Audio Mute”. Otherwise, the
ettings made in the “HDMI Audio Out” will have a priority, and the same signal as being output from the HDMI OUT
ack will be output from the AUDIO OUTPUT (DIGITAL OPTICAL / COAXIAL) jacks as well. (Except that Dolby Digital will
be output instead o
Dolby Digital Plus and Dolby TrueHD, and DTS signal will be output instead of DTS-HD.)
Medi
BD-vi
DVD-vi
Audio C
DTS-
AVCH
M
M
LNA
Video
LNA
M
Netfli
inemaNo
Blockbuste
“Digital Out” setting
“BD Audio Mode”
etting
Dolby Digita
Dolb
Digital Plu
olby TrueH
T
TS-HD
LP
Dolby Digita
T
LP
PCM2c
Do
Digita
LP
Digita
Dolb
M
LPC
P3 / WMA / LPC
AA
AA
“HD Audio Output”
Which audio format can be output depends on the compatibility of the connected device
Dolby Digita
Dolby Digita
Dolby Digita
wnmix 2ch P
“Bitstream” “LPCM”
Mix Audio Output”“HD Audio Output”
olby Digita
olby Digita
olby Digita
T
wnmix 2ch PCM
olby Digita
h PCM2
PCM 2ch PCM
o
Digita
wnmix 2ch PCM
M2
2ch PCM2
olby Digital
2ch PCM 2ch PCM
ownmix 2ch PCM
2ch PCM2
PCM 2ch PCM
Downmix 2ch P
wnmix 2ch P
ownmix 2ch PC
®D
®
wnmix 2ch P
wnmix 2ch P
Downmix 2ch P
Mix Audio Output
Downmix 2ch PCM
wnmix 2ch P
ownmix 2ch PC
Downmix 2ch PCM
wnmix 2ch P
Downmix 2ch PCM
ownmix 2ch PC
wnmix 2ch P
h PCM
wnmix 2ch P
wnmix 2ch P
wnmix 2ch P
M
M
wnmix 2ch P
ownmix 2ch PC
M
PCM
PCM
Full decoded.
Only the independent substream is decoded.
Dolby TrueHD stream is decoded.
Only the Dolby Digital substream is decoded.
Only the core substream is decoded.
When playing back a BD-video which only contains the primary audio, the audio output will be the same case as the
HD Audio Output” even if the “BD Audio Mode” is set to “Mix Audio Output”.
If the connected device is not compatible with AAC, audio will be output as PCM depending on the capability of the
connecte
evice.
N
In order to output LPCM signal from AUDIO OUTPUT (DIGITAL OPTICAL / COAXIAL) jacks while outputting the
HDMI audio signal, set “HDMI Audio Out” setting to “HDMI Multi(LPCM)”.
1
Page 19
9
CONNECTIONS
d
d
o
C
o
wi
th
N
,
.
.
”
.
.
38.
t
cable
quip
oadband router.
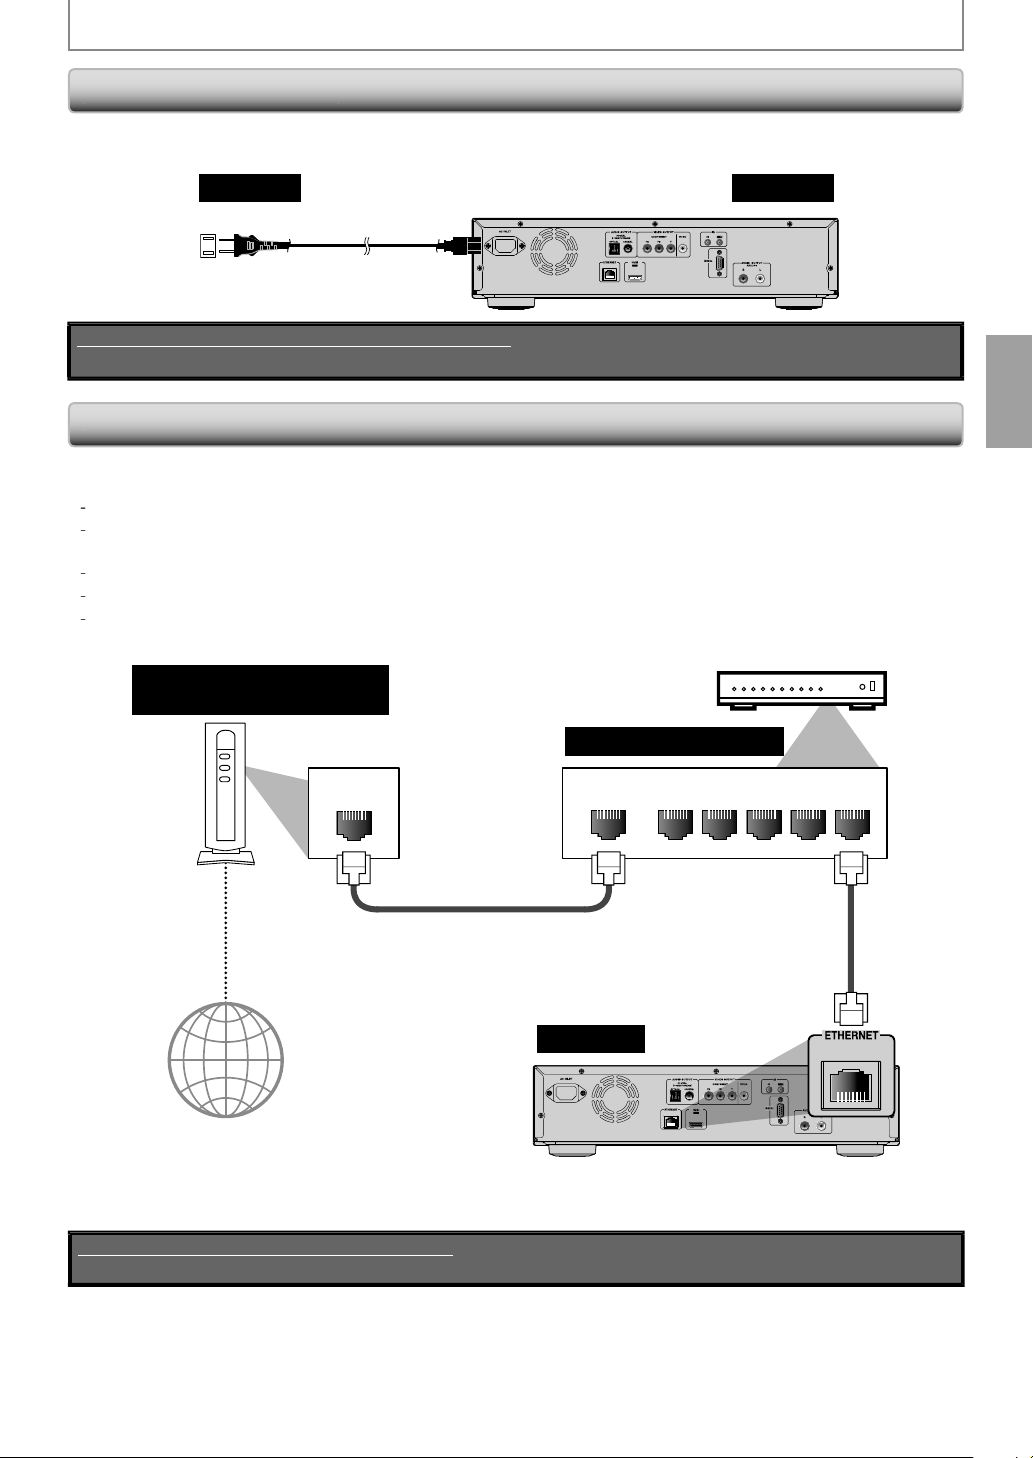
Connecting the AC Cor
After you made all necessary connections, connect the AC cord to the AC INLET. Then connect the AC cord to the AC outlet.
nsert the plugs securely. Incomplete connections will result in the generation of noise.
AC outlet
C 120V, 60 Hz
Supplied cables used in this connection are as follows:
• AC cord x 1
Netw
•By connecting this unit to the Internet, you can update the software via the Internet, play contents stored on DLNA home
media servers or access BD-Live
For more information about software update, refer to “Network Update” on page 55
For more information about DLNA, refer to “Playing Video / Music / Photo Files from DLNA Certified Home Media
Servers
For more information about BD-Live, refer to “Enjoying BD-Live Discs with Internet” on page 33
For more information about Netflix, refer to “NETFLIX OPERATIONS” on page 37.
For more information about CinemaNow and Blockbuster, refer to “CINEMANOW / BLOCKBUSTER OPERATIONS” on
age
nnect
on page 28
Telecommunications
equipment (modem, etc.)
n
AC cor
LA
Netflix, CinemaNow and Blockbuster services
Hub or broadband router
this unit
LAN
LAN
nterne
Make sure to connect the telecommunications e
r
No supplied cables are used in this connection:
Please purchase the necessary cables at your local store.
NALNAW
12345
LAN cable
this unit
ment (modem, etc.) to the ETHERNET terminal via hub or
1
Page 20
CONNECTIONS
ote
.
oadband router.
.
.
s
j
OUT
g
ock
t
t
t
fro
k
e
g
t
h
N
•
ter connecting to the Internet, set up necessary network settings.
o not insert any cable other than a LAN cable to the ETHERNET terminal to avoid damaging the unit
f your telecommunications equipment (modem, etc.) does not have broadband router functions, connect a
r
f your telecommunications equipment (modem, etc.) has broadband router functions but there is no vacant port, use a hub
or a broadband router, use a router which supports 10BASE-T / 100BASE-TX
o not connect your PC directly to the ETHERNET terminal of this unit.
•
or the network setup, refer to “Network Connection” on pages 52-55.
•
or more information about cables or connections, see the manual accompanying modem, broadband router and
ub you use.
ease purchase shielded LAN cables at your local store and use them when you connect to network equipment.
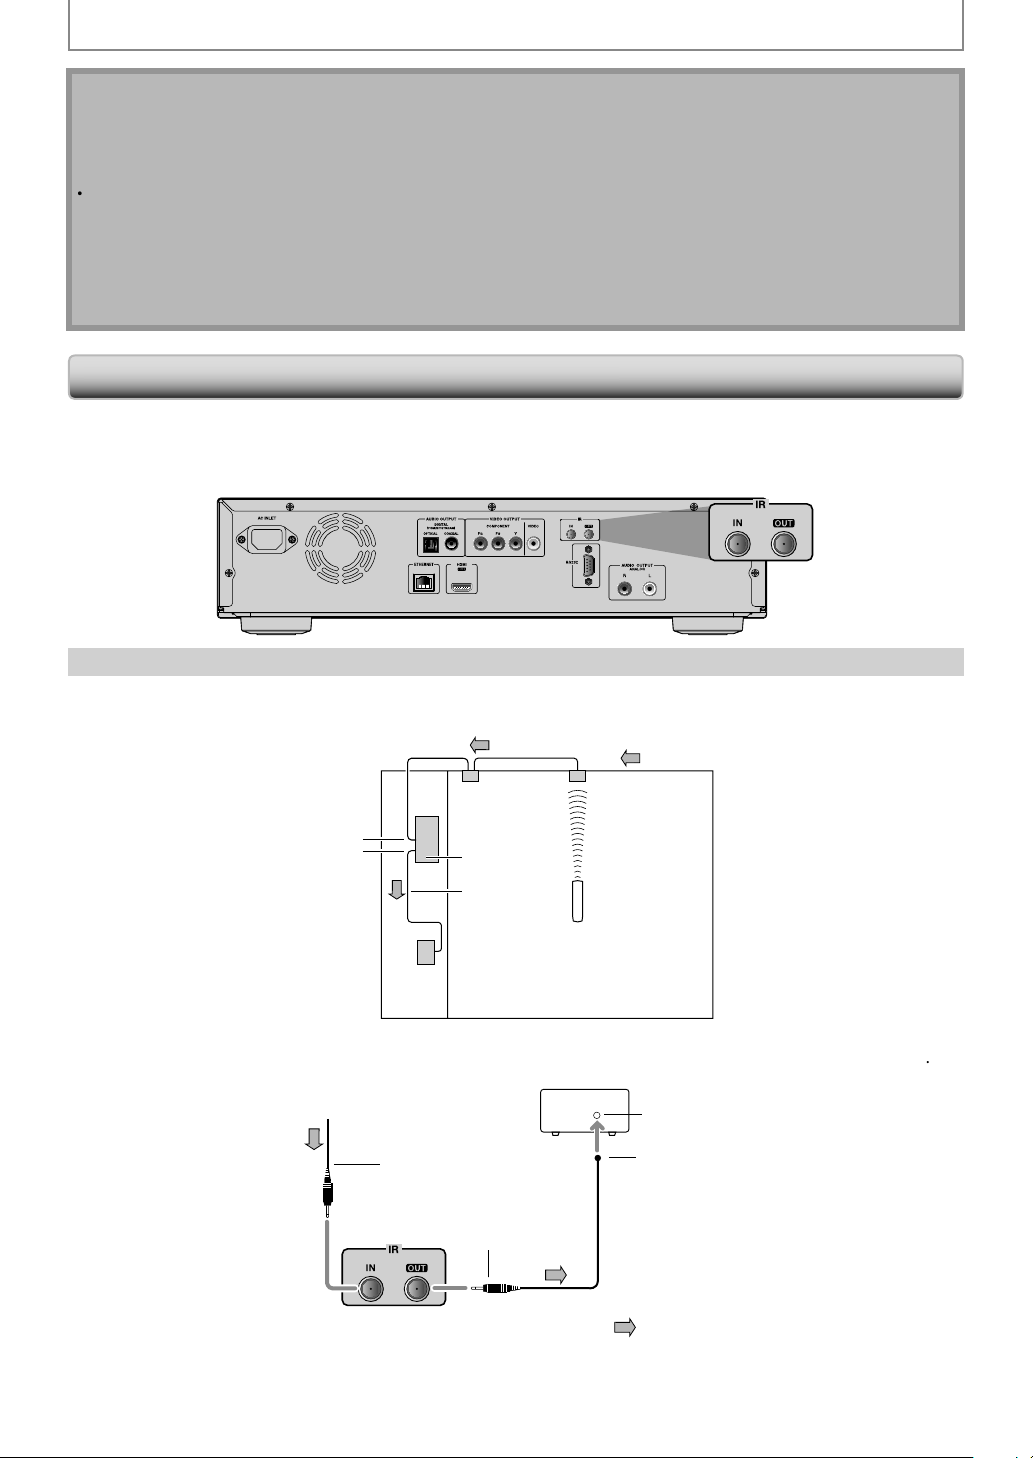
ontrolling AV Components that are Out of Range
ou can use the following multi-room kits to control this unit when it’s out of range of the remote controller:
• Multiroom kits such as those made by Niles and Xantech.
Controlling Other Out-of- Range AV Component
f another AV component is out of range of its remote controller, you can use a commercially available IR emitter to
retransmit the remote controller signals received at this unit's IR IN
onnectin
l
onnect the IR emitter to
IR
ther
omponen
his unit's IR OUT jack, and place the IR emitter in front of the other AV component's remote
This uni
IR emitter
control sensor (usually located on its front panel), as shown below. See the instructions supplied with the IR emitter
m
onnecting bloc
iniplug cabl
iniplu
ack, as shown below.
ignal flow
mote controller
ther componen
mote control
IR emitter
nly remote controller signals received by this unit's IR IN jack are fed through to the IR OUT jack. Signals picked up by
t
is unit's remote control sensor are not output.
This uni
IR emitter
ignal flow
Page 21

INFORMATION ON PLAYBACK
.
T
T
y
.
)
)
)
deo
)
W
a
R-RE
W
)
)
)
V
VV
VV
de
VV
CD
VV
VVVVVVVVVV
VV
G
VVVVVVVVVV
VV
2
VV
VV
VV
)
VVV V
d
Before you start playing back a disc, read the following information
Playable Discs and Files
his unit is compatible to play back the following discs / files.
o play back a disc / file, make sure that it meets the requirements for region codes and color systems as described below. You
back discs that have the following logos. Other disc types are not guaranteed to play back.
can pla
Playable discs Logos
Blu-ray Disc
BD-video (single / dual layer
BD-RE*(ver. 2.1) (single / dual layer)
Recorded in BDMV format
BD-R (ver. 1.1 / 1.2 / 1.3
(single / dual layer)(Recorded in BDMV format)
(Unclosed discs may not be played back.)
DVD-vi
VD-RW
(single layer) (finalized video mode discs only)
VD-R
(single / dual layer) (finalized video mode discs only)
CD-DA (audio CD
CD-R
* Due to the intentional progression of the
lu-ray Disc format by its standard setting
uthority, the company cannot guarantee
r warrant the playability of future
xtensions of the Blu-ray Disc format with
is product
Disc/Card/Media Type
ile type/ Disc
ormat/ Dat
M
video mo
io
MP3, WMA
JPE
PEG1, MPEG
VCHD
Picture-in-picture commentary, subtitles or other extras for BD-ROM ver. 2
Profile 2.0 / Profile 1.1
: Supporte
-
DVD-R/-RWCD-R/-R
SD Memory Card (8MB - 2GB
SDHC Memory Card (4GB - 8GB
iniSD Card (8MB - 2GB
icroSD Card (8MB - 2GB)
Note for SD Memory Cards
Do not remove the SD Memory Card or turn the unit to the standby mode while the contents of the card is in
playback. It may result in malfunction or loss of the card’s data.
Please keep the SD Memory Cards in their cases when you are not using them.
• Do not try to open or modify the card.
• Do not touch the terminal surface with your fingers or any metals.
Do not attach additional labels or stickers to cards.
• Do not remove the label of the SD Memory Cards.
•This unit supports SD Memory Card with FAT12 / FAT16 file system, and SDHC
Memory Card with FAT32 file system.
This unit may not read the SD Memory Cards formatted on computer. If that is the
case, please reformat the SD Memory Cards in this unit and try again.
•This unit does not support miniSDHC and microSDHC Memory Card.
• For miniSD Card and microSD Card, the adapter is necessary.
Portions of this product are protected under copyright law and are provided under license by ARIS / SOLANA / 4C.
miniSD Card
adapter
miniSD Card
microSD Card
adapter
microSD Card
LNA
Page 22
N
T
audio
deo C
D
y)
.
.
s
y
hich
T
Th
f
d
h
d
T
T
tle 2
1
1
2
3
INFORMATION ON PLAYBACK
ded
acks.
/
ded
es.
y
y
T
y
es.
f
f
y
)
)
)
Unplayable Discs and Files
he following discs will not be played back in this unit.
•
D-ROM • CD-I (compact disc-interactive)
VD-RAM
•
VD HD DV
unfinalized disc
•
D / DVD / CD / SD Memory Card contains DivX® files.
D / DVD hybrid disc (played back as a BD-video onl
D that contains AVCHD files
•
VD-RW/-R recorded in VR mode or non compatible
recording format.
• super audio CD - Only the sound on the CD layer can
be heard. The sound on the high-density super audio
D layer cannot be heard
layability of dual discs are not guaranteed.
•
D-RE/-R recorded in BDAV format or non compatible
recording format.
This unit cannot play back the disc contents protected
by Windows MediaDigital Rights Management (DRM)
VSD (video single disc)
• vi
D
VCD
Color System
D-video and DVD-video are recorded in different color
s
stems throughout the world. The most common color
system is NTSC (w
tates and Canada).
his unit employs NTSC color system, so the disc you play
ack must be recorded in the NTSC system. You cannot
lay back the disc recorded in other color systems.
is used primarily in the United
Region Codes
is unit has been designed to play back
D-video with region “A” and DVD-video with
egion “1” or “ALL“. You cannot play back
D-video or DVD-video that are labeled for
other regions. Look
ight on your BD-video or DVD-video.
these region symbols do not appear on
your BD-vi
ay back the disc in this unit. The letter or
umber inside the globe refers to region of
t
e world. A BD-video or DVD-video labele
or a specific region can only be played back
n the unit with the same region code.
eo or DVD-video, you cannot
or the symbols on the
BD-video
Audio CDs are divi
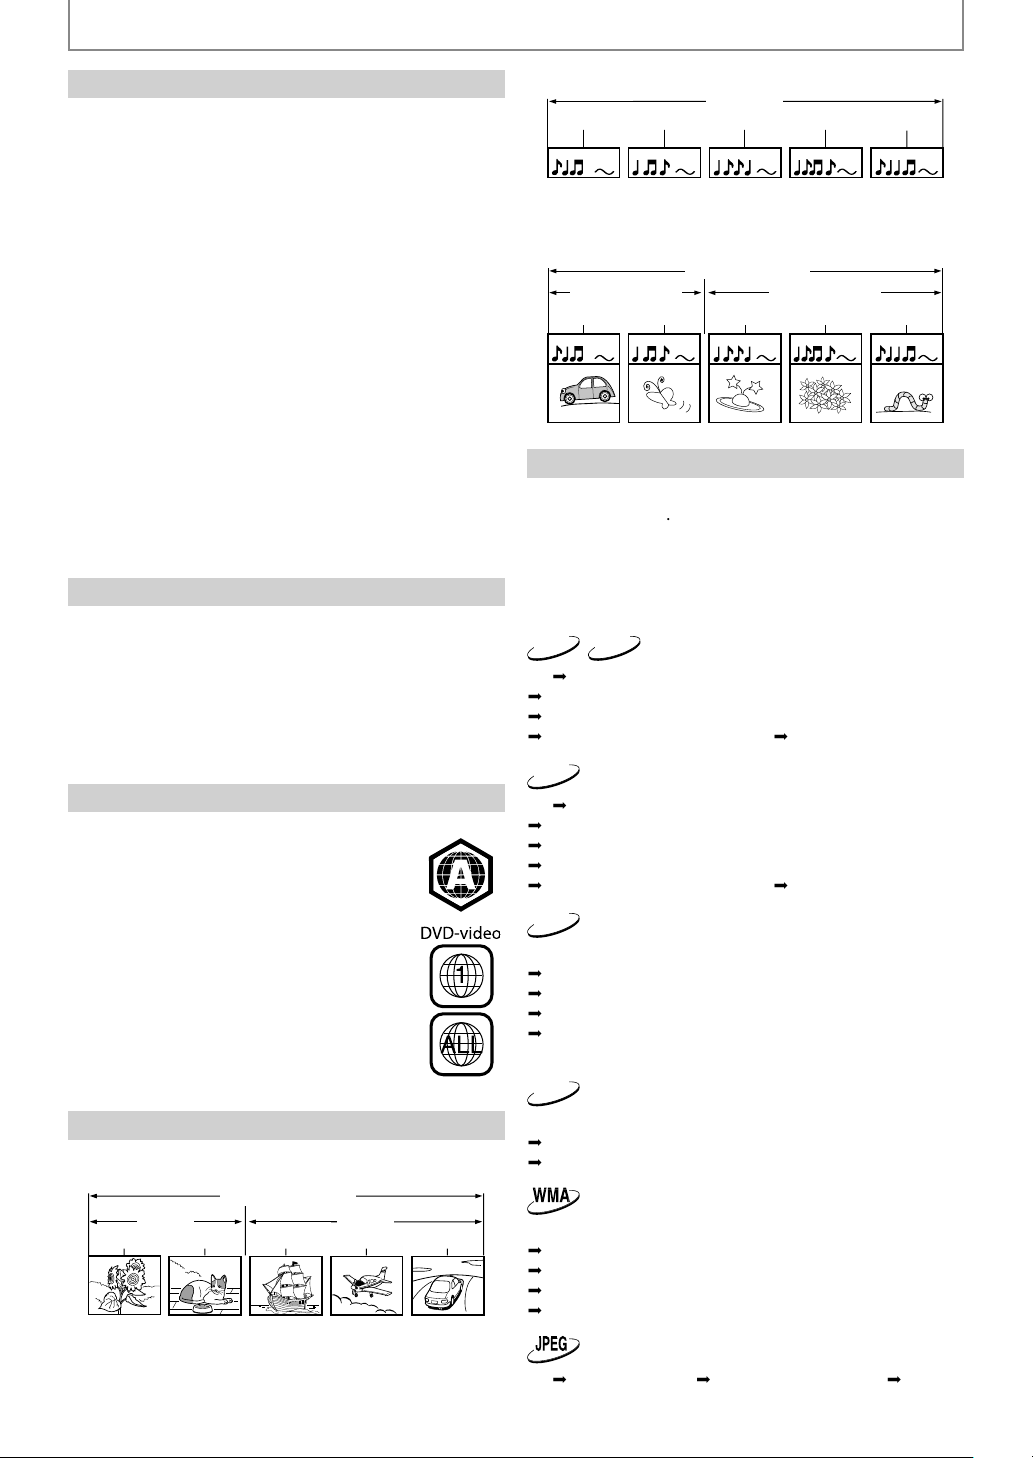
track 1 track 2 track 3 track 4 track 5
Data discs or SD Memory Cards containing MP3 / WMA
JPEG are divided into folders, and the folders are
ivi
into fil
folder (group) 1 folder (group) 2
le 1 le 2 le 3 le 4 le 5
into tr
audio CD
MP3/WMA/JPEG
On-Screen Displa
You can check information about the current disc b
ressing [Display]
o call the on-screen display menu, press [Display]
during pla
nformation changes. Depending on the media, available
nformation vari
BD-V
ff
Title information (elapsed time)
Title information (remaining time)
Decoding format information
back. Every time you press
AVCHD
Title / Chapter information
of
Display]
the
DVD-V
ff
Chapter information (elapsed time)
Chapter information (remaining time)
Title information (elapsed time)
Title information (remaining time)
Decoding format information
of
CD
off (Track information (elapsed time))
Track information (remaining time)
Disc information* (elapsed time)
Disc information* (remaining time)
off (Track information (elapsed time))
(*not available during the program / random pla
back
MP3
Structure of Disc / SD Memory Card Contents
he contents of BD / DVD are generally divided into titles.
itles may be further subdivided into chapters.
itle 1
chapter
BD / DVD / AVCHD
chapter
apter
i
chapter 2chapter
off (File information (elapsed time))
File name information
off (File information (elapsed time)
off (File information (elapsed time))
File name information
Tag information (title name)
Tag information (artist name)
off (File information (elapsed time)
ff
File information
File name informationoff
E
Page 23

3
N
INFORMATION ON PLAYBACK
>
>
Cu
r
hap
h
h
le
n
)
g
pt f
)
)
p
e
e
e
TITLE
e
e
Chapter information
Title / Chapter information for BD and AVCHD
1 2 3
1 1 / 10
T
4 5
Chapter information for DVD
2 6
3 / 5 0 : 01 : 02
CHAPTER
rrent title numbe
1
Current chapter number / Total number of
2
c
ters
Current repeat setting (Only when repeat setting
3
s active)
(C: C
apter repeat, T: Title repeat, AB : A-B repeat)
Indicates that the multi camera angle images are
4
vailable on the scene
Current playback status
5
Elapsed time (or remaining time) of the current
6
c
apter
Title information
1 2
3 / 5 0 : 01 : 02
Current title number / Total number of titles
1
Elapsed time (or remaining time) of the current
2
tit
Indication of SD Memory Card playback
3
3
SD
ecoding format information
1
Dolby Digital
Decoding format
1
isc information
1 2
1 / 14 0 : 00: 51
B
Current track number / Total number of tracks
1
Elapsed time (or remaining time) of the current
2
T
B
isc
B
ile name information
1
File_name_001
Media icon and file name
1
: MP3 fil
: WMA fil
: JPEG fil
ag information
Title name information>
1
TITLE
TITLE
B
Artist name information>
1
2
TITLE
2
ARTIST NAME
MA fil
Artist name based on tag information of current
MA fil
Track / File informatio
1 3 42
SD1 / 14 0 : 00: 51
Current track (file) number / Total number of track
1
G
file
Elapsed time of the current track or file
2
(or remainin
(exce
Indication of SD Memory Card playback
3
Current repeat setting
4
(Only when repeat setting is
time of the current track or file)
or JPEG files
active
(T: Track / File repeat, G: Group repeat,
A: All re
eat, AB: A-B repeat)
E
B
2
Page 24
N
BASIC PLAYBACK
ote
may appear at the top-right on the TV screen when
.
e.
y
/
h
u
d.
y
f
.
y.
B
f
d
.
F
ess
B
C
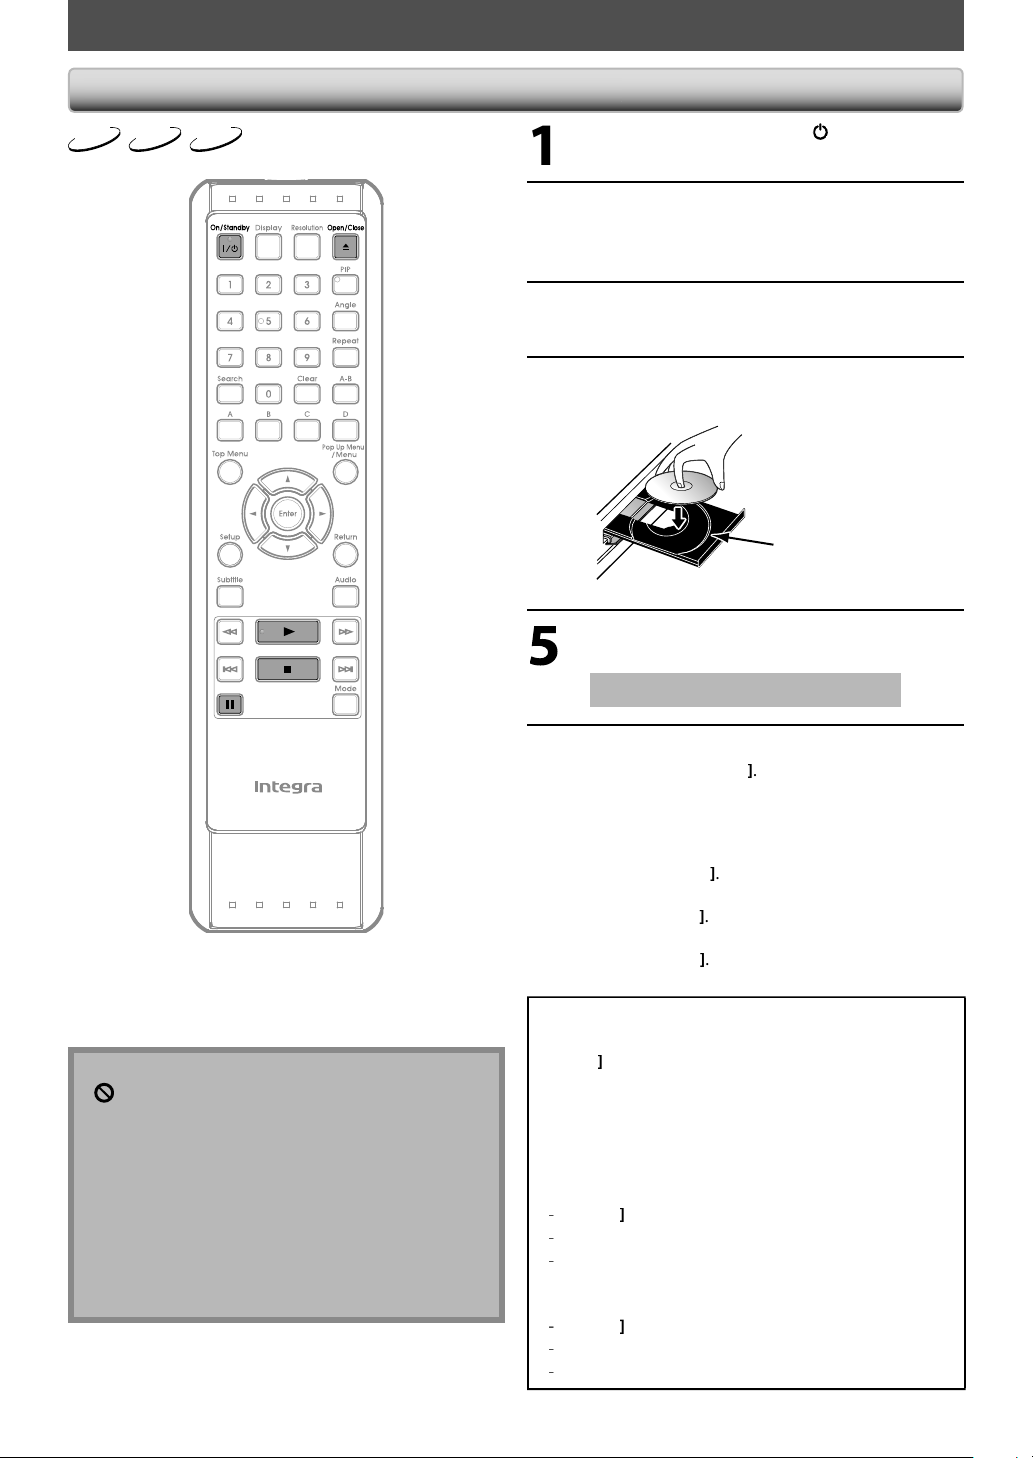
Playing Back a BD, DVD or a Disc with AVCHD Files
DVD-V
BD-V
AVCHD
Press [On / Standb
Turn on the TV and select the
appropriate input on t
the
Press [Open / CloseA] to open the
disc tra
Place the disc on the disc tray with its
label side
nit is connecte
.
acing up.
.
e TV to which
Align the disc to the
disc tray guide.
N
he operation is prohibited by the disc or this unit.
During the playback of 2-layered disc, pictures may
top for a moment. This happens when the 1st layer
witches to the 2nd layer. This is not a malfunction
• BD / DVD / AVCHD menu varies depending on discs.
If a disc contains AVCHD files, the playback of other
iles which are in the same disc is not availabl
Set “Still Mode” setting to “Field” in “Video” menu if
pictures in the pause mode are blurred (refer to page
4).
Press [Open / CloseA] to close the
isc tray.
t may take a while to load the disc
Playback may start automaticall
If not, press
Some discs may show a title or a disc menu. In
this case, re
Disc Menu, an
To pause playback:
ress
To return to the normal playback:
Pr
To stop playback:
Press
Playback will be in Resume-On-Stop mode.
Play
er to “Operations Using Title Menu,
Pop-up Menu” on page 25
Pause
Play
Stop
Resume-On-Stop mode
f a playback is in Resume-On-Stop mode, when you press
Play B next time, the playback will start from the point
ere it has been stopped.
ote
esume playback may not be available for the BD that
supports Java applications (BD-Java).
n the “Disc” mode, the resume information will be
eared when;
Stop Cis pressed while in the Resume-On-Stop mode.
he parental level is changed.
he disc tray is opened.
n the “SD Card” mode, the resume information will be
eared when;
Stop Cis pressed while in the Resume-On-Stop mode.
he SD Memory Card is removed.
e unit is turned into the standby mode.
E
Page 25
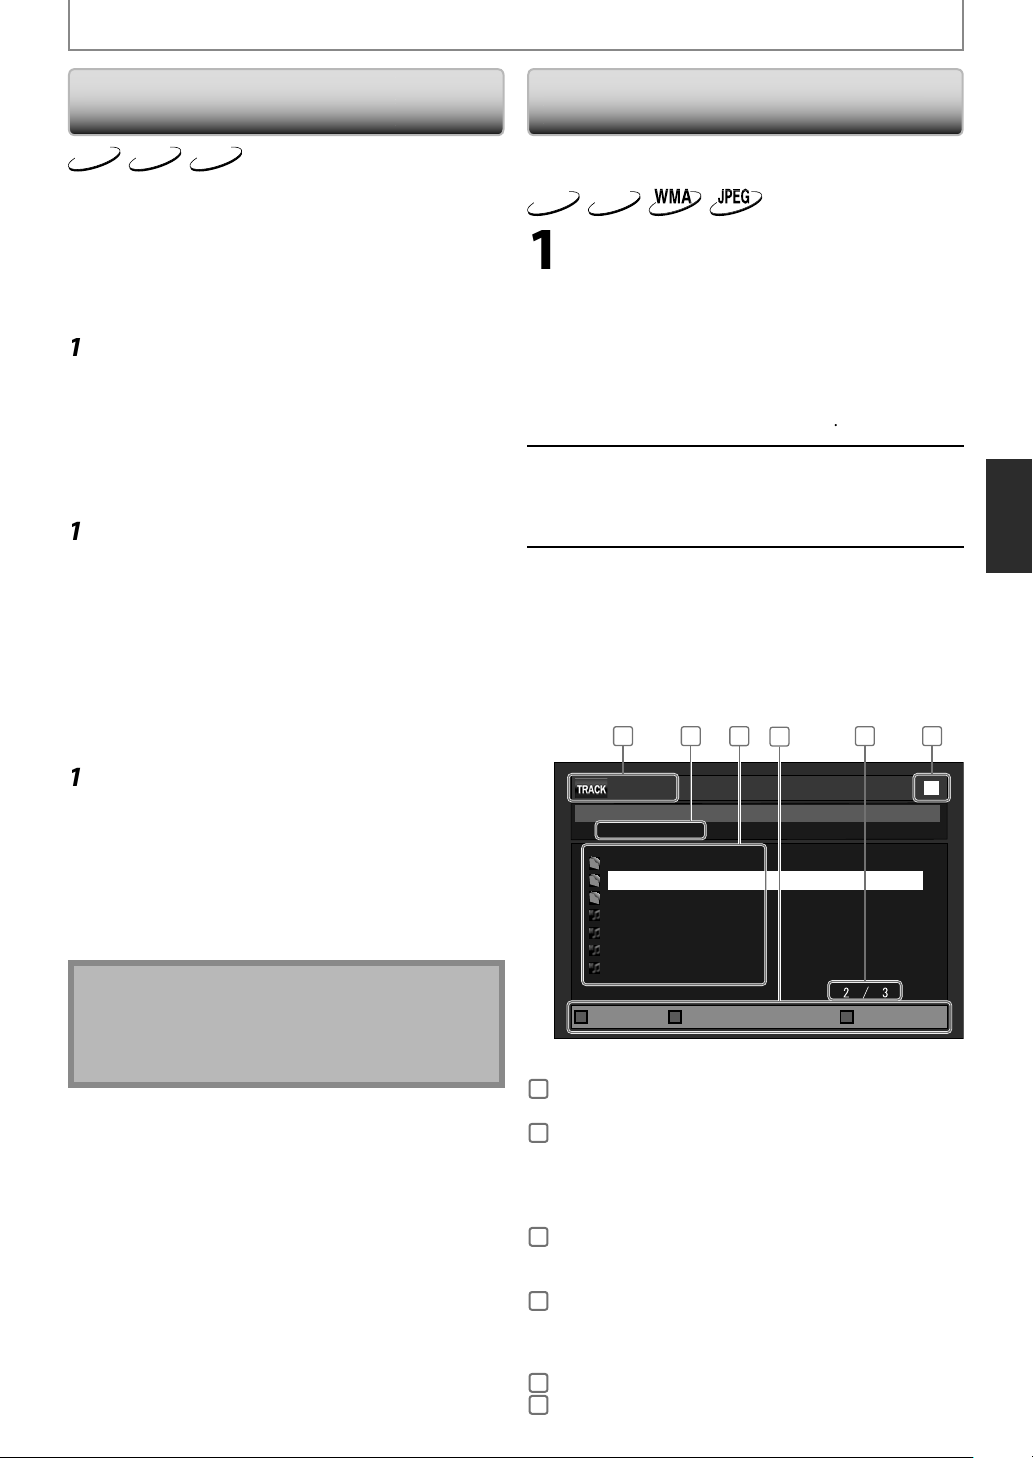
5
N
u
d
f
ff
(
)
].
2
[
K
s/B
[
.
2
[
K
s/B
T
menu pops
y
p Up
.
[
K
s/B
.
/
.
.
f f
.
o
ess
ess
f
f
.
[
K
/
L
p
[
s
/
y f
f
)
layback
/
D
/
D
/
c
r
BASIC PLAYBACK
Operations Using Title Menu,
Disc Menu, and Pop-up Men
DVD-V
BD-V
Many of BD-video and DVD-video disc contains title menu
(BD-vi
eo / DVD-video / AVCHD), disc menu (DVD-video)
r pop-up menu (BD-video) which guides you through
the available
menus may di
Title menu
Press [Top Menu
The title menu will appear.
Use
press
Press [Top Menu] to exit.
Disc menu (DVD-video)
Press [Pop Up Menu / Menu]
The disc menu will appear.
Use
ress [Enter].
Press [Pop Up Menu / Menu] to exit.
Pop-up menu (BD-video)
his is a special feature available for some BD-videos.
en you press
out on the TV screen while the contents still pla
During the playback of BD-video, press
[Po
The pop-up menu will appear.
Use
ress [Enter].
Press [Pop Up Menu / Menu] to exit.
AVCHD
unctions in the disc. The contents of the
er depending on the discs.
BD-video / DVD-video / AVCHD
/ L /
to select an item, then
Enter].
/ L /
to select an item, then
Pop Up Menu / Menu] a
Menu / Menu]
/ L /
to select an item, then
back.
laying Back an Audio CD or a Disc with
P3 / WMA / JPEG Files
Before you begin
selected. Set “Mode Select” to “Disc”.
MP3
CD
Insert an audio CD or a disc with MP3
WMA / JPEG files
Media filter screen will appear
For audio CD and a disc contains only one
T
To return to the track/file played last:
Select the type of the file you want to
play back in the media
Then press [Enter] to display the
Use
or file, then
Use
between the hierarchies. (onl
MP3 / WMA / JPEG
If you press
File List
MP3_DISC
make sure the correct media mode is
type o
return to the first item:
Pr
ile, skip to step 3
r
Top Menu]
Pop Up Menu / Menu]
ilter screen.
to select a desired folder
ress [Enter].
B] to go back and forward
iles
p
1
- - / 20
Folder_1
Folder_2
Folder_3
MP3_A
MP3_B
MP3_C
MP3_D
Enter]on the desired file,
will start.
3
4
5 62
ile list
or
E
Contents of menus and corresponding menu
operations may vary among discs. Refer to the
manual accompanying the disc for details.
Title menu is also available for SD card with AVCHD files
Page Up Page Down
.g.) MP3
audio CD
1
MP3
WMA / JPEGFile information
audio C
2
MP3
WMA / JPEG Current Disc or folder name will
audio C
3
MP3
WMA / JPEG List of the file / folder names in
Operation guide
4
Current page / Total page numbe
5
Playback status
6
Track information
“CD-DA” will be displayed.
e displayed. (Disc or SD Memory
ard name will be displayed for
he top of the hierarchies.)
List of the track number and time
he current folder / dis
Press [A] to go to the previous
ge.
ress [B] to go to the next page.
ress [D] to select “Media Mode”.
Media Mode
2
Page 26

BASIC PLAYBACK
: Folde
: audio CD trac
e
e
A
z
J
b
d
b
)
dots
a
B
d.
a”
J
”
lly
d.
d.
.
T
/
B
d
y
y
)
t
d
.
[
K
/
L
[
K
/
L
,
edia icon and file name:
r
: MP3 file : WMA fil
: JPEG fil
t is recommended that files to be played back in this
nit are recorded under the following specifications:
P3 / WM
• Sampling frequency: 32 kHz, 44.1 kHz or 48 kH
onstant bit rate: 112 kbps - 320 kbps (MP3),
8 kbps - 192 kbps (WMA)
PEG
Upper limit: 2,560 x 1,920 dots
Lower limit: 32 x 32
• File size of image
m
ximum: 12 M
•
igh-resolution JPEG files take longer to be displayed.
Progressive JPEG files (JPEG files saved in progressive
ormat) cannot be played back in this unit.
The system can recognize up to 255 folders / 999 files
or CD, 999 folders / 9999 files for BD, DVD and SD
Memory Card (including the files other than MP3).
When number of folder / files exceeds the limit, they
ill be recognized by the order recorded.
•The name of folder and file can be displayed up to 28
characters. Unrecognizable characters will be
replaced with asterisks.
•The 9th and deeper hierarchies cannot be displayed
or CD and the 10th and deeper hierarchies cannot
be displayed for BD, DVD and SD Memory Card.
xtension other than listed below cannot be recognize
P3: “.mp3”
MA: ”.wm
PEG: “.jpg” / ”.jpeg
• Some unplayable folders or files may be listed due to
he recording status.
• With regard to the multi-border BD-RE/-R, additiona
recorded sections cannot be recognize
With regard to the multi-border DVD-RW/-R,
additionally recorded sections may not be recognize
•
or the SD Memory Card playback, refer to “Reading
he SD Memory Card” on page 26
a disc contains AVCHD files, the playback of other
files which are in the same disc is not available.
(su
sampling is 4:4:4)
5,120 x 3,840
(su
sampling is up to 4:2:2
ots
k
Note for JPEG Playback
very press on [Angle]will turn the image clockwise by
0 degrees when an image is displayed.
o change the visual effect for switching the playback
mage, press
witch between “Cut In/Out” and “Fade In/Out”.
uring JPEG playback, press
ize of the playback image, then use s
witch between “Normal” (100%) and “Small” (95%). The
ize change may have no effect on some files (e.g. files
ith a small picture size).
Mode] once, then uses / Bor
Mode]twice to change the
or
Reading the SD Memory Car
MP3
AVCHD
You can play back the AVCHD / MP3 / WMA / JPEG files in an
SD Memor
enjo
Special additional contents for BD-ROM Profile 1 ver.1.1.
For more information about the special additional contents,
efer to the instruction book that came with the disc.
D-Live function (BD-ROM ver. 2 Profile 2.0). (For more
nformation about BD-Live, refer to page 33.)
Setting the Mode Selec
or the playback media to be read by this unit, the correct
me
ollowing the steps below.
Card. With the SD Memory Card, you can also
the following functions.
ia should be selected. You can switch the media by
In stop mode, press [Setup]
Use
to select, then press
Enter].
Quick
Mode Select Disc
HDMI Audio Out HDMI Multi (Normal)
HDMI Video Resolution Auto
Component Output 480i
Player Menu English
Enter]to
Enter]to
Use
] to select “Mode Select”
then press [Enter].
Page 27

BASIC PLAYBACK
)
)
ote
Th
sted below:
d.
p.
Th
.
\ : | ¥
\ : | ¥
.
”
”
[
K
/
set the unit to “SD Card
ode. To
.
d
i
d
f
l
pp
[
K
/
.
.
f
.
y
)
[
K
/
s
/
B
.
d
d
Use
4
press [Enter].
•This will
L] to select “SD Card”, then
Quick
Mode Select
Disc
SD Card
Network
” m
lay back the contents in any discs, exit “SD
ard” mode by selecting “Disc”
Press [Setup] to exit.
Even if you turn the unit to the standby mode in
“SD Car
next t
” mode, it will be in “Disc” mode the
me you turn it on.
Reading an SD Memory Car
Insert an SD Memory Card, with the
label side
s
ot until it clicks.
If no disc is in operation, “Media Select” screen
will a
acing up, into the SD Card
ear on the TV screen.
Compatible Cards:
SD Memory Card (8MB - 2GB)
SDHC Memory Card (4GB - 8GB)
miniSD Card (8MB - 2GB
microSD Card (8MB - 2GB
For miniSD Card and microSD Card, the adapter will
e required.
N
e “Media Select” screen will disappear under the
nditions li
when
Return] is presse
when the setup menu is called u
•
o not remove the card during its playback.
is unit supports SD Memory Card with
FAT12 / FAT16 file system, and SDHC Memory Card
with FAT32 file system.
• Do not delete the folders or files in the SD Memory
Card with your computer. This unit might not read
SD cards formatted on a computer
•This unit recognizes up to 8 characters (including “~1”)
of file name in the SD Memory Card. Characters after
8th will not be displayed.
If a folder or file name includes one of the following
unrecognizable characters, the folder or file name
may not be displayed correctly.
Unrecognizable characters :
For an SD Memory Card, extension other than listed
below cannot be recognized
MP3: “.mp3
WMA: “.wma”
JPEG: “.jpg
“.jpeg“ is not available for SD Memory Card.
. , “ = + [ ] ;/
SD Memory Card
Use
L] to select “SD Card”, then
ress [Enter].
•
edia filter screen will appear
en the SD Memory Card contains only one
pe of file, skip to step 4
Select the type of the file you want to
play back in the media
ilter screen.
hen press [Enter] to display the file list
•Playback of AVCHD files will start right after
ou choose “Video”. (The file list is not available
or AVCHD files.
Use
L] to select a desired track,
older or file, then press [Enter]. Use
] to go back and forward
etween the hierarchies.
•
f you press
layback will start
To remove the SD Memory Card:
In stop mo
Car
, then pull it out slowly.
Enter] on the desired file,
e, gently push in the SD Memory
Page 28

BASIC PLAYBACK
s
)
y
.
Co
.
y
certified device.
.
.
p
C
]
y
l
layback
p
y
B
.
.
.
p
j
i
de
F
k
y
B
k
C
k
)
]
stead of
.
ote
T
T
S
3
WMA
hoto : JPEG
the
Playi Video / Music / Photo Files from
DLNA Certified Home Media Server
n this unit, you can play video, music and photo files
tored on DLNA certified home media servers (version 1.5
connected to your home network. In order to use this
feature,
This unit can be used only as DMP(Digital Media Player).
ou must connect this unit to the Internet
nnect this unit to the Internet
Refer to “Network Connection with LAN” on page
Set up the necessary network
onnection settings.
Refer to “Network Connection” on pages 52-55.
Start DLNA home media servers in
our home network.
For details, refer to the owner’s manual of the
DLNA
Press [D] while opening screen is
isplayed.
For opening screen, refer to page 12
This unit will start loading the home server list
• To cancel loading, press [Sto
To reload the home server list, press
D
After loading, home server list will
appear. Select a home server
ou
ant to access, then press [Enter].
File list of the selected home server
ill appear. Select a file you want to
p
ay back, then press [Play B or
[Enter] to start p
•If you select a folder, select a file in the folder and
then
ress [Pla
1
- - / 16
File List
User Files
Photo
Video
Music
20090205_0001
Link [KISS Mix]
NEXUS 4
HEROES
Page Up Page Down
or
3
4
.
Enter] to start playback
5 62
2 / 3
• To control the playback, use following buttons.
Button Action
Ski
ause
a
Stop
/
Skip to the previous / next file during
playback or in pause mo
Pause the playbac
Return to the normal playbac
Stop the playbac
(For video files, playback will be in
Resume-On-Stop mode.
Resume-On-Stop mode for video files>
Playback will start from the point
where it is stopped next time you
ress
Play B If you press
in
start from the beginning of the file
instead of resuming from the stop
oint
Play B, playback will
N
•
or the home server list, maximum of 10 servers can
e displayed.
he system can recognize up to 9,999 files (including
olders).
•The 10th and deeper hierarchies cannot be
isplayed.
his unit supports following formats. (Formats other
an listed below cannot be recognized.)
Video : MPEG 1
MPEG 2 P
MPEG 2 TS / TTS
ic : LPCM
MP
P
nplayable files in the home server will not be
isplayed in the file list.
•
or some files, playback is not available even if
isplayed in the file list.
n order to play back the contents in home servers,
he player and the servers must be connected to the
same access point.
Compatibility and available playback function may
iffer depending on the home server.
•
f you select a photo file in step 6, the selected file
ill be played back and go to the next file in the
urrent hierarchy in turn every 10 seconds.
•
or photo files, every press on [Angle] will turn
mage clockwise by 90 degrees when an image is
isplayed.
or a folder contains only photo files, file list or
umbnail list will be displayed, depending on the
nformation from the home server.
•Video files with unsupported audio format will be
skipped.
•The quality of the playback picture or audio differs
epending on your network condition.
Enter
File information
1
Current folder name will be displayed.
2
List of the file / folder names in the current folder
3
4
Operation guide
Press [A] to go to the previous page
Press [B] to go to the next page
5
layback status
6
Page 29

9
BASIC PLAYBACK
on
V
G1
G
S
)
G
)
)
udio
e
CM
z
s
z
s
z
ps
z
0k
e
JPEG
2
4
f
t
Video
e
1
deo
bps
S
)
s
(HD)
ps
)
bps
e
CM
o
kbps
o
s
8.0
o
ps
8.0k
Stereo
kbps
)
o
s
eo
ps
)
o
ps
o
s
)
o
ps
eo
ps
o
s
e
G
f
.
Cod
,
s.
i
f
l
.
bl
ff
.
p
de
LNA Client (DMP) Our Planning Specification
Items Description
LNA versi
System Stream Video Codec type Audio Codec type
ideo file
A
mage fil
fil
PE
PEG2-P
PEG2-TS/TTS
Audio Codec type Sampling Frequency Bit rate
LP
P3 (MPEG1 Layer3)32k, 44.1k, 48kHz
P3 (MPEG2 Layer3)16k, 22.05k, 24kH
P3 (MPEG2.5 Layer3) 8k, 11.025k, 12kH
LNA Playback Forma
PEG
fil
Audio fil
mage fil
PEG2-P
PEG2-TS/TTS
LP
P3 (MPEG1 Layer3
P3 (MPEG2 Layer3
P3 (MPEG2.5 Layer3
JPE
MPEG1-Video
MPEG2 MP@ML(SD
MPEG2 MP@HL(HD
MPEG2 MP@ML(SD
44.1k, 48kH
8k, 11.025k, 16k, 22.05k, 32k, 44.1k, 48kH
YCbCr = 4 : 2 : 0/4 : 2 :
Color depth = 2
Items
MPEG1-Vi
MPEG2 MP@ML(SD
MPEG2 MP@HL
MPEG2 MP@ML(SD
44.1kHz Mon
44.1kHz Stere
4
kHz Mon
4
Hz
on
r
n
tere
Mon
r
8 - 48kHz Stere
Exif Ver.2.21
PE
PCM/Dolby - AC3/MPE
olby - AC3
2k - 320k bp
- 160k bp
k - 160k b
- 32
esolution : 5120 x 3840 or less
ile format : Exi
Supported Bitrate
(DLNAcertification criterion )
,411,200
0.08Mbp
9.3927Mb
9.3927M
05.6
411.2kbp
68kb
536
2 - 160kbp
4 - 320kb
- 80kb
6 - 160kbp
- 80kb
- 160kb
- 320kbp
DLNA Error Co
Error Code appears in the error screen when the unit
etects an error, as shown below. The code is used to
speci
ically determine the cause of error
Network Error
Cannot connect to server.
Please check your settings.
Press ‘ENTER’.
00202010
Error message
Error Code
Error Code are displayed with “[********]”
“*” is error code) as shown above.
rror
In the Home Network (DLNA)
e Form
Error Code are used as
llow
002XXXXX
Detailed Error Code
Summary Error Code
“Summary Error Code” are shown in the list below.
Summary
Error Code
Error message
Cannot connect to server. Please check
your sett
ngs.
Playback Error
5 No playable files found.
ystem Error
1
Unable to display
P
ease check server settings.
iles from the server.
List Updated.
Connection with server lost
e to connect to more than 10
Una
4
servers. Please turn o
or stop
roadcasting 1 or more servers
If you would like to contact us about Home Network
service,
lease confirm the Detailed Error Code.
2
Page 30

N
erse.
d
D
layback
2
ote
els.
s.
g
fferent files are not available.
k
D
ll
2
.
.
k
.
y
B
y
.
k
dly
t
d
.
t
y.
t
t
.
k.
SPECIAL PLAYBACK
Fast Forward / Fast Reverse
DVD-V
BD-V
During playback, press [Fwd D
epeatedly for fast forward.
During playback, press
v
Every time you press [Fw
p
speed will change.
Press [Play B to return to normal
ayback.
N
For BD, DVD and AVCHD, speed changes in 5 different
v
• For audio CD, MP3, WMA and video / music files on
LNA home server, speed changes in 3 different
vel
• For audio CD, fast forward / fast reverse search
between different tracks are not available durin
program and random playback.
For MP3, WMA and video / music files on DLNA home
erver, fast forward / fast reverse search between
i
• For some video / music files on DLNA home server,
fast forward / fast reverse may not function.
Slow Forward Playbac
DVD-V
BD-V
During playback, press [P
ress [
Every time you press
Press [Play B to return to normal
Slow forward speed changes in 3 different levels
•
nly slow forward is available.
Set “Still Mode” setting to “Field” in “Video” menu if
pictures in the slow forward playback mode are blurred
(refer to page 44)
For some video files on DLNA home server, slow
orward may not function.
ange.
ayback.
wd
CD
AVCHD
MP3
AVCHD
Rev E repeatedly for fast
orRev E, the
eF then
Fwd D, playback speed wi
tep by Step Playbac
DVD-V
BD-V
AVCHD
In pause mode, press [Pause F] repeatedly
very time you press
advance one step at a time.
Press [Pla
back.
pla
nly step by step forward is available.
et “Still Mode” setting to “Field” in “Video” menu if
ictures in step by step playback mode are blurred
refer to page 44)
Pause F, playback will
to return to normal
epeat Playbac
Available repeat functions vary depending the discs.
During playback, press [Repeat] repeate
o select the desired repeat mode.
Repeat mode Available media
Chapter repea
The current chapter will be playe
ack repeatedly
Title repea
The current title will be played back
repeatedl
Track repea
The current track or file will be
played back repeatedly.
roup repeat
The current folder will be played
back repeatedly.
All repea
All tracks or files in the media will
e played back repeatedly
The repeat setting will be canceled when you stop
aybac
The chapter, title, track or group repeat will be cleared
hen moving to other chapter, title, track / file or folder.
epeat playback does not function during A-B repeat
layback.
apter and title repeat are not available with some
cenes.
hen the repeat setting is set for a MP3 or WMA
older (file), the repeat setting will be cancelled if you
elect other MP3 or WMA folder (file) to playback.
or some video / music / photo files on DLNA home
erver, repeat playback may not function.
BD-V
AVCHD
BD-V
AVCHD
CD
MP3
CD
DVD-V
DVD-V
MP3
MP3
E
Page 31

N
at
y
2
dly
T
.
set
.
i
ng
hich
d
.
o
o
.
2
[
K
t
Th
d
s
/
ormation.
ote
used
stead of
]
k
.
2
[
K
/
D
audio CD:
.
:
r
s
.
.
K
/
L
to select a
p
K
/
L
]
ess
.
K
/
ect
bottom of the
g
ht hand
/
B
f f
SPECIAL PLAYBACK
E
-B Repe
DVD-V
BD-V
CD
AVCHD
You can play back the specific part (between point A and
point B) repeatedl
.
During playback, press [A-B] at the
esired starting point A.
During playback, press [A-B] at the
esired ending point B.
s soon as you set the point B, the part between point
and point B will start playback repeate
o cancel the A-B repeat, press
A-B] again
.
ote
• Point B should be
oint A
-B repeat is not available with some scenes.
To cancel the A point which was set, press [Clear]
•
-B repeat does not function during chapter, title,
track, group or all repeat playback.
• For some video files on DLNA home server, A-B
repeat playback may not function.
within the same title or track as
PIP (Picture in Picture) (BONUSVIEW) Sett
BD-V
ome BD-videos have the PIP (picture-in-picture) function
w
enables you to display the secondary video in the
primary vi
PIP]whenever the scene contains the secondary video
primary
secondary
During playback, press [PIP]
Use
Press [Return] or [PIP] to remove the PIP
N
• [Mode]can also be
The secondary audio will not be output when the
eo. You can call up the secondary video by pressing
vide
vide
IP information will appear.
/ L to select the secondary video
you wan
e secondary video will be displayed and the
secon
se
.
ary audio will be output.
Bto switch between current setting and “Off”.
inf
in
econdary audio is set to “Off” or when “BD Audio
Mode” is set to “HD Audio Output”. Refer to
Switching Audio Soundtrack” on page 35 and “Setting
the BD Audio Mode” on page 36.
PIP
Program Playbac
MP3
CD
ou can play back the disc in your desired order.
In stop mode, press [Mode]
The program screen will appear.
Use
then press [Enter].
audio CD :Track information
1
P3 / WMA / JPEG :File information
2
P3 / WMA / JPEG
rack / Folder /
3
ile list
rogrammed list : Track / File list in the
4
Cumulative playback time of all tracks in the
5
rogrammed list (audio CD only)
layback statu
6
Current page / Total page number
7
Operation guide : Press [A] to go to the previous
8
• For MP3, WMA or JPEG files, use
folder, then
to select a file, then press
•Pr
•
list to erase all the tracks / files in the pro
The programmed tracks / files is displayed in the
rig
hierarchy o
L to select a track / folder / file,
1 62 3 4
- - / 16
CD_DA
8
0:36
1:14
9
0:45
10
0:50
11
0:53
12
0:20
13
0:54
14
e.g.) audio C
: “CD-DA” will be displayed
Current disc or folder name will
e displayed.
: Track / folder / File list in the
riginal order
rogrammed orde
age in the track / file list
ress [B] to go to the next page
n the track / file list.
ress [C] to go to the previous
age in the programmed list.
ress [D] to go to the next page
n the programmed list
ress
Enter] first, and then use
Clear] to erase the last file of the program
L to sel
“All Clear” at the
screen.
se s
to go back forward between the
olders.
2
4
9
11
12
14
8
Page Prev Page NextPage DownPage Up
Enter
latoTmargorP
1:14
0:50
1:14
0:50
0:53
0:54
0:36
5
0 : 26 : 24
ram.
7
8
Page 32

N
SPECIAL PLAYBACK
layback
y
ess
ote
as
G
p
C
]
.
es.
T
.
.
/
/
h
2
y
B
:
.
to
to
p
C
G
p
C
.
T
T
Press [Play B ] to start program
p
•
rogram playback will start.
To exit from the program pla
r
•
.
Return]in stop mode.
back mode:
N
uring program playback, press
set the resume point, and then press
esume program playback from where
ressed (audio CD) or from beginning of the file
where
StopCwas pressed (MP3 / WMA / JPE
uring program playback, press
to the normal program playback, press
exit from the program screen, then press [Play B
•The program will be cleared when;
the unit is turned into the standby mode.
the media mode is switched to the other mode
the disc / card is removed. (as for “Disc” mode, just
opening the disc tray will clear the program info.)
p to 99 tracks / files can be entered.
To repeat the current track / file in the program, press
Repeat]repeatedly until “ Track” appears
uring playback. To repeat the entire program, press
Repeat]repeatedly until “
ayback.
•
ven if an inserted disc contains mixed MP3, WMA
and JPEG files, program function allows 99 files in
mbination of MP3 and WMA fil
layback from a desired track / file and random
ayback are not available during program playback.
ress
Mode] to switch to the random playback
ode.
StopC
Play B ]
StopC w
Sto
. To go back
Return] to
” appears durin
nce to
andom Playbac
MP3
CD
his function shuffles the playback order of tracks / files
In stop mode, press [Mode] twice
The random screen will appear.
1 62 3 4 5
- - / 16
1 : 13 : 29
CD_DA
1 0:36
1:14
2
0:45
3
0:50
4
0:53
5
0:20
6
0:54
7
Page Down
e.g.) audio CD
audio CD :Track information
1
MP3
WMA / JPEGFile information
audio CD :“CD-DA” will be displayed.
2
WMA / JPEG: Current disc, SD Memory Card, or
MP3
older name will be displayed.
Track / File list : Track / File list in the original order
3
Operation guide : Press [A] to go to the previous
4
age in the track / file list.
Press [B] to go to t
n the track / file list.
Total playback time of all tracks (audio CD only)
5
Playback status
6
Press [Pla
] to start random playback.
latoTmodnaR
e next page
To exit from the random playback mode
ress [Mode] in stop mode
uring the random playback, press
et the resume point, and then press
esume random playback from where
StopC once
Play B ]
StopC was
ressed (audio CD) or from beginning of the file
ere
Sto
uring random playback, press
he random playback, press
was pressed (MP3 / WMA / JPE
Sto
To cancel
Mode]when the
andom playback screen is displayed.
to 99 tracks / files can be entered
o repeat the current track / file in the random
election, press
Repeat]repeatedly until “
rack” appears during playback. To repeat the entire
andom selection press
Repeat]repeatedly until
All” appears during playback.
ou cannot go back to the previous track / file during
andom playback.
or a disc containing mixed MP3 and WMA files,
andom playback of those files will be performed.
E
Page 33
N
SPECIAL PLAYBACK
k
l playback while k
g
2
[
s
/
ff.
d.
l playback
[
B
k.
ote
.
ng
le
deos and
deos conta
scenes
y
h
the
.
f
2
[
K
/
access to additional content such as movie
.
on
.
2
y
y
)
.
y
.
.
f
ect to the
ed.
T
y
es.
Rapid Playbac
DVD-V
BD-V
This function plays back approximately at 1.3 times the
norma
function is available only on discs recorded in the Dolby
Digital format.
During playback, press [M
repeatedly until the Rapid playback
settin
Press [Enter] or
or o
“Off”: Plays back in normal spee
Plays back approximately at 1.3 times of
Press
N
Picture adjustment and audio language setting
annot be changed during this function.
This function may not work at some points on a disc
• During this function, 2ch LPCM will be output from
DMI OUT jack and AUDIO OUTPUT (DIGITAL
PTICAL / COAXIAL) jacks.
AVCHD
eeping the sound output. This
appears.
Off
B to switch (x1.3),
norma
.
] to return to normal playbac
e
Enjoying BD-Live Discs with Internet
BD-V
You can enjoy BD-Live which enables you to use interactive
eatures when the unit is connected to the Internet. (For
he network connection, refer to pages 52-55.)
xamples of BD-Live features:
nline
railers, subtitles, BD-Java applications, etc
ile downloading, special video data may be played
ack.
How to Activate the BD-Live Functi
Insert the disc with BD-Live function
Insert an SD card with enough capacity.
SD card of 1GB or more is recommended.)
Make sure to use the SD card with the supported file
stem.
s
(Refer to “Note for SD Memor
Cards” on page 21
Press [Top Menu] to access the disc menu
Select “BD-Live”, then press [PlayB or
Enter].
Make sure the SD card is correctly inserted, and do
not remove the card during pla
Service and functions differ depending on the disc
Follow the instructions given by the disc when using
the BD-Live
unction.
back
Camera A
DVD-V
BD-V
me BD-vi
been shot simultaneousl
ange the camera anglewhen on
c
During playback, press [Angle].
The selected angle will be displayed on the display
bar at the top o
Use
•
f “Angle Icon” setting is “Off” in “Others” menu,
DVD-vi
from various angles. You can
the TV screen.
in
which have
L] to select your desired angle.
1 / 3
TV screen
ou must connect the unit to the Internet and set up
ecessary settings in order to use BD-Live.
•
or certain discs, “BD-Live Setting” may need to be
hanged.
•
epending on your connection environment, it may
ke time to conn
ay not be connected.
hen BD-Live functions are used and the unit is
onnected to the Internet, you may be charged for
is communication.
•
hile connecting to BD-Live, sometimes it can take
while before the next page is downloaded or
fresh
ome discs with BD-Live function require memory
hen play back the content. If you cannot play back
disc with BD-Live function, insert an SD card (1GB
r more) which is formatted on this unit.
Internet or the Internet
ote for AACS Online
he player or disc IDs may be sent to the content
rovider when playing back a disc with BD-Live function.
•
f you save your viewing history on the server b
sing these IDs, you will be introduced to other
imilar movi
ou can save game score histories.
E
Page 34
N
SEARCH
H
/
G
]
G
h
dl
H
g
y
p
H
G
]
search
search
searc
y
pp
2
g
ess
p
H
G
]
e.
h)
h
.
h
h
h
h
ote
bed here.
Using [Skip
During playback, press [Skip
move to t
repeate
ress [Skip
inning of the current track. Press it
be
repeatedl
For JPEG files, press [Skip Honce to go back to
he previous file.
e next track. Press it
y to skip to subsequent tracks.
] once to go back to the
to go to the previous tracks.
ote
For BD and DVD, if title contains no chapters,
[Ski
For JPEG files, s B] is also available.
Using [Search
using
Search mode Available media
apter /
/
Search] you can select following search
/
itle
hanges the title.
BD-V
CD
DVD-V
MP3
to
AVCHD
Using [the Number buttons] (Direct Searc
itle Searc
In stop mode, enter the title number you
ant to search using [the Number buttons].
Playback of the title will start in a few seconds
Chapter Searc
During playback of a title, enter the
apter number you want to search
c
sing [the Number buttons].
Playback of the chapter will start in a few seconds.
rack / File Searc
Enter the track / file number you want to
searc
Playback of the track / file will start in a few seconds.
using [the Number buttons].
N
•
s for the BD-video, how it performs will be strongly
etermined by the disc, and may not perform as
ri
DVD-V
ime
BD-V
h
AVCHD
CD
During playback, press [Search]
repeatedl
mode a
until your desired search
ears.
Enter the desired chapter, title, track, file
number or time to search for usin
the Number buttons].
Chapter, title, track or time search will start.
r
Clear]
o erase an incorrect input.
ote
During program and random playback, search
unctions are not available except the search using
[Ski
Time search is available only in the same track, file or
itl
For BD / AVCHD, chapter and time search are
available only during playback.
For some video files on DLNA home server, time
search may not function.
E
Page 35

N
s
f
.
2
[
K
d
h
: Sets the subtitle for the
dary
Sets the subtitle for the
.
[
K
y
/
B
tch between current subtitle
.
.
2
[
K
/
L
.
/
B
between current subtitle
.
ote
SPECIAL SETTINGS
k
f
2
[
K
/
.
.
[
K
/
t
/
B
.
A
o
2
[
K
/
l.
.
.
.
ote
)
T
ou can select the format of audio and video as you prefer depending on the contents of the disc you are playing back.
Switching Subtitle
Some video materials may have subtitles in 1 or more
languages. For commercially available discs, the
supported languages can be
Follow the steps below to switch the subtitle language
uring playback.
BD-V
During playback, press [Subtitle]
Use
“Secon
en press [Enter].
t
Primary Subtitle
Secondary Subtitle
Subtitle Style
Primary Subtitle”
”Secon
Subtitle Style” :Sets style of the subtitle
Use
or st
setting and “Off”.
Press [Subtitle] to exit
DVD-V
E
AVCHD
During playback, press [Subtitle]
Use
•
setting and “Off”.
Press [Subtitle] to exit
N
ome discs will only allow you to change the
ubtitles from the disc menu or pop-up menu. Press
Top Menu] orPop Up Menu / Menu]to display the
isc menu or pop-up menu.
If 4-digit-language code appears in the subtitle
menu, refer to “LANGUAGE CODE” on page 61.
• If the disc has no subtitle language or subtitle style,
“Not Available” will be displayed on the TV screen.
• During playback of the secondary video, the primary
ubtitle setting is not available except when there is
no subtitle for the secondary video.
econdary subtitle setting is only available during
playback of the secondary video.
• If you choose a language that has a 3-letter-language
ode, the code will be displayed every time you
hange the subtitle language setting. If you choose
any other Languages, “---” will be displayed instead
(refer to page 61).
ound on the disc case.
/ L] to select “Primary Subtitle”,
ary Subtitle” or “Subtitle Style”,
ENG
ENG
/ 11
/ 11
Subtitle”:
2
2
2
/25
rimary video.
econdary video.
/ L] to select your desired subtitle
le.
to swi
] to select your desired subtitle
1 ENG / 4
to switch
Switching Audio Soundtrac
When playing back video material recorded with 2 or
ore soundtracks (these are often in different audio
languages or audio
ayback.
BD-V
ring playback, press [A
se
Secondary”
nter
.
Primary
1 ENG
Secondary
1 ENG
Primary” :Sets the audio for the primary video
Secondary” : Sets the audio for the secondary video
e
ream
s
For “Secondary”, use
current audio setting and “Off”.
ess [A
DVD-V
CD
During playback, press [
Use
tream channe
1 ENG
For audio CD, you can select following options.
Stereo” :Both right and left channels are active (stereo)
L-ch” :Only left channel is active
R-ch” :Only right channel is active.
Press [Audio] to exit
N
The secondary audio will not be output when the
econdary video is not displayed or when “BD Audio
ode” is set to “HD Audio Output”.(For some BD,
econdary audio will be output even when secondary
ideo is off.
he sound mode cannot be changed during
layback of discs not recorded in multiple audio.
ome discs allow to change audio language setting on
e disc menu. (Operation varies depending on the
iscs. Refer to the manual accompanying the disc.)
Audio] may not work on some discs with multiple
udio streams or channels (e.g. DVD which allow to
ange audio setting on the disc menu).
•
f you select a language that has a 3-letter-language code,
he code will be displayed every time you change the
udio language setting. If you select any other languages,
---” will be displayed instead (refer to page
4-digit-language code appears in the subtitle
enu, refer to “LANGUAGE CODE” on page 61.
f the disc has no audio language, “Not Available” will
e displayed on the TV screen.
or DTS-CD (5.1 music disc), “DTS” will be displayed.
Selecting audio streams or channels is not available.)
ormats), you can switch them during
io
L to select “Primary” or
udio to set, then press
Dolby D
Dolby D+
Multi-ch
Multi-ch
/ 3
/ 3
L] to select your desired audio
hannel.
to switch between
io] to exit
AVCHD
i
L] to select your desired audio
/ 3Dolby D 3/2.1ch 48k
e.g.) DVD-video
1
Page 36
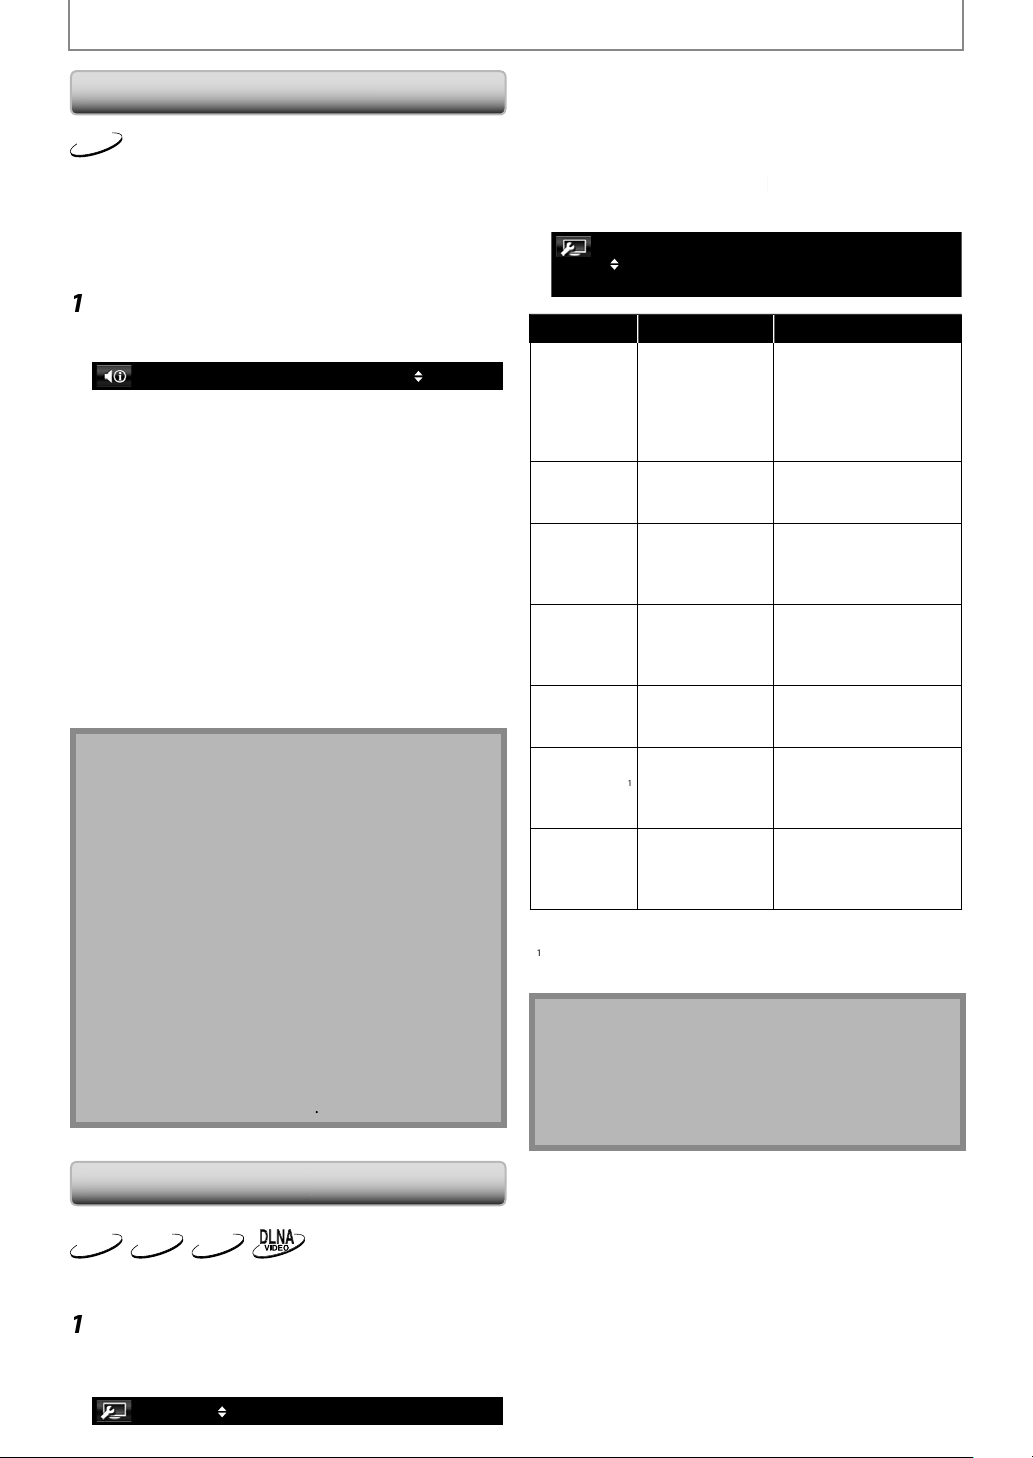
N
SPECIAL SETTINGS
de
Th
d by th
f
lby
lby
g
2
[
K/L
.
d
T
(
lb
f
.
.
j
e
y
dl
ars
2
[
K
/
L
[
K
/
L
[
/
B
ast
e
.
to
)
s
.
)
s
.
t
)
led
h
.
)
or
l-
betwee
.
to
)
l.
.
ded
i
d
d
.
d
g
j
ote
dby
V
Setting the BD Audio Mo
BD-V
ere are 2 ways to set “BD Audio Mode” setting;
whether to output the secondary and interactive audio
accompanie
audio. Depending on the setting o
igital, Do
output chan
In stop mode with BD inserted, press [Mode].
Use
BD Audio Mode Mix Audio Output
“Mix Audio Output”:
it is available, BD-video’s secondary and interactive
au
io will be output with the primary audio.
he secondary audio is the audio for the secondary
video
Director’s comment etc.) and the interactive
udio is the audio for the interactive application
Button click sounds etc.).
“HD Audio Output”:
nly the primary audio will be output. Set this mode in order
to output Do
TS or DTS-HD audio of BD through HDMI connection.
Press [Return] to exit.
You can also set “BD Audio Mode” from the setup
menu. Re
In “Mix Audio Output” mode, if there is no secondary
and interactive audio, the audio will be output as
“HD Audio Output” mode.
In “Mix Audio Output” mode, even if you set “HDMI
ulti(Normal)” in “HDMI Audio Out” setting, multi
LPCM will be output from HDMI OUT jack for BD
audio. Refer to page 15
In “Mix Audio Output” mode with HDMI audio being
utput, 2-channel down-mixed LPCM will be output
rom AUDIO OUTPUT (DIGITAL OPTICAL / COAXIAL)
acks for BD audio.
In “Mix Audio Output” mode with “HDMI Audio Out”
setting set to “Audio Mute” and “Digital Out”setting set
o “Bitstream”, DTS®, DTS-HD® and LPCM will be output
as Dolby Digital for BD audio. Refer to pages 15, 18.
You can also set “ BD Audio Mode” setting from the
setup menu. Refer to page
e primary audio or only the primary
the mode, Dolby
Digital Plus, Do
es between multi LPCM and Bitstream.
TrueHD, DTS, or DTS-HD
] to select your desired setting
y Digital, Dolby Digital Plus, Dolby TrueHD,
er to page 45
Use
to select a memory from
Memory 1” to “Memory 5” to store your
setting, then press [Enter].
Use
to select a item to be
djusted, then use
or [Enter] to
djust the setting.
2. Brightness
1. Contrast
7. Noise Reduction
Item Description
djusts the
ifference
1. Contr
2. Brightnes
3. Sharpnes
4. Gamma
orrection
Col
6. Black Level*
7. No
se
eduction
Default settin
Not effective for the video signal of VIDEO OUTPUT
(COMPONENT)
ween th
right and dark
arts of the
icture
djusts the
rightness of the
icture
usts the
harpness of the
icture for
requency range
Detai
adjustment of
t
e picture’s
rightness
usts the ba
nce
reen and red
djusts the black
eve
uces the
Re
ise of the
ayback picture.
acks (480i) and HDMI OUT jack.
n
0
sB
+1
Off
Adjustment range
7(0*
to+15(0*
o
6(0*
to+5(0*
7(0*
n*: Makes the dark
arts brighter
ff : Shows the original
picture as recor
n : Activates the Noise
Re
uction
*: Deactivates the
Noise Re
uction.
N
The setting remains even you turn the unit into the
tan
mode except unplug the AC cord.
djusting the picture is effective for HDMI OUT jack,
IDEO OUTPUT (COMPONENT) jacks and VIDEO
UTPUT (VIDEO) jack.
.
Adjusting the Pictur
DVD-V
BD-V
ou can adjust the picture quality and store the setting
ou have adjusted on memory 1-5.
During playback, press [Mode]
repeate
enu appe
AVCHD
y until the picture adjustment
.
Memory1
E
Page 37
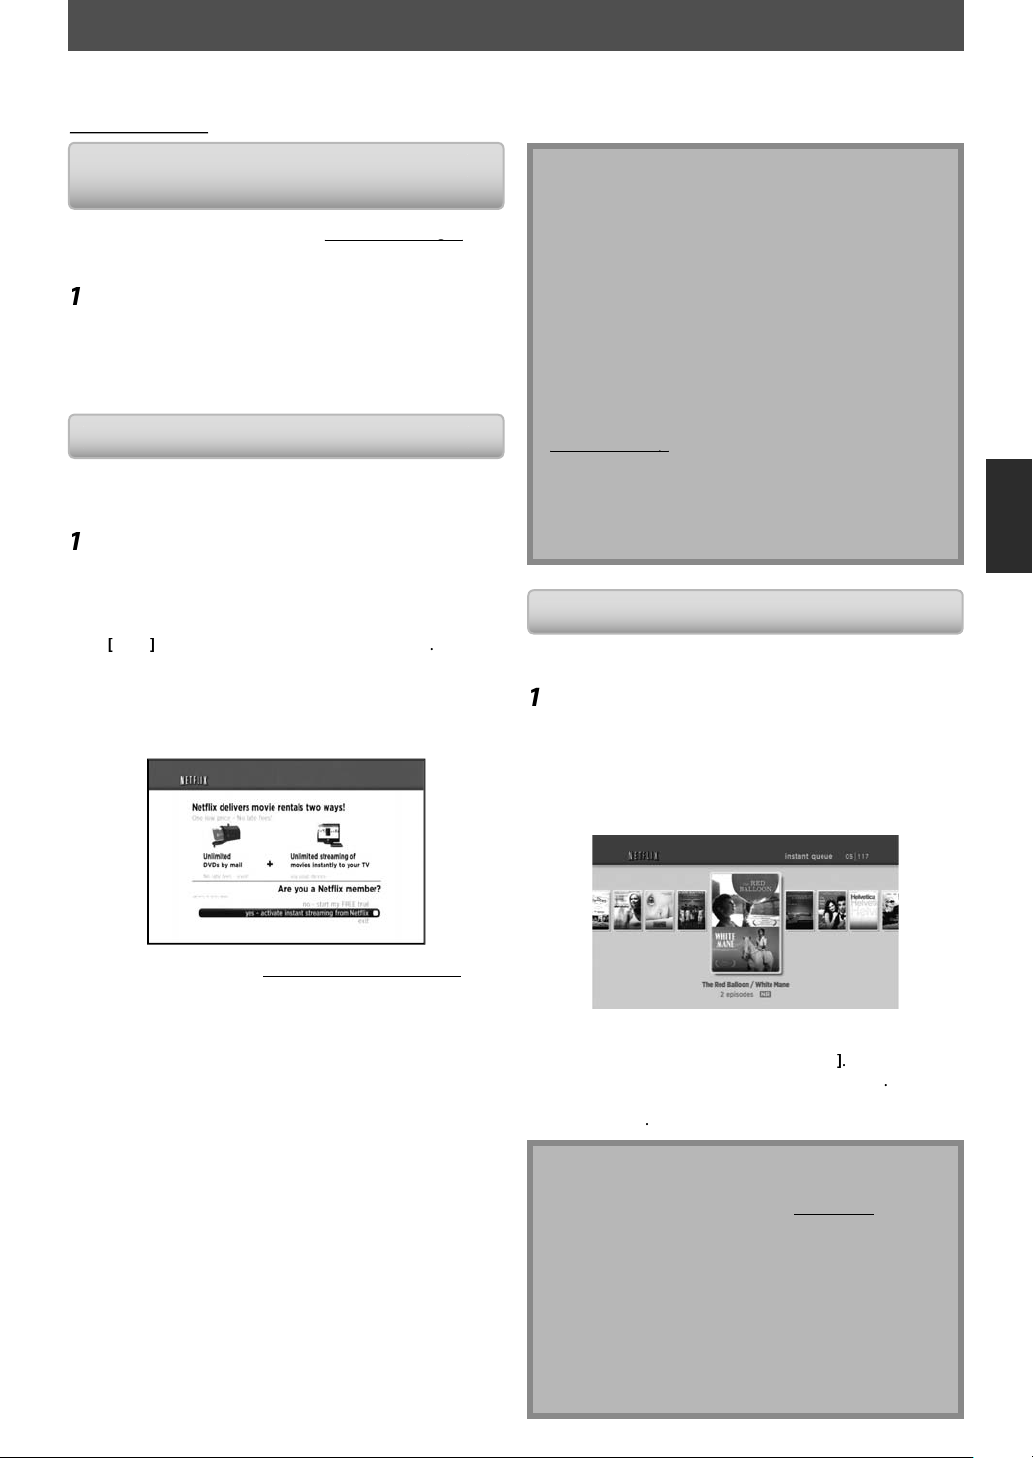
N
NETFLIX OPERATIONS
etf
x
g
.
.
2
g
y f
f
.
.
s
]
2
[
K
g
isi
d
C
f
k
37.
eate a Net
account on this unit.
)
p
p
bottom of the
)
y
d.
.
2
[
s
/
B
d
p
C
]
]
Ab
y
.
.
y
f
g
ith this unit, you can watch movies and TV episodes streamed instantly from Netflix (version 1.6) via the Internet.
n order to use this feature, you must visit the following website on your PC and become a Netflix member.
lix.com/Integra
net
Before Activating the Connection to
N
li
After creating a Netflix account at
ollow the following procedure before activating the
onnection to Netflix.
etflix.com/Integra
Connect this unit to the Internet
Refer to “Network Connection with LAN” on page 19
Set up the necessary network connection
settin
s.
Refer to “Network Connection” on pages
ctivating the Connection to Netfl
In order to watch movies and TV episodes streamed
instantl
the connection between this unit and your Net
rom Netflix via the Internet, you must activate
lix account
Press [A] while opening screen is displayed.
For opening screen, refer to page 12
Netflix welcome screen will appear.
For the first time only, “Network Service Disclaimer”
screen will appear. After confirming the content, use
/ B to select “Agree”, then press
Use
streamin
/ L] to select “yes - activate instant
from Netflix”, then press
Enter
Enter].
Activation screen with the activation code will appear.
etflix is available only in the United States.
cannot cr
newer version of software is required, software
pdate screen may appear after selecting “NETFLIX”
n step 1.
For software update, refer to “Software Update” on
age 55.
•
ou can deactivate the connection to Netflix by setting
he “Netflix Deactivate” to “Yes”. (Refer to page 56.)
•The screen image of Netflix may change after
pdating the firmware.
or questions regarding the Netflix service, visit
etflix.com/Hel
•
hen you contact the Netflix customer service, you
ay be asked for the ESN number, which is a serial
umber to identify this unit by Netflix. You can check
he ESN number on the
eactivate” screen. (Refer to page 56.
flix
“Netflix
atching Streaming Movies
fter you set up the connection to Netflix, you can
browse the instant Queue and watch movies on
Press [A] while opening screen is displaye
For opening screen, refer to page 12
The instant Queue will appear.
Use
to select the desired movie or
V episode, then press [Play B to start
ayback.
our TV.
On your PC, v
t netflix.com/activate an
og into your account.
The entry screen of activation code will appear on
your P
screen.
Enter the activation code which is
isplayed on the TV screen.
The instant Queue will appear.
The connection to Net
To browse the instant Queue and watch movies,
ip to step 2 in “Watching Streaming Movies” on
s
page
E
lix is successfully made.
After loading, playback of the selected movie or TV
e will start.
episo
To stop the playback, press [Sto
To go back to the instant Queue, press
To go back to the opening screen, press [Top Menu
Setup]
A
out the Instant Queue
Instant Queue is the list of movies and TV episodes
ou add on the Netflix website. (
You can manage the movies and TV episodes in your
instant Queue from the Netflix website on your PC.
You cannot add movies or TV episodes to your
instant Queue on this unit
You can remove movies or TV episodes from the
instant Queue on this unit
The picture quality differs depending on the speed of
our Internet connection at the time of loading.
tflix.com
Page 38
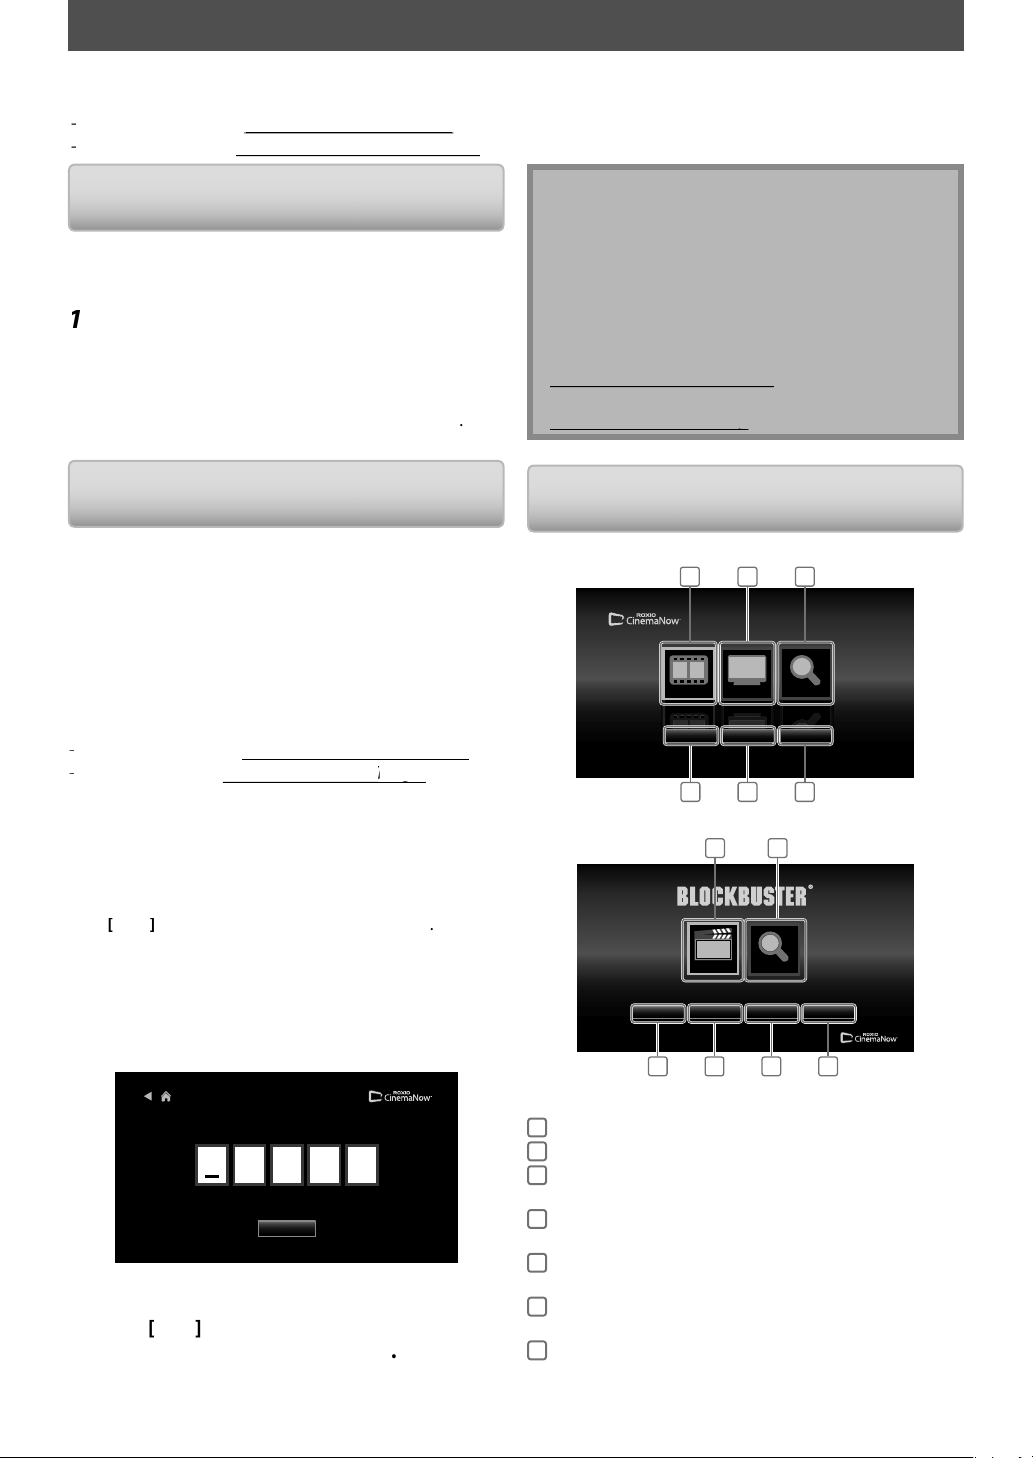
r
.
Co
.
g
55
r
d
,
y
d
y
y
C.
g
2
d
pp
f
s
]
[
s
/
B
]
g
]
,
s
]
.
t.
pp
lp
p
t
o
w
/ Blockb
uster
s
sea
l
kbus
s
h To a
y
CINEMANOW / BLOCKBUSTER OPERATIONS
.
g
g
With this unit, you can watch movies and TV episodes streamed instantly from CinemaNow / Blockbuster via the Internet.
n order to use this feature, you must visit the following website and create a CinemaNow / Blockbuster account
For CinemaNow, visit
For Blockbuster, visit
Before Activating the Connection to
CinemaNow / Blockbuste
ter creating a CinemaNow / Blockbuster account, follow
he following procedure before activating the connection
o CinemaNow / Blockbuster
nnect this unit to the Internet
efer to “Network Connection with LAN” on page 19.
Set up the necessary network connection
settin
s.
efer to “Network Connection” on pages
ww.cinemanow.com/Login
ww.blockbuster.com/auth/login
-
•The image of menu screen may change after
pdating the firmware.
ou cannot create CinemaNow / Blockbuster account
n this uni
To deactivate the connection to CinemaNow or
ockbuster, select “Deactivate” in “Settings”
CinemaNow) or “Configure” (Blockbuster).
•
or questions regarding CinemaNow service, visit
•
or questions regarding Blockbuster service, visit
ww.blockbuster.com/he
Activating the Connection to
CinemaNow / Blockbuste
n order to watch movies and TV episodes streame
instantly from CinemaNow / Blockbuster via the Internet
ou must activate the connection between this unit an
your CinemaNow / Blockbuster account.
1 On
our PC, visit following website and log
our account to get the activation code.
into
ollow the instruction given by the website.
Take a note of the activation code which appears on
P
For CinemaNow, visit
ww.cinemanow.com/activate
For Blockbuster, visit
On this unit, press [B] or [C] while
opening screen is
•
or opening screen, refer to page 12.
• Menu screen of CinemaNow or Blockbuster will a
or the first time only, “Network Service Disclaimer”
screen will appear. A
/ B to select “Agree”, then press
Use
to select “Settings”
isplayed.
ter confirming the content, use
Enter
CinemaNow) or “Configure”
Blockbuster), then press [Enter].
or CinemaNow, select “Activate” and press
again in the next screen.
ctivation code input screen will appear.
Settings-
Activation
ActivatethisdeviceonyourCinemaNowaccount.
Togetstarted,pleasevisitwww.cinemanow.com/activate
Usethenumbersonyourremotecontrol.
Activate
e.g.) CinemaNow
nter the activation code displayed on your PC
s
/ B
usin
select “Activate” and pres
or CinemaNow, confirmation message will appear.
ress
and [the Number buttons
[Enter
Enter]to complete the setting
Enter
then
ear.
Guide
enu Screen
inemaNow
Bloc
1
2
3
4
5
6
7
ter
Movies / Browse
TV Show
Search All /
earc
My Videos /
Librar
Wish List /
y Favorites
Settings /
onfigure
Help
Ci
MyLibrary
4 5 6 7
No
1
2 3
Movies
TVShows
TVShow
TVShows
Movies
Movie
MyVideos
WishList
4 5 6
1
Browse
MyFavorites
3
Search
Configure
To access the movie list
To access the TV show list
ccess search screen
To access the list of rented or
urchased movies / TV episodes
To access your wish list / favorite
ist
To access setting / configure menu
To access the help page
SearchAll
SearchAll
rchAl
Settings
Help
Page 39

d
y
d
.
2
[
K
/
s
h
.
[
K
/
s
l
[
s/B
[
s/B
d
ote
.
d
es
d
d
.
2
[
K
p
[
K
/
s
p
y
[
K
/
s
p
T
2
[
K
s
/
pp
[
K
s
/
[
s
/
B
l
]
p
C
F
]
]
CINEMANOW / BLOCKBUSTER OPERATIONS
Renting or Purchasing Movies / TV
iso
After you set up the connection to
CinemaNow / Blockbuster,
movies / TV episo
es and watch directly on your TV.
Press [B] or [C] while opening screen is
isplayed.
• For opening screen, refer to page 12
Use
/ L
"Browse" or “TV S
• List of movies / TV episodes will appear.
Use
tit
•Title details screen of the selected title will appear.
Use
/ L
e, then press [Enter].
] to select “Rent” or “Buy”, then
ress [Enter].
Checkout screen will appear.
Use
] to select “Submit Order”, then
ress [Enter].
Use [s/B
] to select “Watch Now”, then
ress [Enter].
If you want to continue browsing, select “Continue
Browsing” an
N
you select “Add to Wish List” or “Add to My Favorites”
in title details screen, the title will be added to your
Wish List” or “My Favorites”.
or CinemaNow, if you want to redeem a gift code,
select “Redeem Gift Code” in the checkout screen,
en press
• In most cases, rented movies or TV episodes are
vailable for 24 hours from the playback starting time.
Enter] and enter the gift code
ou can rent or purchase
/ B to select “Movies” ,
ows”, then press [Enter]
/ B to select the desired
press
Enter]to go back to “Movies”.
atching Rented or Purchased
ovies / TV Episodes
Follow step 1 in “Renting or Purchasing
ovies / TV Episodes” on page 39.
Use
Use
Use
If you want to resume playback, select “Resume
To stop the playback, press
To pause the playback, press
To go back to the opening screen, press
Depending on your network environment and speed,
the playback may be paused or stopped. To improve
playback condition, use high speed broadband
Internet connection (For details, contact your
Internet service provider.)
/ L /
B] to select “My Videos” or
My Library”, then press [Enter].
List of rented or purchased movies / TV episodes will
ear.
a
/ L /
B] to select a desired title,
e press [Enter].
to select “Watch from Start” or
Play Now”, the press [Enter].
ay” and press
P
Setup
Enter
Sto
Pause
Top Menu
Searching Movies / TV Episo
From the search screen, you can search for movies / TV
Episo
es by entering search words.
Follow step 1 in “Renting or Purchasing
es” on page 39
ress [Enter].
/ B to select characters,
ed on the right side of the
/ B to select a desired title
ress [Enter].
Movies / TV Episo
Use
/ L to select “Search All” or
“Search”, then
Keypad screen will appear.
Use
then
Use
/ L
ress [Enter]
en you enter a letter, titles that start with the
letter will be displa
/ L
rom the search result on the right side of
the screen, then
itle details screen of the selected title will appear.
Page 40

N
FUNCTION SETUP
u
guag
y
y
e.
k
y
y.
[
K
/
[
K
/
i
g
dly
B
)
[
K
/
].
s
o
sing the Setup Men
In the setup menu you can change the setting for audio,
video, lan
during pla
Setting items displa
vailable under the conditions at the tim
Quic
“Quick” menu contains setting items extracted from
“Custom” menu which ma
e, etc. You cannot change the setting
back.
ed in gray indicates they are not
In stop mode, press [Setup].
be used frequentl
Use
L to select , then press
Enter].
Use
sett
L] to select your desired
ng items.
Quick
Mode Select Disc
HDMI Audio Out HDMI Multi (Normal)
HDMI Video Resolution Auto
Component Output 480i
Player Menu English
Follow the procedure below
dependin
A) If “B “ does not appear on the right side
the setting items when you highlight
e items:
ress [Enter] repeate
tions.
B) If “
etting
tems:
Press [Enter].
1
Use
•
on the setting items.
to change
“ appears on the right side of the
temswhen you highlight the
L] to select options, then press
Enter
r
revious screen.
Return]to go back to the
Press [Setup] to exit.
E
Page 41

N
FUNCTION SETUP
Custom
.
[
K
/
[
K
/
h
ge
:
deo
: Parental
tal
.
[
K
/
i
T
.
s:
i
)
g
s:
[
K
/
s
or
i
“Custom” menu contains all the setting items
In stop mode, press [Setup].
Use
L to select , then press
Enter].
Use
setting category, t
Use
sett
L] to select your desired
en press [Enter].
: Langua
Vi
: Audio
: Others
r “Paren
age 49
” menu, follow the procedure on
L] to select your desired
ng items.
he setting items which are not available with
urrent situation of this unit will be displayed
n gray and you cannot select them
Follow the procedure below
epending on the setting items.
A) If “B “ does not appear on the right side
the setting items when you highlight
the item
Press [Enter] repeatedly to change
opt
ons.
If “ B “ appears on the right side of the
B
settin
temswhen you highlight the
tem
1) Press [Enter].
Use
L] to select options, then press
Enter].
Return]to go back to the
ous screen.
prev
E
Press [Setup] to exit.
Page 42

N
FUNCTION SETUP
ge
.
d
.
h
/
h
/
/
/
/
Turkish
/ /
/
/
rub
.
h
/
h
/
h
/
/
/
/
Turkish
/ /
/
/
r
u
menu.
ch
/
an
/
utc
ussia
/
ese
/
/
Tu
/
/
/
l
.
.
.
ly the l
Langua
Language
Audio Original
Subtitle Off
Disc Menu English
Player Menu English
For how to select the setting items and options, refer to “Custom” on page 41
Setting items Options
io
Au
Sets the language for audio
title
Sets the language for subtitle
c Men
Sets the language for disc menu or
-up
ayer Menu
P
Sets the language for OSD
on-screen display)
*) Settings with (*) are the default.
) “ Auto” activates the Get & Set Menu Language function. (Refer to page 51)
“Auto” is available only when “HDMI CEC” is set to “On”
riginal* /English /
rench / Spanis
ussian / Chinese/ Japanese /orean/
celandic / Hungarian/
olish /Czech
* / Englis
renc
omanian
ulgarian /Othe
Spanish /erman/
ussian / Chinese/ Japanese /orean/
celandic / Hungarian/
olish /Czech
nglish* /Fren
hin
/Japanese /
ungarian /Romanian
Bulgarian/
Auto(XXXX)*
/English*/ Français /Español
omanian
ulgarian /Othe
anish /German /Itali
rean /Danish/
rkish
her
erman /talian /Swedis
anish /Finnish /orwegian
Irish /ortuguese/
talian /Swedis
anish /Finnish /orwegian
Irish /ortuguese/
wedish /D
innish /Norwegian/
rish/ Portuguese /Polish/
utch
h/ R
landic
utch
n
zech /
Quick” menu consists of the setting menus frequently used, and they are accompanied with
you select “Other”, enter the 4-digit-number code for the desired language (Refer to “LANGUAGE CODE” on
anguages supported by the disc can be selected.
page 61). On
E
Page 43

3
N
FUNCTION SETUP
o
.
: this when a
ected.
scs recorded
de-
y
ette
:
T
deo
solutio
:
ected
ce.
pp2
p
p
r
.
:
T
T
deo resolution fo
t.
p
i
Vide
Video
TV Aspect 16:9 Wide
HDMI Video Resolution Auto
HDMI Deep Color Auto
Component Output 480i
Progressive Mode Auto
Still Mode Auto
or how to select the setting items and options, refer to “Custom” on page 41
Setting items Options
V Aspect
Sets the picture size according to
aspect ratio of the connected TV.
HDMI Vi
Re
n
9 Wide*
wide-screen TV is conn
creen format is played back over the entire TV screen.
:3 Pan & Scan:
elect this to play back the discs recorded in wide-screen format with 4:3 TV
n the pan & scan mode (with the sides of the picture cut off). Discs which are
not specified for pan & scan are pla
L
r Box
elect this to play back the discs recorded in wide-screen format with 4:3
V in the letter box mode. (with black strips at the top and bottom).
6:9 Squeeze:
hen playing back 4:3 images, the picture is displayed in the center of the
6:9 screen with a 4:3 aspect ratio.
*
DMI video resolution will be selected automatically depending on the
nn
HDMI devi
p
20
Di
in wi
ed back in the letter box mode.
4:
ives a natural and high quality film reproduction of 24-frame film
material. The connected TV has to be com
atible with 1080p24 frame
nput.
HDMI Dee
Colo
Sets whether to output the picture
from HDMI OUT jack with Deep
olor or not
*
he picture from HDMI OUT jack will be output with Deep Color to the
onnected TV which supports HDMI Deep Color.
:
he picture from HDMI OUT jack will be output without Deep Color.
Component Output
the vi
component outpu
r
i*
80
p
080
E
4
Page 44

N
FUNCTION SETUP
)
jacks.
y
g
g
g
g
T
ll
Vid
y
ll Mode
.
uto*:
eld:
stable eve
uto
ected.
e:
f
.
g
y
y
ls d
.
f
ect the items.
Setting items Options
rogressive Mode
Sets the optimum progressive
mode for the image material
utput from HDMI OUT jack and
VIDEO OUTPUT (COMPONENT
epending on the video material,
image qualit
due to the wron
Mode settin
chan
Sti
Adjusts picture resolution and
uality in still mode
*) Settings with (*) are the de
) An individual picture on the TV screen is called “Frame”, which consists of two separate images called “Field”.
may get degraded
Progressive
. In such case,
e the settin
ault.
Auto*:
he progressive mode will detect 24-frame film material (movies) and
automatica
eo:
Suited for pla
A
Automatically selects the best resolution setting (“Frame” or “Field”) based
n the data characteristics of the pictures.
i
Stabilizes the pictures, although the picture quality may become coarse
ue to the limited amount of data. Select “Field” when the pictures are still
n
ram
isplays relatively motionless pictures in higher resolution. “Frame”
mproves the picture quality, although it may unstabilize the pictures due
o alternate output of 2-field data.
y select appropriate progressive mode.
ing back video material discs (TV shows or animation).
n if “A
” is sel
“Quick” menu consists of the setting menus frequently used, and they are accompanied with
If the picture is not output properly to the TV because of “HDMI Video Resolution” or “Component Output”
, press and hold
settin
default automaticall
If an HDMI cable is connected, for video resolution for the component output, you can only select video
resolution that currentl
If the video resolution for the component output and HDMI video resolution do not match, the video resolution
or the component output will be switched to “480i”. VIDEO OUTPUT (COMPONENT) jacks may not output any
signa
If you play back copy-protected DVD-video, 480p signal will be output from VIDEO OUTPUT (COMPONENT) jacks,
Even if “HDMI Video Resolution” is set to “1080p24”, for the BD that is not recorded by 1080p24 frame or for DVD,
a video resolution supported by the disc and the display device will be output instead o
The setting items which are not available with current situation of this unit will be displayed in gray and you
If “HDMI Video Resolution” is set to “1080p” or “1080p24”, you cannot set “Component Output”.
epending on the disc material.
en “Component Output” setting is set to “720p” or “1080i”
nnot sel
Play Bon the front panel for more than 5 seconds. Both settings will be reset to the
.
output from HDMI OUT jack or “480i”.
1080p24 frame.
E
Page 45

5
N
FUNCTION SETUP
o
.
ode
y
y
d
.
lby
d
audio format for the audio
UDIO OUTPUT
j
T
T
:
T
.
g
(
k
l
C
g
:
C
y
y
y
T
y
.
j
Connected
.
Audi
Audio
BD Audio Mode HD Audio Output
HDMI Audio Out HDMI Multi (Normal)
Down Sampling Off
DRC Auto
or how to select the setting items and options, refer to “Custom” on page 41
Setting items Options
BD Audio M
or BD, selects whether to output
e secondary and interactive
audio with primar
available or onl
audio. Refer to “Setting the BD
Au
io Mode” on page 36
HDMI Audio Out
the
output from HDMI OUT and
A
(DIGITAL OPTICAL / COAXIAL)
Down Samplin
Sets the digital audio output from
AUDIO OUTPUT
OPTICAL/COAXIAL) jac
p
aying back BD or DVD recorded
in LP
M.
DR
Sets whether to compress the
range of sound volume (d
range control) when Dolb
olby Digital Plus or Dolb
rueHD audio is played back.
) Settings with (*) are the default.
• “Quick” menu consists of the setting menus frequentl
•
nder following circumstances, “HDMI Multi(Normal)”, “HDMI Multi(LPCM)” and “HDMI 2ch” are not available.
- HDMI cable is not connected to HDMI OUT
-
- Connected TV is not compatible with audio output.
audio if it is
the primary
acks.
DIGITAL
s when
namic
Digital,
TV is off
D Audio Output*:
utputs only the primary audio. Set this mode in order to output Do
igital, Dolby Digital Plus, Dolby TrueHD, DTS or DTS-HD audio of BD
hrough HDMI connection.
Mix Au
HDMI Multi(LPCM):
io Output:
utputs the secondary and interactive audio with primary audio if it is available.
DMI Multi(Normal)*:
he multi-channel audio signals are output from HDMI OUT jack with
itstream or LPCM.
he multi-channel audio signals are output from HDMI OUT jack with LPCM.
Refer to pages 46-48 for setting options.
DMI 2ch
he audio signals are output from the HDMI OUT jack with a downmixed to
LPCM
udio Mute:
utes the HDMI audio signal, and set the signal format from AUDIO OUTPUT
DIGITAL OPTICAL / COAXIAL) jacks.
Refer to “Digital out setting” on page 46 for setting options.
n:
PCM signals are converted to 48 kHz for output.
Set to “On” when using digital connections to an AV receiver that is not
compatible with samplin
ff*
or BD and DVD recorded in LPCM without copyright protection, 2-channel
udio signals up to 192 kHz are output as LPCM signals with no conversion.
uto*:
hen the discs recorded in Dolby TrueHD format are in playback, this unit detects
RC setting of the disc and set “DRC” setting to “On” or “Off” automatically.
ff
n
used, and they are accompanied with
ack.
frequencies of 96 kHz.
E
4
Page 46

N
FUNCTION SETUP
g
f
tstream*:
y
CM:
.
g
Th
T
f
y
HDMI Audio Out
HDMI Multi(LPCM)
Audio
HDMI Audio Out
HDMI Multi(LPCM)
Digital out settin
en “Audio Mute” is selected in “HDMI Audio Out” setting, HDMI audio signal will be muted and the audio signals
output
rom AUDIO OUTPUT (DIGITAL OPTICAL / COAXIAL) jacks change depending on “Digital Out” setting.
Quick HDMI Audio Out Audio Mute Digital Out
i
When playing back discs recorded in Dolby Digital, Dolby Digital Plus, Dolby TrueHD, DTS® or DTS-HD®,
the corresponding core stream (Dolb
LP
LPCM signal will be output from AUDIO OUTPUT (DIGITAL OPTICAL / COAXIAL) jacks
This setting is not effective when the HDMI audio signal is output.
Digital or DTS®) are output.
Speaker settin
is unit allows you to enjoy multi-channel surround sound such as 7.1-channel / 5.1-channel surround.
Front left and right speakers
Surround back left and right speakers
Subwoofer
Centre speaker
Surround left and right speakers
e.g.) basic layout with 7.1-channel surround system
o make the most of its feature, set up your speakers appropriately by referring to the following table.
peaker setting options are available at the following locations;
<Speaker setting
(Available when
uick
ustom
or the audio signal output from HDMI OUT jack>
ou have HDMI cable connected to HDMI OUT jack)
E
Page 47

N
FUNCTION SETUP
[
K
/
L
.
[
K
/
L
.
ess
[
s
/
B
k
l
.
:
[
s
/
.
T
s
/
s
/
]
:
.
peak
h
ly by
f
ont
ected device is not
allnte
*
ll
d
*
allrround Back
*
efault
]
to
l
T
est Tone:
b
h
d
ect “O
deactivate
est Tone”.
]
t
]
to
l
h
dB*)
T
)
)
dB*)
ch
dB*)
h0 d
dB*)
ch
)
ch
)
t.
ow to navigate through “HDMI Multi(LPCM)”.
Use
Use
•
Use
options in “Spea
For setting options in “Speaker Size” setting:
Press [Enter] to se
For “Test Tone”
Use
•
For “Default”
Press [Enter] to reset to the default.
Press [Setup] to exit
Speaker Size
Selects the desired
s
c
appropriate
re
or each speaker.
] to select your desired menu item then press [Enter]
] to select your setting items
r
Return]to go back to the previous screen.
to select desired options. (Except for “Test Tone”, “Default” and setting
er Size” setting.)
ect desired options
B to select “Off”, “Manual” or “Auto”, then press [Enter]
he test tone will be output. If you select “Manual”, use K / L to select desired speaker, then use
he volume. If you select “Auto”, use
f you want to stop the test tone, press
Menu Setting items Options Descriptions
Fr
er to set. Then
ange the setting
erring to the
escriptions.
nnel Leve
ests or sets the volume
woofer
rroun
D
T
“Test Tone” is the
tone which
can
rom the speakers
so t
a
just the volume
or each speaker.
Front Lc
nter
woofer
Front Rch
rround R
Surround Back
Rc
rround Back
L
rround L
Default
Bto adjust the volume of the speaker that outputs the test tone.
Return
Large*
m
r Large
Sma
Large
m
Large
mall
ff*
e output
at you can
uto
0 dB to -12 dB
(0
dB to -12 dB
0 dB*
dB to -12 dB
0 dB*
dB to -12 dB
(0
dB to -12 dB
(0
(0
dB to -12 dB
0 dB*
dB to -12 dB
0 dB*
anua
B to -12 dB
arge:
or the large speakers with strong low
requency reproduction capabilities.
mall:
or the small speakers which do not
rovide strong bass sound.
ou cannot change the setting of
woofer”. If conn
ompatible with subwoofer, “Subwoofer”
ill be displayed in gray.
elect “Default”, then press
eset “Speaker Size” setting to the default.
l
ff” to
elect “Manual”, then press
anually set the volume for the desired
peaker.
elect “Auto”, then press
utomatically output the test tone from
ach speaker.
you have selected “Manual” in “Test
one”, select the desired speaker to set
nd adjust the volume for the selected
peaker.
f you select “Auto” in “Test Tone”, test
one will automatically be output in order.
djust the volume of the speaker that
utputs the test tone.
elect “Default”, then press
eset “Channel Level” setting to the
l
B to adjust
Enter
“T
Enter
Enter
Enter]to
o
E
Page 48

N
FUNCTION SETUP
e
T
sound is
stance
e
.
stance
eet
y
s
/
B
.
s
t
)
))
l
)
)
d
)
))
ack
)
))
]
t
f
)
).
g
g
Menu Setting items Options Descriptions
Delay Tim
his is a parameter for
ptimizing the timing at
which the
utput from the
peakers according to
heir di
listening position
*) Settings with (*) are the de
For “Speaker Size” setting, the settings of each speaker size may be adjusted automatically corresponding to
ach setting. (e.g. If “Front” is set to “Small”, you cannot set “Center”, “Surround”, and “Surround Back” to “Large”.
For “Delay Time”, the difference between the value of the “Front”, “Surround” and “Surround Back” setting
annot exceed 15 ft (4.5m), and the difference between the value of the “Front” and “Center” setting cannot
xceed 5 ft (1.5m
For “Delay Time”, the value of the “Center”, “Surround” and “Surround Back” setting cannot exceed the value of
he “Front” setting.
For “Delay Time”, the setting of “Center”, “Surround” and “Surround Back” will be changed automatically to the
settin
“Surround Back” will be chan
from th
value of the “Front”. (e.g. If the “Front” is set to 60ft (18m), the setting of “Center”, “Surround” and
Di
Fron
nter
rroun
rround B
Default
ault.
ed to 60ft (18m) as well.)
F
*
r
t to 60ft (12ft*
0m to 18m (3.6m*
ft to 60ft (12ft*
(0m to 18m (3.6m*)
t to 60ft (10ft*
0m to 18m (3.0m*
ft to 60ft (10ft*
0m to 18m (3.0m*
et the desired measure system. This
easure system will be used for
Time” setting. Press
“Dela
) to switch the settings
elect the distance from the listening
osition to the speaker to get the idea
elay time.
elect “Default”, then press
eset “Delay Time” setting to the default.
Enter]
Enter
or
o
E
Page 49
9
N
FUNCTION SETUP
sc.
[
K
/
L
.
2
Use
]
C
l
[
K
.
[
K
.
o release the
tation.
]
.
)
[
K
.
[
K
.
.
ll
.
tted.
d.
table for c
3.
.
]
]
: Suitable for c
.
)
[
K
.
.
ote
T
Parental
atings control allows you to set a limit, which prevents your children from viewing inappropriate materials. Playback
ill be stopped if the ratings exceed the levels you set, and it will require you to enter a password before playing back
di
Parental
BD Rating Level All
DVD Rating Level All
Password Change
Use
] to select , then press [Enter]
Use [the Number buttons] to enter your 4-digit password.
For the first time use:
That number will be used as the password from the second time. Record your password in case you forget it.
f you forget the password, enter
•
hile you input the password, press
•
the Number buttons]to enter any 4-digit number (except for 4737), then press
4]7]
3]7]. The password will be cleared and rating level will be set to “All”.
Clear]to clear the number, then re-enter the password.
Proceed to A –
) BD Rating Leve
1) Use
Use
) Press [Setup] to exit
) DVD Rating Level
Use
1
Use
) Press [Setup] to exit
/ L] to select “BD Rating Level”, then press [Enter]
/ L] to select your desired option, then press [Enter]
”
T
Age Setting”
After selecting “Age Setting”, use
0]
1]5
/ L] to select “DVD Rating Level”, then press [Enter]
/ L] to select your desired level, then press [Enter]
To set the age limitation.
limi
the Number buttons] to enter the age from 0 – 254. (e.g. for age 15, press
ATING EXPLANATIONS
A
[Adult] : DVD software of any grades (adult / general / children) can be played back
NC-17] : No one under 17 admi
R] : Restricted; under 17 requires accompanying parent or adult guardian.
PGR] : Parental guidance recommende
PG-13] : Unsui
PG] : Parental guidance suggested
G
Kid Safe
: Parental control is inactive; all discs can be played back.
hildren under 1
: General audience.
hildren
Enter
C) Password Change
E
Use
1
) Enter a new 4-digit password, then press [Enter].
) Press [Setup] to exit
/ L] to select “Password Change”, then press [Enter]
N
he resume information will be cleared if you change the parental level when the resume information is on.
4
Page 50
N
s
.
:
Th
T
.
:
dby
lly
.
y
:
:
CEC
.
*
y
.
d:
d.
ectio
TestPerfo
ectio
t.nable
)
ess
g
)*
address.
y
l
k
y
S
g
)*
.
l
S
Other
For how to select the setting items and options, refer to “Custom” on page 41
Setting items Options
Angle Icon
Auto Power Off
Panel Displa
ets the brightness of the
ront panel display.
HDMI
whether to utilize
DMI CEC function
Mode Select
elects the media to
ayback.
etting will be back to
Disc” when you turn the
unit to the standb
Network Connection
Others
Angle Icon On
Auto Power Off On
Panel Display Auto
HDMI CEC On
Mode Select Disc
Network Connection Enable(Easy)
Software Update
n*
ngle.
he angle icon disappears on the TV screen
n*
this unit is left with no activity for more than 25 minutes, this unit turns into the
tan
ets off the auto power off
ront panel display gets darker during playback.
right:
ront panel display gets brighter.
immer
ront panel display gets darker.
n
isc*:
elect this when you play back a disc
D Car
elect this when you play back an SD Memory Car
mode.
etwork:
elect this when you use DLNA home media server or Netflix / CinemaNow /
lockbuster feature.
nable(Easy)*
Custom
FUNCTION SETUP
e angle icon appears on the TV screen when playing back the scene with various
:
mode automatica
:
*
nn
n
IP Addr
ettin
DN
Settin
.
Auto(DHCP
anua
Auto(DHCP
anua
P Address
ubnet Mas
rimary DNS
econdary
fault
atewa
N
rm the network conn
est. After you change the IP
ddress or DNS setting, always
erform this test.
If you select “Enable(Easy)”,
onnection test will automatically
r
the IP
In most cases,
ou can connect to
he Internet without making any
hanges to the default setting.
Set the DNS setting
n most cases, you can connect to
e Internet without making any
hanges to the default setting.
n
E
Page 51
N
ork Co
able
)
g
Use*
.
y
er.
e
y
ection
d
uto*
0BAS
f
ll
00BAS
e
g
*You ca
estrict
access
ted Allo
used.
hib
C Address
address.
sableivate the netwo
ection.
ol
able to
able” to switch
cable.
f
sableisclaime
.
ll
e.
.
:
cates the current f
.
:
:
f
.
y
db
y
&
T
guag
T
)
FUNCTION SETUP
Setting items Options
Netw
Software Update
ows you to update this
A
nit’s firmwar
Refer to page 55
) Settings with (*) are the default.
HDMI CEC allows integrated system control over HDMI and is part of the HDMI standard. In addition to
ntegra / Onkyo AV components, it allows interoperability with CEC-compatible AV components and TVs made by
other manu
hen “HDMI CEC” setting is set to “On”, functions listed below will be available.
irect Change
hen this unit is turned on, the TV also is turned on and the appropriate external input channel will be selected
automaticall
ress [Play Bwhen the unit’s power is on.
Stan
irst and then turns off the power of this unit also.
stem Information
S
Get
he unit recognizes the OSD language set for the TV and automatically sets the same language as the player
menu lan
•
his feature is available only when “Auto(XXXX)” is selected in “Player Menu” in the setup menu. (Refer to “Player
enu” on page 42.
nnection
acturers
. The appropriate external input channel can also be selected on your TV automatically when you
y
en you press and hold
Set Menu Language
e (OSD menu language) for this unit.
n
Custom
i
wer On Contr
rrent Version
ndi
isc Update
llows you update this unit’s firmware using a disc.
etwork Update
ou can update the firmware version by connecting this unit to the Internet.
/
On / Standby] on the front panel for 2 seconds, it turns off the power of the TV
roxy
ettin
nn
Spee
-Liv
ettin
MA
r
Do Not
s
A
1
E Hal
10BASE Fu
100BASE Half
E Full
1
Allow
Limited Allow
it
Pro
En
Di
irmware version
rox
ddress
roxy Port
Set the proxy server
n most cases, you can connect to
he Internet without using prox
v
Set the connection speed.
n most cases, you can connect to
he Internet without making any
hanges to the default setting.
n r
imi
nctions are
You can check the MAC
nn
“En
n / standby mode from the
onnected external device with a
AN
en set to “Enable”, the power
onsumption could reach a
maximum o
isplays the network service
isclaimer
Internet
w when BD-Live
5W.
rk
HDMI CEC is available only when the display device is connected by an HDMI cable, and when it supports HDMI CEC feature.
E
Page 52
N
FUNCTION SETUP
f
s
[
p
2
[
K/L
[
K/L
[
K/L
,
[
K/L
.
ess
.
.
.
ectio
est
lable whe
sable
.
y
(
)
e
g
w
g
52
2
[
K
/
].
f
]
t
lly
t
.
)
i
.
.
gg
2
U
[
K
/
,
[
U
[
K
/
.
.
Network Connection
et up the network connection settings in order to use
D-Live, DLNA home media server, Netflix / CinemaNow /
lockbuster feature or network update function.
Connection Test
After you enable a network connection or change the
etwork settings, always perform the connection test to
check i
the connection is correctly made.
In stop mode, pres
se
] to select , then
nter].
se
to select “Others”, then press
nter].
se
Connection”
se
hen
onnection test will start automatically and the test
esult will appear right after the connection test finishes.
“Testing...” : The test is in progress
“Pass” : Connection test is successfully completed.
“Fail” : Connection test failed. Check the connection
settings.
r
Enter]to go to the list of network status
nfirmation screen
to
elect “Network
then
] to
elect “Connection Test”,
ress [nter].
Others
Connection Test
IP Address xxx.xxx.xxx.xxx
Subnet Mask xxx.xxx.xxx.xxx
Default Gateway xxx.xxx.xxx.xxx
Primary DNS xxx.xxx.xxx.xxx
Secondary DNS xxx.xxx.xxx.xxx
then press ‘ENTER’.
etu
ress [E
ess
ter].
Enable(Easy)
Network settings are set to the following settings initially.
(In most cases,
aking any changes to the default settings.)
- IP Address Setting Auto(DHCP)
- DNS Setting Auto
- Proxy Setting Do Not Us
- Connection Speed Auto
- BD-Live Settin
f you want to set the network settings back to the default
settin
s as above (except “BD-Live Setting”), follow the
rocedure below.
ou can connect to the Internet without
DHCP
Allo
ollow steps 1 to 4 in “Connection Test” on
ge
se
L to
elect “Enable(Easy)”, then
pressnter
The unit will start the connection test automatically
and the test result will appear right a
inishes.
After the connection test finishes, press
go to network status confirmation screen.
ess [E
ettings and set
utomatica
ter] to activate the network
e network connection
.
ress
etup
ter the test
Enter
xi
o
ote
The setting of “BD-Live Setting” will not be set back to
the default, even if you follow the procedure
Enable(Custom
n following cases, select “Enable(Custom)” to set each
sett
ng as necessary.
- When connection test failed with the setting of
“Enable(Easy)”
- When instructed by your Internet service provider to make
specific settings in accordance with your network
environment
ress [nter] to go back to the previous
screen, or
ress [etup to xit
llow steps 1 to 4 in “Connection Test”
n page52
If the connection test passes, you are ready to use
BD-Live, DLNA home media server, Netflix /
CinemaNow / Blockbuster feature or network update
unction, using the Internet without making any
xtra settings.
If the connection test fails, you may need to change
he MAC address settings on your router
“Conn
selected in “Network Connection”
n T
” is not avai
n “Di
” is
se
se
he desired setting.
“Auto(DHCP)” : If your router has DHCP server
“Manual” : If your router does not have DHCP
L to
en press
L to
elect “Enable(Custom)”
r
elect “IP Address Setting”,
en press [ter] repeatedly to select
unction, select “Auto(DHCP)”
server function, select “Manual”
E
Page 53
N
FUNCTION SETUP
address and
.
K
/
f
address
y
b
xxx
xxx
xxx
xxx
xxx
xxx
xxx
xxx
xxx
xxx
xxx
y
g
g
umbe
ose of other devices.
]
l
/
L
y
y
buttons and number buttons.
xxx
xxx
xxx
xxx
xxx
xxx
xxx
d
h
h
]
l
.
lly b
y
]
to
)
the next cell.
yg
2
U
[
K
/
,
U
[
K
/
t
you select “Manual”, follow the following
nstruction to set the IP
3-a) Use
•
specifications of
•
address number of other devices. (e.
connected via LAN cable) and assi
n
3-b) After you enter all correctly, press
Confirmation message will appear. Select “Yes” to
comp
3-c) UseK
appear. Enter primar
L to select “IP Address”, “Subnet Mask” or
“De
ault Gateway”, then press
Enter] IP
etting screen will appear. Enter IP address, subnet
mask and default gatewa
er buttons.
num
Others
IP Address Setting
IP Address
Subnet Mask
Default Gateway
then press ‘ENTER’.
with cursor buttons and
xxx xxx
xxx
xxx xxx xxx xxx
xxx
xxx xxx xxx xxx
xxx
xxx xxx xxx
. . .
xxx
xxx
. . .
xxx
xxx
. . .
nter the IP address number after checking the
our router.
f the IP address number is unknown, check the IP
r from th
ete the settings.
Others
IP Address Setting
Is Setting OK?
IP Address
Subnet Mask
Default Gateway
No
Yes
xxx . xxx . xxx . xxx
xxx . xxx . xxx . xxx
xxx . xxx . xxx . xxx
to select “Primary DNS” or “Secondar
NS”, then press
Enter] DNS setting screen will
DNS and secondary DNS with
rsor
Others
DNS Setting
Primary DNS
xxx xxx
Secondary DNS
xxx
xxx xxx xxx xxx
then press ‘ENTER’.
xxx
xxx xxx xxx
. . .
xxx
xxx
. . .
DNS
xxx
xxx
xxx
. PC
n a different
Enter
xxx
xxx
3-d) After you enter all correctly, press
Confirmation message will appear. Select “Yes” to
comp
ete the settings.
Others
DNS Setting
Is Setting OK?
Primary DNS
Secondary DNS
No
Yes
ress [eturn to go back to the previous
creen,r press [etup toxit
The range of input numbers is between 0 and 255.
•
you enter a number larger than 255, the number will
utomatica
e 255.
The manually entered number will be saved even if
ou change the setting to “Auto(DHCP)”.
•
hen you enter a wrong number, press
ancel. (the number will be back to “0”.
you want to enter 1 or 2 digit number in one cell,
B to move on to
the entered IP address or the default gateway or
rimary DNS number is same as the default setting, IP
ress setting will be set to “Auto(DHCP)”. (The
anually entered number will be saved.)
•
hen IP address setting is set to “Manual”, the setting
f DNS setting will automatically be “Manual” and
when IP address setting is set to “Auto(DHCP)”, you
an set either “Auto(DHCP)” or “Manual” for DNS
etting.
llow steps 1 to 4 in “Connection Test”
n page
e
hen
e
ress [
2
L to
elect “Enable(Custom)”
ress [nter].
L to
elect “Proxy Setting”, then
nter] repeatedly to select the
esired setting.
For default settings, select “Do Not Use”.
If you need to change the proxy setting as instructed
your Internet service provider to set the
esignated proxy address and port, select “Use”.
you select “Use”, follow the following
nstructions
set the proxy address and
roxy por
Enter
xxx . xxx . xxx . xxx
xxx . xxx . xxx . xxx
Clear
nter the numbers instructed by your Internet
provi
the number is unknown, check the number of
ot
er devices (e.g. PC connected via LAN cable) and
assign t
E
er.
e same number.
Page 54
N
FUNCTION SETUP
/
L
dd
2 3 4 5 6 7 8 9 0
a b c d e f g h i j
k l m n o p q r s t
u v w x y z . - _
OK
K
/L/
.
.
.
d.
ds.
?
[D]
Set the entered number o
d.
]
b
t
t.
p
f
F
2
U
[
K
/
,
U
[
K
/
L
U
[
K
/
L
:
d
:
“
ll
“
“
P
Th
g
access fo
scs.
F
22U
[
K
/
L
U
[
K
/
L
U
[
K
/
L
“
llow”:
f
f
“
:
P
3-a) Use K
Enter]. Proxy address setting screen will appear.
Enter proxy a
The keyboard screen will appear.
the Number buttons] Enter number
3-b) After you enter proxy address correctly, press
Confirmation message will appear. Select “Yes” to
omplete the settings.
3-c) Use K / L to select “Proxy Port”, then press
Enter] Proxy port setting screen will appear. Enter
proxy port num
3-d) After you enter proxy port correctly, press
ress [Return
screen,r press [
The range of input numbers for the port number is
between 0 and 65535. (If you enter a number larger
an 65535, it will be regarded as 65535.)
For proxy port, the selected ports may be blocked and
not be able to use depending on your network
nvironmen
to select “Proxy Address”, then press
ress.
Others
Proxy Address
_
1 34567890
234567890
34567890
abcde f gh i j
abcde f gh i j
abcde f gh i j
k lmnopqr s t
k lmnopqr s t
k lmnopqr s t
uvwxyz . - _OK
uvwxyz . - _OK
uvwxyz . - _OK
s B : Move the highlight
Enter] : Enter the highlighted number / word
A]
Clear the entered number or wor
B] lear all the entered numbers or wor
C] : Switch between abc ? ABC ? @!
Others
Proxy Address
Is Setting OK?
xxxxx
No
Yes
er with number buttons.
Others
Proxy Port
Please select the input Proxy Port.
then press ‘ENTER’.
xxxxx
OK
OKa/A/@All ClearClear
to go back to the previous
etup to
xi
r wor
Enter]
You can set connection speed as your preference. (The
de
ault setting is “Auto”.)
ollow steps 1 to 4 in “Connection Test”
n page
se
hen
se
hen
se
hen
L to
elect “Enable(Custom)”
ess [nter].
elect “Connection Speed”,
ess [nter].
elect the desired setting,
ess [nter].
“Auto”
Set the appropriate connection speed automatically, in
accor
ance with your network environment.
“1BASE Half”
Set the connection speed to “10BASE Half”.
10BASE Fu
Set the connection speed to “10BASE Full”.
D
100BASE Half”:
Set the connection speed to “100BASE Half”.
100BASE Full”:
Set the connection speed to “100BASE Full”.
ess [eturn
creen,
hoose a connection speed in accordance with your
etwork environment.
e network connection may be disabled depending
n the device, when the settings are changed.
to go back to the previous
r press [etup
to xit.
You can limit Internet
(The default setting is “Allow”.)
r BD-Live di
ollow steps 1 to 4 in “Connection Test”
n page 5
se
then
se
then
se
ess [nter].
ess [nter].
n
ess [nter].
elect “Enable(Custom)”,
select “BD-Live Setting”,
select the desired setting,
“Aow”:
nternet access is permitted for all BD-Live contents.
Limited A
nternet access is permitted only for BD-Live contents
which have content owner certi
without the certi
P
ibit”
nternet access is prohibited for all BD-Live contents.
ess [eturn
creen, or press [
icates is prohibited.
to go back to the previous
etup] to xit.
icates. Internet access
E
Page 55

N
FUNCTION SETUP
e
2
[
K
/
L
T
sio
software version.
2
[
K
/
L
[
K
/
L
P
.
ease
g
oad the latest
.
e
2
[
K
/
L
[
K
/
L
[
[
K
/
L
A
pp
)
A
.
.
T
e
o
et.
2
U
[
K
/
L
U
[
K
/
L
U
[
K
/
L
.
C
[
K
/
L
ersion.
W
pp
y.)
A
.
es.
.
isabl
eactivate all the network connection and settings.
ollow steps 1 to 4 in “Connection Test”
n page
Ue
2
select “Disable”, then press
nter].
Press [eturn
creen,r press [etup
to go back to the previous
to
ote
he network connection can be reactivated by setting
the network connection to “Enable(Easy)” or
“Enable(Custom)”.
Software Update
rrent Ver
can confirm the current
ollow steps 1 to 3 in “Connection Test”
on page
Ue
then press [nter].
Ue
then press [nter].
ress [nter] or [eturn
ote
Pl
visit www.integrahometheater.com
downl
isc Updat
ou can update the software by using disc.
ollow steps 1 to 3 in “Connection Test”
n page
Use
then
Ue
press
Ue
nter].
Disc tray will open automatically.
•
nsert the disc for software update and then press
Open / Close
E
n
2
ess [nter].
nter].
elect “Software Update”,
elect “Current Version”,
Others
Current Version
Current Version x.xxx
If you wish to check latest update
or other product information,
please check our Website.
toxit
firmware version
select “Software Update”,
select “Disc
select “Yes”, then press
xit.
pdate”, then
After completing loading disc,
onfirmation message will appear.
elect “Yes” and press [Enter] to start
pdating.
It may take a while to complete the updating.
(Please wait until “100%” a
isplay.
fter the disc updat
ill restart
ease do not unplug the AC power cord while
xecuting the “Disc Update”.
•
ll settings will remain the same even if you update
he firmware version
he version of Netflix will also be updated if newer
ersion of Netflix is available when updating the
irmware.
Network Updat
You can update the software by connecting the unit t
Intern
nd eject the disc
ears on the front panel
finishes, this unit
llow steps 1 to 3 in “Connection Test”
n page
e
hen
e
hen
e
2
elect “Software
ress [nter].
elect “Network
ress [nter].
elect “Yes”, then press
dat
date”,
ter].
This unit will then start checking for the latest
irmware version
nfirmation message will appear.
e
elect “Yes”, then press
ter].
The unit will start downloading the latest firmware
v
hen the download completes,
nfirmation
ssage will appear. Press
ter].
The unit will start updating the firmware version.
It may take a while to complete the updating.
(Please wait until “100%” a
displa
ears on the front panel
ter updating finishes, this unit will
estart andpen the disc tray
utomatically.
ease do not unplug the AC power cord or LAN cable
ile executing the “Network Update”.
•
ll settings will remain the same even if you update
he software version
•The disc tray will open automatically after updating
inish
The version of Netflix will also be updated if newer
This is not a malfunction
ersion of Netflix is available when updating the
irmware.
”,
Page 56
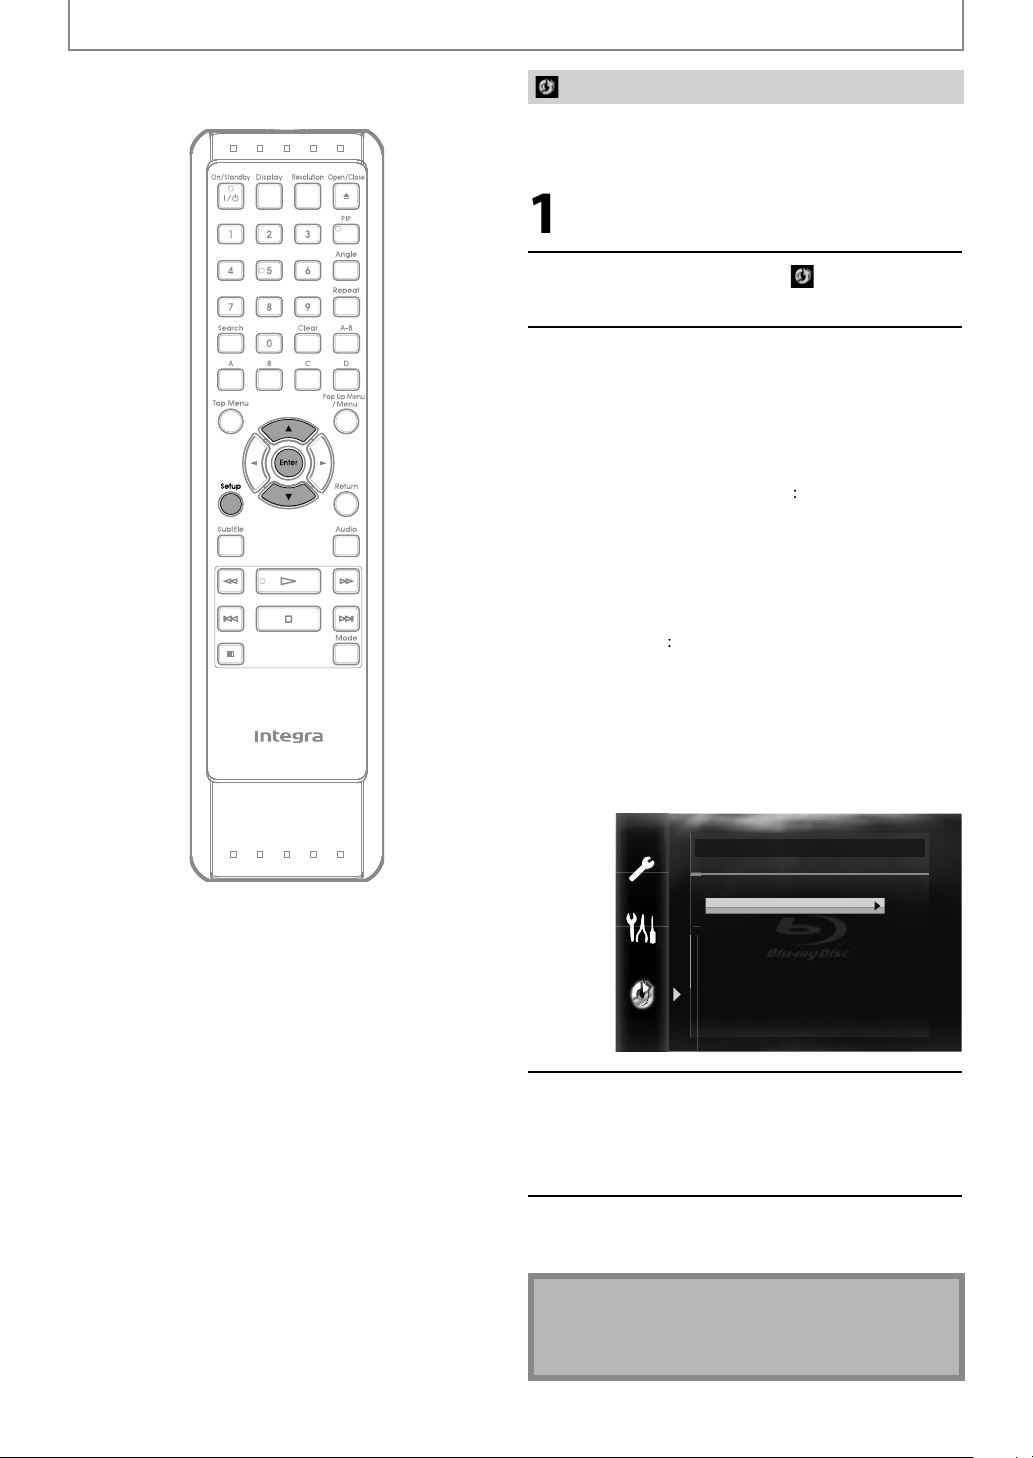
N
FUNCTION SETUP
ate Netf
.
[
K
/
[
K
/
p
.
T
eset.
)
data saved for the
d)”
)
.
t.
:
.
[
K
/
ase Saved
Initialize
Initialize the setting, SD Memory Card, network setting or
iv
In stop mode, press [Setup].
lix
Use
L] to select , then press
Enter].
Use
then
Setup” Resets the setup menu to the default
“Format SD Card” (Available only when an SD
Memory Card is inserted.
“Erase Saved BD-ROM Data (Player)”
Clears the
“Erase Saved BD-ROM Data (SD Car
(Available only when an SD Memory Card is
inserted.
“Network Settings”
“Netflix Deactivate”
L] to select a desired option,
ress [Enter].
he setting for “Parental”, “Network
onnection”and “Mode Select” will
be r
Initializes the SD Memory Card.
BD-ROM
contents, such as BD-ROM game
scores, from this player.
Clears the supplemental data for the
BD-ROM playback, such as subtitle data,
rom the SD Memory Card
Resets the Network Settings menu to the
faul
Deactivate the connection to Netflix
Initialize
Setup
Format SD Card
Erase Saved BD-ROM Data (Player)
Erase Saved BD-ROM Data (SD Card)
Network Settings
Netflix Deactivate
Confirmation message will appear.
Use
L] to select “Yes”, then press
[Enter].
Press [Setup] to exit.
Caution
• Do not remove the SD Memory Card while executing
he “Format SD Card” or the “Er
Data (SD Card)”. It damages the card.
BD-ROM
E
Page 57

N
TROUBLESHOOTING
p
.
g
p
.
ected
eceive
.
y.
h
p
pp
.
y
h
f
y.
.
y
f
y
.
.
.
s is not a malfunction.
be d
.
p
/
.
.
sound or distorted sound.
.
Check the
ections.
f
k.
dge.
sc.
k.
Clean the disc.
y
.
d
.
g
)
ed.
h
l.
educe the distance to
.
l.
g
y
y.
l
bly wh
g
.
d
.
p
g
.
.
uctions of the disc.
ead
.
)
p
.
h.
y
.
If the unit does not perform properly when operated as instructed in this manual, check the unit, consulting the
ollowing checklist.
Problem Solution
No
ower
No sound or
No audio / video signal on the
isplay device via HDMI cable
Distorted picture
Completely distorted picture or
black / white
BD
DVD
No
Picture
Disc cannot be played bac
SD Memory Card cannot be read.- The format of the card does not match to this unit or the card is not compatible.
T
remote contro
Buttons do not work or the unit
stops respon
The unit does not res
some operatin
The unit cannot r
BD / DVD / CD
Angle does not switc
reezes momentarily
uring playbac
o return to start-up screen
n disc is remov
e unit does not respond to the
uring playback
E
icture
icture with
ing
commands
ond to
- Check if the AC cord is properly connected.
- Unplu
- Check if the conn
- Check if the connections are made securely and correctl
- Check whether the connected TV, AV receiver or other device supports HDCP.
- Check whether the out
- When this unit is connected to the DVI jack on your TV or AV receiver, you cannot
- W
- If the unit is connected the unauthorized display device with an HDMI cable, the
- Per
- Ensure that your HDMI cable is certified
- Sometimes a small amount of picture distortion may appear.
- Connect this unit directly to the TV. If the RCA audio / video cables are connected
- Make sure the disc is compatible with this unit
- Adjust the volume
- Check that the speakers are connected correctly.
-
- Check the settings in “Audio” menu.
- Check the disc for fingerprints / scratches and clean with a soft cloth wiping from
- Clean the di
-
- Ensure the disc label is facing up.
- Check if the disc is defective b
- Cancel the ratings control or change the control level.
- Insert a correct
- Reset this unit by turning it off, then on again.
- Aim the remote control directly at infrared sensor window on the front panel.
- R
- Replace the batteries in the remote contro
- Re-insert the batteries with their polarities (+ / - signs) as indicated.
- Check if a stron
- If the BD player is installed in a cabinet with colored glass doors, the remote
- To completely reset the unit, unplug the AC cord from the AC outlet for 5-10 seconds.
- Operations may not be permitted by the disc
- Condensation? (Let sit 1 or 2 hours
- You are attempting to playback a disc other than one with one of the marks on page 21.
- Wi
- The angle cannot be switched for BD / DVD which do not contain multiple angles.
the AC cord once, and wait for 5-10 seconds and then plug it in again.
TV or AV r
(T
is unit will not output a video signal unless the other device supports HDCP.)
su
orted input format of other connected device
hear an
reset to the de
audio / video signal ma
AV receiver and this unit and then reconnect it to both the devices while the
Thi
to a VCR, pictures may
center to e
(Refer to pa
Make sure that the unit is not subjected to direct sunshine or inverter-t
fluorescent lights. Relocate if necessar
contro
cabinet without colored
Refer to the instr
In some cases multiple angles are onl
sound from the HDMI OUT jack if your TV or AV receiver only supports DVI.
en the display device does not support the desired video resolution, press and
old[PlayB on the front panel for more than 5 seconds. Both settings will be
orm an HDMI cable hotplug, wherein you disconnect the HDMI cable from the TV,
owered on
e the dirt off the disc or replace the disc
ault automaticall
HDMI conn
e 21.
may not work relia
ut format of this unit (HDMI FORMAT) matches the
not be output.
istorted due to the copy right protection system
trying another disc
isc that can be played back on this unit
infrared sensor window
light source is not interfering with this unit’s infrared sensor.
lass
r is turned on
en the doors are closed. Open the doors, or use a
recorded for specific scenes
are
pe
Page 58

N
Problem Solution
.
f
g
.
ect the network.
.
odem or broadband router.
f
.
ect to the network
hil
etwork.
d
.
d.
k
.
use the
oad of data does not
y.
.
k
d.
).
.
.
k
d.
stored o
ome media server are not
y
.
)
f
.
sit
a
g
dd
d
.
C.
g
p
y of
.
f
.
f
.
.
)
g
.
p
)
use
ow
/
buste
eature.
isi
n
g
g
.
oad of data does not
y.
y
y
.
y.
:
y
h
T
f
ayback does not start when the
title is selected
The password
been for
nnot conn
nnot conn
w
e my PC is connected to the
n
The capacity of the SD card
ecrease
nnot
r downl
perform properl
Cannot play back BD-video
BD-ROM Profile 2.0
Folder or files
h
isplayed in the file list or cannot
be pla
Cannot use Net
Cannot a
episo
es to the instant Queue
Even thou
Internet connection im
uring playback, the picture
qualit
oes not improve
The picture quality of streaming
movie (Net
ockbuster) is poor
Streaming movie (Netflix,
CinemaNow or Blockbuster
tops or start buffering durin
playback
nnot
inemaN
The playback of BD-video or
wnl
perform properl
“HDCP NOK” appears on the front
panel displa
or rating level has
otten
BD-Live function
n DLNA
ed back
lix feature. - Netflix is available only in the United States
movies or TV
h the speed of the
Netflix streaming movie
lix, CinemaNow or
Block
roves
r f
often
TROUBLESHOOTING
- Check the settings in “Parental” menu.
- Enter the default password “4737”, then your forgotten password will be cleared.
- Check if the LAN cable connection is properly made
- Turn on the m
- Check the network setting.
- Check i
- Check the “BD-Live Setting”.
- Check the content of your Internet service contract to see if your Internet service
- Data may be written to the SD card when a BD-video that supports the virtual
- Insert an SD card with enough capacity (1GB or more)
- Check if an SD card is correctly inserted.
- Ma
- Insert an SD card(1GB or more) which is formatted on this unit
- Do not remove the card during playback.
- Ma
- Check the setting on your home media server. (Refer to the owner’s manual of the
- Check the network connection and settings.
- Check if the network connection is properly made.
- Vi
- Visit netflix.com on your P
- Adding movies or TV episodes on this unit is not available.
- The picture quality does not change during playback.
- The picture quality differs depending on the speed of Internet connection at the
- Check the speed of your Internet connection
- Contact your Internet service provider. (You may need to improve the broadband
- Check if the network connection is properly made.
- V
- Check if an SD card is correctly inserted.
HDCP NOK” appears under the following conditions
- When the connected device does not support HDCP.
- When the connected device is recognized as an HDCP incompatible b
- W
the broadband router and / or modem is correctly connected
provi
er prevents multiple terminals connecting at the same time
pac
age is used and an SD card is in the slot
e sure the write-protect switch on the SD card is not enable
Some discs with BD-Live function require memory when playing back the content
e sure the write-protect switch on the SD card is not enable
home media server.
netflix.com/Integr
loading
time o
s
eed.
t
ww.cinemanow.com/Logi
(Blockbuster) on your PC and create an account
Do not remove the card during pla
during pla
compatible for some reason.
back
en the connected device supports HDCP but cannot be recognized as an HDCP
on your PC and become a Netflix member.
(CinemaNow) or www.blockbuster.com/auth/login
back as some BD-videos require an SD card
HDMI SRM.
he BD player contains a microcomputer for signal processing and control functions. In very rare situations, severe
nterference, noise from an external source, or static electricity may cause it to lockup. In the unlikely event that this
happens, unplug the power cord
ote
• Some functions are not available in specific modes, but this is not a malfunction. Read the description in this
manual for details on correct operations.
Some functions are prohibited on some discs.
rom the wall outlet, wait at least 5 seconds, and then plug it back in again.
E
Page 59

N
o
g
h
g
l
o
p
T
l
l
l
.
d
a
y
active menus.
e
g
.
bus
y
d
r
p
J
.
ow
pp
l
r
p
T
p
close to natural ones
thout color streak.
g
ding
f
layback
)
gg
er
lby
l
yg
y
ulti-channel audio.
lby
s
yg
lby
d
D
y
l
)
gy
h
.
y
.
y
y
)
g
cable connection.
k.
ss
k.
GLOSSARY
nalog Audi
An electrical signal that directly represents sound.
Compare t
si
nal, but is an indirect representation of sound. See also
“Digita
is to digital audio which can be an electrical
Audio”.
spect Rati
he width of a TV screen relative to its height.
Conventiona
a
most square); widescreen models are 16:9 (the TV
screen is a
TVs are 4:3 (in other words, the TV screen is
most twice as wide as it is high)
VCHD
AVCHD is a new format for high definition video
camcor
ers which can record and play high-resolution
images.
-Jav
ith some BDs which support Java applications, you can
enjo
the interactive functions such as games or
nter
D-Liv
D-Live is a BD-video (BD-ROM version 2 Profile
2.0 / Profile 1.1) which contains new functions (e.
nternet connection), in addition to the BONUSVIEW
nction
lock
ockbuster is online service which you can rental or
urchase movies and TV episodes streamed over the
nternet.
ter
.
lu-ray Disc (BD)
u-ray Disc is a next generation optical video disc which
s capable of storing much more data than a conventional
VD. The large capacity makes it possible to benefit from
he features such as high-definition videos, multi-channel
surroun
sounds, interactive menus and so on.
Digital Audio
n indirect representation of sound by numbers. During
recor
(44,100 times a second
igital converter, generating a stream of numbers. On
p
nalog signal based on these numbers. See also
Sampling Frequency” and “Analog Audio”.
, the sound is measured at discrete intervals
or CD audio) by an analog-to-
, a digital-to-analog converter generates an
DLNA (Digital Living Network Alliance
DLNA is a cross-industry organization of consumer
lectronics that formulates DLNA Interoperability Guidelines
or sharing digital contents within a home network.
DNS Serv
server which translates Internet domain names into IP
resses.
o
Digita
The system to compress digital sound developed b
Dolby Laboratories. It offers you sound of stereo (2ch) or
m
Do
Digital Plu
Dolby Digital Plus is the next generation digital audio
ompression technology developed as an extension to
Do
Digital. Blu-ray Disc supports 7.1 multi-channel
surroun
sound output.
Dolby TrueH
Dolby TrueHD is a lossless coding technology developed
or next generation optical discs. Blu-ray Disc supports 7.1
mu
ti-channel surround sound output.
DTS® (Digital Theater System
DTS® is a multi-channel surround sound system. You can
njoy movie dynamic and realistic sound like movie
t
eater. DTS surround sound technologies were developed
y DTS, Inc
hapte
ust as a book is split up into several chapters, a title on a
D-video or DVD-video is usually divided into chapters.
also “Title”
nemaN
CinemaNow is online service which you can rental or
urchase movies and TV episodes streamed over the Internet.
omponent Video Output
ach signal of luminance (Y) and component (P / C
/ C) is independent to output so that you can
experience picture color as it is.
so, due to compatibility with progressive video
A
525p / 480p), you can experience higher-density picture
an that in interlace (525i / 480i).
eep Colo
his technology allows expression of more number of
colors than the conventional 8 bits and can re
rs
E
wi
DTS-HD®
DTS-HD® is a lossless coding technology developed as an
xtension of the original DTS Coherent Acoustics format.
Blu-ra
Disc supports 7.1 multi-channel surround sound
utput
atewa
P address of the electronic devices (such as router) which
rovide Internet access.
DMI (High-Definition Multimedia Interface
digital interface between audio and video source. It can
transmit component video, audio, and control signal with
ne
device used for connecting multiple device to the
networ
roduce
P Addre
set of numbers which are assigned to devices
participating in a computer networ
Page 60

N
GLOSSARY
JPEG (Joint Photographic Experts Group)
gp p p
y
)
hool
.
g
d
)
y
y
t.
G
T
g
g
.
S
T
T
T
T
S
T
x
h
)
T
f
r
y
station user and the
e
de
g
y
g
y
g
r
f
y
pg q y
T
f
h
ask
dd
le
p
k
T
ge
g
T
f
y
o
f
f
d pl
.Color
y
y
.
JPEG is a method of compressing still picture files. You can
cop
JPEG files on BD-RE/-R, DVD-RW/-R, CD-RW/-R, SD
emory Card or DLNA home server from a computer and
lay back the files on this unit.
LAN (Local Area Network
A group of computer networks covering a small area like a
company, sc
Local Storage
A storage area of sub contents for playing virtual packages
on BD-vi
MP3 (MPEG audio layer 3
P3 is a method of compressing files. You can copy MP3
iles on BD-RE/-R, DVD-RW/-R, CD-RW/-R, SD Memory Card
or DLNA home server from the computer and pla
iles on this uni
MPE
his is an abbreviation of Moving Picture Experts Group,
which is an international standard of the movin
audio compression method. Ima
ecorded using this method
MPEG2-TS / TT
his is adopted in digital broadcasting.
TS (Timestamped TS) is a format of TS packet with
imestamp information. TS is an abbreviation of
ransport Stream.
MPEG2-P
his is used for DVD and HDD recording format.
S is an abbreviation of Program Stream.
fli
etflix is online movie rental service, offering online
streaming to customers in t
CM (Pulse Code Modulation
he most common system of encoding digital audio,
ound on CD and DAT. Excellent quality, but requires a lot
o
data compared to formats such as Dolby Digital and
PEG audio. For compatibility with digital audio
ecorders (CD, MD and DAT) and AV receivers with digital
nputs, this unit can convert Dolby Digital and MPEG
audio to PCM. See also “Digital Audio”.
or home
eo.
back the
picture
es of BD and DVD are
e United States.
oute
A networking device which distinguishes the IP address
assigned to each device and routing and
nformation in the computer network.
orwarding
ampling Frequenc
he rate which sound is measured by a specified interval
to turn into digital audio data. The numbers o
n one second defines as sampling frequency. The higher
t
e rate, the better the sound quality.
sampling
net M
A mask which is used to determine what subnet an IP
a
ress belongs to.
Tit
A collection of chapters on BD-video or DVD-video. See
also “Cha
ter”.
Tra c
Audio CD use tracks to divide up the content of a disc.
he BD-video or DVD-video equivalent is called a chapter.
ee also “Chapter”.
Virtual Packa
he function which copies data to other media (local
storage)
secondar
rom the Internet and plays the secondary video,
audio and the subtitles at the same time. The
ethod of the playback varies depending on discs.
Windows Media™ Audi
Windows Media™ Audio is the audio compressing
technology developed by Microso
Windows Media™ Audio
D-RW/-R, SD Memory Card or DLNA home server from a
computer an
ay them back on this unit.
iles on BD-RE/-R, DVD-RW/-R,
t. You can copy
x.v
“x.v.Color” is a promotion name given to the products that
have the capabilit
the xvYCC specifications and is a trademark of Son
orporation
to realize a wide color space based on
roxy Serve
roxy server is a server which acts as an intermediary
ween a work
security.
Internet to ensur
egion Co
egions associate discs and players with particular areas
of the world. This unit will onl
compatible re
our unit by looking on the rear panel. Some discs are
compatible with more than one re
ion codes. You can find the region code of
play back discs that have
ion (or all regions).
E
Page 61

N
B
bkhazia
8
bania
c
b
i
ese
65
b
q
l
0Bh
2Bih
slama
eto
g
ese
l
bod
9
[
]
oatia
h
h
h
0
stonia
66
H
iji
h
h [
]
isia
1
7
]
]
58
c
58
0
7Hebre
55
67
K
65Indonesia
]
7
66
J
]
7
J
9Kannada
60Kash
65Kaza
57
69
1
0
]
61Kurdish5767
N
aothia
7
860
6
y
y
8966
55
]
9
)
59
65rsia
]
58
6
9
]
]
3
0rbia
oatia
owana
a
0
at
]
p
65ndanese
dish
8
k
ata
hai
beta
igriny
g
]
k
i
9-Zra
du76
bek
etnamese
lsh
f
hosa
ddish
uba16
ulu26
LANGUAGE CODE
Language Code
A-
A
Afar
Afrikaans
Al
Amhari
Ara
Armen
Azer
Bashkir
Bas
Benga
Bi
Bul
Burm
Bye
Cam
Chinese
Czec
Danis
Dutc
English [ENG] 516
Esperanto
E
F
Finnis
n
n
ic
an
m
mara
aijani
ue
i;Bangla
utani 507
ari
r
n
arian [BUL]
orussian
-E
ian 575
n
CHI
rsican
r
n
[CZE]
[DAN] 5047
[DUT]
n
-
aroese 5261
[FIN]
74
747
752
759
764
7
771
167
971
7254
961
464
161
1
5256
Language Code
Frenc
Fr
Galician
German [GER
Greek [GRE
Greenlandi
47
Hindi
Hungarian [HUN]
6
Icelandic [ICE] 55
54
Interlingua
4
Interlingue
Inupiak
Irish [IRI
51
Italian [ITA] 55
47
Kinyarwanda
65
Kirghiz
Kirundi 646
Korean [KOR
L
Latin
Latvian;Lettish
Lingala5
Lithuanian 586
FRE
n
eorgian 574
uarani 536
ujarati
ausa 544
w
-
n
apanese [JPN
avanese 566
miri
kh
-
n
57
1
7
4
4
7
7
7
4
77
Language Code
nian
7
4
4
4
alagas
ala
alayalam 595
ri
rathi
oldavian 5961
ongolian
auru 6047
epali
orwegian [NOR
-R
ccitan 614
riya
romo(Afan
anjabi
ashto;Pushto
n
olish [POL
ortuguese [POR]626
uechua
aeto-Romance 645
omanian [RUM
ussian [RUS
moan
angho 655
anskrit
cots Gaelic 535
n
rbo-Cr
h
hon
indhi 655
inghalese
n
7
9
964
1
1
164
1
47
2
247
2
7
461
467
9
547
4
4
555
Language Code
isw
Slovak [SLO
lovenian
Somali
anish [SPA]
S
wahili
Swe
Tagalog
Taji
Tamil
T
Telugu
T
Ti
T
Tonga
Tson
Turkish [TUR
Tur
Tw
Vi
Volapuk
We
Wolo
X
Yi
Yor
Z
[SWE]
r
n
a
a
men
inian
r
z
7
561
1
7
9
56
47
51
54
1
1
4
7
66
757
4
772
1
71
61
4
1
7
ote
• If you choose a language that has a 3-letter-language code (written in bracket), the code will be displayed every
time you change the audio or subtitle language setting on page 35. If you choose any other languages, ‘---’ will be
displayed instead.
E
Page 62

N
SPECIFICATIONS
l
colo
q
dby
g
/
)
g
)
gy
d
)
o
)
)
dB
)
)
k
2
)
1
)
j
k
1
(
)
D
k
1
o
General
Signa
system NTSC
Power re
ower consumption 20W (stan
Dimensions (width x hei
eight 10.9 lbs ( 4.9kg )
Operatin
Audio
BD Linear Au
DVD Linear Audi
Signal to Noise Ratio 100
udio Dynamic Range 98 dB
THD (Total Harmonic Distortion
Terminals
Rear
uirements 120V AC, 60Hz
ht x depth) 17/x 4-/ x 1
temperature 41°F (5°C) to 104°F (40°C
Less than 80% (no condensation)
io 4 Hz–88 kHz (192 kHz
4 Hz–44 kHz (96 kHz), 4 Hz–22 kHz (48 kHz
io CD 4 Hz–20 kHz (44.1 kHz
0.005% (1 kHz
udio output (Analog)
RCA jac
Video output
RCA jack x
Component video output
RCA
RCA jac
Optical jack x 1
H
HDMI jac
ETHERNET terminal 10BASE-T / 100BASE-TX
x
ack x 3 Y: 1Vp-p (75Ω) P
udio output (Digital)
x
MI output
x
L / R: 2Vrms (output impedance: more than 1kΩ
1Vp-p (75Ω
500mVp-p
Digital connector
Video: 480p, 720p, 1080i, 1080p, 1080p24 / Audi
r
: 0.6W)
75Ω
inches (435 x 108 x 309mm
700mVp-p (75Ω) P
700mVp-p (75Ω)
The specifications and design of this product are subject to change without notice.
E
Page 63

N
NETWORK SERVICE DISCLAIMER
Network Service Disclaimer
Content and services made available through this product are transmitted by third
parties by means of networks and transmission facilities over which Company has no
control and third party services may be terminated or interrupted at any time, and
Company makes no representation or warranty that any content or service will
remain available for any period of time. Without limiting the generality of this
disclaimer, Company expressly disclaims any responsibility for any interruption or
suspension of any content or service made available through this product. Company
is not responsible for customer service related to the content and services. Any
question or request for service relating to the content or services should be made
directly to the respective content and service providers.
THIRD PARTY CONTENT AND SERVICES MADE AVAILABLE THROUGH THIS PRODUCT
ARE PROVIDED “AS IS.” COMPANY DOES NOT WARRANT CONTENT OR SERVICES SO
PROVIDED, FOR ANY PURPOSE WHATSOEVER. COMPANY EXPRESSLY DISCLAIMS ANY
WARRANTIES, EXPRESS OR IMPLIED INCLUDING WITHOUT LIMITATION, WARRANTIES
OF MERCHANTABILITY OR FITNESS FOR A PARTICULAR PURPOSE, ACCURACY,
VALIDITY, TIMELINESS, LEGALITY, SUITABILITY, OR QUALITY OF ANY CONTENT OR
SERVICE MADE AVAILABLE THROUGH THIS PRODUCT.
IN NO EVENT SHALL COMPANY BE LIABLE FOR, ANY DAMAGES, WHETHER ARISING IN
CONTRACT OR TORT, INCLUDING WITHOUT LIMITATION, ANY DIRECT, INDIRECT,
INCIDENTAL, SPECIAL OR CONSEQUENTIAL DAMAGES, LOST PROFITS, ATTORNEY
FEES, EXPENSES, OR ANY OTHER DAMAGES ARISING OUT OF, OR IN CONNECTION
WITH, ANY CONTENT (OR ANY INFORMATION CONTAINED THEREIN) OR SERVICE
PROVIDED TO THE USER OR ANY THIRD PARTY, EVEN IF ADVISED OF THE POSSIBILITY
OF SUCH DAMAGES.
All content and services accessible through this product belong to third parties and
are protected by copyright, patent, trademark and/or other intellectual property
rights. Such content and services are provided solely for the User’s personal
noncommercial use. User may not use any content or services in a manner that has
not been authorized by the content owner or service provider. Without limiting the
foregoing, unless expressly authorized by the applicable content owner or service
provider, you may not modify, copy, republish, upload, post, transmit, translate, sell,
create derivative works, exploit, or distribute in any manner or medium any content
or services made available through this product.
E
Page 64

ntegravisiono
f
8
k
Way,
.
f
ORPO
ON
0,
JAPAN
63
92
ORPO
.
All
hts
ted
a
NKYO.S.A.RPORATION
1
par
Tel: 800-225-1946,
pper
addle
1-818-9200Fax:01-785-2650
ver,
.J.7458,U.S.A
ttp://www.integrahometheater.com
ntegra
alesroductanningv.:-1,
Tel:72-831-8023Fax:
N
vision o
NKY
4004
opyright10NKY
RATI
72-831-81
sshin-cho,
RATIONJapan
eyagawa-shi,
rig
AKA572-854
reserved.
rin
E5SF1UD / 1VMN29753
in Chin
 Loading...