

Intamsys FUNMAT HT Quick Start Manual
QUICK START GUIDE PN:320-0205 REV: P02
1 / 8
FUNMAT HT QUICK START GUIDE
Remove The Packaging
Unpack the printer and accessories trays from the cardboard box, and then take out the printer
and accessories trays.
Gently place the printer on a flat, solid and sturdy platform.
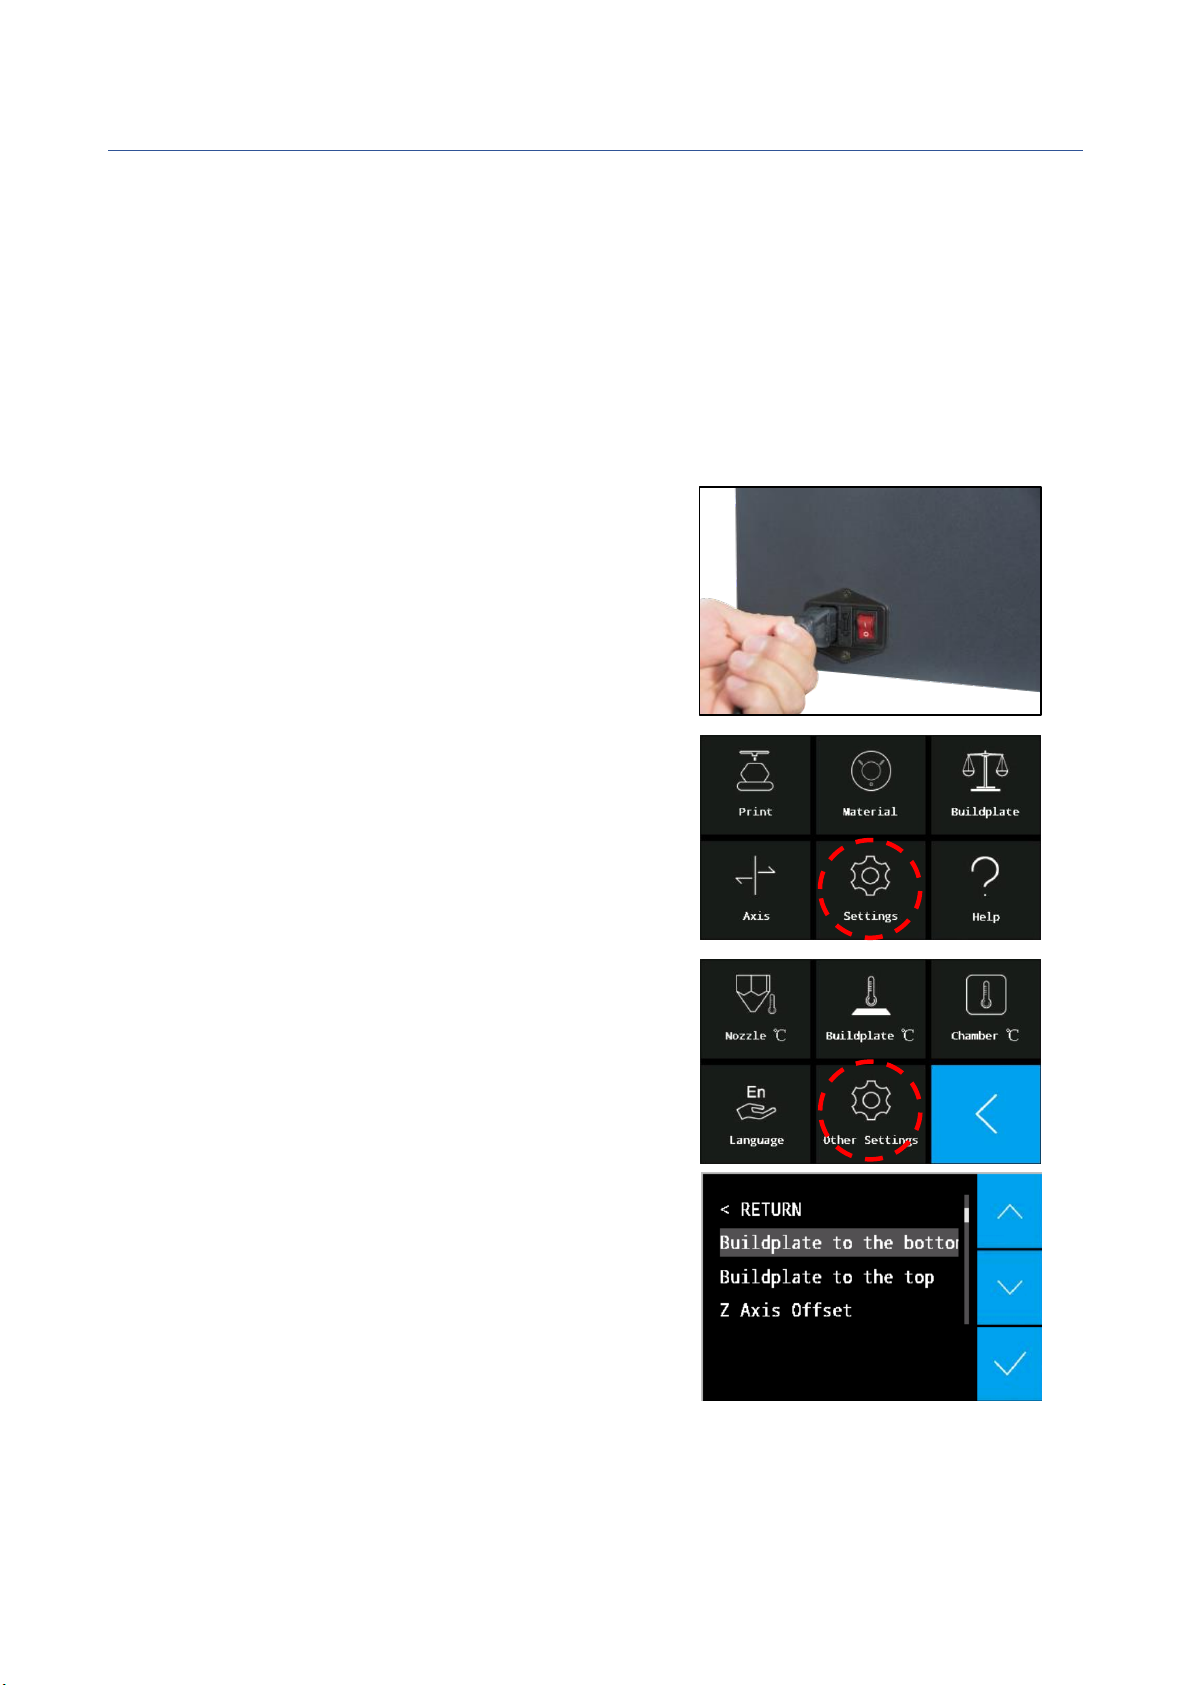
STEP 1: Connect the power cable and
power on your printer.
STEP 2: Lower down the build plate by
clicking “Settings” → “Other
Settings”→ “Buildplate to the bottom.”
Reminder: Please keep all packaging materials for warranty purpose.

QUICK START GUIDE PN:320-0205 REV: P02
2 / 8
Install The Printer
STEP 1: Power off the printer. Use the Allen
key and socket wrench to remove the four
screws to free the X & Y axis.
STEP 2: Install the motor on top of the
extruder, and ensure the upper PEEK tube is
securely inserted into its position.
STEP 3: Disassemble the nozzle set cover,
connect the motor connector to P7 on the
pin board. and fix the cables with a cable
tie.
STEP 4: Assemble the nozzle set again.
STEP 5: Open the front door to put the
glass plate onto the platform. Align the
three magnets on the glass plate to the
magnet holders on the platform.

QUICK START GUIDE PN:320-0205 REV: P02
3 / 8
STEP 6: Power on the printer.
NOTE: All maintenance work must be performed in
power off
mode.
Set Up The Printer
Install The Filament
Go back to the main menu, click “Material
→ “Load Material”, then refer to the
instruction and the right images to ensure
that the filament is installed correctly.
Bed Leveling
There are two methods for bed leveling:
Manual leveling and Auto leveling.
Manual Bed Leveling
STEP 1: Click “Buildplate”on the display
of the printer.
 Loading...