

Inta VR994CP Quick Start Manual
VVRR999944CCPP VVaannddaall RReessiissttaanntt SShhoowweerr HHeeaadd
RReeaarr aanndd BBoottttoomm CCoonnnneeccttiioonnss
CCoonncceeaalleedd IInnssttaallllaattiioonn
/2B
1
G
Exposed
Inlet
OOppeerraattiinngg CCoonnddiittiioonnss
Max. Operating Pressure 10 bar
Min. Operating Pressure 0.2 bar
Max. Inlet Temperature 65˚C
LLooccaattiioonn
For ease of servicing always mount on a tiled wall
or similar water proof surface, never tile up to the
shower head.
Choose the position of the shower to suit the
tallest user.
The shower must not be positioned where it will
be subjected to freezing condition
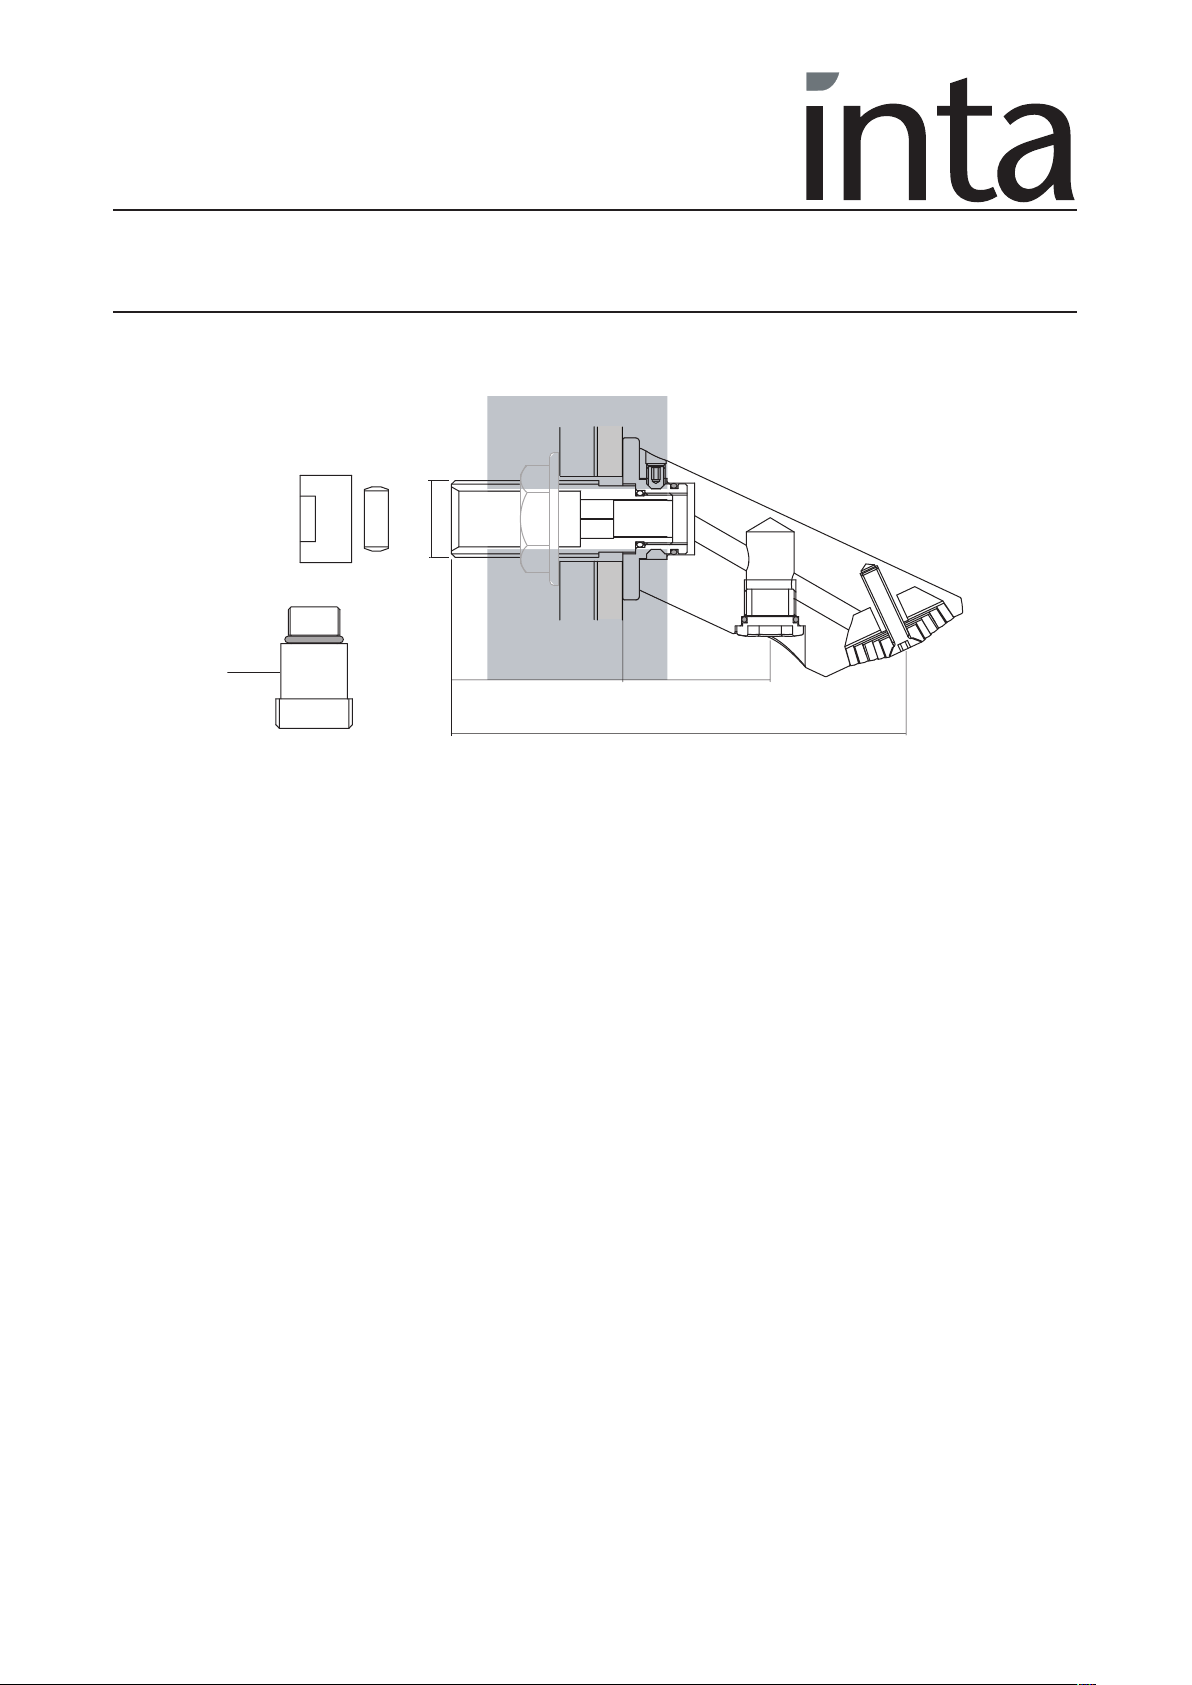
CCoonncceeaalleedd IInnssttaallllaattiioonn IInnssttrruuccttiioonnss
The shower head is always dispatched configured
for concealed pipework.
The installation shown is typical for a tiled stud
wall.
Drill a hole through the wall 24mm in diameter.
40mm46.5mm
124.4mm
Using the back nut secure the shower arm to the
wall, do not over tighten
Connect the copper supply pipe to the pipe
connector using using the olive and compression
nut, tighten to make a water tight joint.
Straight or angled swivel connectors with a fibre
washer (tap connector) can also be used
Turn on the water supply and check joints for
leakage, tighten or re-make the joint until water
tight.
AAfftteerrccaarree
With all highly polished items, care should be
taken not to damage any of the external surfaces.
To maintain the appearance of the shower head
periodically it should be cleaned with a soft damp
cloth and a mild detergent.
The use of abrasive or solvent cleaners will
damage the finish of the product and should not
be used.
The shower head can be mounted to the wall
using a back nut (not provided) or by screws as
the exposed installation.
IInnttaatteecc LLiimmiitteedd,, AAiirrffiieelldd IInndduussttrriiaall EEssttaattee,, HHiixxoonn,, SSttaaffffss,, SSTT1188 00PPFF
0011888899 220077220000
© Intatec Ltd 2008
Te
l:
Fax:
0011888899227711117722
email:
ssaalleess@@iinnttaatteecc..ccoo..uukk
VVRR999944CCPP VVaannddaall RReessiissttaanntt SShhoowweerr HHeeaadd
RReeaarr aanndd BBoottttoomm CCoonnnneeccttiioonnss
EExxppoosseedd IInnssttaallllaattiioonn
3
45
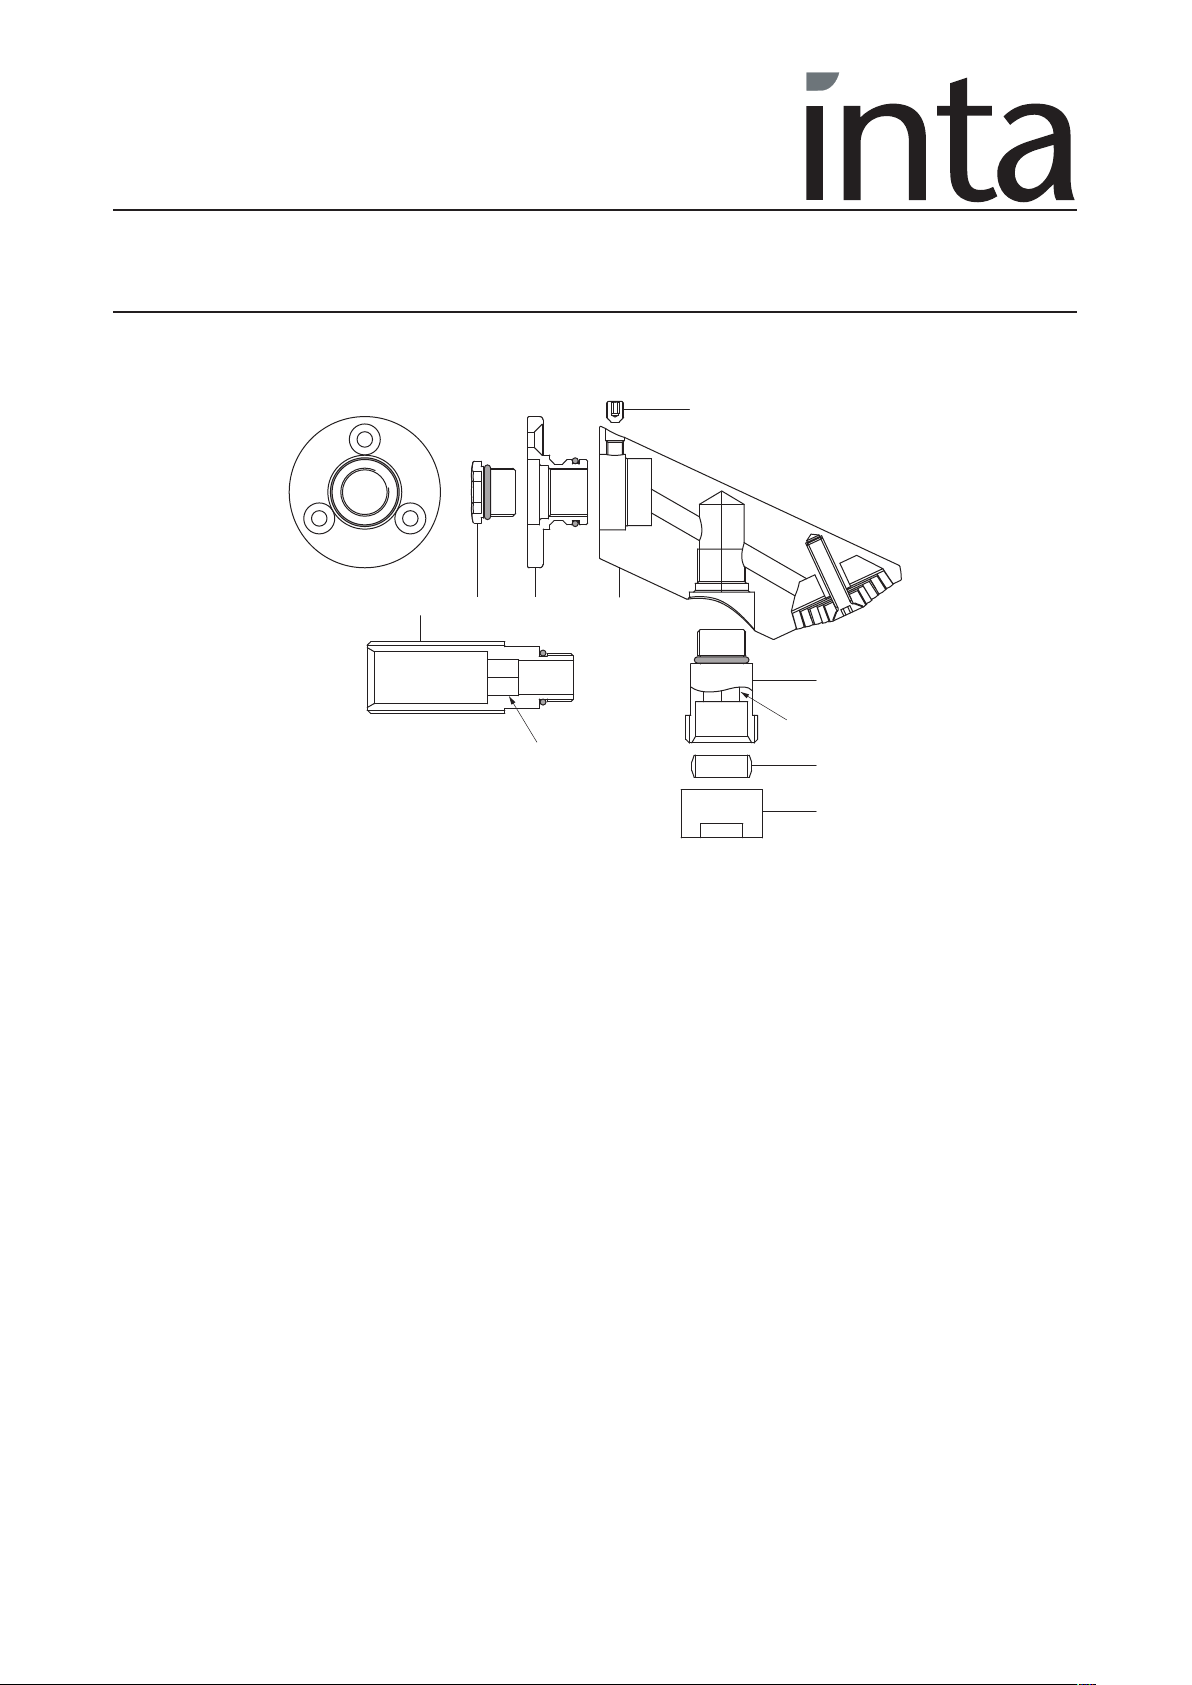
EExxppoosseedd IInnssttaallllaattiioonn IInnssttrruuccttiioonnss
For exposed pipework the configuration of the
shower needs to be changed.
Care needs to be taken not to damage the
highly polished surfaces during the modification.
Separate the body (1) from the backing plate (2)
by unscrewing the set screw (3) and pulling
apart.
Unscrew the pipe connector (4), using the
hexagonal section, from the back plate (2) using
a 10mm Allen key.
Lubricating the ‘O’ rings which a mild detergent
or silicone grease will ease assembly.
Unscrew the plug (5) from the body using a
10mm Allen key and screw into the backing
plate and tighten, taking care not to damage the
‘O’ ring and tighten to make a water tight joint.
Hexagon
12
6
Hexagon
7
8
Using the backing plate (2) as a template mark
the position for the three fixing holes.
Drill and plug to suit the fixing screws supplied
which are suitable for most brick walls.
If the wall is plaster board or soft building block
use special wall plugs obtainable from most DIY
stores.
Position the backplate on the wall and secure in
position using the screws provided.
Push the body onto the backplate taking care not
to damage the ‘O’ ring seal and re-tighten the
socket set screw to hold in position, do not over
tighten.
Connect the supply pipe using the olive (7) and
compression nut (8) as shown and check the
joint for leakage.
Screw the exposed inlet pipe connector (6) into
the body taking care not to damage the ‘O' ring
and tighten to make a water tight joint.
IInnttaatteecc LLiimmiitteedd,, AAiirrffiieelldd IInndduussttrriiaall EEssttaattee,, HHiixxoonn,, SSttaaffffss,, SSTT1188 00PPFF
0011888899 220077220000
© Intatec Ltd 2008
Te
l:
Fax:
0011888899227711117722
email:
ssaalleess@@iinnttaatteecc..ccoo..uukk
 Loading...