

INSTEON 2412N, SmartLinc 2412N Quick Start Manual
Quick-Start Guide
SmartLinc™ - INSTEON
Model: #2412N, rev 2.0 –
An Internet web server interface to your INSTEON products,
optimized for mobile devices (especially iPhone / iPod touch).
Also gives you the ability to create downloaded timers.
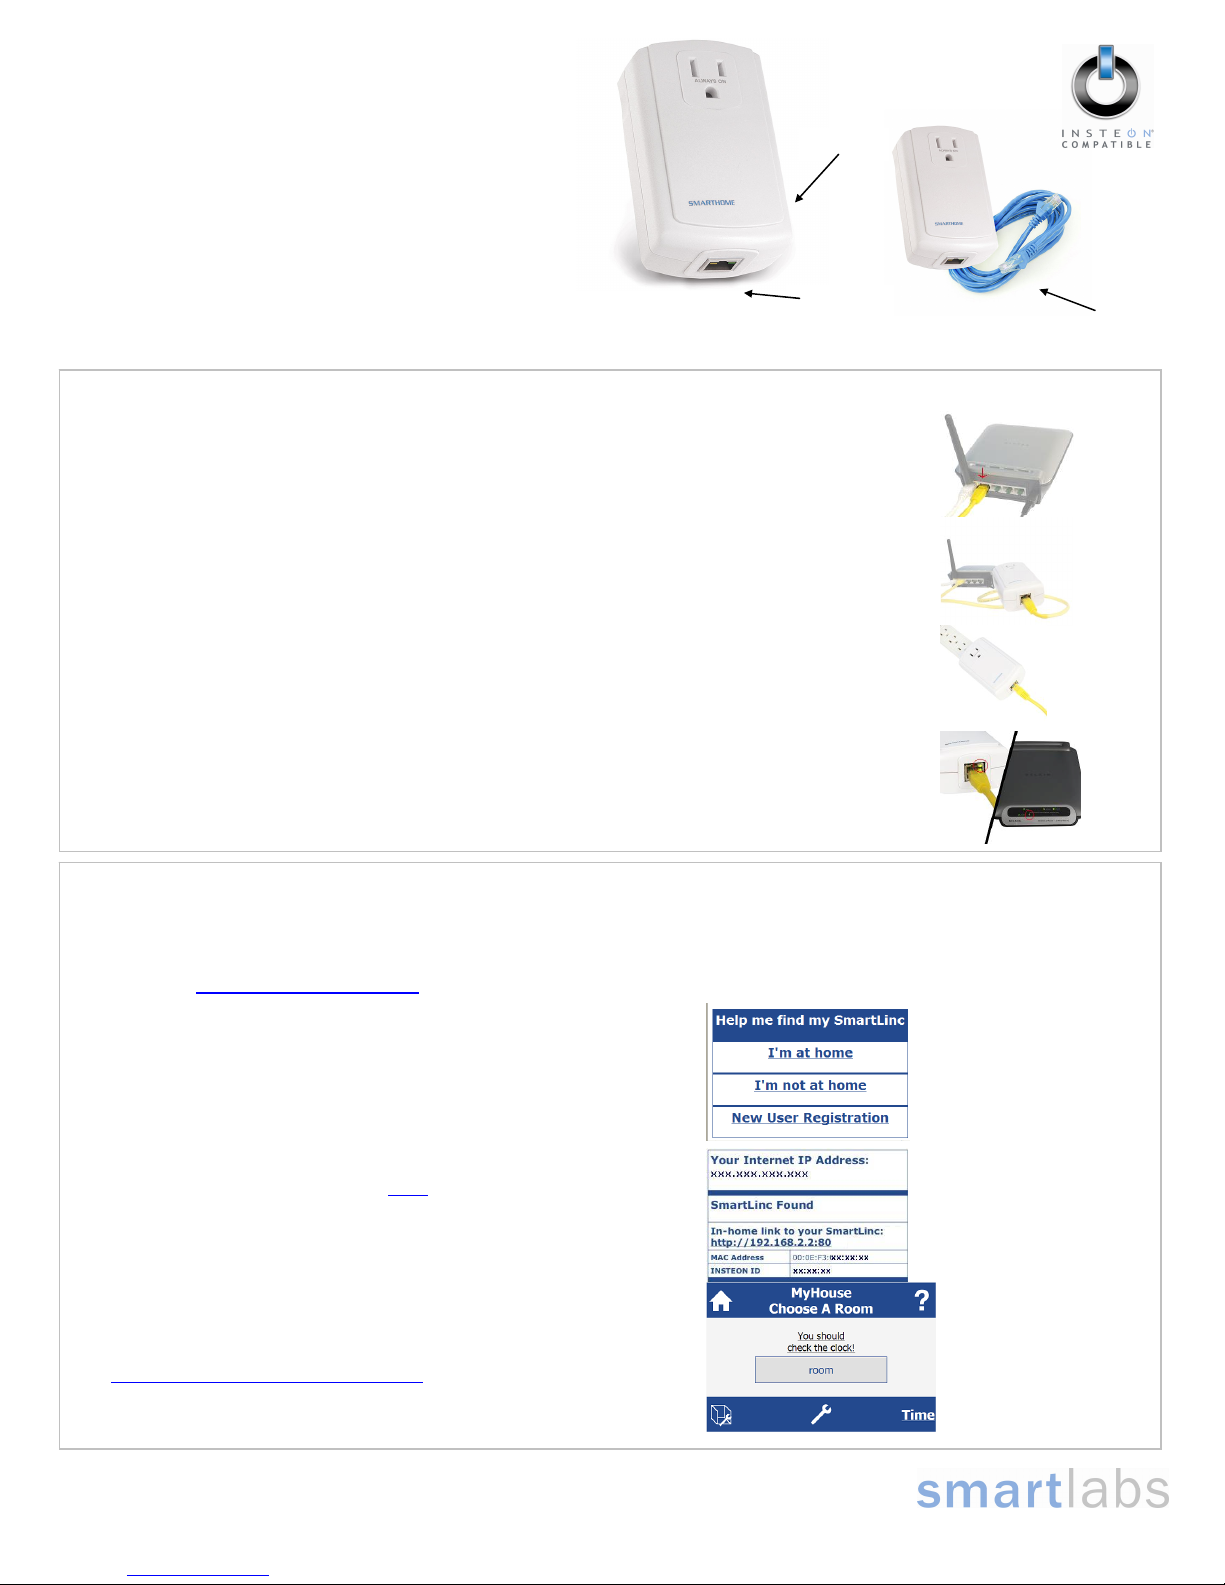
Installation
1 Plug included Ethernet cable into an open LAN port on your router (Cable color may vary. Shown yellow in
steps 1-4 and blue in the image above, but could be any color.)
2 Plug the other end of Ethernet cable into SmartLinc’s Ethernet jack
3 Plug SmartLinc into an AC outlet
4 Verify proper connection between SmartLinc and your router:
Log into SmartLinc while at Home
5 Open a browser on your PC, PDA, or mobile phone, while connected to the Internet
6 Type http://smartlinc.smarthome.com
7 Click on “I’m at home”
8 Click on the link that begins with http://
Note: If you experience any issues or would like more information, please visit
http://wiki.smarthome.com/index.php?title=SmartLinc_Help.
SmartLinc’s white LED should turn on dimly
Router’s LED for the port SmartLinc is plugged into should be on
Green LED on SmartLinc’s Ethernet jack should be on
NOTE: JavaScript support required for default web server application. HTML version is available for devices that do not support
JavaScript. Both versions of SmartLinc can be accessed simultaneously. For access to the HTML version, see step 8.
• To access HTML version, type “hindex.htm” to the end of your web
address
SmartLinc’s Home Page will appear
“You should check the clock” text will disappear once you set the clock
Page 1 of 3
Rev. 07-27-2009
®
Central Controller
Ethernet Jack
SmartLinc
INSTEON Central Controller
Set Button
Included Ethernet Cable
(cable color may vary)
Quick-Start Guide INSTEON Central Controller
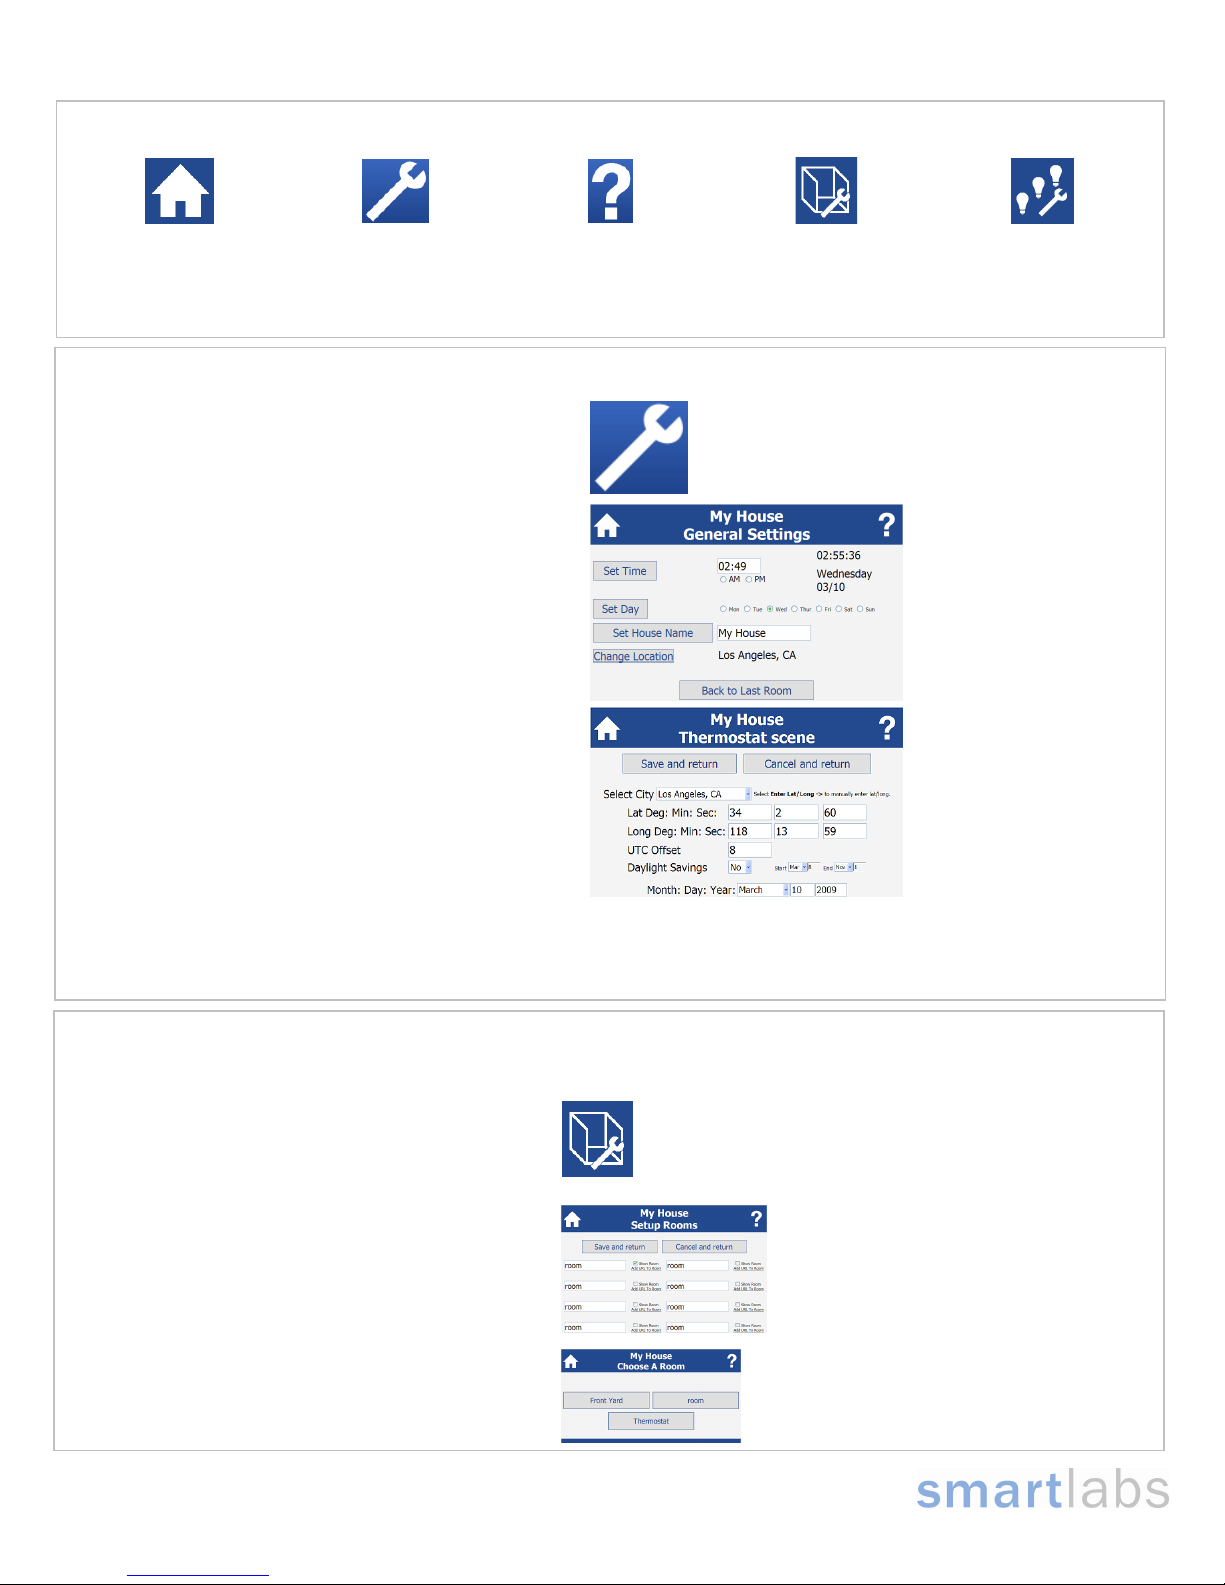
SmartLinc Icons
Home Screen
Settings
Help
Room Settings
Scene Settings
Returns you to the
SmartLinc Home Screen
Takes you to SmartLinc
general settings
Takes you to the
SmartLinc Help page on
the Smarthome Wiki
Takes you to the Room
Settings screen where
you can add, remove,
and rename your rooms
and add URL’s (cameras)
Takes you to the Scene
Settings screen where
you can add, remove,
and rename your scenes
Setting the Time, Day, House Name and Location
9 Click on the Settings icon (Wrench, bottom center)
(or get here the first time opening SmartLinc, by clicking on
“You should check the clock”)
10 Type in the correct time and click “Set Time”
11 Click on the correct day of week and click “Set Day”
12 If desired, type in a name for your house and click “Set
House Name”
13 If you’ll be using sunrise/sunset timers, click “Change
Location”
14 Select your city (or nearby city) from the drop-down list, or if
you prefer, enter your latitude / longitude
15 Select / confirm the appropriate daylight savings time
settings
16 Confirm the correct date and click “Save and return”
Setup a Room, a Device (Scene) and a Timer
Let’s say you’d like to create a room called “Front Yard”, with the device/scene
“Front Lights” that you’d like to come on weekdays at 7pm and go off at 11pm
17 Click the Room Settings icon (lower left corner of
homepage)
18 Type “Front Yard” over the first room label (room
indicates that no name had been assigned yet)
19 Ensure the Show Room checkbox to the right of the
room name is checked
20 Click ”Save and Return”
Click on “Front Yard”
Page 2 of 3
Rev. 07-27-2009
 Loading...