

INSTEON 2844-222 Owner's Manual

Motion Sensor
Owner’s Manual

Contents
Getting Started
Device Overview 4
Installation 5
Battery
Micro USB Power
Mounting Options 6
Tabletop
Corner Mount
Flexible Mount
Basic Linking
Control an Insteon Device with Motion Sensor 8
Control Multiple Insteon Devices with Motion Sensor 9
Removing Control of an Insteon Device From Motion Sensor 10
Removing Control of Multiple Insteon Devices From Motion Sensor 11
Insteon app for iPhone, iPad and iPod touch
Add to the Insteon Hub 13
Congure Motion Sensor 14
Congure Motion Sensor 15
Control a Device with Motion 16
Control a Device with Motion 17
Insteon app for Android
Add to the Insteon Hub 19
Congure Motion Sensor 20
Congure Motion Sensor 21
Control a Device with Motion 22
Congure Arm and Disarm 23
Local Programming
About Local Programming 25
Local Programming Flow Chart 26
Factory Reset
Factory Reset 28
Appendix
Specications 30
Troubleshooting 32
Certications and Warnings 33
Product Warranty 34

Getting Started
Everything you need to quickly get up and running.
3
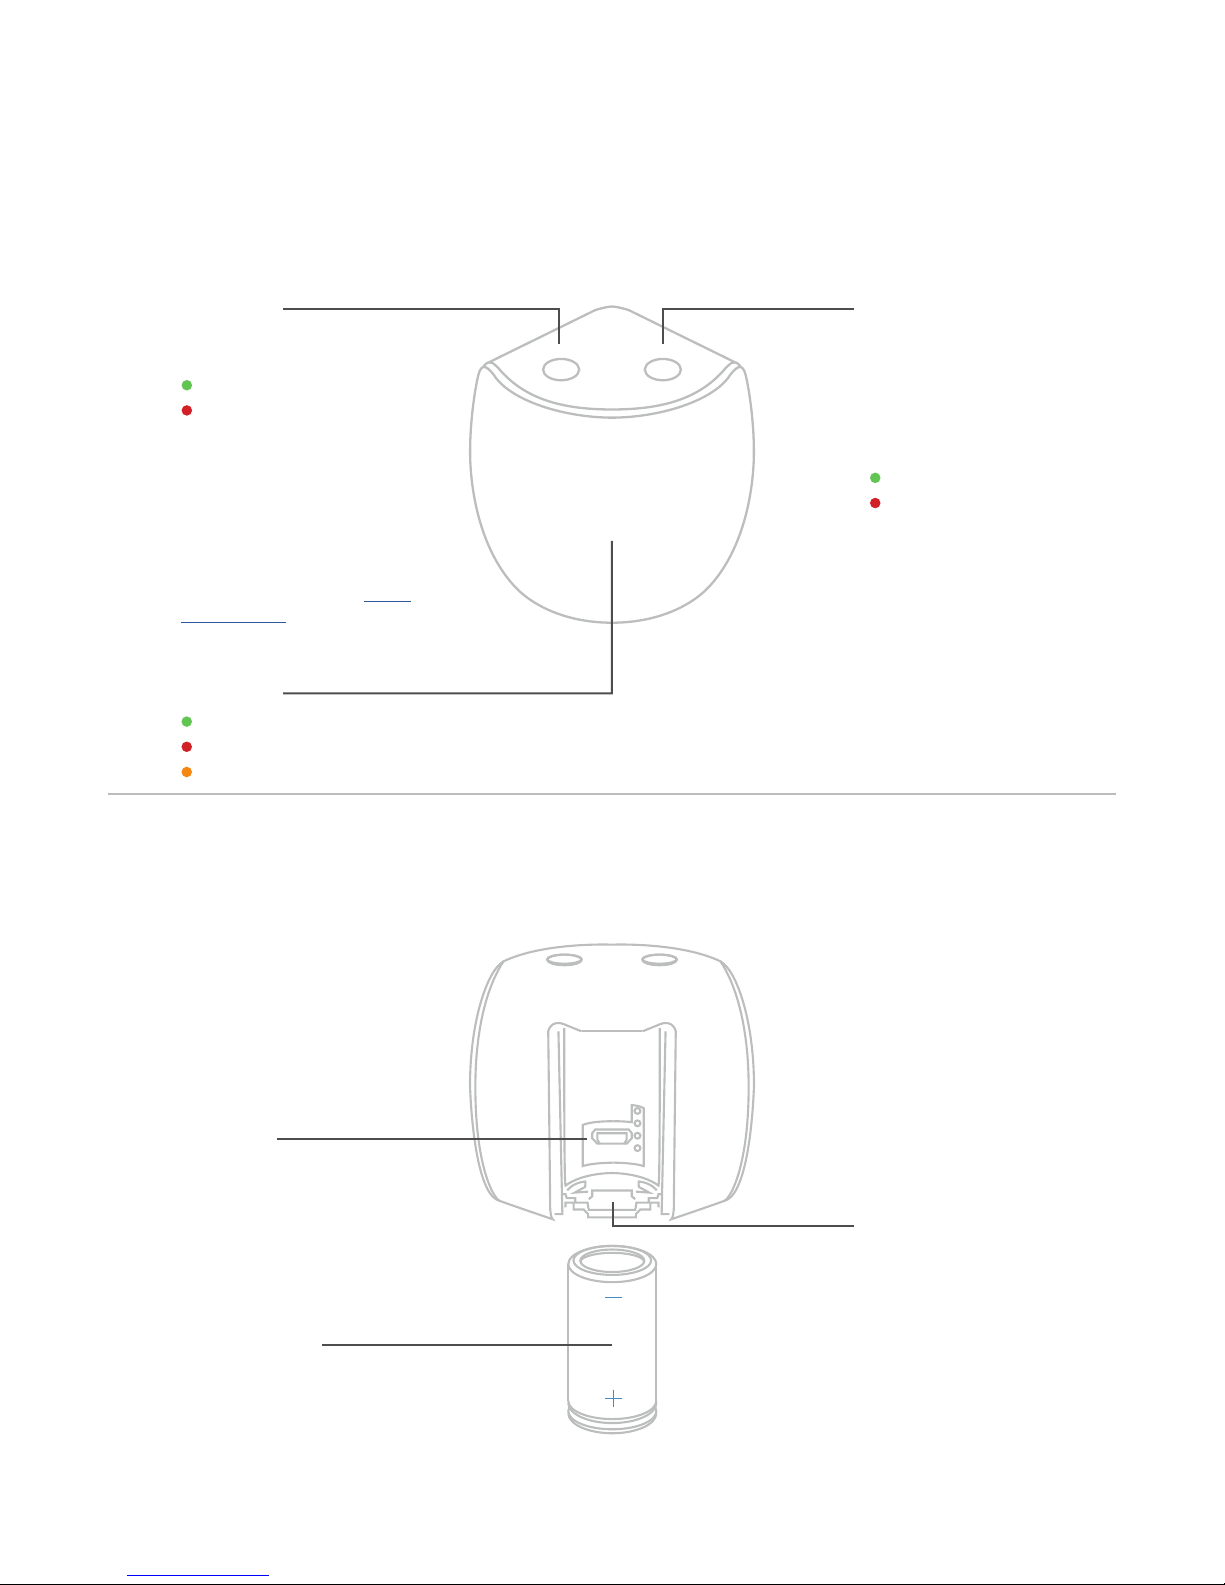
Device Overview
Set Button
Tap to send on/off commands
to linked devices.
On
Off
Link: press & hold until LED
blinks green.
Unlink: press & hold until LED
blinks green. Press and hold
again until LED blinks red.
For more functions see Local
Programming
Status LED
Motion Detected
Error Controlling a Device
Low Battery
Motion Override Button
Tap to toggle motion
detection enable/disable.
All other sensor features
are not affected. Motion
detection will automatically
resume after 12 hours.
Motion Enabled
Motion Disabled
Micro USB
Optional power
through Micro USB
(cable sold separately)
CR123A Battery
Depending on
activation frequency,
the battery should last
6 to 18 months
Battery Compartment
Tamper Switch
Not Pictured
4
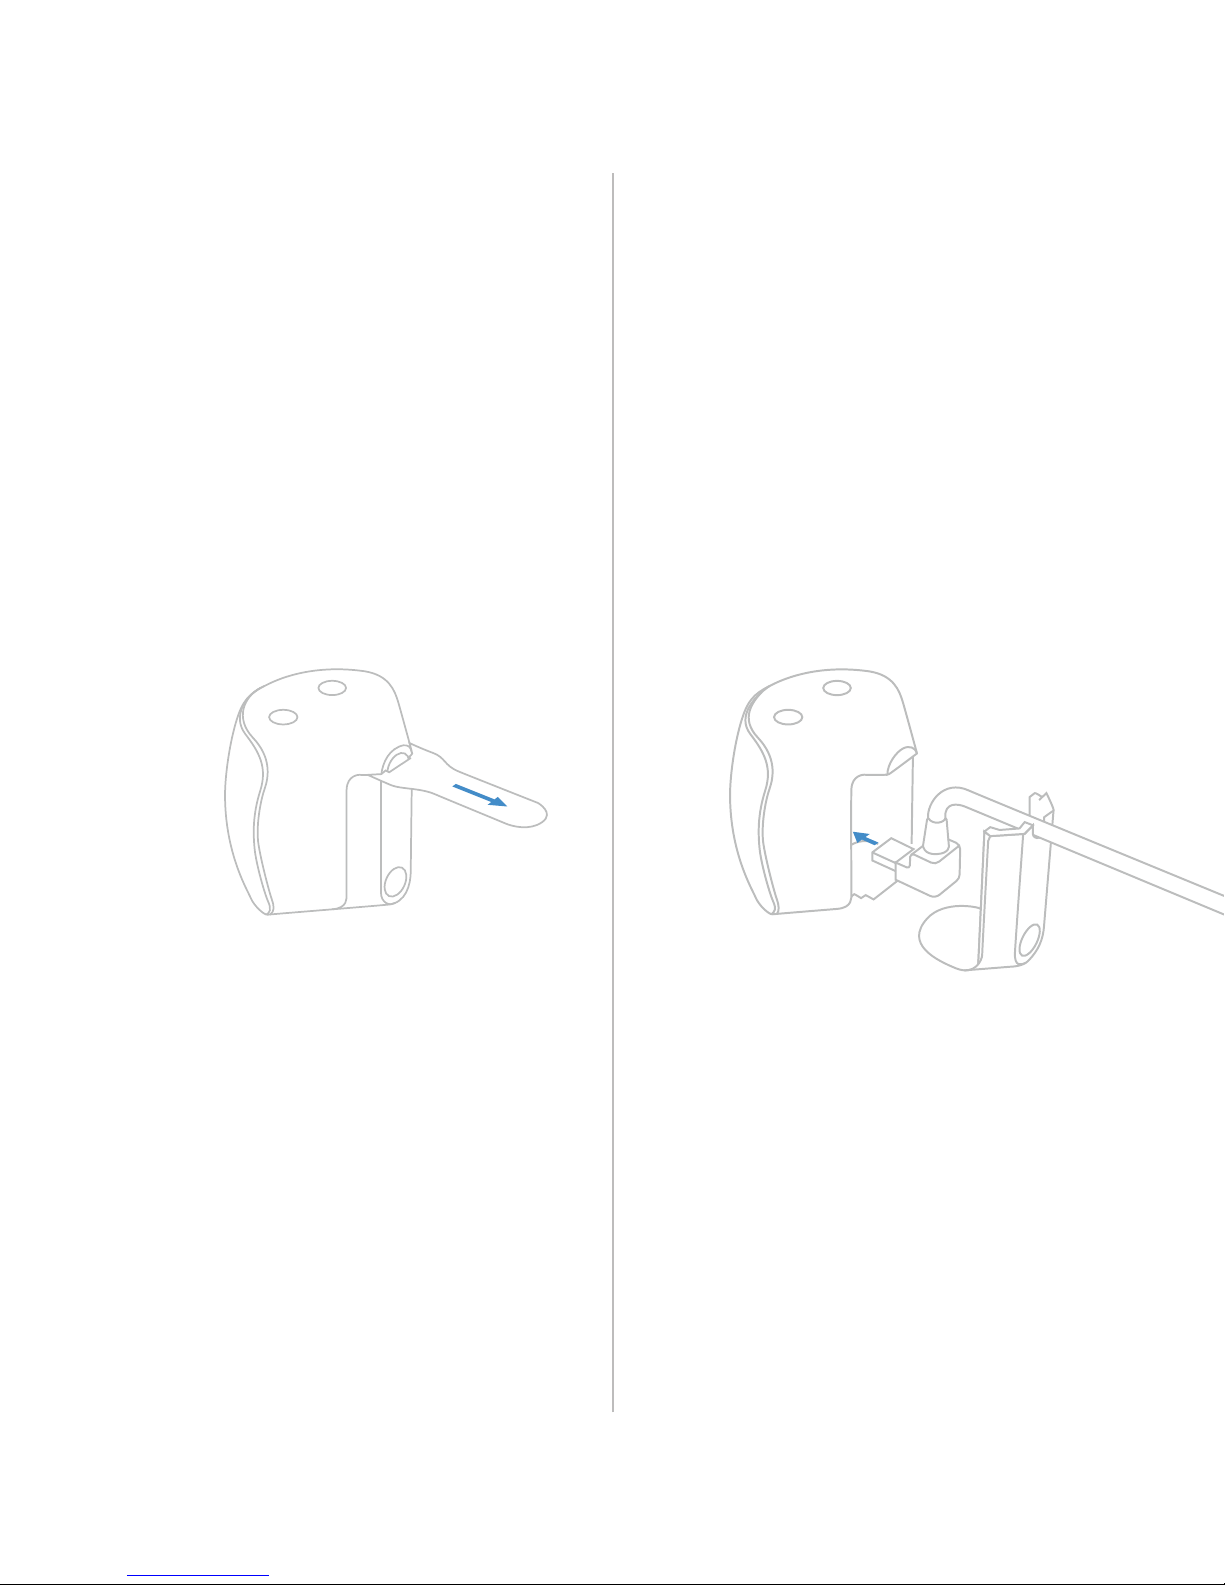
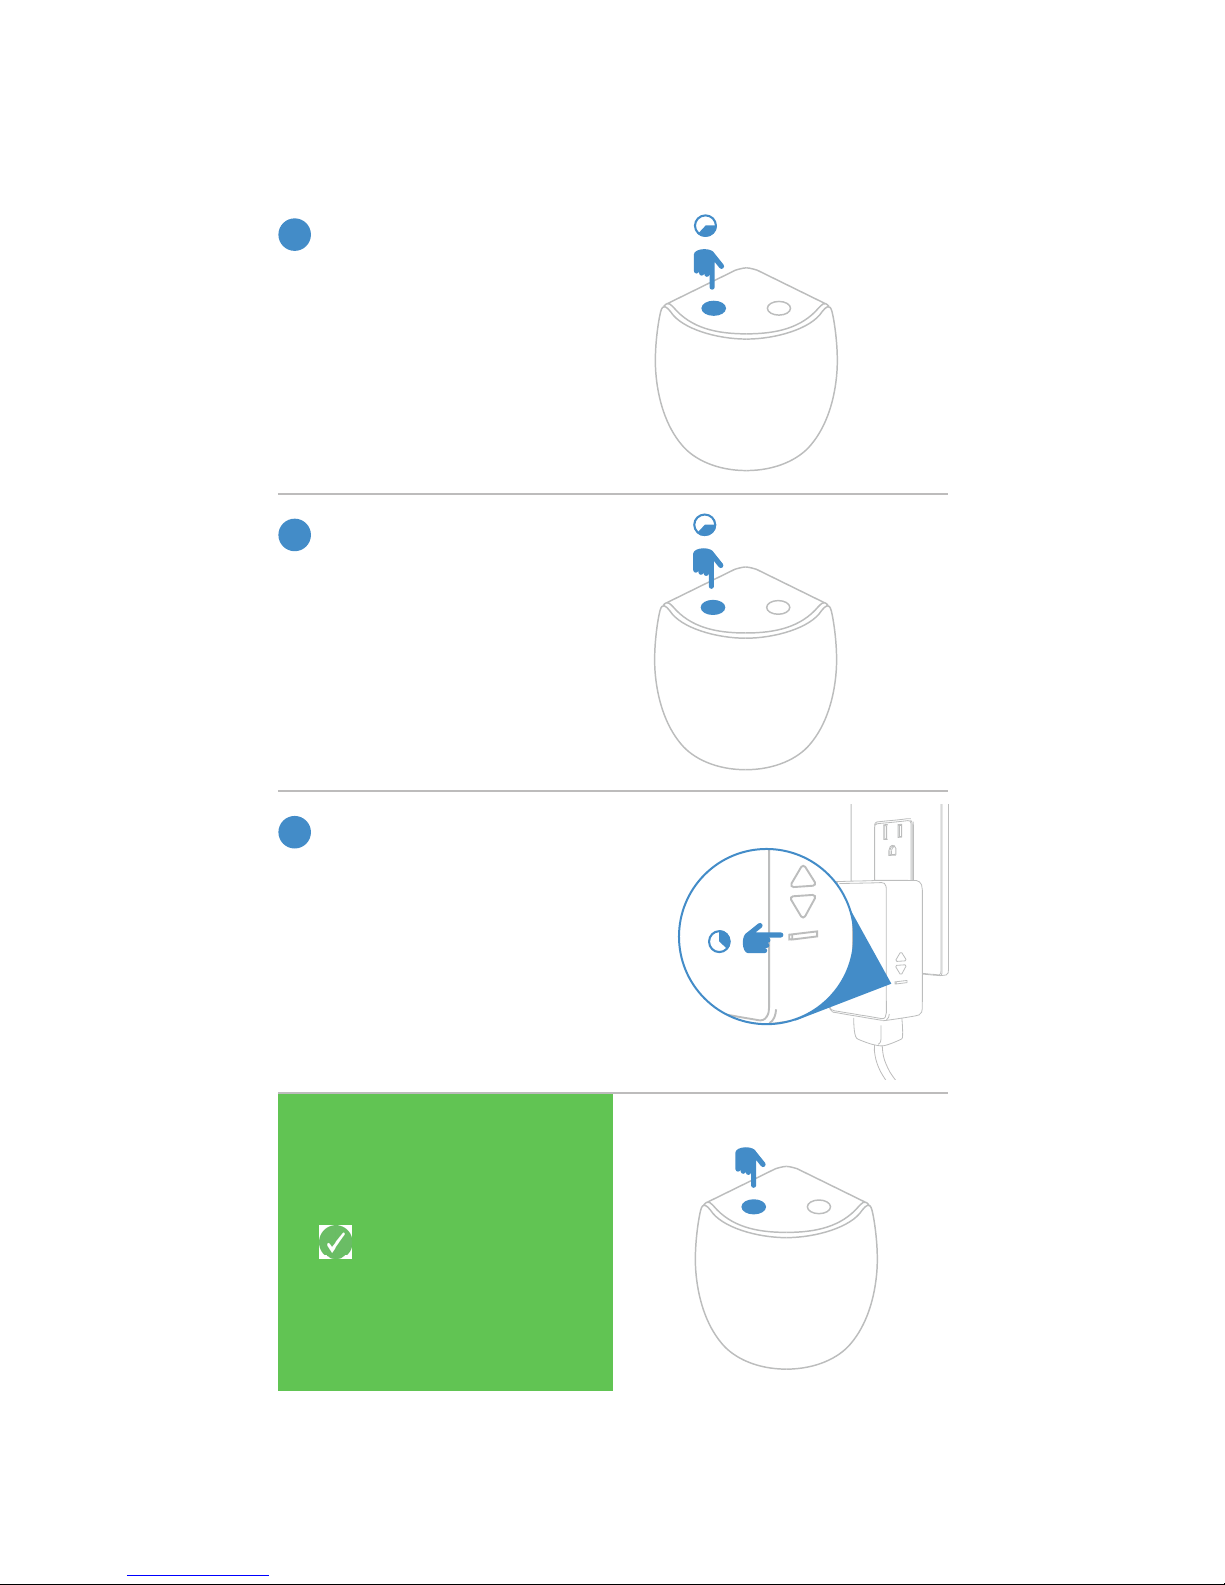
Battery Micro USB Power
Remove the battery tab to
power Motion Sensor.
Installation
Motion Sensor can be powered using a
right-angled Micro USB Cable (2822-222) and
standard USB power adapter.
5

Mounting Options
Tabletop
To place Motion Sensor on a tabletop or other at
surface, leave the at battery cover in place.
Corner Mount
To mount Motion Sensor in a corner, leave the at battery
cover in place and apply the two adhesive strips. Ensure
the wall surface is clean before mounting. Motion Sensor
must be unmounted when replacing battery. Adhesive
strips are designed to be reusable for this purpose.
To precisely position Motion Sensor, slide off the at back
and install the exible mount. Screw the mounting bracket to
a solid surface and position the Motion Sensor as desired.
Flexible Mount
6

Basic Linking
Congure Insteon Motion Sensor without Insteon Hub; do not use these
instructions if you intend to use Motion Sensor with Insteon Hub or other
Insteon management software.
7
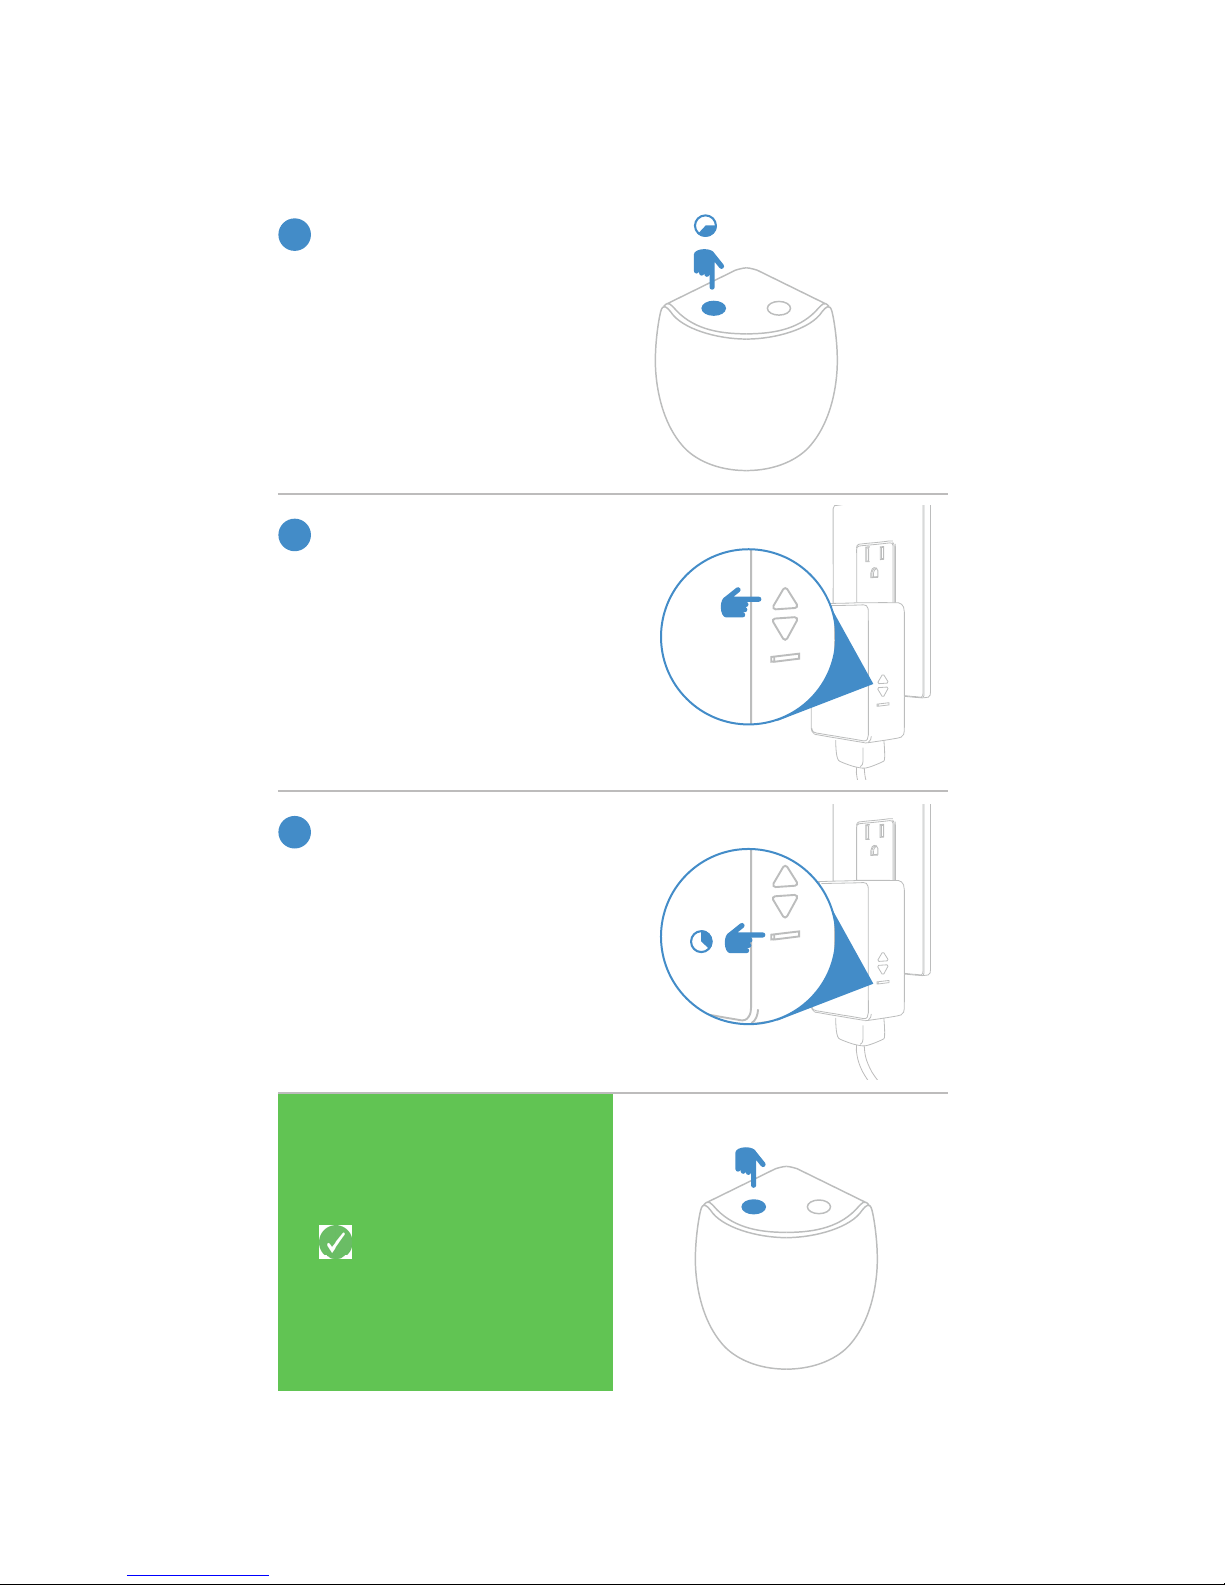
Control an Insteon Device with Motion Sensor
On Motion Sensor, press and
1
hold the set button until its LED
begins blinking green.
On the device that you would like
2
Motion Sensor to control, turn
on the device and adjust it to the
desired brightness, if applicable.
Press and hold the set button
3
until you hear a double-beep.*
*For Insteon bulbs, remove from power and then return
to power. For devices that do not have a beeper, look
for their status LED to ash and return to normal.
Test Motion Sensor by
tapping Motion Sensor’s
set button to simulate
motion.
8
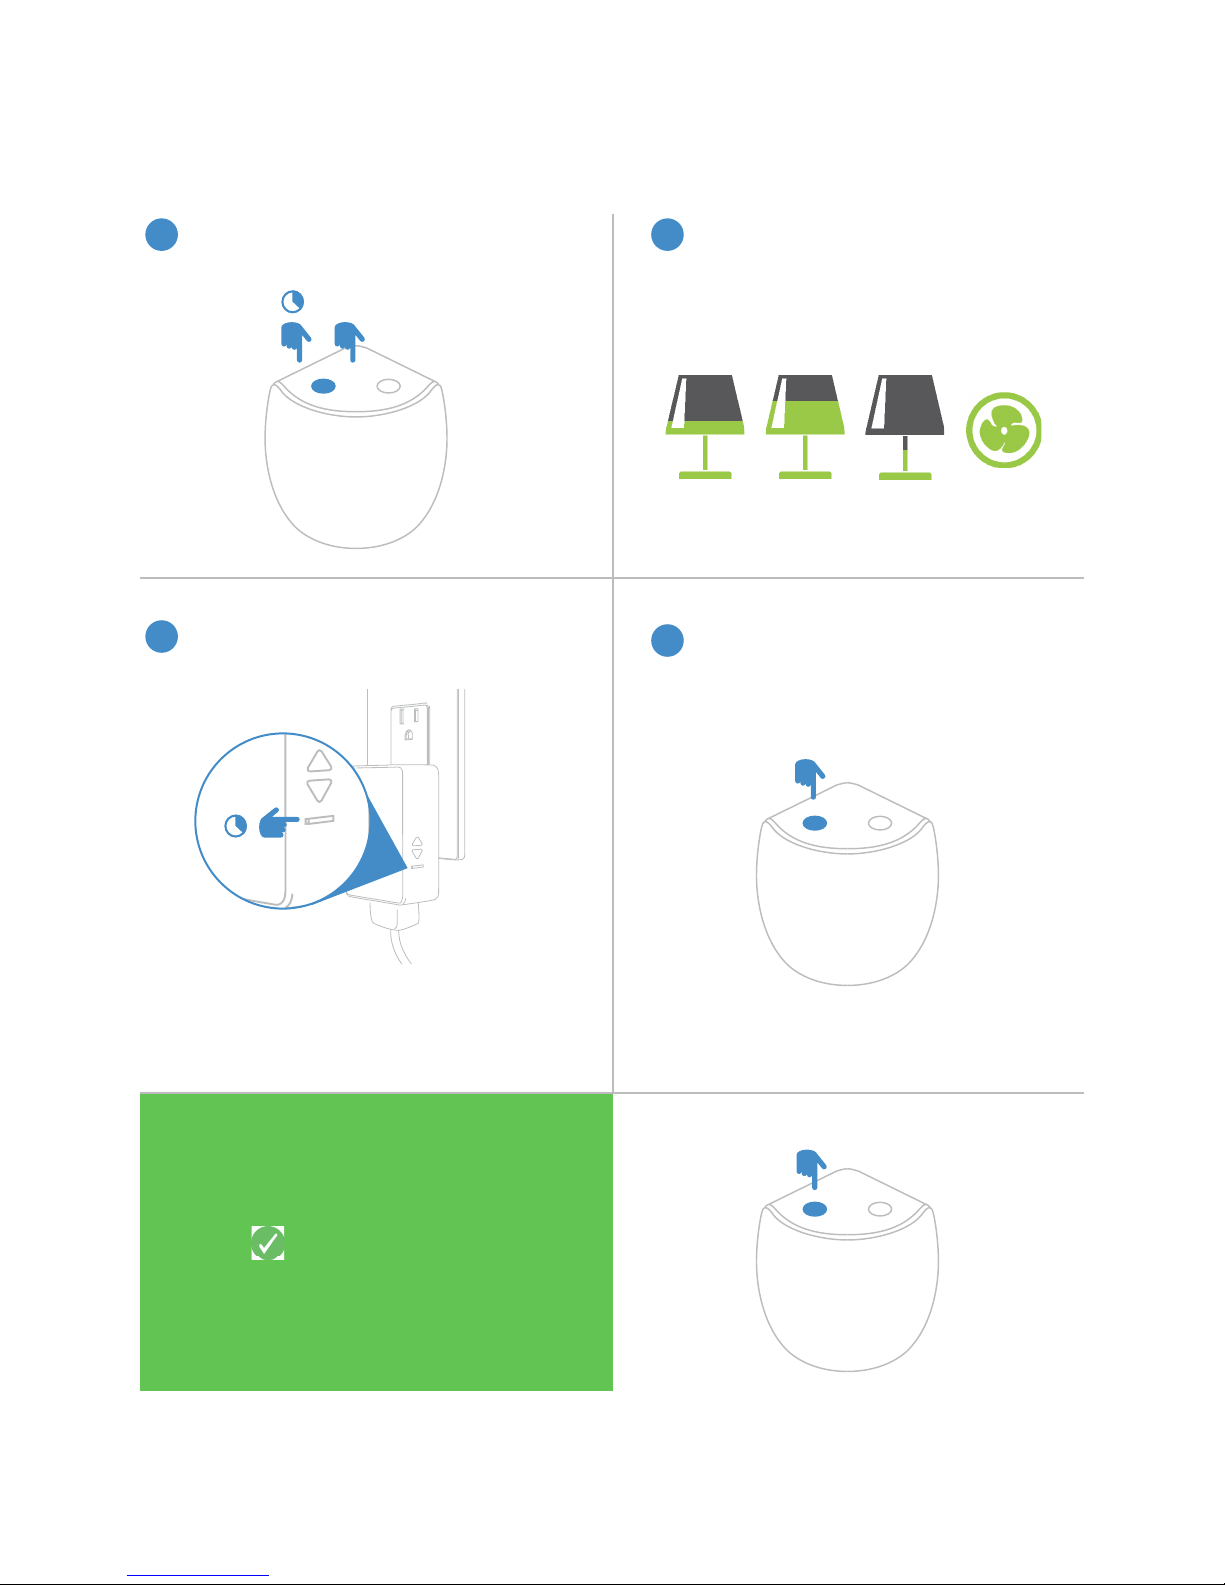
Control Multiple Insteon Devices with Motion Sensor
On Motion Sensor, press and hold the
1
set button until its LED begins blinking
green then tap the set button.
A B
One at a time, press and hold the set
3
button on each device until it doublebeeps.*
Adjust each device to their desired state:
2
On, off, or brightness level if dimming.
50% 72%
Lamp 1
Tap the set button on Motion Sensor to
4
exit multi-link mode.
Lamp 2
30%
Lamp 3
ON
Appliance
*For Insteon bulbs, remove from power and then return
to power. For devices that do not have a beeper, look
for their status LED to ash and return to normal.
Test Motion Sensor by
tapping Motion Sensor’s
set button to simulate
motion.
9
Removing Control of an Insteon Device From Motion Sensor
On Motion Sensor, press and
1
hold the set button until its LED
begins blinking green.
Press and hold the set button
2
again until its LED begins blinking
red.
Press and hold the controlled
3
device’s set button until the
device double-beeps.
*For Insteon bulbs, remove from power and then return
to power. For devices that do not have a beeper, look
for their status LED to ash and return to normal.
Test Motion Sensor by
tapping Motion Sensor’s
set button to simulate
motion.
10

Removing Control of Multiple Insteon Devices From Motion Sensor
On Motion Sensor, press and hold the
1
set button until its LED begins blinking
green.
One at a time, press and hold the set
3
button on each device until it doublebeeps.*
Press and hold the set button again until
2
its LED begins blinking red then tap the
set button.
A B
Tap the set button on Motion Sensor to
4
exit multi-unlink mode.
*For Insteon bulbs, remove from power and then return
to power. For devices that do not have a beeper, look
for their status LED to ash and return to normal.
Test Motion Sensor by
tapping Motion Sensor’s
set button to simulate
motion.
11
 Loading...