

Page 1
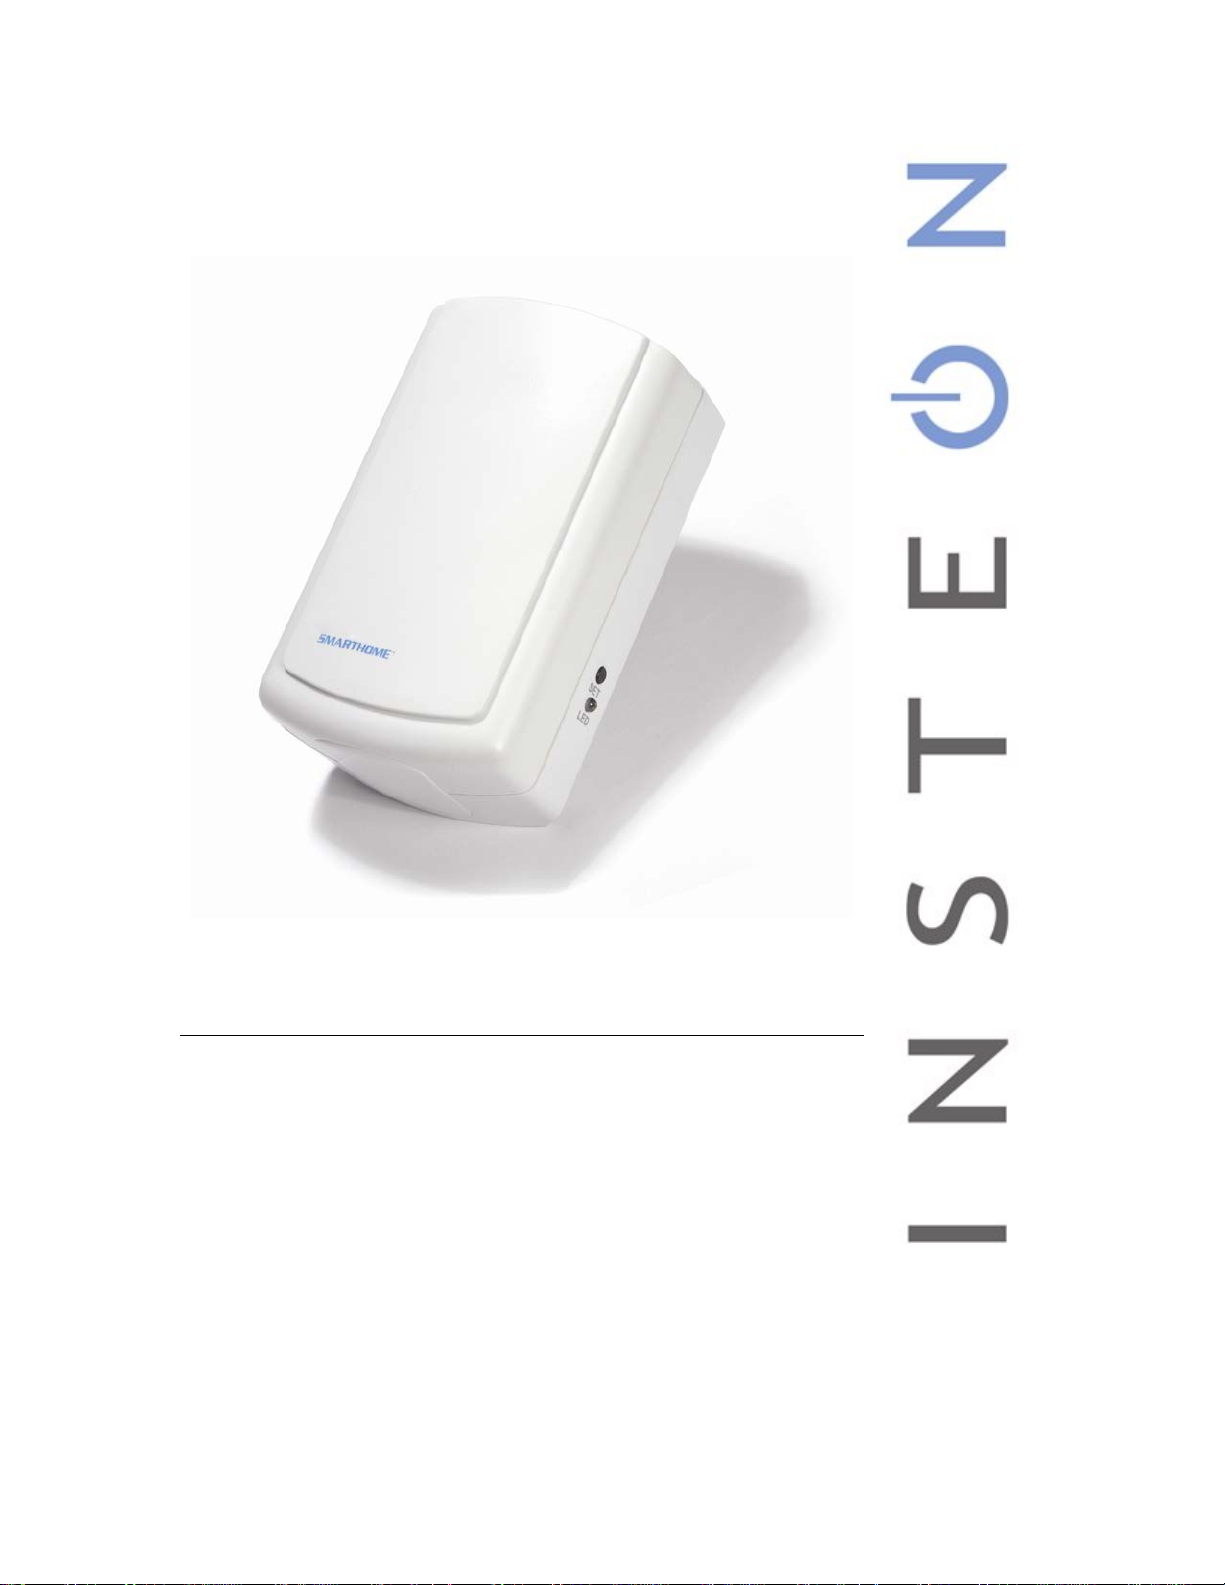
MorningLinc
INSTEON® Morning Industry RF Doorknob/Deadbolt
Controller
Model :
2458A1
Page 2
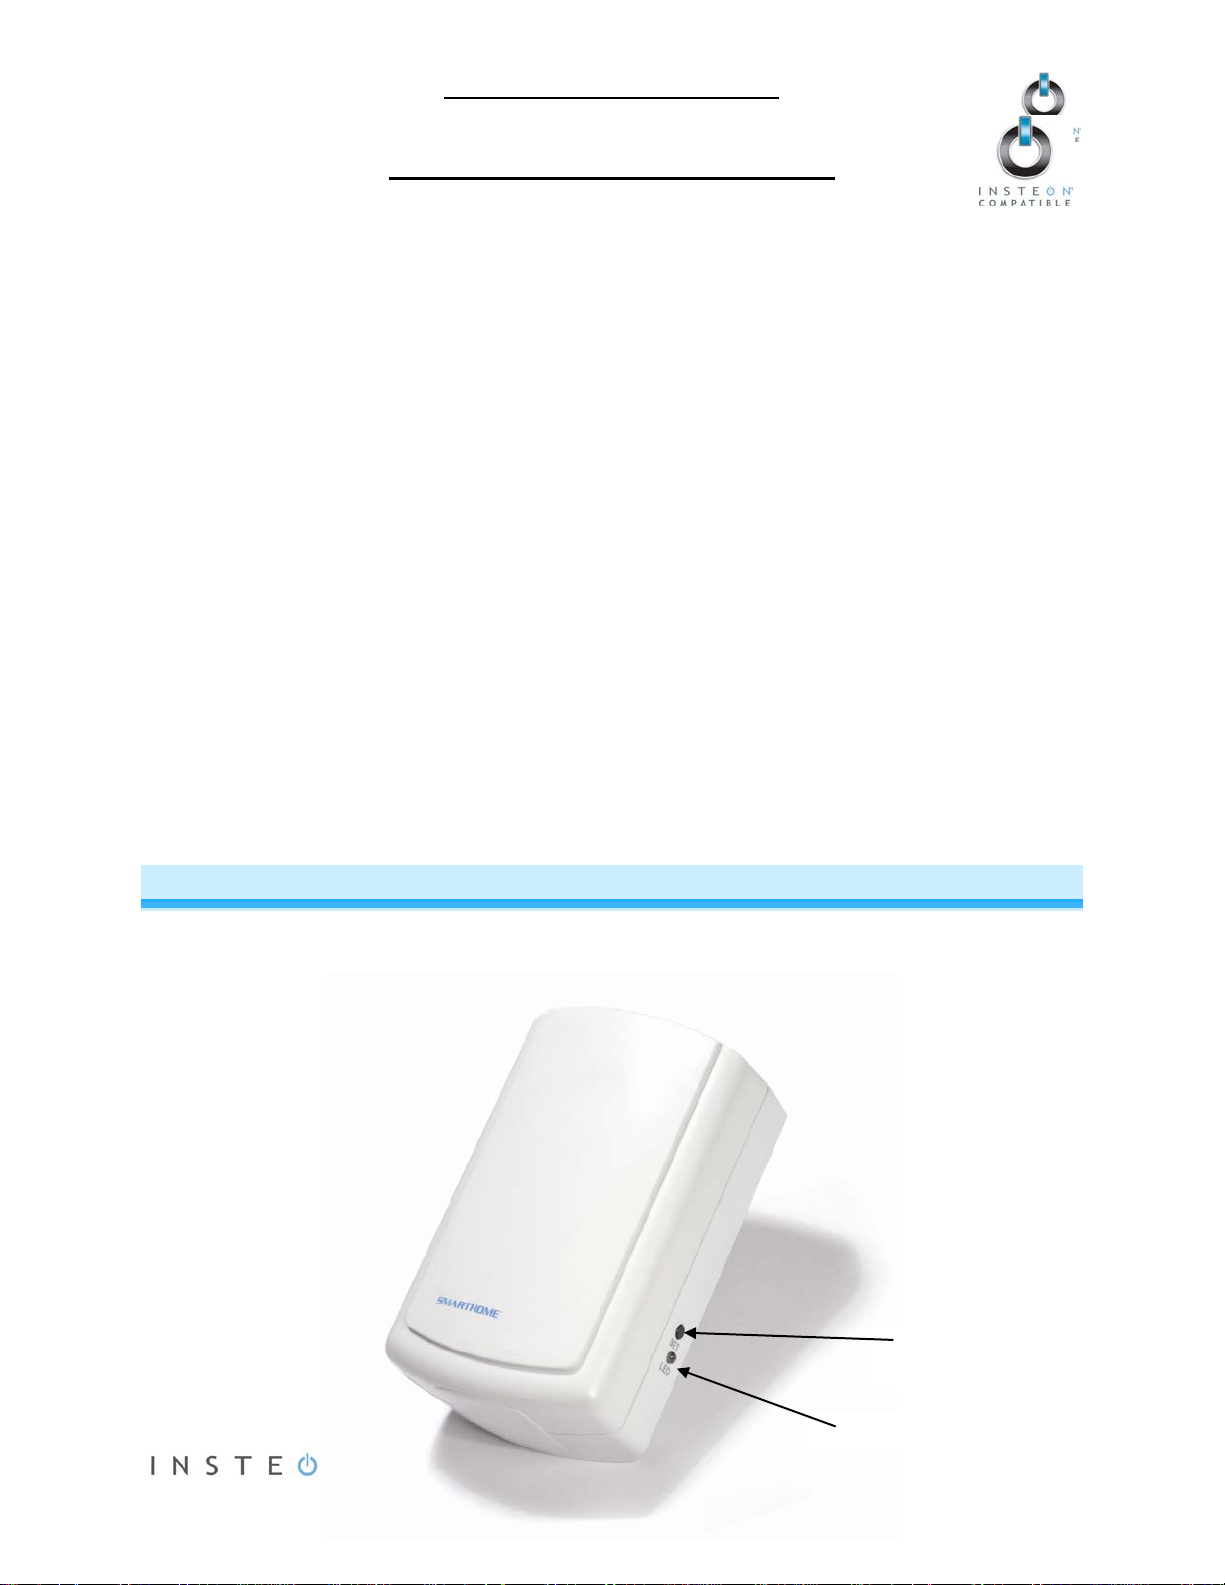
Status LED
Set button
MorningLinc Owner’s Manual
TABLE OF CONTENTS
MorningLinc Owner’s Manual
ABOUT MORNINGLINC ............................................................................................................................... 2
Key MorningLinc Features......................................................................................................................... 3
What is Included with MorningLinc ............................................................................................................ 3
INSTALLATION ............................................................................................................................................ 3
Preparing to Install MorningLinc ................................................................................................................ 3
Installing MorningLinc ................................................................................................................................ 4
USING MORNINGLINC ................................................................................................................................ 5
CONTROLLING MORNINGLINC FROM AN INSTEON CONTROLLER .................................................... 5
Linking an INSTEON Controller to MorningLinc ........................................................................................ 5
Unlinking MorningLinc from an INSTEON Controller ................................................................................ 6
ADVANCED FEATURES ............................................................................................................................. 6
Restoring Power to MorningLinc ............................................................................................................... 6
Resetting MorningLinc to its Factory Default Settings .............................................................................. 6
ADDITIONAL RESOURCES ........................................................................................................................ 7
TROUBLESHOOTING .................................................................................................................................. 7
SPECIFICATIONS, CERTIFICATION, AND WARRANTY .......................................................................... 8
Specifications ............................................................................................................................................ 8
Certification ................................................................................................................................................ 8
FCC and Industry Canada Compliance Statement ................................................................................... 8
Limited Warranty ....................................................................................................................................... 8
ABOUT MORNINGLINC
MorningLinc allows you to lock and unlock your Morning Industry RF deadbolts and door lock s with any
linked INSTEON controller.
Page 2 of 9 2458A1 - Rev: 1/21/2014 8:44 AM
Page 3

MorningLinc Owner’s Manual
Key MorningLinc Features
• Installs and links in minutes
• Locks or unlocks up to 15 Morning Industry RF deadbolts and door locks at the press of a button
• Links individual commands to On and Off buttons on INSTEON controllers
• Indicates INSTEON setup mode activity and operational states with a Status LED and beeper
• Stores setup state in non-volatile memory so settings aren’t lost during power outages
• Two-year warranty
What is Included with MorningLinc
• MorningLinc – INSTEON Morning Industry RF Doorknob/Deadbolt Controller
• Quick Start Guide
INSTALLATION
Preparing to Install MorningLinc
CAUTION
Read and understand these instructions before installing and retain them for future reference.
MorningLinc is intended for installation in accordance with the National Electric Code and local
regulations in the United States or the Can adian Electrical Code and local regulations in Can ada. Use
indoors only. MorningLinc i s not designed nor approved for use on p ower lines other than 120V 60Hz,
single phase. Attempting to use MorningLinc on non-approved power lines may have hazardous
consequences.
Prior to installing MorningLinc, please review the entire installation procedure and take the following
precautions:
• Use indoors or in a properly insulated and weatherproof electrical box only
• Don’t plug MorningLinc into a filtered power strip or AC line filter
IMPORTANT! If you are have any questions, please call:
INSTEON Support Line - 800-762-7845
Page 3 of 9 2458A1 - Rev: 1/21/2014 8:44 AM
Page 4

MorningLinc Owner’s Manual
Installing MorningLinc
When installing MorningLinc, it is recommended to use an outlet or extension cord to keep the unit within
five feet of the door lock fixture. Once installation is complete, MorningLinc can be moved to another
outlet (up to 30 feet away from the door lock fixture).
MorningLinc can be used to control up to 15 Morning I ndus try deadbolts and door locks. However, each
door lock must be within 30 feet of MorningLinc.
1) Plug MorningLinc into an unswitche d wa ll outlet .
The MorningLinc Status LED will turn on solid.
If the Status LED is not solid, tap MorningLinc’s Set button.
2) Use a screwdriver to remove the cover plate from the door lock fixture. Then, tap the door lock
fixture’s Set button (labeled “S”).
The door lock fixture will beep.
3) Tap MorningLinc’s Set button.
The door lock fixture will double-beep.
The MorningLinc Status LED will turn off.
4) If you wish to contr ol multiple door locks with MorningLinc, r epeat steps 3 an d 4 with eac h additional
door lock fixture.
Page 4 of 9 2458A1 - Rev: 1/21/2014 8:44 AM
Page 5

MorningLinc Owner’s Manual
USING MORNINGLINC
Tap MorningLinc’s Set button to toggle the door lock fixture locked and unlocked.
The MorningLinc Status LED will turn on solid if the door is locked or turn off if the door is
unlocked.
NOTE: The MorningLinc Status LED will follow the last INSTEON command it received. When the door is
manually locked/unlocked from the keypad or lock itself, the Status LED will not change until it receives
an INSTEON command (either from a linked controller or MorningLinc’s Set button). It may take 3-5
seconds for the door lock fixture to respond to INSTEON commands.
CONTROLLING MORNINGLINC FROM AN INSTEON CONTROLLER
Linking an INSTEON Controller to MorningLinc
MorningLinc includes a special feature that allows you to link individual commands to the On and Off
buttons on your control ler. For exam ple, you can link the door to lock when you press the On but ton and
unlock when you pres s the Off button on your controller, or vic e vers a. Refer to your controller’s Owne r’s
Manual for more detailed instructions on how to properly install and link it to MorningLinc.
NOTE: LOCK and UNLO CK commands must each be linked to separate button s. Commands c annot be
toggled unless you are using a controller that allows toggle mode (e.g., KeypadLinc).
The following will work for the most common INSTEON devices:
To Link to an On button:
1) Tap MorningLinc’s Set but t on to put your lock into the des ired s tat e ( the action you wou ld like the lock
to perform when you tap the On button).
2) Set the controller to linking mode. (For most controllers, press and hold th e Set button for 3 seconds
an On/scene button for 10 seconds.)
You will have 4 minutes to complete the next step before linking mode automatically times out.
3) Press and hold MorningLinc’s Set button for 3 seconds.
The MorningLinc Status L ED will flash once and th en turn on soli d if the door is locked or turn off
if the door is unlocked.
4) Confirm that linking was successful by lock ing/unlock ing the door and tap ping the On button you just
linked to on the controller.
MorningLinc will respond appropriately.
To Link to an Off button:
NOTE: Not all INSTEON devices have the ability to link to an Off button (see the device’s Owner’s
Manual).
1) Tap MorningLinc’s Set but t on to put your lock into the des ired s tate (the action you would like the lock
to perform when you tap the Off button).
2) Set the controller to linking mode. (For most controllers, pres s and hold the S et button for 3 sec onds
an On/scene button for 10 seconds.)
You will have 4 minutes to complete steps 3 and 4 before linking mode automatically times out.
3) Double-tap MorningLinc’s Set button and wait for 3 seconds before next step.
4) Press and hold MorningLinc’s Set button for 3 seconds.
Page 5 of 9 2458A1 - Rev: 1/21/2014 8:44 AM
Page 6

MorningLinc Owner’s Manual
The MorningLinc Status LE D will f lash onc e and th en turn on if the door is locked or turn off if t he
door is unlocked.
5) Confirm that linking was succes sful by locking/un locking the do or and tapping th e Off button you j ust
linked to on the controller.
MorningLinc will respond appropriately.
Unlinking MorningLinc from an INSTEON Controller
If you are going to discontinue usi ng MorningLinc, it is very important that you unlink it from any linked
controllers. Otherwise, the controllers wi l l retry any commands repetitively, thus slowing down the system.
NOTE: If you unlink MorningLinc from a single button of an On/Of f button pair, any linked commands for
the controller will be erase d, even if the commands were linked to separate butt ons. After unlinking, you
will have to relink the commands you wish to continue using on the controller.
The following will work for the most common INSTEON devices:
1) Set the controller to unlinking mode. (For most controllers, press and hold an O n or Scene button for
10 seconds twice or the Set button for 3 seconds twice.)
You will have 4 minutes to complete the next step before unlinking mode automatically times out.
2) Press and hold MorningLinc’s Set button for 3 seconds.
The MorningLinc Status L ED will flash o nce and then t urn on solid if th e door is locked or turn off
if the door is unlocked.
3) Confirm that unlinking was successful by locking/unlock ing the door and pressing the button you jus t
unlinked from on the controller.
MorningLinc will no longer respond.
4) If there are any comm ands you would like to continue using w ith the controller, relink them with the
prior settings. See L inki ng an IN STEON Controller to MorningLinc.
ADVANCED FEATURES
Restoring Power to MorningLinc
MorningLinc st ores all of its setti ngs, such as links to other INST EON d evices, in its non-volatile mem or y.
Because settings are saved in this internal memory, they will not be lost in the event of a power failure.
Resetting MorningLinc to its Factory Default Settings
The factory reset procedure can be used to clear the MorningLinc memory of all INSTEON links.
1) If you are using a controller to control MorningLinc, be sure to unlink it from the controller. See
Unlinking MorningLinc from an INSTEON Controller.
2) Unplug MorningLinc for about 10 seconds.
3) While holding down Mor ningLinc’s Set button, plu g it back in, making sure not to let go of the Set
button.
The MorningLinc Status LED will turn on solid.
4) Continue to hold down the Set button for 3 seconds and then release.
After a few seconds, the MorningLinc Status LED will flash once a nd then tur n on solid .
NOTE: If you wish to use MorningLinc to lock and unlock your door again, you will need to reinstall
MorningLinc. See Installin g Morning Linc and start from step 3.
Page 6 of 9 2458A1 - Rev: 1/21/2014 8:44 AM
Page 7

MorningLinc Owner’s Manual
Problem
Possible Cause
Solution
The Status LED on
control the load.
MorningLinc
through RF.
The controller may be
loading down the signal.
If the above doesn’t work, perform a factory reset
on the controller.
ADDITIONAL RESOURCES
Find home automation solutions, helpful tips, interactive demos, videos, user forums, and more at the
Smarthome Learning Center: www.smarthome.com/learningcenter.html
TROUBLESHOOTING
MorningLinc is not
turning on and
MorningLinc won’t
MorningLinc is not
linking with the
Morning Industry door
lock fixture.
MorningLinc is taking
a long time to respond
to a controller.
MorningLinc is not
being controlled from
a controller.
MorningLinc may not be
getting power.
communicates through the
powerline, while the
Morning Industry door lock
fixture only communicates
sending commands to a
responder that is no
longer in use. Commands
for the unused responder
are being resent and
MorningLinc is plugged
into a power strip.
MorningLinc is not in
range of the door lock
fixture.
Be sure MorningLinc is not plugged into a switched
outlet that is turned off.
Be sure that you have installed at least one dualband INSTEON device (Access Point #2443) to
allow communication between the units.
Unlink any unused responders from the controller.
HINT: If you are using home automation software
such as HouseLinc, you can easily check scene
membership and eliminate unnecessary links.
Powerline signals can’t travel through power filters.
Plug MorningLinc directly into a wall outlet.
Move MorningLinc to an outlet within RF range of
the door lock fixture.
A surge or excessive
MorningLinc is locked
up.
If you have tried these solutions, reviewed th is Owner’s Manual, and st ill cannot r esolve an issue you are
having with MorningLinc, pleas e call:
Page 7 of 9 2458A1 - Rev: 1/21/2014 8:44 AM
noise on the power line
may have caused the
problem.
Unplug MorningLinc for 10 seconds and reinstall.
If the above doesn’t work, perform a factory reset.
See Resetting MorningL inc to its Factory Default
Settings.
INSTEON Support Line
800-762-7845
Page 8

MorningLinc Owner’s Manual
SPECIFICATIONS, CERTIFICATION, AND WARRANTY
Specifications
View specifications for MorningLinc at: www.smarthome.com/2458A1.html
Certification
This product has been thorough ly tested b y ITS ETL SEMKO, a nationall y recognized indep endent thirdparty testing laborator y. The North Am erican ET L Lis ted m ark s ignifies tha t the device has been tested to
and has met the requirements of a widely recognized consensus of U.S. and Canadian device safety
standards, that the manufacturing site has been audited, and that the manufacturer has agreed to a
program of quarterly factory follow-up inspections to verify continued conformance.
FCC and Industry Canada Compliance Statement
This device complies with FCC Rules Part 15 and Industry Canada RSS-210 (Rev. 7). Operation is
subject to the following two conditions:
(1) This device may not cause harmful interference, and
(2) This device must accept any interference, including interference that may cause undesired
operation of the device.
Le present appare il est conforme aux CNR d'Industrie Canada applicables aux apparei ls radio exempts
de licence. L'exploitation est autorise aux deux conditions suivantes:
(1) l'appareil ne doit pas produire de brouillage, et
(2) l'utilisateur de l'app areil doit accepter t out brouillage radiolec trique subi, mme si le brou illage est
susceptible d'en compromettre le fonctionnement.
The digital circuitr y of th is dev ice has been t ested and found to com pl y with the lim its for a C lass B digital
device, pursuant to Par t 15 of the F CC Rul es. T hese l im its ar e designed to pro vid e reason able pr otecti on
against harmful interfer ence in residential installations . This equipment generate s, uses, and can radiate
radio frequency energy and, if not installed and used in accordance with the instructions, may cause
harmful interference to rad io and television reception. However , there is no guarantee that interference
will not occ ur in a p artic ular installa tion. If this device d oes caus e such i nterf erenc e, wh ich can b e verif ied
by turning the device off and on, the user is encouraged to e liminate the interfer ence by one or mor e of
the following measures:
• Re-orient or relocate the receiving antenna of the device experiencing the interference
• Increase the distance between this device and the receiver
• Connect the device to an AC outlet o n a circuit different from the one that supplies power to the
receiver
• Consult the dealer or an experienced radio/TV technician
WARNING: Changes or modific ations to this device not expressl y approved by the party responsible for
compliance could void the user’s authority to operate the equipment.
Limited Warranty
Seller warrants to the original consumer purchaser of this product th at, for a peri od of t wo years fr om th e
date of purchase, this product will be free from defects in material and workm anship and will perform in
substantial conform ity t o the description of the produc t in this Owner’s Manual. T his warranty shall not
apply to defects or er rors caused b y misuse or neg lect. If the product is f ound to be def ective i n material
or workmanship, or if the product do es not p erf orm as warranted ab ove dur ing the warra nty peri od, Sel ler
will either repair it, re place i t, or ref und th e purchas e pric e, at its opt ion, up on rec eipt of the prod uct at th e
Page 8 of 9 2458A1 - Rev: 1/21/2014 8:44 AM
Page 9

MorningLinc Owner’s Manual
address below, postage pr epaid, with proof of the date of purchas e and an explanation of the defect or
error. The repair, replacement, or refund that is provided for above shall be the full extent of Seller’s
liability with respect to this product. For repair or replacement during the warranty period, call the
INSTEON Gold Support Line at 800-762-7845 with t he Model # and Revision # of the device to receive
an RMA# and send the product, along with all other required materials to:
INSTEON
ATTN: Receiving Dept.
16542 Millikan Ave.
Irvine, CA 92606-5027
Limitations
The above warranty is in lieu of and Seller disclaims all other warranties, wheth er oral or written, express
or implied, including any warranty or merchantability or fitness for a particular purpose. Any implied
warranty, including any wa rranty of merchantab ility or fitness f or a particular purpose, which may not be
disclaimed or supplanted as provided above shall be limited to the two-year of the express warranty
above. No other representation or claim of any nature by any person shall be binding upon Seller or
modify the terms of the above warranty and disclaimer.
Home automation devices have the risk of failure to operate, incorrect operation, or electrical or
mechanical tam pering. For optimal use, manuall y verify the device state. An y home automation device
should be viewed as a convenience, but not as a sole method for controlling your hom e.
In no event shall Seller be liable for special, incident al, consequential, or other dam ages resulting from
possession or use of this device, including without limitation damage to property and, to the extent
permitted by law, personal injury, even if Seller knew or should have known of the possibility of such
damages. Some states do not allow limitations on how long an implied warranty lasts and/or the exclusion
or limitation of dam ages, in which c ase the abo ve lim itations and/or exclus ions m ay not app l y to you. You
may also have other legal rights that may vary from state to state.
INSTEON Technology Patent
Protected under U.S. and foreign patents (see www.insteon.com)
© Copyright 2012
INSTEON, 16542 Millikan Ave., Irvine, CA 92606, 800-762-7845, www.insteon.com
Page 9 of 9 2458A1 - Rev: 1/21/2014 8:44 AM
 Loading...