

Page 1
Quick Start Guide
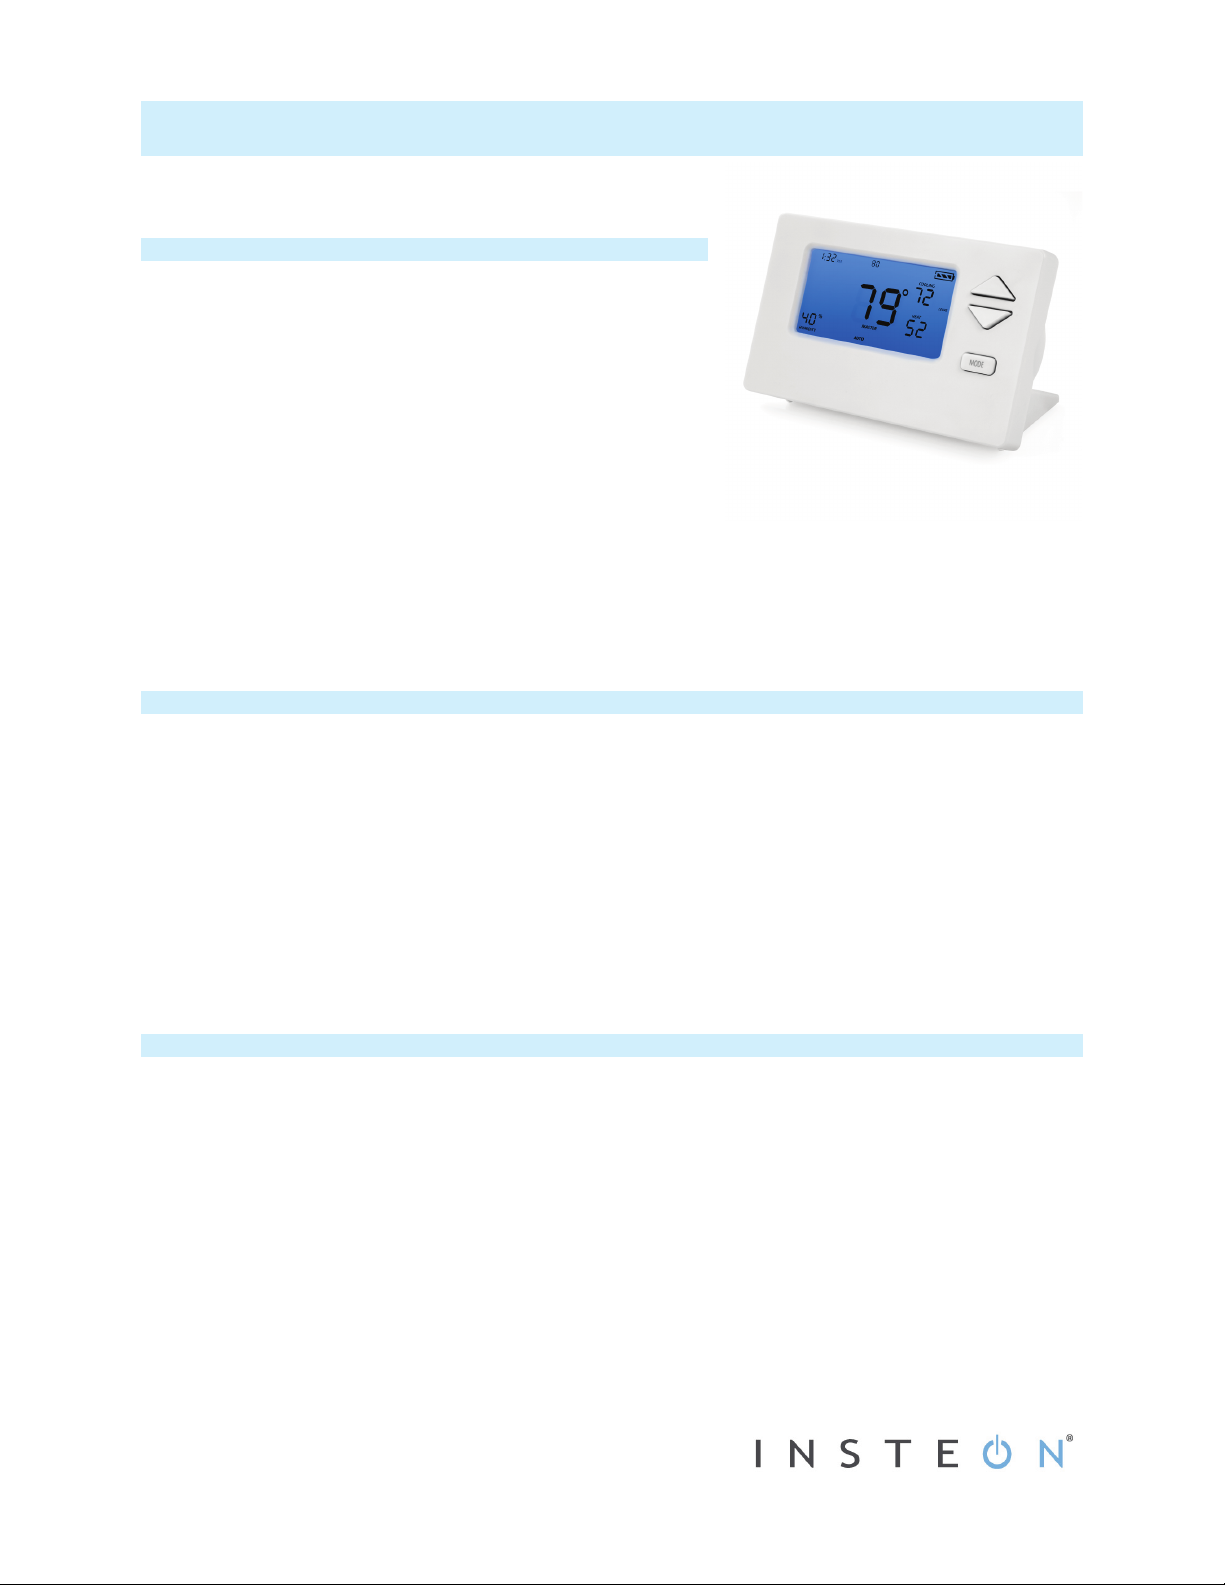
INSTEON® Wireless Thermostat
Model: 2441ZTH
About INSTEON Wireless Thermostat
INSTEON Wireless Thermostat is a wireless, battery-operated, oneday programmable, INSTEON-compatible thermostat. INSTEON
Wireless Thermostat includes a humidity sensor and the ability to
communicate via RF to other INSTEON devices and thermostats.
INSTEON Wireless Thermostat does not connect directly to the HVAC
(Heating, Ventilating and Air Conditioning) system. If you want to
control the HVAC system you need to install INSTEON Thermostat
and connect it directly to the HVAC system.
INSTEON Wireless Thermostat may be used as a standalone
INSTEON controller capable of controlling other INSTEON
responders. On its own, INSTEON Wireless Thermostat sends out notifications based on temperature status and can
even control standalone heaters and fans plugged into ApplianceLinc modules (#2456S3).
INSTEON Wireless Thermostats can also be linked to your main INSTEON Thermostat controller to create extra
temperature zones in your home. INSTEON Thermostat displays the temperature readouts from up to two linked
INSTEON Wireless Thermostats on its display.
Preparation
Proper installation of INSTEON Wireless Thermostat will be accomplished by following these steps. The product will
mainly be used in a tabletop stand; wall mounting is optional.
1) Make sure the location that you have selected for INSTEON Wireless Thermostat will not be affected by daily
movement of sunlight or is not in direct line of sight of a nearby HVAC vent or fan
2) Insert 2 AA batteries into INSTEON Wireless Thermostat
3) Close the cover on INSTEON Wireless Thermostat
- After a few seconds INSTEON Wireless Thermostat will display ambient temperature and humidity
- Mode will default to OFF
- Battery segment should show full with fresh batteries
- Time will show default (12:00 PM) and become active
4) Snap INSTEON Wireless Thermostat into the supplied tabletop stand or mount safely on a wall
Test Operation
INSTEON Wireless Thermostat communicates via radio frequency (RF) to the INSTEON Thermostat that controls the
HVAC system. Before adding INSTEON Wireless Thermostat as a controller of INSTEON Thermostat, perform the
following tests to familiarize yourself with INSTEON Wireless Thermostat. Keep in mind that INSTEON Wireless
Thermostat is presently a standalone device and you are not yet sending any INSTEON communications.
Note: While testing, the display will change but no HVAC operations will take place. INSTEON Wireless Thermostat
defaults to a 5-minute delay between modes and cycles.
Heating Mode Test
1) Press Mode button once to enter Heat mode
2) Tap Up or Down arrow button several times until setpoint is 1° above ambient
3) Tap Up or Down arrow button until you reach a desirable heat temperature setpoint below ambient
2441ZTH Rev. 7/18/2012 9:57 AM / See Owner’s Manual for Warranty Information.
Protected under U.S. and foreign patents (see www.insteon.com)
© Copyright 2012 INSTEON, 16542 Millikan Ave., Irvine, CA 92606, 800-762-7845
INSTEON Wireless Thermostat will call for Heat
“Heat” segment will change to “Heating,” blink for 3 seconds and then go steady
No furnace activity will take place at this time--only display changes
Page 2

Cooling Mode Test
1) Tap Mode button once again to enter Cool mode
2) Tap Up or Down arrow button several times until setpoint is 1° below ambient
INSTEON Wireless Thermostat will call for Cooling
“Cool” segment will change to “Cooling,” blink for 3 seconds and then go steady
No A/C activity will take place at this time--only display changes
3) Tap Up or Down arrow button until you reach a desirable cool temperature setpoint
Auto Mode Test
1) Tap Mode button once to enter auto mode
Note that your Heat and Cool setpoints are set in previous steps, unless you did not have a minimum
2° gap between settings
2) Tap Up once to increase both Heat and Cool setpoints by 1°
3) Tap Down once to decrease both Heat and Cool setpoints by 1°
4) Tap Mode once to enter “time of day” mode
Indicated by Auto at bottom and relevant time of day to right of Heat/Cool set temps
5) Tap Mode once more to turn to Off mode
Adding an INSTEON Wireless Thermostat to INSTEON Thermostat
Link INSTEON Wireless Thermostat to INSTEON Thermostat to provide a portable thermostat wherever you want
temperature control. You can add up to two INSTEON Wireless Thermostats to an INSTEON Thermostat.
1) Press and hold INSTEON Wireless Thermostat Set button
INSTEON Wireless Thermostat Set LED will blink green and unit will beep
2) Press and hold INSTEON Thermostat Set button
INSTEON Thermostat will beep, then double-beep
INSTEON Wireless Thermostat will double-beep
3) Test the scene by pressing and holding INSTEON Wireless Thermostat’s Master button.
- When properly synchronized, pressing the Master button on one INSTEON Wireless Thermostat will
illuminate the “Master” segment on that same screen. Additionally, the present room temperature of the
Wireless Thermostat will be displayed in position 1 as temperature segments at the display’s top center.
- A visual inspection of each display will reveal Master status of INSTEON Thermostat or Zone Thermostat
Note: Only INSTEON Thermostat is directly wired to the HVAC system. If you plan on operating multiple INSTEON
Wireless Thermostats, you must have at least one INSTEON Thermostat installed to control the HVAC.
Control Settings
Master button Press and hold Master to make a specific INSTEON Wireless Thermostat the “active” thermostat
Fan button Tap Fan to keep “FAN ALWAYS” on (tap again to return to automatic mode)
Hold button Tap Hold to keep current settings active. Tap Hold again to release/send a “release Hold”
Energy (Leaf) Tap Energy to “relax” the heat and cool setpoints by 4° (adjustable with software)
for a system with one or more Zone Thermostats
INSTEON command
Owner’s Manual and Tech Support
Owner’s Manual and current Quick Start Guide: http://www.insteon.com/support
Call: INSTEON Support Line at 800-762-7845
This device complies with FCC Rules and Industry Canada license-exempt RSS standard(s). Operation is subject to the following two conditions: (1) this device may not cause
harmful interference, and (2) this device must accept any interference, including interference that may cause undesired operation of the device.
Le present appareil est conforme aux CNR d'Industrie Canada applicables aux appareils radio exempts de licence. L'exploitation est autorise aux deux conditions suivantes: (1)
l'appareil ne doit pas produire de brouillage, et (2) l'utilisateur de l'appareil doit accepter tout brouillage radiolectrique subi, mme si le brouillage est susceptible d'en
compromettre le fonctionnement.
2441ZTH Rev. 7/18/2012 9:57 AM / See Owner’s Manual for Warranty Information.
Protected under U.S. and foreign patents (see www.insteon.com)
© Copyright 2012 INSTEON, 16542 Millikan Ave., Irvine, CA 92606, 800-762-7845
 Loading...