

Page 1
Quick Start Guide
Introduction
Programming Thermostat Adapter as an INSTEON Responder
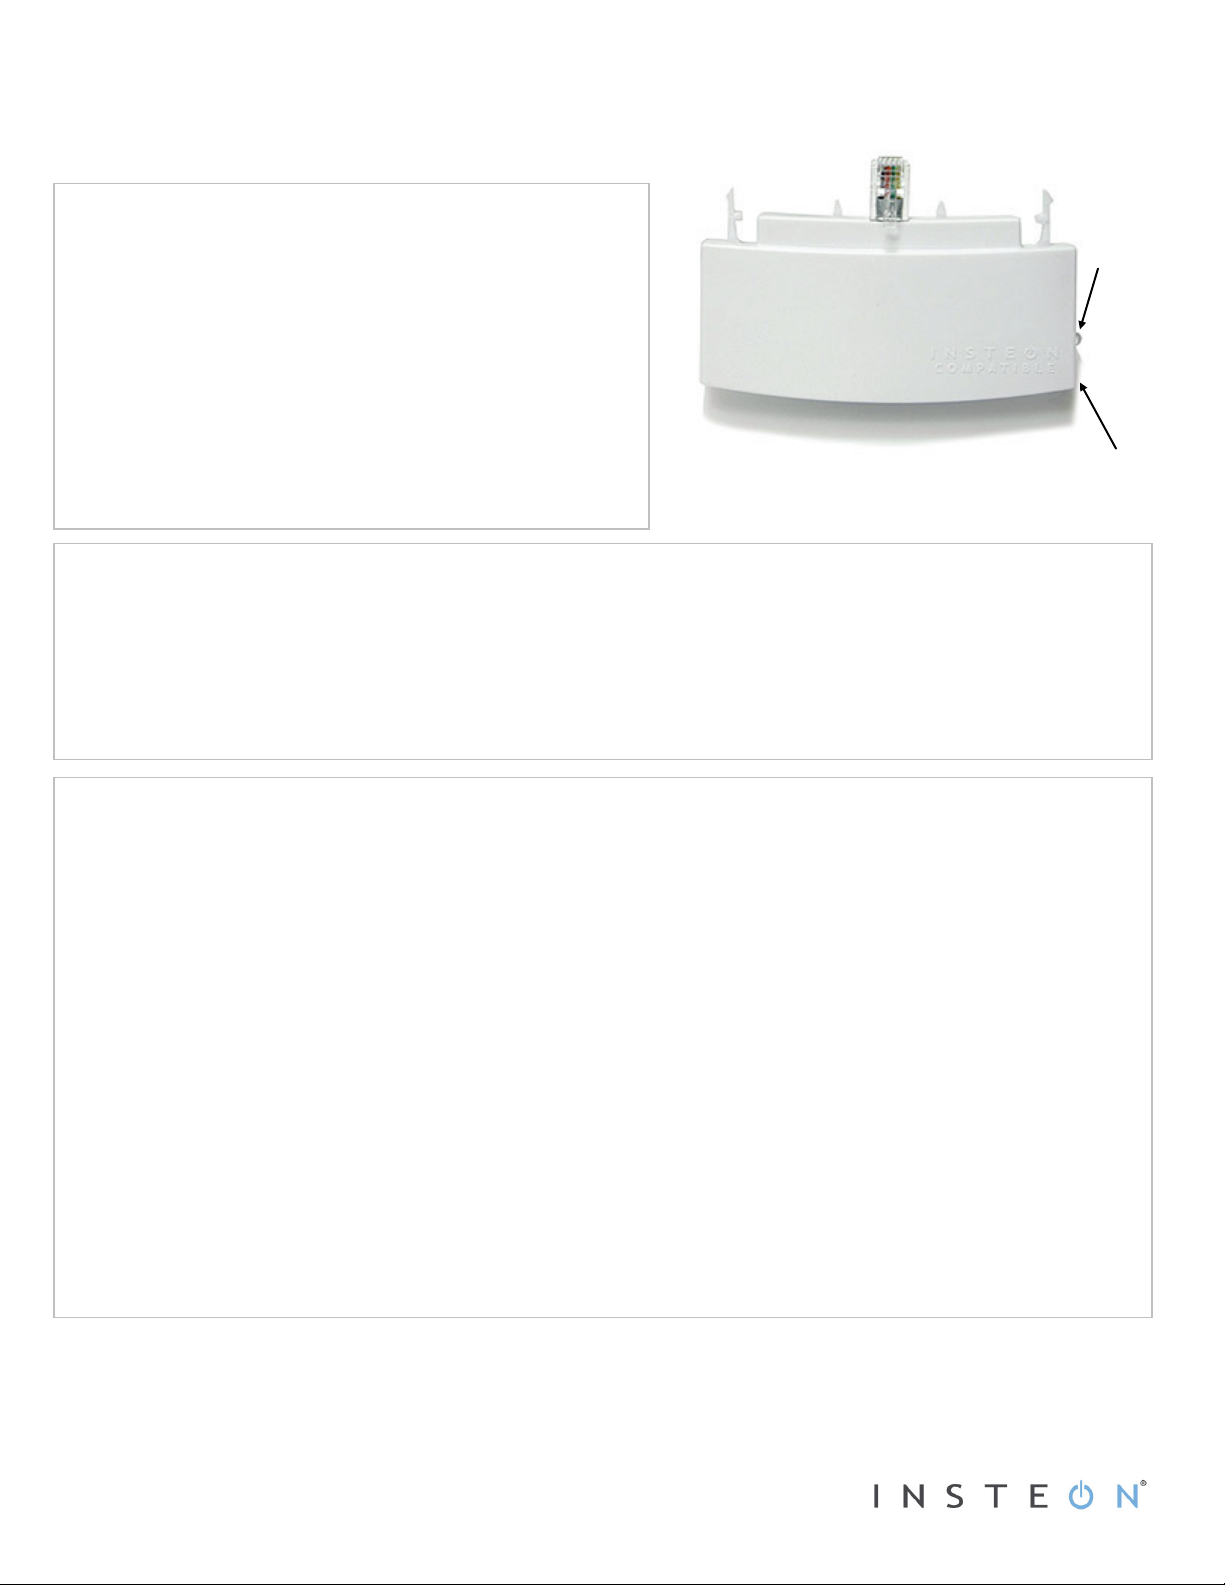
Set
LED
Installing Thermostat Adapter
Thermostat Adapter will disconnect from the thermostat
INSTEON® Thermostat Adapter, Totaline™/Venstar
Model: #2441V, Rev 2.0
The INSTEON Thermostat Adapter adds remote control and
monitoring to 3 compatible models of Totaline/Venstar brand
thermostats. It simply plugs into the bottom of compatible
thermostats and communicates via INSTEON RF (radio frequency)
to give you wireless remote control and monitoring from anywhere
in your home or the world.
The 3 compatible models are:
• 1-Day Programmable Venstar Thermostat (30410A)
• 7-Day Programmable Venstar Thermostat (30411A)
• 7-Day Programmable, Dual-Fuel Venstar Thermostat (30412A)
Note: To use the above mentioned thermostats, make sure your install
location’s wiring has 5 wires or check with a local installer.
For the best INSTEON network performance, make sure you have properly installed at least two Access Points (#2443) or other dualband products. Search for dual-band INSTEON products at: http://www.smarthome.com/dualband.
1) Plug Thermostat Adapter into the jack on the bottom of your thermostat
Thermostat Adapter LED will turn on solid green
Uninstalling Thermostat Adapter
1) Open the front cover of the thermostat by gently pulling the right edge of the cover towards you
2) While pressing firmly on the small round button (bottom center of thermostat) pull down gently on the Thermostat Adapter
To use Thermostat Adapter as a responder to an INSTEON Controller, follow these steps to link Thermostat Adapter and the
controller together. See your controller’s Owner’s Manual for more detailed instructions.
The following instructions will work for the most common INSTEON controllers.
Note: Linking your Adapter to a scene allows your thermostat to go to a chosen setting
1) Set your thermostat to the desired mode (Manual/Program/Auto, Heat/Cool, Temperature, Fan Auto/Fan On)
2) Set your controller to linking mode. (For most controllers, press and hold the Set button for 3 seconds or an On/Scene button for
10 seconds.)
3) To link to an ON command:
4) To link to an OFF command:
5) Test that linking was successful by changing the mode on your thermostat, then tapping the button you just linked on the
6) Repeat steps 1 through 5 for as many scenes and set points on your controller as you wish
Note: Different set points can be linked to different buttons should you need more flexibility
You will have 4 minutes to complete the next steps before linking mode automatically times out
• Tap the Thermostat Adapter Set button once
• Press and hold the Thermostat Adapter Set button for about 3 seconds
• Tap Thermostat Adapter Set button twice
• Press and hold Thermostat Adapter Set button for about 3 seconds
controller
Thermostat display will flash all the LCD characters twice
Thermostat display will flash all the LCD characters twice
™
button
Page 1 of 2
Rev. 07-16-2012
Page 2

Quick Start Guide INSTEON Thermostat Adapter
Controlling Thermostat Adapter
Programming Thermostat Adapter as an INSTEON Controller
Limited Warranty – I NSTEON warrants to original consumer of this product for a period of 2 years from date of purchase, t his product will be free from
INSTEON, 16542 Millikan Ave., Irvine, CA 92606, 1-800-SMARTHOME (800-762-7846)
Complete Instructions, Troubleshooting and Tech Support
• Tap an On or scene button on a linked controller to recall the thermostat mode and setpoints established during linking
• Tap on Off button on a linked controller to turn off the thermostat mode and setpoints established during linking
• Tap the Brighten** button on a linked controller to raise the setpoint(s) by a single degree
• Tap the Dim** button on a linked controller to lower the setpoint(s) by a single degree
**To prevent “runaway” temperature setpoints, these operations only apply to controllers with brighten/dim buttons (e.g.,
RemoteLinc
temperature setpoints.
Thermostat Adapter can be used to control remote INSTEON devices when the thermostat switches the A/C, heat or fan on and off.
See your INSTEON device’s Owner’s Manual for more detailed instructions.
The following will work for the most common INSTEON devices:
1) Set your remote INSTEON device to the state you wish to activate from Thermostat Adapter
2) Set your thermostat to the state you wish to use to trigger your remote INSTEON device (Cool, Heat, Fan On mode)
3) Set Thermostat Adapter to linking mode by pressing and holding the Thermostat Adapter Set button for about 5 seconds
You will have 4 minutes to complete the next step before linking mode automatically times out
4) Press and hold the Set button on your remote INSTEON device.
5) Test that linking was successful by changing the mode on your thermostat to confirm that the remote INSTEON device is working
as expected
Owner’s Manual and current Quick Start Guide: www.insteon.com/support
Call: INSTEON Support Line at 800-762-7846
™
). For example, pressing and holding the ON/OFF buttons from a SwitchLinc™ or KeypadLinc™ will not change the
NOTE: Thermostat must be in Off mode to link to Fan On mode
Thermostat Adapter LED will begin blinking
Thermostat display will flash all the LCD characters
Thermostat Adapter LED will stop blinking
Thermostat display will flash all the LCD characters
This device complies with FCC Rules and Industry Canada license-exempt RSS standard(s). Operation is subject to the following two conditions: (1) this device may not cause harmful interference, and
(2) thi s device must accept any interference, including interference that may cause undesired operation of the device.
Le present appareil est conforme aux CNR d'Industrie Canada applicables aux appareils radio exempts de licence. L'exploitation est autorise aux deux conditions suivantes: (1) l'appareil ne doit pas
produire de brouillage, et (2) l'utilisateur de l'appareil doit accepter tout brouillage radiolectrique subi, mme si le brouillage est susceptible d'en compromettre le fonctionnement.
defects in material and workmanship and will perform in substantial conformity with its Owner's Manual. Warranty shall not apply to defects caused by
Page 2 of 2
Rev. 07-16-2012
misuse or neglect.
Protected under U.S. and foreign patent s (see www.insteon.com) © Copyright 2012
 Loading...