

Page 1
Dedicated
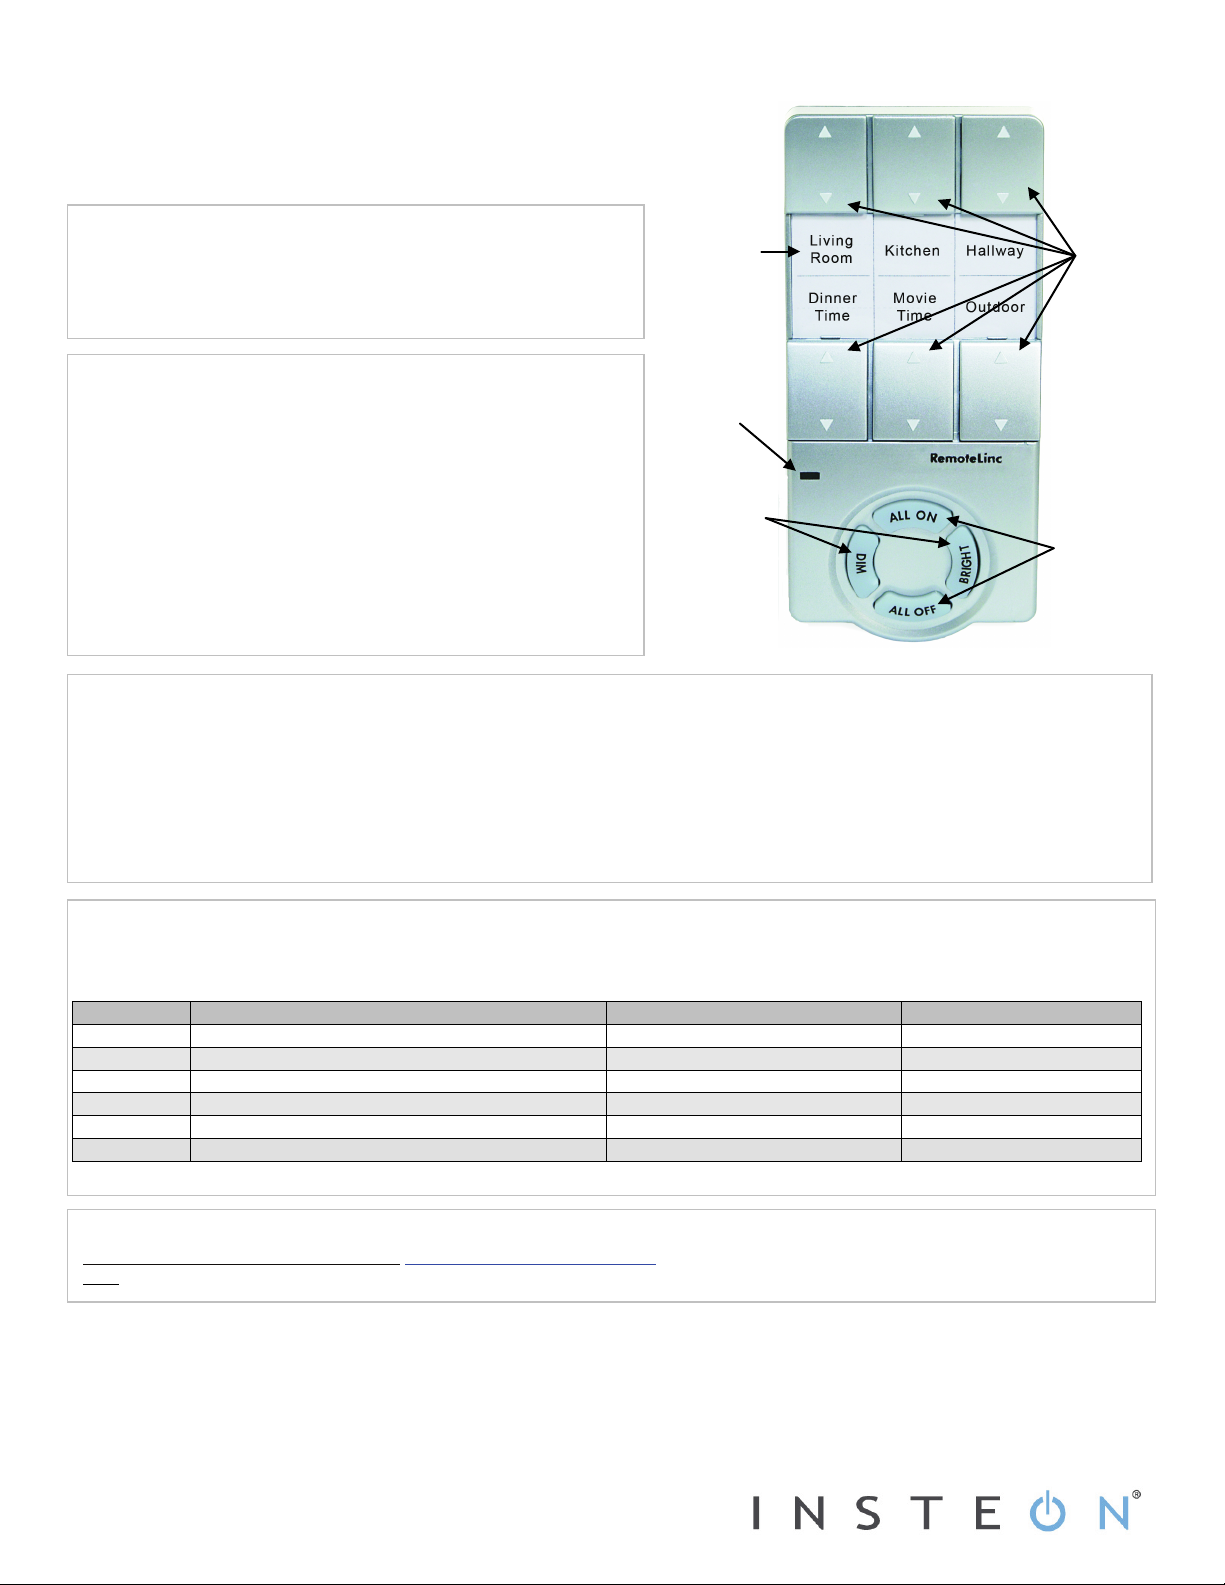
buttons
Customizable
Dedicated
buttons
Setting Up RemoteLinc
Quick Start Guide
Introduction
a customizable label insert.
Using RemoteLinc as an INSTEON Controller
INSTEON Limited Warranty – INSTEON warrants to original consumer of this product for a period of 2 years from date of purchase, this product will be free
INSTEON, 16542 Millikan Ave., Irvine, CA 92606, 800-762-7845, www.insteon.com
Using RemoteLinc
Button
Applies To
Tap
Press and Hold
On
Device(s) linked to that specific button pair
Ramp to On-Level
Brighten until release
Off
Device(s) linked to that specific button pair
Ramp to Off
Dim until release
All On
All devices linked to RemoteLinc
Fast-on
Brighten until release
All Off
All devices linked to RemoteLinc
Fast-off
Dim until release
Brighten
Device(s) linked to last On/Off button pushed
Brighten by 3 levels (out of 32)
Brighten until release
Dim
Device(s) linked to last On/Off button pushed
Dim by 3 levels (out of 32)
Dim until release
Complete Instructions, Troubleshooting and Tech Support
On/Off
Status
RemoteLinc™ – INSTEON® Wireless Remote Control
Model #2440BK
RemoteLinc allows you to use the power of INSTEON to control
your home with the convenience of a handheld wireless
controller. RemoteLinc can control up to six scenes and features
label insert
1) RF-only devices require at least one dual-band INSTEON
device for communication. For the best INSTEON network
performance, be sure you have properly installed at least
two Access Points or other dual-band INSTEON devices.
2) Remove the battery compartment from the rear of
RemoteLinc and install four AAA batteries.
3) Replace the battery compartment door.
NOTE: Use alkaline batteries, or high quality rechargeable
batteries. A fully charged set of alkaline batteries will provide
approximately 1,500 – 2,000 button taps.
Dim/Brighten
1) On RemoteLinc, press and hold the On button of the button pair you wish to use until it beeps (10 seconds).
2) Set the responder to the state you want to activate from RemoteLinc.
3) Press and hold the responder’s Set button for 3 seconds
4) Test link by tapping the On/Off buttons you just linked to on RemoteLinc.
RemoteLinc’s status LED will begin blinking.
RemoteLinc will beep and its status LED will turn off.
The responder should respond appropriately.
Each button on RemoteLinc has a dual purpose. Linked responders will behave differently depending on what button you
press, and whether it is tapped or pressed and held.
NOTE: Non-dimming responders will not be affected by brighten/dim commands or pressing and holding any of the buttons.
Owner’s Manual and Quick Start Guide: http://www.insteon.com/support
Call: INSTEON Support Line at 800-762-7845
*Setup Modes automatically time out after 4 minutes.
This device complies with FCC Rules and Industry Canada license-exempt RSS standard(s). Operation is subject to the following two conditions: (1) this device may not cause harmful interference,
and (2) this device must accept any interference, including interference that may cause undesired operation of the device.
Le present appareil est conforme aux CNR d'Industrie Canada applicables aux appareils radio exempts de licence. L'exploitation est autorise aux deux conditions suivantes: (1) l'appareil ne doit pas
produire de brouillage, et (2) l'utilisateur de l'appareil doit accepter tout brouillage radiolectrique subi, mme si le brouillage est susceptible d'en compromettre le fonctionnement.
Page 1 of 1
Rev. 07-03-2012
from defects in materi al and workmanship and will perform in substant ial conformity with its Owner' s Manual. Warranty shall not apply to defects caused by
misuse or neglect.
Protected under U.S. and foreign patent s (see www.insteon.com) © Copyright 2012
button
pairs
LED
simultaneous-
control
 Loading...