

INSTEON 2412N User Manual 2
Quick Start Guide
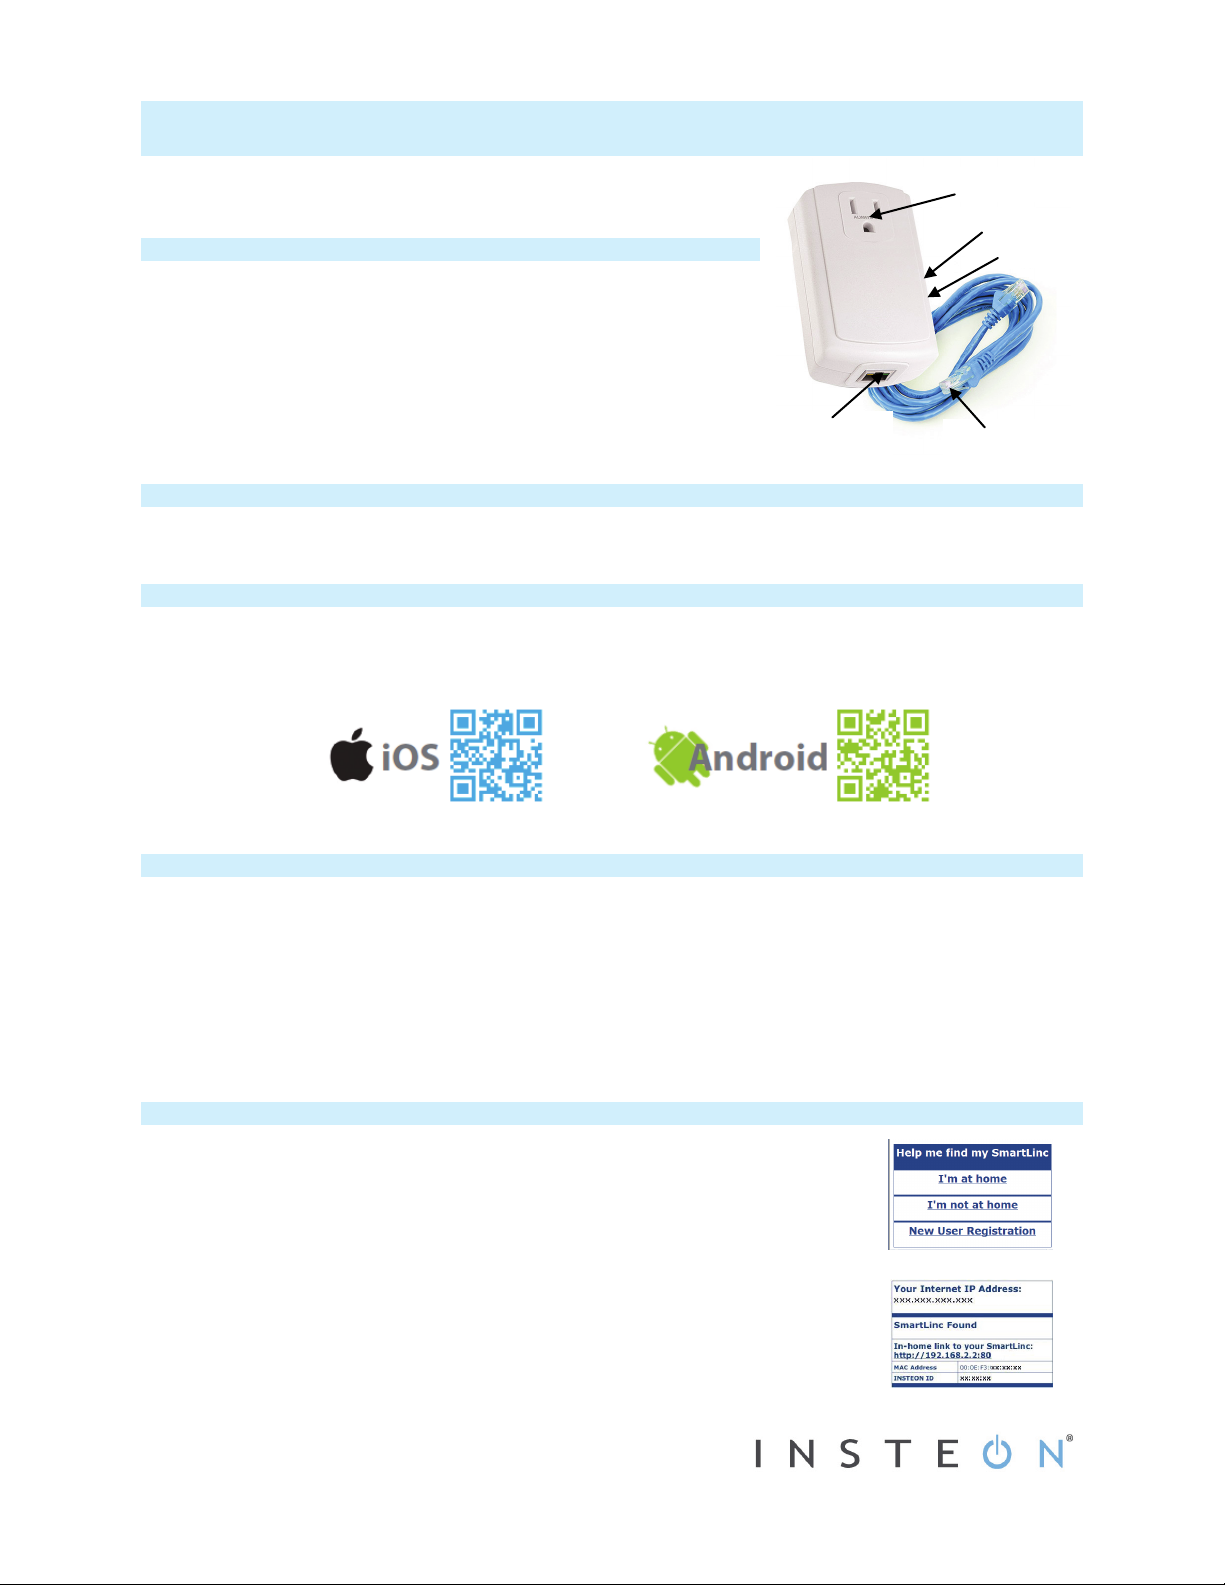
Status LED
Set button
Ethernet jack
and LED
Pass-through outlet
Included Ethernet
cable (color varies)
INSTEON® SmartLinc™ Central Controller
Model: 2412N
About INSTEON SmartLinc
SmartLinc puts the power of managing your entire INSTEON home
automation network in the palm of your hands. Just plug this module into
your router and into a wall outlet, and you’ll be able to wirelessly control all
your INSTEON devices.
Control any INSTEON compatible device with from your iOS/Android
smartphone or tablet (via the free INSTEON app) or any web browser (with
the web-based interface). Link devices, create scenes, set timers and more,
all from an intuitive interface.
In the Box
• SmartLinc • 6’ Ethernet cable (color varies)
Download INSTEON App
If you have an iOS/Android smartphone or tablet, install the INSTEON app prior to installing SmartLinc. It’s
completely free with no monthly fees and makes setting up and configuring SmartLinc super simple. To download the
INSTEON app, just scan a QR code below or visit your favorite app store/marketplace and search “INSTEON.”
Installation
1) Plug included Ethernet cable into an open LAN port on your router
2) Plug other end of Ethernet cable into SmartLinc Ethernet jack
3) Plug SmartLinc into unswitched AC outlet
SmartLinc status LED will turn on dim, solid white
4) Verify proper connection between SmartLinc and router
LED on router port into which SmartLinc is plugged will turn on
SmartLinc Ethernet jack LED will turn on green
5) If using INSTEON app, launch app on smartphone/tablet and follow onscreen instructions to configure SmartLinc
Use Web-Based SmartLinc Interface
If you do not have an iOS/Android smartphone or tablet, set up SmartLinc with the webbased interface to control your INSTEON network from any web browser, including webenabled mobile devices.
1) While connected to the Internet, open web browser on PC or web-enabled mobile
device and go to http://smartlinc.smarthome.com
Note: JavaScript support is required for the default web server application. An
HTML version is available for devices that do not support JavaScript (see step 3).
2) Click I’m at home
3) Click link that begins with http:// or, to access the HTML version, type hindex.htm to
the end of your web address
SmartLinc homepage will load
2412N Rev. 9/5/2012 4:00 PM / See Owner’s Manual for Warranty Information.
Protected under U.S. and foreign patents (see www.insteon.com)
© Copyright 2012 INSTEON, 16542 Millikan Ave., Irvine, CA 92606, 800-762-7845
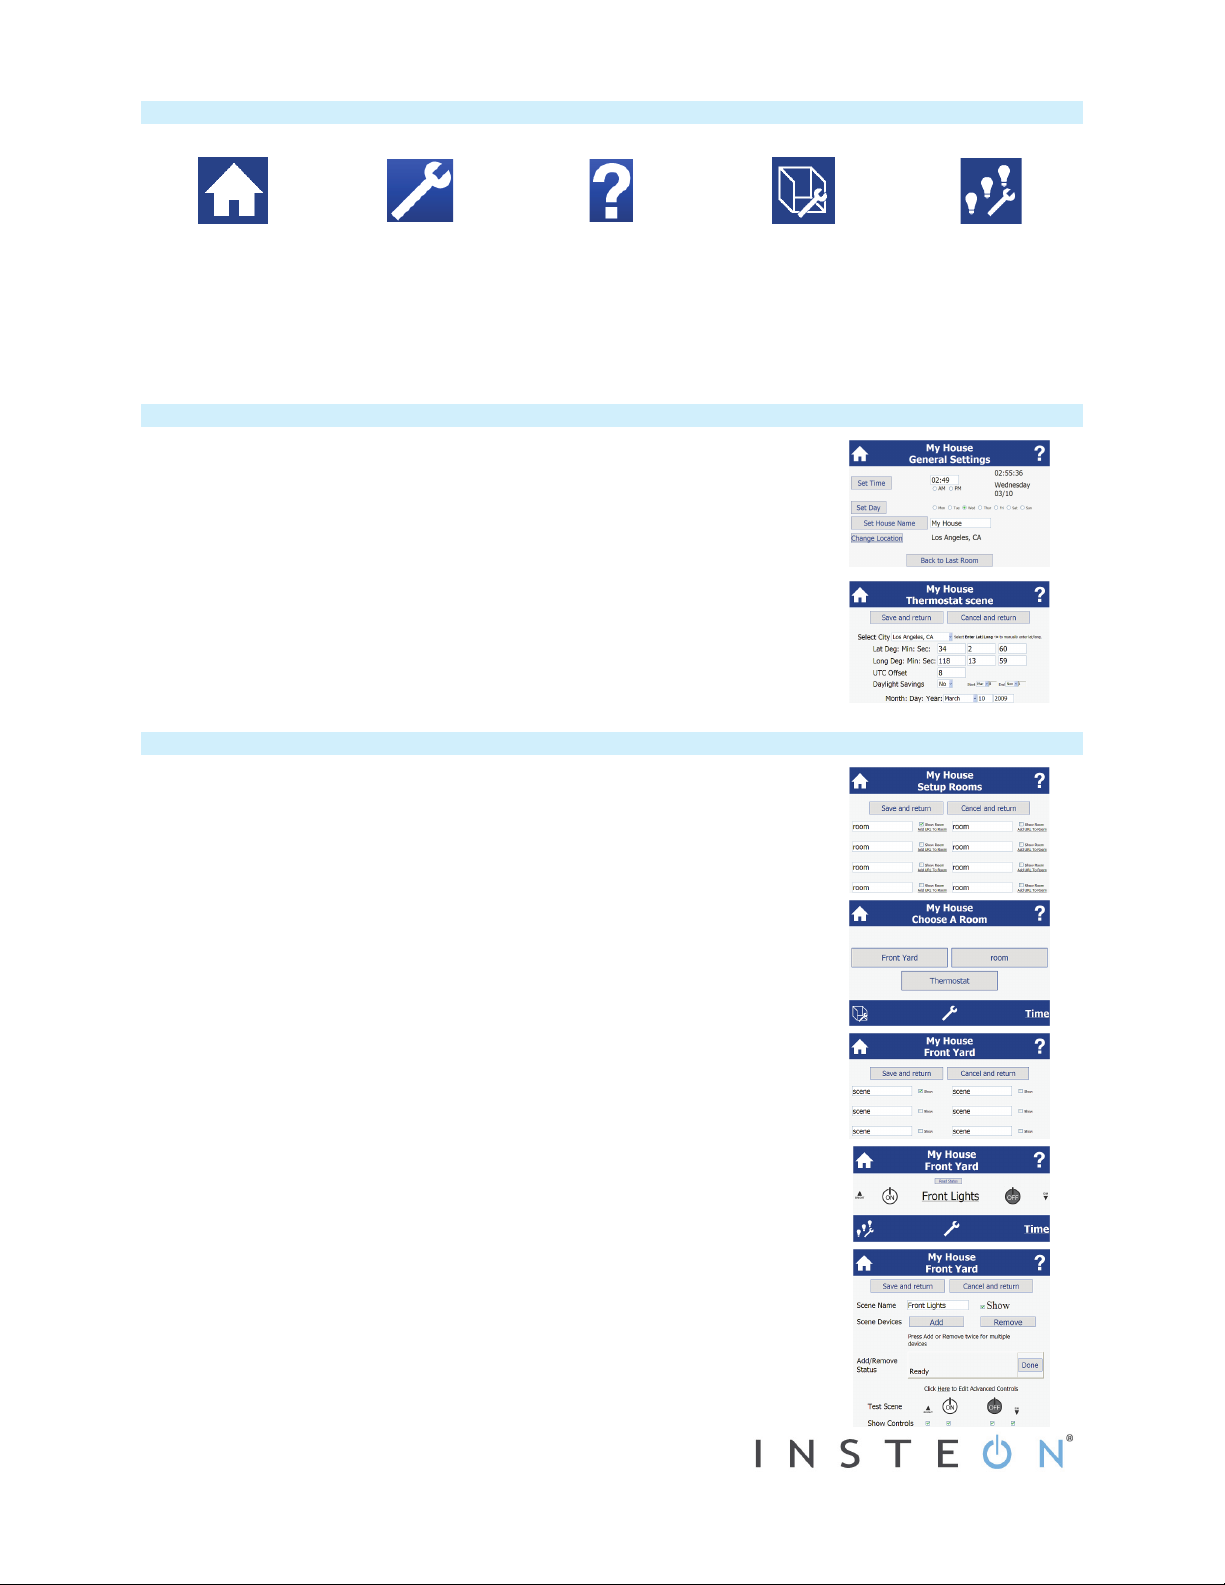
SmartLinc Icons
Homepage
Returns you to the
SmartLinc homepage
Settings
Takes you to
SmartLinc general
settings
Help
Takes you to the
SmartLinc Help page on
the Smarthome Wiki
Room Settings
Takes you to the Room
Settings page to add,
remove and rename
your rooms and add
URLs (cameras)
Set Time, Day and House Name and Location
1) From SmartLinc homepage, click Settings icon
2) Type in current time, click AM or PM and click Set Time
3) Click current day and click Set Day
4) Type in desired house name (default is “My House”) and click Set House Name
5) If you want to use sunrise/sunset timers, click Change Location
6) Select your location (or nearest city) from drop-down list or enter geographical
latitude and longitude
7) Select appropriate Daylight Savings Time setting
8) Confirm current date (month, day and year) is correct
9) Click Save and return
Scene Settings
Takes you to the
Scene Settings page
to add, remove and
rename your scenes
Set Up Room with a Device/Scene and Timer
Follow these instructions to set up a room, add a device/scene to it, then put that
device/scene on a timer.
1) From SmartLinc homepage, click Room Settings icon
2) Type desired room name (such as “Living Room” or “Bedroom”) over a room
label
3) Ensure Show Room checkbox next to room name is checked
4) Click Save and return
5) A new button labeled with your room name will appear on the Choose a Room
menu. Click it.
6) Click Scene Settings icon
7) Type desired scene name over a scene label
8) Click Show checkbox next to scene name
9) Click Save and return
10) A new link with your scene name will appear in your room menu. Click it.
11) Click Add
The Add/Remove Status will change to “waiting . . .”
12) Activate linking mode on the INSTEON device you want to add to the room. (For
most INSTEON devices, press and hold the Set button until it beeps and/or its
LED begins blinking; consult device’s Quick Start Guide or Owner’s Manual for
specific instructions.)
The Add/Remove Status will change to “Done” and display INSTEON I.D. of
device you just linked (e.g., 0D425B)
13) Click ON and OFF icons
Device will respond appropriately
SmartLinc will now monitor and display the status of the linked device. To
change this, scroll down and enter a new INSTEON I.D. in Status Device ID
field or uncheck Report Status box to disable status reporting for that device.
14) To set a timer, type desired on time (such as 07:00) into On Time box and click
AM or PM
2412N Rev. 9/5/2012 4:00 PM / See Owner’s Manual for Warranty Information.
Protected under U.S. and foreign patents (see www.insteon.com)
© Copyright 2012 INSTEON, 16542 Millikan Ave., Irvine, CA 92606, 800-762-7845
 Loading...