

Instanta WM3, WM3SS, WM7, WM7SS, WM15-3SS Installation And User Instructions Manual
...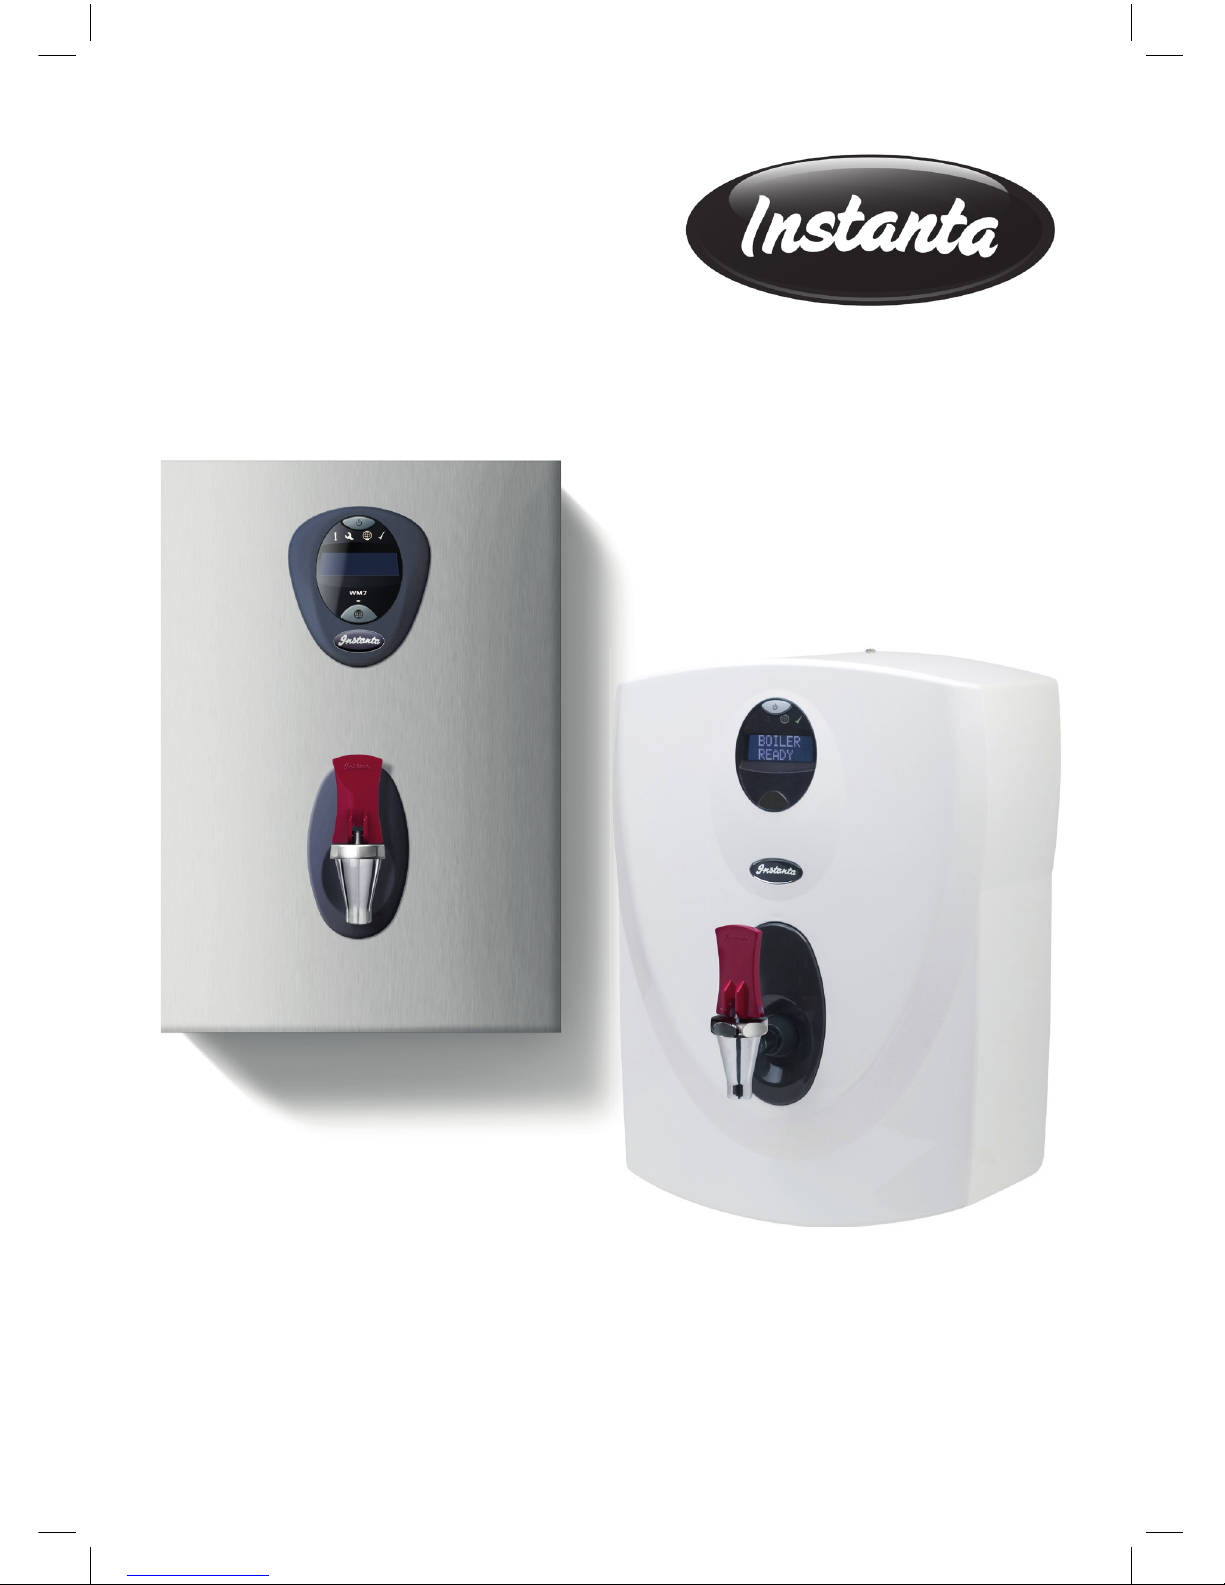
WM SERIES Models:
WM3, WM3SS, WM7, WM7SS,
WM15-3SS, WM15-6SS & WM25SS
Auto-Fill, Wall-mount Catering
Water Boilers
Installation and User Instructions
INSTANTA LIMITED
Canning Road, Southport, Merseyside, PR9 7SN
Tel: (01704) 501114 Fax: (01704) 501115
IB21 – ISS: 03
The Professional’s Choice

2 3
CONTENTS & INTRODUCTION 2
SAFETY INFORMATION 2
ENVIRONMENTAL INFORMATION & DELIVERY CHECKLIST 3
TECHNICAL SPECIFICATION 3
INSTALLATION 4 - 5
OPERATION 5 - 6
REGULAR DAILY USE 6
ECO MODE 6
LCD & PROGRAM MODE 6 - 7
CLEANING 7
MAINTENANCE, SPARES & SERVICE INFORMATION 8
SERVICE WARNINGS & FAULT DIAGNOSTICS 8 - 9
FULL PROGRAM MENU 10
SERVICE/TECHNICAL SUPPORT/GUARANTEE 11
Introduction
Dear Customer,
Congratulations on the purchase of your
Instanta machine.
Your new boiler is designed to give years
of trouble-free service, provided that the
instructions contained in this manual are
followed.
All new series Instanta products are energy
ef cient, simple to operate and easy to service.
Find out more about Instanta products at
www.instanta.com
Safety Information
Please read the following carefully
before switching on this appliance:
A competent installation engineer should install
this appliance in accordance with the installation
instructions for this appliance and all relevant
local and national standards including the
following:
• Health and Safety at Work Act
• IEE regulations
• Local and national building regulations
• BS Codes of practice
• Water supply regulations
Your new water boiler is designed to provide
a constant source of near-boiling water for the
preparation of hot drinks.
Caution Safety: All personnel must be
provided with suf cient and appropriate
training in the safe use of this appliance.
• In line with Health and Safety requirements
we recommend that a risk assessment be
carried out after the boiler has been
installed.
• A warning notice, displayed next to the
machine, is often helpful in notifying users
that the appliance contains and dispenses
near-boiling water.
• Inform users that certain surfaces will
become hot (especially the draw off tap).
Care should be taken to avoid potential
injury from burns and scalding whilst
operating this appliance.
• The unit must be earthed.
• Always disconnect the unit from the power
supply before servicing
Environmental
(Information on Disposal for Users of Waste
Electrical & Electronic Equipment)
The “crossed out wheelie bin” symbol on
this product means that discarded electrical
and electronic products should not be mixed
with general waste. Disposing of the product
correctly will help to save valuable resources
and prevent any potential negative effects
on human health and the environment which
could otherwise arise from inappropriate waste
handling. For proper treatment, recovery and
recycling of end-of-life products, please contact
your dealer or supplier for further information,
or local authority for details of your nearest
designated collection point.
Model Width Depth Height Power
Rating
Rapid
Draw-off
Weight
(empty)
Weight
(full)
Water
Inlet
Pressure
mm mm mm kW Litres KG KG Bar
WM3 332 210 452 3 3 7.3 12.5 2 to 7
WM3SS 314 215 414 3 3 9.4 14.5 2 to 7
WM7 350 220 498 3 7 8.4 18.6 2 to 7
WM7SS 320 225 456 3 7 9.5 19.7 2 to 7
WM15-3SS 350 250 545 3 15 10.7 29 2 to 7
WM15-6SS 350 250 545 6 15 10.9 29.2 2 to 7
WM25SS 410 304 596 3 or 6 25 17.1 48 2 to 7
Technical Specifi cation
Outer casing is constructed from either impact
resistant plastic or Type-304 stainless steel.
The tank is made from Type-304 stainless steel
and the internal baf e-plates [for condensing
steam within the tank, are made from Type-316
stainless steel. The tank is fully insulated with
high-temperature polystyrene.
The appliance has electronic control of the main
functions. This means that the heating, lling
and temperature are controlled precisely within
given parameters.
Checklist
Before starting installation check that you have
the following parts:
1. Main Boiler Unit
2. Boiler Case
3. Paper Mounting Template
4. Fitting Kit (screws & wall-plugs etc.)
5. Instruction Booklet

54
Installation [All Models]
a) Positioning the unit
The boiler should be positioned in a convenient
place, on a wall that is capable of supporting it
safely (refer to section “Technical Specication”
for weight of boiler). Use the mounting template
and tting kit provided.
Position the boiler so that the tap is
approximately 400mm above a draining board.
Leave sufcient space around the unit to enable
access for servicing, paying particular attention
to the position of the top-centre xing screw that
holds the case in place.
When mounting on wall, screw in the top two
screws leaving about 6mm protruding and hang
the machine using the keyhole slots provided.
Once the machine is positioned, tighten the top
screws and insert the bottom screw.
b) Electrical Connection
3.0kW Units: (WM3, WM3SS, WM7, WM7SS,
WM15-3SS)
Supply: 230V, 50/60Hz (3.0kW).
The circuit should be protected by its own
13amp double pole connection unit with ex
outlet to BS5733, alternatively the circuit should
have means of disconnection incorporated in
xed wiring, having a contact separation of a
least 3mm in all poles. Minimum cable size is
1.5mm2. The use of an ELCB is recommended.
Base Entry of Cable: Use the cable gland.
Loosen cable-gripping nut and pass cable
through gland, leaving enough free cable to
connect to terminal block. Tighten cable gland
grip nut.
Alternative Rear Entry Installation (Electrical):
The xed or exible cable is connected direct
to the terminal block – the cable gland is not
utilised.
DO NOT SWITCH ON UNTIL THE
INSTALLATION IS COMPLETE AND THE
CASE AND TAP ARE IN PLACE
6.0kW Unit: (WM15-6SS)
Supply: 230V, 50/60Hz (6.0kW).
This unit is 6KW so must be connected to a
30amp isolator tted with a suitable ELCB.
Electrical installation should conform to current
I.E.E. wiring regulations.
3.0 or 6.0kW Unit: (WM25SS) - Optional on
installation
The 25 litre unit can be congured to either
3KW or 6KW.
As it leaves the factory it is congured to 3KW.
This can be changed to 6KW by tting the link
wire (supplied) to the second heating element.
NOTE:
If the unit is congured to 6KW then the unit
must be connected to a 30amp isolator tted
with a suitable ELCB. Electrical installation
should conform to current I.E.E. wiring
regulations.
In addition, the “Heater Rating” must be
changed in the Program Mode, from 3KW to
6KW (select “Set Heater Rating”). To access
Program Mode, follow instructions as on page 6
- WARNING: This appliance must be earthed.
- Electrical installation should conform to
current I.E.E. wiring regulations.
ONLY A QUALIFIED ELECTRICIAN SHOULD
CARRY OUT THIS WORK
c) Water Connection
The water supply must have a pressure not
exceeding 7bar and no lower than 2bar.
If the mains water pressure is below 2bar, a fault
situation could arise.
If the water pressure exceeds 7bar a suitable
water pressure reducing valve will need to be
tted to the water supply to bring it to a level
that the machine can cope with. Failure to do so
could result in the boiler overlling.
THE MANUFACTURERS CANNOT BE
HELD RESPONSIBLE FOR ANY MACHINE
MALFUNCTION IF THE WATER PRESSURE
IS NOT WITHIN THE RANGE STATED. IF IN
DOUBT, CONSULT YOUR WATER SUPPLY
COMPANY.
- Connect to a suitable cold water drinking
supply using 15mm copper pipe and using
“T” piece supplied.
- Push the “T” piece rmly onto the water
inlet solenoid pipe with the brass plug
facing forward (Note: the “T” has been
blanked off using a brass plug – leave the
plug in-place).
- Push the 15mm cold water supply rmly
into the bottom of the tting.
Alternative Rear Entry Installation (Water
Connection):
Remove the brass plug from “T” piece and
re-t into the bottom of the “T” piece instead.
Push rmly onto the inlet solenoid pipe with the
“T” facing the wall. Push the 15mm cold water
supply rmly into the “T” tting.
NOTE: To avoid damage to the appliance, do
not use any solder connections whilst pipes
are connected to the boiler.
- A 15mm stop valve must be tted between
the water supply and the boiler so that it
can be isolated.
- Water purication lters are available from
Instanta to ensure fresh tasting water.
In hard water areas, scale can cause
problems. Fitting a scale reducer will help
minimise scale but will not eliminate scale
completely.
d) Overow/Drain
The tting kit includes a 15mm, straight push-t
coupling with a small piece of 15mm copper
pipe pushed into it. NOTE: This connector
must be pushed onto the corresponding
brass overow connection on the services-
bracket (along side the solenoid).
If the overow is to be extended, remove the
copper pipe (supplied) and replace with 15mm
pipe of your chosen length. The pipe must have
a continuous fall and should not be longer than
300mm (if a longer run is required, use 22mm
pipe to avoid airlocks). The overow pipe should
have no more than four right angle bends and
should discharge to a safe, visible position.
Alternative Rear Entry Installation
(Overow/Drain):
If rear entry has been chosen, the straight
push-on coupling must be replaced with a
15mm push-t elbow (available from plumber’s
merchants). Push the elbow onto the brass
overow connection on the services bracket
(alongside the solenoid). As described above,
the pipe must have a continuous fall etc.
Under certain conditions the overow
pipe could vent steam, hot water or cold
water. The manufacturers cannot be held
responsible should damage occur from
such discharge, if the overow pipe has not
been directed to a suitable position where
overowing water can run away safely.
VENT PIPE:
A small silicone rubber tube connects the tanklid to the back panel. Ensure this is connected
(and hasn’t come off in transit) and that the
outlet tting in the back-panel is not obstructed.
e) Fitting Case:
- Stainless Steel Case Units Only: Attach
the Earth wire connection to the bottom of
the boiler-case (screw & washer supplied).
- Position the boiler-case close to the
wall-mounted boiler assembly and plug-in
the communications lead (located on inside
of boiler-case) into the circuit board.
- With the communications lead connected,
offer up the case to the wall-mounted boiler
assembly, aligning the tap and plastic
spring-mounted tap moulding with the
cut-out in the boiler-case.
- Secure case in position using M4 screws
(supplied) at top and bottom of the case.
- Slide the grey tap collar along the chromed
tap assembly so that it ts snugly against
the plastic tap moulding.
Operation
First use (once water and electrical connections
have been made):
NOTE: If the “7-day Timer” or “Filter Monitor”
features are not required, the boiler can be
used without any program set-up.
Simply switch the machine on by pressing the
small button at the top of the LCD window.
 Loading...