

Page 1
Model: 9005
Assembly & Fitting Instructions
For the latest fitting instructions please visit www.insigniarange.co.uk
Contents
Introduction 3
Electrical Requirements 5
Tools Required 6
What’s in the boxes 7
Staring the Installation 11
Connecting The Shower Accessories 23
Electric Connections 26
Water Connections 27
Product Testing 33
Testing for Leaks 36
Safety 37
Warranty Information 38
Spare Parts 41
Frequently asked Questions 42
Page 2

For the latest fitting instructions please visit www.insigniarange.co.uk
ASSEMBLY AND SIMPLE PLUMBING
THIS PRODUCT BUILD IS RATED SUITABLE FOR DIY PURPOSES PROVIDING THE
CUSTOMER IS OF ABOVE AVERAGE SKILLS AND FEELS CONFIDENT IN THEIR
ABILTY. ONLY YOU THE CUSTOMER WILL KNOW THIS SO BEFORE ANY ATTEMPT
IS MADE TO ASSEMBLY READ THROUGH THE FOLLOWING PAGES IN DETAIL
THEN DECIDE. IF YOU HAVE ANY DOUBT USE THE SERVICES OF A PROFESSIONAL.
IN PICKING SUCH, ALLOW THEM TO DECIDE IF THEY ARE CAPABLE OF BUILD BY
FIRST SHOWING THESE INSTRUCTIONS TO THEM. ALWAYS GET THREE QUOTES.
REMEMBER THE BEST IS NOT ALWAYS THE CHEAPEST!
REMEMBER PLUMBERS PLUMB! 90% OF THIS JOB IS NOT PLUMBING!
ELECTRICAL CONNECTION TO HOUSE MAINS
WHEN YOUR ITEM IS ASSEMBLED ALWAYS USE THE SERVICES OF A FULLY QUALI-
FIED ELECTRICAL COMPANY TO COMPLETE CONNECTION FROM SHOWER TO
HOUSE SUPPLY. LAWS DEMAND IN MANY CASES YOU DO THIS AND YOUR WAR-
RANTY IS VOID REGARDS ELECTRICAL ITEMS IF THIS IS NOT UNDERTAKEN.
YOURS AND OTHERS SAFETY IS PARAMOUNT. NEVER ATTEMPT THIS YOURSELF.
DUE TO THE NATURE OF THIS PRODUCT WE HIGHLY ADVISE THE PURCHASE
AND FITTING OF A WATER SOFTENER
PLEASE READ ON NOW AND CHECK AGAINST YOUR ABILTY
For the latest fitting instructions please visit www.insigniarange.co.uk
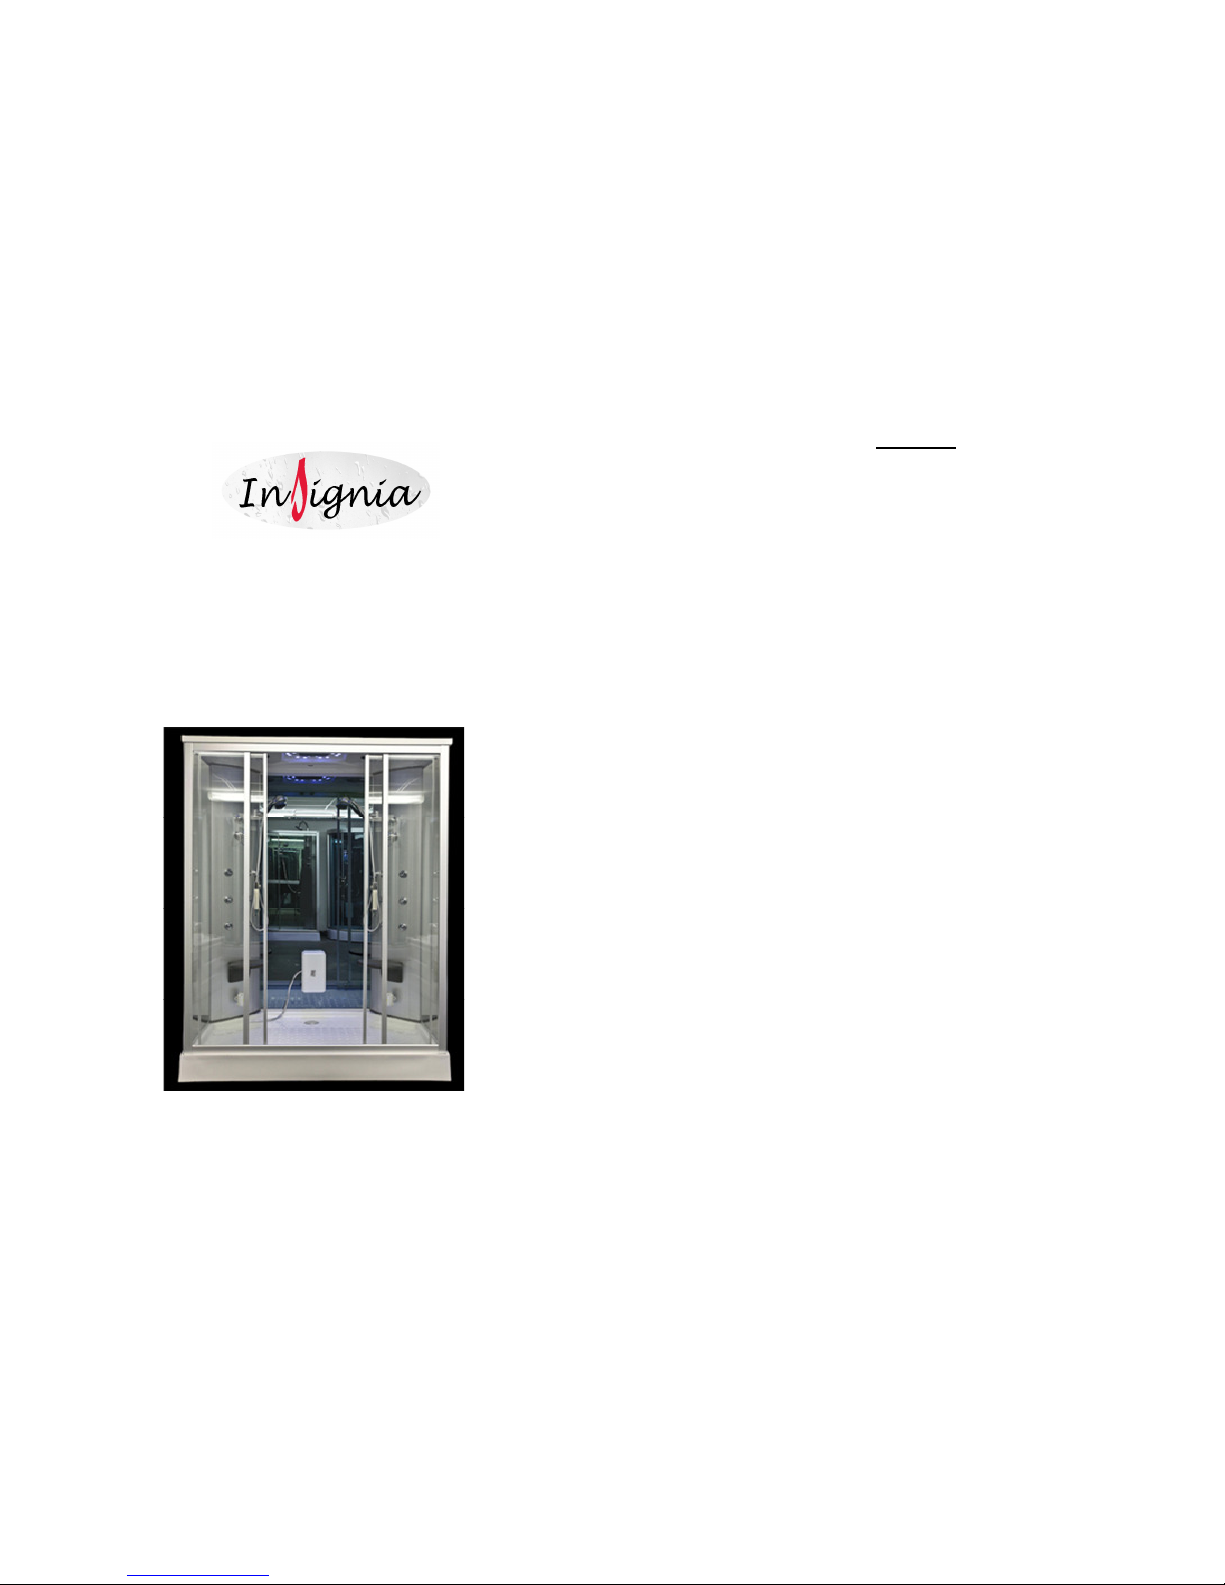
Thank you for your recent purchase of an Insignia steam shower.
Please read this booklet with great care to ensure you get the
best out of your build and have a shower that will last for many
years to come!
Like everything, in order to obtain a first class product that will
serve you well for many years, the effort and correctness put into
the assembly will reflect in the quality of your finish. First remember what you need from your new item then remember this as
you build. The result will only be as good as the assembly!
OUR BADGE RATING IN TERMS OF DIFFICULTY OF ASSEMBLY BASED
ON CLIENT FEEDBACK
1 Badge = Very easy
2 Badges = Easy
3 Badges = Moderate
4 Badges = Harder than average
5 Badges = Professional skills required
This shower is rated 4 Badges
3 4
Page 3

For the latest fitting instructions please visit www.insigniarange.co.uk
For the latest fitting instructions please visit www.insigniarange.co.uk
5 6
REMEMBER:
These showers are designed to be free standing and movable
from their location should you have need to replace anything. ALWAYS USE Flexible braided water inlet pipes at least a metre long
(not central heating plastic type! ) from
house supply to the shower and again flexible waste pipe to join
to your house waste. NEVER fix with rigid pipes, never fix the unit
to the wall.
DURING BUILD, LIKE ALL SHOWERS CORRECT SEALING IS IMPERATIVE.
ALWAYS FIT "EASY TO GET TO TAP VALVES" ON BOTH HOT AND COLD WATER. THE SAME AS A DISHWASHER OR WASHING MACHINE THIS PRODUCT
SHOULD BE ISOLATED WHEN NOT IN USE
NOTE: From time to time these showers may have small differ-
ences from that of these instructions. Due to continuous improvements and upgrades, this should not cause you any inconvenience
just sometimes extra commonsense needs applying as changes
1. 2 People
2. Scissors
3. Silicone Gun
4. Knife
5. Tape Measure
6. Spirit Level
7. Phillips Screwdriver
8. Drill
YOU WILL NEED
TOTAL ELECTRICAL REQUIREMENTS
Voltage Rating 220 -240AC
Frequency Rating 50HZ
Power Rating 3.0KW
Other than steam generator
Internal Circuit Voltage is 12V
Internal Current Rating 0.17A
Your electrical contractor should understand ALL legal require-
ments of connection before undertaking any work or installation.
UNDER NO CIRCUMSTANCES UNDERTAKE THIS YOURSELF!!!
Note for electrician. This product comes with 13 amp plug(s) fitted
with RCD unit. We leave the way you prefer to connect this to yourself due to continued additions to current regulations. As at October
2010 we offered two following alternatives.
1) Connect within current laws and IP directives using plug and RCD
provided with steam version or supply one for non steam version
2) (Preferred) Wire into isolated fused feed connecting directly to
the house consumer / service box. Remove the plug / RCD fitted and
ensure the Consumer unit has capabilities to replace RCD feature.
Always use protection against electrical surge. Your shower should
be treated the same as a home computer. A surge protector should
eradicate the possibility of either the transformer or computer control being burnt out because of this reason.
Please note earth is required and found on chassis of shower tray. A
further earth is required from Steam Generator unit. Each earth
must ground through power supply line.
Tools required
Page 4
What’s In The Boxes?
Please check with pictures, some of the items have been assembled by ourselves in order for ease of recognition as to what they
are and can be used as reference in later construction
Shower tray box
1. Shower tray with waste fitted loosely (if purchased),
2. Shower roof with fitted LED lights,1 x speaker. 1 x extractor
ozone box (optional extra)
Note: Protective film should be removed
For the latest fitting instructions please visit www.insigniarange.co.uk
Box 2
1. 2 x seat jet columns
2. 2 x shower head,
3. 1 x foot spa,
4. 1 x shelf,
5. 1 x flexi hose.
For the latest fitting instructions please visit www.insigniarange.co.uk
7 8
Page 5
Box 3
1. 2 x front glasses,
2. Box of fittings,
3. 2 x end column uprights,
4. 2 x cross support columns.
5. 2 x supple glass seal trims
6. 2 x steam escape door seals
For the latest fitting instructions please visit www.insigniarange.co.uk
Box 4
Check against size (very heavy) contains 2 x side glasses and 1 x
back panel
For the latest fitting instructions please visit www.insigniarange.co.uk
9 10
F
i
t
t
i
n
g
s
Page 6

For the latest fitting instructions please visit www.insigniarange.co.uk
For the latest fitting instructions please visit www.insigniarange.co.uk
VERY IMPORTANT
Have you got everything? If not please contact your supplying
dealer
now. Remember NEVER book your tradesman until every-
thing has arrived, been checked and is present. No replacement /
missing parts can obtained free of charge during or after build only
within the timescale permitted (48 hours after delivery) and always
BEFORE build.
GOT EVERYTHING AS YOU SHOULD?
GREAT NOW FOR BUILD PLEASE READ ON!
TO START.
Make sure you have a clear space, remember when finished and in
place you need access to check your build and able to pull the
shower out should you need to replace anything!
Taking the tray you need to level it in order the water runs correctly down the waste. Place the tray section on the position you
require it when fully built. Now using a sprit level carefully adjust
the feet underneath. When you are happy with the result and all
feet firmly connect to the floor move the bath out to a more assessable working space.
Now secure the tray waste and seal in as would be normally undertaken with a standard shower tray. Take note of where you need
to run the flexi waste first in relationship to the house waste.
Check now the pipe attached to the spigot coming from the waste
is tight and the clip firm.
11 12
Check Levels both
Tray Feet
Normal waste set up using
optional fitting kit
Page 7
Stage two
Taking the left column with control panel on (as you look from the
front) and the centre panel, align one to the other and drill four
equally spaced holes to through the edge as they will join. Offer
these up to the correct position on the shower tray. Taking the
right jet massage column repeat the same procedure. Your will
now have the three back sections drilled ready to screw. Taking the
silicone sealer now joint each mating vertical surface making sure
the sealer will be on the shower internal side of screws. If this is
not undertaken water will ingress and leak through threads. Screw
all self tappers into the holes you drilled and make sure you have a
firm seal. Now offer this section onto the shower tray and note
the position it will fit with each side aligned to tub. Remove off the
tray and silicone seal along the area the frame is about to fit to.
When done place the frame on the tray, drill holes approx 30 cm
apart and screw the frame to the tray as you did wall to columns.
NOTE: This is a 2 person job as parts are heavy!!!
This is stage two complete.
For the latest fitting instructions please visit www.insigniarange.co.uk
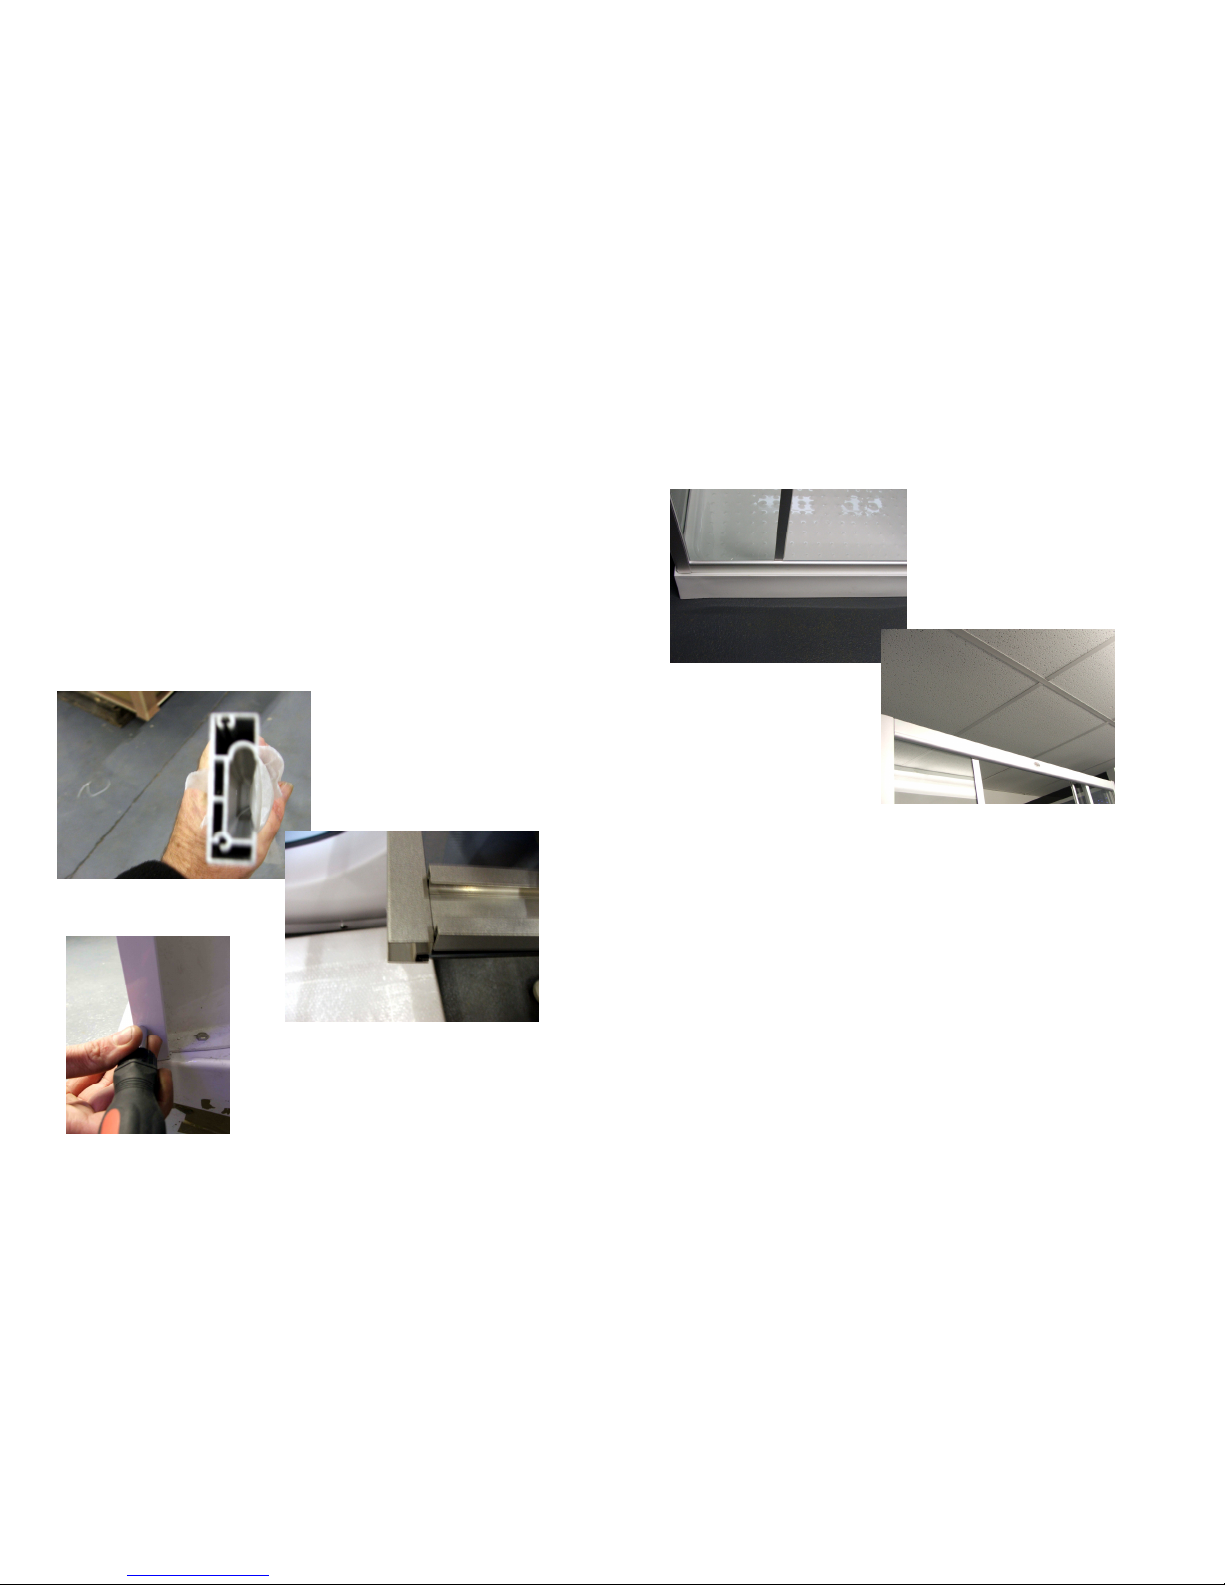
Stage three.
Taking the left hand side glass this needs fixing to the column and
is undertaken as so in picture. Offer the wider edge up to the column front end. Seal along mating surfaces column and tray where
frame will sit now screw through pre drilled holes.
For the latest fitting instructions please visit www.insigniarange.co.uk
13 14
Screw side to column here
Note side glasses have cut out
to overhang tray lip slightly at
rear
Page 8
Stage four.
You are now going to construct the front frame and glasses. Taking
the two cross supports, one fits at the top and one at the bottom,
note the curved edges fit towards each other so flat fact goes to
the shower tray and top cross member will be flat on the top to
accommodate the roof. We constructed these will carry the front
glasses and the door runners.
Starting with the lower one, locate the two screw holes in the side
glass as example below. Silicone along whole surface where the
tray will meet the lower cross support. And screw together. Repeat
the opposite end.
For the latest fitting instructions please visit www.insigniarange.co.uk
With the lower cross support firmly in place take the upper cross
member and repeat procedure but no sealing is required here!
Bottom joint should be neat and tidy as picture right for bottom
and left for top.
Taking now one of the two corner fascias (yours could be squared
not curved as picture) seal in the two channels and press firmly
over one front upright to fit as picture shows. Repeat other end.
When complete locate screw holes inside the cabin and taking a
white washer place the screw through it and firmly screw into each
pre drilled hole.
See overleaf…...
For the latest fitting instructions please visit www.insigniarange.co.uk
15 16
Yours will look similar to above
Joint will look similar to this
Screw into 2 x location
Page 9

For the latest fitting instructions please visit www.insigniarange.co.uk
Taking now 1 x front glass place the supple plastic trim onto one
long side end
For the latest fitting instructions please visit www.insigniarange.co.uk
17 18
Trim onto glass
Press trim fitted to glass into upright
Page 10

With trim on the glass edge take glass and press firmly into the upright channel. Repeat the other front end. You now have the two
front side glasses fitted in place. To retain the glass take small
screws provided and locate in the bottom cross section support
both sides. Screw tightly in place as picture below shows. Repeat in
the top sections also.
For the latest fitting instructions please visit www.insigniarange.co.uk
Stage five Door Assembly
NOTE: Identify the doors left and right up and down. Door magnets
attract then you have it correct. Repel and you have one round the
wrong way!
Taking the 8 x door wheels place through glass with wheel tyres on
outside of doors. While still loose offer into the door runners (two
person job in case a door should fall out of runner!) When located
tighten but NOTE: All wheels are eccentric and you adjust these to
give a correct smooth running alignment. At the same time close
the two doors together and make sure the door magnets are tight
the full length and aligned squarely.
Door running smoothly? Both aligned? Now fix the 2 x door handles on.
For the latest fitting instructions please visit www.insigniarange.co.uk
19 20
Screw to retain front glass
Door wheels, adjust, tighten then place white cap on
Page 11

Now if not already pre-fitted, fix the door stops in place the picture
below shows you where and how. There are usually eight of these
four top and four bottom
For the latest fitting instructions please visit www.insigniarange.co.uk
Stage six Roof section.
Taking the roof section offer into place, when you are happy the fit
is precise and no real gaps are present, screw to frame.
Congratulations you steam cabin is now built!
Take a look at the shower picture opposite. Now fit any fitting
that has not been already placed by factory. This includes the
foot spa, hand showers etc.
For the latest fitting instructions please visit www.insigniarange.co.uk
21 22
Door handles
Screwing roof into location
Drill through rear frame and self tap screw
Page 12

For the latest fitting instructions please visit www.insigniarange.co.uk
You now only have the water and electrical connections to make.
For the latest fitting instructions please visit www.insigniarange.co.uk
23 24
Shelf
Foot Massager
Hand showers - Left/Right
Page 13

Seal where shown in red on!
For the latest fitting instructions please visit www.insigniarange.co.uk
Electric Connections.
At this stage you will need to connect the following. These are all
12V and considered “safe” for DIY connection as each is labelled
and low voltage.
NEVER CONNECT TO MAINS AT THIS STAGE
Overhead light * Led rear panel lights* Ozone (if fitted) * Speaker *
fan * Aerial (unfold if fitted) * C.D Telephone (if required most do
not bother!) external jacks if required NOTE! If you purchased the
optional shower tray skirt lights these join to the rear internal led
light connection.
Identify these connections and snap together with connector
blocks on the end of each. Telephone will need hard wiring from
another socket point in your house.
For the latest fitting instructions please visit www.insigniarange.co.uk
25 26
Page 14

Shower Water Connections
Connect each hose to it’s respective location as marked on both
panels.
Hot / Cold water in, connect braided hoses to these (supplied if
fitting kit purchased)
Now join the left column water “in” pipes to the right water “in”
pipes. This is undertaken by following the picture below using a
brass “TEE” connection (not supplied). You now have 2 x water
supply braided hoses ready for coupling to the house supply.
VERY IMPORTANT!!!
For the latest fitting instructions please visit www.insigniarange.co.uk
Wait you are not finished yet!!! All joints from the factory have
been left loose. TIGHTEN ALL JOINTS. These will include hose clips,
check you own connections again and tighten ALL massage jets,
foot spa water coupling through glass, same with hand shower
coupling. In fact every nut and bolt!
For the latest fitting instructions please visit www.insigniarange.co.uk
27 28
1
2
3
1= Hand Shower
2=Foot Massager
3= Body Jets
1= hand Shower
2= Rain Shower
3= Body Jets
4= Water to steam unit
1
2
3
4
Page 15

For the latest fitting instructions please visit www.insigniarange.co.uk For the latest fitting instructions please visit www.insigniarange.co.uk
29 30
Connecting the steam generator
Fitted at the bottom of the shower rear you will find the steam
generator which will look similar to the picture below. Connect
white insulated hose to the shower steam pod. This is located
below the seat in the cabin and connection is at the rear for ease.
Check now by picture or words written on the generator box,
“Water In” This will connect to the middle braided hose found
coupled to the rear of the water valve you just tighten connections to. Finally if the fitting kit was purchased couple the last connection which is “Steam Generator water waste” This goes from
the generator to the shower tray spigot mentioned at the earliest
stage (Remember? You drilled this out!). If no waste purchased
you will need to make your own arrangements to connect somewhere else into the house waste or call 0844 800 3069 to order
the special waste. Remember to tighten all connections
See typical set up overleaf…..
Checked neoprene seals are in
Water In
Drain/Water Out
Steam Out
Important!
Never use the steam
generator with the vent
holes pointing towards
the shower wall or a
person.
Never use the steam
outlet in the closed position. This excessive heat
will damage your tub
and this is NOT covered
under your warranty
terms.
What Should I Know About Steam Room Safety?
Please visit the following link:
http://www.insigniarange.co.uk/instructions/
Steam_Safety_Please_Read.pdf
Steam Outlet
Page 16

Pressure Requirements from your house supply.
We recommend a bar pressure between 2 and 3 bar. If you have a
combi boiler system no problem should be experienced. If you
have a gravity feed older type of installation (hot water tank type
usually less than 1 bar) you will almost certainly need a pump. We
cannot advise on which type of pump is used, location or design
because all house plumbing layouts vary. This is a job for your installer /plumber. The end delivery however must fall within the
scope above.
Debit Requirements.
You will need the debit capabilities of at least 10 litres per minute.
Again an average combi boiler will supply this but please check if
you have a gravity feed system.
Important Note Do not exceed 3 bar pressure under any circumstances. Warranty void if so as damage will occur. If combi. type
supply, use a pressure reducing valve if required.
Remembering this product is free standing and designed to be
pulled away from the wall, the water supply pipes and waste pipe
require flexible pipes. If you purchased the fitted kit with this
shower you will have the required fittings. The water supply pipes
need to be at least 1 metre long and flexi braided type not speed
fit type heating piping. Your generator will have 3 x connections.
Water in, waste water to house waste and the insulated white pipe
which is steam out going to the tub. Make sure these are fitted in
correct position as they are only attached for transit delivery reasons! Please note if a shower pump is used via gravity system we
recommend a separate cold feed bypassing pump direct to generator to avoid damage to the generator. Further to this as you would
For the latest fitting instructions please visit www.insigniarange.co.uk
with a washing machine or dishwasher, it is highly recommended
accessible water valve taps are installed to turn off the shower
when not In use. This will avoid any possible flooding due to a
burst pipe or connection failure in the future.
Electrical House connections.
WE REITERATE: NEVER ATTEMPT THIS YOURSELF. THIS MUST BE
UNDERTAKEN BY A QUALIFIED ELECTRICAL COMPANY. A CERTIFICATE MUST BE OBTAINED AFTER INSTALLATION AS PROVE OF
COMPLIANCE WITH CURRENT SAFETY REGULATIONS AND WILL BE
REQUIRED TO CONFORM WITH ANY WARRANTY OFFERED WITH
THIS PRODUCT.
UNDER NO CIRCUMSTANCES UNDERTAKE THIS YOURSELF!!!
Note for electrician. This product comes with 13 amp plug(s) fitted
with RCD unit. We leave the way you prefer to connect this to
yourself due to continued additions to current regulations. As at
October 2010 we offered two following alternatives.
1) Connect within current IP directives using plug RCD provided
2) (Preferred) Wire into isolated fused feed connecting directly to
the house consumer / service box. Remove the plug / RCD fitted
and ensure the Consumer unit has capabilities to replace RCD feature.
Please note earth is required and found on chassis of bath tub. A
further earth is required from Steam Generator unit. Each earth
must ground through power supply line.
For the latest fitting instructions please visit www.insigniarange.co.uk
31 32
Page 17

TESTING PRODUCT.
With the shower still not fully positioned as you will require it.
Complete the following tests:
Electrical. Switch unit on and test all features contained. Lights,
Ozone if fitted, radio, TV, underwater light, fan. Below is a copy of
the control panel and what each feature operates
For the latest fitting instructions please visit www.insigniarange.co.uk
1. On/Off Switch
2. Radio frequency
3. Volume setting
4. Steam Unit operation—Press this button to active the steam
function. If no
water is present the unit will not function for safety reasons.
5. Light Operation
6. Telephone answer—Press to answer the phone if connected.
7. Volume/tune up
8. Panic Alarm—press to active, then turn the unit off by button 1
to turn it off.
9. Station memory. Press this to select your preset stations between 1-10. If you are turning your radio, once you have the station selected press “Mem” to assign a preset station. Keep pressing
the “Mem” button until you have selected the required present
station number. Now leave it to stop flashing to preset the station.
10. Lock—The lock will turn on automatically. To disable hold button for 3/4 seconds. and the padlock display will change to an open
icon.
11. Set—Switches between tune and volume
12. Switches between the radio and the CD player (if fitted) or
turns both off.
13. Ozone activation (If Fitted) Run this feature for 10-15 minutes
to clean the
shower cabin.
14. Fan operation
15. Control panel lock icon on/off
16. Room Temperature sensor
17. Light display icon
For the latest fitting instructions please visit www.insigniarange.co.uk
33 34
9
Page 18

Your completed shower should now look like this:
For the latest fitting instructions please visit www.insigniarange.co.uk
TESTING FOR WATER LEAKS
LEAVING SHOWER 24 HOURS AFTER BUILD ALLOWING SEALENT TO
CURE HAVE YOU BUILT THIS CORRECTLY? FIND OUT NOW.
With all connections tight, the waste and hoses checked, jets fully
sealed, your shower still around18 inches from its designated final
resting point and the silicone sealer fully cured (hence leaving for
24 hours at min) Switch on the overhead shower NOT massage jets
remember these will fire water out at you and are not suitable for
checking leaks as they would normally only operate when a person
is fully in front of them. Just use COLD water setting as hot will
make cabin misty and condensate thus the inspection becomes
very difficult. Now on the OUTSIDE inspect each joint, factory seal,
hose, clip, jet, from one side going round to the back and then
other side finishing at the front. If you have a small leak (normally
caused through insufficient sealer or air bubble on assemble. Dry
area thoroughly and reseal on the OUTSIDE. Again remember
where you see water may not be exactly where the leak is, it could
have run round to a low point. Never seal anything inside unless
you feel it necessary and make sure it is thin and neat, remember
you will see this for the life of your shower! Leave to cure again
and check. If all good now check shower functions, Jets for back
massage, foot massage, (if you have one) and finally hand shower,
check your joints to these functions at the rear again. Never use
the shower until all checks have been made and the installer is
100% happy in the knowledge no leaks are present. All good? Now
push your shower FROM THE BASE NEVER GLASS OR FRAME into
its final resting position. Now you can shower in the knowledge
that you have no leaks a job done well and long product life.
Happy showering!
For the latest fitting instructions please visit www.insigniarange.co.uk
35 36
Page 19

Message to tradesmen: Should you require any help or advice
please call 0844 800 3069 10.00am –4.00pm. We further point out
that providing this product has been built correctly and the instructions followed with particular attention to the final paragraph, the
client should have been left with a 100% trouble free product. We
have on occasion heard of less scrupulous tradesmen making return visits at the customers request because of various faults and
charging effectively for corrections to work that should never have
been required. We would expect no further charges should be
made for call backs unless alien to original work carried out.
Safety precautions
Never leave children unattended in the shower or bath.
Never bath children (under 12) using whirlpool function if fitted.
Regulate the temperature of water before showering
Never allow children to use steam function unattended. This function is also not recommended for children. ADULTS ONLY.
If steam facility is used always be aware that with many types, the
steam outlet in tub or fitted on column MUST be in “OPEN” position. Close after use. Failure to do so will result in crazing of acrylic
due to excessive heat generated on it.
Always be aware of the steam outlet pod position. Never use in
close proximity to the person using it.
Never use this shower if you have been drinking alcohol.
Never use with more than one person unless the shower is designed for this.
This product is not to be used for washing / bathing animals
Always turn power supply off after use
For the latest fitting instructions please visit www.insigniarange.co.uk
Do not use a remote control inside the shower or leave in heavy
moisture areas.
Never clean your shower directly after use especially after steaming. Allow one hour or longer to cool to room temperature. Cold
water on hot glass increases the risk of glass shattering and increases the risk of acrylic crazing. Never do this!
Never be tempted to investigate a fault by opening ANY electrical
fitting on your appliance. No parts are reclaimable and no parts are
supplied for these. All items are unit exchange only from both the
manufacturers and ourselves.
Warranty information.
This product is covered against any electrical or mechanical breakdown for a minimum period of 12 months. This warranty is limited
to replacement parts only as it is deemed to be a DIY product and
delivered to the customer ready for assembly. No service costs are
paid. In addition to items mentioned the warranty also includes
any further item deemed to have suffered a defect by manufacturers or makers fault. This to include tubs, walls, roof, columns, original makers hoses, valves, computer control, transformer boxes,
whirlpool pumps, chassis. PLEASE NOTE a further additional period of 12 months is available as an upgrade provided it is taken
within 28 days from the day this product was delivered to you. For
cost and enabling kindly contact Insignia on 0844 800 3069.
Your warranty starts from the day the product was delivered not
the day it was originally ordered. To initialise your warranty please
fill in your warranty registration card within 90 days of delivery and
return to address shown or simply go on line to:
For the latest fitting instructions please visit www.insigniarange.co.uk
37 38
Page 20

www.insigniarange.co.uk/warrantyreg.asp and fill out details for
instant registration.
Please note: The above warranty is only implied on goods supplied
and described as new. Ex demo, returned items, overstocked products sold at lower than normal price are deemed to be covered as
above but with a 90 day limit.
Limitation of warranty. All products must be tested as mentioned
in the instructions for the item. Water leaks are not covered as all
products are made from impervious materials. Any leak found will
always be resultant of sealing problems, if a fault has been identified in the structure of the shower (base cracked, column split etc)
causing a leak, this must be reported at the time of initial build and
test as no negotiations are entered into after the shower has been
in use. Chips, dents, scratches are not deemed to be makers faults
and therefore must always be reported within the 48 hour period
allowed from delivery date. No replacement items will be given
freely after this period and this must be borne in mind during build
as all parts, are at this point, considered to have been in good condition on delivery.
Incorrect build, negligence on installers behalf, changes to manufacturers specifications, modifications, incorrect maintenance,
Lime scale / Calcium build up, incorrect cleaning procedures or inadequate / spasmodic water supply contributing to parts failure
and incorrect consumer use will result in voiding the agreed cover.
Please note you are not covered for consequential or incidental
damage however caused relating to any product part failure. This
includes but not limited to carpets, floors, ceilings, walls and other
appliances. Flooding, electrical failure, water ingress can all be
For the latest fitting instructions please visit www.insigniarange.co.uk
avoided by following the instructions supplied with your product.
Isolate your shower or bath from main electrical supply as you
would your TV when not in use and again isolate water supply at
taps as recommended. Your product will also last longer and you
go to bed happy and safe!
Please note all terms and conditions of warranty are in addition to
current merchandising laws, distance selling and consumer rights,
not in place of.
For further details of warranty please follow this link
www.insigniarange.co.uk/warranty.asp
To proceed with a claim you feel you might have please use the
services of our dedicated service team based in France to cover not
only the UK but Europe and ready to assist you in any way they
can. We pride ourselves on the speed of service and our system
appears to have been adopted to a lesser extent by smaller companies. We think we are number one for this service. Please go to
www.insigniarange.co.uk/customerservice.asp fill out your details
in the message box and just click send. You will be given a message
number dedicated just to you and your product and replies are always in writing through e-mail, this way both the customer and
ourselves both have records of details and nothing can be misconstrued. Reply response time is expected to be within 120 mins of
initial contact. Our service team can also be reached on:
customerservice@insigniarange.co.uk And for the smaller items
just contact Insignia on 0844 800 3069 for on the spot advice and
help.
For the latest fitting instructions please visit www.insigniarange.co.uk
39 40
Page 21

Returned Goods
Your attention is drawn to the terms and conditions. Any returned
Item must be accompanied by a return form. Using our customer
service department, they will authorise this subject to conditions
and offer you a returns number, NO PRODUCT can be returned
without this and will be refused at the destination address. It is
also very important to remember NO GOODS are accepted for return if built, used or no return number. In addition all boxes and
packaging must at all times be in the same condition as it was delivered. The goods must be as new and in a position (sub. to reason
of return) ready to be resold as so. Failure to adhere to this incurs
costs at the senders liability.
Spare Parts
We are happy to say due to our market position, we are probably
the largest stockists of all steam shower, non steam shower and
whirlpool bath spares in the UK. It is rare an item is out of stock
and usually on the shelf. All items are courier delivered where possible and 24 hour service in place. So you need something and out
of warranty just identify it from the instructions to build, call Insignia on 0844 800 3069, tell them, pay by card over the telephone
and endeavour to despatch same day.
For the latest fitting instructions please visit www.insigniarange.co.uk
FAQs
What water pressure is required to operate you showers correctly and what
about your baths and basin taps?
2.5 bar is what we consider optimum pressure for all. A combi boiler is ideal just
make sure it is not giving too much pressure. If it is, use a pressure reduction
valve. If your house cannot deliver the required pressure you will need the assistance of a pump.
I have a pump on my gravity fed system but it pulses so water comes out in
spurts. Why?
This could be a few things, if just installed you have the wrong pump or it could
be correct but in wrong position. If it pulses with a shower the chances are, it
will be on the hand shower application more than others. You need to consult
shower pump makers regards this offering the requirements we have stated
required for your product. If you have had this installed sometime and been fine,
the chances are lime scale has blocked the valve filters fitted in the back of the
shower valve block. Unscrew you hoses hot and cold and with a torch check inside you will see filters, remove these check and replace if required. Also check
hoses, as we have seen these blocked before in a very short space of time. Our
showers operate high pressure and calcium build up is faster than with older
systems. Think hard about a water softener it will answer future problems and
keep you covered by warranty because remember calcium damage is not covered.
I have a bath and shower where water only dribbles out, my old bath worked
great before and our tank supplied it fine.
You need a pump, increasingly more and more appliances operate on hi pressure systems and tank fed hot water is on the way out as it is very inefficient.
Without changing your boiler this is a good investment. Tell your plumber you
need a twin impeller hot/cold feed pump.
For the latest fitting instructions please visit www.insigniarange.co.uk
41 42
Page 22

My shower has leaked water from day one! It comes up through the glass and
everywhere. My plumber has been back four times and now says he has had
enough it is product fault. I now have silicone everywhere it looks terrible. I
want my money back!
Don’t let him get away with it! This is not product fault it is build quality problems and is bad news. It means stripping down the shower and checking each
joint for sealing integrity. We have seen this before! The shower is glass, ABS
plastic, and aluminium. Just take a minute to think about it.
These materials are impervious to water, they simply cannot leak. Why is it coming out of the glass seal? It at first looks like the seal is leaking but it will not be
this, the problem is your plumber perhaps for neatness has sealed all the columns correctly BUT at the rear of each section to stop sealer squeezing out the
front. If he had sealed at the front in front of screw holes and at the back it
would not happen! By sealing at the rear he has left it possible and highly likely
the water will run down the front half of the joint and through screw fixings.
Even worse, through the cut out in the frame where they screw together. Why
worse? Because this then allows water to enter into what should be sealed panels, they fill with water and now the seal, glass against frame is the only way the
water can find to get out. It creates the illusion it is this that is causing the leak
when really it is not. It will also allow the other end of the frame to leak out running over silicone and making you think it is leaking there. Cure, sorry it’s a biggie! You need to take down each panel, remove old silicone and rebuild with this
in mind. Simple to have done this in first instance, difficult to cure now. It should
also be borne in mind why is four trips required by your installer? Our instructions are precise. After build check 100% for leaks and cure at the time. When
cured he should never have needed to come back. Sorry for bad news!
Extractor fan, where’s the kit to trunk it out of my bathroom?
Doesn’t have one, it only expels out of shower roof. You can fit standard trunking over this and then expel to a convenient location but in most cases not necessary. What is necessary is your bathroom should have already been fitted with
an extractor fan to extract to outside. This is a building regulation requirement
these days in most cases and will suffice in dealing with your shower.
For the latest fitting instructions please visit www.insigniarange.co.uk
I have water leaking from my shower valve inside the cabin, my bath tap does
the same, why?
Because the water cartridge in both needs replacing. Remove this and replace,
just call us we have them in stock and not expensive BUT check for calcium problem first!! Big problem in some areas and will happen again if you do not purchase a water softener.
I have loads of marks on the bath I purchased from you, it’s black in places and
cannot be used.
Seen this lots of times, you have not taken protective film off!! Remove this and
underneath you will have a gleaming bath or shower tray.
Bulbs gone in my overhead light. Is it dangerous?
No it is not dangerous, all your lights operate on 12 volts even the fluorescent
type.
We purchased a shower from you 3 months ago now found one that looks the
same for £100.00 cheaper. We have been ripped off!
No you haven’t we are importers we design build test all of our items, many you
see in the shops have already been supplied by ourselves to them. Our dealer
network extends over five counties not just a small area. You cannot purchase
cheaper. The key to your statement is “looks the same”. It may look the same
but certainly is not! It is more than possible that dealers are indeed selling models such as this at maybe up to £150,00 cheaper than our price BUT this is old
technology we rejected more than three years ago. Control panels were unstable, transformers offering partial performance, thermostatic valves with a very
high failure rate, we could go on. With Insignia we guarantee only the latest
technology is used, even if a customer has ordered from our advertising something we have deleted, we upgrade free of charge before delivery. Now think
back up! You will not find a more refined customer service dept open 80 hours
per week, to attend to any problem you have and all in writing. As far as we
know we are the only company to offer the option of a second year warranty
which more faith in our products than almost all others.
For the latest fitting instructions please visit www.insigniarange.co.uk
43 44
Page 23

I am a big guy, will the shower trays or baths you sell support my weight.
No problem unless you are massive in which case you would probably not fit in
it! We test these on our chairman, if it holds his weight it will hold anyone’s ha
ha! Seriously now, the shower trays are reinforced fibre resin, each has a steel
cross section to compliment. The whirlpool baths come the same way. 20 stone
we reckon is fine.
If I buy one of your showers how can I get it in the bathroom?
Simple it comes in four boxes ready to assemble on the spot. This divides weight
and size to bite size chunks!
How do I clean my shower?
We sell shower cleaner spray but always use the Ozone feature as well. Turn this
on for 20 mins with doors closed 2-3 times a month, it will assist in the resistance of mould growth along with disinfect the shower killing various bacteria.
Here’s a tip for glass. Try RainX products! If you Google it a full description will
appear and where to purchase.
Yes made for car windscreens but that environment is far harsher than your
shower. Splash marks do not like to stick to glass! Never clean with the shower
still hot. Wait until it cools to room temperature naturally.
How do I clean my whirlpool bath?
Easy enough just follow this! Proper Care and Maintenance of Your Whirlpool
Tub
Keeping your whirlpool tub clean and free of bacteria is essential for the health
of your family and the life of your whirlpool. Cleaning the surface as well as the
jets and plumbing system twice a month will keep your whirlpool tub working
properly.
Whirlpool Surface Care
After every use, wipe down the entire surface and basin of the tub. This will prevent mildew from building up in the corners and
edges of the jet openings. Make sure to use a soft cloth or squeegee to absorb
any residual water left in corners and avoid
scratching the surface of the whirlpool. When undertaking maintenance
For the latest fitting instructions please visit www.insigniarange.co.uk
cleaning, use a mild non abrasive cleaner and avoid
detergents, disinfectants or cleaning products that come in an aerosol can.
Keeping up on regular cleanings will save time and effort during monthly deep
cleaning.
Whirlpool Jet and Plumbing Maintenance
Before performing the whirlpool system cleaning process make sure that all of
the jets are closed tightly so there is no air induction.
Fill the tub with hot water until the water level is just above the highest jet. Be
careful not to start the whirlpool before the water has reached the appropriate
level. Running a whirlpool without water can damage the pump seals which will
lead to leaking or failure. Once the whirlpool tub is full, add
cleaning product
( We sell the products you need!) and let the whirlpool run for 10-15 minutes
with the air controls fully open. After this, drain the tub completely and refill the
tub with cold water. Run the whirlpool for 5-10 minutes to rinse the system. Dry
completely afterwards and your whirlpool will be clean for another two weeks
to a month depending on the amount of usage.
My chrome fitting have gone rusty in my shower and the chrome is coming off
my bath taps and plug. Cheap chroming was used in manufacture must have
been used! I want free replacements.
Sorry to hear this but we cannot replace these items freely. Have a word with
however cleans the items in your house, they have been over enthusiastic.
Sounds like Mr Muscle, or Limelight or even one of the many other products of
this kind on the market today. They will kill Chrome bright work in a very fast
time. Always use delicate products!! You don’t use sandpaper to shave!
My shower no longer generates steam, what is the problem?
This could be most likely be one of two things, the generator has failed or the
electrical box has failed. If you contact customer service at
www.insigniarange.co.uk/customerservice.asp they will advise. No matter if
covered by warranty or you need to purchase a part, these are the people to go
to! They will identify the most likely cause and ask you to remove this from your
shower or bath then using their returns form with your priority message number
given, send it directly back to ourselves. When with them they operate a 24 hour
turnaround system, this means the item gets checked (free of charge if out of
warranty) fault is diagnosed and a replacement is sent by courier 24 hour
For the latest fitting instructions please visit www.insigniarange.co.uk
45 46
Page 24

delivery. If out of warranty you will be contacted and advised of cost first. Payment can be made instantly over the telephone to avoid delay.
My control panel on my bath / shower has failed only certain functions work. I
contacted customer service but they insist I send back a part before sending
out another. I need it now as my plumber wants to fit it while taking off the
old one. Why do they do this?
Many times although some functions have stopped operating, it is not the part
your plumber / electrician thought it was. In 50% of cases the cause is thought to
be the control display panel but it is rarely this! Our system is built to be as “fail
safe” as possible, by having your part back for testing, we can not only test and
diagnose but advise as to cause of failure to avoid having the same fault occur
again if possible. This applies if warranty is in place or not. If we send you the
item you think has failed and it is not this, it means you need to return it, pay
postage both ways and now rebook your tradesman (if used) to attend to the
correct replaceable part! It can get time consuming and expensive. From our
perspective, we also experienced a large number of items never being returned
under warranty despite the fact we pay for this! Some items are expensive and
without them we cannot in turn, reclaim our losses. We are happy to bypass the
system for you should you wish and send whatever part you require BUT, if under warranty, we do require a deposit of £100.00 taken by credit card which is
then returned on arrival of your old part back. If you are no longer covered by
warranty we are happy to do this without charge but again remember it is not
the ideal way and could end up costing you more.
I needed to replace my bath taps so as I know nothing about plumbing I arranged for one to do this for me. He charged two and a half hours to do this ,
well over £100.00. When I purchased this bath I was told everything was easy
to replace. I feel you lied!
All items are in fact easy to change on both bath and showers. Both are free
standing both should be in a position to pull out and in your case 15 mins removal time and 15 mins to refit was all that was needed! We understand tradesmen charge call out but we recommend taking this up with them. Another issue
is the need to replace the taps in the first place, why was this? If leaking the
problem probably came from calcium build up and you just needed a new cartridge, to renew this is even easier, just take the top of the tap off with water
turned off at mains then pull out cartridge and replace.
For the latest fitting instructions please visit www.insigniarange.co.uk
Only a matter of minutes, no need to take taps off the bath or shower and cost
is minimal. Always contact us first, it could save you a fortune!!
I had a pipe on my shower burst during the night, although it looks to have
failed due to calcium build up I would like you to pay for the repairs needed to
my house, the ceiling in the kitchen has collapsed, the walls are ruined. Even
kitchen cupboards have water in them. This pipe should not have failed after
only 12 months!
Sorry please see terms and conditions we do not contribute in any form for consequential damage whatsoever. We in all cases recommend the fitting of a good
quality proven water softener at the time of install, all other appliances will
benefit from this as well. Showers, baths, taps, in fact anything we sell is based
on high pressure water supply to operate it. Most new items today are like this
already or going this way. This means a softener is even more critical than ever.
Please also check the instructions with your item on build, it states it is highly
recommended to turn off water supply after use as you should a dishwasher or
washing machine. It also states turn off your power supply after use. Very dangerous to leave both on and things could have been very much worse if you had
been on holiday!! We are sorry to learn of your problem but suggest had this
been done and both supplies isolated with easy to get to switch/valves, it could
have been avoided. The worst thing that could have happened then was the
pipe would have still failed but it would have been when the shower was in use
and noticing the water stop, it is more than reasonable to suggest within just a
few seconds the problem would have been recognised and isolation made keeping water spill to a minimum.
The water inlet chrome cover of my whirlpool bath has broken, we continued
using the bath (what else could we do with two children aged three and five?)
but point out this is very dangerous as a child can get their fingers or flesh
sucked into this causing bruising. To add to the problem the whirlpool pump
has stopped working. Please help.
Firstly NEVER allow children to use the whirlpool feature of these baths. We are
explicit, these baths are not designed for children, the jets as you know are very
powerful and not at all recommended for children let alone young ones! Now
your problem, under normal circumstances the inlet cover will not break unless
it has been hit with some force. If it breaks remove it and try to piece all broken
sections together.
For the latest fitting instructions please visit www.insigniarange.co.uk
47 48
Page 25

Whatever is missing has been sucked into the system, if small it would get fired
out of the jets but if a large section it will jam the pump. This is what has happened to you. You now need a tradesman to remove the cover of the pump and
the remove the offending item from the impeller. If the pump no longer operates you will need a new pump. Never use a bath or shower bath whirlpool with
this broken as other items could get sucked in as well (soap etc)
What happens if I don’t use the steam generator for long periods of time is this
ok?
We recommend that you switch on the steam unit at least every fortnight and
run it at least for 5 minutes. This will stop the build up of lime scale forming in
the unit and will keep the unit operation at all times. It is not recommended to
leave it for a period of say 6 months between use as this could damage the unit.
If this is the case the unit will not be covered under warranty.
Disclaimer.
Whilst all information given is checked and thought correct, we do appreciate
human errors can from time to time creep in despite all efforts to avoid this. The
instructions given are for reference only and from time to time updates or
changes are made by the manufacturer without prior notice. Errors and omis-
sions excepted (E&OE).
All build instructions are written with the consumer in mind, we do consult cus-
tomers from time to time and would be interested in any feedback you may
have. Can you help improve our service? Have you any tips which others may
benefit from? Please call 0844 800 3069 and press for technical help when
prompted. We would sincerely like to hear from you
For the latest fitting instructions please visit www.insigniarange.co.uk
49 50
 Loading...