

900MHz
Frequency Agile
®
Technology
Installation
Installation
InstallationInstallation
Instructions
Instructions
InstructionsInstructions
FA202
Scope of Manual:
lation manual:
ming and servicing the detector in response to trouble in dications at the control panel.
This Inovonics manual contains additional installation and servicing information that is not available in the accompanying primary instal-
ESL 560 Series Wireless Smok e Detector Installatio n Instru ction s
. This secondary manual is chiefly concerned with transmitter program-
FA202 Current Draw Specifications
(Supersedes Sentrol ESL 560 specifications)
Typical average standby current......................................................38.5µA
Typical peak alarm current..............................................................91.1mA
The FA202 Wireless Smoke Detector, built upon photoelectric Sentrol/ESL
technology, continually monitors its own sensitivity and operational status.
If it detects a Low Battery condition or is in need of cleaning, it transmits a
Low Battery signal that should be interpreted as a “Maintenance Needed”
trouble condition at the control panel. If the unit is in need of cleaning, it can
be serviced on-s ite by rep la c ing its Sm o ke C ha mbe r. Two 3 vo lt lit hiu m ba tteries, supplied with the product, provide at least one year of operation.
(National Fire Protection A ssociation, Batterymarch Park, Quincy, MA 02269)
Programming Procedure
1. Locate the transmitter programming pins by disassemblin g the dete c tor
as follows (refer to Figures 4 through 7 in the ESL 560 instructions):
a. Remove the red dust cover containing the batteries from the smoke
detector.
b. With the smoke detector facing you, remove the detector from its
Mounting Base by twisting the detector about 15 degr ees counterclockwise with respect to the Mounting Base.
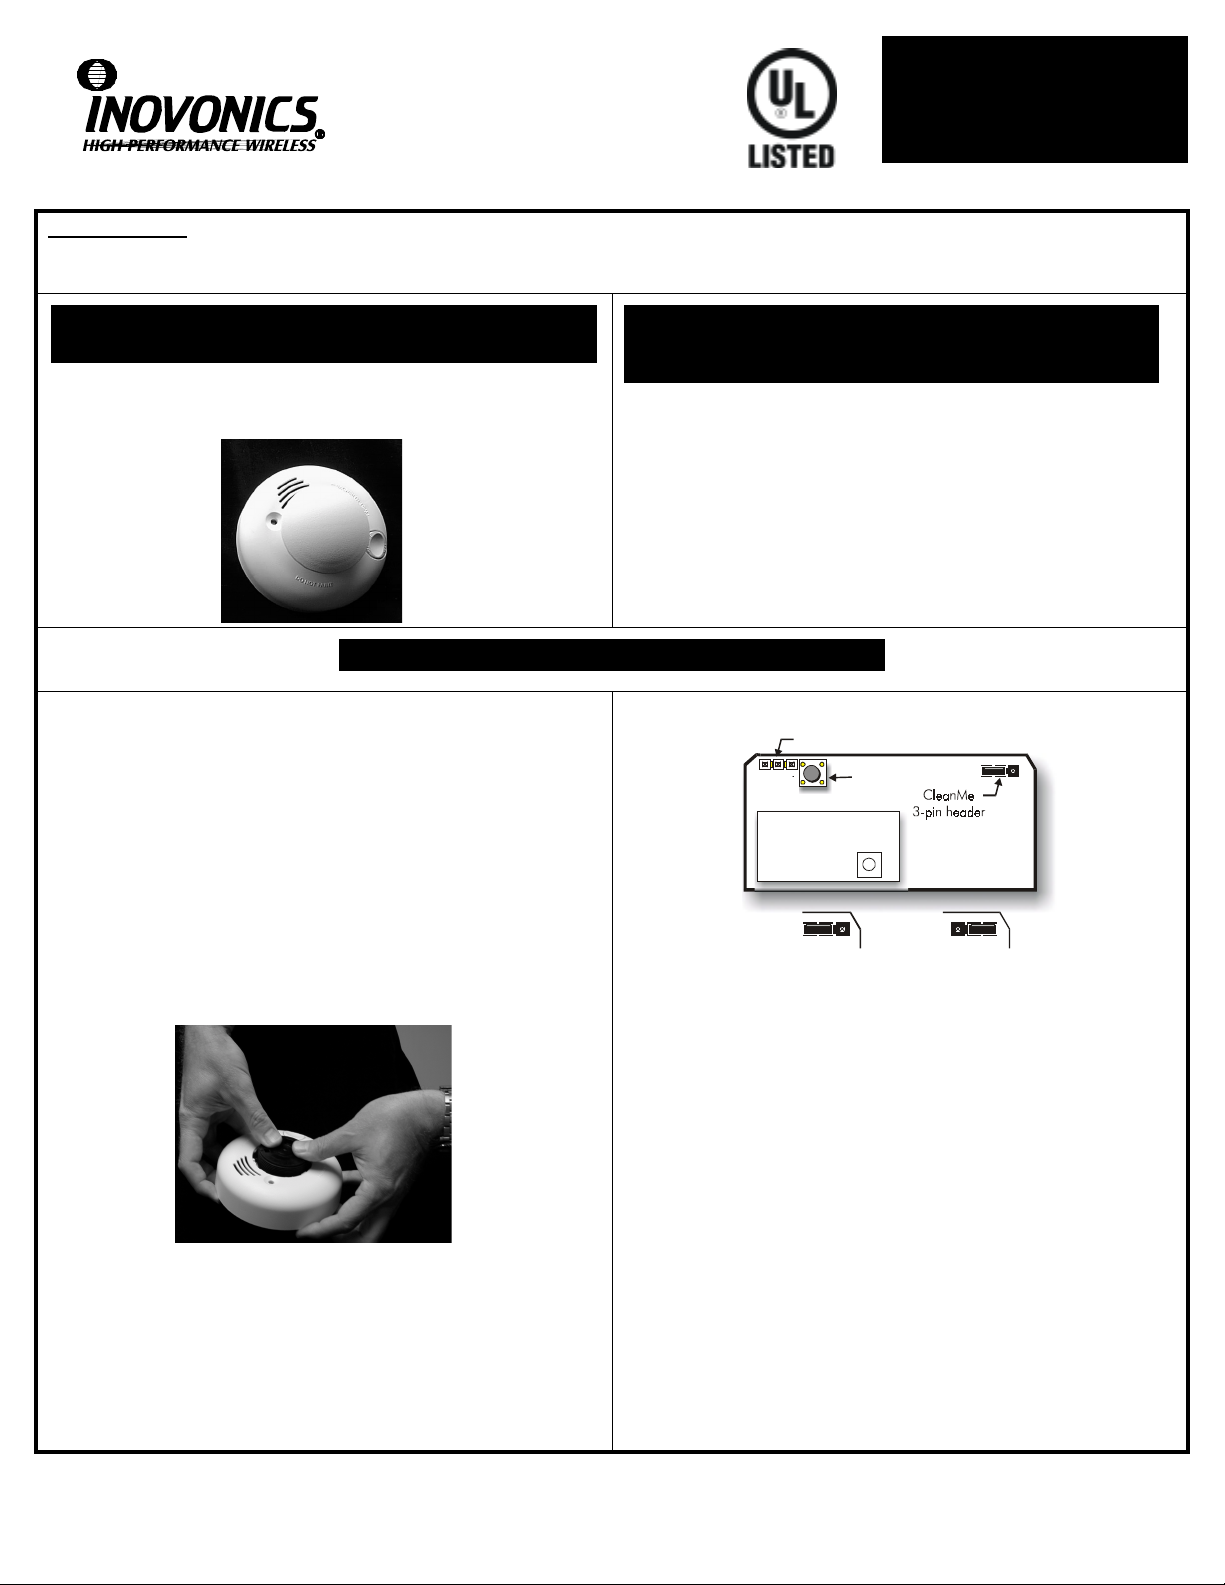
c. Remove the Detector Cap by first sliding a flatblade screwdriver
part way into the slot on the side of the Detector Cap. Now, gently
push the handle down while twisting the Detector Cap counterclockwise with respect to the Detector Lid.
d. Remove the Detector Lid from the Body by pushing down on the
Smoke Chamber while p ull ing u p on th e bo tto m of t he Li d (se e Fi gure A).
2. Using an appropriate Inovonics programming device, set the program-
Note: These also are the factory default programming options. Some programming devices like the FA422 Receiver can place an Identification Number into a transmitter without changing the default settings.
FA202 Wireless Smoke Detector
FA202 Wireless Smoke Detector
with CleanMe™ Signaling
with CleanMe™ Signaling
HIS EQUIPMENT SHOULD BE INSTALLED IN ACCORDANCE WITH
T
THE NATIONAL FIRE PROTECTION ASSOCIATION’S STANDARD
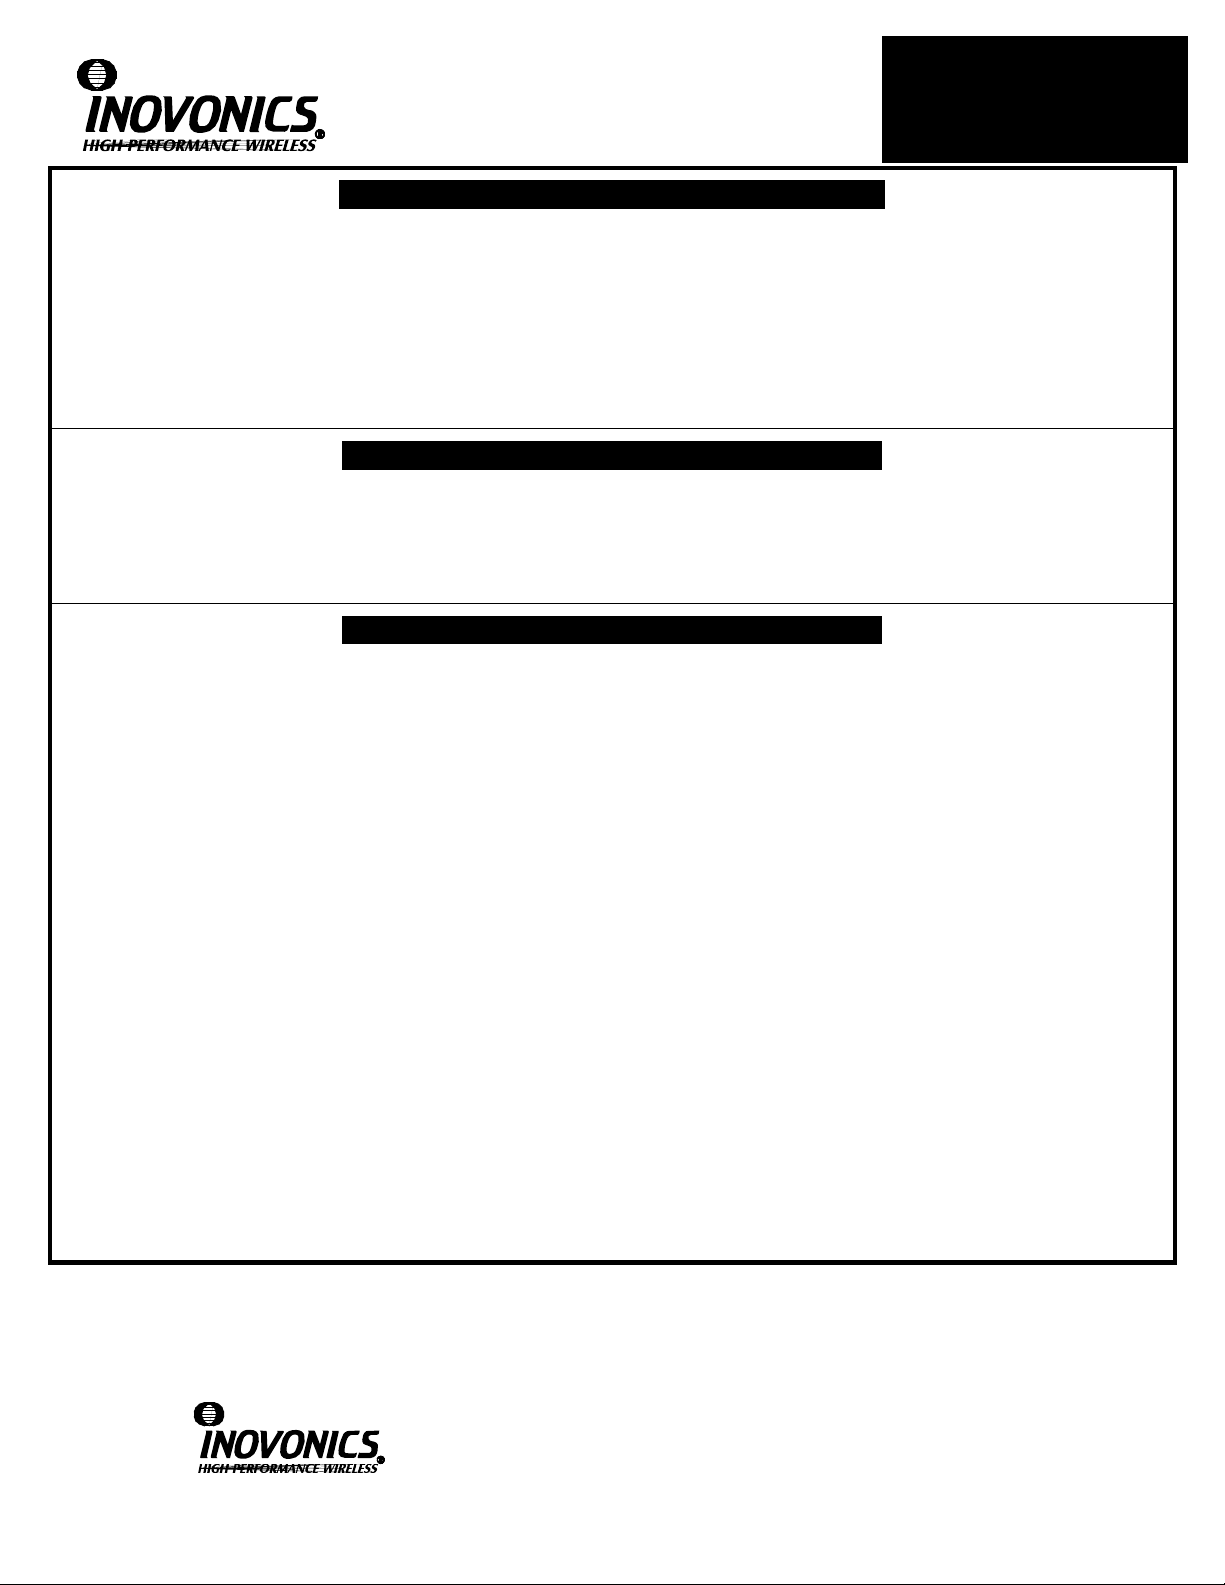
3-pin programm ing header
Reset button
CleanM e
enab led position
Figure B: Transmitter Board Features
ming options as follows:
• External Switch Type: Normally Closed
• EOL Resistor: No
• Use Internal Contact: No
• Check-in Time: 60 seconds
CleanM e
disabled position
72.
Figure A: Removing the Detector Lid
e. Remove the Battery Cover that encloses the Battery Compartment
by pushing on the area marked
f. Take the batteries out of the red dust cover holder and load them
into the Battery Compartment. Make sure to observe battery polarity and that the battery removal ribbon rests unde r the batterie s.
g. Refer to Figure B to locate the program ming pin s on the transmit ter
board.
OPEN
.
3. When prompted by the programming device to plug in t he transmitter,
connect the programming cable to the 3-pin header. (Orientation of the
cable with respect to the 3-pin h eader is not im portant; bot h outside pins
on the 3-pin header are at ground potential.)
4. Press the Reset button on the transmitter.
When programming is complete, disconnect the cable, test the detector per
the Wireless Sensitivity Test Procedure (on the back of this sheet), and reassemble the smoke detector.
© 1999 Inovonics support@inovonics.com phone: 800.782.2709 www.inovonics.com
Page 1
F202_V1.FM re v 1.10 1/27/00
FA202
Wireless Sensitivity Test Procedure
The FA202 should be tested upon initial programming and each time the Smoke Chamber is changed or the batteries are replaced. To make wireless signals from the detector cause an al arm or trouble indication at the control panel, receiver and panel pr ogramming must be completed prior to this test. If
this has not been done, do so now.
To t est the detector, fo llow th e pro ced ure described under the Testing the Detector Sensitivity section in th e ES L 5 60 in stru ctions. When the test button is
pressed, the LED will flash the number of times that corresponds to its sensitivity. During this test, the control panel should receive an alarm, followed a
few seconds later by a restoral.
If the panel fails to respond properly, i t is po ssible th at the tra nsmitter failed to reset properly when the batteries wer e insta lled. To force a transmitter reset, remove the batteries from the FA202 for a least 30 seconds, reinstall them, and then retest as described above.
Disabling Wireless CleanMe Reporting
As the factory default condition, the FA202 combines the CleanMe signal described in the ESL 560 instructions with its Low Battery signal. If the control panel indicates a Low Battery trouble conditi on, this shou ld be interprete d as a Maintenan ce Needed trouble indication . (The battery may be fin e, but
the detector needs cleaning.) If this multiple-condition panel indication is not desired, wireless reporting of the CleanMe status can be disabled by moving the jumper on the CleanMe 3-pin header to the inactive position (see Figure B). When this is done, only a Low Battery signal will be sent from the
detector, and only a Low Battery trouble condition reported at the panel.
Servicing Panel Trouble Indications
In the event that a Low Battery trouble in di cation appears on the control pane l, service the FA202 as described in the following procedure:
1. Remove the FA202 from its Mounting Base and disassemble the unit as described in the above Programming Procedure. (The Detector Lid needs to
be removed from the De te ct or B od y.)
2. Perform a wireless sensitivity test on the unit as described in the previous Wireless Sensitivity Test Procedure. Depending on the results of this test
do the following:
a. If the results of this test show that the detector
detector’s latest operation a l status.
If the panel trouble indication returns, the batteries need changing. Change the batteries as described in the Replacing the Batteries section of the
ESL 560 instructions and repeat this step.
As indicated in the
batteries
If the panel trouble indication now remains off, servicing has been completed.
b. If the results of this test shows that the unit
tion of the ESL 560 instru ctio ns. No w, press the Reset button on the transmitter to update the panel with th e dete ctor’s latest operational status.
If the panel trouble indicatio n remai ns of f, the uni t is performing normally, the batteries do not need changing, and servicing has been completed.
If, however, the panel trouble indication returns, the detector probably has a secondary Low Battery conditi on that requires that the batteries be
replaced. Change the batteri es as describ ed in th e Replacin g th e Batteries sectio n of the ESL 560 instruct ion s, wai t abou t nin e seconds until the
detector LED begins to flash, and press the transmitter Reset button.
As indicated in the
batteries
If the panel trouble indication now remains off, servicing has been completed.
As discussed before, if the wireless CleanMe signal reporting were disabled, some of this complication could be avoided . A Low Battery indica-
Note:
tion at the panel would always mean that the batteries needed changing; there would be no CleanMe signal piggybacked onto the Low Battery indication.
However, it is recomme nd ed th a t the wirele ss Clea nMe sign al rep orting rema in e nab led (fa c tor y de fa ult co n diti on ) in or der to let t he pa ne l k no w tha t th e
detector is operating within normal limits, and to avoid potential false alarms due to detector over-sensitivity.
. This is necessary to force an immediate test of the new batteries.
. This is necessary to force an immediate test of the new batteries.
WARNING
WARNING
label on the Battery Compartment,
label on the Battery Compartment,
does not
does
need cleaning, press the Reset button on the transmitter to update the panel with the
wait at least 30 seconds after removing batteries before inserting new
need cleaning, replace the Smoke Chamber and retest the unit per the Cleaning the Detector sec-
wait at least 30 seconds after removing batteries before inserting new
If an FA202 fails to operate properly, phone Inovonics Technical Support (800.782.2709) to request a
Return Material Authorization (“RMA”) number, then ship the unit to the address shown below.
(Please include the RMA number on the package to expedite handling.)
Inovonics Corporation
Inovonics Corporation
Inovonics CorporationInovonics Corporation
RMA # ________
RMA # ________
RMA # ________RMA # ________
2100 Central Ave
2100 Central Ave
2100 Central Ave2100 Central Ave
Boulder CO 80301
Boulder CO 80301
Boulder CO 80301Boulder CO 80301
© 1999 Inovonics support@inovonics.com phone: 800.782.2709 www.inovonics.com
Page 2
F202_V1.FM re v 1.10 1/27/00

Warranty & Disclaimer
Inovonics Corporation ("Inovonics") warrants its products ("Product" or "Products") to conform to its
own specifications and to be free of defects in materials and workmanship under normal use for a
period of twenty-four (24) months from the date of manufacture. Within the warranty period Inovonics Corporation will repair or replace, at its option, all or any part of the warrantied product. Inovonics
will not be responsible for dismantling and/or reinstallation charges. To exercise the warranty, the
User ("User", "Installer" or "Consumer") must be given a Return Material Authorization ("RMA")
Number by Inovonics. Details of shipment will be arranged at that time.
This warranty does not apply in cases of improper installation, misuse, failure to follow installation
and operating instructions, alteration, abuse, accident or tampering, and repair by anyone other than
Inovonics.
This warranty is exclusive and expressly in lieu of all other warranties, obligations or liabilities,
whether written, oral, express, or implied, including any warranty of merchantability or fitness for a
particular purpose. Inovonics will not be liable to anyone for any consequential or incidental damages
for breach of this warranty or any other warranties.
This warranty will not be modified, varied or extended. Inovonics does not authorize any person to
act on its behalf to modify, vary or extend this warranty. This warranty will apply to Inovonics Products only. All other products, accessories or attachments used in conjunction with Inovonics equipment, including batteries, will be covered solely by their own warranty, if any. Inovonics will not be
liable for any direct, incidental or consequential damage or loss whatsoever, caused by the malfunction of Product due to products, accessories, or attachments of other manufacturers, including batteries, used in conjunction with Inovonics Products.
This warranty does not warrant the replacement of batteries that are used to power Inovonics Products.
The User recognizes that a properly installed and maintained security system may only reduce the
risk of events such as burglary, robbery, personal injury and fire. It does not insure or guarantee that
there will be no death, personal damage and/or damage to property as a result.
claim that the Product may not be compromised and/or circumvented, or that the Product will
prevent any death, personal and/or bodily injury and/or damage to property resulting from
burglary , r o bbery, fire or otherwise, or that the Prod uct will in all case s pr ovide ade quate war ning or protection.
Inovonics Corporation shall have no liability for any death, injury or damage, however
incurred, based on a claim that Inovonics Products failed to function.
held liable, directly or indirectly, for any loss or damage arising under this limited warranty or otherwise, regardless of cause or origin, Inovonics' maximum liability will not in any case exceed the purchase price of the Product, which will be fixed as liquidated damages and not as a penalty, and will be
the complete and exclusive remedy against Inovonics.
Warning: The User should follow all installation, operation and maintenance instructions.
User is strongly advised to conduct Product and systems tests at least once each week. Changes in
environmental conditions, electric or electronic disruptions and tampering, may cause the Product to
not perform as expected.
Inovonics does not
However, if Inovonics is
The
Warning: Inovonics warrants its Product to the User.
due prudence and taking necessary precautions for the safety and protection of lives and property
wherever Inovonics Products are installed. Inovonics strongly advises the User to program Products
to be supervised whenever used in applications affecting life safety. Users are warned that unsupervised devices are subject to undetected failure due to malfunction, battery failure, tampering, or
changes in environment.
The User is responsible for exercising all
 Loading...