

Inoi DW560 Quick Installation Manual
ii. Click “Install Device Driver” to install the driver.
iii. Wait for a few seconds, the setup program is running.
iv. On the first screen of the program, click Next to continue.
v. On the following screen, select “I accept the terms of the license agreement”, and then
click Next.
vi. After the necessary files are copied, click Finish to exit the setup program.
vii. Now you can connect the external drive to PC. Make sure the USB cable and external
power are connected as described in Hardware Installation. Connect the USB cable to
the USB port of your PC. The “Power Status LED” on the front panel should have now lit
up.
Note: if the LED does not light-up, un-plug
the USB cable from PC, push the Power
Switch of the drive to ON position, and
then plug the USB cable back to PC.
viii. Windows will detect the external drive and
install the device driver automatically. You will
find a new drive letter assigned to the drive in
“My Computer” after the automatic
installation.
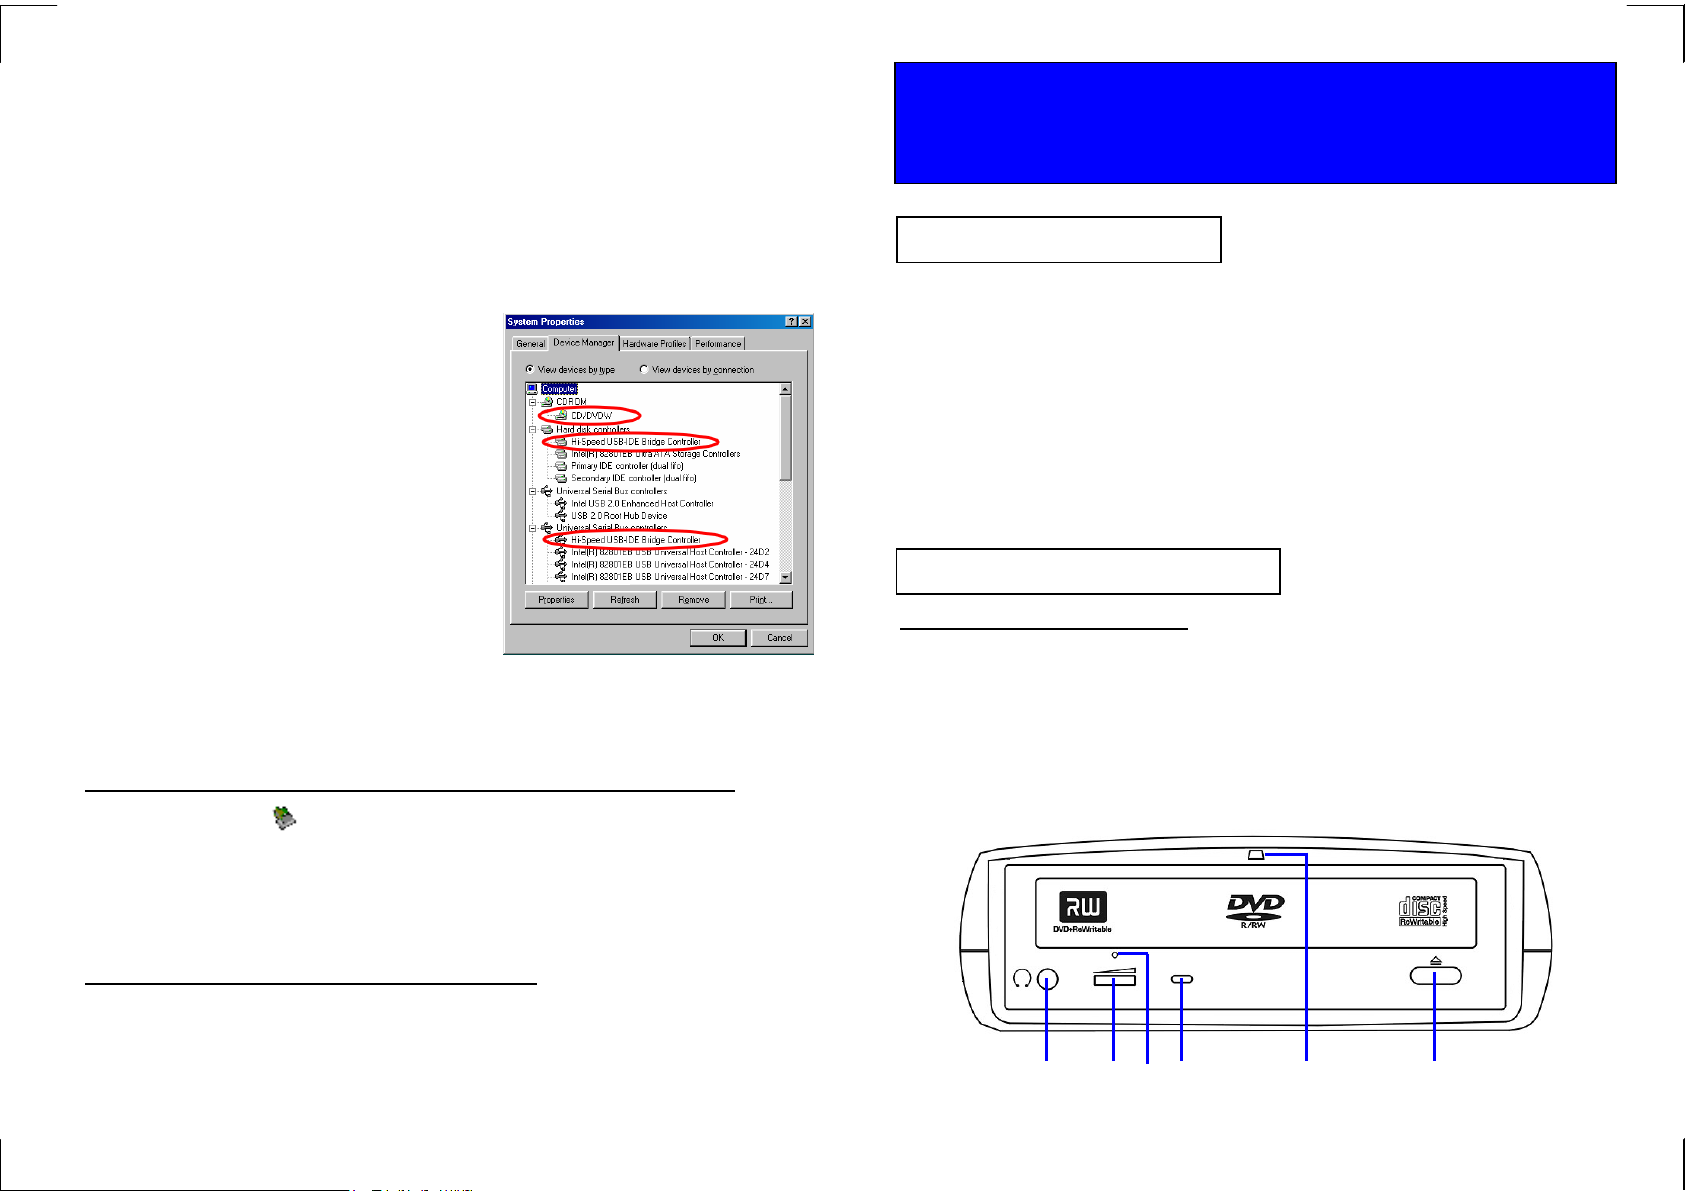
ix. If the external drive doesn’t appear in “My
Computer” or doesn’t work properly, please
go into “Device Manager” to check whether
the device is installed as the following status:
z Hi-Speed USB-IDE Bridge Controller:
Installed under “Universal Serial Bus
Controller”
z Hi-Speed USB-IDE Bridge Controller: Installed under “Hard Disk Controller”.
z The name of the DVD writer: Installed under “CDROM”.
How to Disconnect the External Drive from PC Under Windows 98SE
1. Click on the icon on system tray and a dialog box will appear beside this icon.
2. Click “Safely remove DVD-RW Drive – Drive (D:)” (The name and the drive letter may
differ from yours, depending on the drive model you are using.) in the dialog box.
3. Wait for a few seconds until system prompts, “The DVD-RW Drive storage device can
now be safely removed from the system”. Click OK, and then remove the USB cable
from computer.
Removing the USB Driver under Windows 98SE
Stop the external drive, and disconnect the power plug. Go to “Add/Remove Programs” in
“Control Panel”, select “Hi-Speed USB-to-IDE Win98 Driver”, click “Remove” and then
follow the on-screen instruction. The driver will be removed from the Win98 system.
4
7450767-00
USB 2.0 / IEEE 1394
External DVD Dual Writer Drive
Quick Installation Guide
System Requirements
♦ Notebook or Desktop PC with USB2.0 or USB1.1 port, or IEEE1394 port.
♦ Windows 98SE/Me/2000, or Windows XP (Make sure the device driver for USB Host
controller or IEEE1394 Host controller has been installed and is available).
NOTE:
♦ When using IEEE1394 interface under Win98SE, the Windows system must be
updated with “Storage Supplement Update” from “Windows Update” website.
♦ The transfer speed of the external drive depends on the USB host it is
connected to. USB2.0 host supports 480Mbps (maximum) data transfer rate,
and USB1.1 host supports ONLY 12Mbps (maximum) data transfer rate. Check
your system to make sure you have the right hardware to gain maximum
performance.
Part Names and Functions
FRONT PANEL OF THE DRIVE
1. Headphone Jack
2. Wheel Knob: Headphone Volume Control
3. Emergency Eject Hole: Poke a rod through it to eject the disc tray emergently.
4. Disc Ready/Read/Write LED: Intermittent light indicates disc access status.
5. Power status LED: Indicate Power on (stable light) / off (no light) and disc access
(intermittent light) status.
6. Eject Button: Press to eject or close the disc tray.
1
3
2
* Note: Front Panel may be different for various models.
4
5 6
1
y
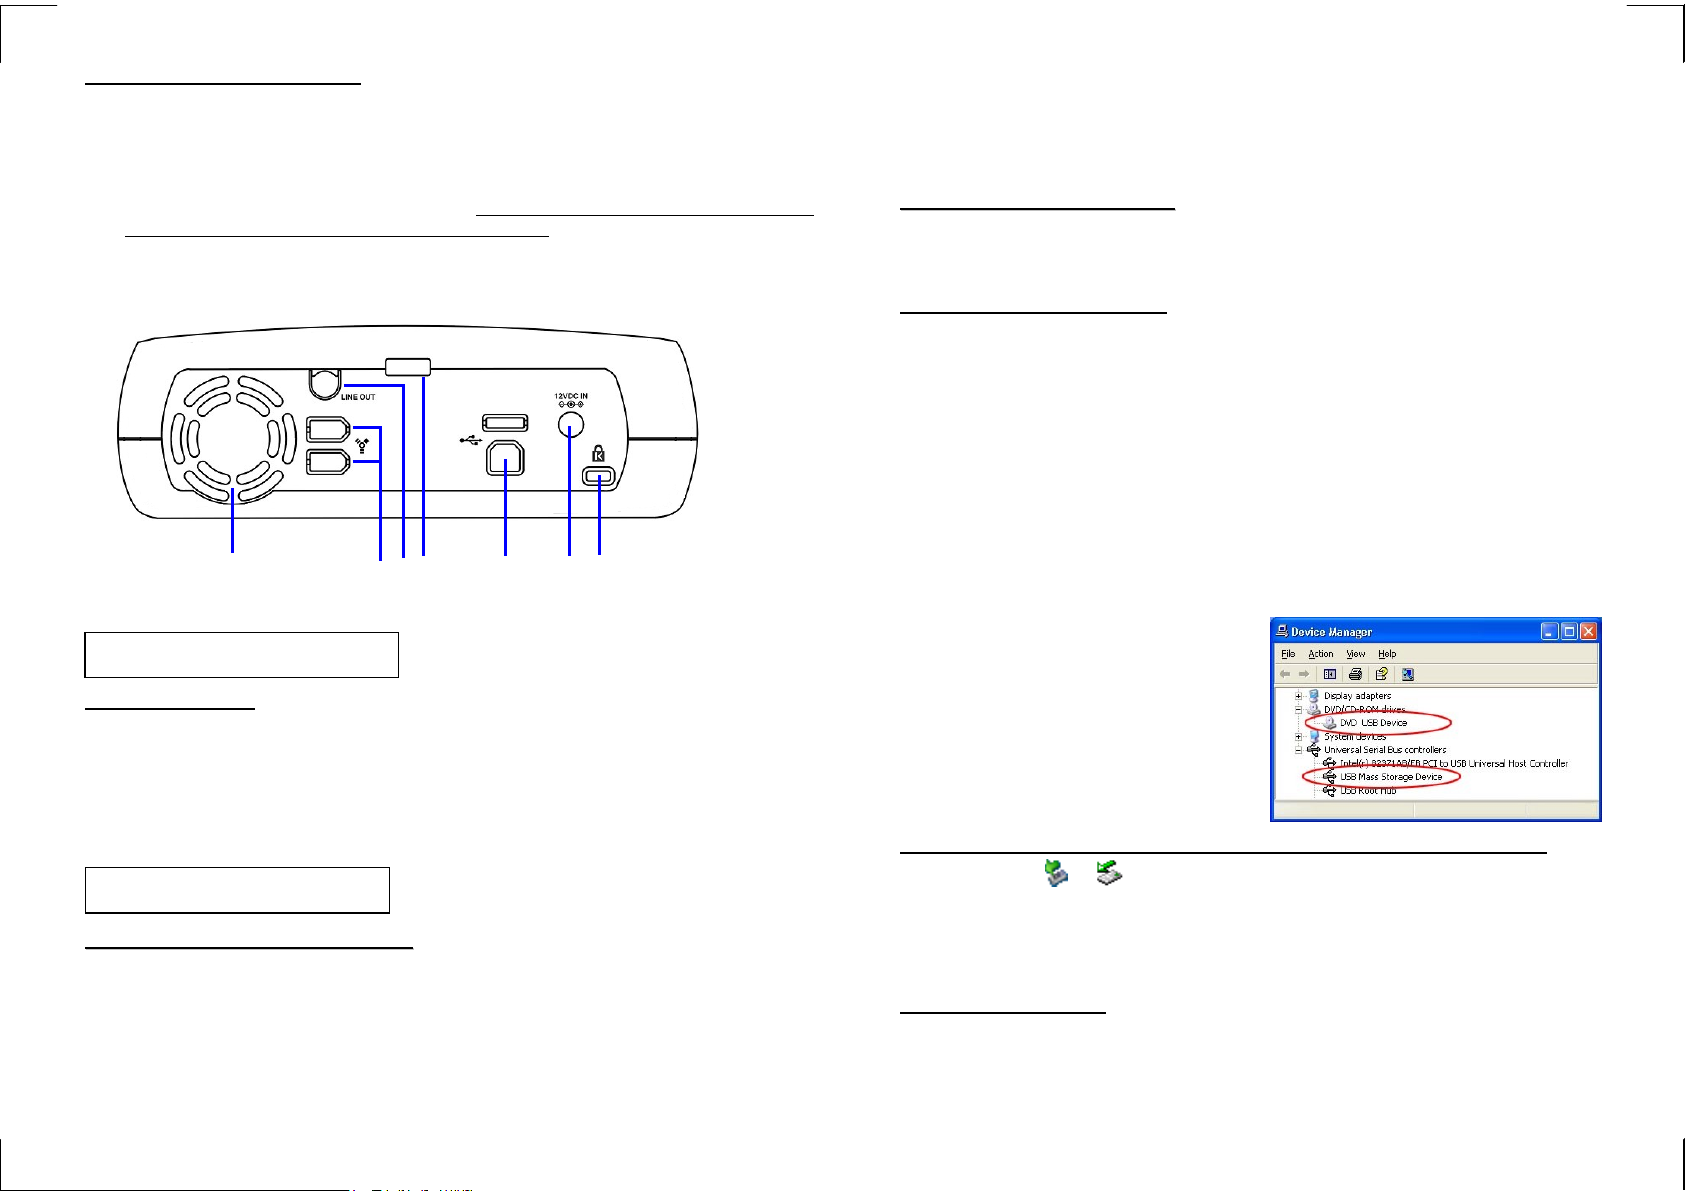
REAR PANEL OF THE DRIVE
1. Vent
2. IEEE 1394 Interface Connector x 2 (Optional): Choose either of these two
connectors. The other can be connected to other IEEE 1394 devices.
3. Line Out Jack: Used to output audio signal to an amplifier.
4. Power Switch: Switch to power on or off. (When USB cable is connected to PC, the
Power is always on despite of power switch position.)
5. USB Connector
6. External Power Jack: Connect to AC adapter.
7. Kensington Lock Connector
1
4
3
2
* Note: Your model ma
5 6 7
only support USB interface.
Hardware Installation
Cable Connection
Note: you cannot connect both interface cables to the PC at the same time.
1. Insert the plug of the interface cable into the related Interface Connector.
2. Insert the plug of AC adapter into the External Power Jack of drive.
3. Attach the AC adapter to the outlet.
4. Please follow the related software installation guide to install the driver.
Software Installation
WWhheenn uussiinngg IIEEEEEE11339944 IInntteerrffaaccee
** Microsoft has provided the "Storage Supplement Update" on "Windows Update" website.
This patch file allows IEEE1394 devices to work more stably and to be safely removed
from the system. **
Please follow the following procedures to download this patch file:
i. In Windows 98SE system, make sure you have connected to the Internet.
ii. Click "Start" then "Windows Update" to link to the website.
iii. On the website, click "Product Updates" to open the download list.
2
iv. Under the "Recommended Updates" area, select "Storage Supplement Update", and
then click "Download" button to start download and install this patch.
v. After the update is complete, restart PC.
vi. After the PC has restarted and booted into Windows, insert the IEEE 1394 interface
cable into computer, the external drive will be recognized automatically.
WWhheenn uussiinngg UUSSBB IInntteerrffaaccee
♦ When connecting this external drive to USB1.1 port, the Data Transfer Rate is
too slow to playback a DVD title or burn a DVD disc smoothly. Connect this
drive to USB2.0 host is recommended.
Under Windows Me/2000/XP
i. Boot-up your computer into Windows, making sure the USB port device driver has
been installed and is available. To check this, open the “Device Manager” window to
see if the “USB 2.0 Host Controller” is installed without error.
ii. Make sure the USB cable and external power are connected as described in
Hardware Installation. Connect the USB cable to the USB port of your PC. The
“Power Status LED” on the front panel should have now lit up.
Note: if the LED does not light-up, un-plug the USB cable from PC, push the
Power Switch of the drive to ON position, then plug the USB cable back to PC.
Windows will install its resident device driver automatically. After the automatic
installation, this external drive will appear under a new drive letter in “My Computer”.
iii. If the external drive doesn’t appear in “My Computer” or doesn’t work properly, please
go into “Device Manager” to check whether the device is installed as the following
status:
z USB Mass Storage Device:
Installed under “Universal Serial
Bus Controllers”
z The name of the DVD writer:
Installed under “DVD/CD-ROM
drives”
How to Disconnect the Device From PC Under Windows Me/2000/XP
1. Click the icon or on system tray and a dialog box will appear beside the icon.
2. Click “Safely Remove USB Mass Storage Device – Drive (D :)” (The drive letter may
differ from yours) in the dialog box.
3. Wait for a few seconds until “The USB Mass Storage Device can now be safely
removed from the system” prompts. Then remove the USB cable from computer.
Under Windows 98SE
i. Boot-up computer into Windows. Do not connect the external DVD Dual Writer drive
to PC. Insert the “Driver CD” into a CD-ROM drive, the welcome screen will pop-up
automatically. If the welcome screen does not pop-up, double click “My Computer”,
double click the CD-ROM icon that contains the “Driver CD”, and then double click
“Autorun.exe” to open the welcome screen.
3
 Loading...