

Page 1
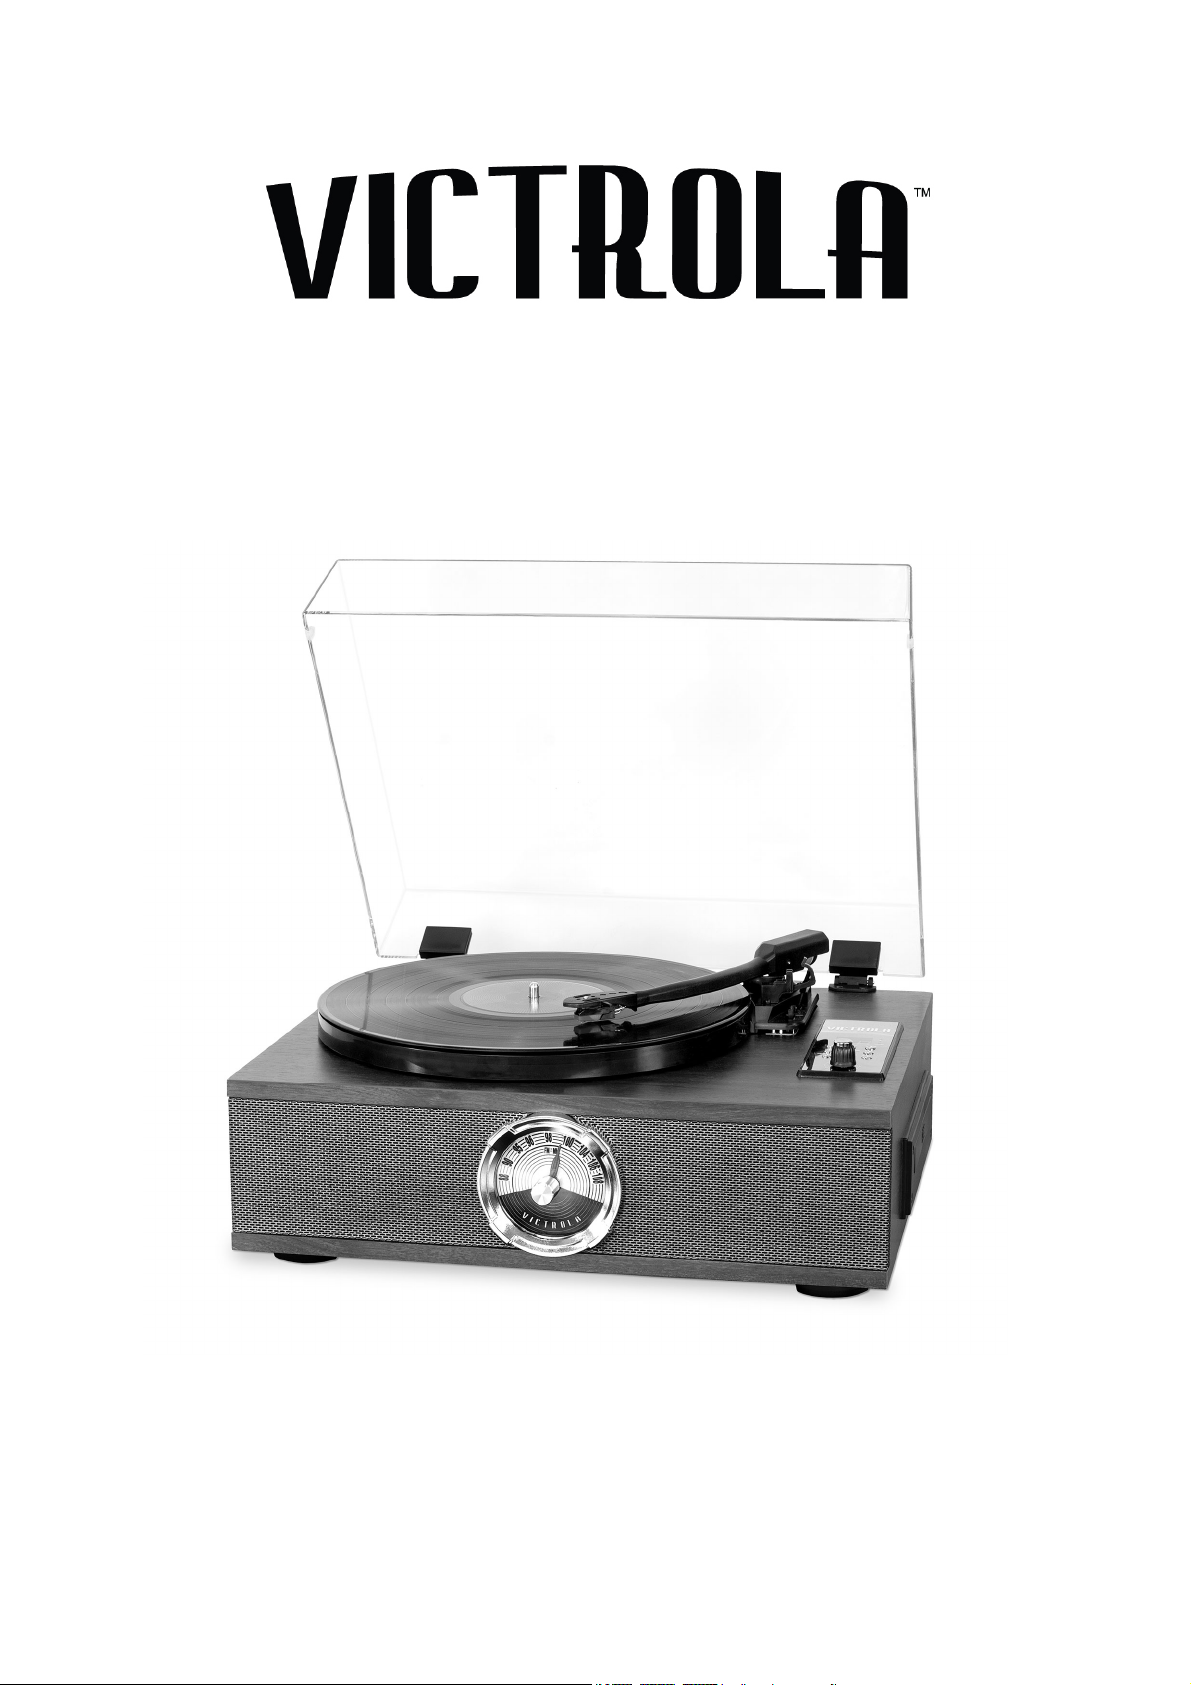
5-IN-1 TURNTABLE
MODEL: VTA-60
Instruction Manual
PLEASE READ THIS INSTRUCTION MANUAL CAREFULLY BEFORE USE
AND KEEP IT FOR FUTURE REFERENCE.
Page 2
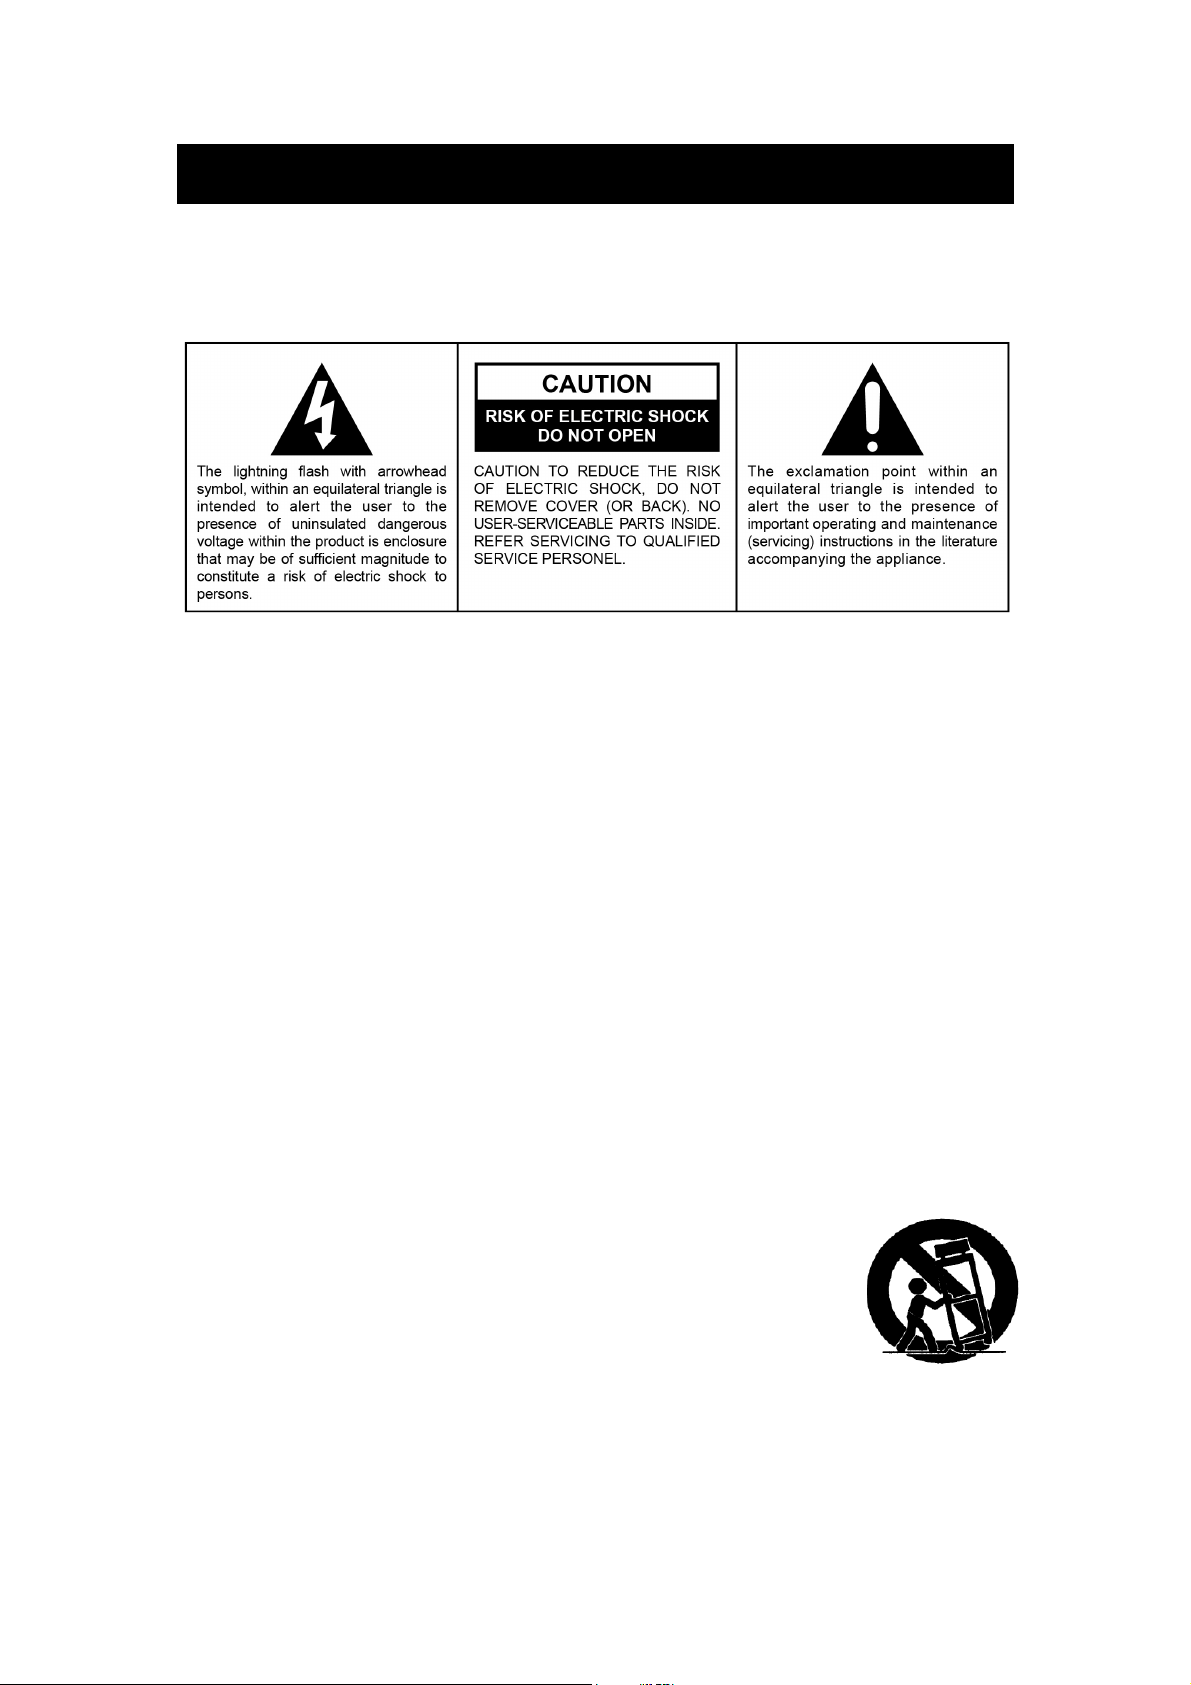
WARNING
TO PREVENT FIRE OR SHOCK HAZARD, DO NOT USE THIS PLUG WITH
AN
EXTENSION CORD, RECEPTACLE OR OTHER OUTLET UNLESS THE
BLADES CAN BE
TO PREVENT FIRE OR SHOCK
APPLIANCE TO RAIN OR MOISTURE.
The Caution Marking is located at the bottom enclosure of the apparatus.
The Rating plate is located at the bottom enclosure of the apparatus
IMPORTANT SAFETY INSTRUCTIONS
1. Read these instructions.
2. Keep these instructions.
3. Heed all warnings.
4. Follow all instructions.
5. Do not use this apparatus near water.
6. Clean only with dry cloth.
7. Do not block any ventilation openings. Install in accordance with the
manufacturer’s instructions.
8. Do not install near any heat sources such as radiators, heat registers,
stoves, or other apparatus (including amplifiers) that product heat.
9. Do not defeat the safety purpose of the polarized or grounding-type plug. A
polarized plug has two blades with one wider than the other. A grounding
type plug has two blades and a third grounding prong. The wide blade or
the third prong is provided for your safety. If the provided plug does not fit
into your outlet, consult an electrician for replacement of the obsolete outlet.
10. Protect the power cord from being walked on or pinched particularly at
plugs, convenience receptacles, and the point where they exit from the
apparatus.
11. Only use attachments/accessories specified by the manufacturer.
12. Use only with a cart, stand, tripod, bracket, or table
recommended by the manufacturer, or sold with the product.
When a cart is used, use caution when moving the
cart/apparatus combination to avoid injury from tip-over.
13. Unplug this apparatus during lightning storms or when
unused for a long periods of time.
14. Refer all servicing to qualified service personnel. Servicing is required when
the apparatus has been damaged in any way, such as power-supply cord
or plug is damaged, liquid has been spilled or objects have fallen into the
apparatus, the apparatus has been exposed to rain or moisture, does not
operate normally, or has been dropped.
15. This appliance shall not be exposed to dripping or splashing water and that
FULLY INSERTED TO PREVENT BLADE EXPOSURE.
HAZARD, DO NOT EXPOSE THIS
Page 3

no object filled with liquids such as vases shall be placed on the apparatus.
16. Do not overload wall outlet. Use only power source as indicated.
17. Use replacement part as specified by the manufacturer.
18. Upon completion of any service or repairs to this product, ask the service
technician to perform safety checks.
19. Power Sources - This product should be operated only from the type of
power source indicated on the marking label. If you are not sure of the type
of power supply to your home, consult your product dealer or local power
company. For products intended to operate from battery power, or other
sources, refer to the operating instruction.
20. Object and Liquid Entry - Never push objects of any kind into this product
through openings as they may touch dangerous voltage points or short-out
parts that could result in a fire or electric shock. Never spill liquid of any kind
on the product.
21. Damage Requiring Service - Unplug this product from the wall outlet and
refer servicing to qualified service personnel under the following conditions:
a) When the power-supply cord or plug is damaged,
b) If liquid has been spilled, or objects have fallen into the product,
c) If the product has been exposed to rain or water,
d) If the product does not operate normally by following the operating
instructions. Adjust only those controls that are covered by the
operating instructions as an improper adjustment of other controls
may result in damage and will often require extensive work by a
qualified technician to restore the product to its normal operation.
e) If the product has been dropped or damaged in any way, and
f) When the product exhibits a distinct change in performance - this
indicates a need for service.
22. Mains plug is used as disconnect device and it should remain readily
operable during intended use. In order to disconnect the apparatus from the
mains completely, the mains plug should be disconnected from the mains
socket outlet completely.
23. Battery shall not be exposed to excessive heat such as sunshine, fire or the
like.
24. Excessive sound pressure from earphones and headphone can cause
hearing loss.
25. Minimum distances of 10 cm around the apparatus for sufficient ventilation.
26. The ventilation should not be impeded by covering the ventilation
openings with items, such as newspapers, table-cloths, curtains, etc.
27. No naked flame sources, such as lighted candles, should be placed on the
apparatus.
28. The use of apparatus in moderate climates.
29. Attention should be drawn to the environmental aspects of battery
disposal.
This symbol indicates that this product incorporates
insulation between hazardous mains voltage and
par
ts.
CAUTION:
TO PREVENT ELECTRIC SHOCK, MATCH WIDE
BLADE OF AC PLUG TO WIDE SLOT. FULLY INSERT.
doub
user
le
accessible
Page 4
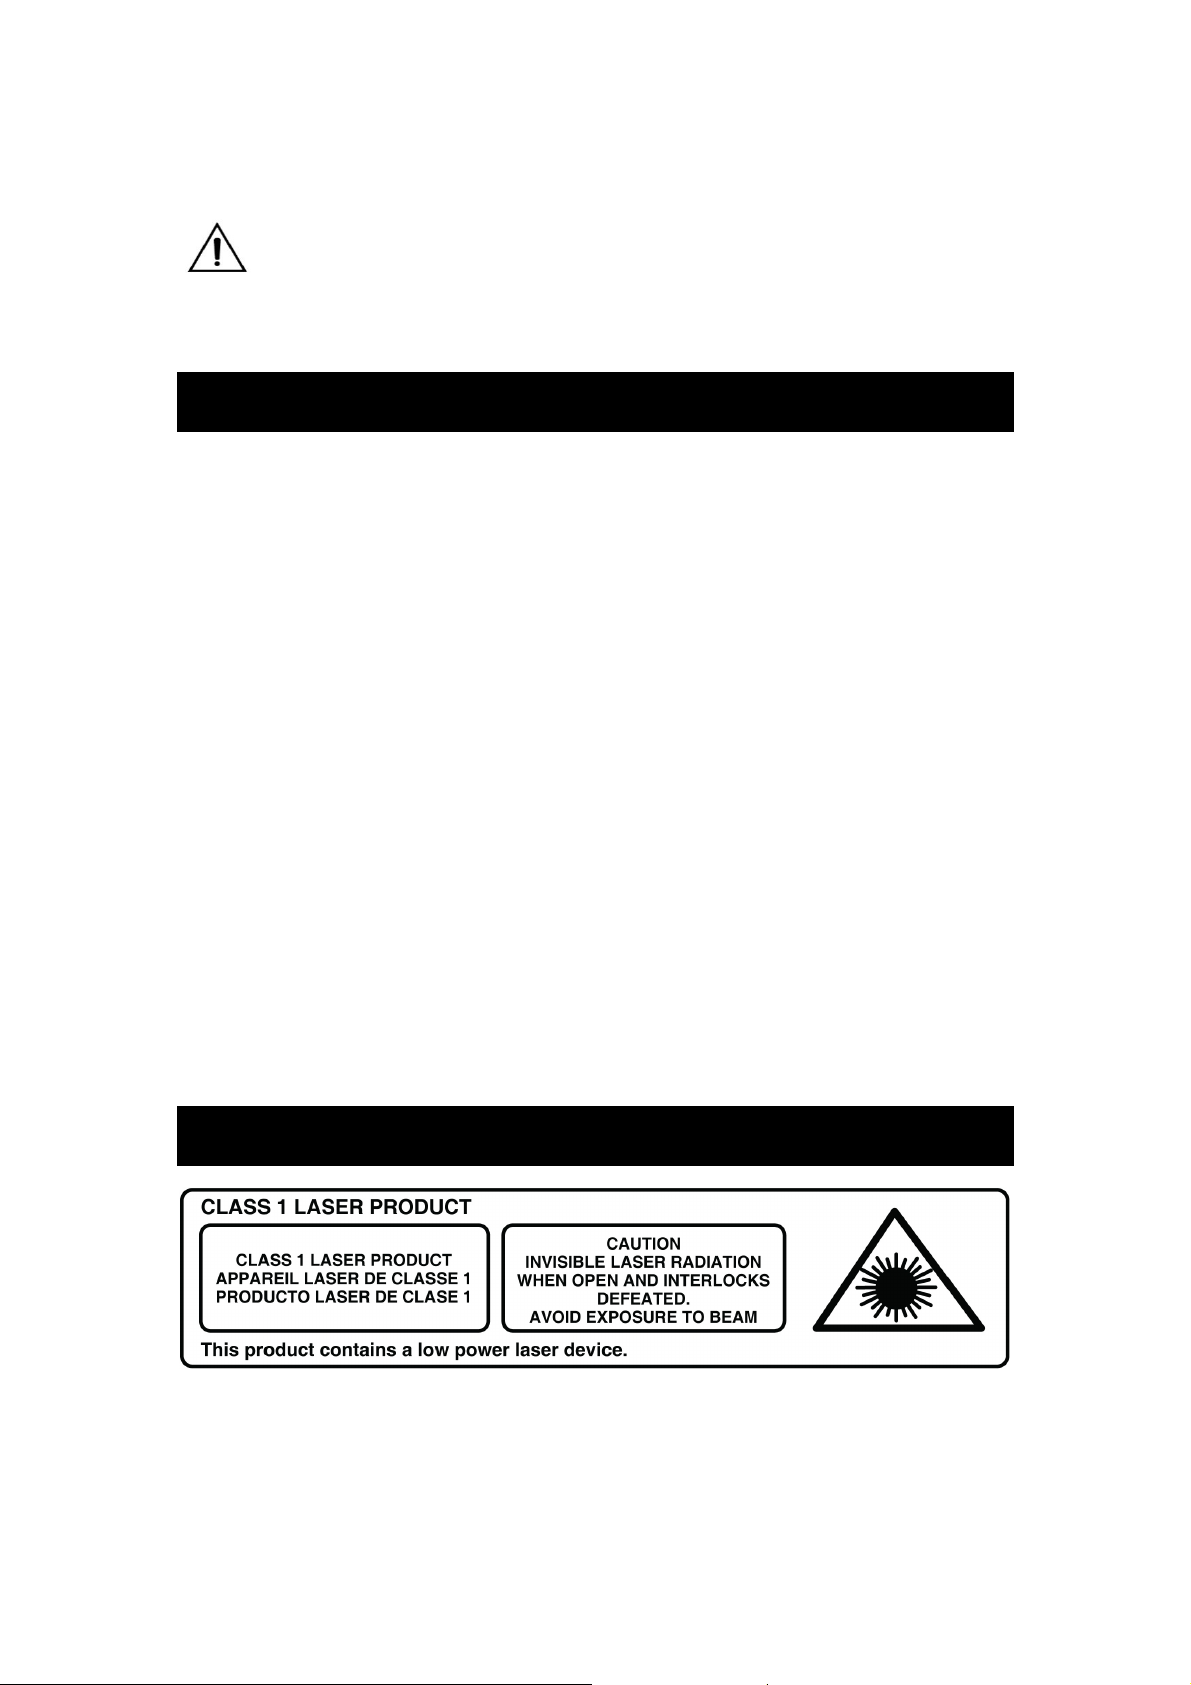
CALIFORNIA PROP 65 WARNING
WARNING: This product can expose you to chemicals including lead
which is known to the State of California to cause cancer. For more
information go to www.P65Warnings.ca.gov.
SAVE THESE INSTRUCTIONS
COMPLIANCE WITH FCC REGULATIONS
This device complies with Part 15 of the FCC Rules. Operation is subject to the
following two conditions:
(1) This device may not cause harmful interference, and
(2) This device must accept any interference received, including interference
that may cause undesired operation.
Changes or modifications not expressly approved by the party responsible for
compliance could void the user's authority to operate the equipment.
NOTICE: This equipment has been tested and found to comply with the limits
for a Class B Digital Device, pursuant to Part
limits are designed to provide reasonable protection against harmful
interference in a residential installation. This equipment generates, uses and can
radiate radio frequency energy
with the instructions, may cause harmful interference to radio
However, there is no guarantee that interference will not occur in a particular
installation. If this equipment does cause harmful interference to radio or
television reception, which can be determined by turning
on, the user is encouraged to try to correct the interference by one or more
of the
Reorient or relocate the receiving antenna.
Increase the separation between the equipment and receiver.
Connect the equipment into an outlet on a circuit different from that to which
Consult the dealer or an experienced radio/TV technician for help.
following measures:
the receiver is connected.
and, if not installed and used in accordance
15 of the FCC Rules. These
communications.
the equipment off and
CAUTION
Follow the advice below for safe operations.
ON PROTECTION AGAINST LASER ENERGY EXPOSURE
As the laser beam used in this compact disc player is harmful to the eyes, do
not attempt to disassemble the casing.
Stop operation immediately if any liquid or solid object should fall into the
Page 5

cabinet.
Do not touch the lens or poke at it. If you do, you may damage the lens and
the player may not operate properly.
Do not put anything in the safety slot. If you do, the laser diode will be ON
when the CD door is still open.
If the unit is not to be used for a long period of time, make sure that all power
sources are disconnected from the unit. Remove all batteries from the
battery compartment.
This unit employs a laser. The use of controls or adjustment or performance
of procedures other than those specified here may result in exposure to
hazardous radiation.
Should any trouble occur, remove the power source and refer servicing to
qualified personnel.
CAUTION
This unit should not be adjusted or repaired by anyone except qualified service
personnel.
:
IC WARNING
- English:
This device complies with Industry Canada’s license-exempt RSS. Operation
is subject to the following two conditions: (1) This device may not cause
interference, and (2) This device must accept any inference, including
inference that may cause undesired operation of the device.
- French:
Le présent appareil est conforme aux CNR d'Industrie Canada applicables aux
appareils radio exempts de licence. L'exploitation est autorisée aux deux
conditions suivantes:
(1) l'appareil ne doit pas produire de brouillage, et (2) l'utilisateur de l'appareil
doit accepter tout brouillage radioélectrique subi, même si le brouillage est
susceptible d'en compromettre le fonctionnement.
This device complies with Part 15 of the FCC Rules. Operation is subject
to the following two conditions: (1) this device may not cause harmful
interference, and (2) this device must accept any interference received,
including interference that may cause undesired operation.
FCC CAUTION
Changes or modifications not expressly approved by the part responsible
for compliance could void the user's authority to operate the equipment.
FCC STATEMENT
"This equipment has been tested and found to comply with the limits for a
Class B digital device, pursuant to part 15 of the FCC Rules. These limits
Page 6

are designed to provide reasonable protection against harmful interference
in a residential installation. This equipment generates, uses and can radiate
radio frequency energy and, if not installed and used in accordance with
the instructions, may cause harmful interference to radio communications.
However, there is no guarantee that interference will not occur in a
particular installation. If this equipment does cause harmful interference to
radio or television reception, which can be determined by turning the
equipment off and on, the user is encouraged to try to correct the
interference by one or more of the following measures:
—Reorient or relocate the receiving antenna.
—Increase the separation between the equipment and receiver.
—Connect the equipment into an outlet on a circuit different from that to
which the receiver is connected.
—Consult the dealer or an experienced radio/TV technician for help."
RSS-Gen & RSS-247 statement:
This device complies with Industry Canada licence-exempt RSS
standard(s).
Operation is subject to the following two conditions: (1) this device may
not cause interference, and (2) this device must accept any interference,
including interference that may cause undesired operation of the device.
Le présent appareil est conforme aux CNR d'Industrie Canada applicables
aux appareils radio exempts de licence. L'exploitation est autorisée aux
deux conditions suivantes : (1) l'appareil ne doit pas produire de brouillage,
et (2) l'utilisateur de l'appareil doit accepter tout brouillage radioélectrique
subi, même si le brouillage est susceptible d'en compromettre le
fonctionnement.
RSS-102 Statement:
This equipment complies with Industry Canada radiation exposure limits
set forth for an uncontrolled environment.
Cet équipement est conforme à l'exposition aux rayonnements Industry
Canada limites établies pour un environnement non contrôlé.
GETTING STARTED
SET UP
An AC/DC adaptor with an output of 12 DC 2.0A is included with the unit. This
adaptor is required for operating the unit.
Page 7
1. Firmly and securely insert the DC plug of the adaptor to the DC IN jack on
the back of the unit.
2. Plug the adaptor’s AC plugs into a power outlet rated at 120V AC~60Hz.
The POWER LED INDICATOR will light up in RED.
3. Press and hold the Power On/Off Button to turn on the unit. The POWER
LED INDICATOR will turn off.
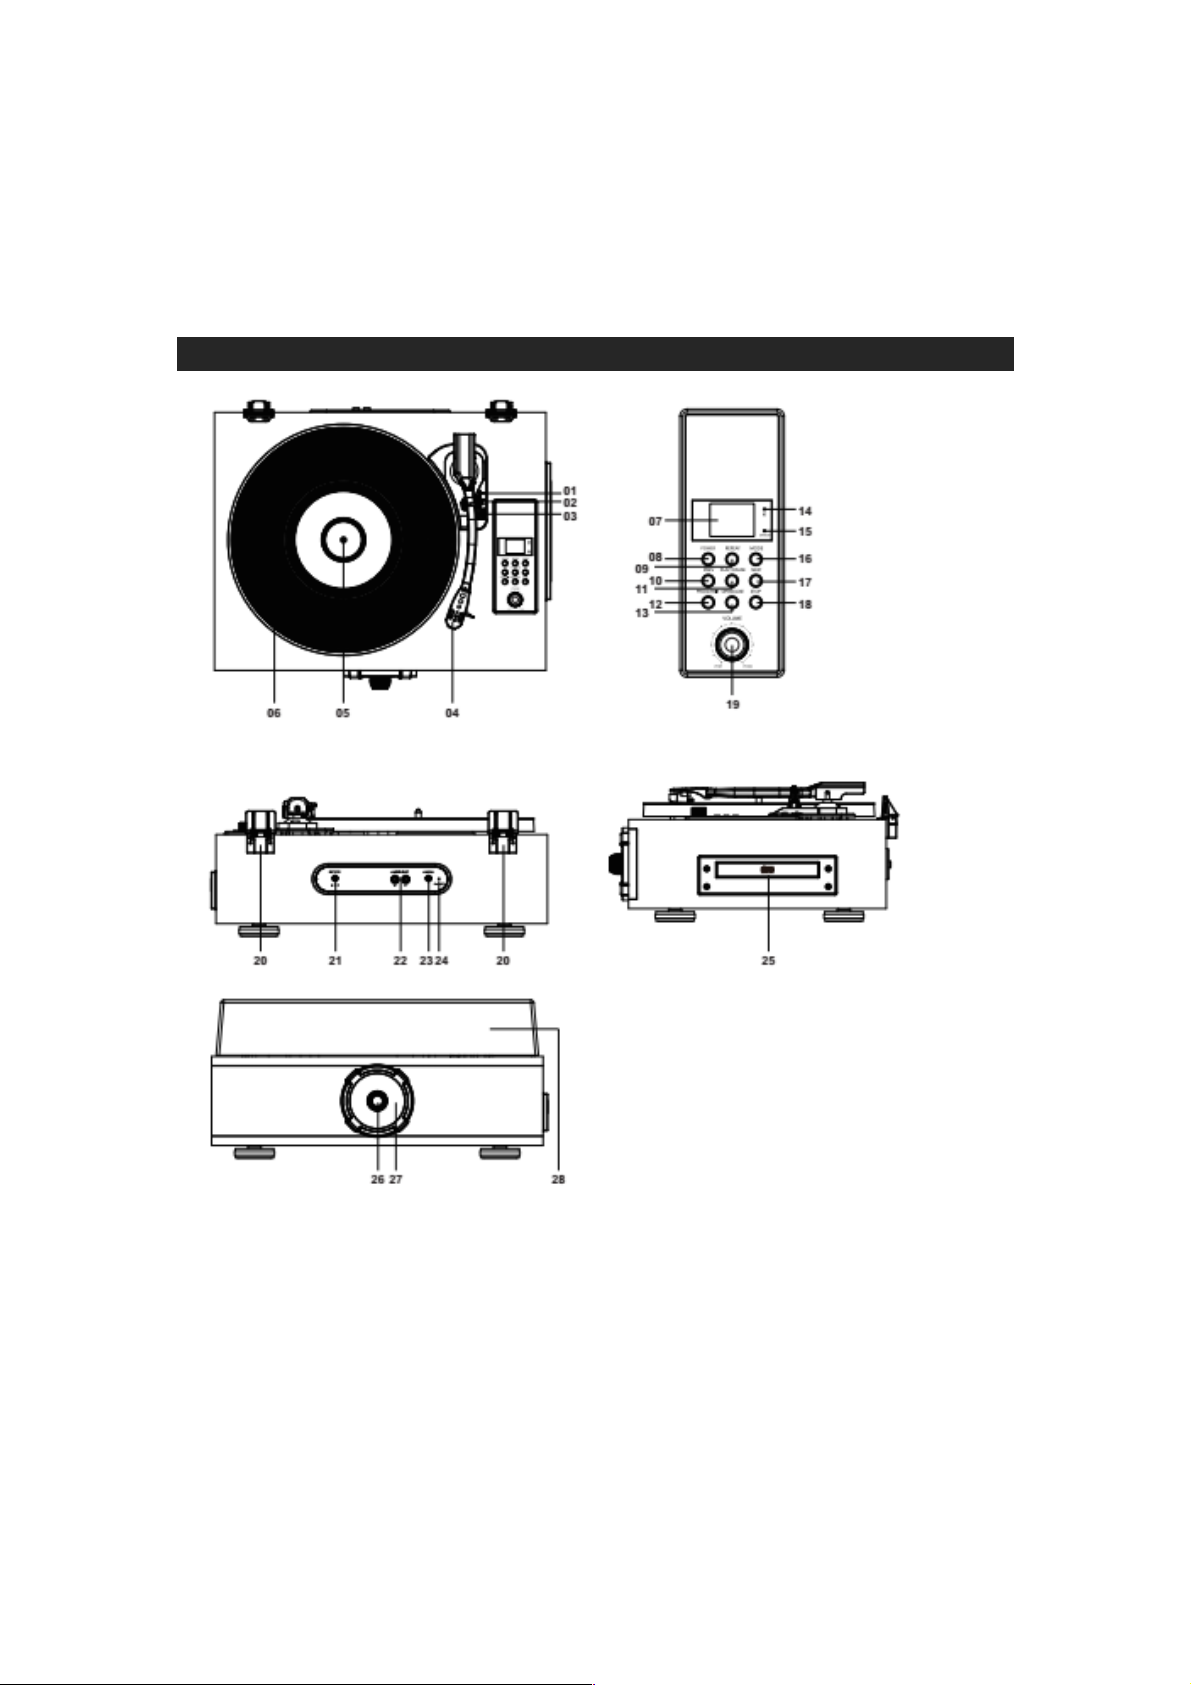
LOCATION OF CONTROLS
01. Lift Lever
02. Auto Stop On/Off Switch
03. Speed Selection Switch
04. Needle Cartridge
05. Turntable Shaft
06. Turntable Platter
07. LED Display
08. Power on/off Button
09. Repeat Button
10. Previous Button
11. Play/Pause Button
12. Prog/Pairing Button
13. Open/Close Button
14. Bluetooth Pairing Led Indicator
15. Power Led Indicator
16. Mode Button
17. Next Button
18. Stop Button
Page 8
19. Volume Control Knob
20. Dust Cover Hinge
21. DC power adaptor Jack
22. RCA Jack
23. 3.5mm Aux-in Jack
24. FM Pigtail Antenna
25. CD Door
26. Dial Knob
27. Dial Scale
28. Dust Cover
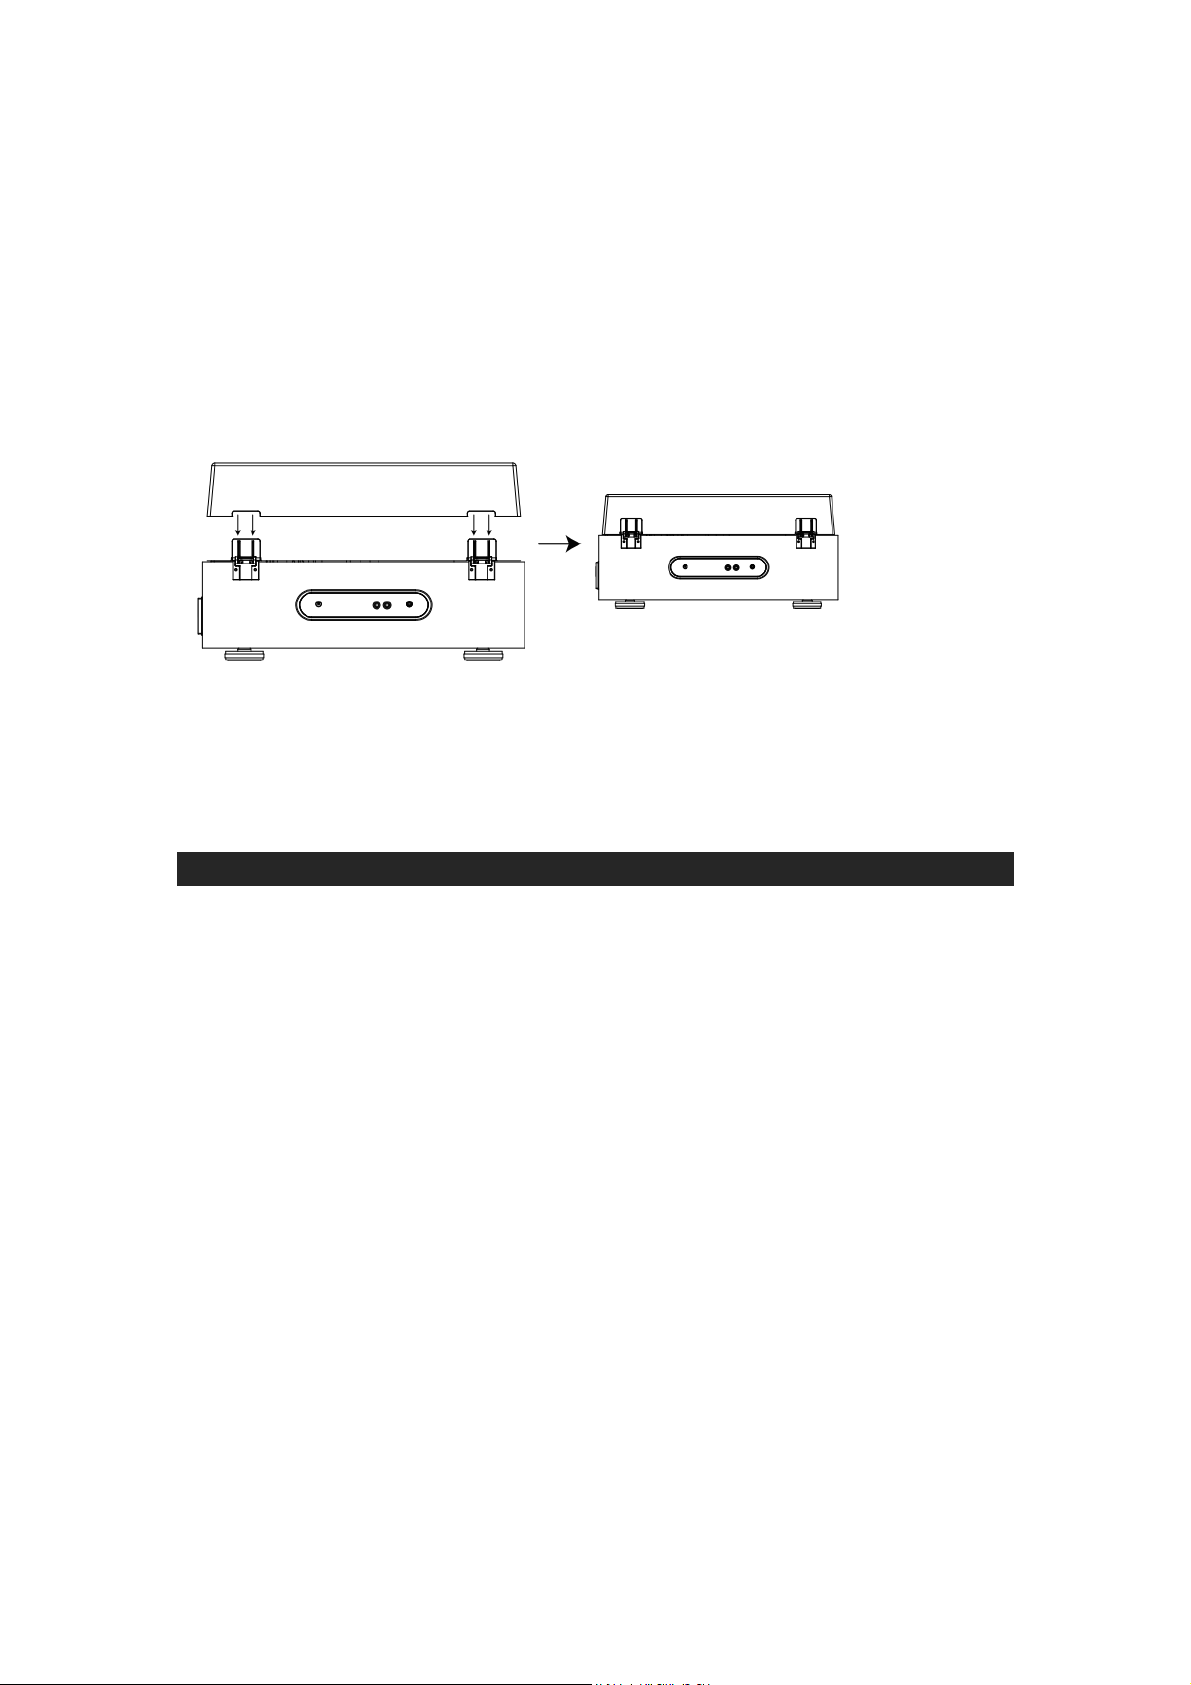
ASSEMBLY OF THE DUST COVER
1. Remove protective plastic film from the DUST COVER.
2. Align the DUST COVER (#28) to the DUST COVER HINGE (#20), on the
back of the unit. Then, push down the dust cover gently to clip into the
hinges.
TURNTABLE OPERATION
BASIC OPERATION
Before use, be sure to remove the white stylus guard off of the needle. Always
make sure that the tone arm is unlocked and free to move across the record
while operating. Lock the tone arm in place again when it is not in use.
1. Press the MODE BUTTON to PHONO mode, the LED DISPLAY will
indicate “PH”.
2. Place a record on the TURNTABLE PLATTER and select the desired
speed (33/45/78) by sliding the SPEED SELECTION SWITCH according to
the record.
NOTE: When playing a 45 RPM record, use the included 45 RPM
ADAPTOR located in the holder near the tone arm.
3. Open the TONE ARM CLIP to release the TONE ARM. Push the LIFT
LEVER backward to raise the TONE ARM and gently move the TONE ARM
to the desired position over the record. The turntable will begin to spin
when the arm is moved toward the record. Push the LIFT LEVER forward
to lower the TONE ARM slowly onto the desired position on the record to
begin playing the record.
NOTE: The record will begin to spin only when the tone arm is moved over
the record if the Auto Stop is turned on.
If the AUTO AND MANUAL STOP SELECTION SWITCH is turned ON, the
record will stop automatically when finished. If this switch is at OFF position,
record will continue to spin.
4. To select the volume level, turn the VOLUME CONTROL KNOB to adjust
the volume.
Page 9
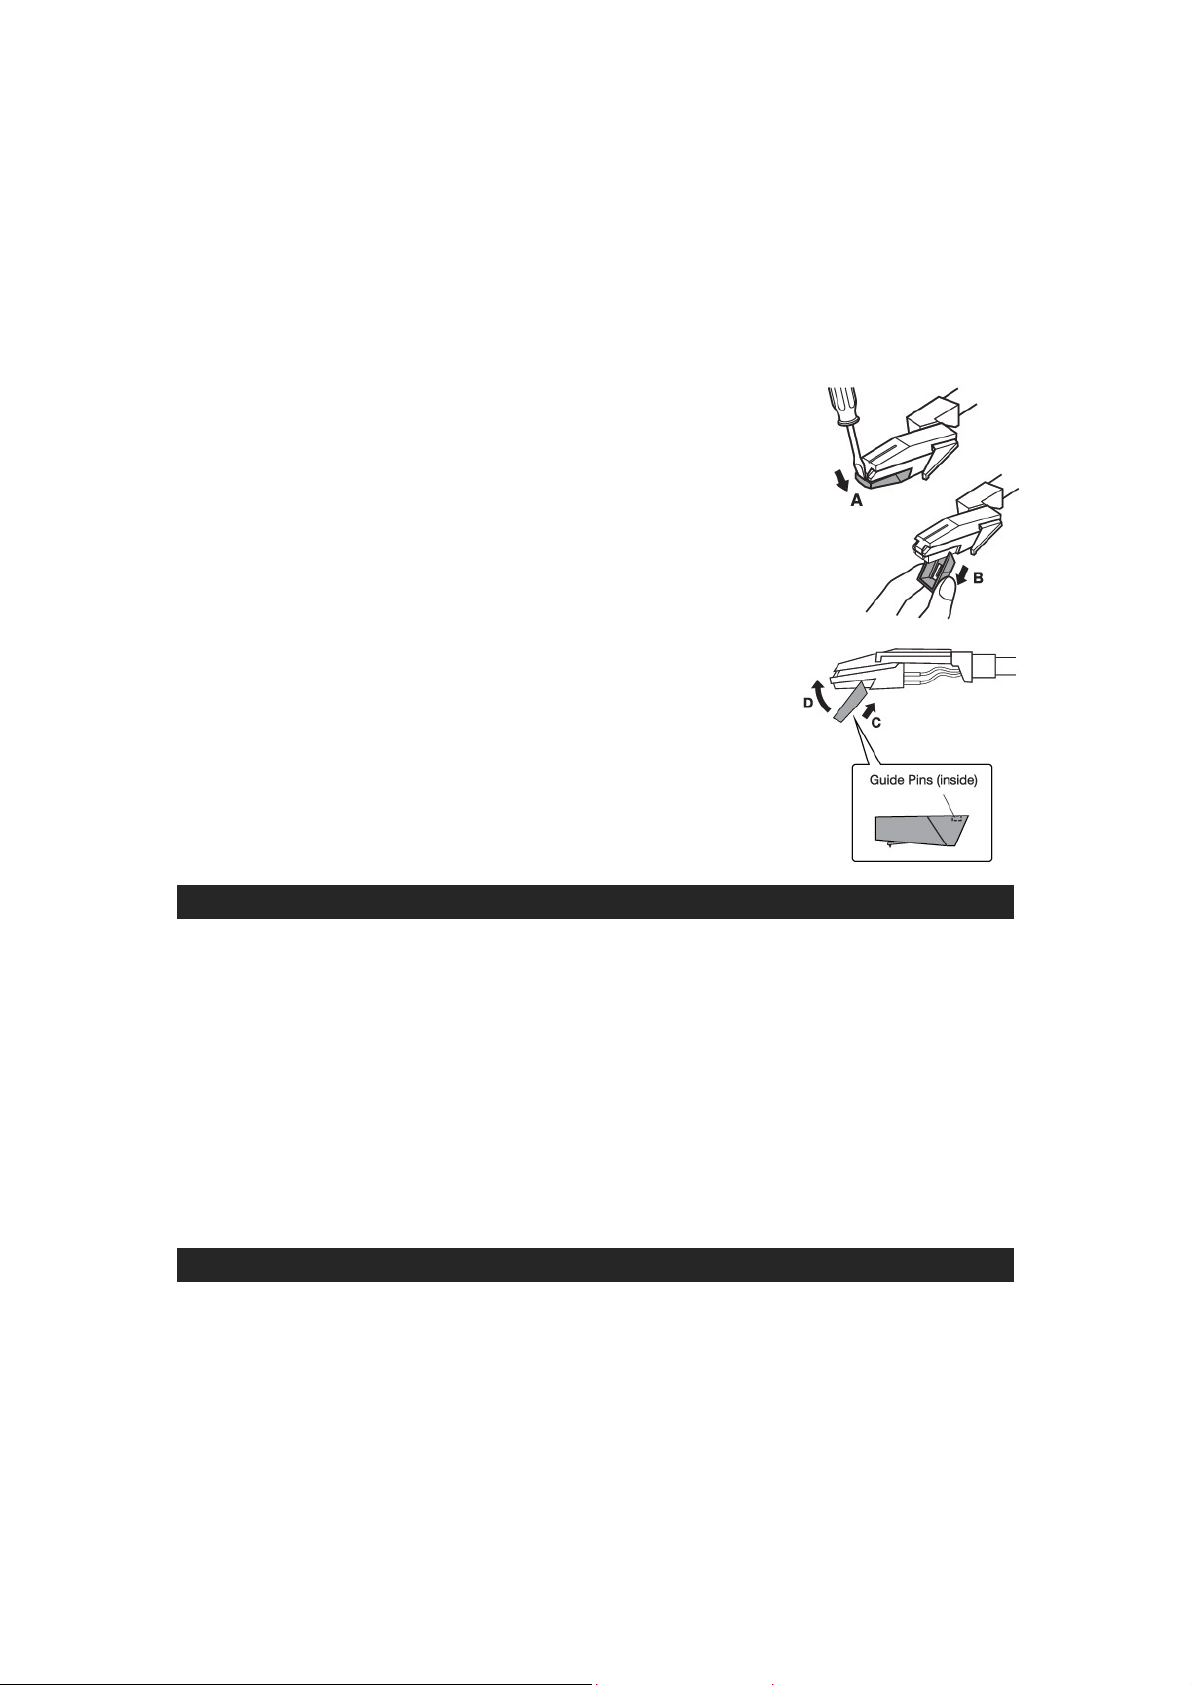
How to Replace the Turntable Stylus (Replacement Needle # ITNP-Y2)
The stylus should last about 50 hours under normal use. However, it is
recommenced that the stylus be replaced as soon as you notice a change in
sound quality. Prolonged use of a worn-out stylus may damage the record. The
highest speed of 78 RPM records would wear out the stylus more quickly.
Removing the Stylus from the Cartridge
1. Set a screwdriver at the tip of the stylus and push
down to the direction “A”.
WARNING: When applying force to stylus,
too much may damage or break the stylus.
2. Pull the stylus out toward the direction “B”.
Installing the Stylus
1. Hold the tip of the stylus and insert the other
edge by pressing toward direction “C”.
2. Push the stylus up toward direction “D” until
it locks at the tip.
Caution:
• Do not remove or bend the stylus needle.
•
Do not touch the needle to avoid injury to your hand.
•
Turn off the unit’s power before you replace the stylus.
•
Keep out of reach of children.
RADIO OPERATION
1. Press the MODE BUTTON to RADIO mode, the LED DISPLAY will indicate
“rA”. The DIAL SCALE backlight will light up.
2. Turn the RADIO DIAL KNOB to tune to the station you want to listen to.
3. Rotate the VOLUME CONTROL KNOB to the desired volume level.
4. To turn off the Radio press the POWER BUTTON to turn off the unit or
press the MODE BUTTON to switch to a different mode.
Tips for Best Reception:
The receiver has a build-in FM PIGTAIL ANTENNA hanging on the back of the
unit. This wire should be unraveled and extended for best reception.
BLUETOOTH OPERATION
1. Press the MODE BUTTON to Bluetooth mode, the LED DISPLAY will
indicate “bt”. The BLUETOOTH LED INDICATOR will flash in blue color.
2. Turn on your external Bluetooth device to pair with the unit. Go to your
device’s Bluetooth Menu and select Bluetooth pairing name “VTA-60” to
connect the unit. Once connected, the blue Led light will stop flashing.
3. Select desired songs on your Bluetooth device.
4. To select the volume level, either turn the VOLUME CONTROL KNOB to
adjust the volume or adjust from your Bluetooth device.
Page 10

5. If you want to disconnect the Bluetooth connection, you can press and hold
the PROG/PAIR BUTTON for 3 seconds.
NOTE: Playback functions such as Prev, Next and Play/Pause on the main
unit can be used in Bluetooth mode.
CD OPERATION
NOTE: THIS UNIT NOT ONLY PLAYS COMMERCIAL COMPACT DISCS BUT
ALSO SELF-COMPILED CD-RW DISCS.
PLEASE READ THIS IMPORTANT INFORMATION:
CD mechanisms used in devices like this are designed to fully read all
commercial CDs. They will also read self-compiled CD-R/CD-RW discs but it
may take up to 10 seconds for playback to start. If playback does not start, it is
likely due to the quality of the CD-R/RW disc and/or the compatibility of the CD
compilation software. Manufacturer is not responsible for the playback quality
of CD-R/RW discs.
Do not attach a label or seal to either side of the CD-R/RW disc. It may cause a
malfunction.
PLAYING A CD
1. Press the MODE BUTTON to CD mode, the LED DISPLAY will
indicate “CD”.
2. Press CD DOOR OPEN/CLOSE BUTTON to open the disc tray.
3. Carefully place an audio CD with its label side upward on the tray.
4. Press CD DOOR OPEN/CLOSE BUTTON to close the tray, the LED
DISPLAY will indicate the number of tracks on the disc. If there is no disc
inserted, it will indicate “no”.
5. Press PLAY/PAUSE to start playing the first track.
6. To pause playback, press the PLAY/PAUSE BUTTON. To resume playing
press PLAY/PAUSE BUTTON again.
7. You can choose to play your favorite track directly by pressing either the
PREV BUTTON or NEXT BUTTON. The LED DISPLAY will indicate the
current track number selected.
8. To locate a particular section within a track, press and hold the PREV
BUTTON or NEXT BUTTON until the section is found. Release the button
to continue playing your selection.
9. To stop playing, press the STOP BUTTON.
REPEAT MODE
REPEAT 1
When the REPEAT BUTTON is pressed once, the REPEAT LED INDICATOR
on the LED DISPLAY will flash in RED. The current selected track will be played
on repeat.
REPEAT ALL
When the REPEAT BUTTON is pressed twice, the REPEAT LED INDICATOR
on the LED DISPLAY will light up in RED. The whole disc will be played on
Page 11

repeat.
CD PROGRAM PLAY MODE
This function allows the CD tracks to be played in a programmed sequence.
NOTE: Program can only be set in STOP mode.
1. Load the CD Disc you wish to program.
2. Make sure the unit is in STOP mode by pressing the STOP BUTTON.
3. Press the PROGRAM/PAIR BUTTON once, the LED DISPLAY will flash "00"
on the LED DISPLAY.
4. Press PREV BUTTON or NEXT BUTTON until the desired track number is
reached.
5. Press the PROGRAM/PAIR BUTTON again to store the selection.
6. Repeat the (4) to (5) steps until you have entered all the tracks you want to
program.
7. To play the stored sequence, press the PLAY/PAUSE BUTTON.
8. After all the stored tracks have been played the CD will automatically stop.
NOTES:
• When 20 tracks of CD music have been programmed, the memory is full and
“FUL” will be indicated on the LED DISPLAY.
• If you want to cancel the program memory, you need to disconnect the
power adaptor from the unit.
• The Repeat function also applies to programmed playback.
To repeat programmed tracks:
1. During program play, press REPEAT BUTTON once will repeat the
specifically programmed tracks.
2. Press the REPEAT BUTTON again to repeat all the programmed tracks.
AUXILIARY INPUT
Use the AUX-IN JACK to connect external audio devices like MP3 players, CD
players and the older, non-dockable iPod (except iPod shuffle 3rd generation)
to listen through the speakers of this system.
1. Use a 3.5mm Aux-in cable (not included) to plug one end into the AUX-IN
JACK at the rear of the unit and the other end of the cable into the Line-out
Jack or Headphone Jack of your external audio device.
2. Turn on the VTA-60 and your external audio device.
3. Press the MODE BUTTON to Aux-in mode, the LED DISPLAY will
indicate “AU”.
4. The volume level can be controlled through the main unit.
Operate all other functions on the external device as usual.
RCA OUTPUT
For amplifier device with RCA auxiliary input sockets, insert the white and red
plugs on the RCA cable (not included) into the unit. Insert the opposite end into
the amplifier device. Be sure to connect the white plug to the white jack and the
red plug to the red jack.
Page 12

SPECIFICATIONS
Power Supply: AC adaptor: 100-240V, 50-60Hz DC-12V/2.0A
Speaker Impedance: 3” 8ohm 3W
Freq. Range: 88-108 MHz
Max Power Consumption: 30W
Size: 17” (431mm) W x 13.25” (336mm) D x 8” (203mm)
Weight: 11.5 lbs (5.2kg)
Included: Turntable, Instruction Manual, Turntable
Operation Sheet, 12V/2.0A Switching
Power Supply, 45 RPM Adaptor, Felt Mat
Design and specification are subject to change without notice
Bluetooth is a registered trademark of Bluetooth SIG, Inc.
Other trademarks and trade names are those of their respective owners
Made in China.
WARRANTY
Victrola is a registered trademark of Innovative Technology Electronics LLC.
Innovative Technology Electronics LLC.
Limited Warranty: 90 Days Labor, One Year Parts
Innovative Technology Electronics LLC. (IT) warrants the product to be free from
“Defects” in materials under normal use for a period of “One Year” from the date of the
original purchase. The Warranty is “Not” transferable. IT agrees, within the initial “90
Day” period, to repair or replace the product if it is determined to be defective at “No
Charge”. It is further agreed that IT will cover the cost to repair or replace damaged
“Parts” only for a total period of “One Year” from the date of the original purchase. The
warranty does not cover cosmetic damage, antennas, AC cords, cabinets, headbands,
ear-pads, or damage due to line power surges, connection to improper voltage supply
or settings, misuse, mishandling, accident, acts of God or attempted repair by an
unauthorized service agent.
To obtain service, the purchaser MUST present an original sales receipt / proof
of purchase. Please contact us at www.victrola.com to request an RMA (Return
Material Authorization) number to return products for service or replacement.
Returns without an RMA number on the package will be refused and returned to
sender. Upon receipt of the returning item and our full inspection (IT) may issue a
replacement to customer for the same item or of one that has equivalent value and
features. To return an item, supply full name, return address, phone number, item
purchased, receipt of purchase and reason for return to obtain RMA number. All
returns must be in the original packaging or reasonable substitute to prevent damage.
Page 13

Customer “Must” include full name, shipping address and telephone number inside of
package. No return will be shipped back to a PO Box or APO address. Please include
your check or money order in the amount of
• USD $5.00 for items $10.00 to $39.99 (Price Paid Per Unit)
• USD $10.00 for items $40.00 to $99.99 (Price Paid Per Unit)
• USD $16.00 for items $100.00 and up (Price Paid Per Unit)
• Shipping fees are non-refundable
to be payable to Innovative Technology Electronics LLC. (for handling and return
shipping charges) (IT) will not be responsible for delays or unprocessed claims
resulting from a purchaser’s failure to provide any / all of the necessary information.
Send all inquiries or RMA request via our website
www.victrola.com/pages/technical-support.
Innovative Technology Electronics LLC.
1 Channel Drive
Port Washington, NY 11050
Toll free: 1-877-483-2497
Website for support: www.victrola.com/pages/technical-support
There are no express warranties except as listed above.
REPAIR OR REPLACEMENT AS PROVIDED UNDER THIS WARRANTY IS THE
EXCLUSIVE REMEDY OF THE CUSTOMER, (IT) SHALL NOT BE LIABLE FOR ANY
INCIDENTAL OR CONSEQUENTIAL DAMAGES FOR BREACH OF ANY EXPRESS
OR IMPLIED WARRANTY ON THIS PRODUCT EXCEPT TO THE EXTENT
PROHIBITED BY APPLICABLE LAW. ANY IMPLIED WARRANTY OF
MERCHANTABILITY OR FITNESS FOR A PARTICULAR PURPOSE ON THIS
PRODUCT IS LIMITED IN DURATION TO THE DURATION OF THIS WARRANTY.
Some states do not allow the exclusion or limitation of incidental or consequential
damages, or limitations on how long an implied warranty lasts, so the above exclusions
or limitations may not apply to you. This warranty gives you specific legal rights and
you may also have other rights, which vary from state to state.
 Loading...