

Page 1
Page 2

FCC WARNING: Changes or modifications to this unit not expressly approved by
the party responsible for compliance will void the user’s authority to operate the
equipment.
NOTE: This equipment has been tested and found to comply with the limits for
Class B digital device, pursuant to Part 15 of the FCC Rules. These limits are
designed to provide reasonable protection against harmful interference in a
residential installation. This equipment generates, uses and can radiate radio
frequency energy and, if not installed and used in accordance with the instructions,
may cause harmful interference to radio or television reception. If this equipment
does cause harmful interference, which can be determined by turning the
equipment off and on, the user is encouraged to try to correct the interference by
one or more of the following measures:
- Reorient or relocate the receiving antenna.
- Move the transmitter to a different physical location.
- Increase the separation between the equipment and receiver.
- Connect the equipment into an outlet on a circuit different from that to which the
receiver is connected.
- Consult the dealer or an experienced radio/TV technician for help.
- If you cannot eliminate the interference, the FCC requires that you stop using
your headphones.
1
Page 3
1.Product Introduction
DPFMate is specifically designed PC software for small screened digital photo
frames. Download pictures from your PC into a variety of digital photo frames.
Features:
Language (English)
Picture preview
Zoom In/Out, Crop, Rotate
Single, Sequence, Delete
Read and save pictures
Function Keys/Buttons
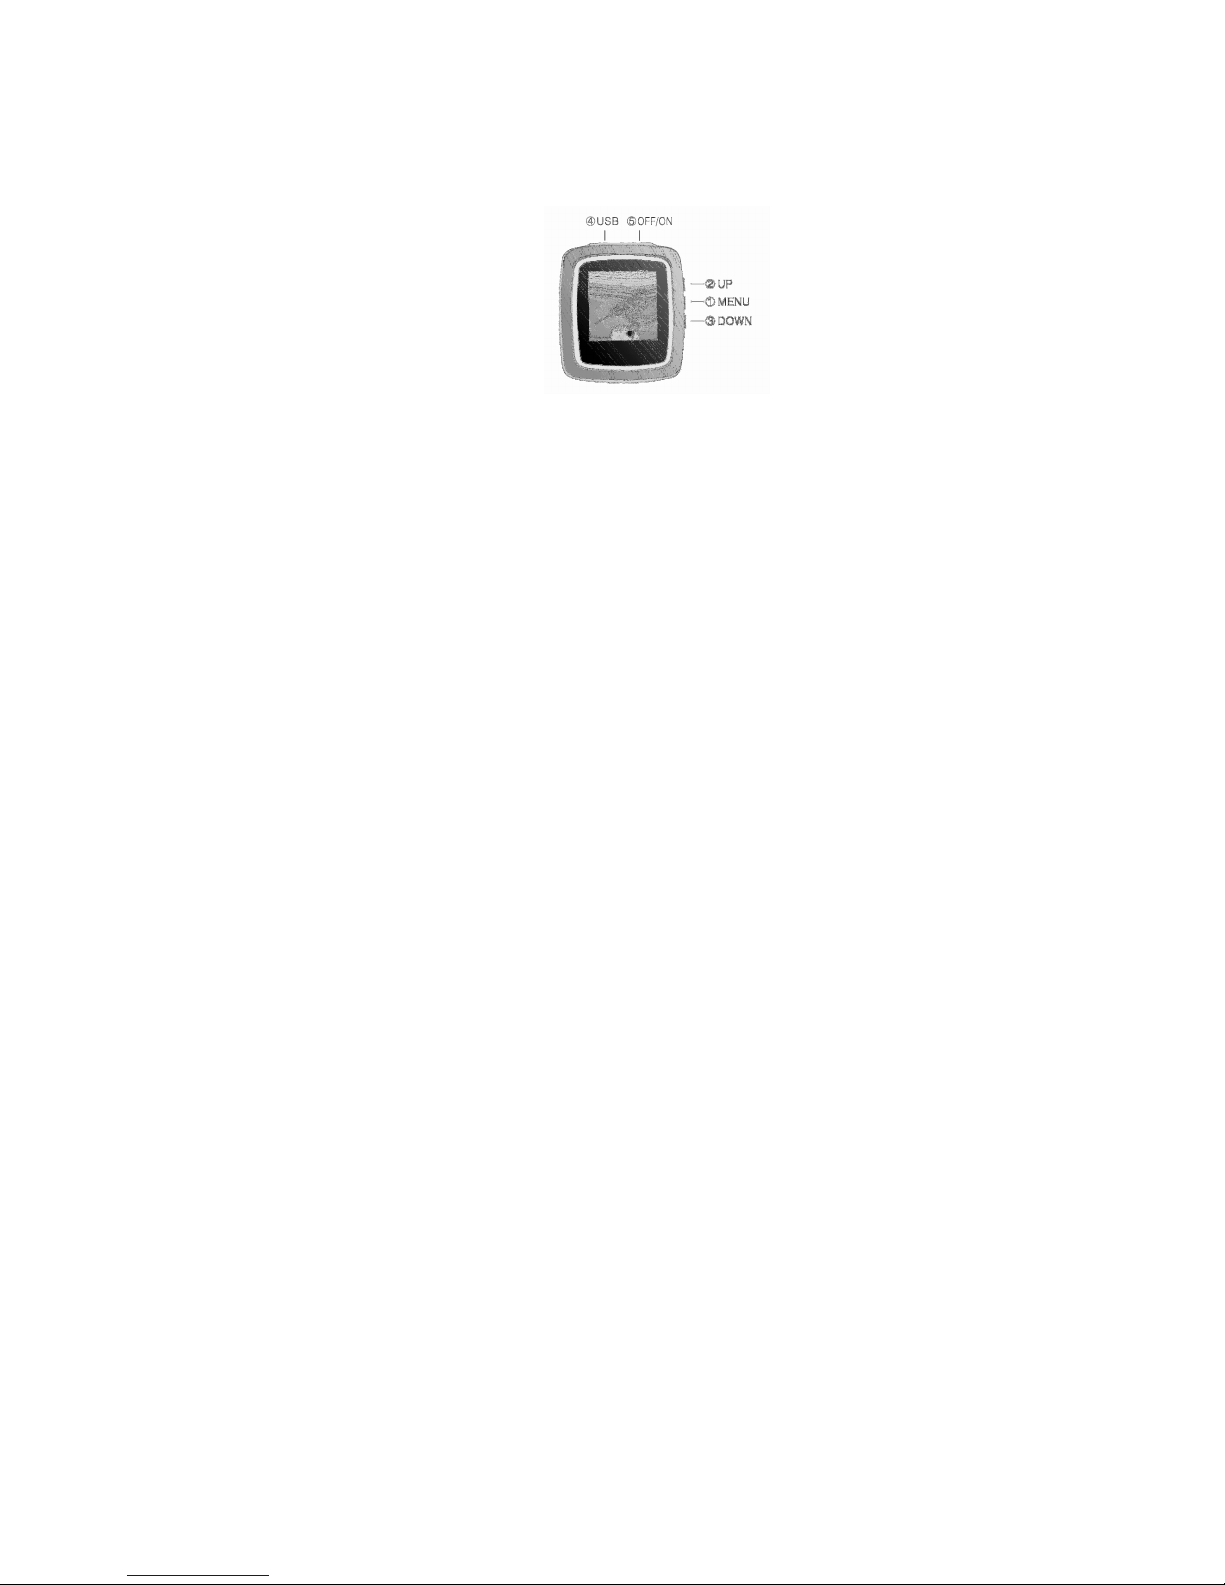
1. MENU/ENTER: Press and hold to turn on/off the device; Press to enter MENU
mode; press to confirm selection.
2. UP: go to next
3. DOWN: go to front
4. USB: to connect the device to PC by USB cable.
2
Page 4

5OFF/ON: to turn off/on the device power. If OFF, to press MENU can not turn
on the device.
Functional Specification
LCD 1.5” CSTN
Resolution 128x128 dots, 65K colors
Internal Memory 8MB Flash
Memory Capacity >50pcs photos
Display Modes Single/Slide mode
Operation Modes Calendar and Clock display
File formats JPG, BMP, GIF
Power supply Rechargeable Li-ION batteries, 150mAh,
Charging hour <3 hours
Charging current 75-85mA
Life time 4 hours
Connectivity USB 1.0
OS Windows 2000/XP/Vista
Product features Support auto-run, (No CD required)
2. Interface Guide
Picture 1
USB Charge
3
Page 5

3. Transfering pictures to the digital keychain photo frame.
3.1 Connecting Terminal
Connect the keychain photo frame to the computer using the included USB cord.
Once connected, the DPFMate will automatically start up. If connected correctly,
the DPFMate will automatically load all the pictures that are saved in the keychain
photo frame. They will be displayed in the “Pictures in DPF” section. If there are
no pictures saved in the keychain photo frame, the DPFMate will show a dialog
box that says there are no pictures in the DPF.
Picture 2
‘Picture 1’ shows the "Crop Frame", the specific range of the selected picture that
will be imported into the DPF Pictures Zone. Use the cursor to move the “Crop
Frame” to select the area of that you would to have displayed. You can also zoom
or rotate images with the “Preview Images Zone” with the buttons to the right of
the picture displayed. Once you have the area you wish to be displayed selected,
click the "Add" button on the right to add into the “DPF Image Zone”, these
pictures can be loaded in to the keychain photo frame.
Once finished with the picture selections, click on the "Download" button to have
the “DPF Image Zone” and DPF synchronize, this downloads the pictures from the
right side in to the keychain photo frame.
4
Page 6

Specific steps as shown in ‘Picture 3’:
Picture 3
CAUTION: While donwloading pictures, if the USB cable is disconnected all
pictures selected will be lost. Please be sure not to disconnect the keychain
photo frame from the computer while downloading pictures.
4. Other Functions
4.1 ZOOM Preview Image
1. Click on the + button to the right of the displayed picture to zoom in.
2. Click on the – button to the right of the displayed picture to zoom out.
4.2 ROTATE Preview Image
Press the “Rotate L” button to the right of the displayed picture to rotate the
picture counterclockwise 90 degrees.
Press the “Rotate R” button to the right of the displayed picture to rotate the
picture clockwise 90 degrees
5
Page 7

4.3 Crop Preview Picture or Auto Resize Picture
There are pictures that DPF Mate can be used with the “Crop Frame” to crop. The
“Clear” button erases the selected rectangle on the displayed picture, as shown
Picture 4 below.
Click on “Clear” button, to change the displayed picture size. This will
automatically change the picture to be as big as the keychain photo frame’s LCD
size. After using the “Clear” function, the “Clear” button to the right of the
displayed picture will turn to “Rect”, for the “Crop Frame” function. As shown in
Picture 5.
Picture 5
Click on the “Rect” button to get the “Crop Frame” back on the displayed
Picture 4
6
Page 8

picture (See Picture 4).
Users can click on “Add” button so that the cropped or resized picture that is
displayed will be added into “DPF Pictures Zone” on the right hand side of the
screen can be saved in to the keychain digital photo frame.
4.4 Deleting Pictures from the DPF Picture Zone (edited or cropped pictures)
Select one picture or several pictures then click on the “Delete” button to delete.
Click the “All” button to select all pictures to delete from the “DPF Picture Zone”.
Note :
After deleting pictures and exiting the DPFMate, click on the
“Dow nloa d” button to update the DPFMate data into the keychain
digital photo frame.
“Save” button: Saves the selected picture from the “DPF Picture Zone” into the
PC.
“Save All” button: Saves all pictures from the “DPF Picture Zone” into the PC.
Right click on a blank area of the DPFMate menu, a pop up menu will show the
DPFMate menu language to change, as shown Picture 6, choose from English or
Chinese.
Picture 6
7
Page 9
4.5 Changing the Menu Color
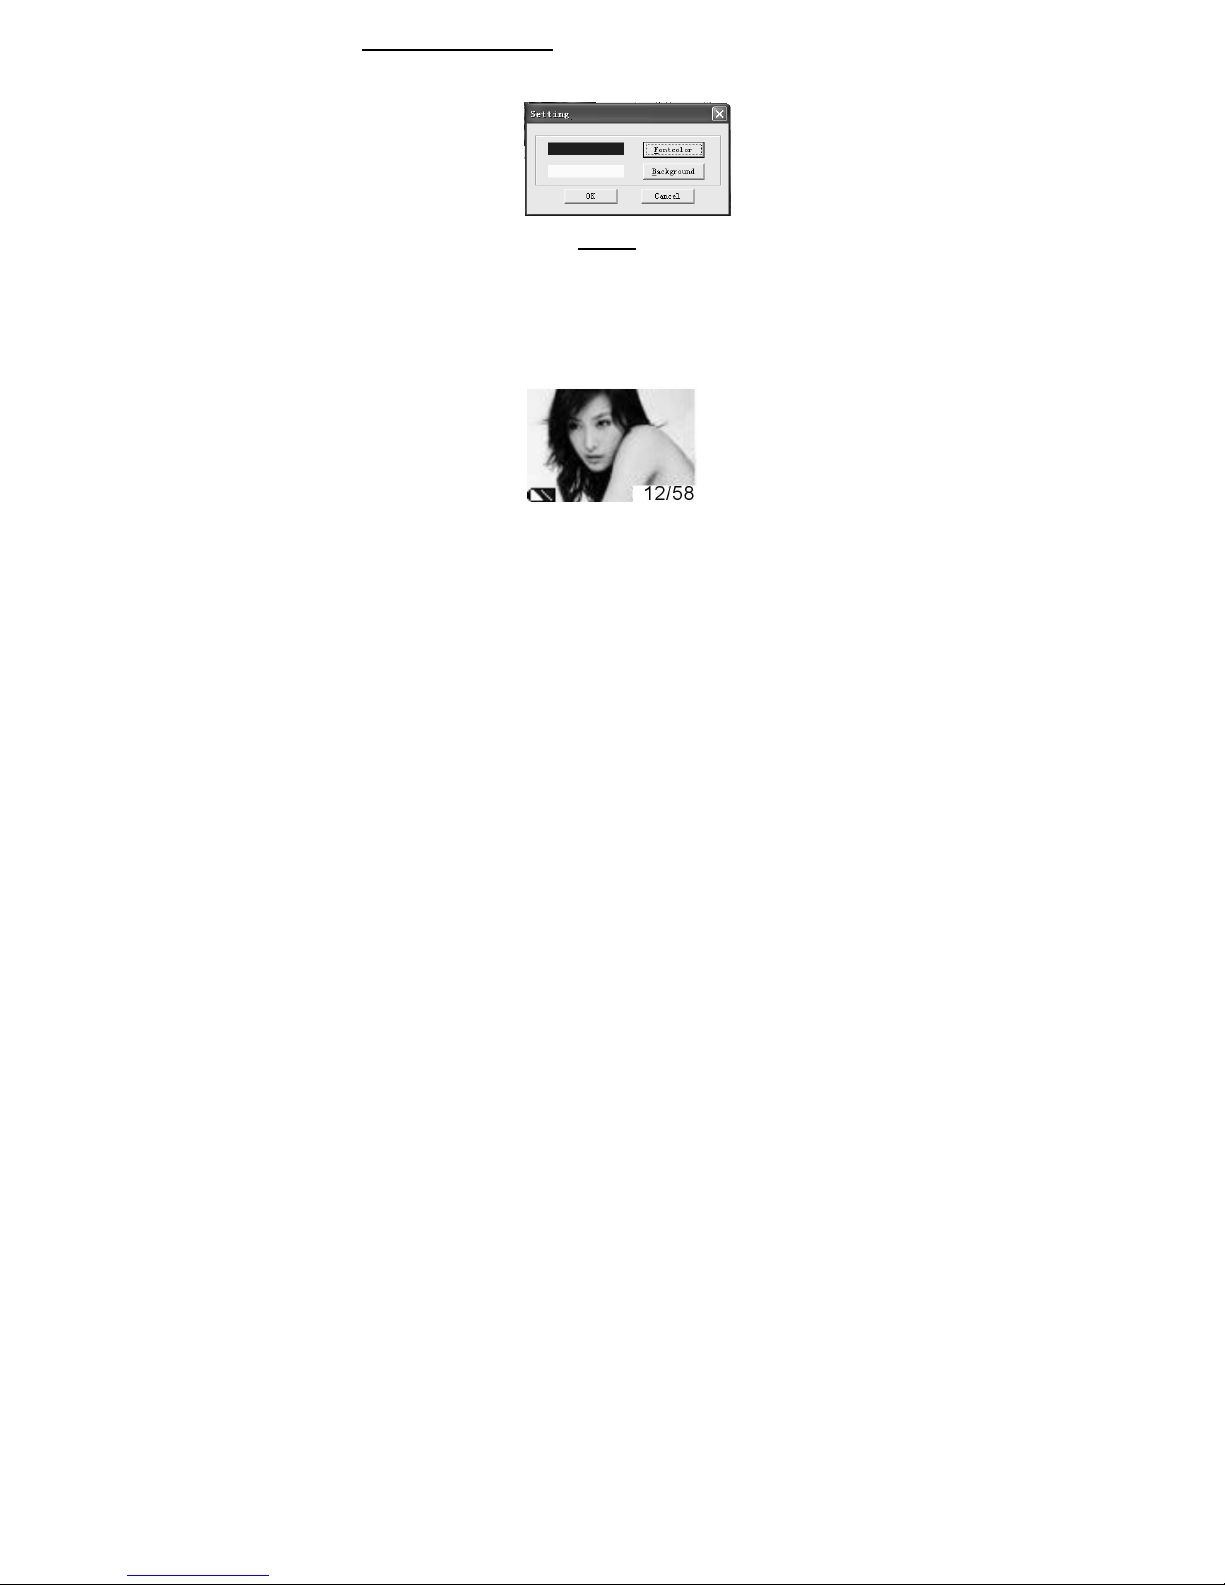
The DFFMate “Setting” dialog box let’s you set the DPF front color and
background color, as shown in Picture 7. After changing the settings, you can see
the results in the DPF menu interface.
Keychain Digital Photo Frame Function Introduction
There are three buttons on the side of the keychain digital photo frame. UP,
DOWN and MENU. UP is the first button, DOWN is the second button and
MENU is the last button which is also the power button.
I. Press the UP key to preview the previous picture.
Press the DOWN key to preview next picture.
Press the MENU key to enter the main menu, or to turn on and off.
Press the MENU key to enter the menu with the main functions as shown below.
Picture 7
8
Page 10

Main Menu
USB Connect
Slide Show
AUTO Off
LCD Contrast
Backlight
Display Clock
Set Clock
Delete One
Delete All
The “USB Connect” function charges and downloads pictures from the PC.
II. Setting the display time and selecting the “Slide Show” function.
Press the MENU key to get into the submenu.
Exit
Main Menu
USB Connect
Slide Show
AUTO Off
LCD Contrast
Backlight
Display Clock
Set Clock
Delete One
Delete All
Exit
9
Page 11

Exit
Slide Show
03
Sec
Press the UP key or DOWN key to set the time. To finish this action, press the
MENU key to confirm and exit.
When the time value is zero minutes, the slide show function will be off. Pictures
will have to be switched manually with the UP and Down buttons.
III. Setting the auto power off function and “AUTO Off”
Press the MENU key to get into the submenu.
Press the UP key or DOWN key to set “Power Off” time. To finish this action,
Main Menu
USB Connect
Slide Show
AUTO Off
LCD Contrast
Backlight
Display Clock
Set Clock
Delete One
Delete All
AUTO Off
08 Min
10
Page 12

02
press the MENU key to confirm and exit.
When the time value is zero minutes, the unit must be turned off manually by
keeping the MENU button down for a few seconds.
IV. Setting the screen contrast,LCD Contrast”.
Main Menu
USB Connect
Slide Show
AUTO Off
LCD Contrast
Backlight
Display Clock
Set Clock
Delete One
Delete All
Press the MENU key to get into the submenu.
Press the UP key or DOWN key to set the contrast value. To complete this action,
press the MENU key to confirm and exit.
V. Setting the screen light,Backlight”.
Exit
LCD Contrast
11
Page 13

Exit
Exit
Main Menu
USB Connect
Slide Show
AUTO Off
LCD Contrast
Backlight
Display Clock
Set Clock
Delete One
Delete All
Press the MENU key to get into the submenu.
Press the UP key or DOWN key to set the backlight value. To complete this action,
press the MENU key to confirm and exit.
VI. Clock Display, select “Display Clock”.
Backlight
18
Main Menu
USB Connect
Slide Show
AUTO Off
LCD Contrast
Backlight
Display Clock
Set Clock
Delete One
Delete All
12
Page 14

VII. Set Clock
Once the USB is connected, the keychain digital photo frame can update
using the PC time when download pictures.
Set Clock, select
Press the MENU key to get into the submenu.
Press the UP key or DOWN key to set a clock value. To complete this action,
press the MENU key to confirm and set.
VIII. Deleting one picture. First, view the picture to be deleted, press the MENU
key to enter the main menu. Select the sixth item “Delete One” then press the
ENTER key to confirm this action.
Note: When the keychain digital photo frame is in auto display mode, the “Delete
Set Clock”.
Main Menu
USB Connect
Slide Show
AUTO Off
LCD Contrast
Backlight
Display Clock
Set Clock
Delete One
Delete All
Exit
01-12-2008
09:42:31
SAT
13
Page 15

Exit
One” function may delete the wrong picture. You may want to first disable the
auto display mode and then choose the picture to be deleted.
IX. Deleting ALL pictures. Select the seventh item “Delete All”, this will delete all
the pictures in the keychain digital photo frame. If you are sure this is the action
you would like to take, press the MENU.
X. Exiting the Main Menu
Main Menu
USB Connect
Slide Show
AUTO Off
LCD Contrast
Backlight
Display Clock
Set Clock
Delete One
Delete All
Main Menu
USB Connect
Slide Show
AUTO Off
LCD Contrast
Backlight
Display Clock
Set Clock
Delete One
Delete All
Exit
14
Page 16

To select “Exit”, press the MENU key to exit the main menu and go back to
displaying pictures.
XI. Press and hold the MENU key to turn on/off.
Note:
Connect the USB cable to the keychain digital photo frame to a PC to charge.
Once finished charging, the battery gauge will show full.
15
Page 17

Important Safety Instructions
CAUTION: To reduce the risk of fire or electric shock, do not expose this appliance to rain or
moisture.
WARNING: To prevent electric shock, do not use this (polarized) plug with an extension cord,
receptacle or other outlet unless the blades can be fully inserted to prevent blade exposure.
1. Read these instructions.
2. Keep these instructions
3. Heed all warnings
4. Follow all instructions
5. Do not use this apparatus near water. This apparatus shall not be exposed to dripping or
splashing, and no objects filled with liquids, such as vases, shall be placed on the apparatus.
6. Clean only with a dry cloth.
7. Do not block any ventilation openings. Install in accordance with the manufacturer ’s
instructions. The apparatus should not be situated on a bed, sofa, rug or similar surface that
may block the ventilation openings. The apparatus must not be placed in a built-in installation,
such as a closed bookcase or cabinet that may impede the flow of air through the ventilation
openings.Ventilation should not be impeded by covering the openings with items such as
newspapers, tablecloths, curtains, etc.
8. Do not install near any heat sources such as radiators, heat registers, stoves, or other
apparatus (including amplifiers) that product heat. Extended exposure to temperatures higher
that 170 degrees Fahrenheit, for example inside a closed vehicle during the summer, may result
in damage to your product.
9. No open flame sources, such as lighted candles, should be placed on the apparatus.
10. Do not defeat the safety purpose of the polarized or grounding-type plug. A polarized plug
16
Page 18

has two blades with one wider than the other. A grounding type plug has two blades and a third
grounding prong. The wide blade or the third prong is provided for your safety. If the provided
plug does not fit into your outlet, consult an electrician for the replace ment of the obsolete
outlet.
11. Protect the power cord from being walked on or pinched-particularly at plugs, convenience
receptacles, and the point where they exit from the apparatus.
12. Do not install in an area which impedes the access to the power plug. Disconnecting the
power plug is the only way to completely remove power to the product and must be readily
accessible at all times.
13. Power source – Use only power supplies of the type specified in the operating instructions
or as marked on the appliance. If a separate power supply – use only manufacturer-provided
power supplies.
14. Unplug this apparatus during lightning storms or when unused for long periods of time.
15. It the unit will be unused for long periods of time, the batteries should be removed.
16. For products which incorporate batteries, please refer to local regulations for proper battery
disposal.
CALIFORNIA PROP 65 WARNING
WARNING This product contains chemicals known to the State of California to cause birth
defects or other reproductive harm. For more information on these regulations and a list of
chemicals, log on the following website address: http://www.oehha.ca.gov/prop65.html
17
Page 19

Innovative Technology Electronics Corp.
Limited Warranty
90 Days Labor, One Year Parts
Innovative Technology Electronics Corp. (IT) warrants the product to be free from “Defects” in
materials under normal use for a period of “One Year” from the date of the original purchase.
The Warranty is “Not” transferable IT agrees, within the initial “90 Day ”period, to repair the
product if it is determined to be defective at “No Charge”. it is further agreed that IT will cover
the cost to repair or replace damaged “Parts” only for a total period of” One Year” from the
date or the original purchase. The warranty does not cover cosmetic damage .antennas, AC
cords, cabinets, headbands, ear-pads, or damage due to line power surges, connection to
improper voltage supply or settings, misuse, mishandling, accident, acts of God or attempted
repair by an unauthorized service agent. To obtain service, the original purchaser MUST
present a sales receipt/proof of purchase indicating date of purchase, amount paid, and place of
purchase. Send the unit prepaid to the address below in the original packaging or reasonable
substitute to prevent damage. You “Must” include your full mane, shipping address and
telephone number. No return will be shipped back to a PO Box. Please include your check or
money order in the a mount of $12.00, payable to Innovative Technology Electronics Corp. to
cover handling and return shipping charges. (IT) will not be responsible for delays or
unprocessed claims resulting from a purchaser’s failure to provide any or all of the necessary
information.
Send all inquires or returns to:
Customer Service Dept.
Innovative Technology Electronics Corp
4 Anchor Way, Port Washington, NY 11050
TOLL FREE#1-877-ITECH-97 (1-877-483-2497)
There are no express warranties except as listed above.
REPALR OR REPLACEMENT AS PROVIDED UNDER THIS WARRANTY IS THE
EXCLUSIVE REMEDY OF THE CUSTOMER, (IT) SHALL NOT BE LIABLE FOR ANY
INCIDENTAL OR CONSEQUENTIAL DAMAGES FOR BREACH OF ANY EXPRESS OR
IMPLIED WARRANTY ON THIS PRODUCT EXCEPT TO THE EXTENT PROHIBITED
BY APPLICABLE LAW.ANY IMPLIED WARRANTY OF MERCHANTABILITY OR
FITNESS FOR A PARTICULAR PURPOSE ON THIS PRODUCT IS LIMITED IN
DURATION TO THE DURATION OF THIS WARRANTY.
18
Page 20

D110A
Some states do not allow the exclusion or limitation of incidental or consequential damages, or
limitations on how long an implied warranty lasts, so the above exclusions or limitations may
not apply to you. This warranty gives you specific legal rights and you may also have other
rights, which vary from state to state.
VPS08-0702 DKF-
19
 Loading...