

Page 1
Touchscreen Terminal
USER MANUAL
Page 2

Concept 4000 Touchscr e e n Term inal. User Manual. 2
Concept 4000 Touchscreen Term i n al
User Manual
Revision 1.1
Contents
Introduction.................................................................................................2
Default Display............................................................................................3
The Main Buttons........................................................................................4
Area Control................................................................................................................. 4
Area List Control.......................................................................................................... 4
Output Control.............................................................................................................4
Go To Menu.................................................................................................................. 4
Back, Tools & Logout .................................................................................................. 4
User Operations..........................................................................................5
LOGON to a Touchscreen Terminal............................................................................ 5
Area Status and Control.............................................................................................. 6
Turning Area/s OFF.................................................................................................... 6
Turning Area/s ON .....................................................................................................7
Area List Control.......................................................................................................... 9
Turning an Area List OFF......................................................................................... 10
Turning an Area List ON........................................................................................... 11
Output Control........................................................................................................... 12
Controlli ng ‘Standar d’ S witch Outputs....................................................................... 13
Controlling ‘Variable’ Outputs................................................................................... 14
Controlling ‘Timed’ Outputs....................................................................................... 15
Alarm, Level & Custom Messages ............................................................................ 16
Acknowledging an Alarm.......................................................................................... 17
Viewing Review Events ............................................................................................. 18
Accessing Review.................................................................................................... 18
Viewing the Review Events....................................................................................... 19
Appendix ...................................................................................................20
Available Home Screen Colours............................................................................... 20
© 2011, Inner Range Pty. Ltd. Part Number: 635022UG
Page 3
Concept 4000 Touchscr e e n Ter m i na l. User Manual. 3
Introduction
The Touchscreen Termi nal pr ov ides a friendly, intuitive way for users to operate and interact
with the Concept 4000 Sec uri ty, Access Control and Building Aut om ation system using a
touch sensitive colour display.
With the Touchscreen, y ou c an:
• Arm/disarm the system, or sections (areas) of the system
• View and acknowledge alarms
• View area and system status, event messages and the historical ev ent log
• Control buil ding/home automation features and tim ing operations
The screens and menu layouts are customisable and can be tailor ed to your needs. Your
Installer would have already configured your Touchscreen( s) for you, however, if you have
additional r equir em ents, do not hesitate to contact your Installer to make the necessary
changes.
*
Default Display
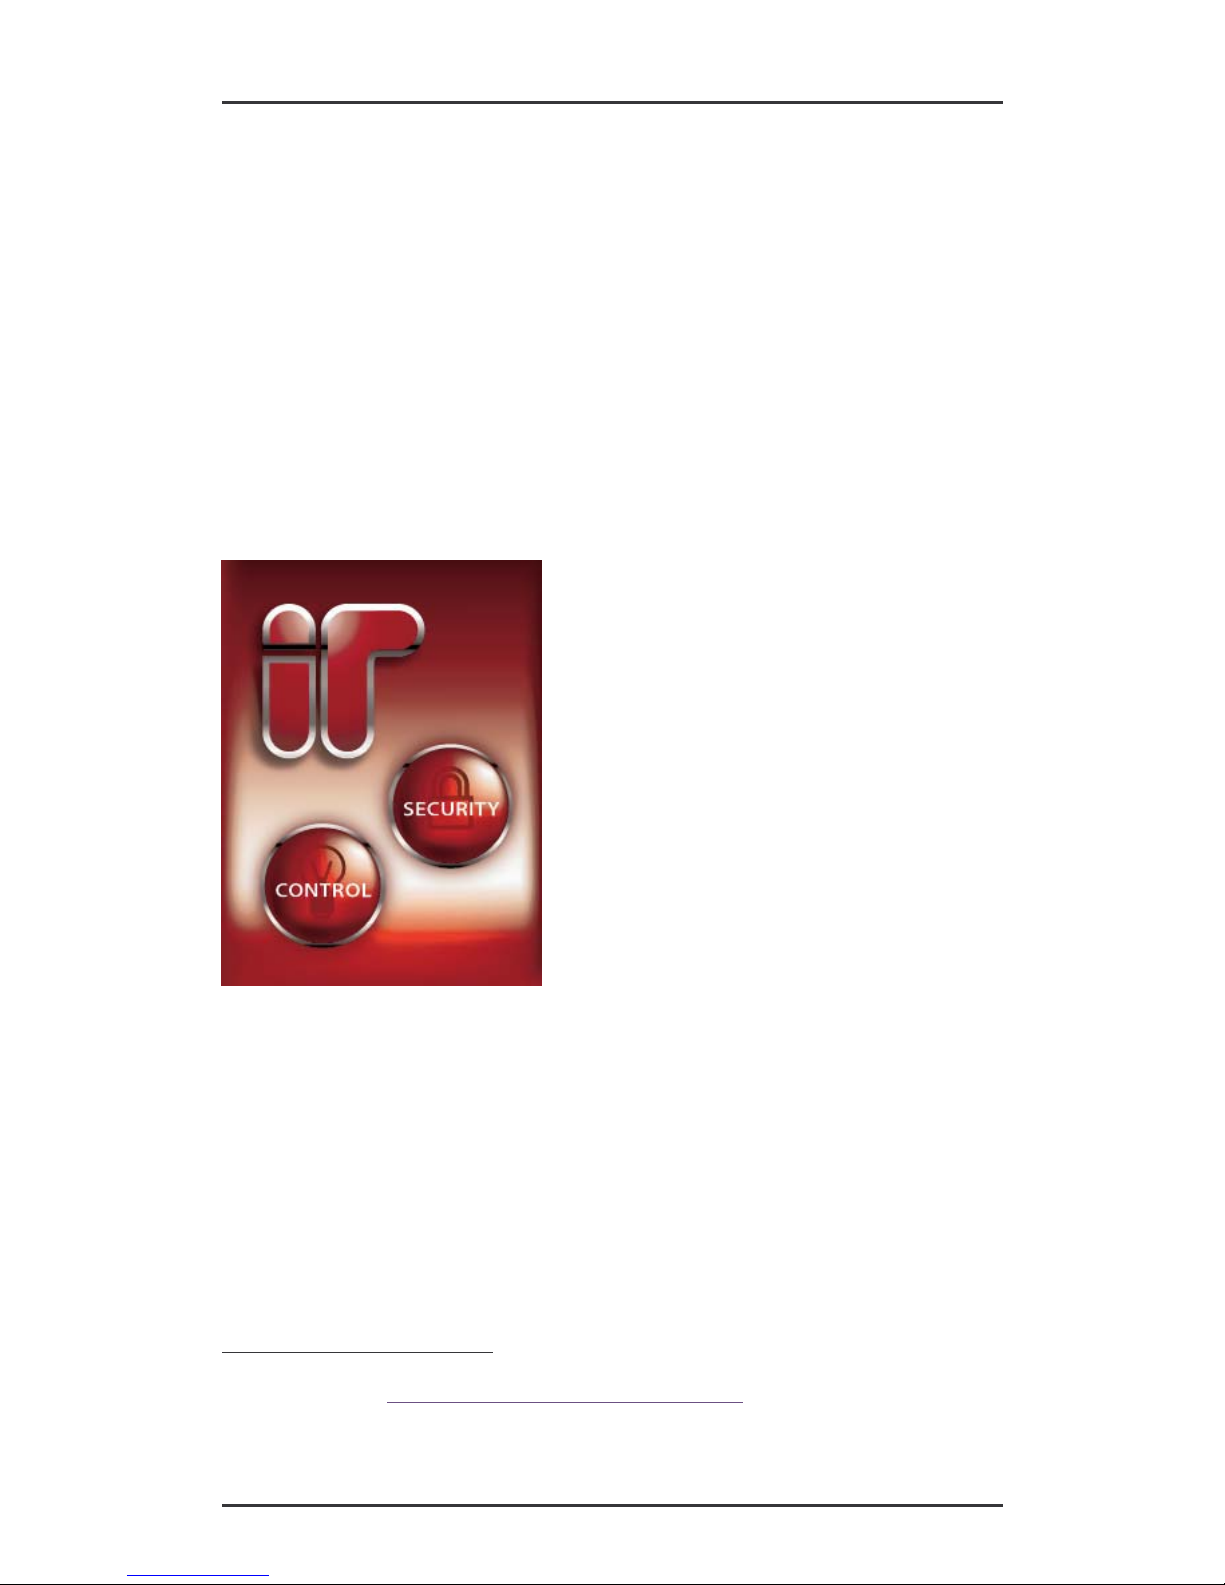
Illustrated on the left is the “home” screen shown on
the Touchscreen. The Touc hscreen wi ll always
revert to the home screen af ter a period of inactivity,
or if a user ‘logs out’ aft er using t he interface.
You will see that ther e are two buttons on the screen,
Security and Contr ol.
Selecting Security will allow you to ac c ess f unctions
to arm and disarm areas of the security system, clear
alarm messages, as well as viewing system Review
Events. Normally, all users are prompted for a PIN
code immediately aft er sel ec ting the Security button.
Selecting Control will open a menu screen from
which you can access and control any building
automation feat ur es which have been enabled in
your Concept 4000 system.
The backlight on the displ ay will turn itself off after
one minute to save power and extend the life of the backlight. Touchi ng the t op half of the
display will ‘wake’ the Touchscreen and turn the backlight on.
The main screen is shown here in its default colour (“Fire”), although your Installer may have
set it to one of the other 9 colours av ai lable, to better match your décor. See the table on
page 20 for the list of available c olour s .
* If you do not know who your Install er is, y ou can find an Inner Range A c c r edited Dealer
in your area at: http://www.innerrange.com/HowToBuy.cfm
Page 4
Concept 4000 Touchscr e e n Ter m i na l. User Manual. 4
The Main Buttons
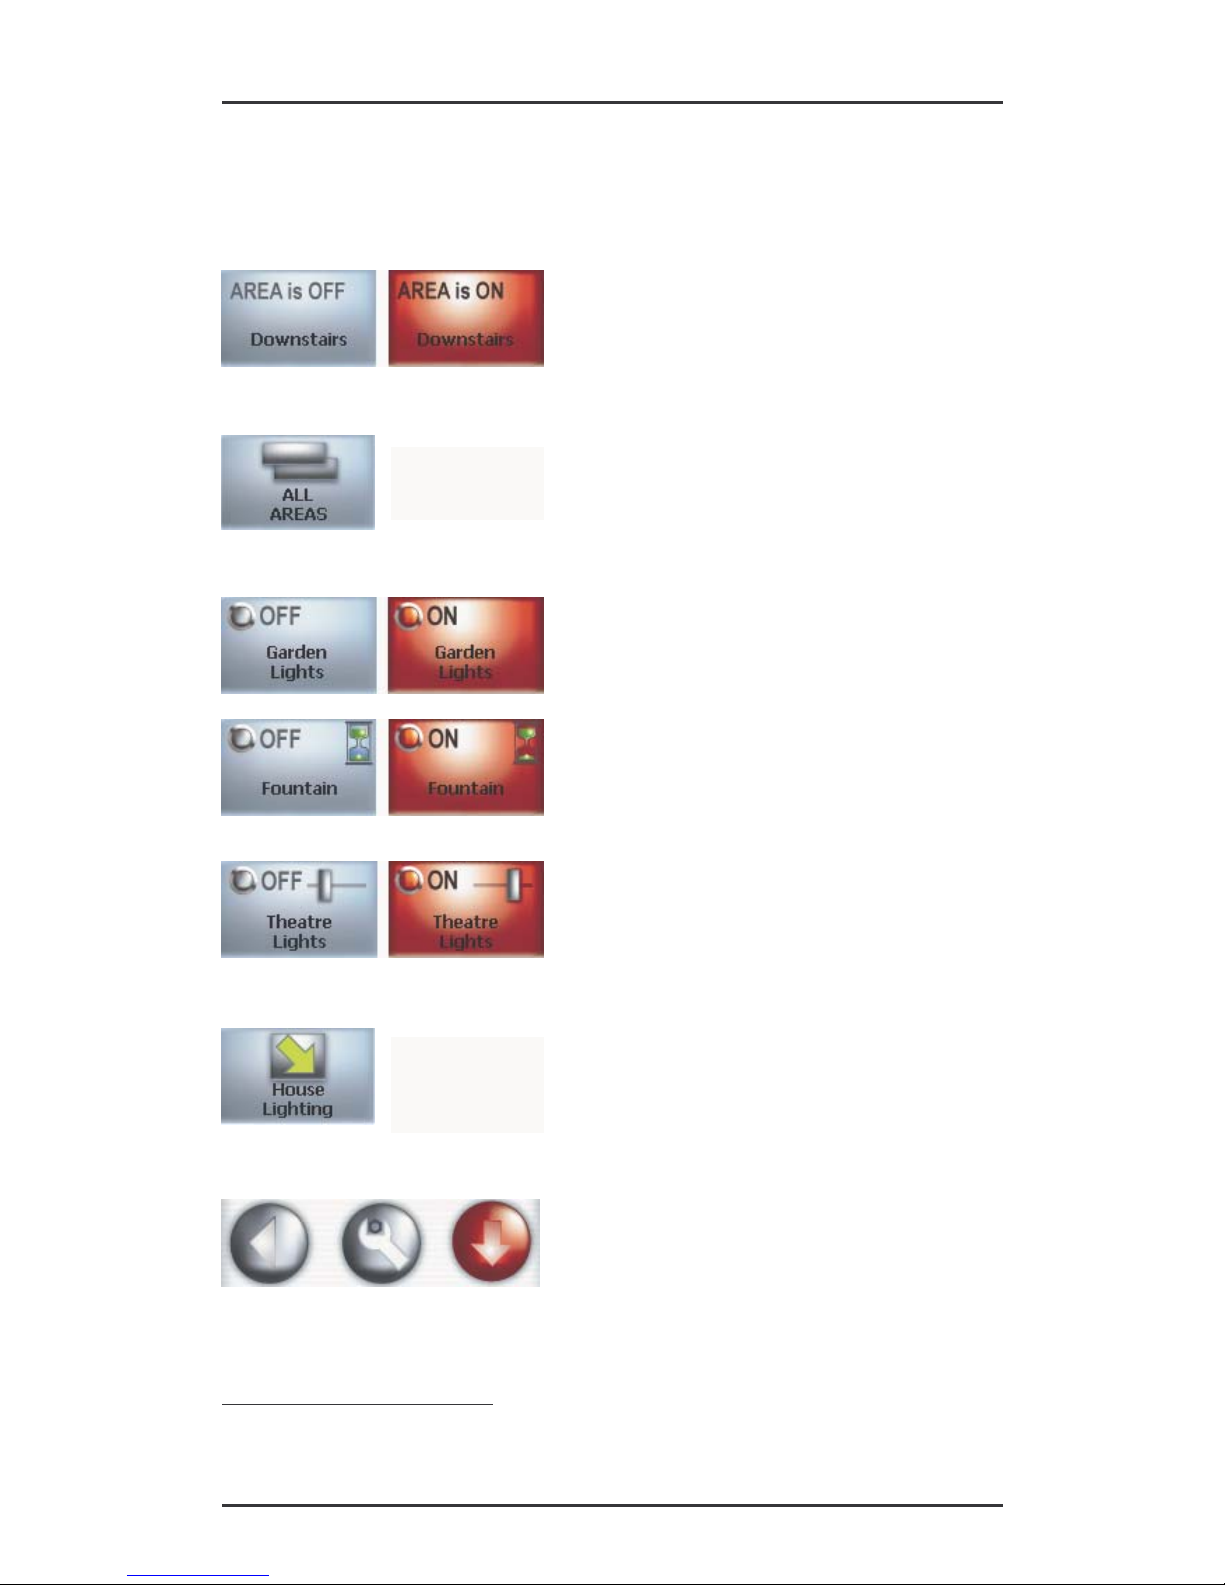
Each of the main buttons on the Touchscreen Terminal are described here:
Area Control
Toggles the status of t he Area named on the button
when pressed.
Area List Control
Allows you to arm or disarm a group of ar eas, such
as the whole security system, at one time. Selecting
<Area List> buttons wil l open a c onfirmation screen.
Output Control
Standard Switch: Toggles the item named on the
button from OFF to ON and vice-versa.
Timed: An hourglass means you can set a tim e for
the controll ed item to stay ON before it switches itself
OFF. This is in addition to ‘Standard’ ON/OFF
control.
Variable: A slider icon shows that you can set the
level of the item being c ontrolled. Typical examples
where this control is used are di m m er switc hes and
electrically c ontrolled curtains. This is in addition to
‘Standard’ ON/OF F control.
Go To Menu
Opens a menu screen showing m ore buttons.
Back, Tools & Logout
Back: Go back one screen. (Logs the user off if
Back takes you back to the hom e screen)
Tools: Opens the Tools menu where you can l ook at
Review events histor y . You may also be abl e to
isolate inputs.
*
Logout: Go back to the home screen and log out
the currently logged in user.
*
The Isolat e Inputs functi on ality may h ave b een enabl ed by y our Ins taller. You s h oul d only use this f eatu re under
instruction from your Installer.
Page 5
Concept 4000 Touchscr e e n Ter m i na l. User Manual. 5
User Operations
LOGON to a Touchscreen Terminal
Logging on is always the first step after selecting Sec uri ty from the home screen. Some or all
screens behind the Contr ol button may also require you to log on, dependi ng on how the
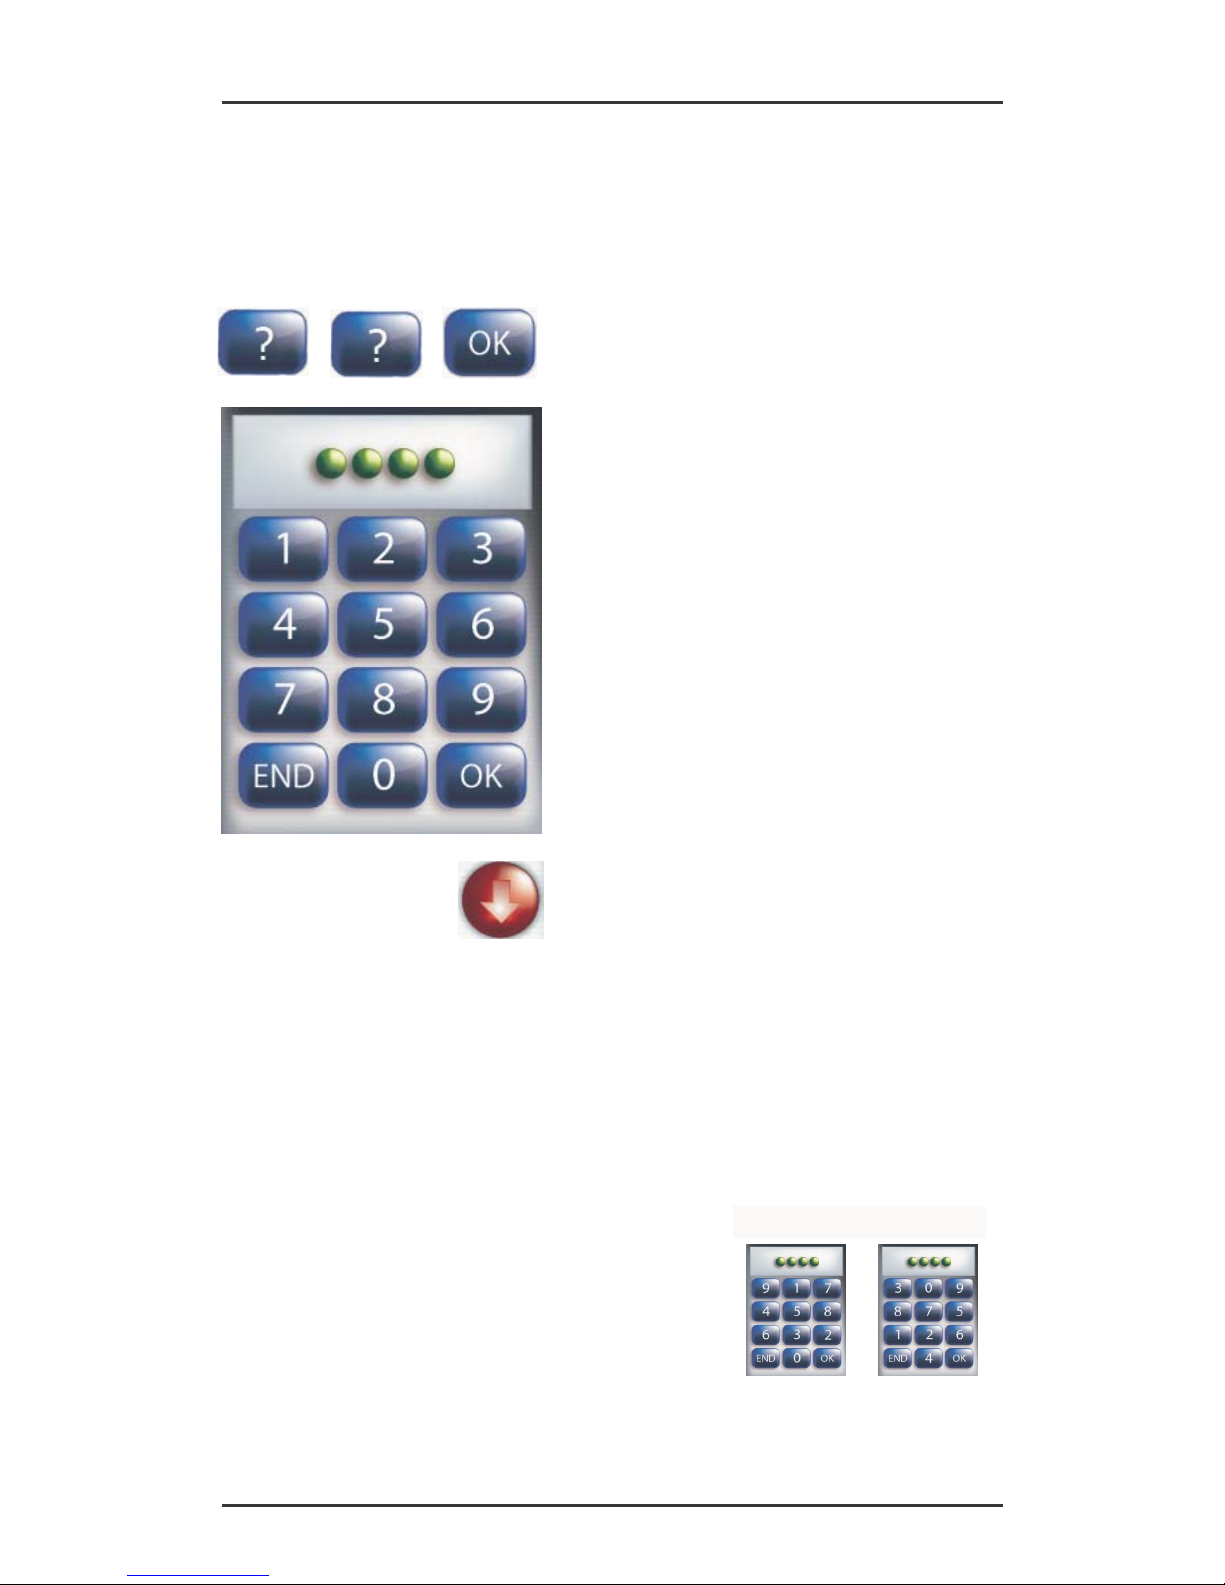
Touchscreen is configured. When prompted to logon, you will be pr esent ed with a keypad.
Enter your secret PIN c ode usi ng the digit keys, then
- , press the <OK> key. Each digit pressed will be
displayed as a green, “pea”.
If you make an error while ent eri ng your PIN, you
can press the display ar ea where t he peas appear t o
delete the last digit ( s) ent ered.
Alternat ely, y ou pr ess the < E ND> key. This wil l take
you back to the screen you were on.
Once a correct PIN has been entered, the
Touchscreen may gr eet and identify you. You will
then be taken to the screen you selec ted.
Note: Greeti ng can be di sabl ed, if necessary.
When opening the main Security screen, the
Touchscreen may bri efly indicate that Alarms are
present and then show a message to acknowl edge.
In this case, refer to “Acknowledge an Alarm”.
When your operations are complete, you should
press the Log out button to go t o the home screen
and have the system log you out.
NOTES:
1. Keypad Lockout. If a valid PIN code is not entered after a number of successiv e tries
(usually 5), the Touchscreen Terminal will displ ay a “Pin not found” message and will be
totally locked out for a pre-determined period. (Normally 60 seconds). A message “Module
Lockout: Touc h. #??” will be logged in the Review memory and an alarm message “Too Many
Tries” may be reported.
2. Duress. If you are being forced to perform operations at an LCD Terminal against your
will, your system may allow a Duress alarm to be activated by using a special PIN Code.
See “Activat ing a Dur ess Alar m ” in the Concept 4000 User Manual for details.
3. Scrambling Keypad. An option is available that causes
the digit keys (0 to 9) to be randomly scrambled every time
the keypad is displayed. This helps to prevent an onlooker
from guessing a PIN code based on the key use pattern.
The <END> and <OK> keys rem ain fixed.
This option is available in Touchscreen Terminal fi rmware
V1.6 or later, and can only be enabled by the Installer.
e.g.
Page 6
Concept 4000 Touchscreen Terminal. User Manual. 6
Area Status and Control
In most applications with the Touchscreen, Area arming and disarming functions are
accessed from the Security menu.
From the home screen, select the Security button.
The keypad will appear. Logon to the Touchscreen
- , as described earlier.
(PIN code + <OK>)
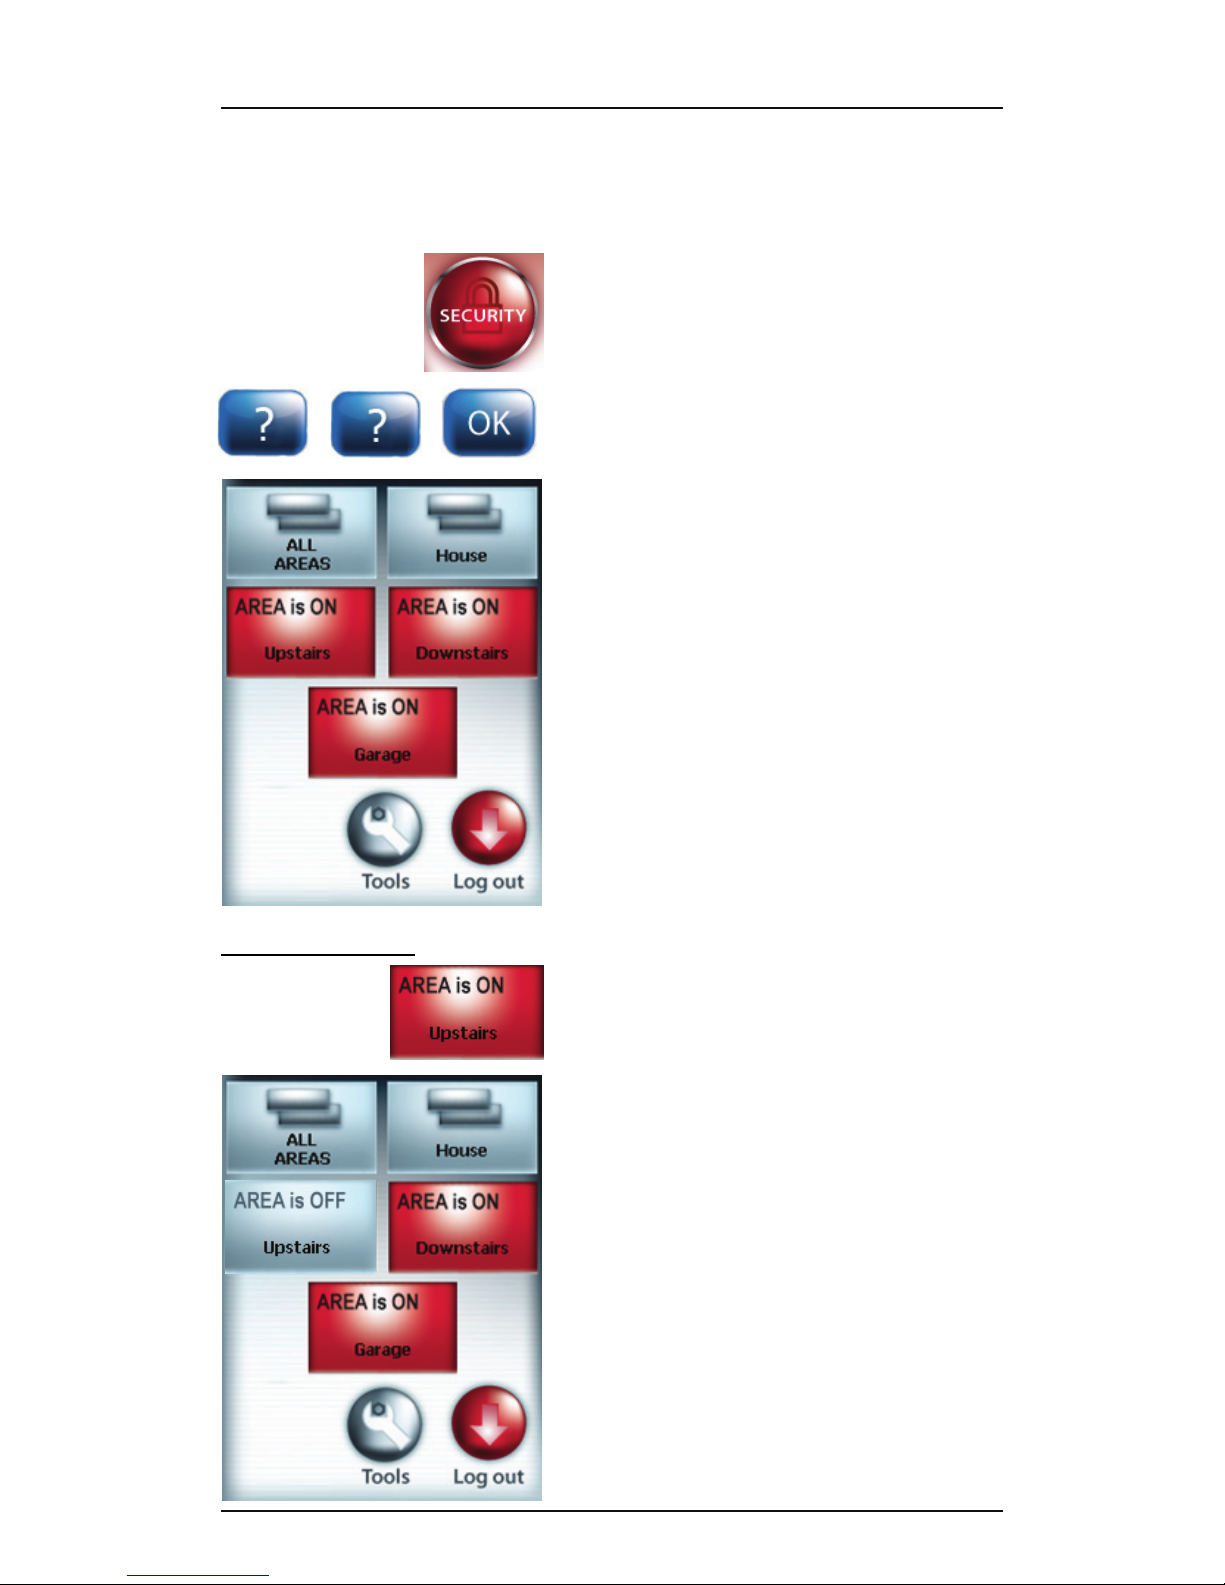
After the greeting (if enabled), the display will show
the first security screen. This will show the status of
any areas configured to be displayed on this screen.
The example on the left has three Areas, all of which
are currently ON. It also shows two Area List Control
buttons, “ALL AREAS” and “House”
NOTES:
1. If there are Go To Menu buttons on the screen,
then you may have to navigate to one of these
further screens to view the status of and have control
of some Areas.
2. If you do not have the required permissions to
control an Area, the corresponding control will be
greyed-out.
Turning Area/s OFF
To turn an Area OFF, simply select the button for the
desired area.
After a short delay, the Touchscreen will update the
status of the Area, as shown.
Page 7

Concept 4000 Touchscreen Terminal. User Manual. 7
Turning Area/s ON
To “Arm” or turn an Area ON with the Touchscreen,
simply select the button for the desired Area.
After the button has been pressed, the system will
test the state of all the inputs allocated to the Area to
ensure that they are in the Sealed condition and the
Area is ready to be turned ON.
THEN:
If all Zones programmed to be tested are Sealed, the
Area will turn ON and this display will indicate that
the operation was successful.
Page 8

Concept 4000 Touchscreen Terminal. User Manual. 8
OR:
If an Exit Delay time has been programmed for this
Area, the Exit Delay timer display will appear. During
the last 10 seconds of the timer, the pitch of the
beeps will change to warn you that you have a
limited time to Exit.
Remember: You have a limited time to exit the Area
once you have turned it ON. (Usually 30-90
seconds). Ask the Installer for the Exit time used in
your system.
OR:
After pressing the <ON> key, the display may show a
message like this. It means that an item in the
system is either faulty or in an alarm state, and the
Area will not turn ON.
e.g. A detector or it’s cabling have been
damaged.
A door or window has been left open
Try to rectify the problem before trying again.
If this is not possible, you may be allowed to
ISOLATE the item while the “Error – Unsealed
zone(s)” message is displayed, by pressing the
<ISOLATE> key.
NOTE: Inputs isolated in this way are automatically
de-isolated when the Area is turned OFF.
The unsealed Zone input is presented. Select
<ISOLATE> to isolate the zone and attempt to arm
the Area(s).
The system will ignore this Zone input and test all
other Zone inputs. If another input is found to be
unsealed or tampered with, the process will be
repeated.
Page 9

Concept 4000 Touchscreen Terminal. User Manual. 9
Area List Control
An Area List is a collection of Areas in your system that can be controlled as one block. In the
simple example below, there are three Areas: Upstairs, Downstairs and the Garage. Two
Area Lists have been set up by the Installer: ALL AREAS, which, not surprisingly contains all
three Areas and House, which contains the Areas Upstairs and Downstairs.
Area Lists are typically displayed on the same menu screen as other areas. To control an
Area List, you must first access the screen it is on.
From the home screen, select the Security button.
The keypad will appear. Logon to the Touchscreen
- , as described earlier.
(PIN code + <OK>)
Navigate to the screen on which the desired Area
List is shown.
Select the button for the desired Area List
Page 10

Concept 4000 Touchscreen Terminal. User Manual. 10
The display will show a control screen for the
selected Area List.
Turning an Area List OFF
Once you have opened the control screen for the
desired Area List, select the <TURN OFF> button.
A brief message will appear whilst the Areas are
being turned off.
The hourglass will then disappear and the message
will change to “<Area> off”
Once the Areas are disarmed, you will be returned to
the screen containing the Area List button selected.
Page 11

Concept 4000 Touchscreen Terminal. User Manual. 11
Turning an Area List ON
Once you have opened the control screen for the
desired Area List, select the <TURN ON> button.
After the button has been pressed, the system will
test the state of all the inputs allocated to the Areas
to ensure that they are in the Sealed condition and
the Areas are ready to be turned ON.
If there are unsealed doors or zones in any of the
Areas, you may get an “Error – Unsealed zone(s)”
message. See Turning Area/s ON for more
information.
The hourglass will then disappear and the message
will change to “<Area> on”
Once the Areas are armed, you will be logged out of
the Touchscreen and returned to the home screen.
Page 12

Concept 4000 Touchscreen Terminal. User Manual. 12
Output Control
The Touchscreen Terminal has been designed for easy access and control of Outputs known
in Concept 4000 systems as “Home Auxiliaries”. Refer “SYSTEM OVERVIEW” in the
Concept 4000 User Manual for a detailed explanation of Auxiliaries.
Individual LCD and Touchscreen Terminals may be programmed to allow Users to control
specified Home Auxiliaries without needing to Log on to the Terminal.
In order to view Outputs and functions in the system
that you can control, select the <Control> button from
the home screen
Depending on how many items your system has
been set up to control, you may have to navigate to
another menu screen to find the Output you wish to
control.
In this example, the desired function is in the House
Lighting, so the <House Lighting> Menu Screen
button will be pressed.
After the <House Lighting> menu screen button is
selected, a screen containing more buttons appears.
The screen shows the status of the Outputs available
on this screen.
In the menu on the left, there are three ‘Standard’
Output controls, one ‘Variable” control and one
‘Timed’ control.
Page 13

Concept 4000 Touchscreen Terminal. User Manual. 13
Controlling ‘Standard’ Switch Outputs
Each time one of the ‘Standard’ Switch controls is pressed (e.g. <Kitchen>), the state of the
Output will toggle from OFF to ON or ON to OFF.
Right now, <Kitchen> is shown as OFF, so pressing
it should turn it ON.
The display will change to indicate that <Kitchen> is
now ON. In this example the, the physical item that
is being controlled should also switch on. So, the
Kitchen light(s) should now be on.
NOTE: Access to some Home Auxiliaries may be limited to particular User Types. Some
screens with Output Control buttons may require a valid PIN in order to access them. Users
without the required permissions may be able to see the Output Control buttons on the
Touchscreen, but will see an error message if they try to interact with the output.
Page 14

Concept 4000 Touchscreen Terminal. User Manual. 14
Controlling ‘Variable’ Outputs
Output Control buttons with a slider in the top right hand side indicate that you can adjust the
level of the item in addition to ON/OFF control. ‘Variable’ buttons will typically be used for
light dimmer controls.
For ‘Standard’ ON/OFF control of an Output with a
‘Variable’ button, select the left half of the button to
toggle the Output.
To control the level of a ‘Variable’ Output, select the
right half of the button.
NOTE: Selecting the right half of the button will also
turn the Output ON if it was OFF to start with.
A control screen for the ‘Variable’ Output will appear.
The item being controlled and its current status are
shown in the top left corner. Underneath this is the
current level setting, in percent that the Output is set
to.
By dragging the slider on the right hand side of the
screen, you can adjust the level of the Output.
Selecting <Back> will take you back to the menu
screen.
Selecting <Log out> will take you back to the home
screen and log you out if you were logged in.
NOTE: Your Installer may have programmed the Concept 4000 to allow you to set a dimmer
light to a maximum of 90% of its available power. In this case, 100% (Maximum) on the
control screen is actually setting the physical device to 90%. This can be adjusted for you by
your Installer.
Page 15

Concept 4000 Touchscreen Terminal. User Manual. 15
Controlling ‘Timed’ Outputs
Output Control buttons with an hourglass in the top right hand side indicate that you can set a
time for how long an item stays on before switching itself off in addition to ON/OFF control.
For ‘Standard’ ON/OFF control of an Output with a
‘Timed’ button, select the left half of the button to
toggle the Output.
To set the ON time of a ‘Timed’ Output, select the
right half of the button.
A control screen for the ‘Timed’ Output will appear.
The item being controlled, and it’s current status
appear in the top left hand side.
The current ‘ON time’ setting is shown in the top right
hand corner.
You can switch the timer between minutes or
seconds by selecting the <MIN> or <SEC> buttons.
This will update the ON time setting accordingly. The
selected time increment button will turn orange.
You can set the time by adjusting the blue
thumbwheels. A maximum of 255 seconds or 255
minutes can be set. The current setting of each
wheel is the white number in the centre of the wheel.
To increment the number on a thumbwheel, touch
the bottom part of the wheel.
To decrement the number on a thumbwheel, touch
the top part of the wheel.
Select <OK> to accept changes, turn the Output on
and go back to the previous screen. The Output will
switch itself off after the timer has elapsed.
Selecting <Back> will cancel any changes made,
and take you back to the previous screen.
Selecting <Log out> will cancel any changes made,
take you back to the home screen and log you out if
you were logged in.
Page 16

Concept 4000 Touchscreen Terminal. User Manual. 16
Alarm, Level & Custom Messages
Sometimes, the home screen looks like the
illustration on the left. This is usually the result of a
“Diary” event being triggered in the Concept 4000
system. The “Diaries” feature allows custom
messages to be displayed on certain dates, date and
time or on certain days. For instance, a diary
message might appear every Monday night saying,
“Put the bins out!”.
Most Diary messages should disappear at 12:00AM
on the next day.
Depending on how your Touchscreen was
configured, Alarm messages may appear on top of
the home screen as well. See, “Acknowledging an
Alarm” for information on clearing these messages.
Another kind of message may also appear. These
are called, “Level Messages”. A “Level Message”
will appear if certain conditions or problems arise in
the system. Level messages will remain on the display until the condition is rectified, at which
point the Level message will disappear.
See “Level Messages” in the User Operations section of the Concept 4000 User Guide for
more information.
Put the bins out!
Page 17

Concept 4000 Touchscreen Terminal. User Manual. 17
Acknowledging an Alarm
Alarm messages can only be acknowledged by a User with the appropriate authority. These
messages provide precise information of the type of alarm, the Area it has occurred in, as well
as the Zone or System Input that generated the alarm.
Depending on how the Touchscreen has been configured, Alarm messages may appear on
‘top’ of the home screen, or they may only appear to authorised Users after they log in to a
Touchscreen for any reason.
To acknowledge an Alarm, you must logon to the
- , Terminal as described before. (Usually after
selecting <Security> from the home screen).
The display will show the specific details of the Alarm
as well as some options.
Select <Clear> to acknowledge the Alarm and clear it
from the display. Note that the Alarm event will still
be present in the event Review memory. If there is
another unacknowledged Alarm, another message
will appear. Repeat this process for all Alarms you
wish to acknowledge. After you have acknowledged
all Alarms, you will be taken to the first Security
menu screen to perform normal operations.
If <OK> is selected, you will be taken to the first
Security menu screen, but any outstanding Alarms
will NOT be acknowledged. This alarm message
(any any others) will still appear when an authorised
user logs into a Terminal, until such time as the
alarm is acknowledged.
Selecting <Back> will take you back to the home
screen and log you off the Terminal.
Page 18

Concept 4000 Touchscreen Terminal. User Manual. 18
Viewing Review Events
On the Touchscreen Terminal, the default method of accessing Review information is from
the Tools button on screens behind the Security button.
Accessing Review
From the home screen, select the Security button.
The keypad will appear. Logon to the Touchscreen
- , as described earlier.
(PIN code + <OK>)
If enabled by your Installer, there will be a <Tools>
button on one, some, or all of the security screens,
as highlighted here.
Select <Tools> to bring up the System Toolbox
screen.
Select <Review> from the System Toolbox to open
Review.
NOTE: The <Review> and/or <Isolate> buttons may
not appear on the System Toolbox screen depending
on your access permissions and how the Installer
configured the Touchscreen.
Page 19

Concept 4000 Touchscreen Terminal. User Manual. 19
Viewing the Review Events
The display will show the last Review event
, which,
on the Touchscreen, will probably be a record of
yourself logging into the Touchscreen Terminal.
The Touchscreen will always show each Review
event on one screen and will adjust the size of the
text to ensure that all text fits.
The <START> button is used to go the the start of
Review (earliest event still stored) and the <END>
key is used to go to the end of Review
(last event
saved).
The blue arrows
, <Back> (left) and <Forward> (right)
are used to search Review one event at a time.
<Back> goes to the next oldest Review event, so
<Forward> goes to the next newest Review event.
The red arrows
, <Back 10> and <Fwd 10> are used
to navigate Review in steps of 10 events.
NOTE: If you are at the first Review event and you
try to use <Back> or <Back10>, you will see a
message saying, “At start of review” and vice versa if
<Forward> or <Fwd 10> are used
To leave the Review screen and go back to the
System Toolbox screen, use the <EXIT> button.
Page 20

Concept 4000 Touchscreen Terminal. User Manual. 20
Appendix
Available Home Screen Colours
There are 10 themes to choose from in the Touchscreen. The default theme is, “Fire”. Your
Installer can set/change your desired home screen theme for you.
Chrome Plum Wheat
Straw Ocean Storm
Sunset Ash Mauve
Fire
 Loading...