

INMUSIC ACV5 Users Manual

Quickstart Guide
English ( 2 – 11 )

Introduction
Features
• Standalone MPC—no computer required
• 10.1” (257 mm) full-color multi-touch display
• Also acts as a control surface for MPC 2.0 software
• Phono inputs with ground peg
• (16) Q-Link knobs with graphical displays
• (2) full-size MIDI inputs and (4) full-size MIDI outputs
• 16 GB of on-board storage (over 10 GB of sound content included)
• 2 GB of RAM for sampling
• Full-size SD card slot
• User-expandable 2.5” SATA drive connector (SSD or HDD)
• (2) USB-A 3.0 slots for thumb drives or MIDI controllers
Box Contents
MPC X
Power Adapter
USB Cable
Software Download Card
Quickstart Guide
Safety & Warranty Manual
Important: Visit akaipro.com and find the webpage for MPC X to download the complete user guide.
Support
For the latest information about this product (documentation, technical specifications, system requirements,
compatibility information, etc.) and product registration, visit akaipro.com.
For additional product support, visit akaipro.com/support.
2
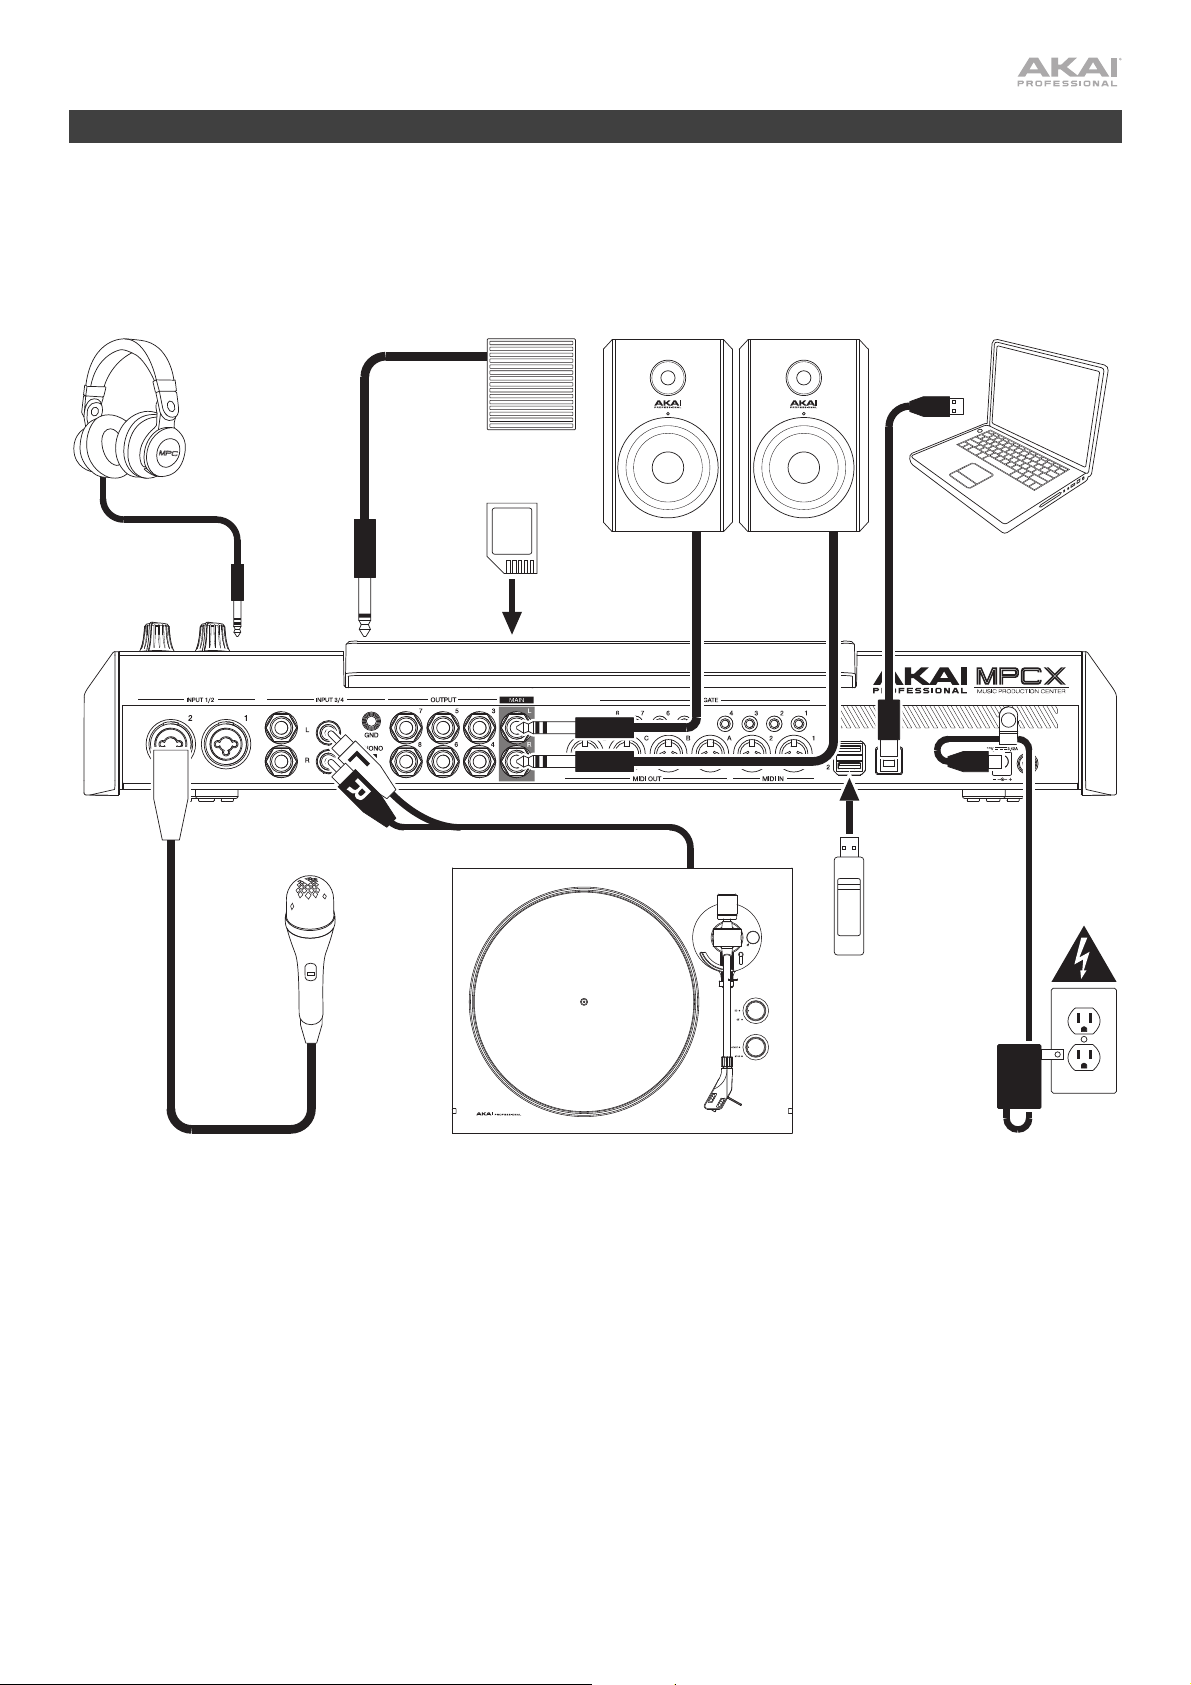
Setup
Items not listed under Introduction > Box Contents are sold separately.
Headphones
(to front-panel headphone output)
Footswitch
(to FS 1)
SD Card
(to SD card slot)
Powered Monitors Computer
USB
Flash
Drive
Turntable Microphone
Power Outlet
3
Features
Important: Visit akaipro.com and find the webpage for MPC X to download the complete user guide.
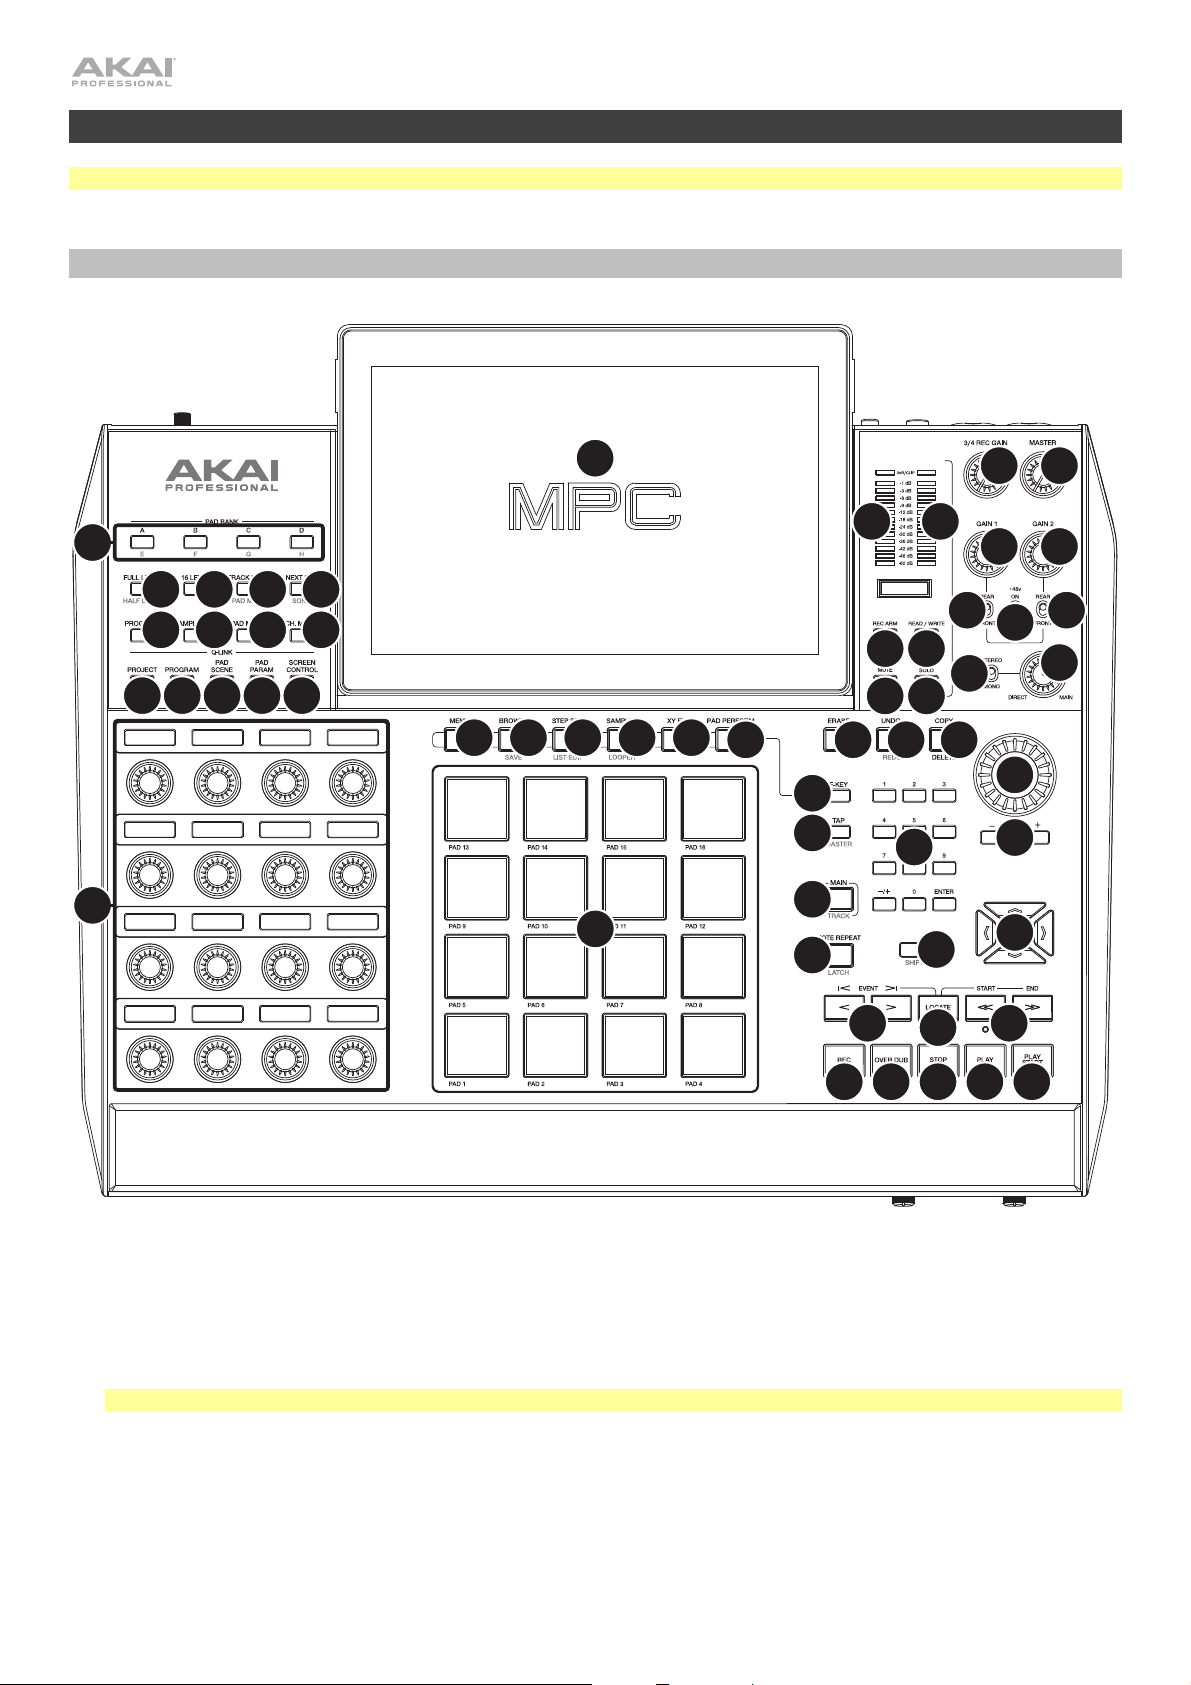
Top Panel
11
9
16
13
28
17
32
14
29 30
19
18
20
33
31
21
23
24
10
1
25
26
27
55 55
51
53
42
8
43
22
15
39 40
6
52
54
5
7
41
45
50
12
47
44
46
3
4
2
48
44
45
49
34
36
38
37
Navigation & Data Entry Controls
1. Display: This full-color multi-touch display shows information relevant to MPC X’s current operation. Touch the
display (and use the hardware controls) to control the MPC interface. See Operation to learn how to use some
basic functions.
Tip: If you adjust the angle of the display, we recommend using the stand on its back panel to secure it in place.
2. Cursors: Press these buttons to navigate through the fields of menus and options shown in the display.
3. Data Dial: Turn this dial to scroll through the available menu options or adjust the parameter values of the
selected field in the display.
4. –/+: Press these buttons to increase or decrease the value of the selected field in the display.
4
35
 Loading...