

Inkel LRC-122RF Users Manual
ENGLISH
41
Examples: For "3" :
For "
27" :
For
"124" :
• When "XM CH
" disappears, repeat again from
the above step 1.
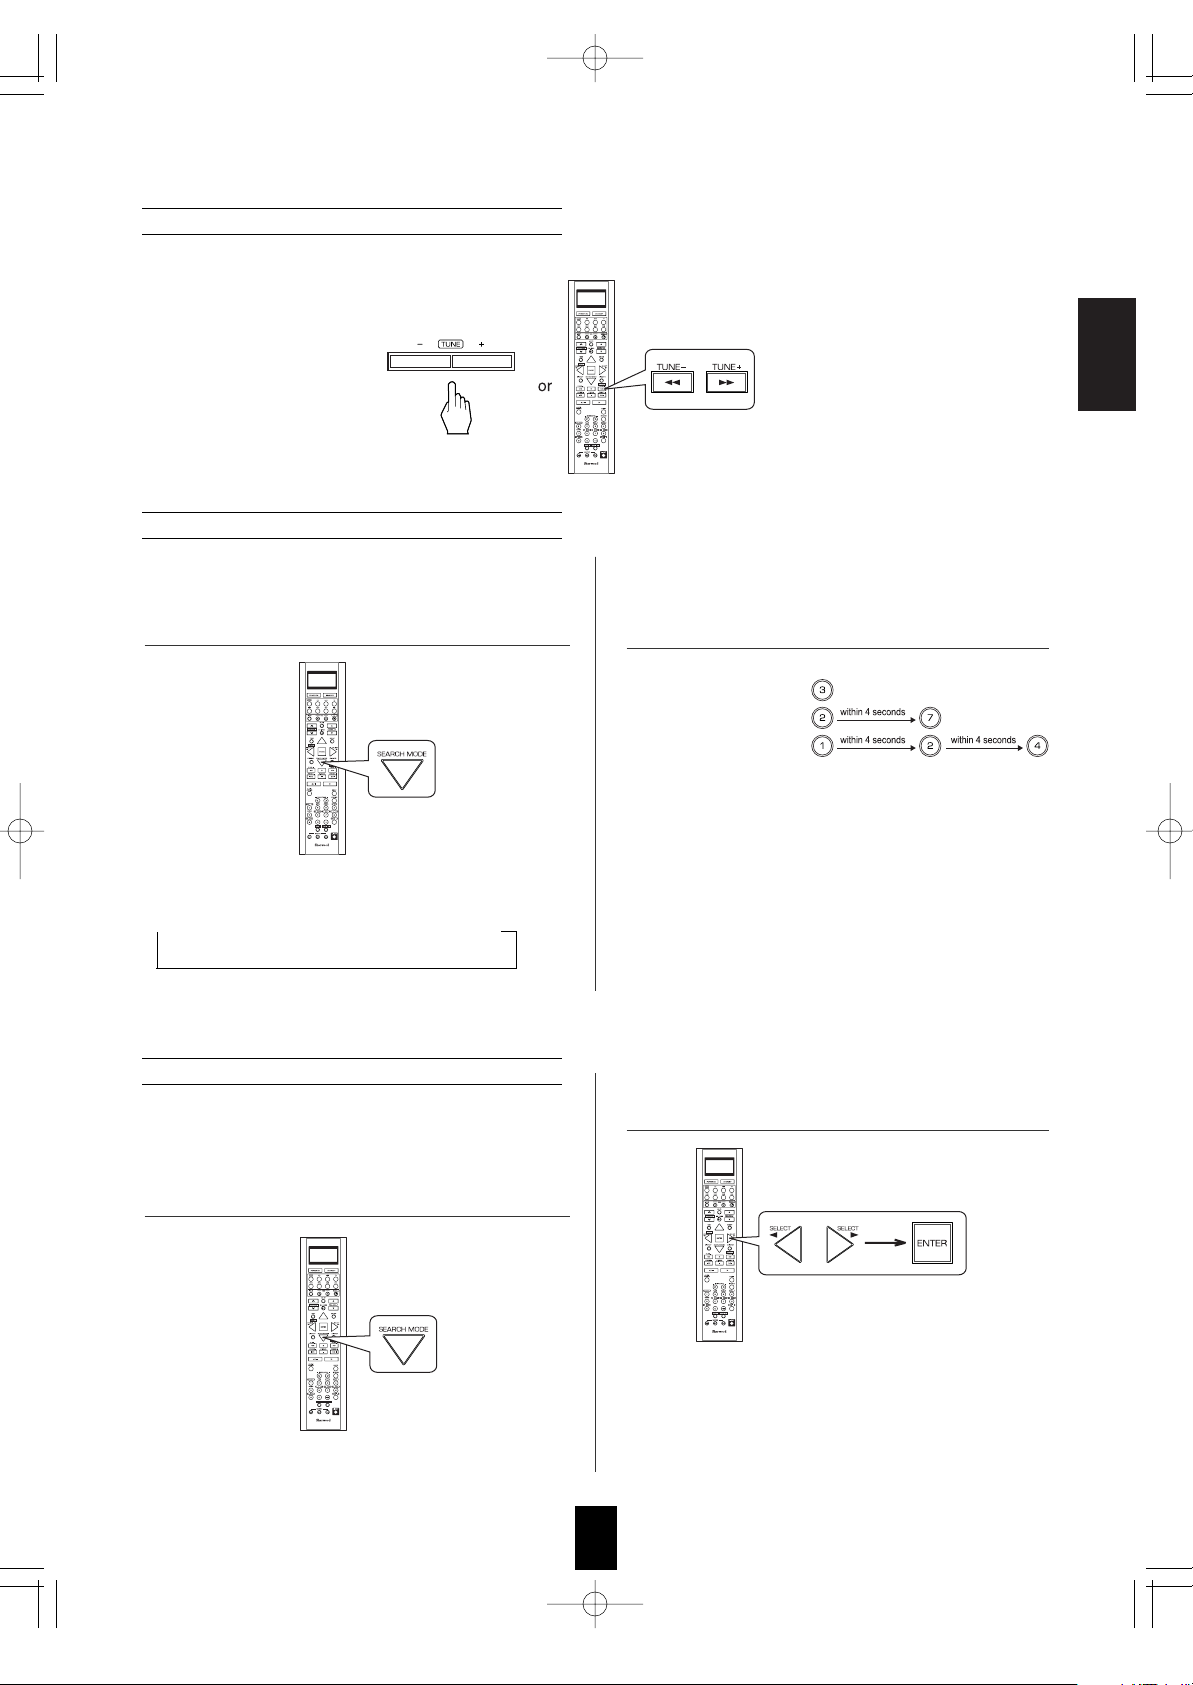
1. In the XM mode, select the direct search mode.
2. While displaying "XM CH", select the
desired channel number with pressing the
NUMERIC (0 ~ 9) buttons.
• Each time this button is pressed, the search mode
changes as follows:
XM CH
Category name OFF
(Direct search) (Category search)
Note:
• When using channel search or preset search, press this
button to select the search off.
• Direct search is useful when you already know the channel
number.
Direct search
1. In the XM mode, select the category search
mode.
2. While displaying a category name, select the
desired category, then press the ENTER button.
• Then a category name is displayed.
• Each time these buttons are pressed, one of different
categories is selected.
• When a category name disappears, repeat again from
the above step 1.
• Category search allows you to select the desired
channel by the selected category.
Category search
• In the XM mode, press the TUNING UP (+)/DOWN (-) buttons repeatedly to select the desired channel.
Channel search
R-772(A) 2007.8.16 5:21 PM 페이지 41
42
ENGLISH
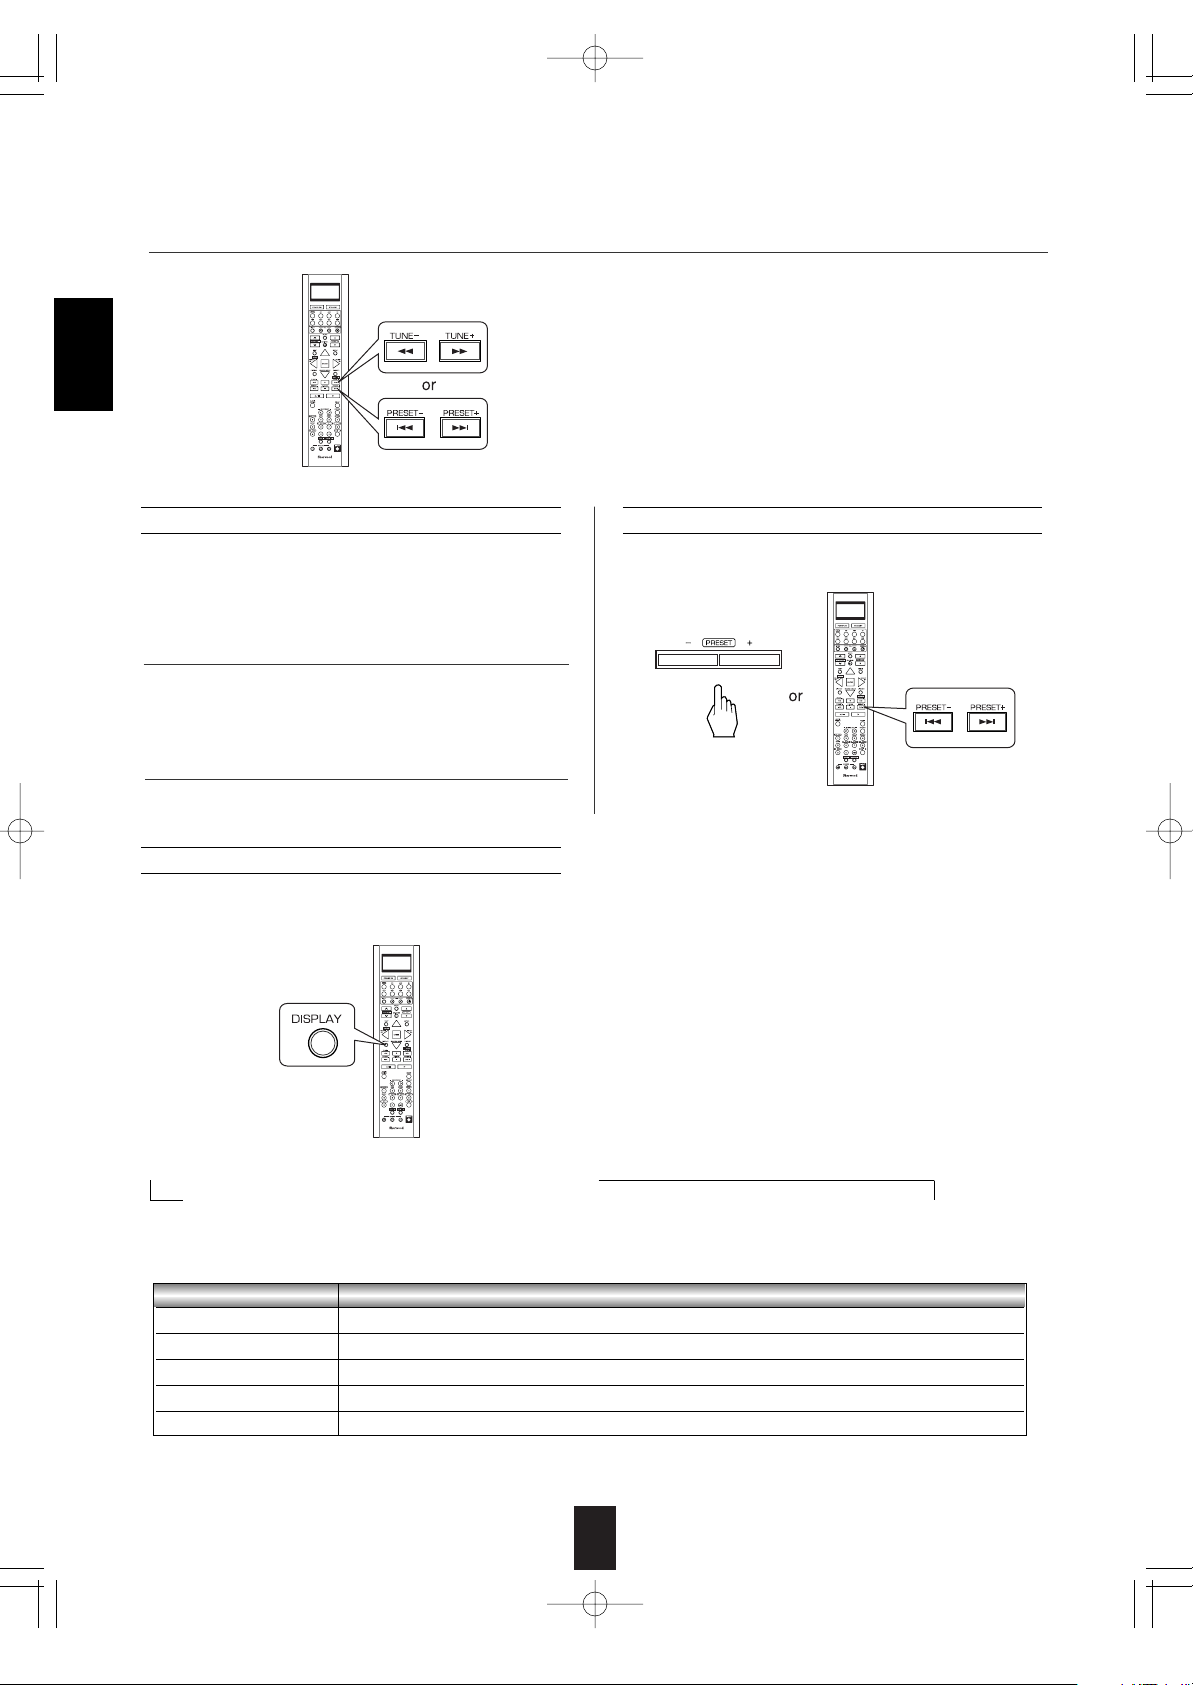
1. Select the desired channel with preforming
channel search, direct search or category search.
2. To memorize the channels, perform the steps 2 to
4 in "Manual presetting" procedure on page 39.
• You can store up to 30 preferred channels in the memory.
Presetting channels
• In the XM mode, select the desired preset channel.
Preset search
Note:
• If the information on artist name, song title or category is
not available, it will not be displayed correctly.
Signal strength display mode
• If the reception is poor, you can check the signal
strength of the XM radio signal and adjust the position of
the XM antenna until "GOOD" is displayed.
• You can display XM information such as channel name, artist name, song title and signal strength.
Displaying XM information
• In the XM mode,
Error message and status
• If an operation takes longer than usual or an error occurs, one of the following messages may be displayed.
Message Status
ANTENNA The XM antenna is not connected correctly. Check the antenna.
UPDATING The XM user encryption code is being updated. Please wait.
NO SIGNL The signal is too weak. Check the antenna connection and reposition it for the best reception.
LOADING This receiver is tuning or decoding audio or text data. Please wait.
OFF AIR The selected XM channel is not currently broadcasting. Select another channel.
• Each time the DISPLAY button is pressed, the display mode changes as follows:
Channel number/name Artist name Song title Category
Volume Surround mode Input signal Signal strength("GOOD", "MARGINAL", "WEAK", "NO SIGNL")
Continued
3. While displaying the selected category, select the desired channel.
R-772(A) 2007.8.16 5:21 PM 페이지 42
43
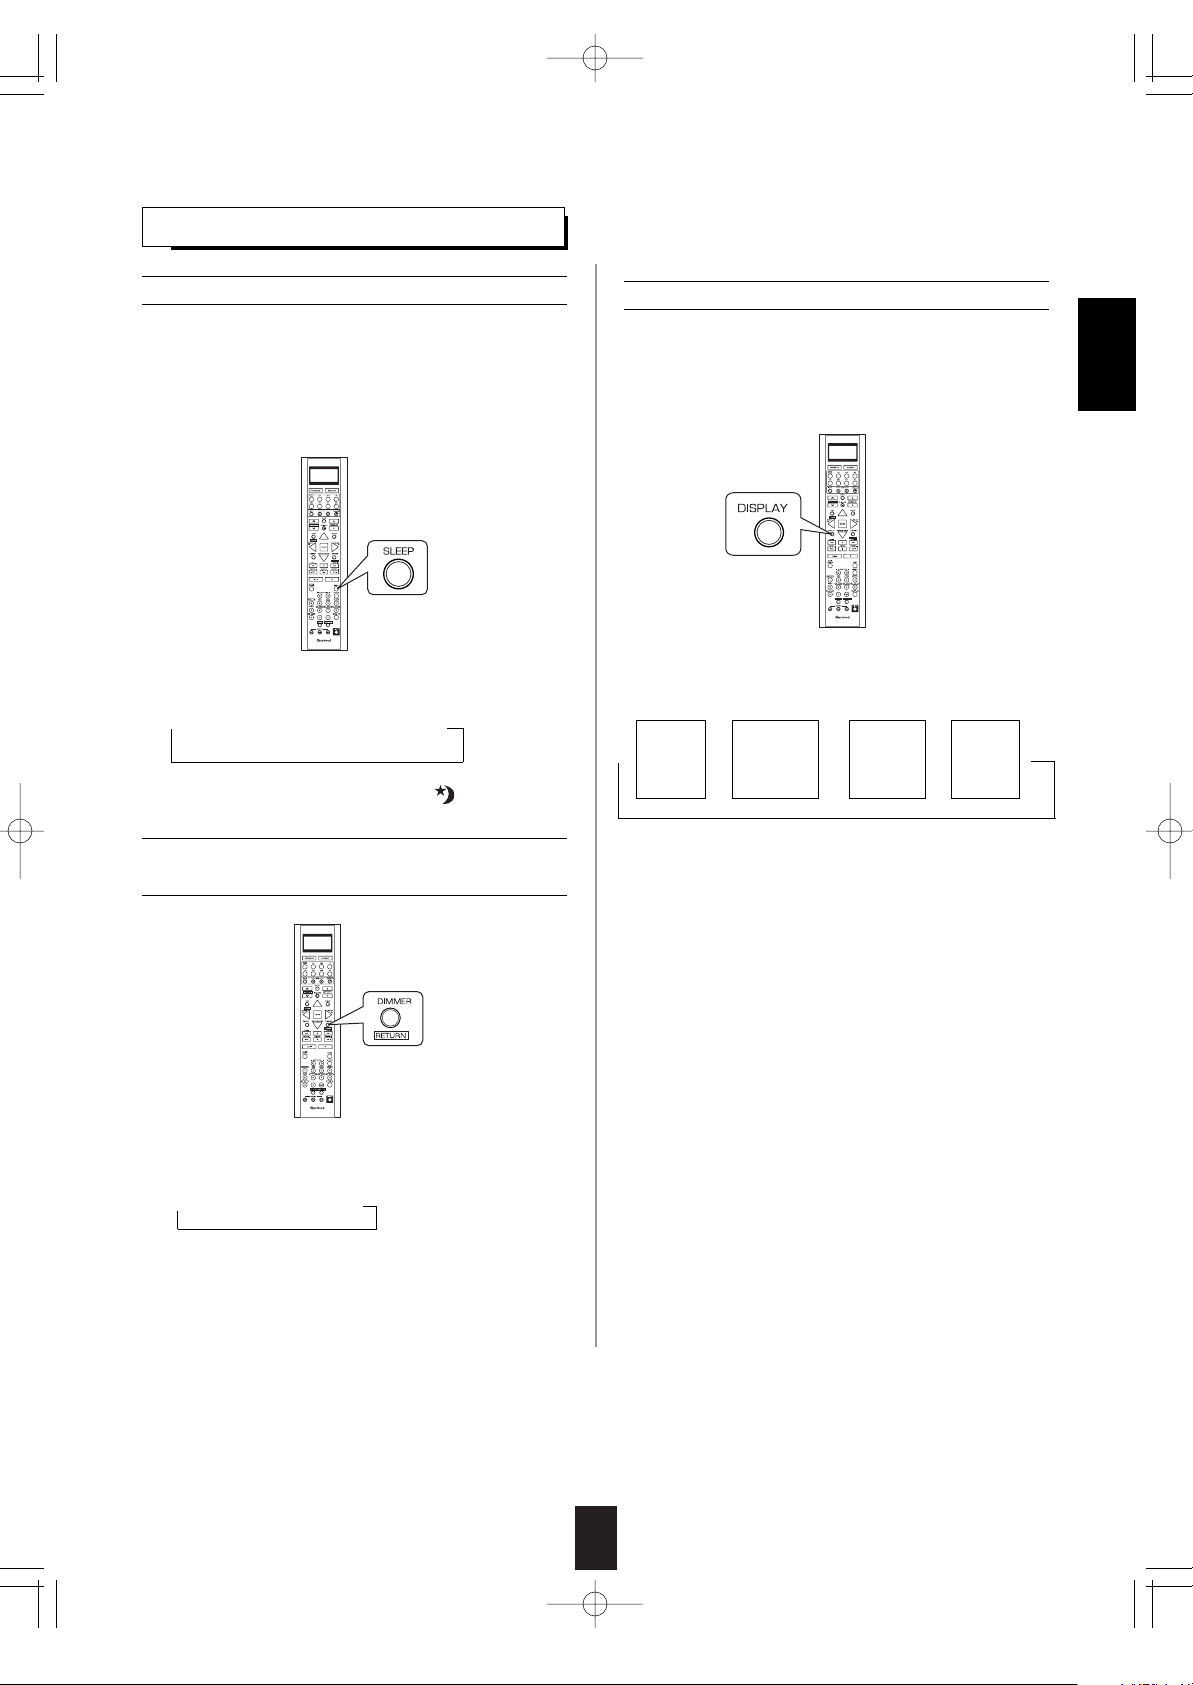
Operating the sleep timer
• The sleep timer allows the system to continue to
operate for a specified period of time before
automatically shutting off.
• To set the receiver to automatically turn off after
the specified period of time.
• Each time this button is pressed, the sleep time
changes as follows:
→ 10 → 20 → 30 → --- → 90 → OFF
Unit : minutes
• While operating the sleep timer, " " lights up.
Displaying the audio information
• You can check the audio information on the input
source.
• During playback,
• Each time this button is pressed, the display
mode changes as follows :
• When the EXTERNAL IN is selected as an input
source, the surround mode is not displayed.
• When XM satellite radio function is available in
your country, for details on the XM information,
see "Displaying XM information" on page 42.
• Each time this button is pressed, the brightness
of the fluorescent display changes as follows:
→ ON → dimmer → OFF
• In the display OFF mode, pressing any button will
cancel the display OFF mode.
Adjusting the brightness of the
fluorescent display
OTHER FUNCTIONS
ENGLISH
Input
signal
Surround
mode
Volume
Input
source
→→ → →
R-772(A) 2007.8.20 10:2 AM 페이지 43
44
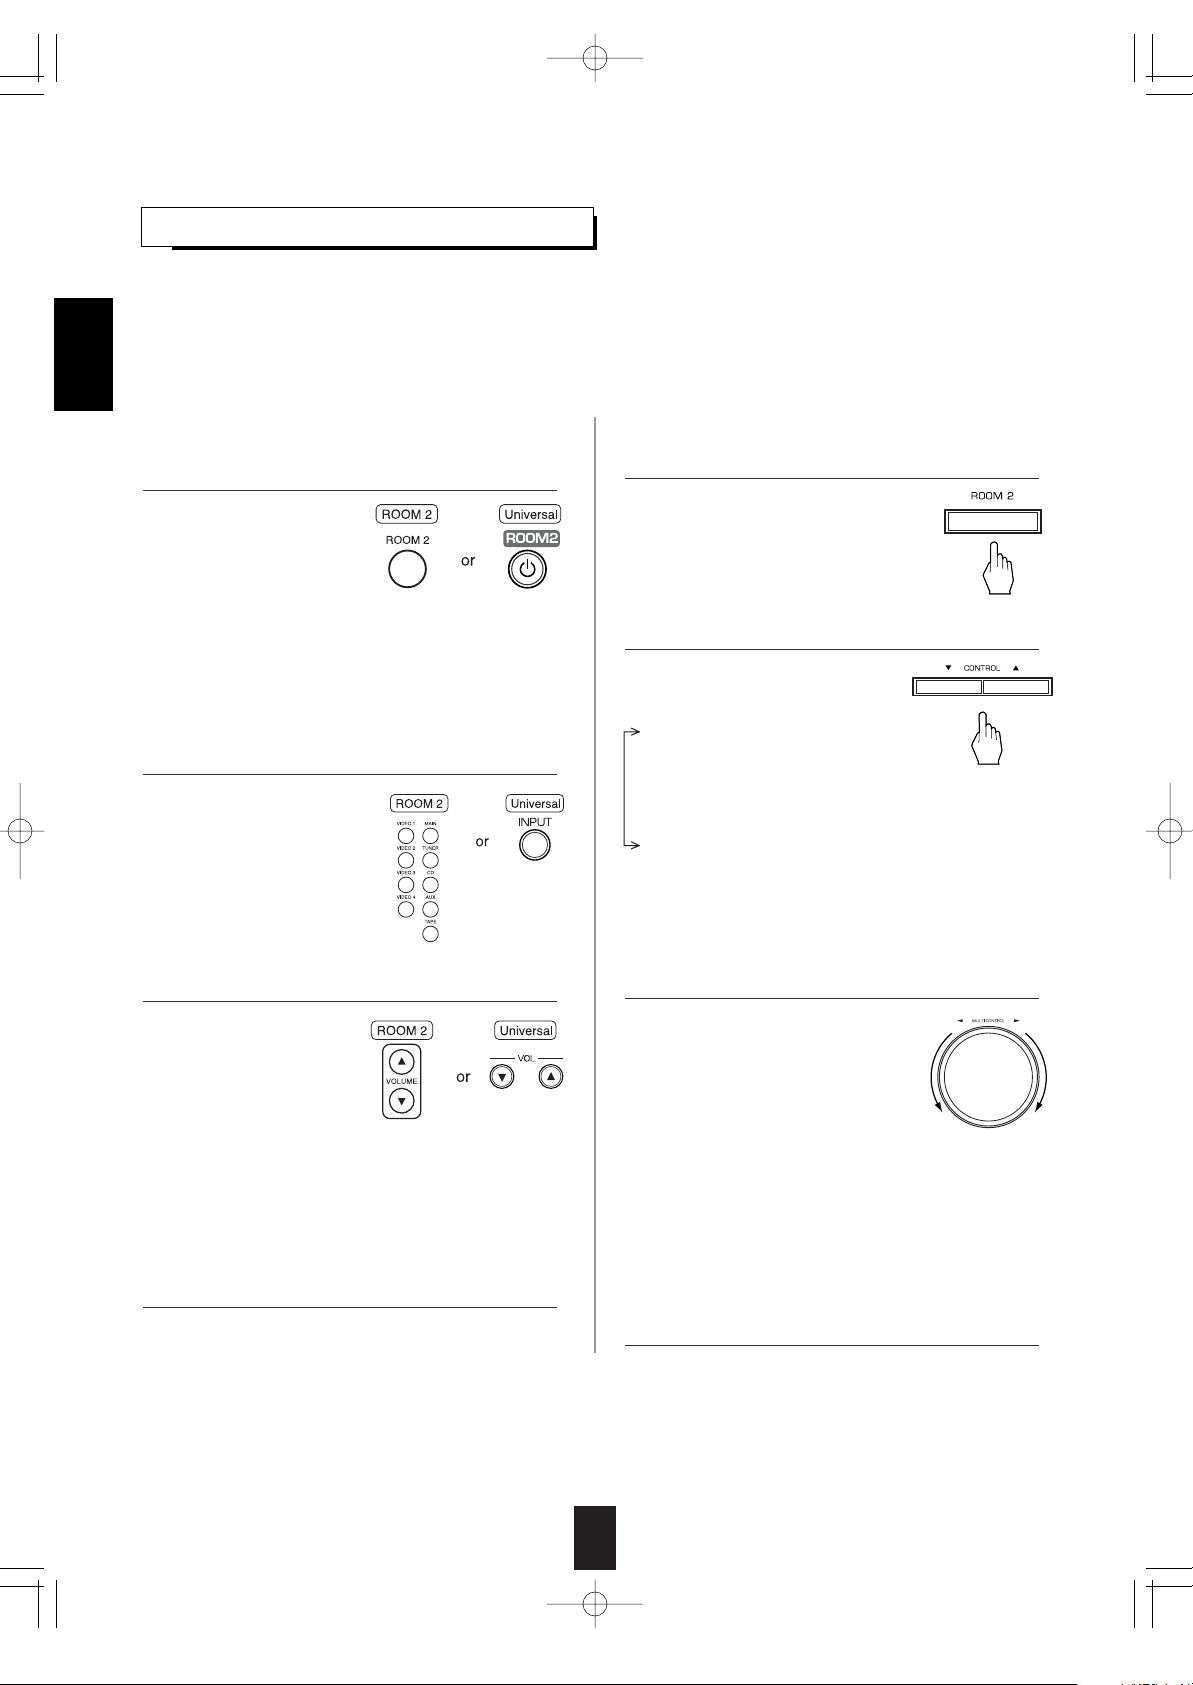
• ROOM 2 ~ is displayed for
several seconds.
• Each time this button is
pressed, the ROOM 2
mode changes as follows :
OFF : To turn off the ROOM 2 function. ("R2" goes off .)
ON : To turn it on. ("R2" lights up.)
Note :
• When the ROOM 2 mode is set to OFF, you cannot
adjust the ROOM 2 volume.
ROOM 2 SOURCE PLAYBACK
When using the buttons on the remote control unit.
• This function allows enjoying one source in the main room and playing another in a different room at the same time.
• When you connect the multi-room system kit to the IR IN jack of this receiver, you can control this receiver with not only the
universal remote control unit but also the ROOM 2 remote control unit in a different room, too. (For details, refer to
"CONNECTING MULTI-ROOM SYSTEM KIT" on page 13 and "ROOM 2 Remote Controls" on page 29.)
Notes:
• The analog signals from the EXTERNAL INs and the digital signals cannot be output to the different room, meaning no
playback in a different room.
• You cannot play the ROOM 2 source in any surround mode.
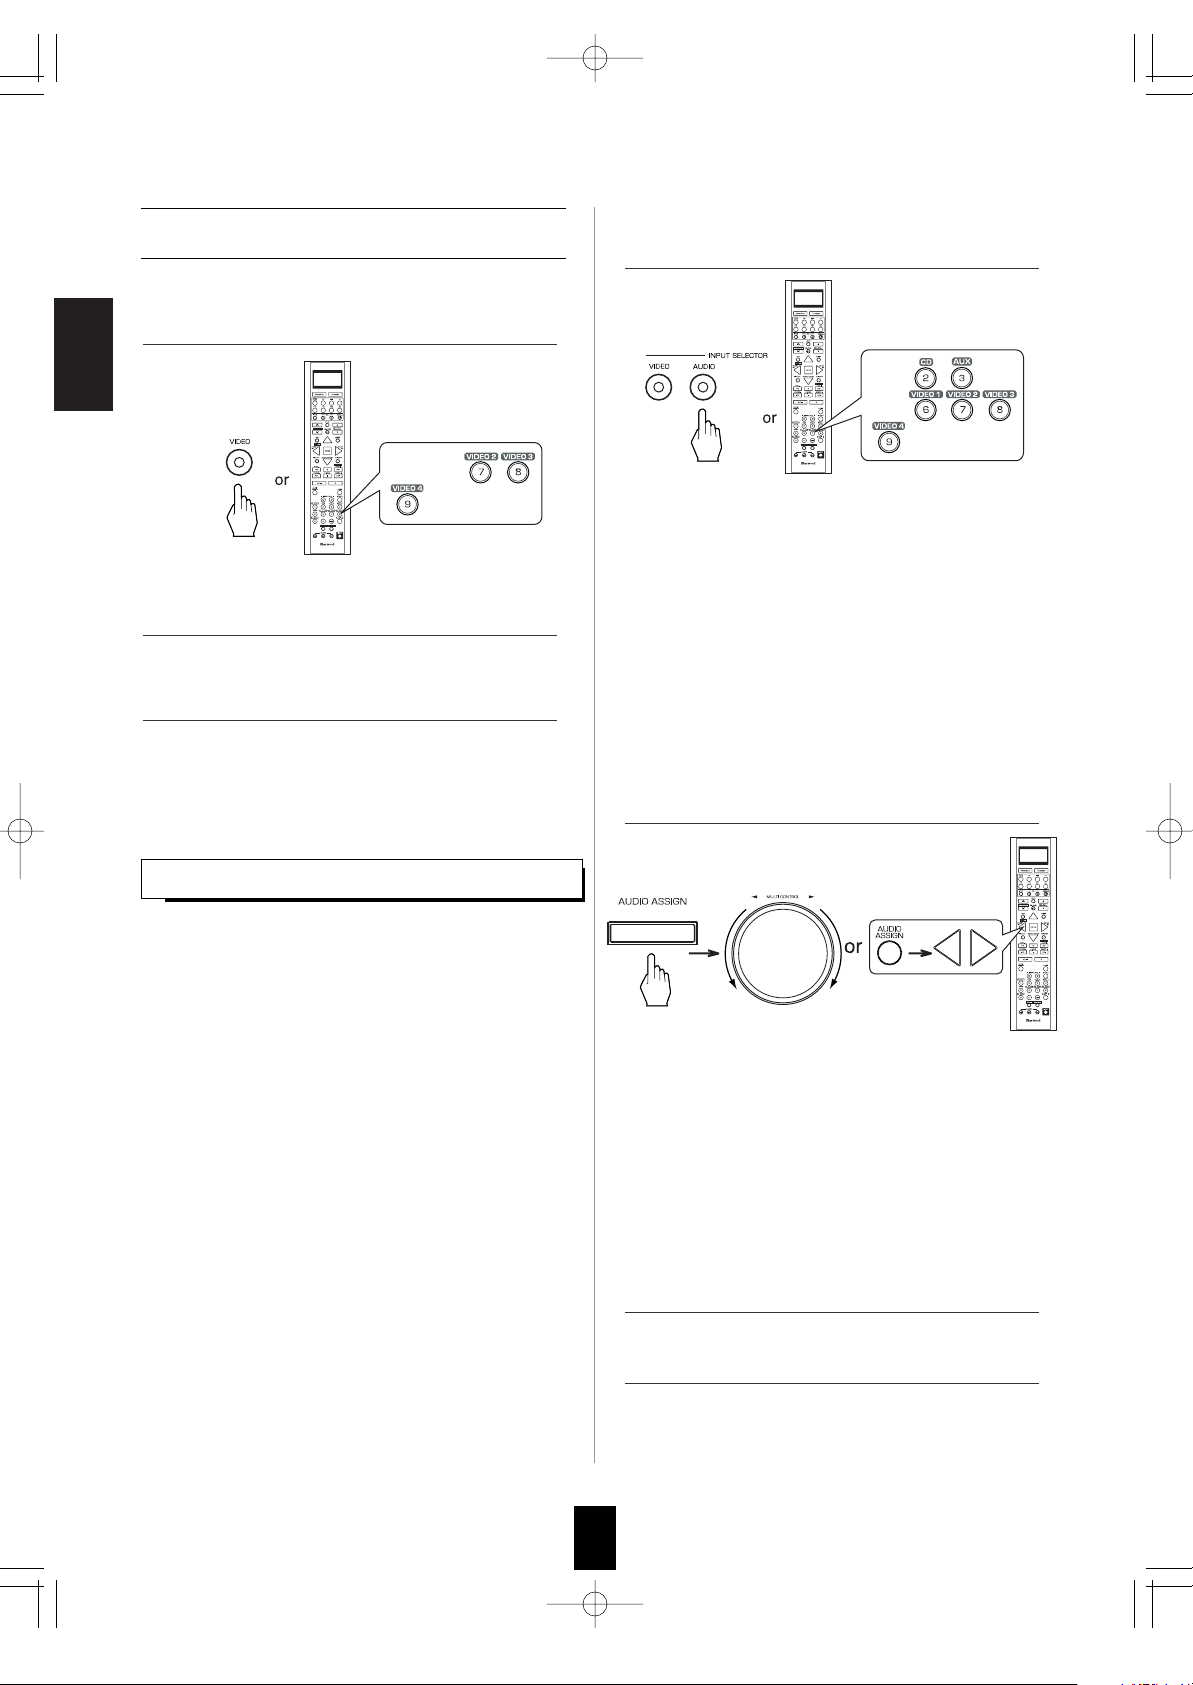
When using the buttons on the front panel.
• Each time the INPUT button
on the universal remote
control unit is pressed, the
ROOM 2 input can be
selected among MAIN
source, TUNER, CD, AUX,
TAPE, VIDEO 1 ~ VIDEO 4.
• ROOM 2 ~ is displayed for several
seconds.
• When the ROOM 2 setting mode
disappears, press the ROOM 2 button
again.
• Each time these buttons are
pressed, the mode changes as
follows :
ROOM 2 ~ : To turn on or
(ROOM 2 mode) off the ROOM 2
function.
IN ~ : To select the desired ROOM 2 source.
(ROOM 2 input)
VOL ~ : To adjust the volume on the power
(ROOM 2 volume) amplifier assigned to "BACK
ROOM 2" or "ROOM 2".
Notes:
• When the EXTERNAL IN is selected as a main input, if the MAIN source is selected as a ROOM 2 input, no audio signal can
be heard in the different room (ROOM 2).
• Even when this receiver enters the standby mode, in such a case that "R2" lights up still and the POWER ON/STANDBY
button lights up blue as it does in the operating mode, meaning only the ROOM 2 circuitry operates, the ROOM 2 source can
be played independently.
• When you do not use the ROOM 2 function, turn off the ROOM 2 function to save electricity.
• You can adjust the volume
on the power amplifier
assigned to "BACK
ROOM 2" or "ROOM 2"
when the ROOM 2 speaker
terminals are connected to
the speakers in a different
room. (For details, refer to "When selecting the AMP
ASSIGN" on page 49.)
• The MUTE button on the ROOM 2 remote control unit can
be available only when the ROOM 2 function is operating.
When selecting the ROOM 2 mode.
OFF : To turn off the ROOM 2
function. ("R2" goes off.)
ON : To turn it on. ("R2" lights up.)
When selecting the ROOM 2 input.
• You can select the desired among
MAIN source, TUNER, CD, AUX,
TAPE, VIDEO 1 ~ VIDEO 4 as a ROOM 2 source.
When selecting the ROOM 2 volume.
• You can adjust the volume on the power amplifier
assigned to "BACK ROOM 2" or "ROOM 2" when
the ROOM 2 speaker terminals are connected to the
speakers in a different room. (For details, refer to
"When selecting the AMP ASSIGN" on page 49.)
Note : When the ROOM 2 mode is set to OFF,
the ROOM 2 input and the ROOM 2 volume
cannot be selected
1. Press the ROOM 2 button.
1. Press the ROOM 2 button to enter the ROOM 2 mode.
3. Set the selected mode as desired.
4. Start play on the component related to the ROOM 2
source.
2. Select the desired mode while displaying the ROOM 2
setting mode.
2. Select the desired input as a ROOM 2 source.
3. Adjust the ROOM 2 volume.
4. Start play on the component related to the ROOM 2
source.
ENGLISH
R-772(A) 2007.8.16 5:21 PM 페이지 44

45
RECORDING
Recording with TAPE
• To record the analog signals onto the recording
equipment, be sure to connect the ROOM2 OUT
jacks to the recording equipment. (For details,
refer to "CONNECTING AUDIO COMPONENTS"
on page 8.)
• The analog signals from the EXTERNAL INs as well as the digital signals from the coaxial or optical digital input can be
heard but cannot be recorded.
• When recording the analog signals from CD, AUX, VIDEO 1 ~ 4, be sure to select the "ANALOG" for the AUDIO MODE.
(For details, refer to "When selecting the AUDIO MODE" on page 54.)
• The volume and tone (bass, treble) settings have no effect on the recording signals.
1. Select the desired input as a recording source
except for TAPE.
2. Turn on the ROOM 2.
3. Select the MAIN as a ROOM 2 input.
4. Start recording on the TAPE.
5. Start play on the desired input.
ENGLISH
Dubbing the audio and video signals
separately onto VIDEO 1
Example: When dubbing the VIDEO 2 video signal and
the CD audio signal separately onto VIDEO 1.
1. Select VIDEO 2 as a video recording source.
2. Select CD as an audio recording source.
3. Start recording on the VIDEO 1.
4. Start play on the VIDEO 2 and the CD
respectively.
• The audio signal from the CD and the video
signal from the VIDEO 2 will be dubbed and you
can enjoy them on the TV set and from the
speakers.
Note : Be sure to observe the order of the above
steps 1 and .
R-772(A) 2007.8.16 5:21 PM 페이지 45
ENGLISH
46
1. Select the desired of CD, AUX, VIDEO 1~4 as a
recording source.
2. For digital recording, select the digital input as
recording signal input.
3. Start recording on the component connected to
the OPTICAL DIGITAL OUT.
4. Start play on the desired input.
DIGIT AL AUDIO RECORDING WITH MD RECORDER
• Only when the OPTICAL DIGITAL OUT of this receiver is
connected to the OPTICAL DIGITAL IN of the MD recorder
or CD recorder, you can enjoy high-quality sound of digital
recording without converting the original signals. Refer to
"CONNECTING VIDEO COMPONENTS", "CONNECTING
AUDIO COMPONENTS" and "CONNECTING DIGITAL
INS and OUT" on pages 6~9 and the operating instructions
of the MD recorder or CD recorder.
Notes:
• Depending on the digital audio signal format input into the
HDMI IN connector, some digital signals cannot be output
from the OPTICAL DIGITAL OUT jack.
• Digital recording is available for the digital audio program
sources such as CDs, MDs, some DVDs, etc.
• In most DVDs and SACDs as well as some CDs, etc.,
digital recording may not be available depending on the
signal format.
• There are some restrictions on recording digital signals.
When making digital recordings, refer to the operating
instructions of your digital recording equipment to know
what restrictions are imposed.
Note :
• If the AUDIO MODE is set to the mode other than
"DIGITAL" for the corresponding recording source
on the INPUT SETUP menu, the digital audio
signals from the selected digital input will not be
output and there will be no recording. (For details,
refer to "When CD, AUX, VIDEO 1~ 4 is selected
as an input source" on page 31 and "When
selecting the AUDIO MODE" on page 54.)
Dubbing from video components onto
VIDEO 1
• The audio and video signals from the desired
input will be dubbed onto the VIDEO 1 and you
can enjoy them on the TV set and from the
speakers.
1. Select the desired of VIDEO 2 ~ 4 as a recording
source except VIDEO 1.
2. Start recording on the VIDEO 1.
3. Start play on the desired input.
In case of recording the digital audio signal input
into a HDMI IN connector
• Select the desired recording source to which the HDMI
IN is connected and assigned and then perform the
steps 3 and 4 (, but ignore the step 2).
Note :
• If the AUDIO MODE is set to the mode other than
"HDMI" for the corresponding recording source on the
INPUT SETUP menu, the digital audio signals will not
be output and there will be no recording. (For details,
refer to "When selecting the AUDIO MODE" on page
54.)
R-772(A) 2007.8.16 5:21 PM 페이지 46
ENGLISH
47
OSD Menu Settings
• The OSD (On-Screen Display) menu is a setting menu that is displayed on the monitor TV and allows you to perform
the setup procedures easily. In most situations, you will only need to set this once during the installation and layout of
your home theater, and it rarely needs to be changed later.
The OSD menu consists of 6 main menus ; system setup, input setup, speaker / room EQ setup, CH level setup,
sound parameter and multi room setup. These menus are then divided up into various sub-menus.
Notes:
• The OSD menu and the momentary OSD cannot be displayed via the HDMI MONITOR OUT connector.
• Depending on the VIDEO MODE setting and the video connections between this receiver and the video component,
the OSD menu and the momentary OSD cannot be displayed via (COMPOSITE) VIDEO MONITOR OUT jack, or
the picture is automatically turned off and only the OSD menu can be displayed via COMPONENT MONITOR OUT
jacks. (For details, refer to "Relationship between the video input signal and the video output signal" on page 7.)
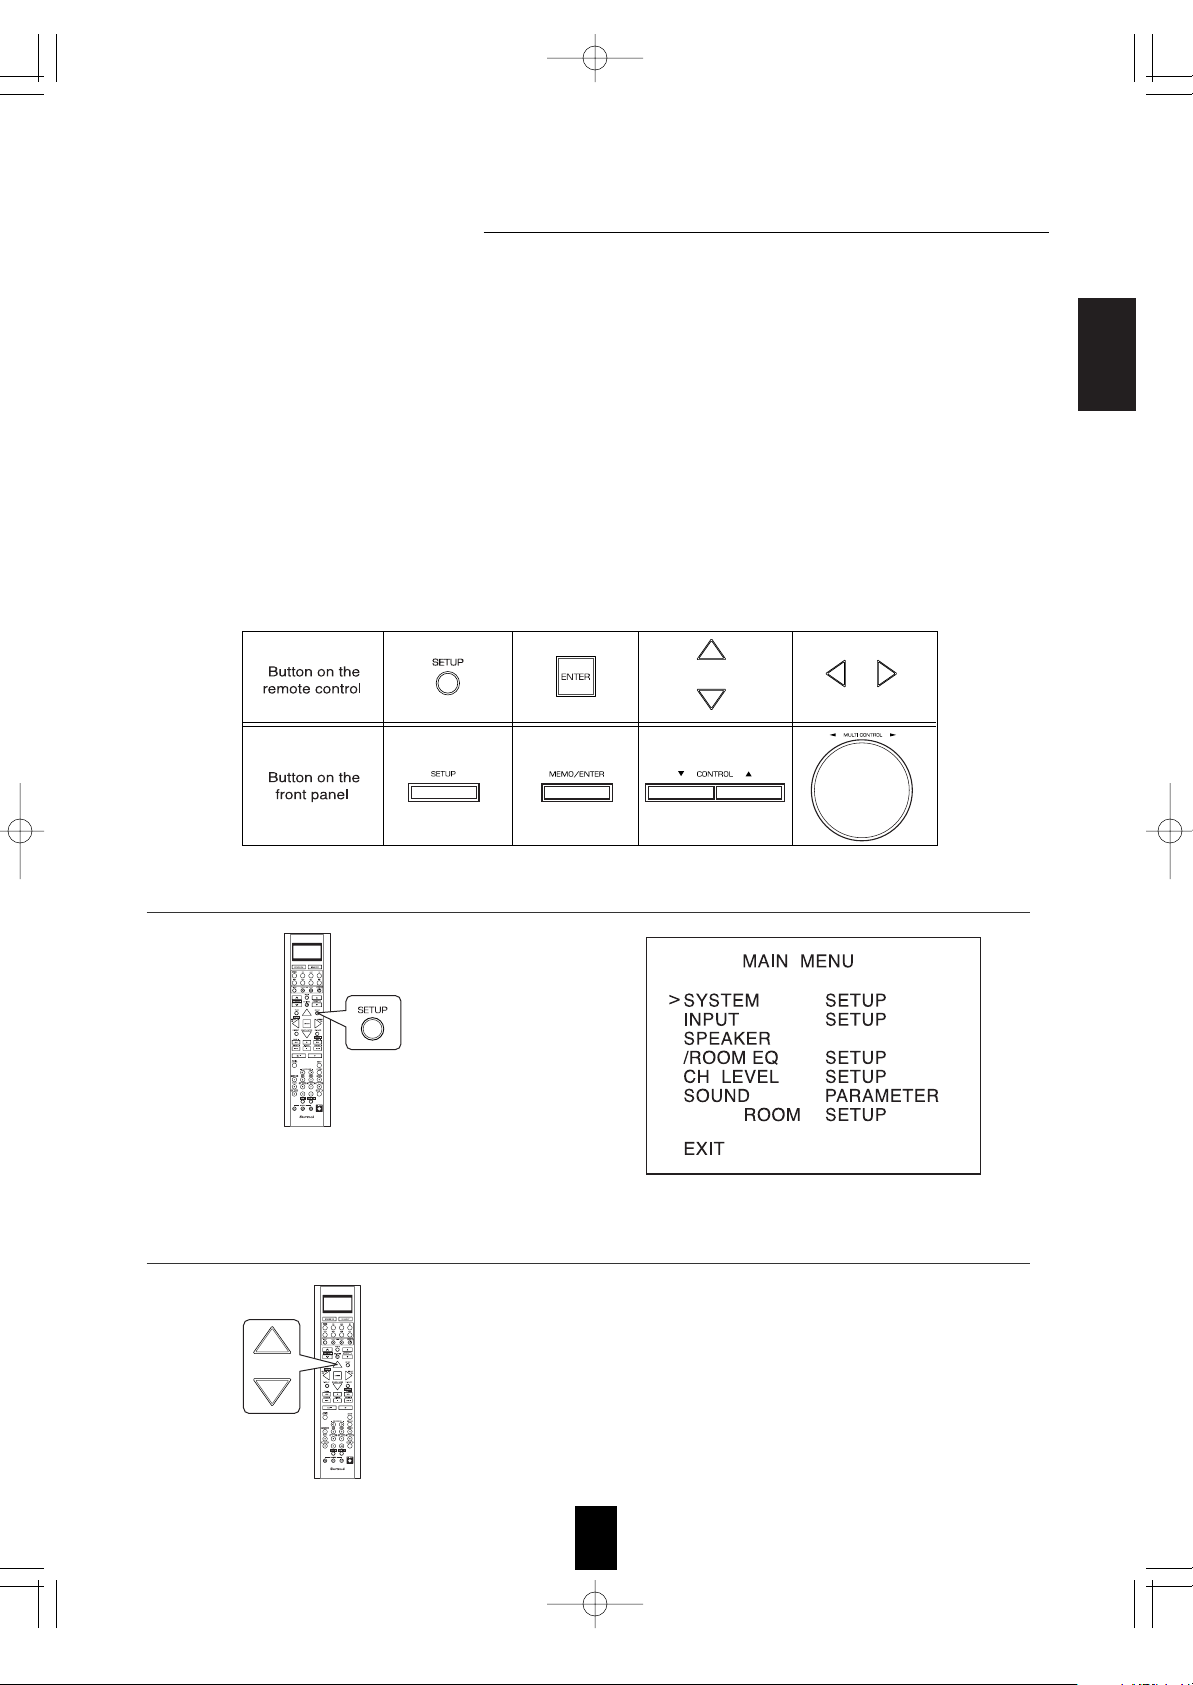
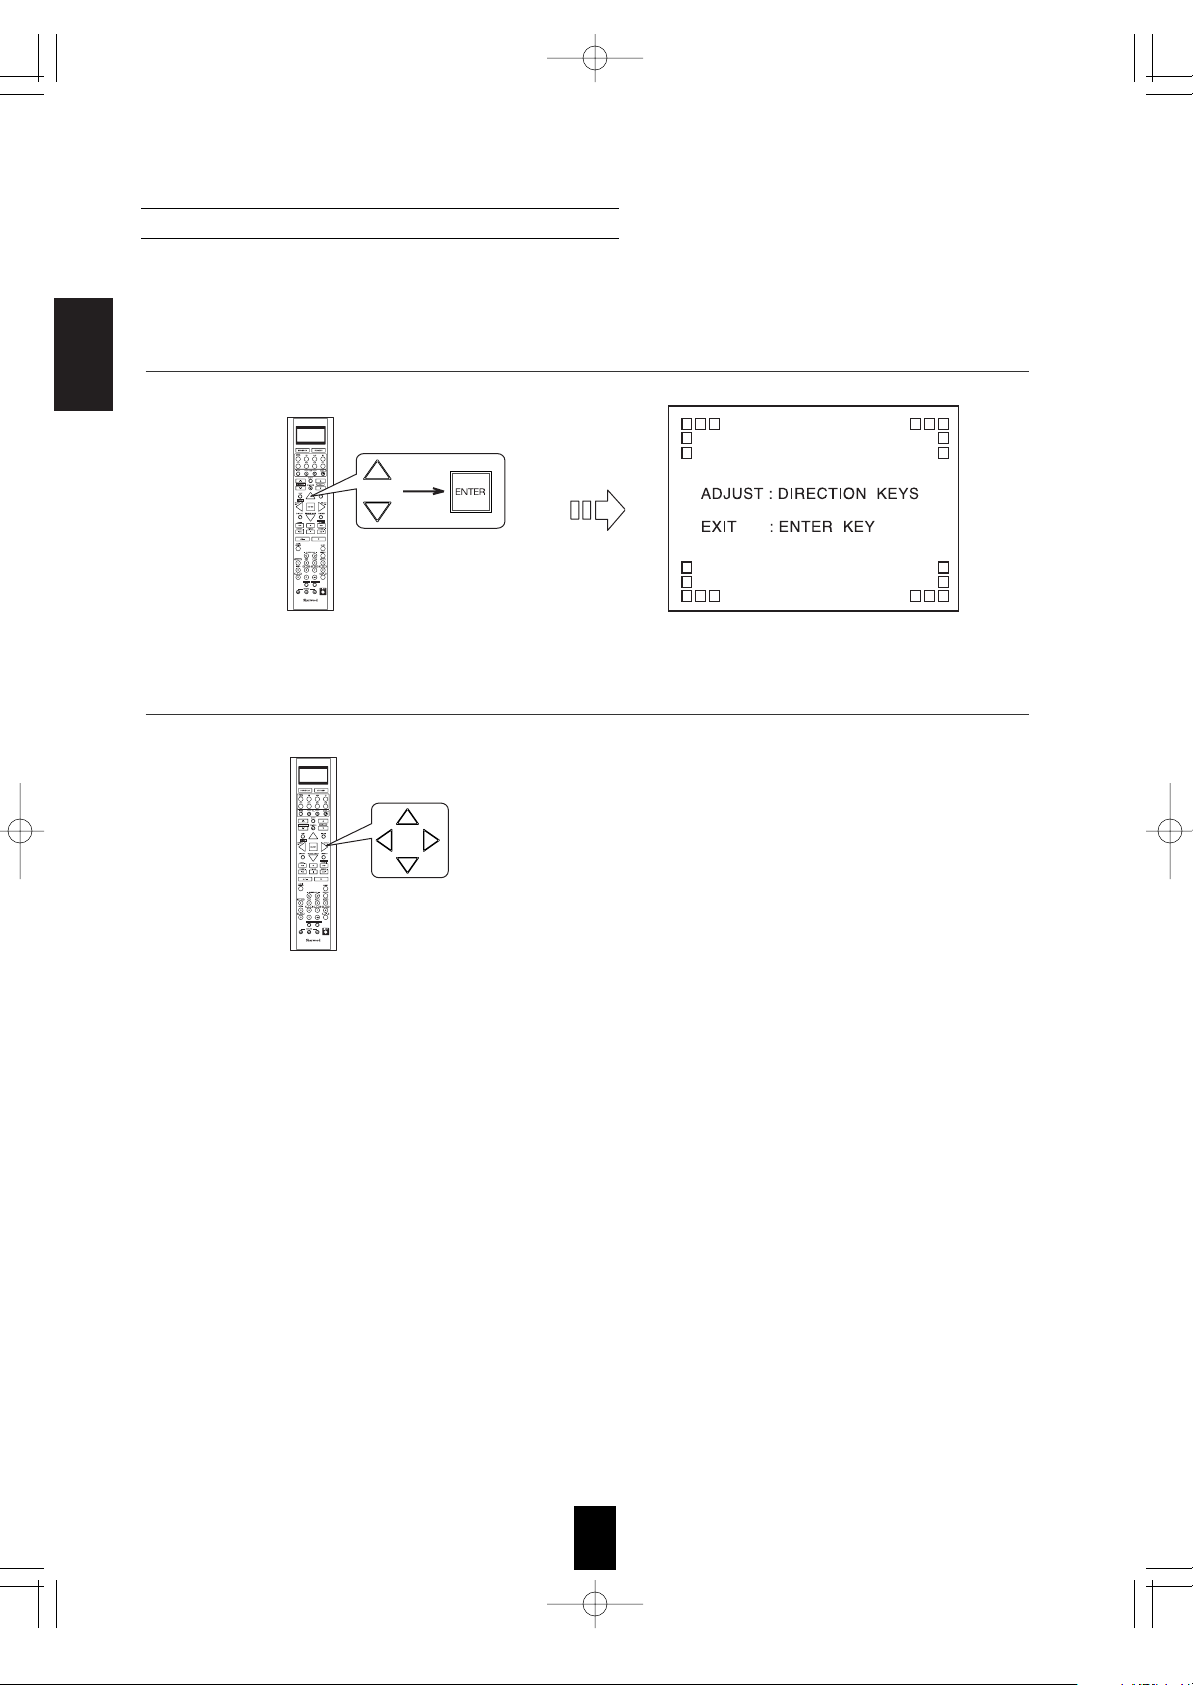
Navigating through the OSD menu
• The explanations here assume you are using the buttons on the remote control when performing the OSD menu
operation. However, you can use the buttons on the front panel as well.
The buttons on the front panel correspond to those on the remote control as shown below.
MULTI
• The main menu will be shown.
• To turn the menu screen off, press this button again.
1. Turn the menu screen on.
2. Select the desired menu using the CURSOR UP()/DOWN() buttons.
R-772(A) 2007.8.16 5:21 PM 페이지 47
ENGLISH
48
• For the setting details, see page in
• Adjust the setting(s) in each setting category to your preference.
• When the SETUP button is pressed on a sub-menu, the menu screen will be turned off.
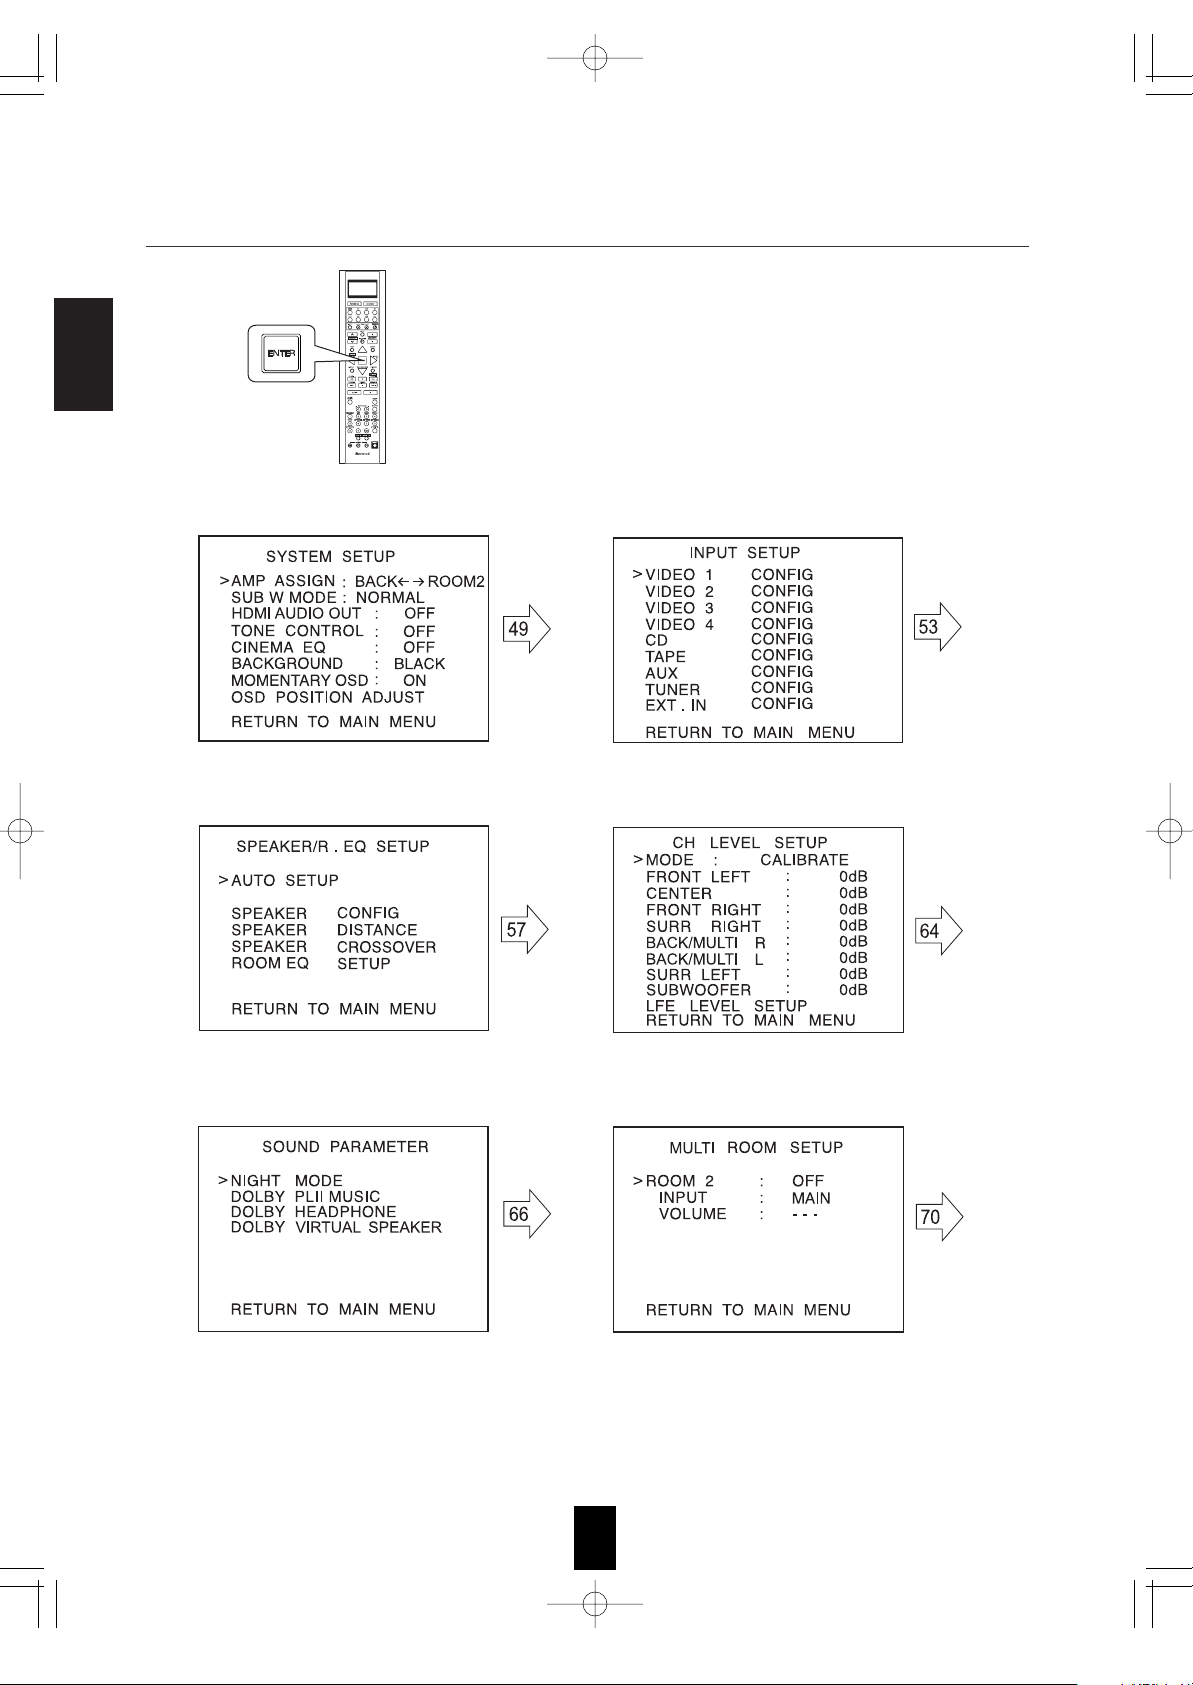
When selecting the SYSTEM SETUP When selecting the INPUT SETUP
When selecting the SOUND PARAMETER When selecting the MULTI ROOM SETUP
When selecting the SPEAKER /ROOM EQ SETUP
When selecting the CH LEVEL SETUP
3. Confirm your selection.
R-772(A) 2007.8.16 5:21 PM 페이지 48
ENGLISH
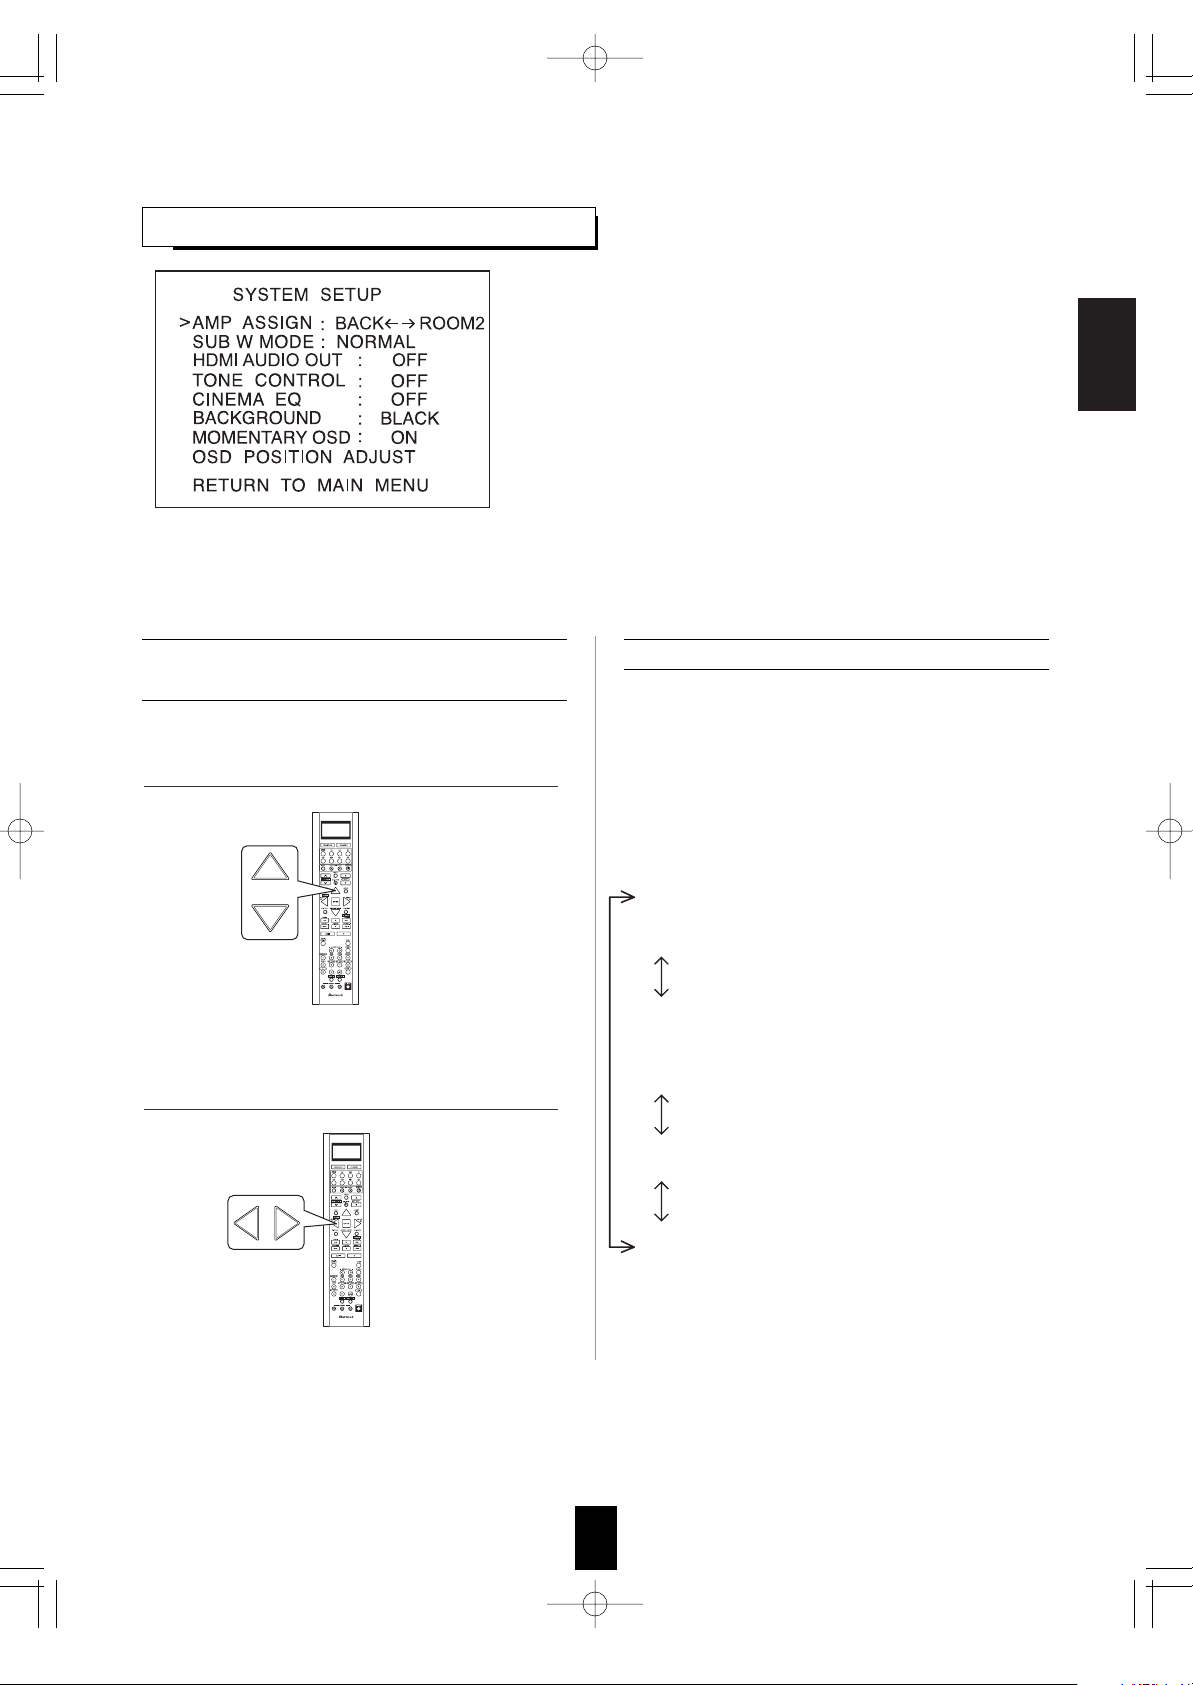
49
• AMP ASSIGN : To assign the surround back channels' power
amplifier correctly depending on how to use the
speakers.
• SUBWOOFER MODE : To select the desired subwoofer mode.
• HDMI AUDIO OUT : To output the digital audio signals from the
HDMI MONITOR OUT connector.
• TONE CONTROL : To adjust the tone (bass and treble) as
desired.
• CINEMA EQ : To select the desired cinema EQ mode.
• BACKGROUND : To select the desired background color of the
momentary OSD and the OSD menu.
• MOMENTARY OSD : To turn on or off the OSD that shows the
status corresponding to each operation
momentarily.
• OSD POSITION ADJUST : To adjust the positon of the
momentary OSD and the OSD menu.
SETTING THE SYSTEM SETUP
When selecting the items other than OSD
POSITION ADJUST
• The surround back channels' power amplifier can
drive the surround back speakers, the ROOM 2
speakers or the front bi-amp capable speakers.
Depending on how to use the speakers, you
should assign the power amplifier correctly. (For
details, refer to "CONNECTING SPEAKERS" on
page 10 and "CONNECTING ROOM 2 OUTS" on
page 12.)
BACK ROOM 2 : When connecting this
receiver to the surround back
speakers and the ROOM 2 speakers
both, the power amplifier
automatically drives the surround
back speakers or the ROOM 2
speakers depending on whether the
ROOM 2 function is turned off or on.
BI - AMP : To drive the front bi-amp capable
speakers when connecting the FRONT
and the SURROUND BACK/MULTI
channels to them.
SURR BACK : To drive the surround back
speakers when connecting the
SURROUND BACK/MULTI
channels to them.
ROOM 2 : To drive the ROOM 2 speakers when
connecting the ROOM 2 channels to
them.
When selecting the AMP ASSIGN
1. Press the CURSOR UP()/DOWN() buttons
to select the desired item.
2. Press the CURSOR LEFT()/RIGHT()
buttons to set the selected item as desired.
R-772(A) 2007.8.16 5:21 PM 페이지 49
ENGLISH
50
When selecting the SUBWOOFER MODE
• "SW PLUS" mode is valid only when "FRONT" and "CENTER" are set to "FULL RANGE" and
"SUBWOOFER" is set to "YES" on the SPEAKER/ROOM EQ SETUP menu. (For details, refer to "SETTING
THE SPEAKER/ ROOM EQ SETUP" on page 57.)
NORMAL : When the low frequency signals of channels set to "FULL RANGE" are reproduced from those
channels only. In this mode, the low frequency signals that are reproduced from the subwoofer
channel is only the low frequency signals of LFE (from the multi-channel sources that contains LFE
(Low Frequency Effects) channel, also called the ".1" channel) and the channels set to the setting
value other than "FULL RANGE".
SW PLUS : When the low frequency signals of channels set to "FULL RANGE" are reproduced
simultaneously from those channels and the subwoofer channel.
In this mode, the low frequency range expands more uniformly through the room, but depending
on the size and shape of the room, interference may result in a decrease of the actual volume of
the low frequency range.
• The HDMI connection can carry uncompressed digital video signals and digital audio signals.
Depending on whether these digital audio signals are output from the HDMI MONITOR OUT of this receiver
or not, you should set the HDMI AUDIO OUT correctly.
OFF : Not to output the digital audio signals from the HDMI MONITOR OUT of this receiver, meaning these
signals are heard from the speakers connected to this receiver.
ON : To output the digital audio signals, meaning these signals are heard from the speakers of your TV.
Notes:
• When the HDMI AUDIO OUT is set to ON, no sound will be heard from the speakers connected to this
receiver (except ROOM 2 speakers) even though any input source is selected.
• If your TV cannot support some digital audio formats, no sound may be heard from its speakers even when
the HDMI AUDIO OUT is set to ON.
OFF : To listen to a program source without the tone effect. ("DIRECT" indicator lights up.)
ON : To adjust the tone for your taste. ("DIRECT" indicator goes off.)
When selecting the TONE CONTROL
When selecting the HDMI AUDIO OUT
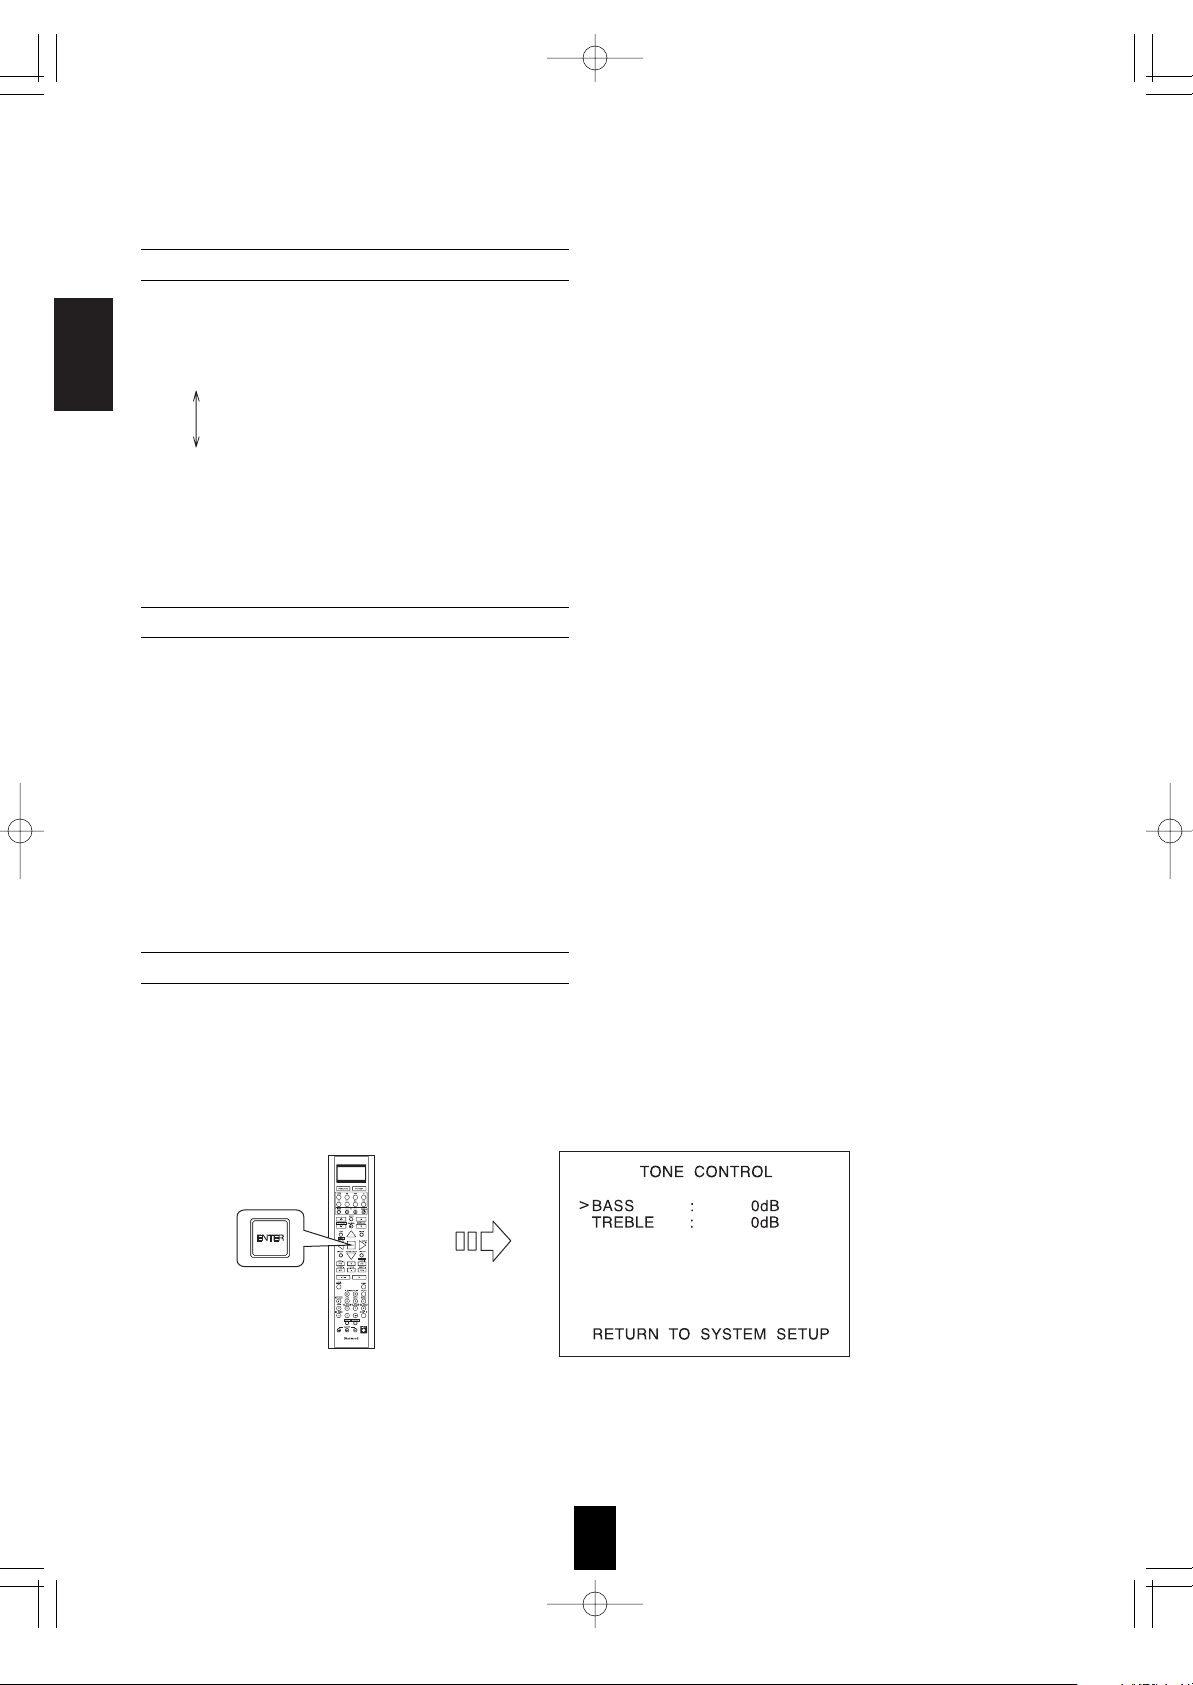
When the TONE CONTROL is set to ON to adjust the tone (bass and treble)
. Press the ENTER button to enter the tone adjustment mode.
Continued
R-772(A) 2007.8.16 5:21 PM 페이지 50

ENGLISH
51
. Press the CURSOR LEFT()/RIGHT() buttons to adjust the selected tone as desired.
• The tone level can be adjusted within the range of -10 ~
+10 dB.
• In general, we recommend the bass and treble to be
adjusted to 0 dB (flat level).
• Extreme settings at high volume may damage your
speakers.
• To complete tone adjustment, repeat the above steps
and .
OFF : To turn off the cinema EQ function.
ON : To compensate for edgy or shrill movie sound tracks.
When selecting the CINEMA EQ
BLACK : To display the black as the color background of the momentary OSD and the OSD menu.
BLUE : To display the blue.
Note : Only when no video signals are input into this unit, the selected background color will be displayed.
When selecting the BACKGROUND
ON : To turn on the OSD function that shows the status corresponding to each operation on this unit
momentarily.
OFF : To turn it off.
When selecting the MOMENTARY OSD
Note : When outputting the component video signal from the COMPONENT MONITOR OUT jacks as it was
input, the momentary OSD cannot be displayed.
Continued
. Press the CURSOR UP()/DOWN() buttons to select the desired tone mode.
R-772(A) 2007.8.16 5:21 PM 페이지 51
ENGLISH
52
When selecting the OSD POSITION ADJUST
• You can adjust the position of the momentary OSD and the OSD menu that are displayed on the monitor TV.
1. Press the CURSOR UP()/DOWN() buttons to select the OSD POSITION ADJUST, then press the
ENTER button.
2. Press the CURSOR UP()/DOWN()/LEFT()/RIGHT() buttons to adjust the position of the momentary
OSD and the OSD menu as desired.
R-772(A) 2007.8.16 5:21 PM 페이지 52
 Loading...