

Inkel EXM50 User Manual
EXM-50
WIRELESS STREAMING AUDIO
DIFFUSION AUDIO SANS FIL
AUDIO POR TRANSMISIÓN INALÁMBRICA
OPERATING INSTRUCTIONS
INSTRUCCIONES DE FUNCIONAMIENTO
GUIDE D’UTILISATION

Table of Contents
Safety Precautions .....................................................3
Getting Started ..........................................................6
Features .......................................................................................................................6
What’s Included ........................................................................................................7
Parts Description ......................................................................................................8
Power Connection ................................................................................................12
Application Installation ....................................................................................... 14
Pairing with the Application .............................................................................14
LED Indicators......................................................................................................... 15
Application Main Screen Overview ................................................................16
Operation .................................................................17
Listening to Music of Your Phone .................................................................... 17
Listening to USB ....................................................................................................17
Listening to an External Audio Component ................................................ 21
Listening to FM Radio ..........................................................................................23
Settings ....................................................................26
Setting the Sound Eects ................................................................................... 26
Setting Sleep Timer ..............................................................................................26
Setting Auto Power Down ................................................................................. 27
Viewing the Information.....................................................................................27
Troubleshooting ......................................................28
Specications ...........................................................29
2

Safety Precautions
t Keep these instructions.
t Do not install the device near any heat sources such as radiators, heat registers,
stoves, or other apparatus (including ampliers) that produce heat.
t Unplug the device during lightning storms or when unused for long periods of
time.
t Do not attempt to disassemble the device or any accessories.
t Batteries shall not be exposed to excessive heat such as sunshine, re or the like.
t Observe and follow local regulations regarding battery disposal.
t Do not drop or apply any physical shock/impact to the device.
t Do not clean the device with chemical products, cleaning solvents or
detergents. Clean only with a dry cloth.
t Do not use the device near areas of large electromagnetic interference.
t Do not obstruct or place wet objects near/on the speaker grill.
t Refer all servicing to qualied service personnel. Servicing is required when the
device has been damaged in any way, such as power-supply cord is damaged,
liquid has been spilled or objects have fallen into the device, the device has
been exposed to rain or moisture, does not operate normally, or has been
dropped.
t To completely disconnect this product from AC power, disconnect the plug
from the wall socket outlet.
t When setting up this product, make sure that the AC outlet you are using is
easily accessible.
English
3

FCC information
This equipment has been tested and found to comply with the limits
for a Class B digital device, pursuant to Part 15 of the FCC Rules. These
limits are designed to provide reasonable protection against harmful
interference in a residential installation. This equipment generates, uses
and can radiate radio frequency energy and, if not installed and used
in accordance with the instructions, may cause harmful interference to
radio communications. However, there is no guarantee that interference
will not occur in a particular installation. If this equipment does cause
harmful interference to radio or television reception, which can be
determined by turning the equipment o and on, the user is encouraged
to try to correct the interference by one or more of the following
measures:
t Reorient or relocate the receiving antenna.
t Increase the separation between the equipment and receiver.
t Connect the equipment into an outlet on a circuit dierent from that
to which the receiver is connected.
t Consult the dealer or an experienced radio/TV technician for help.
Caution: Any changes or modications in construction of this device
which are not expressly approved by the party responsible for
compliance could void the user’s authority to operate the equipment.
This Class B digital apparatus complies with Canadian ICES-003.
This device complies with Part 15 of the FCC rules. Operation is subject to
the following two conditions:
(1) This device may not cause harmful interference, and
(2) This device must accept any interference received, including
interference that may cause undesired operation.
IC Radiation Exposure Statement
This equipment complies with IC RSS-102 radiation exposure limits
set forth for an uncontrolled environment. This equipment should be
installed and operated with a minimum distance of 20 cm between the
radiator and your body.
4
FCC Radiation Exposure Statement
This equipment complies with FCC radiation exposure limits set forth for
an uncontrolled environment. This equipment should be installed and
operated with a minimum distance of 20 cm between the radiator and
your body.
This transmitter must not be co-located or operated in conjunction with
any other antenna or transmitter.
Product Name: WIRELESS STREAMING AUDIO
Model Number: EXM-50
Responsible Party Name: Inkel Corporation
Address: 3-8, Cheongcheon-Dong, Bupyeong-Gu, Incheon, Korea, 403-853
Phone: 82-32-650-6000
URL: http://www.inkel.co.kr
“Made for iPod,” “Made for iPhone,” and “Made for iPad” mean that an electronic
accessory has been designed to connect specifically to iPod, iPhone, or
iPad, respectively, and has been certified by the developer to meet Apple
performance standards. Apple is not responsible for the operation of this device
or its compliance with safety and regulatory standards. Please note that the use
of this accessory with iPod, iPhone, or iPad may affect wireless performance.
iPhone, iPod, and iPod touch are trademarks of Apple Inc., registered in the U.S.
and other countries.
Bluetooth technology works with iPhone 5, and iPod touch (5th generation).
English
5
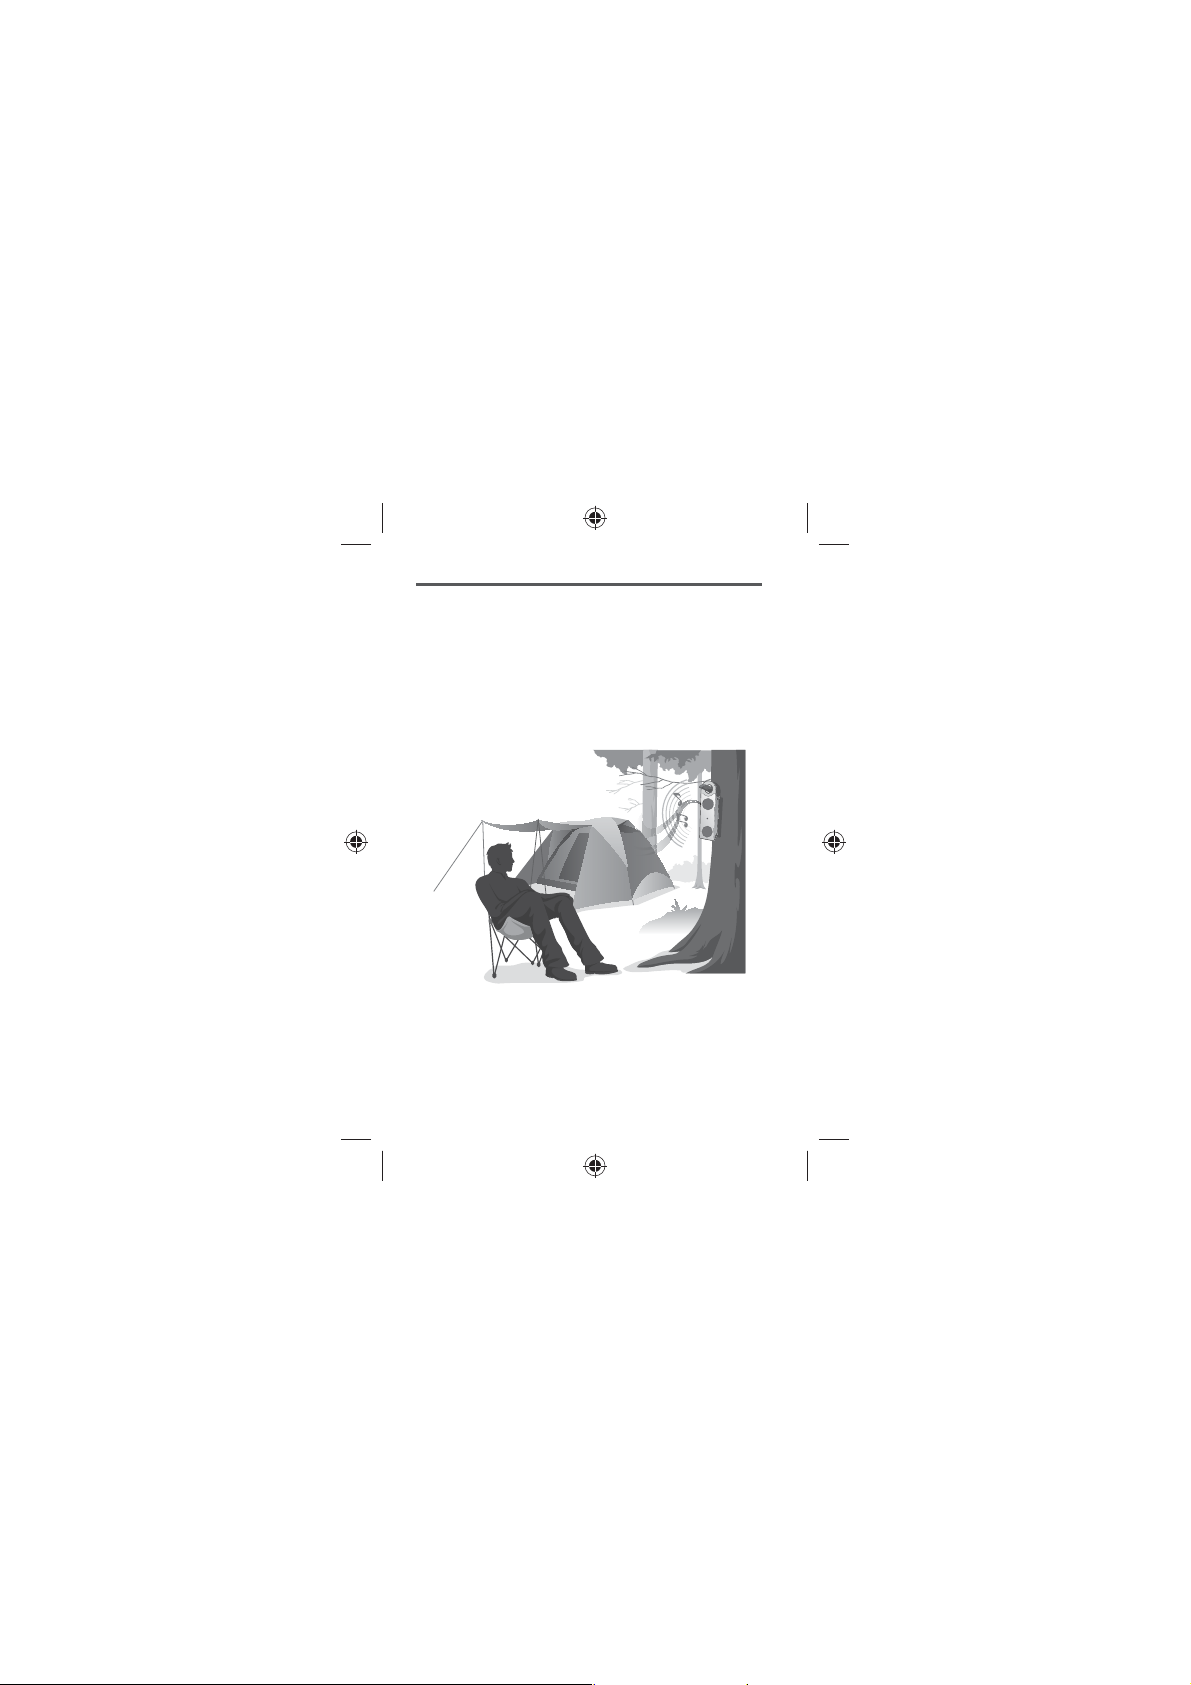
Getting Started
Features
You can enjoy the following features:
t Wireless Music Streaming via Bluetooth
t Free Sherwood Smart Audio Application
t Made for iPhone 5 and iPod touch (5th generation)
t Made for Android
t 5W x 2Ch Powerful Output
t Crystal Clear Stereo Sound
t Stylish, Unique, and IPX4 Certied Water-proof Design
6
TM
Smartphone

What’s Included
Main Unit Remote Control
ON/STANDBY
MUTE
VOLUME INPUT SELECT
TUNE+
PRESET-
PRESET+
TUNE-
REPEAT
3D
FLAT
SOUND
SHUFFLE
EQ1 EQ2
SLEEP
RC-153
Adapter FM Radio Antenna User Manual
Note
t Contents of the user manual may change without prior notication.
t Warranty may be provided depending on the region.
t The shape of the adapter may vary depending on the region.
English
7

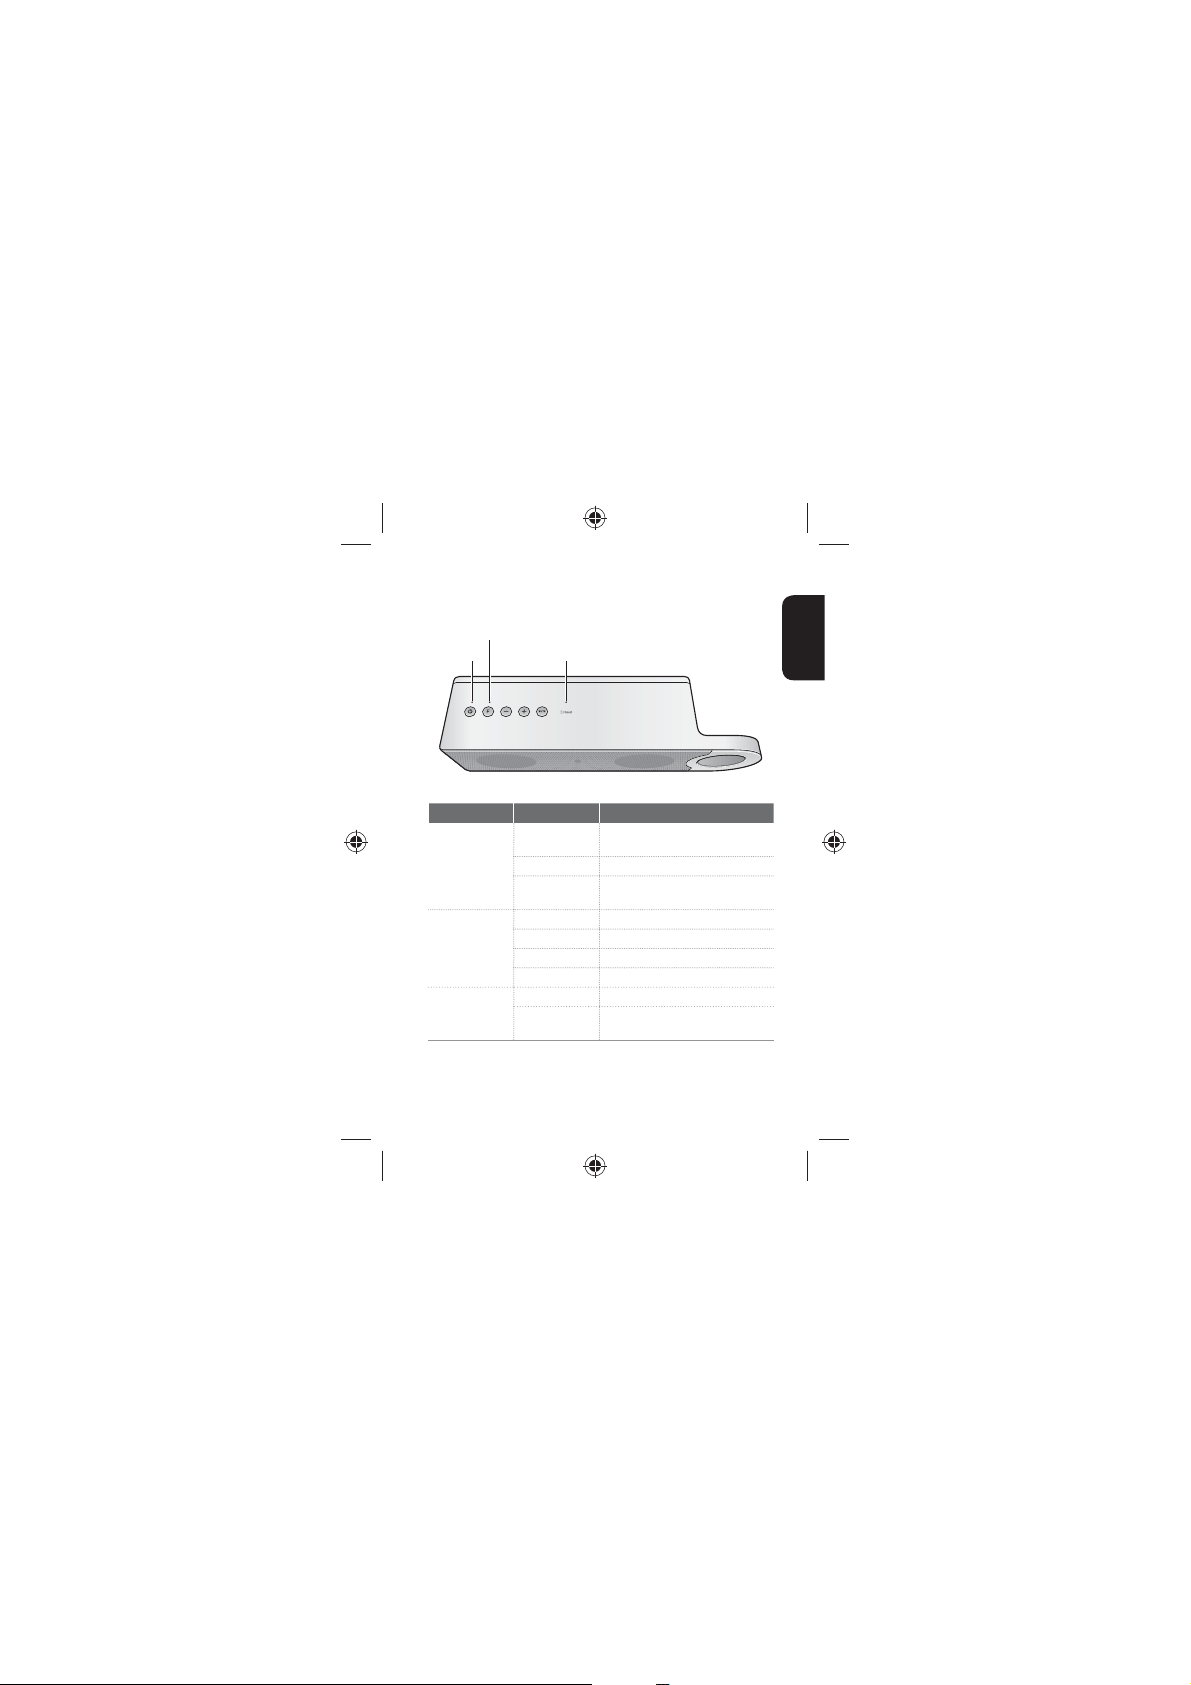
Parts Description
Main Unit
2
3
4
5
6
1
7
8
8
10
9

No. Name Description
Mute button Mutes the sound.
1
Volume
2
buttons
Function
3
button
Power button
4
Speaker Built-in stereo speaker units
5
Battery cover Places six AA(9 V) batteries.
6
7
connector
AUX IN
8
connector
USB port Connects a USB ash drive.
9
FM antenna
10
connector
Adjusts the volume level.
Changes function: MUSIC LIBRARY, USB HOST,
FM TUNER, AUX IN
Turns on or o the main unit or turns the main
unit to the standby mode.
DC IN
Connects the power cable.
Connects a 3.5 mm mini cable.
Connects the FM radio antenna.
English
9
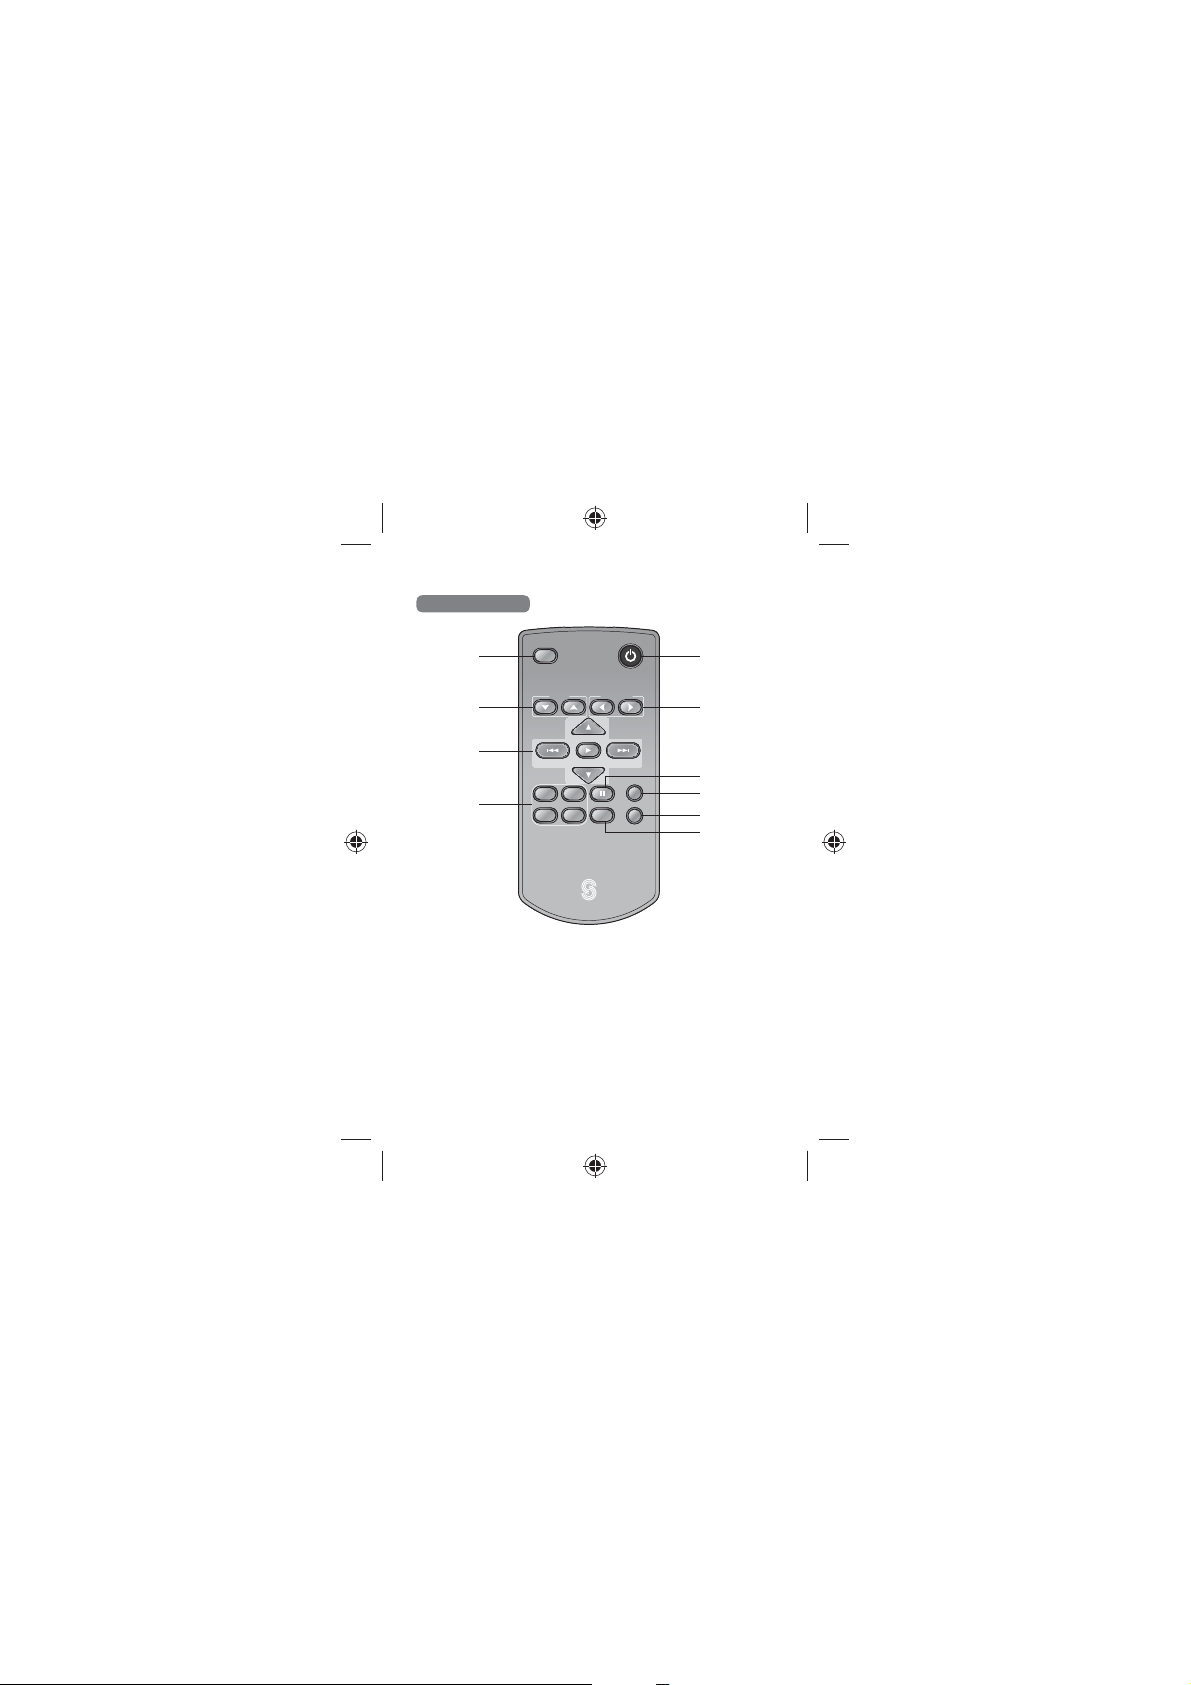
Remote Control
1
2
3
4
MUTE
VOLUME INPUT SELECT
PRESET-
3D
SOUND
EQ1 EQ2
ON/STANDBY
5
6
TUNE+
PRESET+
TUNE-
REPEAT
FLAT
SHUFFLE
SLEEP
7
8
9
10
RC-153
10
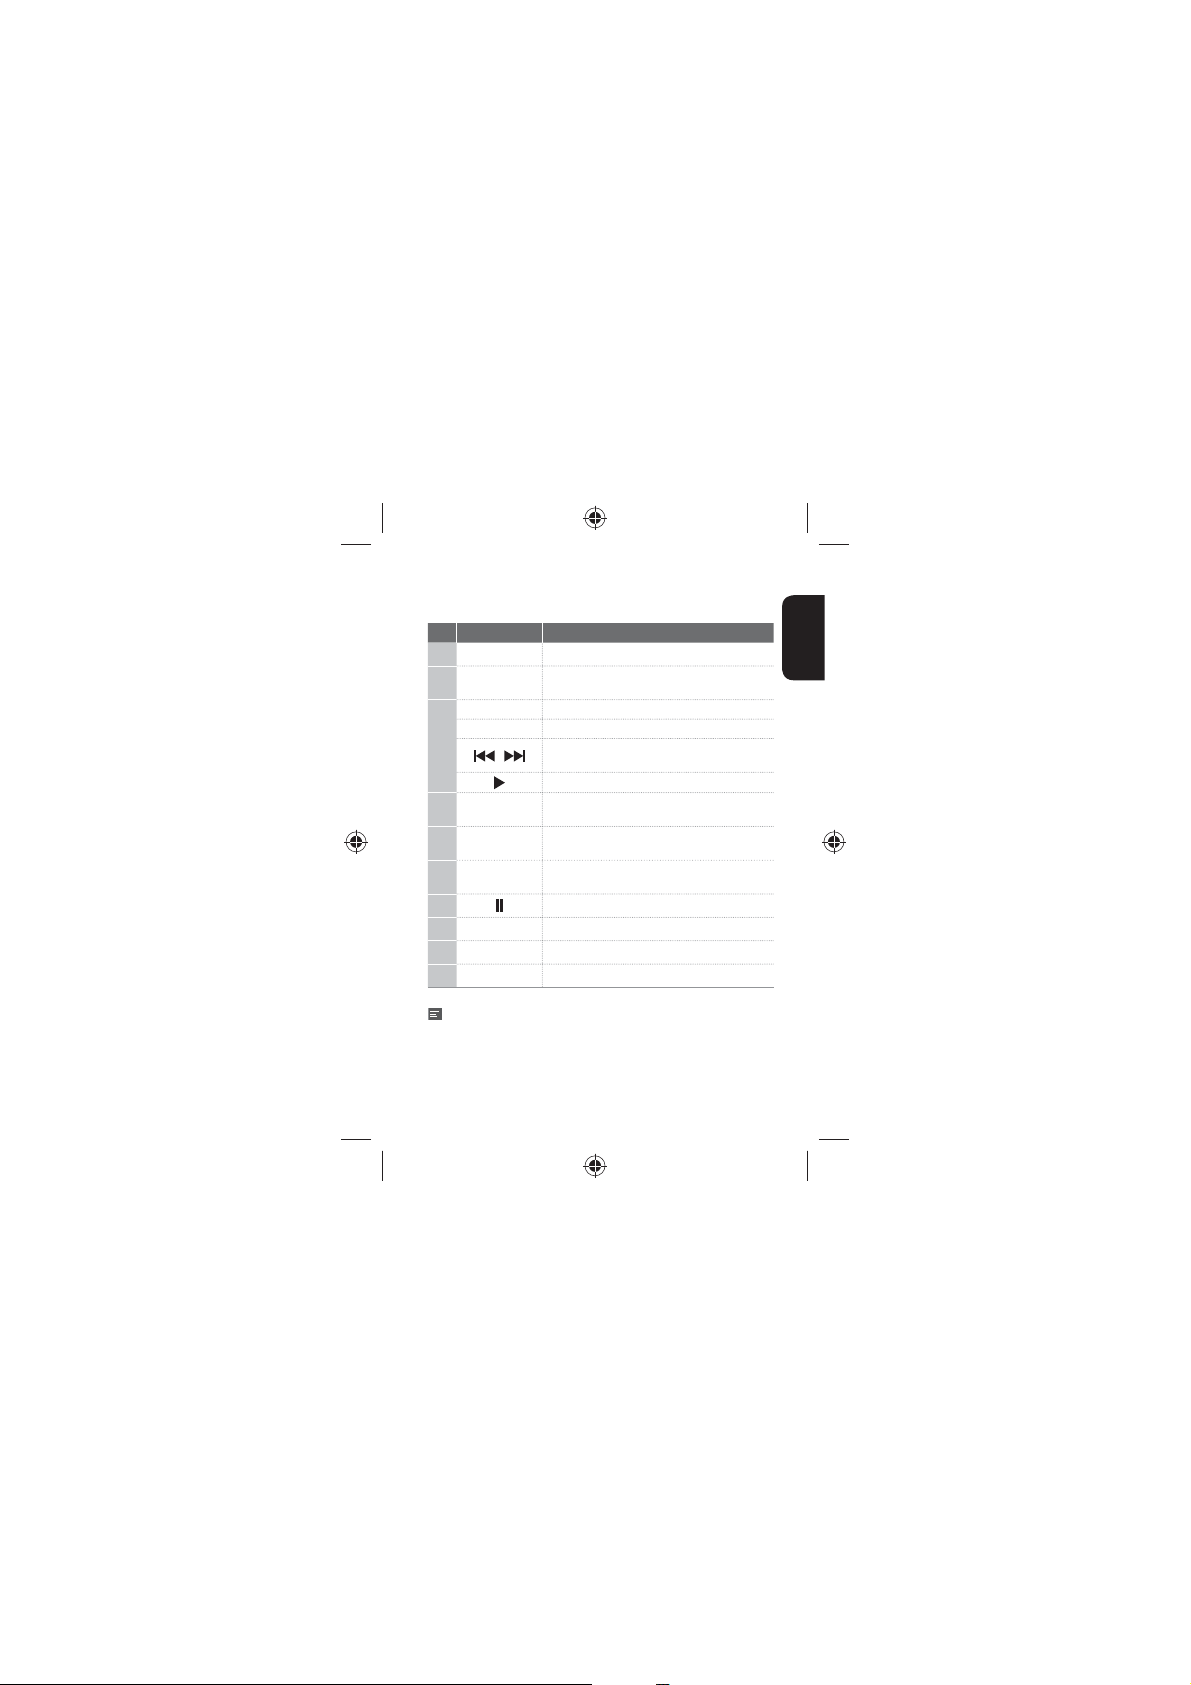
No. Name Description
Mute button Mutes the sound.
1
Volume
2
buttons
Tuning buttons Searches for FM radio channels.
Preset buttons Goes to the preset FM radio channel. (FM radio)
3
Sound eects
4
select buttons
ON/STANDBY
5
button
Input select
6
buttons
7
Repeat button Repeats music les.
8
Shue button Shues music les.
9
Sleep button Sets the sleep timer.
10
Note
t The printed image may be dierent from the real remote control.
Adjusts the volume level.
Skips to the previous or next le.
,
(USB, MUSIC LIBRARY)
Plays a music le.
Turns on or o preset sound eect.
Turns on or o the main unit or turns the main
unit to the standby mode.
Selects an input function.
Pauses the playback.
English
11
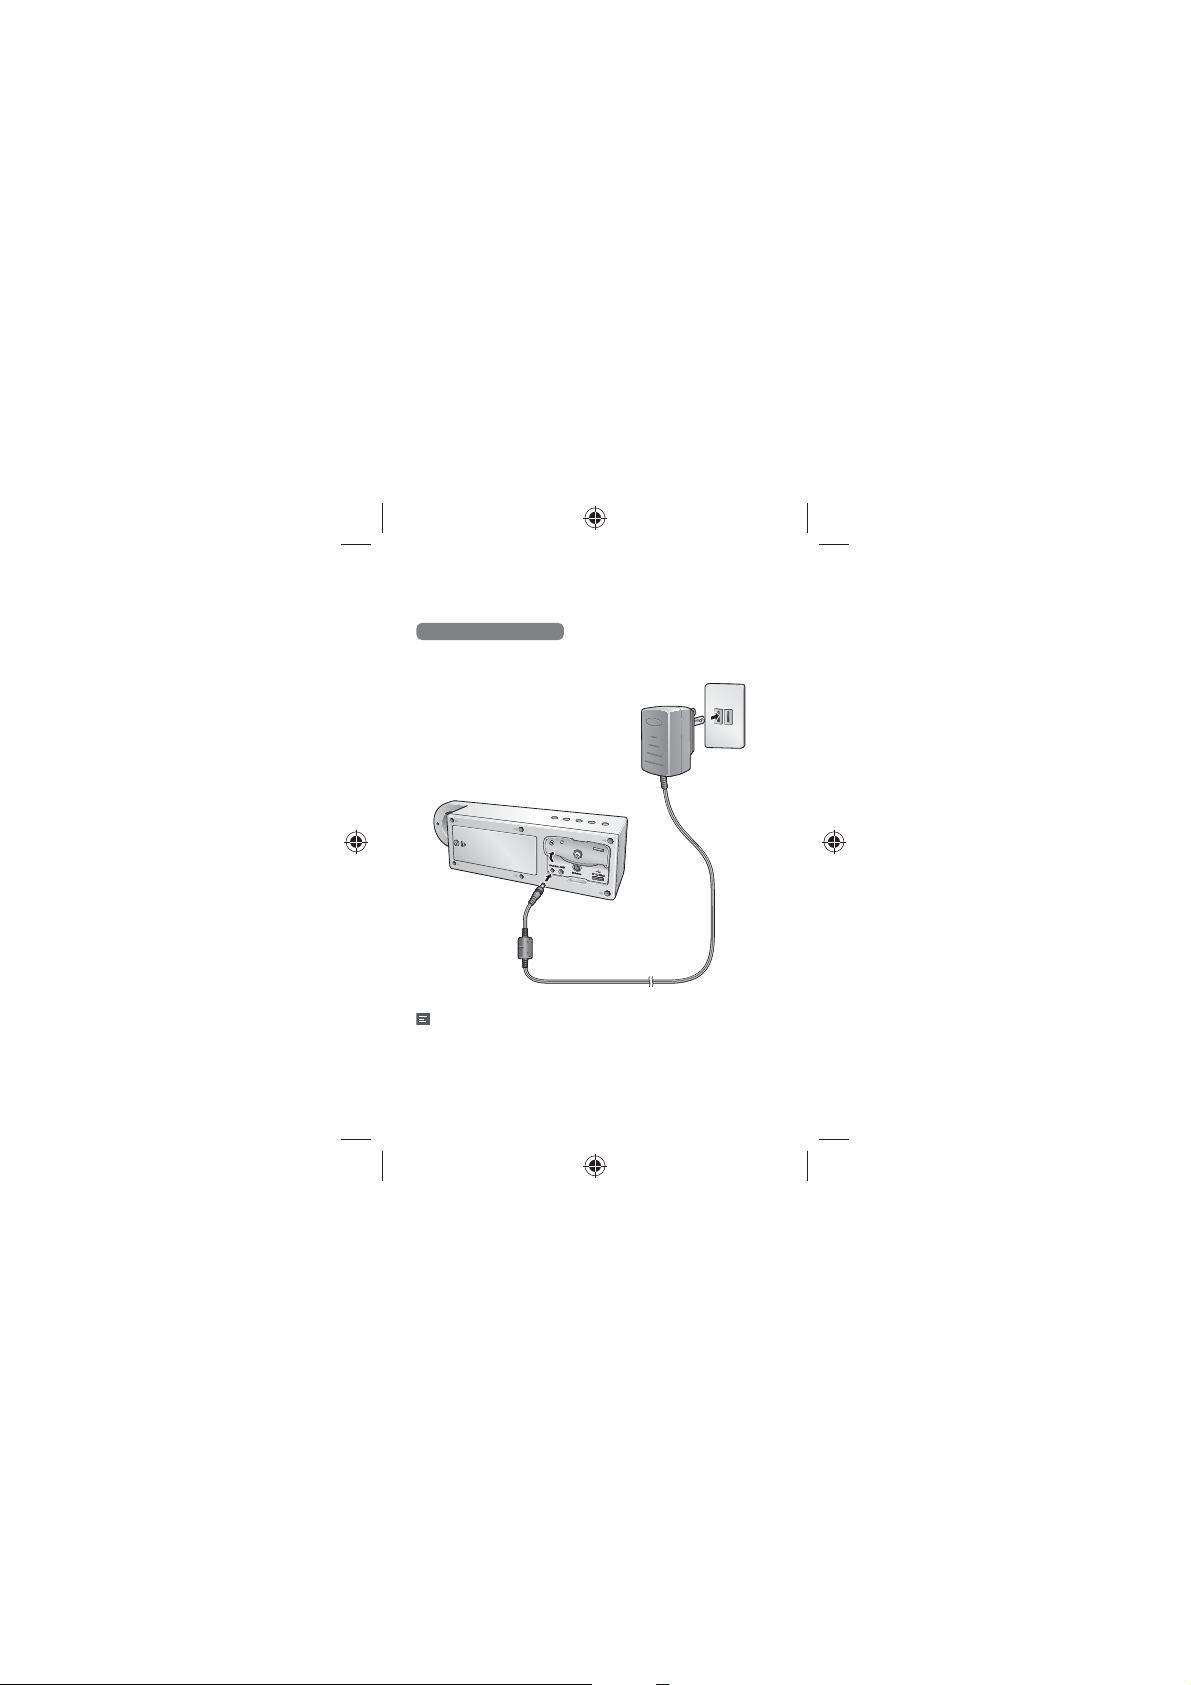
Power Connection
Connecting Power Cord
Connect one end of the power adapter to DC 12V on the rear side of the
main unit.
Note
t Do not use any AC adapter other than the one included with this unit.
12

Installing Batteries
Loosen the screw on the rear side of the main unit.
1
Open the cover and insert six AA size batteries with the polarity
2
matched properly.
Close the cover and tighten the screw again.
3
English
13

Application Installation
Visit App Store on your iPod/iPhone.
1
Or visit Play Store on your android phone.
Search for EXM-50.
2
Install the application on your smartphone.
3
Pairing with the Application
Press on the main unit or on the remote control to turn on
1
EXM-50. Pairing is also available in standby mode.
Go to Settings > Bluetooth and turn on Bluetooth on your
2
smartphone.
Search for and select EXM-50 on your smartphone. Then, the
3
Bluetooth LED turns on to blue on the main unit.
Run the application.
4
Note
t When a message to request a Bluetooth paring pops up even after
pairing and starting the application, tap Pairing.
t The application may not work in some smartphone depending on
specication, e.g. OS version.
14
LED Indicators
Function LED
Power LED
Bluetooth LED
English
Indicator Display Description
EXM-50 is powered on or power
O
Power LED
Blinking
save mode.
Red EXM-50 is in standby mode.
The batteries remain low.
After blinking, the unit is turned o.
O MUSIC LIBRARY is selected.
Function LED
Red USB HOST is selected.
Green FM TUNER is selected.
Orange AUX IN is selected.
Blue EXM-50 is paired with the phone.
Bluetooth LED
EXM-50 is not paired with the
O
phone.
15
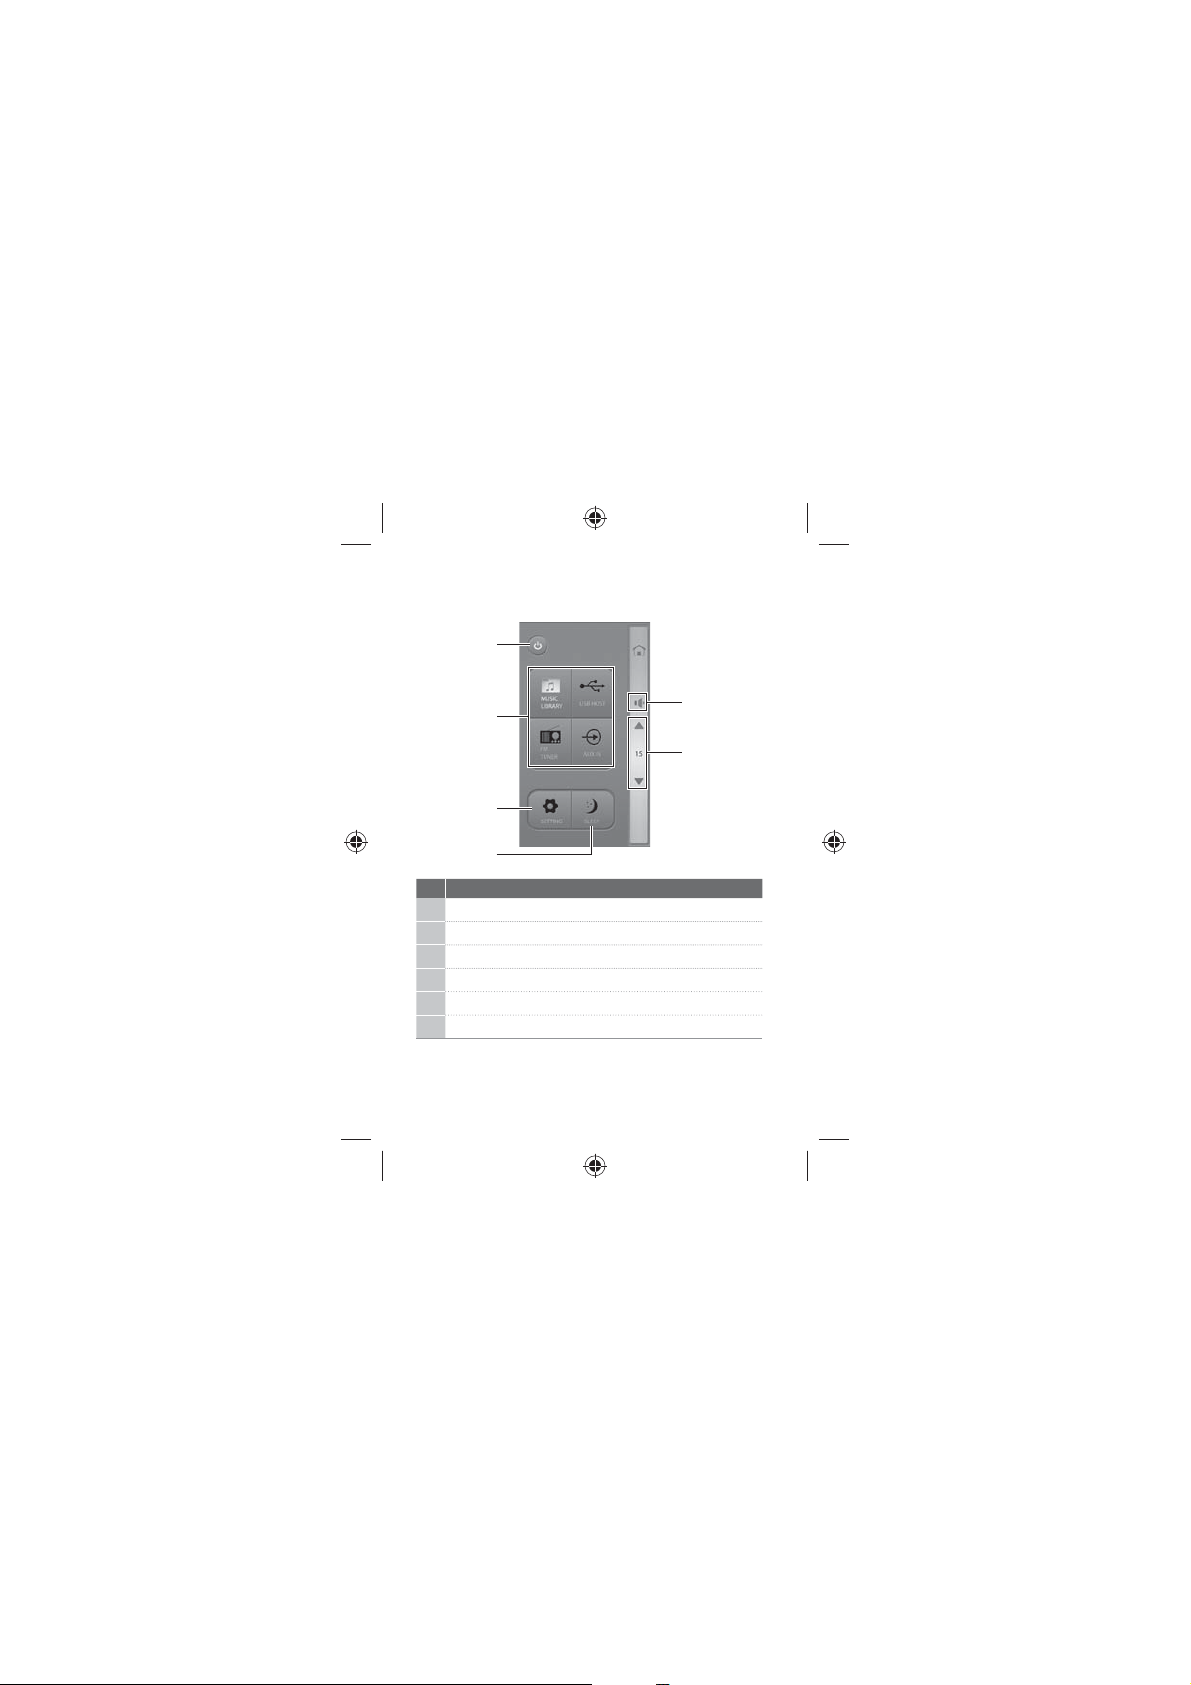
Application Main Screen Overview
1
2
3
4
No. Description
Turns on or o the main unit.
1
Selects a function: MUSIC LIBRARY, USB HOST, FM TUNER, AUX IN
2
Moves to the setting menu.
3
Sets the sleep timer.
4
Adjusts the volume level.
5
Mutes the sound.
6
16
6
5
Operation
Listening to Music of Your Phone
After pairing the main unit with your phone, you can play music les
stored in your phone.
Tap MUSIC LIBRARY.
1
All of the playback functions are the same as those of USB. Refer
2
to page 16-18 for details.
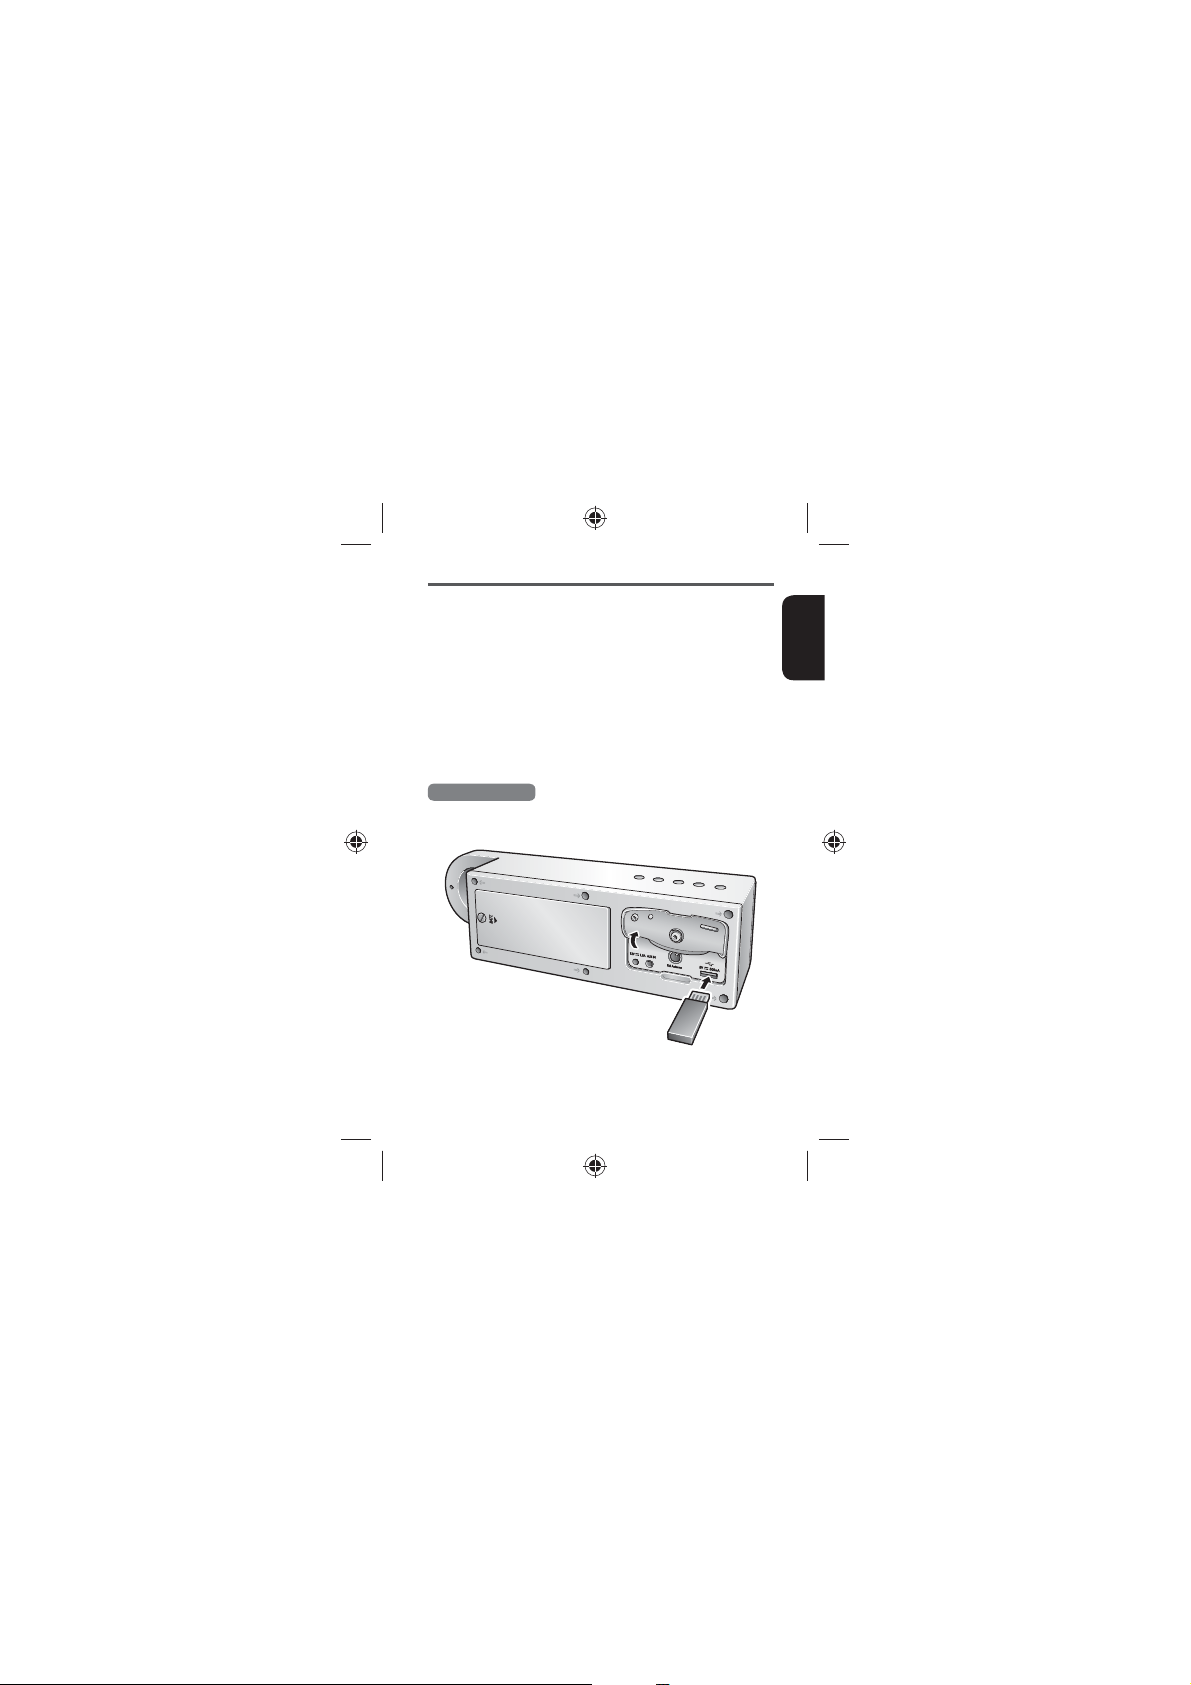
Listening to USB
Connecting USB
You can play audio les from a USB device by inserting it into the USB
port of the main unit.
English
17
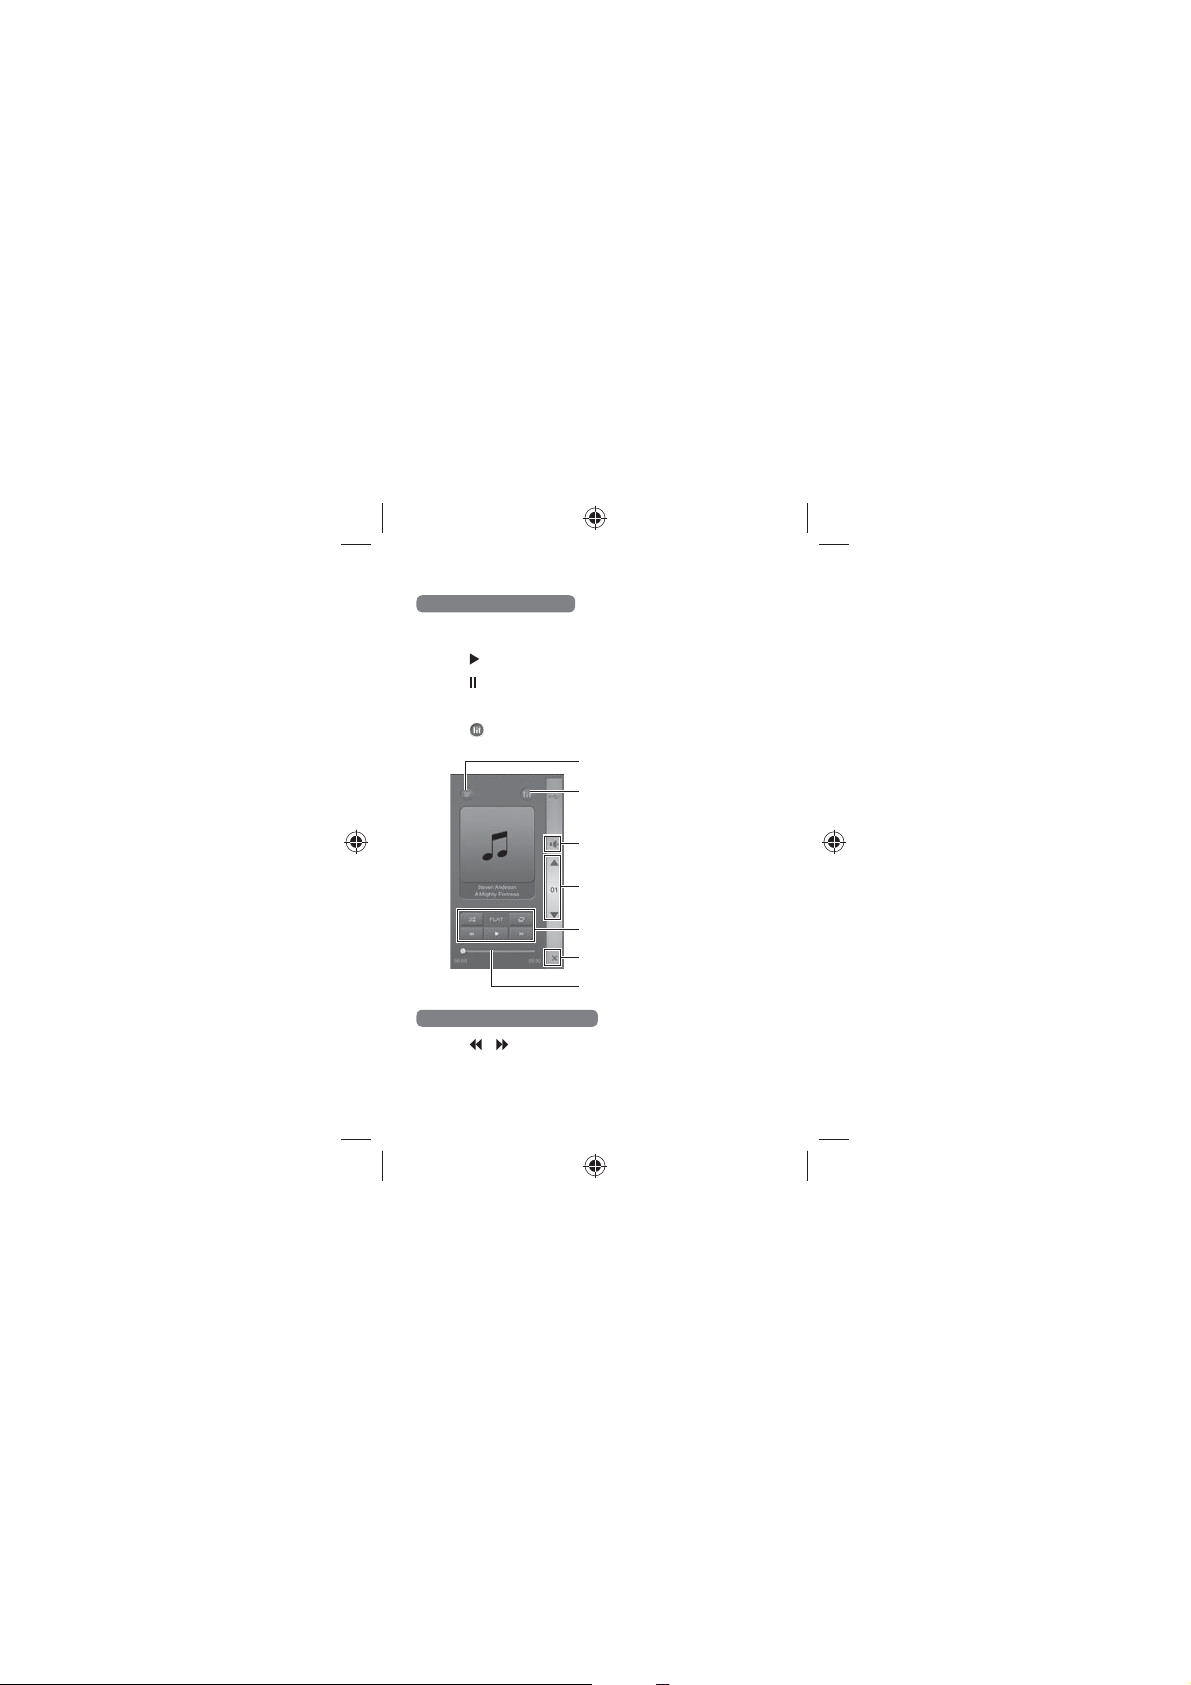
Listening to Music of USB
Tap USB HOST.
1
Tap to play a music le.
2
Tap again to pause.
3
Tap the volume buttons to adjust the volume.
4
5
Tap to set sound eect. Refer to page 26 for details.
Music le list button
Sound eect button
Mute button
Volume buttons
Playback function buttons
Home return button
Progress bar
Skipping Forward or Backward
Tap or to skip to the previous or next music.
1
18
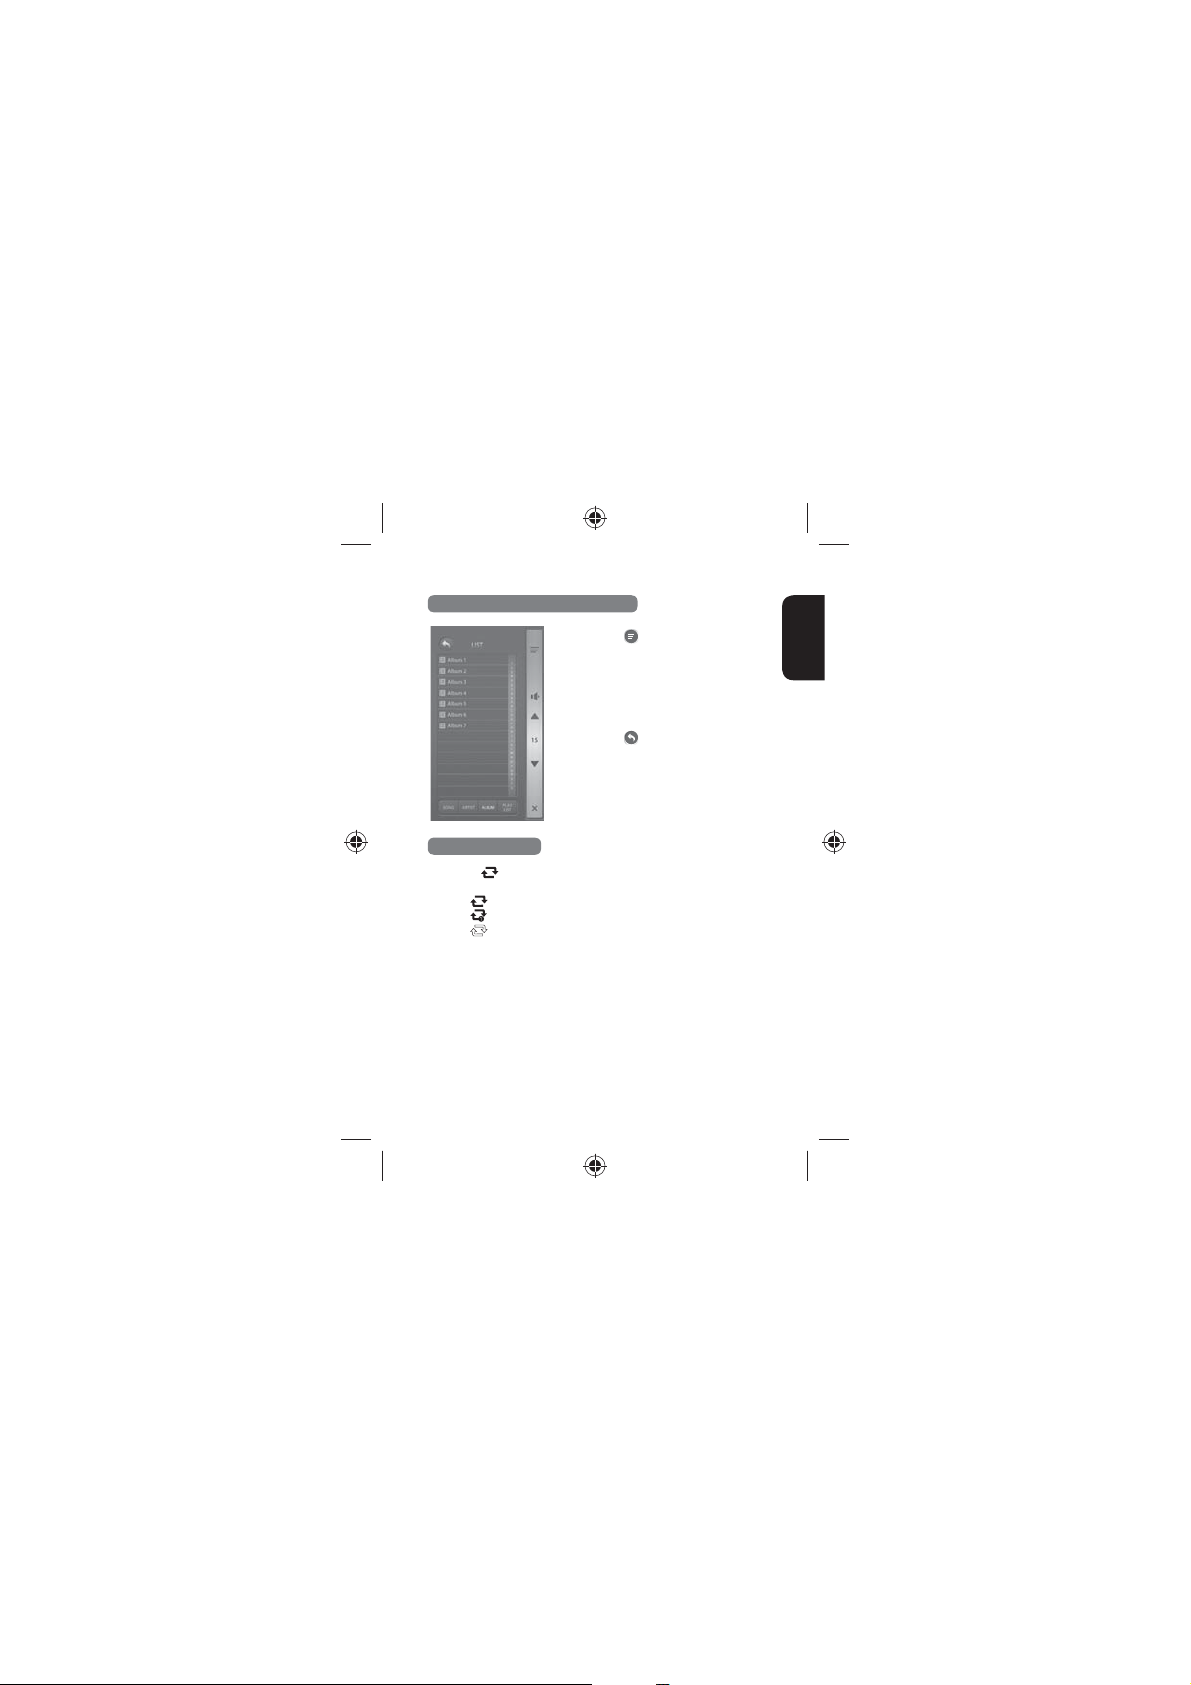
Selecting a Music from the Music List
1
Tap to open the music list.
Tap SONG, ARTIST, ALBUM, or
2
PLAY LIST(SONG or FOLDER in
USB) to select a music list.
Tap a music le to play.
3
4
Tap to return to the previous
menu.
Repeat Playback
Tap . Each time the button is tapped, the repeat mode
1
changes as follows.
t
: All music repeat mode
: One music repeat mode
t
: Repeat o
t
English
19

Shue Playback
Tap . Then all music les in a music list are played randomly.
1
Tap the icon again to deactivate the shue playback.
2
Operating with Remote Control
Press the input select buttons to select USB HOST.
1
Press to play.
2
Press to pause.
3
Press or to skip to the previous or next music.
4
Press the volume buttons to adjust the volume level.
5
Note
t Supported le formats include MP3 and WMA.
t After playing music from the USB ash drive, remove the USB ash
drive in the power save mode or the standby mode.
t When you change to other mode during USB playback and return to
USB, you can resume playback from the previously paused point.
20
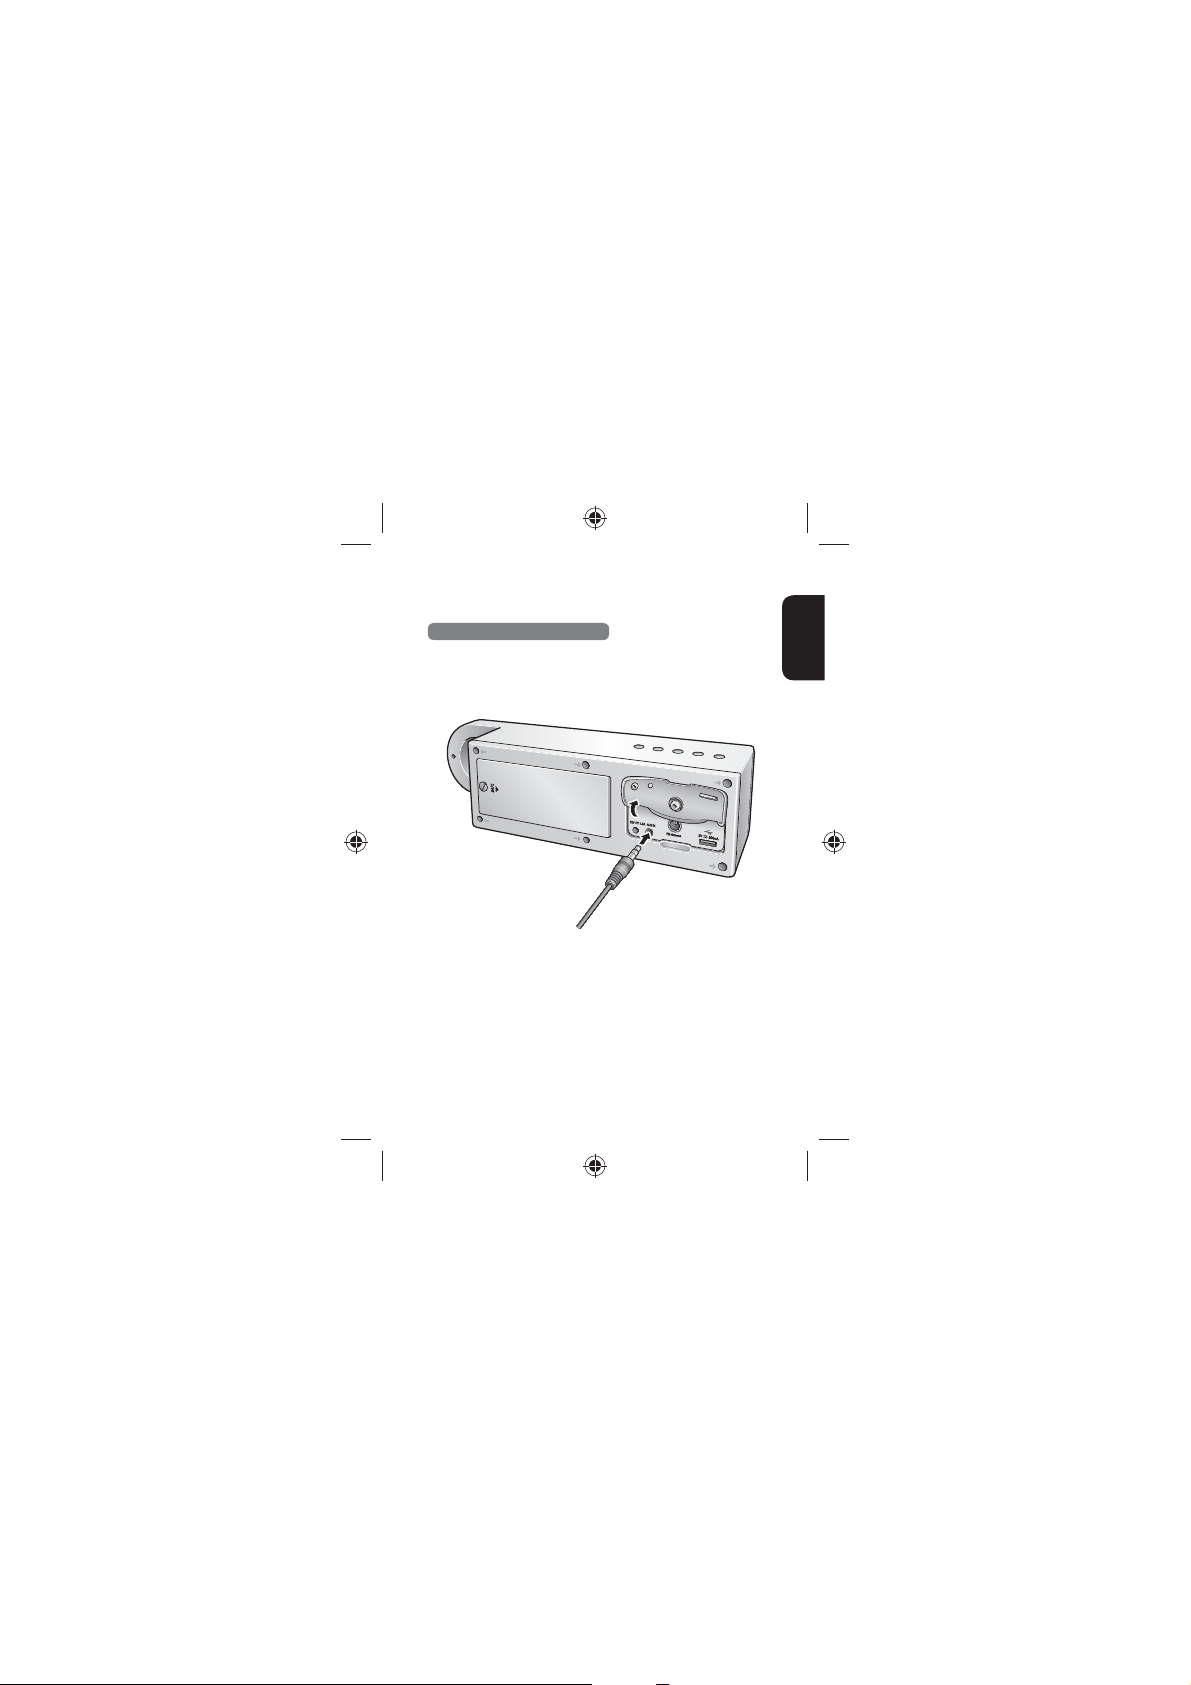
Listening to an External Audio Component
Connecting an External Device
You can use the AUX IN input jack to connect portable audio components
such as an MP3 player, etc. Plug one end of the 3.5 mm stereo cable into
AUX IN connector of the main unit and the other end to the portable
audio components.
English
21

Listening to Music of an External Device
Tap AUX IN.
1
Play back a desired le on the connected portable audio
2
component.
Press the volume buttons to adjust the volume level.
3
4
Tap to set sound eect. Refer to page 26 for details.
Sound eect button
Mute button
Volume buttons
Home return button
Operating with Remote Control
Press the input select buttons to select AUX IN until the function
1
LED turns to orange.
Play back a desired le on the connected portable audio
2
component.
Press the volume buttons to adjust the volume level.
3
22
Listening to FM Radio
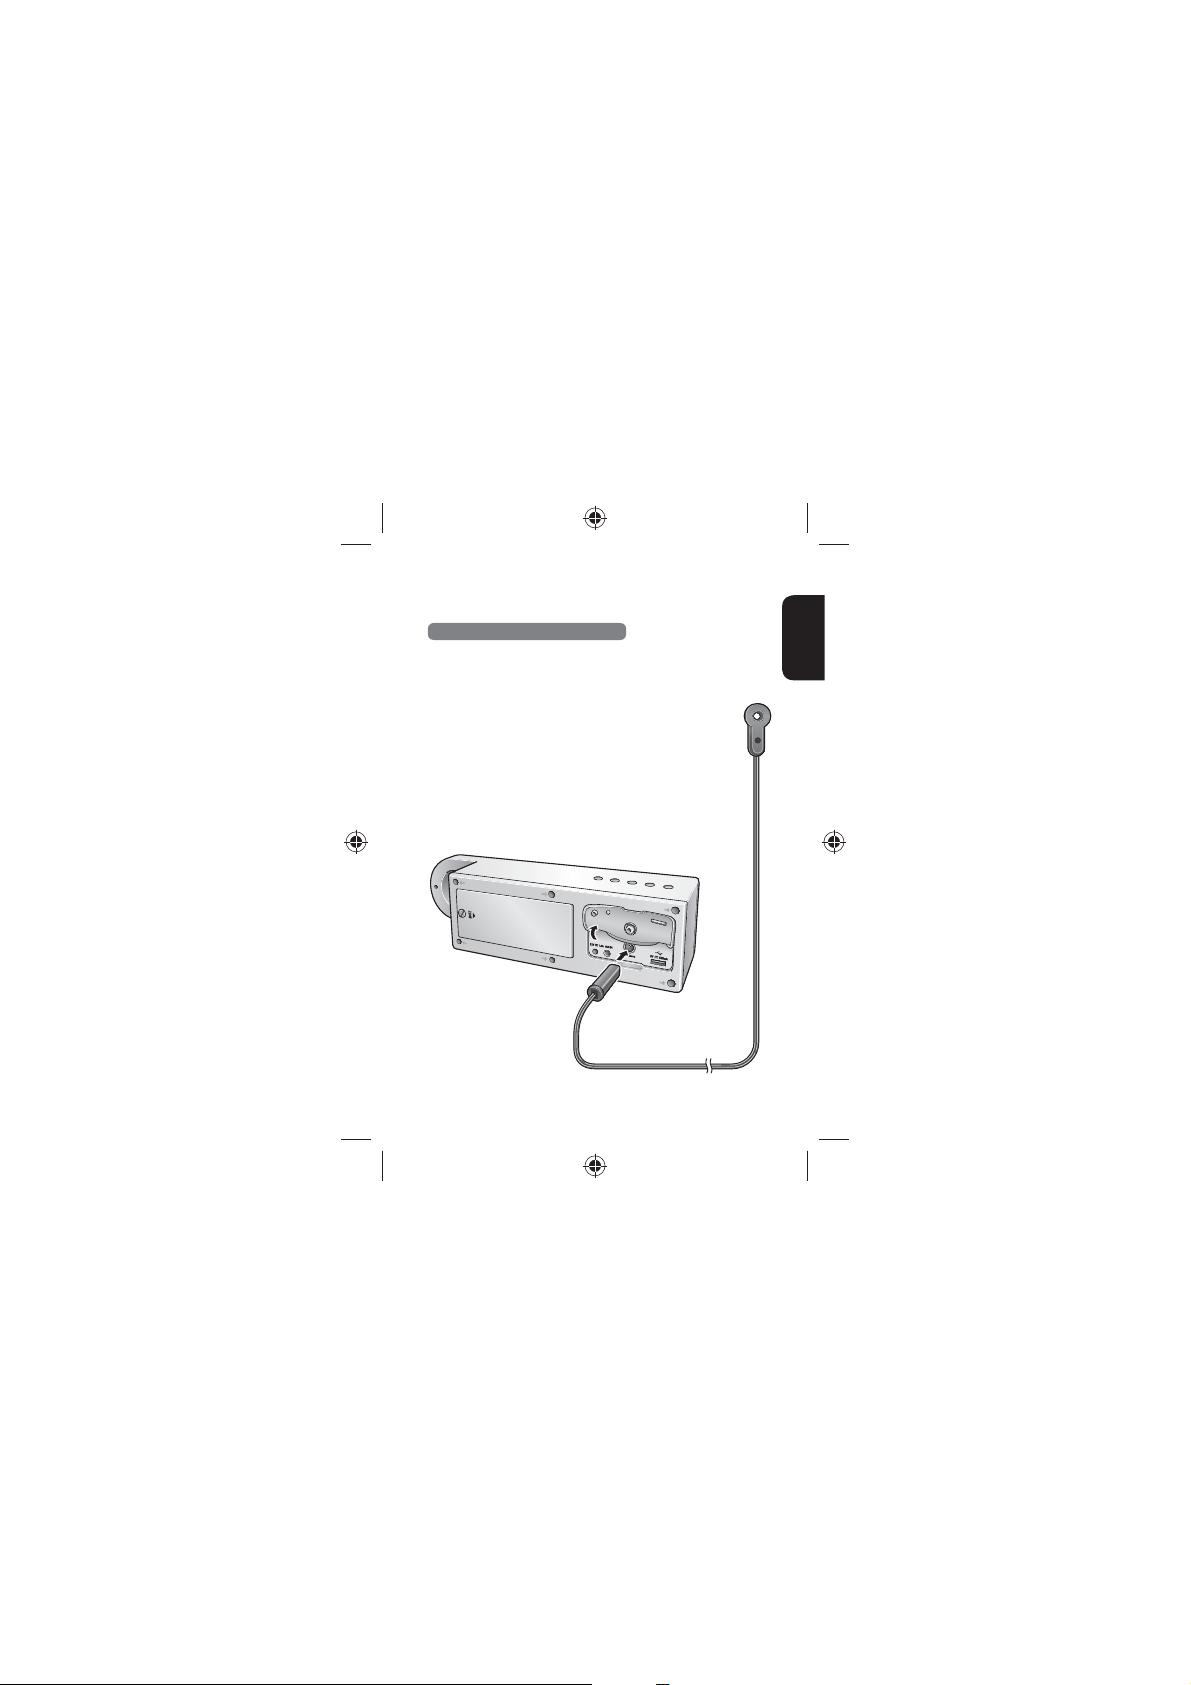
Connecting the FM Radio Antenna
You can listen to FM radio by connecting the FM antenna to the FM
antenna connector on the main unit. To strengthen the signal reception,
extend the antenna to its full length.
English
23
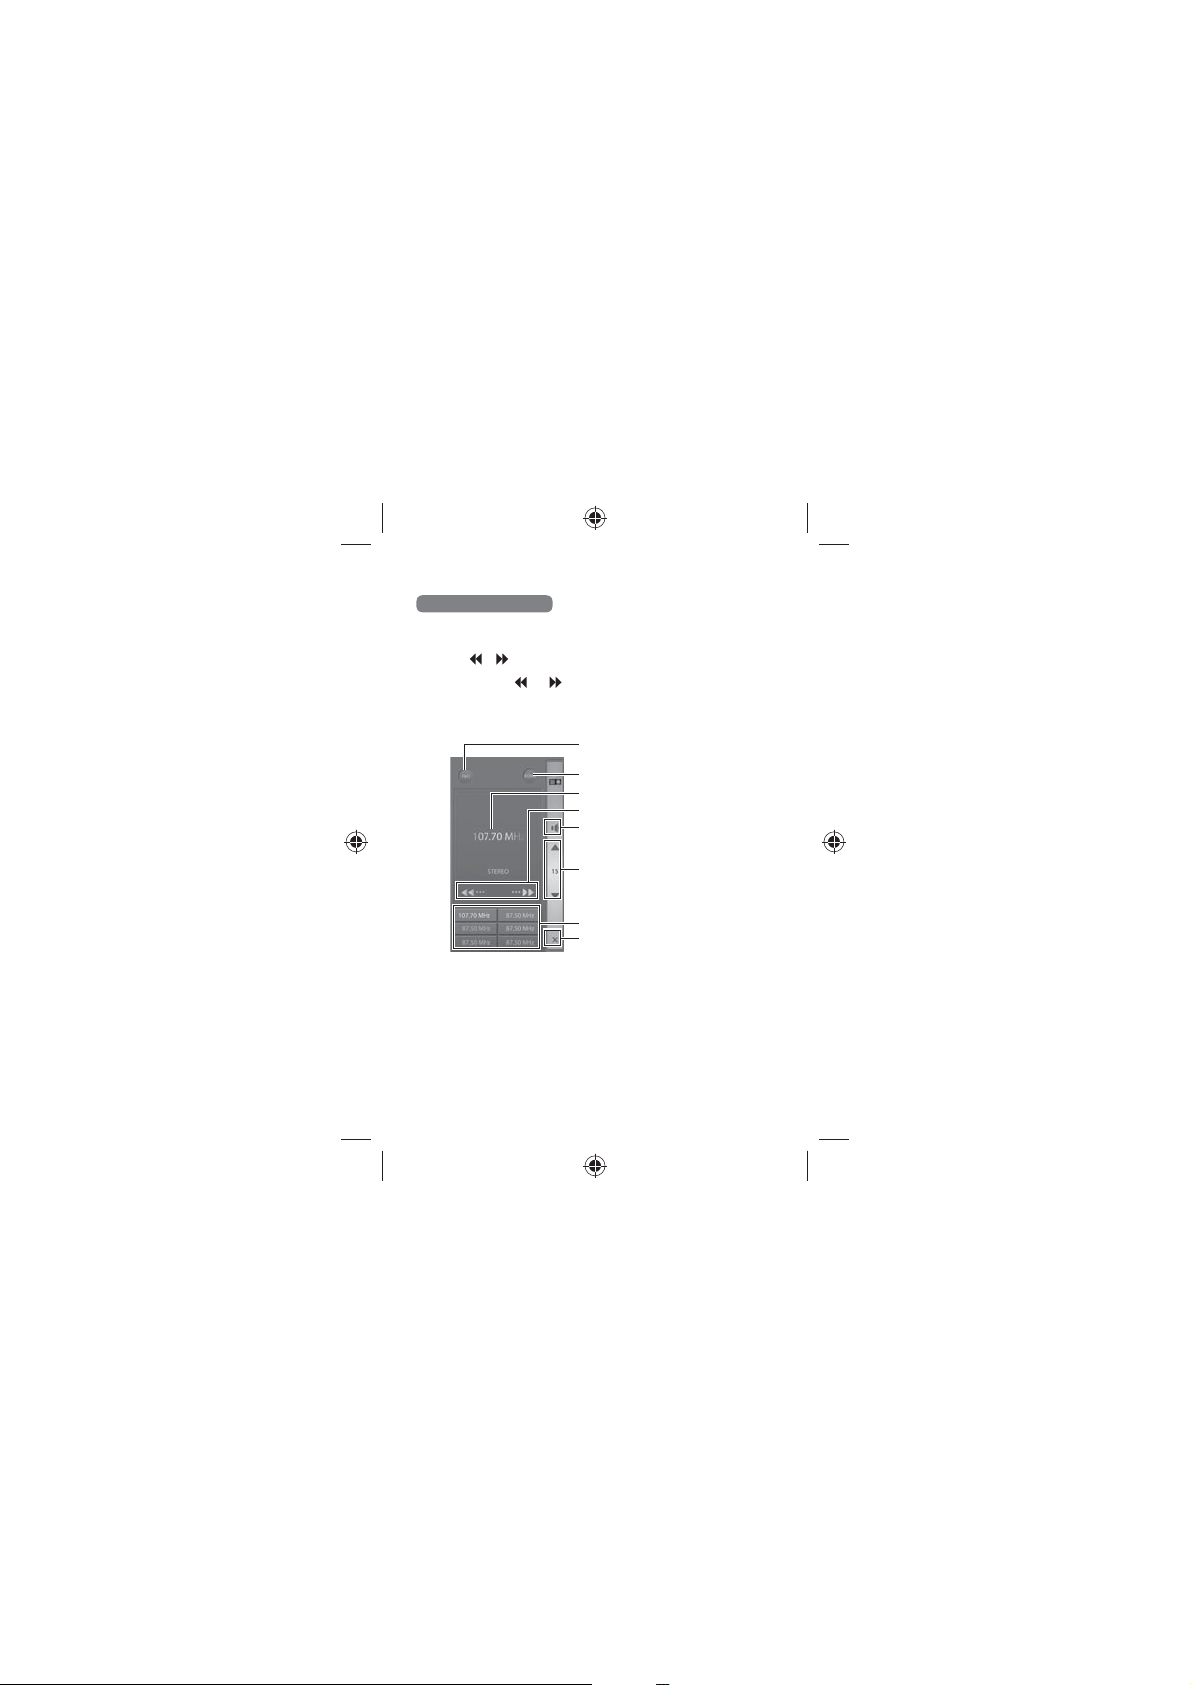
Listening to FM Radio
Tap FM TUNER.
1
Tap or to tune to a desired frequency manually.
2
Tap and drag and to to left or right to search for a desired
3
frequency automatically.
Tap the volume buttons to adjust the volume.
4
FM select button
MONO/STEREO button
Currently tuned station
Tuning buttons
Mute button
Volume buttons
Preset stations
Home return button
24

Presetting Stations
Tune a desired station by following the steps in "Listening to FM
1
Radio".
Tap and drag the current tuned station to a desired preset
2
station box on the bottom of the screen.
You can assign up to 18 channels in FM1, FM2, or FM3 separately.
Operating with Remote Control
Press the input select buttons to select FM TUNER.
1
Press PRESET - or PRESET + to skip to the previous or next
2
preset channel.
Press TUNE + or TUNE - to skip to the previous or next
3
frequency.
Press the volume buttons to adjust the volume level.
4
English
25
Settings
Setting the Sound Eects
Tap MUSIC LIBRARY, USB HOST, or AUX IN.
1
Tap the sound setting button on the right top of the screen.
2
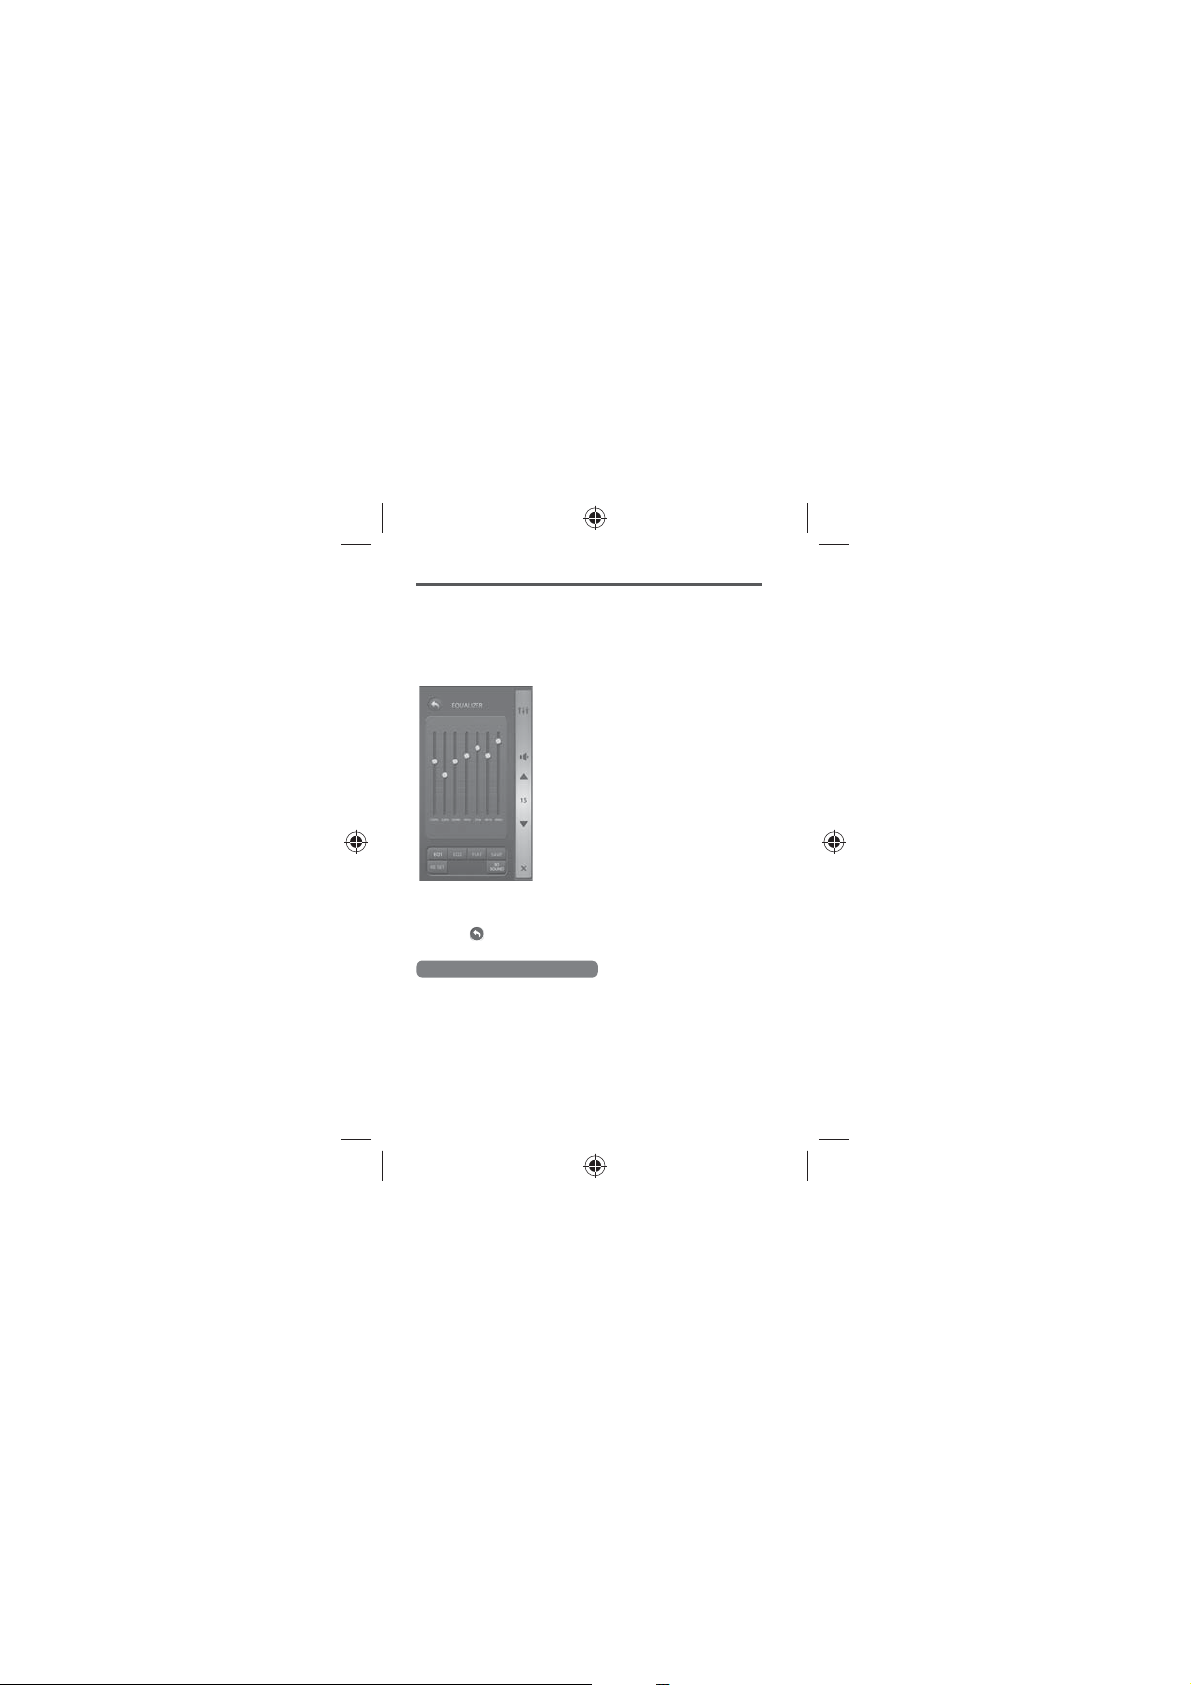
Tap the sound setting for your
3
preference.
t Tap EQ1 or EQ2 to set your own
sound eect. To adjust EQ1 or EQ2
setting, tap EQ1 or EQ2, adjust
setting and tap SAVE. To reset
current settings, tap RESET.
t Tap EQ1 or EQ2 to listen to music in
the preset sound settings.
t Tap 3D SOUND to listen to music in
3D sound.
t Tap FLAT to listen to music with no
change to the current sound setting.
t When 3D Sound is enabled, you
cannot control the frequency of
EQ1, EQ2, or FLAT.
4
Tap to return to the previous menu.
Operating with Remote Control
Press 3D SOUND, FLAT, EQ1, or EQ2 for your preference.
1
Setting Sleep Timer
Tap SLEEP on the application or on the remote control.
When you press the button, the set time changes from 15 to 120 minutes.
26

Setting Auto Power Down
You can set the time for the main unit to be automatically turned o
when any other operation is not inputted.
Tap SETTING > AUTO POWER DOWN.
1
Set the options.
2
t Tap the Power Save Mode check
box to enable the power save mode.
t Tap the Standby Mode check
box to enable the standby mode.
t Tap the O check box to deac tivate
the Auto Power Down function.
t Tap
or to set time to 2Hours,
4Hours, 6Hours,or 8Hours.
3
Tap to return to the previous menu.
Note
t When EXM-50 is turned o in Power Save Mode, the Bluetooth
pairing drops. However, When EXM-50 is turned o in Standby Mode,
it keeps Bluetooth pairing.
t A.P.D. is activated when this unit is under the following conditions.
- When MUSIC LIBRARY or USB HOST is selected as an input source,
the player remains in pause/stop status.
- When FM TUNER or AUX IN is selected as an input source, any
button of the player has not been pressed for saved hours.
Viewing the Information
Tap SETTING > INFORMATION. You can view model name, application
version, F/W version, and MCU version.
English
27
 Loading...