

TM
USER’S GUIDE
IDM-1081
8 Inch Flipdown Wide
Digital LCD Monitor
1

TABLE OF CONTENTS
Introduction...................................................................................................... 3
Installation.......................................................................................................4
Operation ........................................................................................................ 7
Troubleshooting ............................................................................................ 10
Specifications................................................................................................11
2

INTRODUCTION
Congratulations on your purchase of this high quality product from Initial.
Please read through this manual thoroughly, especially taking note of the
precautions and warnings.
Warning!
All Internet sales of Initial products are prohibited and have no warranty
coverage. If you purchased this product on-line, we advise you to return it and
purchase one from our authorized Initial dealer.
INSTALLATION
COMPONENTS
Power supply cord 1 User manual 1
AV output cables 1 Mounting fittings 1
AV input cables 2 Lamps 2
Remote control 1 DC12V power cord 1
AAA batteries 4 IR headphone 1
VEHICLE INSTALLATION
Warning!
The product must be installed by a certified Initial dealer for the warranty
coverage to be valid. The user waives warranty coverage if the product is
moved to another vehicle.
Where to install
Before installing the monitor, please check your local traffic rules and
regulations. Follow the diagram on page 4 to install the monitor in a suitable
position in your car.
3

Do not install the monitor where:
• It will obstruct the driver’s view when the monitor is in either the open
or closed position.
• It will obstruct the operation of the airbag system.
• It will obstruct the operation of the vehicle, especially the steering
wheel, shift lever, or brake pedal.
• A driver or passengers may injure themselves when getting into or out
of the car.
4

CONNECTIONS
Cautions before connection
• This product is designed for negative ground +12V DC operation only.
• Before making electrical connections, turn the car ignition off and disconnect
the vehicle battery.
• Connect the yellow power input lead only after all other leads have been
connected.
• Run all ground wires to a common ground point to avoid noise.
• Use of control adjustments or performance of procedures other than those
specified herein may result in hazardous laser radiation exposure in models
with built in DVD players
Monitor Power connections
1. First connect the black (GROUND) lead to a metal surface on the car.
2. Connect the blue (DOOR+) or white (DOOR-) leads to the door switch of
the car.
3. Connect the yellow (POWER) input lead to the +12V power terminal. Be
sure to connect the black (GROUND) lead first.
5

Wire color chart
Black- Ground
Red- Ignition
Yellow- Constant + 12 volts
Blue-Positive door dome light trigger
White- Negative door dome light trigger
Audio and Video Input connections
1. Connect the monitor’s power supply cords correctly, according to the
connections diagram above.
2. Connect external signal sources to this monitor through AV1 IN and/or
AV2 IN cables.
1) Connect the audio cables to the AUDIO OUT L (left-white) and R
(right-red) jacks of your external source equipment, and to the
corresponding audio input jacks of the monitor’s AV1 IN or AV2 IN
terminals.
2) Connect the video cable (yellow) to the VIDEO OUT jack of your
external source equipment, and to the video input jack of the monitor’s
AV1 IN or AV2 IN terminals.
3) All connections from any one source should go to the corresponding
source in connections. Use AV1 as the main default mode if only one
source is to be used.
3. Turn on the monitor by pressing the SOURCE button on the main unit or
on the remote control, and turn external equipment on. Press the
SOURCE button to select AV inputs between AV1 IN and AV2 IN. The
default mode will normally be AV1.
NOTE: If there is no signal input to the monitor within 10 seconds, it will turn
off automatically
6

OPERATION
Precautions
• Installion of this monitor requires technical expertise. A qualified technician or
car audio installation specialist should install the monitor.
• Before installation, be sure to turn the ignition key switch to the OFF position
or take the key out. Whenever possible it is suggested the battery negative
terminal be disconnected.
• Be extremely careful not to damage any pipes, tubes or wiring associated
with either the Air Conditioning or fuel system when installing this monitor.
This can cause a fire or coolant leaks as well as short circuits.
• Do not use any nuts or bolts associated with safety devices such as steering
linkage, fuel supply or braking systems. This can cause a fire or an accident.
• Take care to prevent cords and wires from getting tangled or crimped in the
moving portion of a seat rail when routing wires from any area of the car to
the monitor.
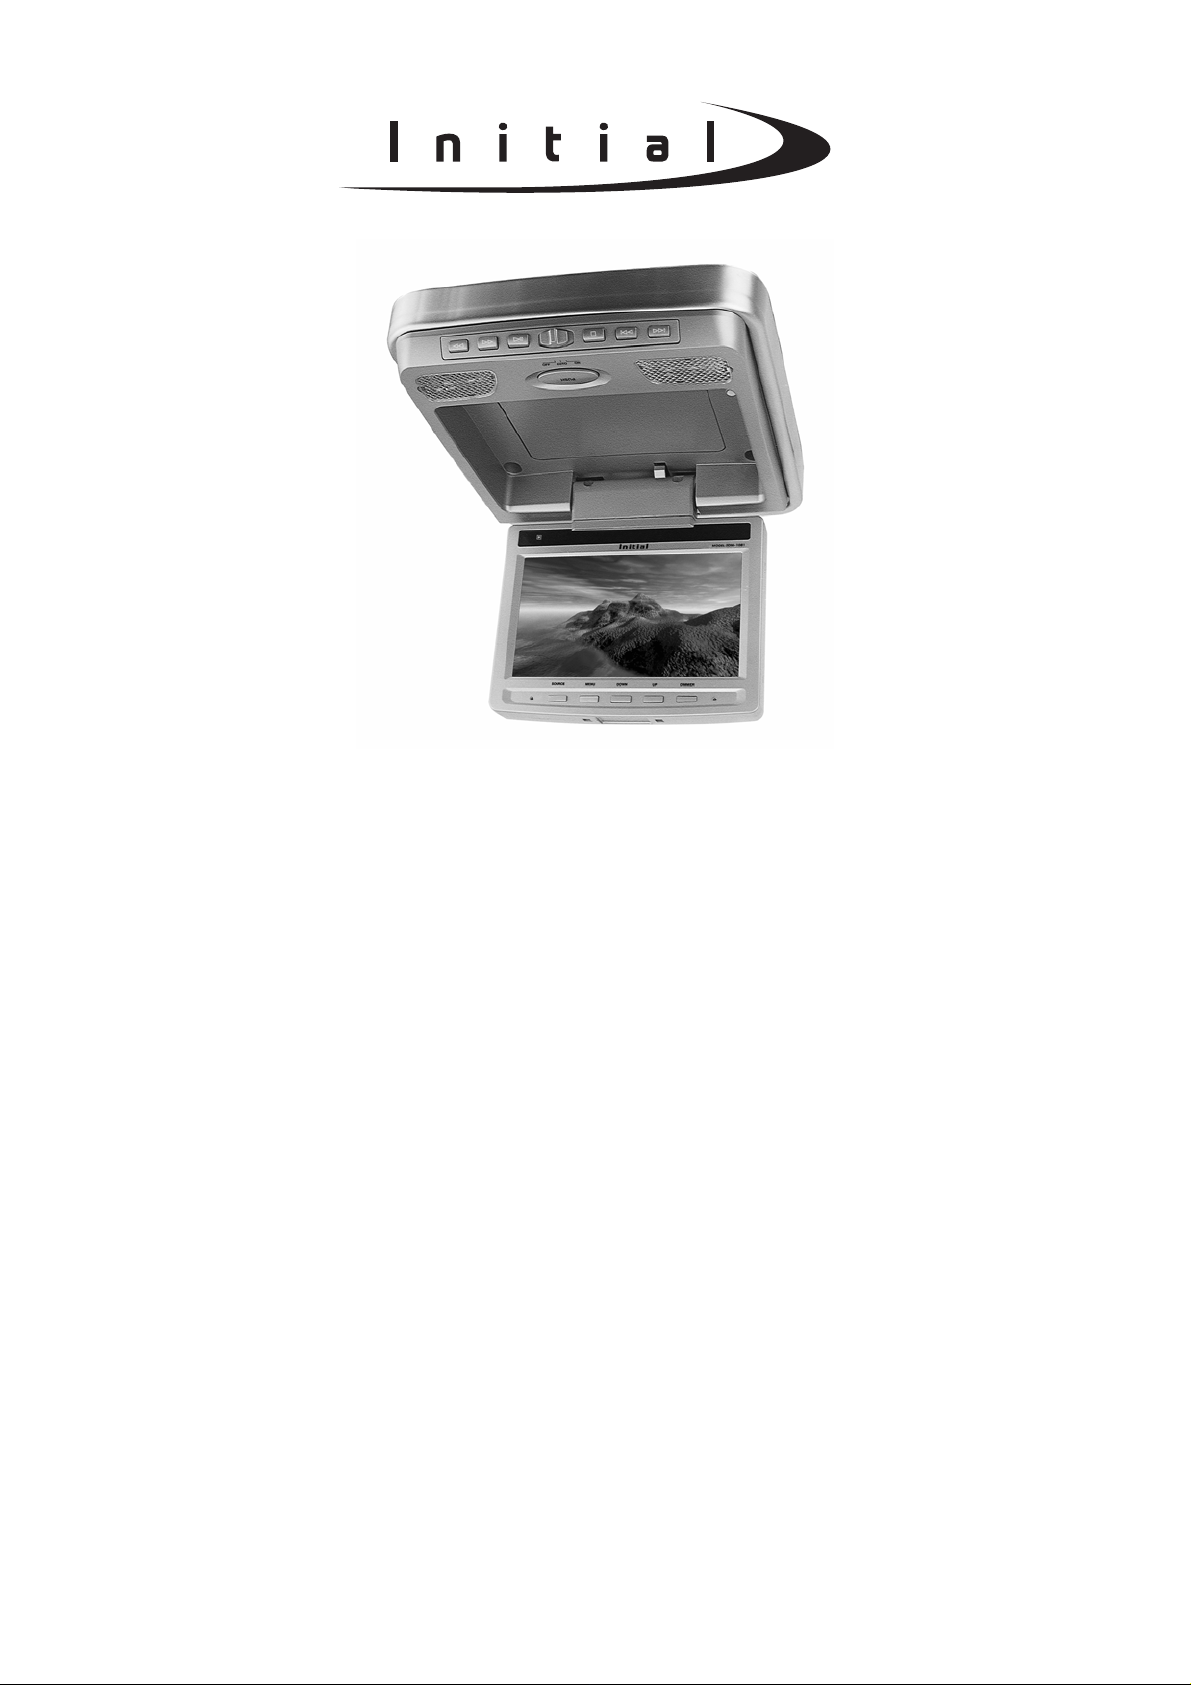
FEATURES
Main Unit
1. Dome Lamp (L)
2. Dome lamp Control Switch
3. 8” TFT Monitor
4. SOURCE Button
5. Reset Button
6. MENU Button
7. UP/DOWN Buttons
8. Display Dimmer Button
9. Dome lamp (R)
7

Remote control
SETUP
ADJUST
DVD LCD
3
LR
LAMP
DISC DISC
+
01
45
OSD
VOLUME
SOURCE
FM TX
2
+5
RPT
MUTE
+
D
U
A
L
R
L
O
R
T
N
E
O
M
C
O
E
T
NOTE: Please make sure the slide switch is set to LCD position.
OPERATION GUIDE
TFT Adjustment
Color
• Press the SETUP or MENU button to select Color adjustment and
press UP/DOWN or –ADJUST+ button until moderate color is
available.
Brightness
• Press the SETUP or MENU button to select Brightness adjustment
and press UP/DOWN or –ADJUST+ button until moderate brightness
is available.
Contrast
• Press the SETUP or MENU button to select Contrast adjustment and
press UP/DOWN or –ADJUST+ button until moderate contrast is
available.
Tint
• Press the SETUP or MENU button to select Tint adjustment and
press UP/DOWN or –ADJUST+ button until moderate tint is available.
8

Wireless headphone Channel selection
• Press the SETUP or MENU button to select FM FREQ adjustment
and press UP/DOWN or –ADJUST+ button to select an FM
Frequency you want.
Monitor Aspect ratio
• Press the SETUP or MENU button to select D.MODE adjustment and
press UP/DOWN or –ADJUST+ button to select a Display Mode you
want.
Monitor Dimmer
• Press the DIMMER button to reduce the brightness of the monitor by
half; press it again to resume the brightness.
Dome Lamps
• Slide the Slide Switch (OFF/AUTO/ON) on the main unit to “ON”
position to turn lamps on.
• Slide the Slide Switch (OFF/AUTO/ON) on the main unit to “OFF”
position to turn lamps off.
Automatic operation
• The Dome lamps can be controlled by the car doors. Slide the Slide
Switch (OFF/AUTO/ON) on the main unit to “AUTO” position; when a
door is opened, the two lamps will light; when the door is closed, the
two lamps will go out.
Note: This feature will need to be installed before it will work, please
check with your installation technician.
Wireless Headphones
• A built in FM signal transmitter transmits the wireless headphone
signal. The signals are transmitted over 7 different and selectable FM
frequencies. The wireless headphones receive these frequencies for
the listener.
• The FM signal transmitter will transmit over 7 FM frequencies:
87.7MHz, 87.9MHz, 88.1MHz, 88.3 MHz, 88.5MHz, 88.7 MHz, and
88.9MHz. It is possible to receive these signals over any FM radio
tuned to those frequencies. In some cases the vehicles own radio may
pick them up.
o To change the monitors FM signal transmission frequency,
press the FM TX button on the remote control, and then keep
pressing the FM TX button to shift between the 7 reset
frequencies.
o To receive the FM transmission on a radio, tune the radio to
the specific frequency selected above. You must be in front of
the monitors screen to receive these signals.
9

TROUBLESHOOTING
If you experience the following problems while using the unit, this
troubleshooting guide can help you.
PROBLEM POSSIBLE CAUSE SOLUTION
The Unit will not turn on
Ignition key is off
No video signal
The fuse has blown.
Installer
The power input leads
have not been
connected properly.
Nothing happens when
the buttons are pressed.
System may need to be
reset.
No video image. Selection of AV1 or AV2
may be improper.
No signal from source
Installer
The video input cable
has not been connected
correctly.
The screen is dark. In extreme cold
temperatures the screen
may need to warm up.
No sound from the
wireless headphone.
Headphones power
switched off.
Dead battery in
headphone.
The headphone’s
volume is set to the
minimum.
Installer
Check proper AV1/AV2
connections
Check frequency
selection
Check source unit
Check ignition key
Check video source is
on.
Check for blown fuses
Check for proper voltages and
ground connections on RED,
YELLOW and BLACK wires.
See wiring diagram
Press the reset button
on the unit.
Press the SOURCE
button to select between
AV1 IN and AV2 Inputs.
Check source unit
function
Check the video cable
for connection and
continuity.
If the temperature of the
monitor is very low, the
screen may appear
darker when power is
first turned on. Turn the
unit on and let it play to
“warm up”.
Check power on.
Check Battery condition
.
Adjust the headphone’s
volume to a suitable
level.
Check audio /video
connections, signal
presence and correct
relationships of Av1 and
AV2 sources if used
10

FEATURES & SPECIFICATIONS
Specifications are subject to change without notice.
Monitor picture size…………………………………..……………… 8 inches wide
Monitor Aspect Ratio ……………………………………………………………9/16
Monitor Resolution ………………………………………………………..480 X 234
Color system……………………………………………..………………….… NTSC
External video input level……………………….…………………………..…1Vp-p
External audio input level……………………….………….…………………..…2V
Transmission Frequencies ….....87.7, 87.9, 88.1, 88.3, 88.5, 88.7, & 88.9 MHz
Operating voltage……………………………………………………….… +12V DC
Current Consumption ………………………………………………….……... 2.0A
Operational temperature range………………….……………….. -10°C to +55°C
Weight ……………………………………………………………… Approx. 3.3 Lbs
11
 Loading...