

Page 1

DVC Camcorder
Page 2
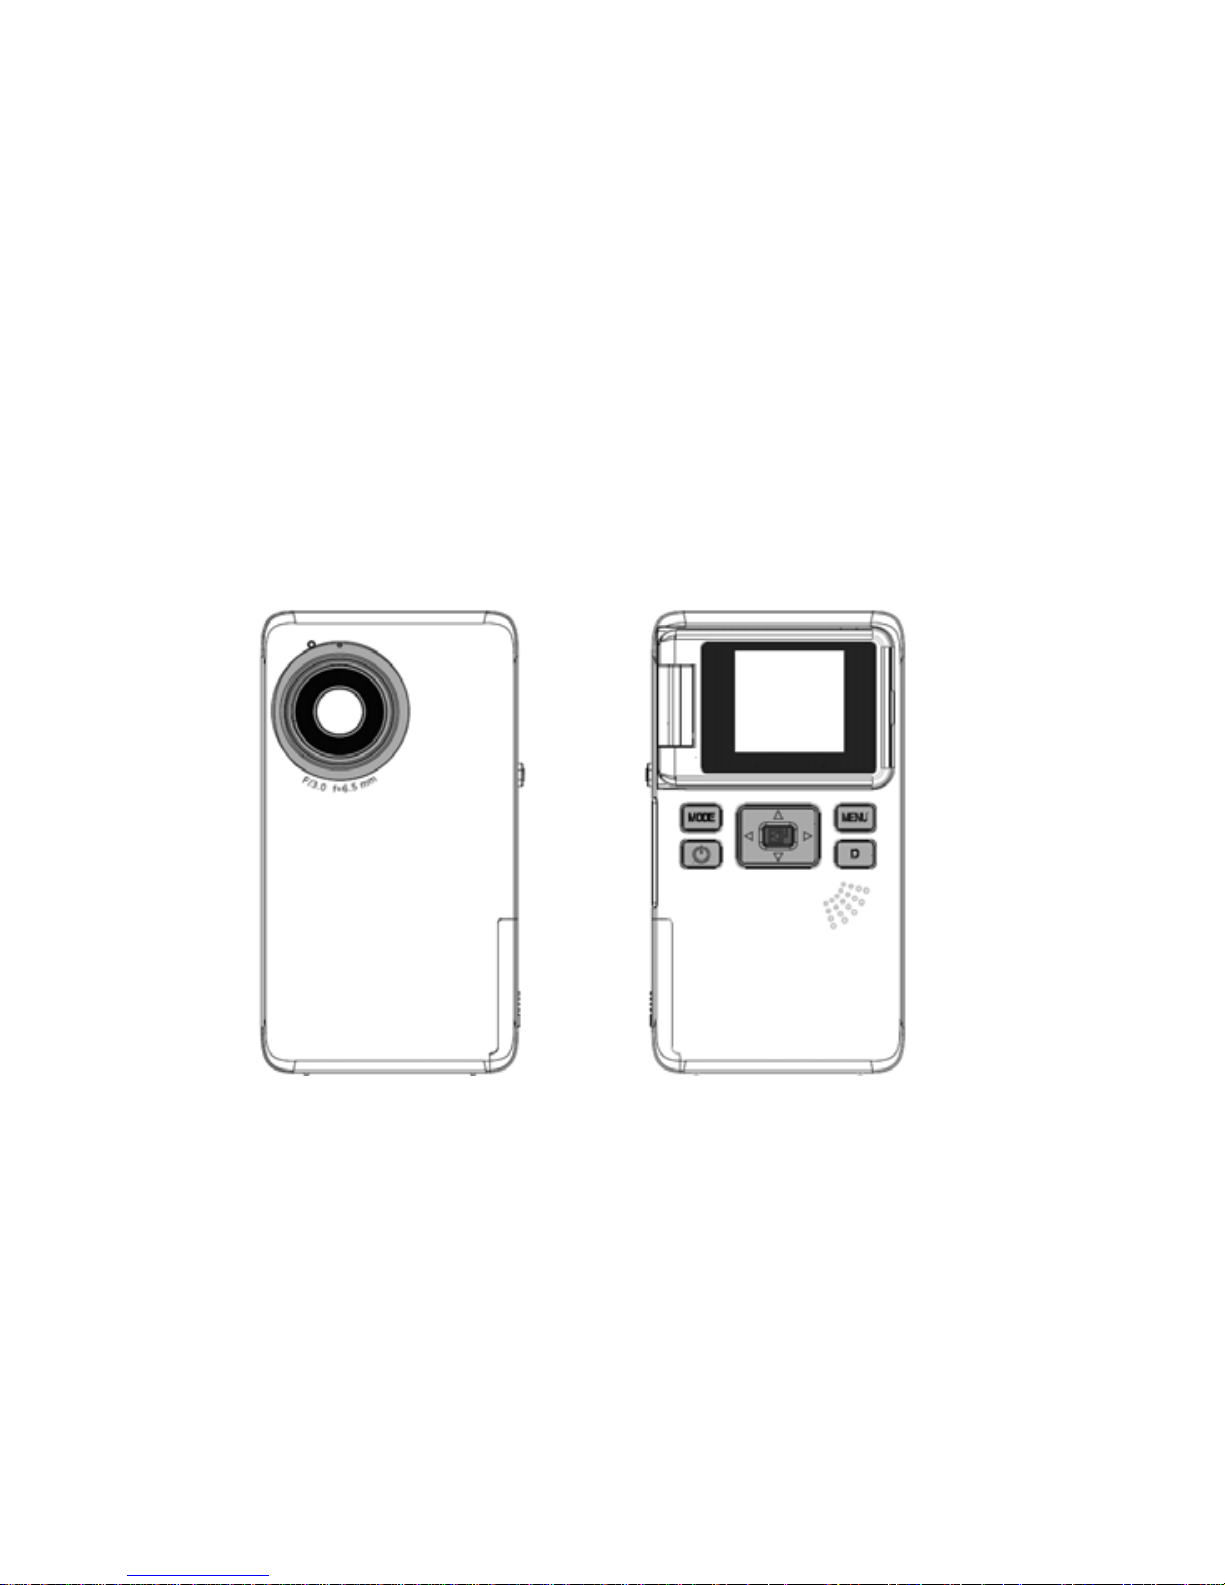
Digital Video Camera
User’s Manual
Please, read this manual carefully before using this unit and keep it for future
reference.
Please, keep the product’s packaging for future reference. It contains important
information.
Page 3
1
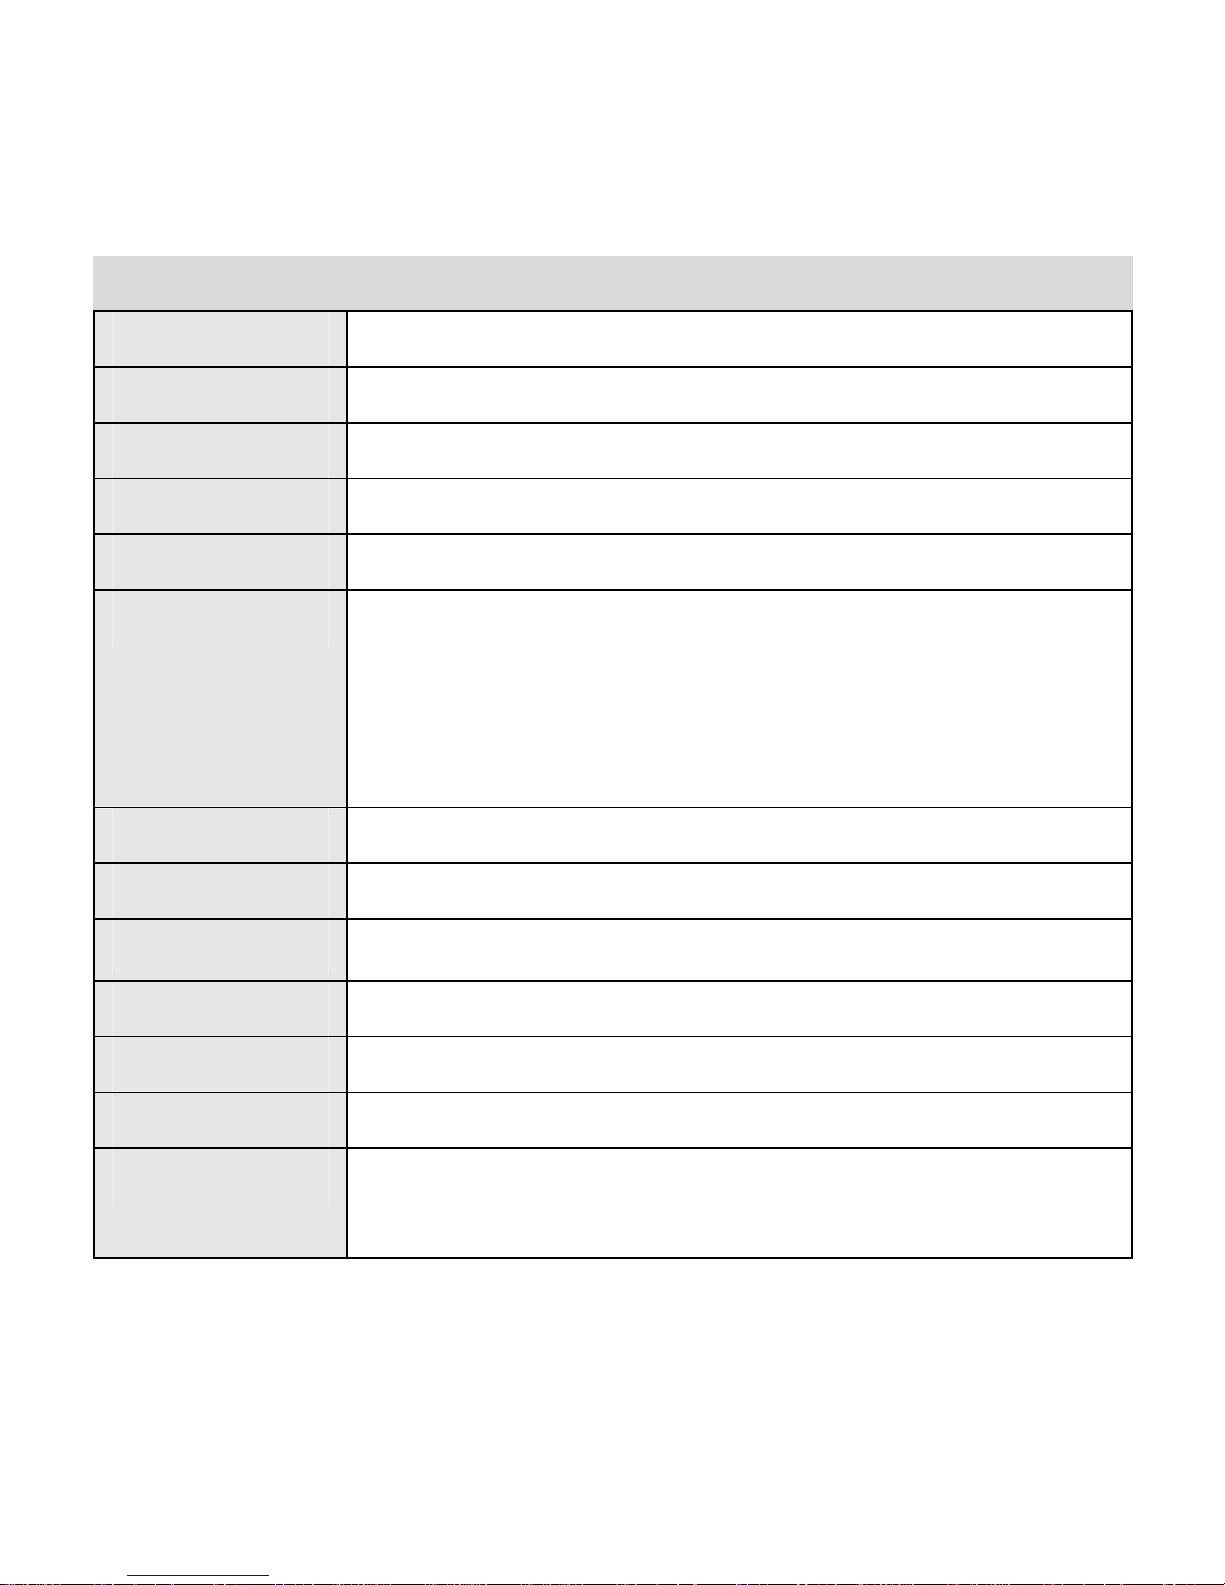
TECHNICAL SPECIFICATIONS
Sensor 1.3 MegaPixels CMOS,
Display 1.44" TFT Color LCD
Focus range 150cm ~ infinity
Aperture F3.0, Fixed Focus
Shutter
Electronic Shutter: 1/2000 ~ 1/2sec.
Resolution
StillImage: 2592X1944(5M by interpolation)、2048X1536(3M
by interpolation)、1280X960(1.3M)、800X600(SVGA)、
640X480(VGA)
Video: 1280X 720,720X480, 640x480,320 x 240
Sensitivity Auto
White balance
Auto / Daylight / Cloudy / Fluorescent / Bulb
Exposure control
-2EV to +2EV in 0.3 step
Burst 3 consecutive shots captured
Photo effect Normal/ B&W/ Sepia / Negative/ Red/ Green/ Blue
Self-timer 2 or 10 second time delay options
Storage External memory card slot: Accepts up to 8GB SD / SDHC
card
Page 4
2
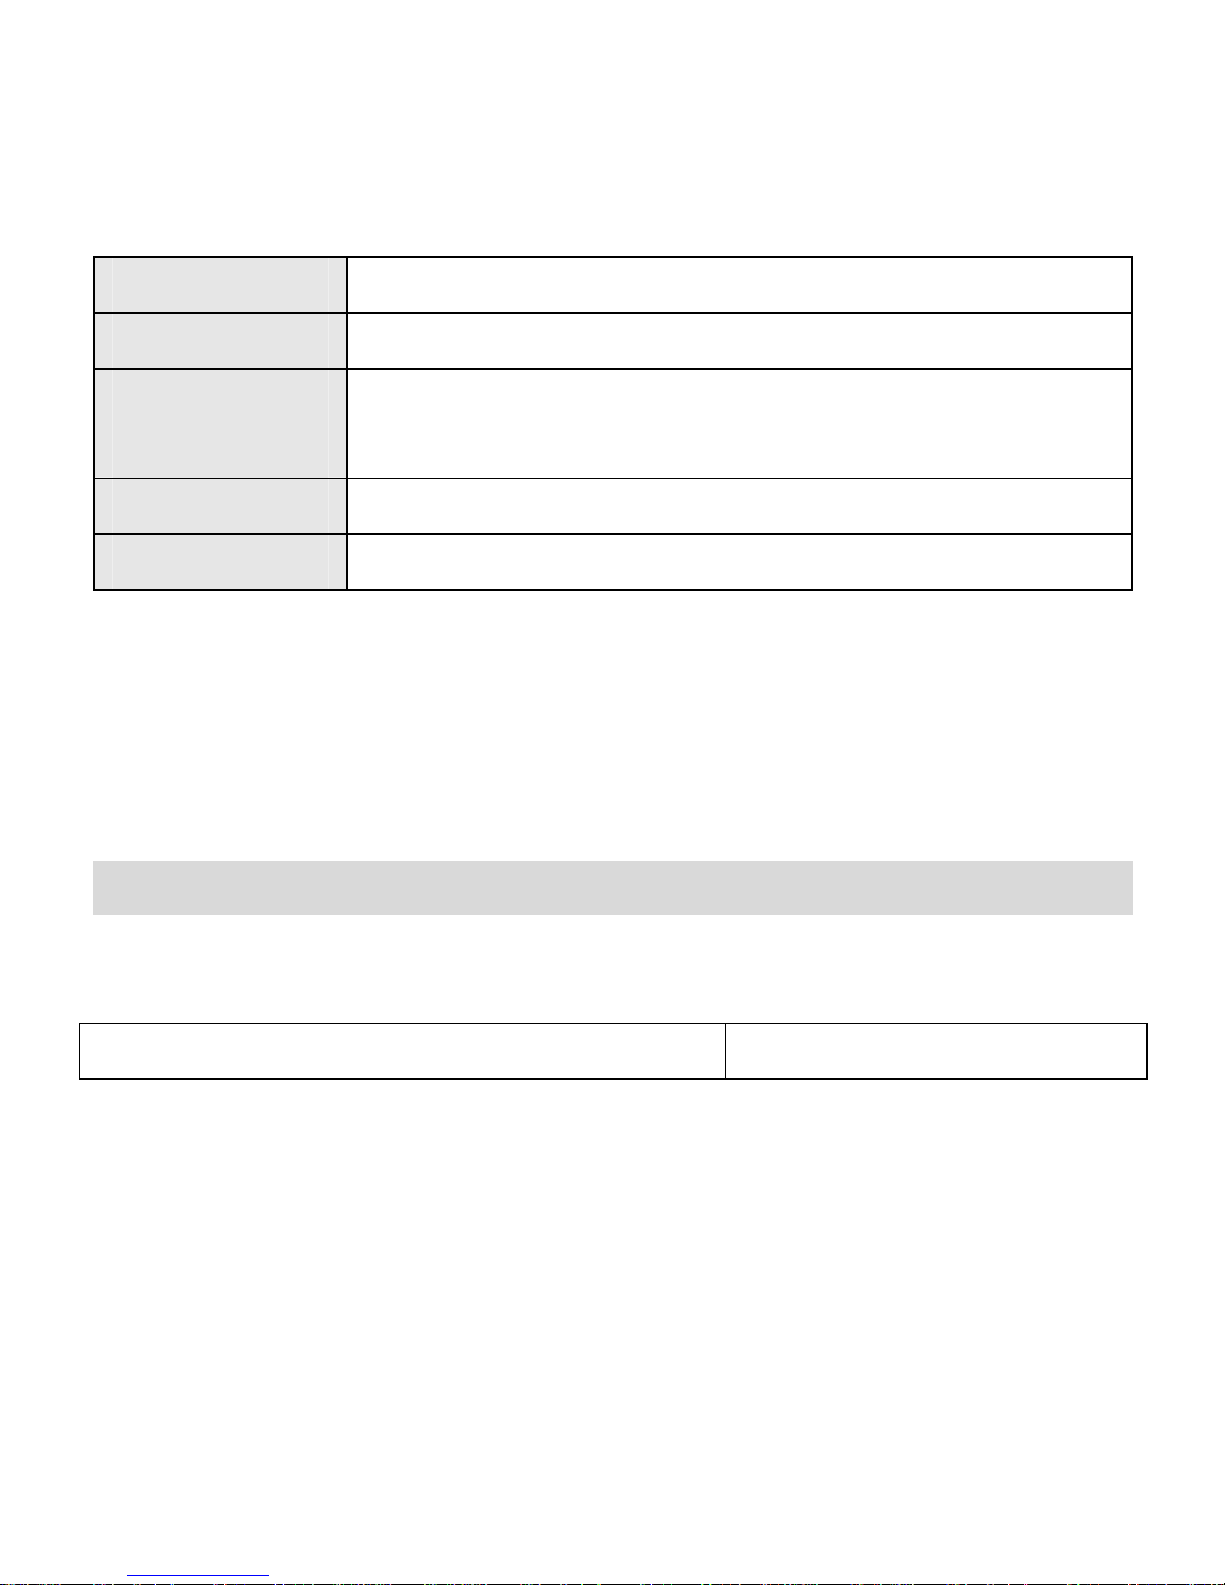
TV system NTSC / PAL
Power Supply 2 * AA (alkaline/ 1.5V) batteries
Ambient
temperature
Operating: 0° C to 40° C
Storage: -20 to 60° C
Microphone Built-in
Speaker Built-in
PRODUCT SUPPORT
There is a dedicated help line for this product if you have problems. For help and
advice ring:
UK 0207 704 2598 SPAIN 902 023 951
Please have your receipt ready when you call. You can also contact us via email:
[email protected] or visit us at http://www.ingodevices.com.
Page 5
3
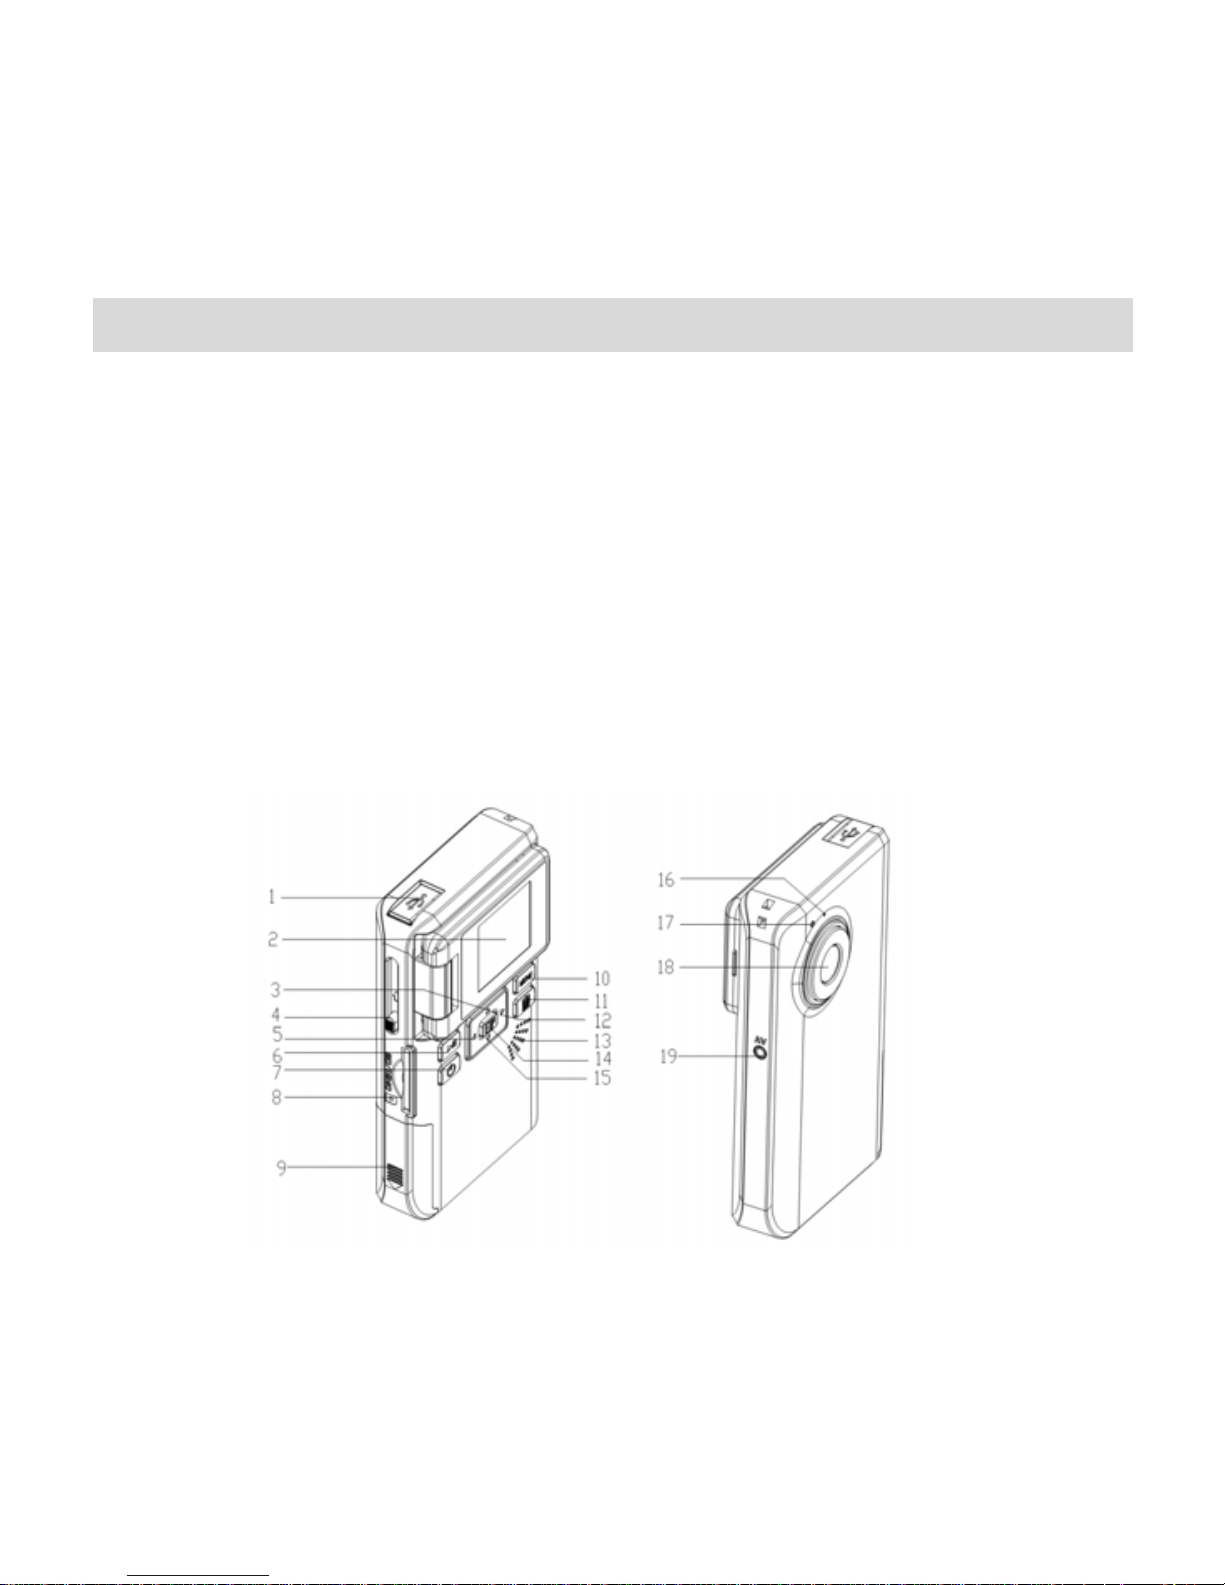
PARTS OF THE VIDEO CAMERA
1:USB jack
2:LCD screen
3:Up button
4:USB switch
5:Left/Self-timer button
6:MODE button
7:Power button
8:SD card slot
9:Battery cover
10:Menu button
11:Delete button
12:Right button
13:Speaker
14:Shutter/OK button
15:Down button
16:Microphone
17:Power LED
18: Lens
19: AV out jack
Page 6
4
PREPARING FOR USING
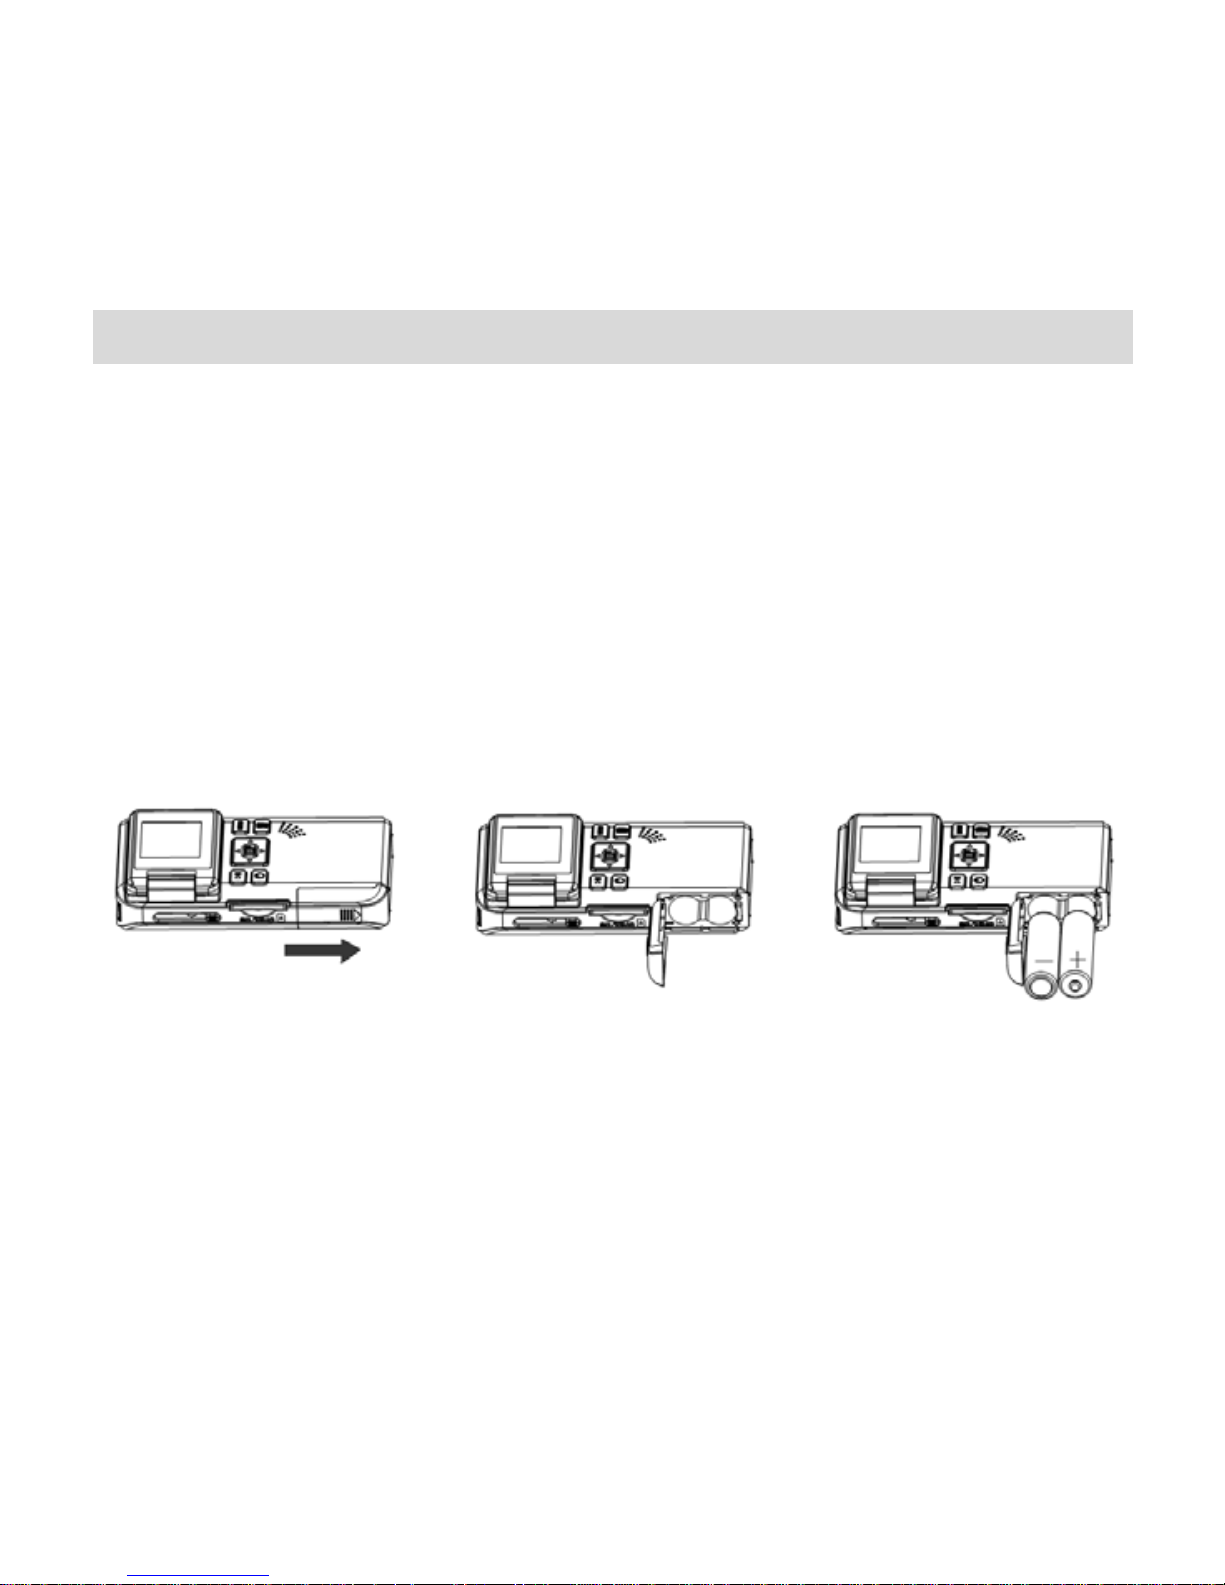
Installing the Battery
1. Open the video camera battery door.
2. Insert two AA-size batteries with the positive (+) and negative (-) poles matching
the directions indicated on the battery cover.
3. Close the battery door .
Inserting the Memory Card
Turn off the camera before inserting or removing the memory card. Be sure to orient
the card correctly when inserting it. Never try to force the memory card into the slot
Page 7

5
when you feel resistance. The memory card has a write protect switch, which used to
protect data from accidental deletion. Therefore, whenever you want to record,
format or delete files in the SD card, disable the write protection beforehand.
1. Turn off the video camera.
2. Find the SD card slot;
3. Make the frontispiece of the card upward, and then insert the card inside softly.
• Never insert any other object which is not a SD/MMC card into the
camera’s SD card slot. Doing so will cerate the risk of damaging to the
camera and the card.
• Never remove the SD card from the camera while the camera is powered on.
Doing so can cause failure to the picture recording operation, and even
damage the memory card.
Format the memory card
All data will be deleted including protected files. Be sure to download important files
to your computer before formatting.
1: Turn the power on, and set the video camera to the Setup Menu.
Page 8
6
2: Press the UP or DOWN button to select [Format] then press the SHUTTER/OK
button to launch the submenu.
3: Press the UP or DOWN button to select the item [YES] and then press the
SHUTTER/OK button to erase all data.
Setting the Language
When using the video camera for the first time after purchasing it, be sure to choose
a language and set the date & time before using the video camera.
1: Turn the power on, and set the video camera to the Setup Menu.
2: Press the UP or DOWN button to select [Language] then press the SHUTTER/OK
button to launch the submenu.
3: Press the UP or DOWN button to select the desired language and then press the
SHUTTER/OK button to confirm the setting.
4: Press the MENU button to close the menu.
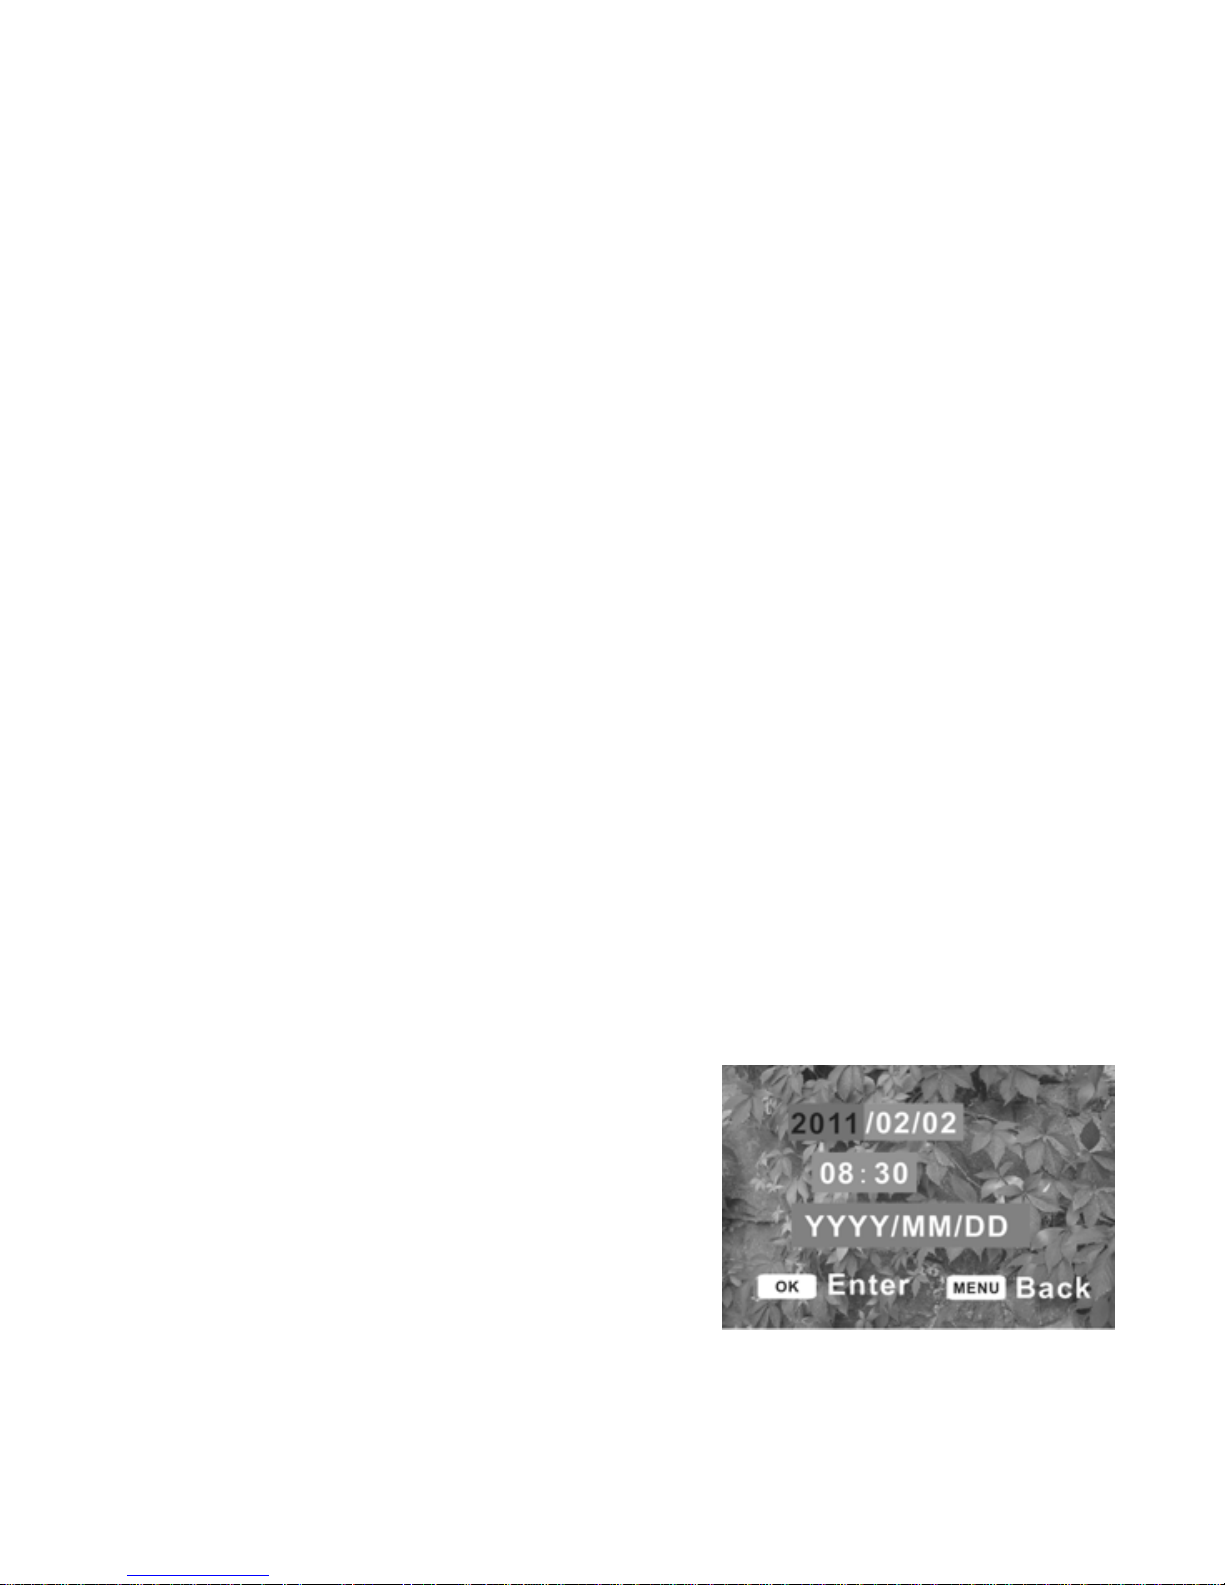
Setting the date and time
1: Turn the power on, and set the video camera
to the Setup Menu.
Page 9

7
2: Press the UP or DOWN button to select [Date & Time] then press the
SHUTTER/OK button to launch the submenu.
3: Press the UP or DOWN button to change the highlighted value. Press the LEFT or
RIGHT button to move the cursor between settings.
4: Press the SHUTTER/OK button to confirm the setting.
5: Press the MENU button to close the menu.
Page 10
8
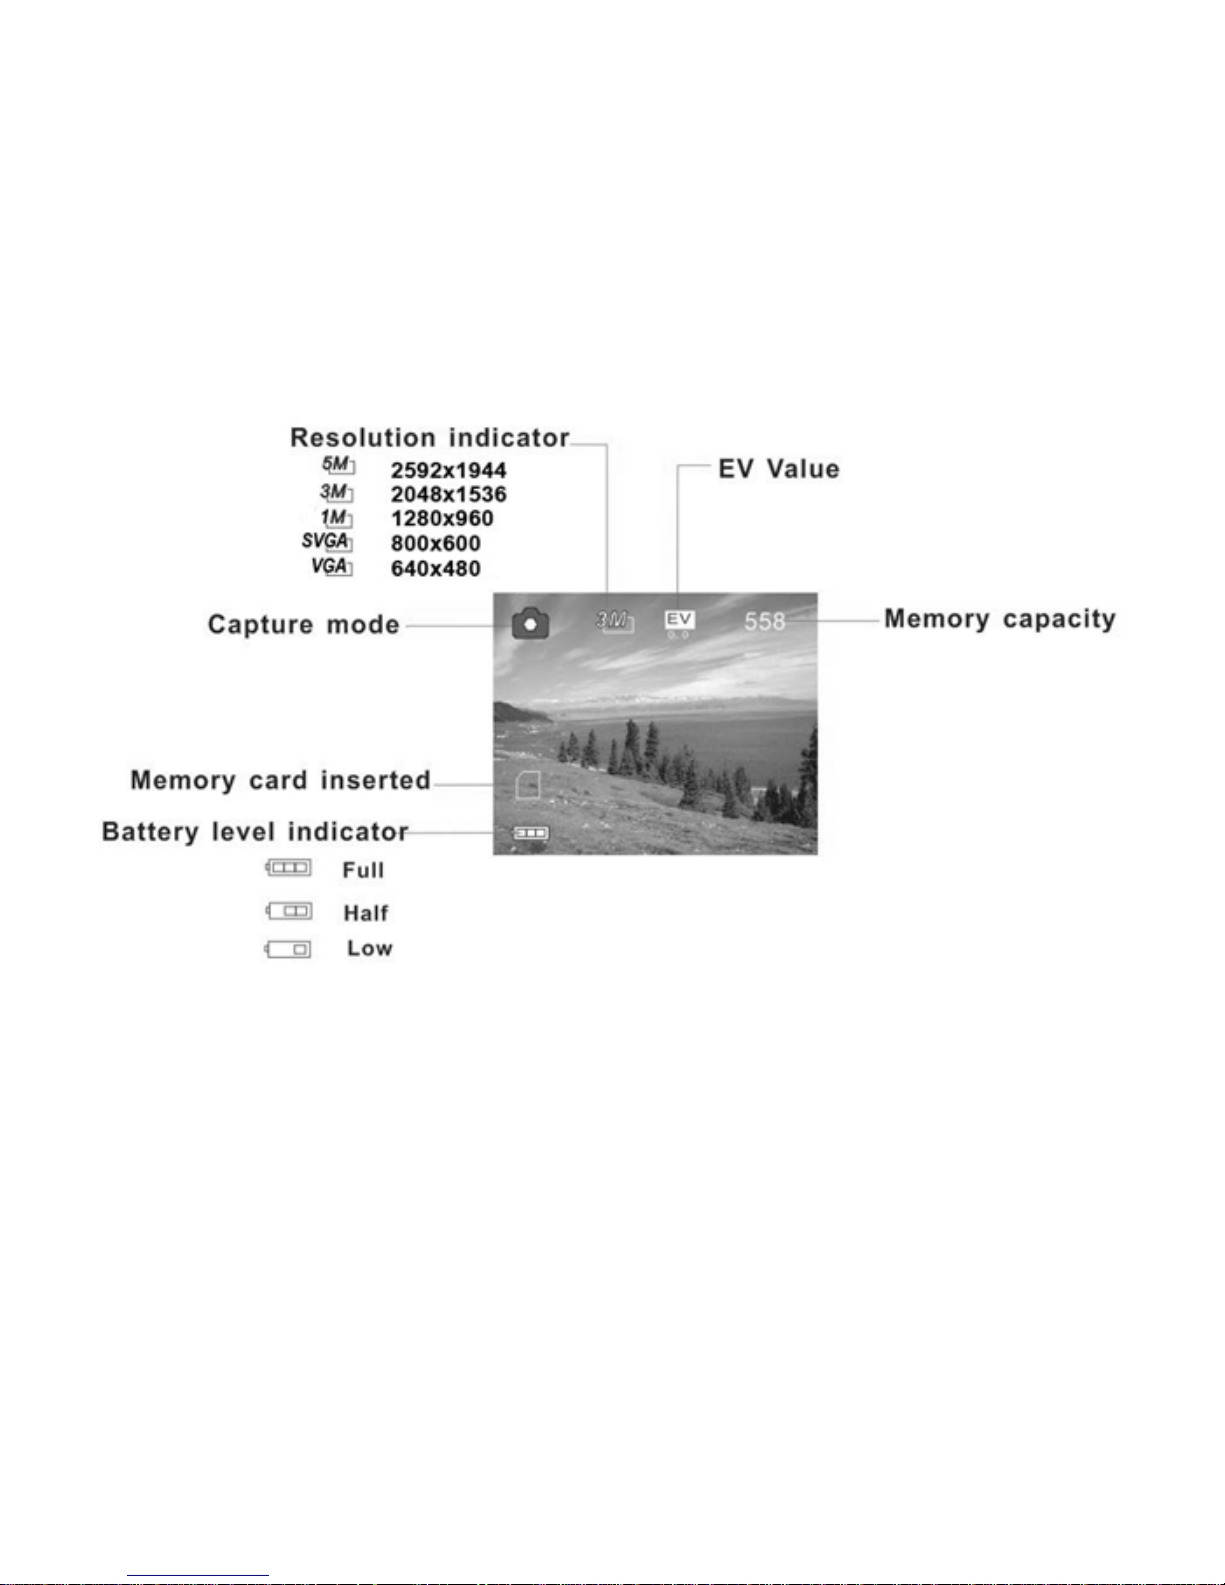
Monitor screen display
Capture mode
Page 11
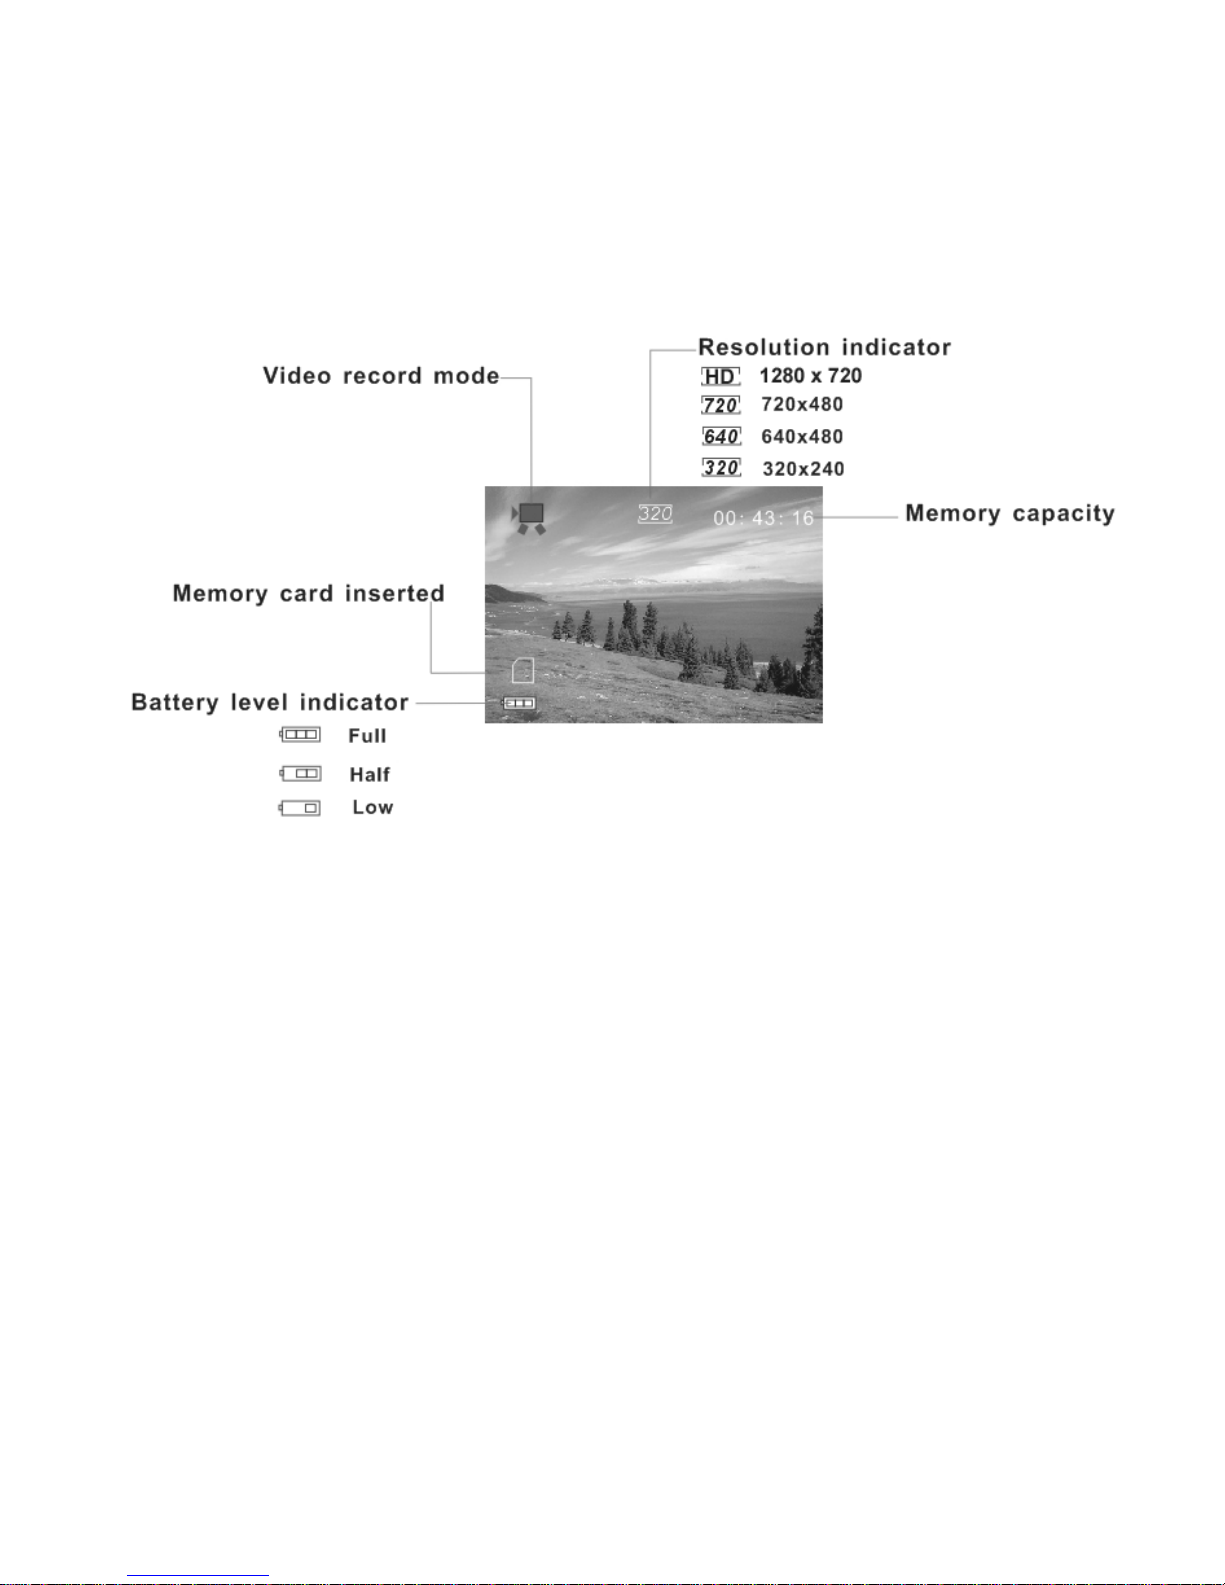
9
Video record mode
Page 12
10
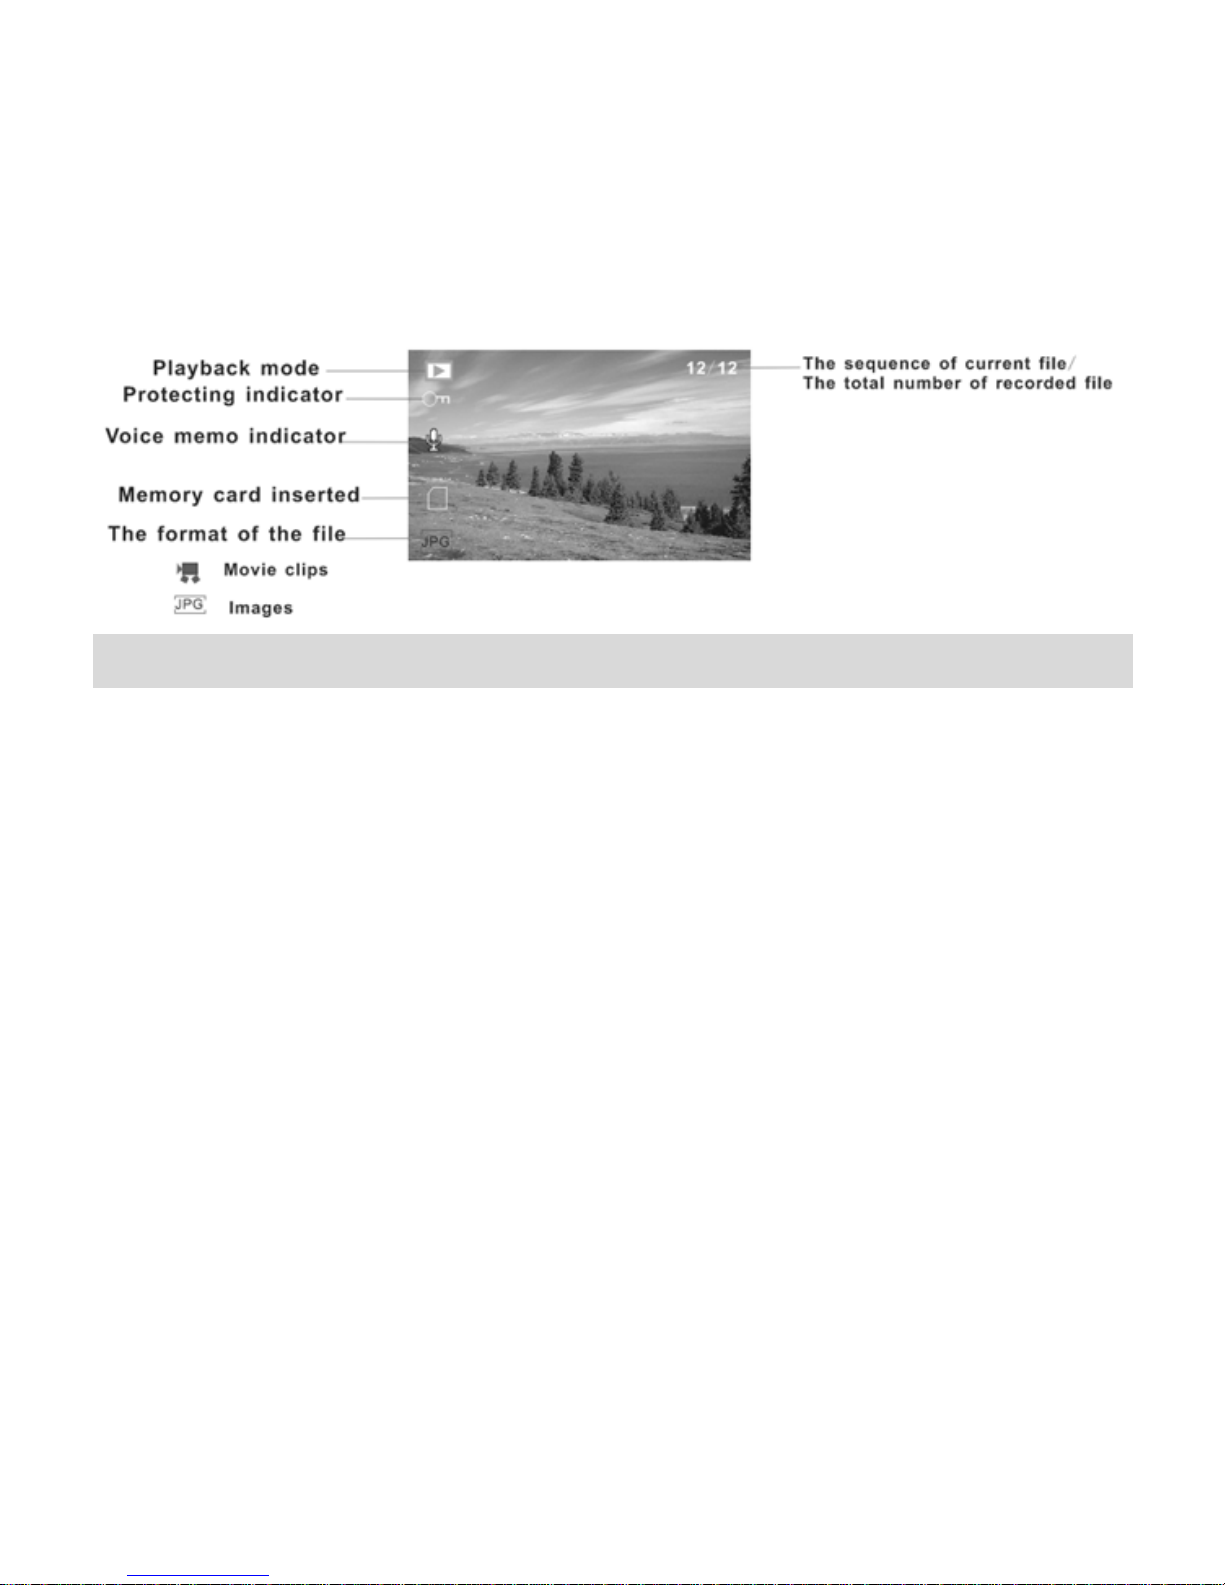
Playback mode
USING THIS VIDEO CAMERA
Turning the Camera On and Off
1. Press the POWER button to turn on the video camera.
2. Press the POWER button again will turn the camera off.
To save battery power, the video camera automatically turns off a period of time
after the last control accessed. Press the power button to power the camera back on.
You can change the power-off time by setting the function [Power Save] in the
Setup menu.
Page 13
11
Change the record mode
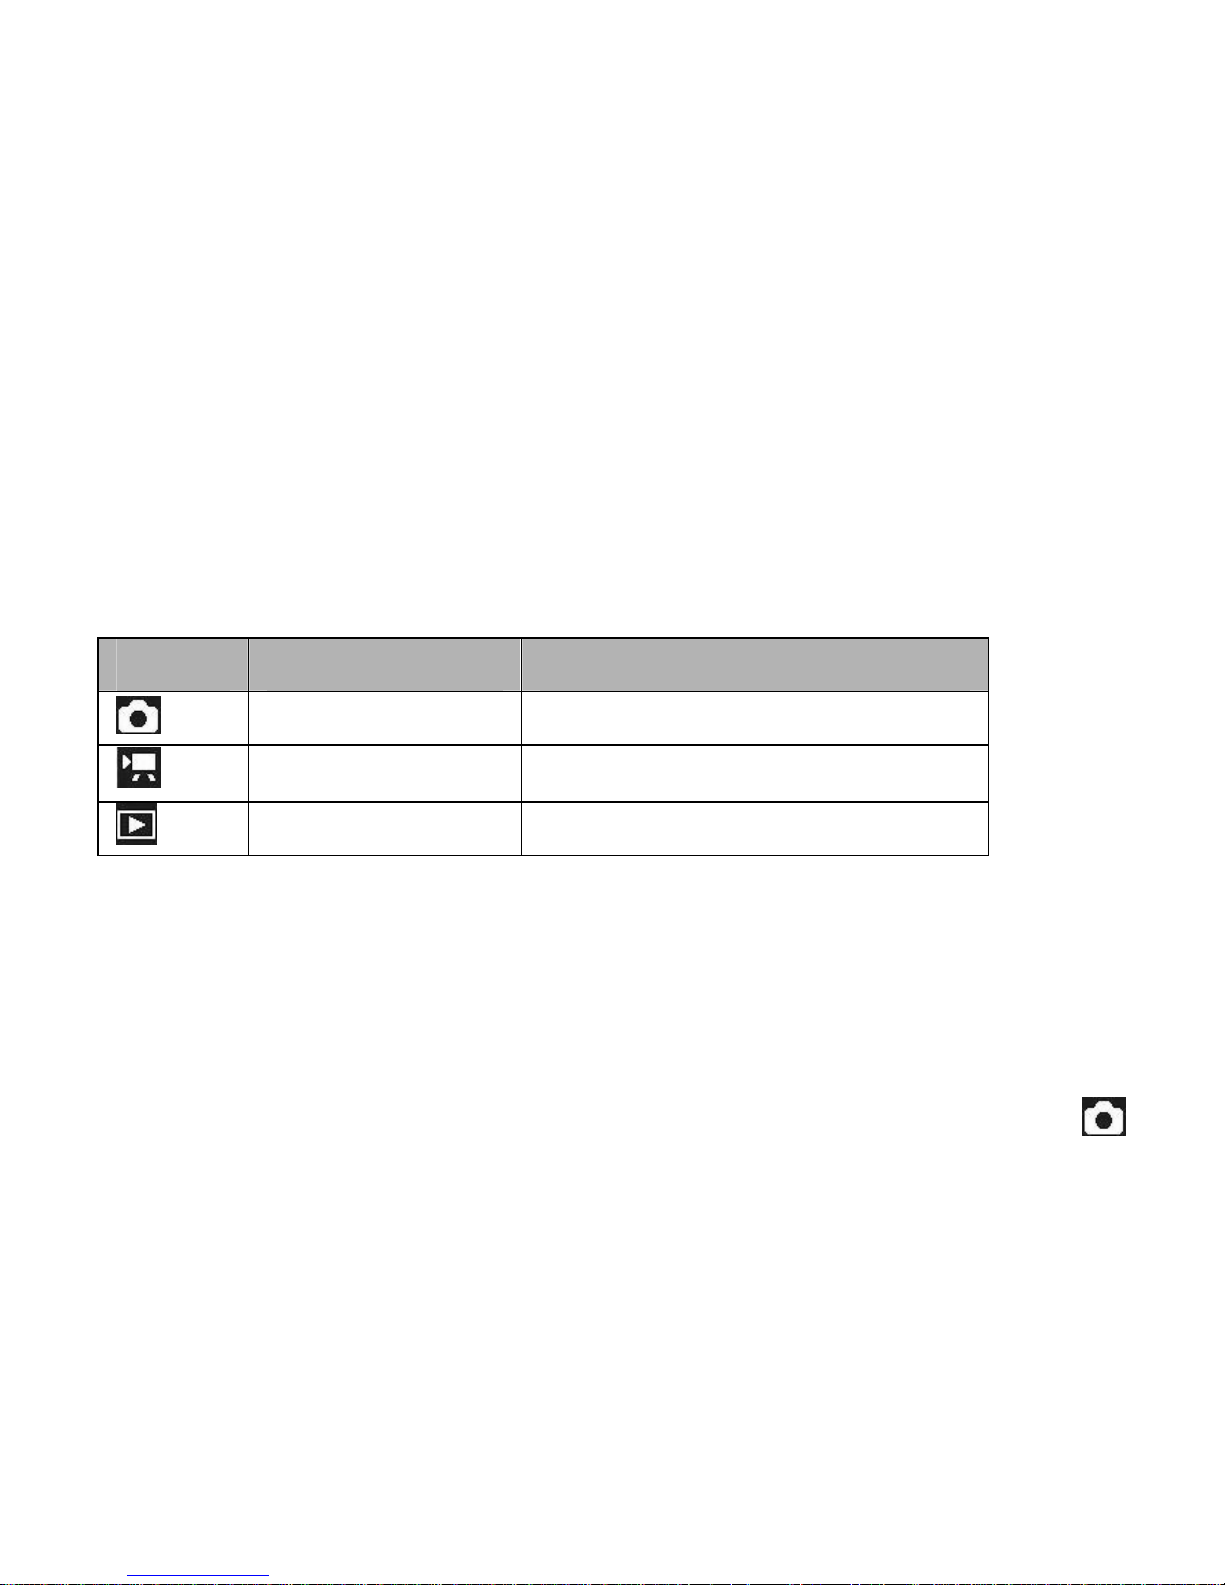
There are three record modes in this video camera.
1: Press the POWER button to turn on the camera, and the camera get into the
default video mode.
2: Press the MODE button to change the mode. Each time the MODE button is
pressed the mode icon is changed.
Taking still images
1. Turn on the video camera.
2. Press the Mode button to set the video camera to capture mode, the icon
appears on the LCD screen.
3. Use the LCD screen to frame your subject.
Display Title Description
Capture mode For taking still photos.
Video mode For recording movie clips.
Playback mode Preview the record files.
Page 14

12
4. Hold the video camera steady and then press the SHUTTER/OK button
completely down to take a picture.
• Automatically the number displayed on the screen is decreased by one. For
example, if the screen displays 018 when the camera is powered on, after one
photo has been captured, 017 will appear. If the memory is full, “Memory
Full“ will appear on screen.
• Make sure that your fingers do not cover the lens.
• Do not take the memory card or battery out when the video camera is saving
the image, otherwise the image will not be saved completely.
Using the Self-timer and Burst snapshot
Use the self-timer to set a delay from the time the shutter button is pressed to the
time the image is shot. Use the burst snapshot to take pictures continuously.
1: Turn the power on, and press the Mode button to set the video camera to
the Capture mode.
2: Press the LEFT button to change the self-timer mode: each time the LEFT button is
pressed the icon on the up-leftward is changed.
Page 15

13
Off: Without delay, take picture normally.
2 seconds: The shutter release will delay for 2 seconds.
10 Seconds: The shutter release will delay for 10 seconds.
Continues: Press the SHUTTER/OK button once to take three
pictures continuously.
3: Press the SHUTTER/OK button to take picture.
• You can also set the self-timer and burst snapshot by the capture menu.
Using the Zoom Function
This video camera has a digital zoom function that allows you to zoom in or zoom
out on subjects. The digital zoom enlarges or shrinks the image using a software
process.
1: Turn the video camera on and set it to capture mode or video record mode.
2: Press the UP+ or DOWN - button to compose the image.
UP +: zoom out for a wide-angle shot.
DOWN -: zoom in for a telephoto shot.
Page 16
14
When the zoom button is pressed, the value of magnification level appears on the
LCD monitor.
Recording video clip
1: Turn the video camera on and set it to video record mode.
2: Press the SHUTTER/OK button to start recording. Press the RIGHT button to have
a pause and press it again to continue.
3: Press the SHUTTER/OK again to end the recording. If the memory is full the video
camera will stop recording automatically.
• The LCD monitor displays the recorded time.
USING THE MENU IN RECORD MODE
When a menu is displayed, the UP, DOWN, SHUTTER/OK button is used to make
the desired setting. The audio record mode doesn’t have a menu.
Menu in capture mode
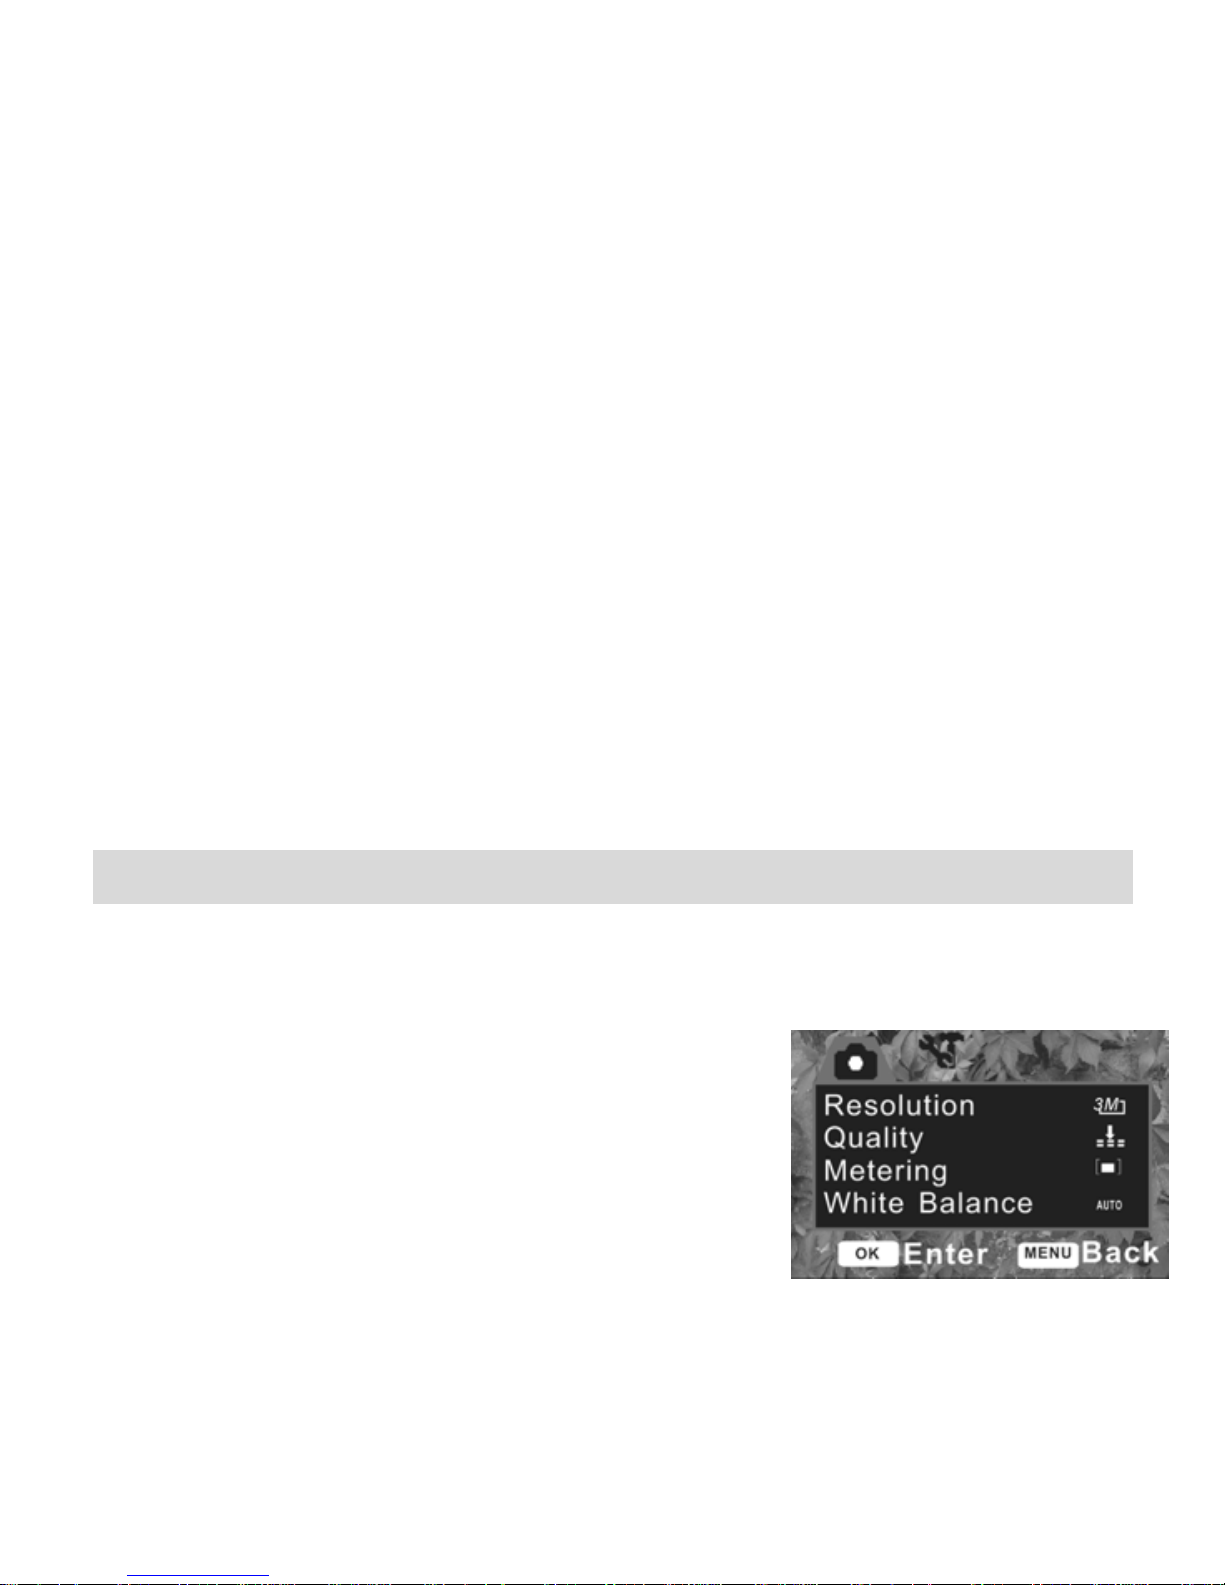
1: Turn on the video camera and set it to capture
mode.
Page 17

15
2: Press the MENU button to display the menu.
3: Use the UP or DOWN button to select an item.
4: Press the SHUTTER/OK button to enter the submenu.
5: Use the UP or DOWN button to select the desired item.
6: Press the SHUTTER/OK button confirm the setting.
7: Press the MENU button to close the menu.
Capture menu list
Menu item Function
Resolution There are five options for choice:
2592X1944(5M by interpolation)/
2048X1536(3M by interpolation)/
1280X960 (1.3M)/800X600(SVGA)/640X480(VGA)
Quality Select a lower image quality to decrease the image size in order to
capture more images. There are three options for choice: [Super
Fine] /[Fine] /[Normal].
Metering Change the metering method to change the brightness of the
picture.
[Center]: The exposure will be calculated based on light in the
Page 18
16
center area and this is suitable for general use.
[Multi]: The exposure will be calculated based on the average light.
[Spot]: Only the spot in the center of the LCD screen will be
metered for light.
White
Balance
Adjust the white balance to suit different light sources. There five
items for option: [Auto]/ [Daylight]/ [Cloudy] / [Fluorescent] /
[Bulb].
Exposure Set the exposure value manually to compensate for unusual
lighting conditions such as indirect indoor lighting, dark
backgrounds, and strong backlighting. The exposure value range
is –2.0 to 2.0.
Capture
Mode
Use this item to set the camera to different mode: Off/ Self-timer
2s/ Self-timer 10s/ Continues
Effect Use this function to change the image’s color tone: Normal/ B &
w/ Sepia / Negative/ Red/ Green/ Blue.
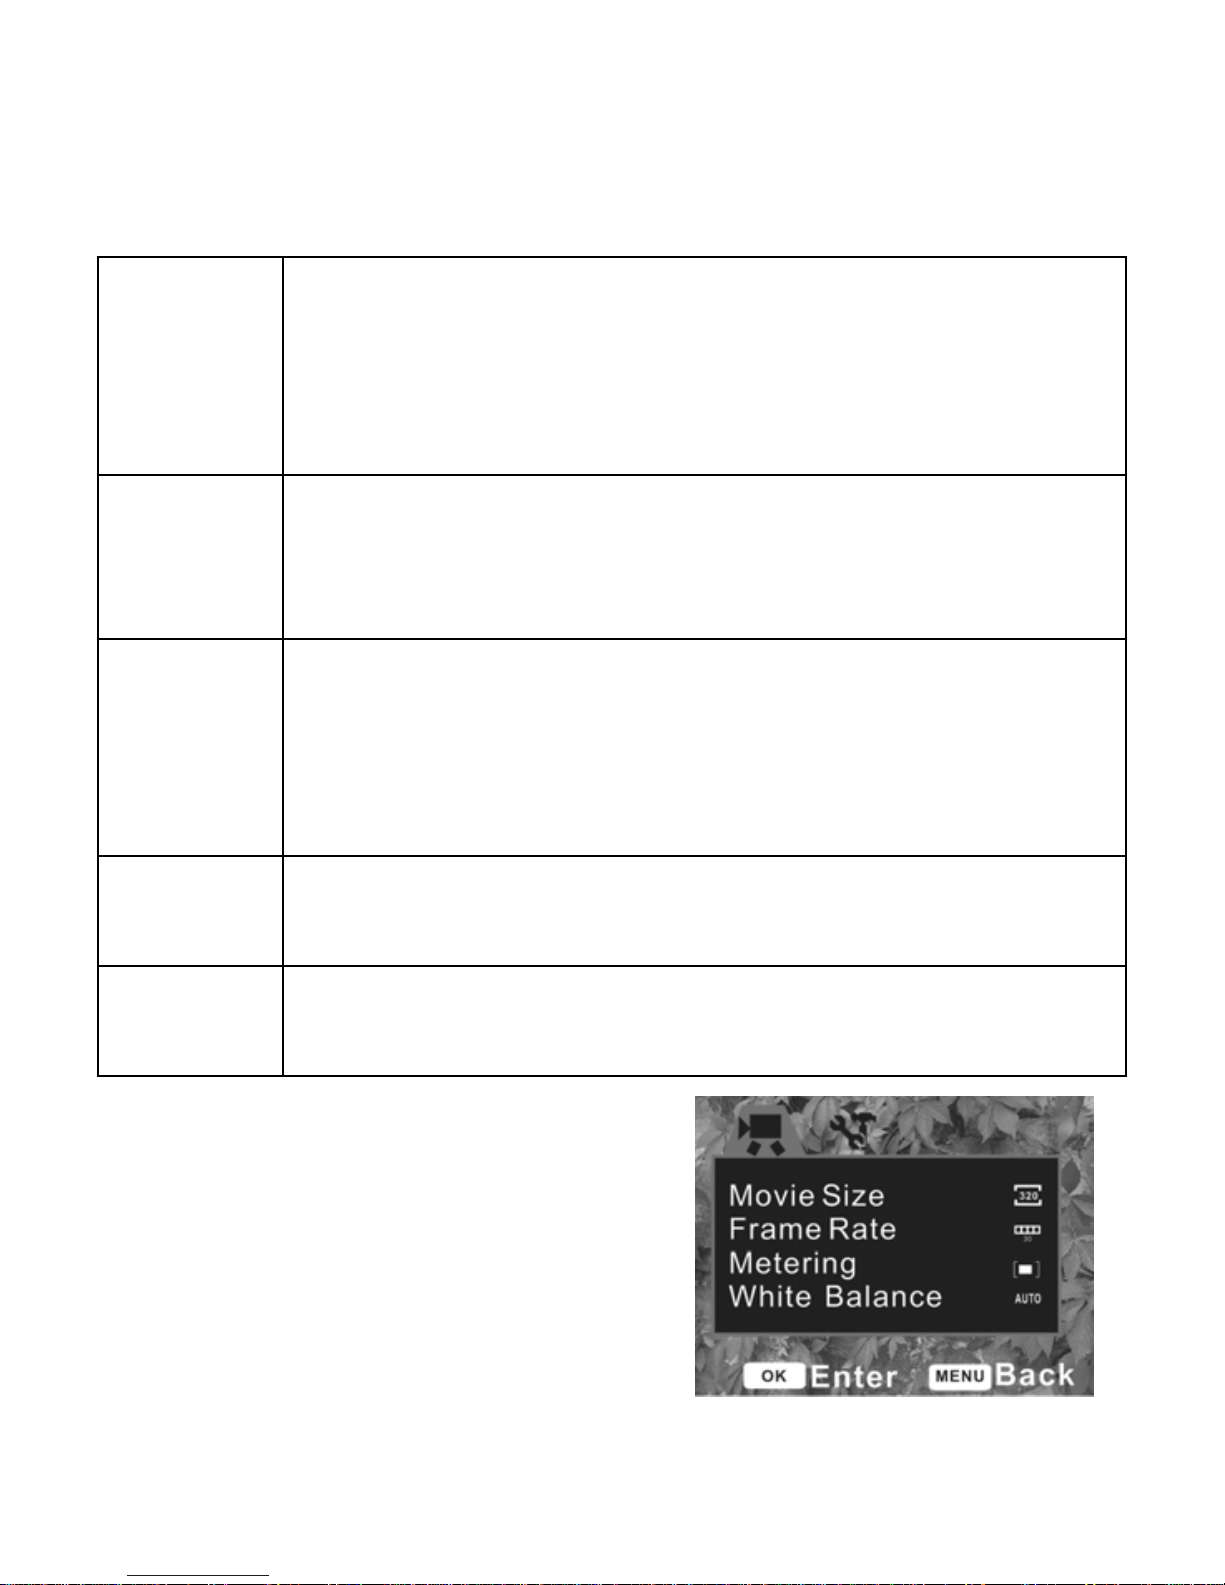
Menu in video mode
1: In video record mode press the MENU
Page 19
17
button to display the menu.
2: Use the UP or DOWN button to select an item.
3: Press the SHUTTER/OK button to enter the submenu.
4: Use the UP or DOWN button to select the desired item.
5: Press the SHUTTER/OK button to confirm the setting.
6: Press the MENU button to close the menu.
Menu item Function
Movie Size Select small movie size to record longer time. There are four
items for option:
1280x720/ 720x480/ 640x480/ 320X240.
Frame Rate Select low frame rate to record longer time. There are two
items for option: High/ Low.
Metering Setting metering.
White Balance Setting white balance
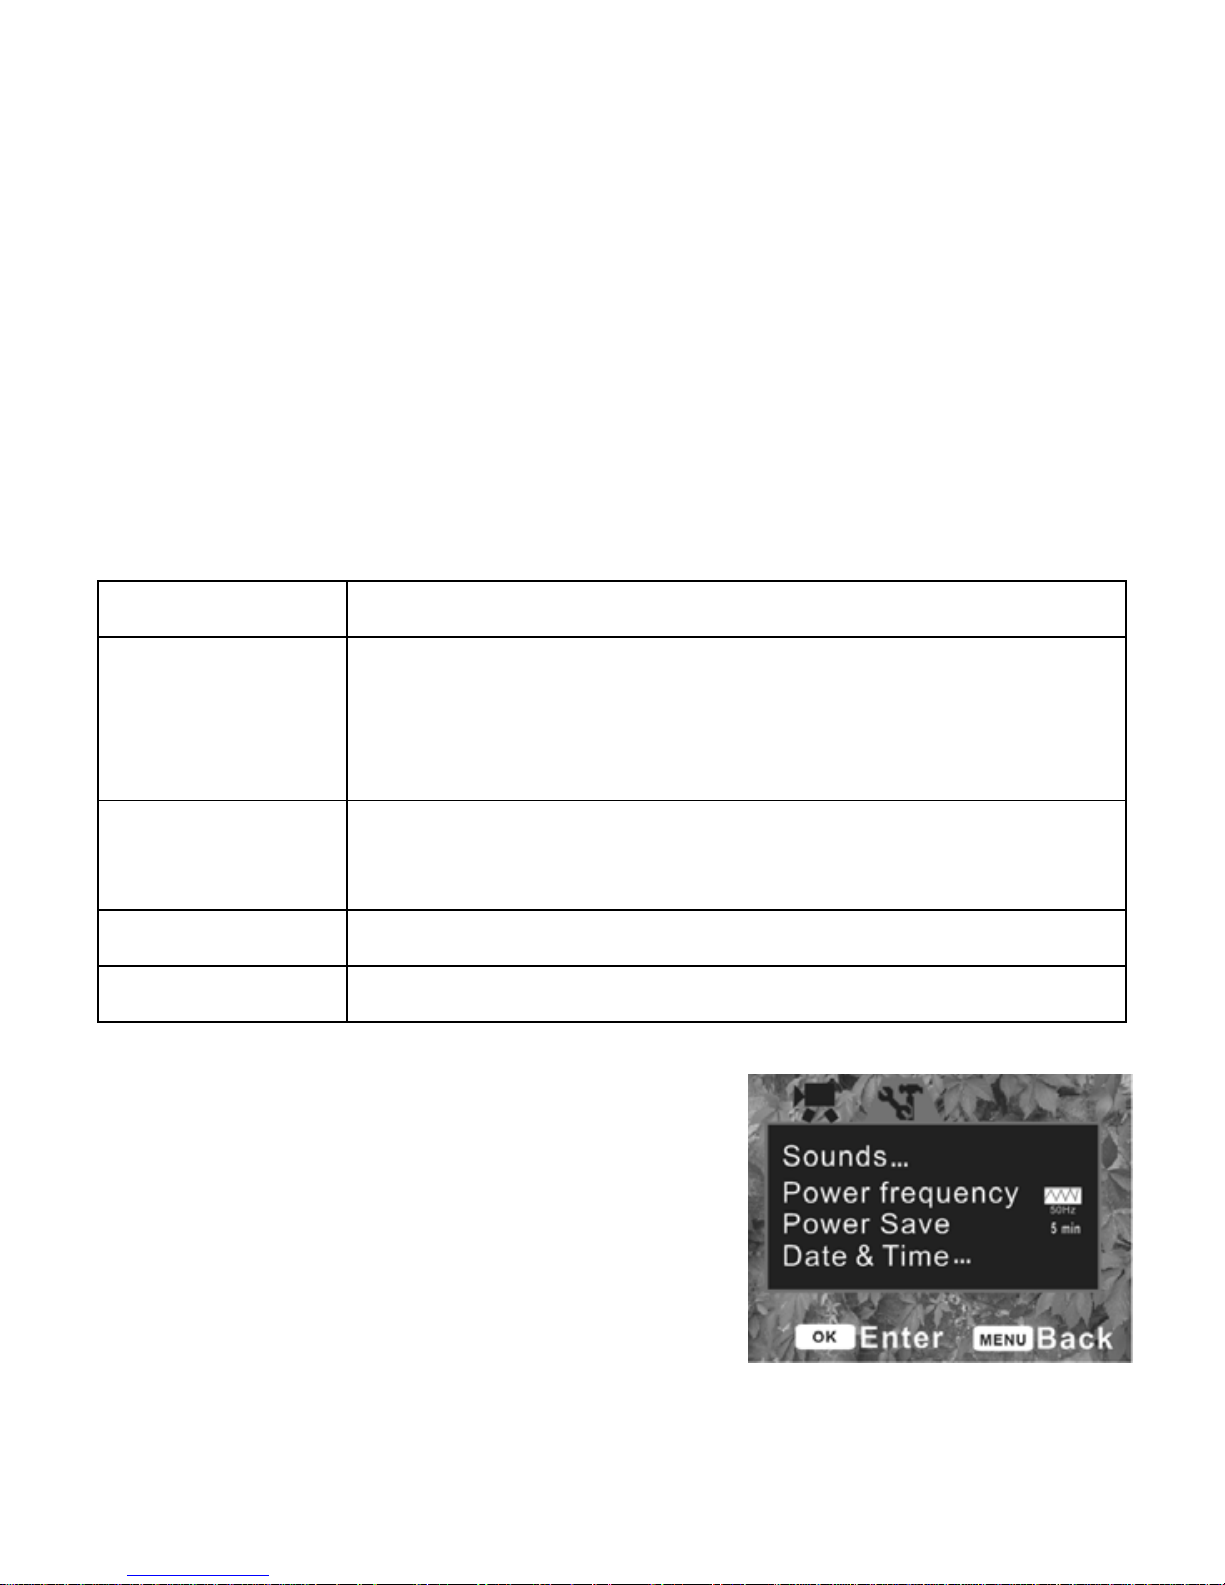
Setup menu
You can set the system items in setup menu.
1: Turn the power on and press the MENU button
Page 20

18
to display the menu.
2: Press the RIGHT button to select
[Setup].
3: Use the UP or DOWN button to select an item.
4: Press the SHUTTER/OK button to enter the submenu.
5: Use the UP or DOWN button to select the desired item.
6: Press the SHUTTER/OK button to confirm the setting.
7: Press the MENU button to close the menu.
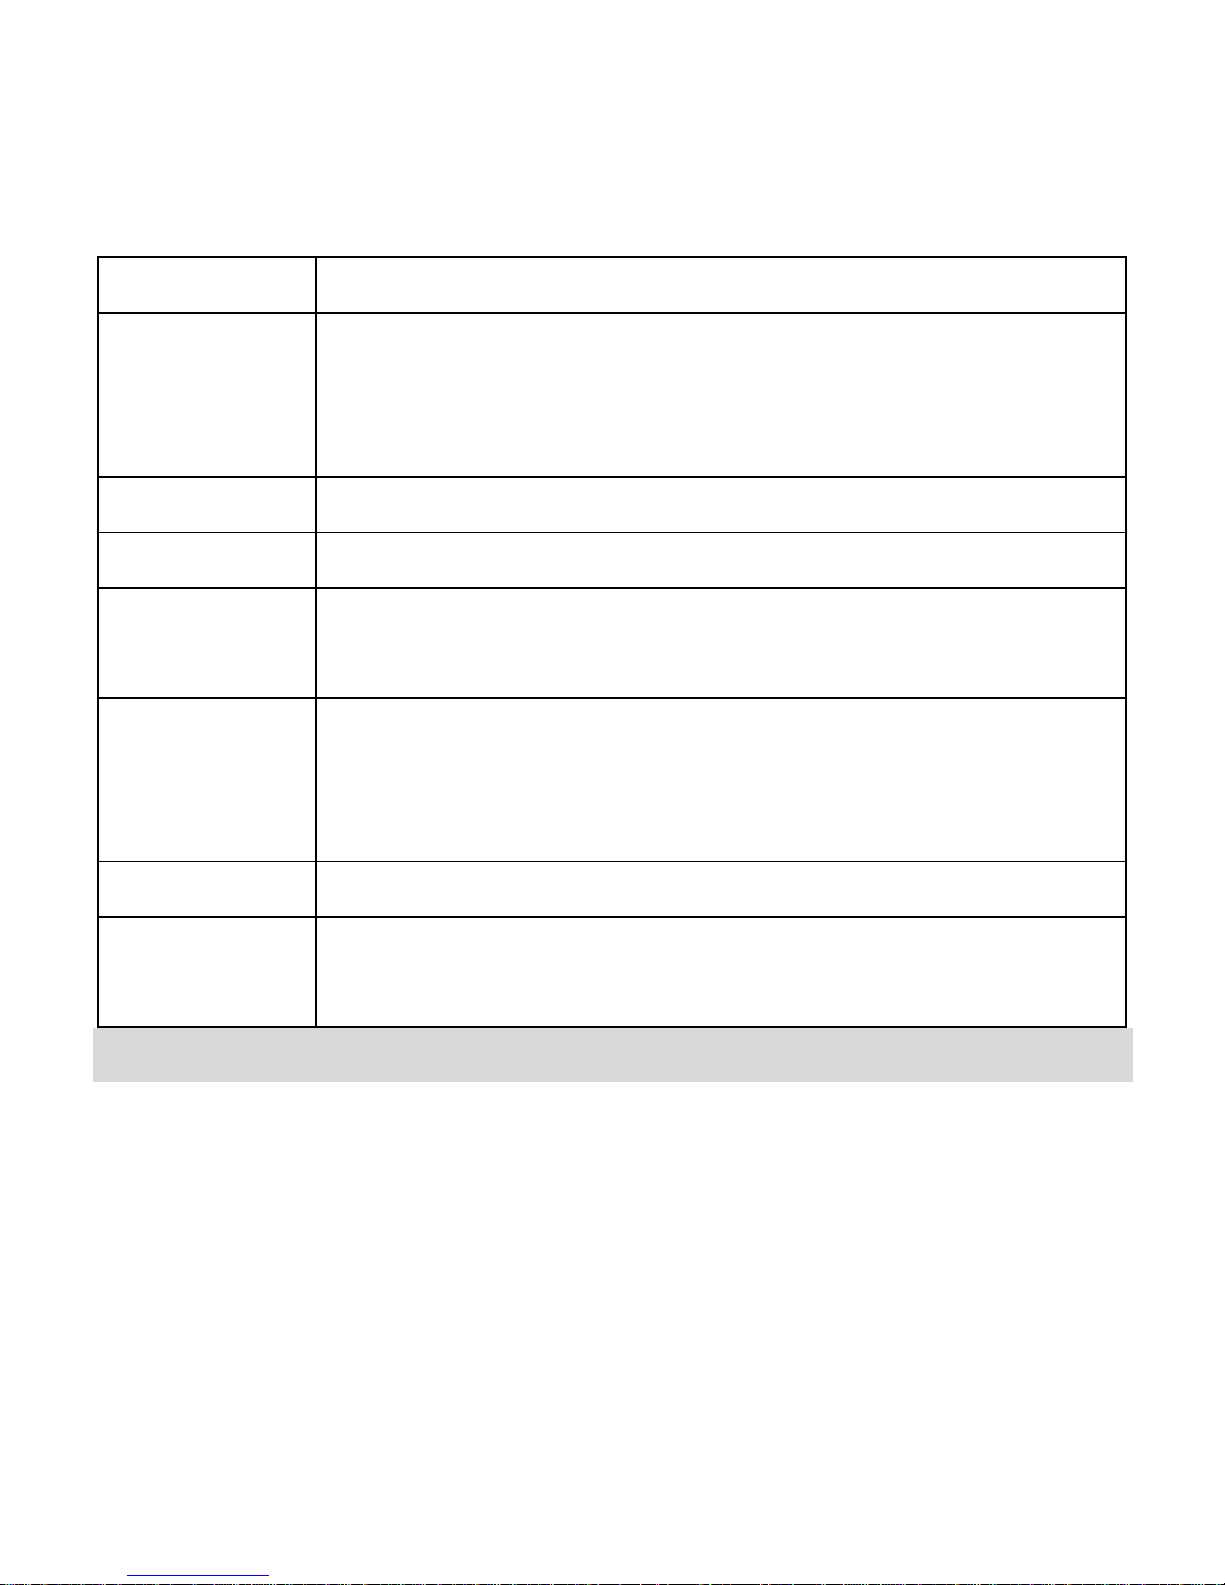
Menu item Function
Sounds There are four items for option:
[Shutter]: Set the shutter sound on or off by pressing the
RIGHT button.
[Start-up]: Set the start-up sound. Press the RIGHT button to
change the sound. There are two options: [On] / [Off].
[Beep]: Set the operation sound on or off by pressing the
RIGHT button.
[Volume]: Adjust the sound volume. You can change it by
pressing the RIGHT button.
Power Light Frequency should be set to either 60Hz or 50Hz
Page 21
19
frequency depending on your region. [50HZ] / [60HZ].
Power save To save power, the camera is turned off automatically after a
period of time. There are three options: [1min.] / [3min.] /
[5min.].
Date & Time Setting Date & Time
Language Setting language
TV Out TV Out should be set to either NTSC or PAL depending on your
region. [NTSC] / [PAL].
USB You can use this camera as a PC camera or removable disk.
[MSDC]: Use as a removable disk.
[PCCAM]: Use as a PC camera;
Format Format SD card
Reset all To reset the entire menu and button operation settings to
initial default. [Yes]/ [No].
PLAYBACK
Playback still image
1: Turn the camera on, and then press the MODE button repeatly.
Page 22

20
The latest recorded file appears on the LCD screen. If there are no images stored, a
message [No File] appears.
2: Press the LEFT or RIGHT button to preview the previous or next image.
Playing back movie clips
1: Press the LEFT or RIGHT button to select the movie clips you want to playback.
2: Press the SHUTTER/OK button to start playing. Press the UP button to pause it
and press it again to continue. Press the RIGHT button to fast forward and press the
LEFT button to back forward. Press the MENU or
SHUTTER/OK button to end playing.
Other function in playback mode
Viewing Thumbnails
Press the DOWN button to view the file in thumbnails mode. Use the UP, DOWN,
LEFT, RIGHT button to select a file. Press the SHUTTER/OK button to view the file in
full screen.
Page 23

21
Lock files
1: Press the MENU button in playback mode.
2: Press the UP or DOWN button to select the item [Lock...].
3: Press the SHUTTER/OK button to enter the submenu.
4: Use the UP or DOWN button to select the item: [Lock/Unlock one]: Lock /Unlock
current file. [Lock All]: Lock all files. [Unlock All]: Unlock all files.
5: Press the SHUTTER/OK button to confirm the setting. A dialog box will appear.
Using UP or DOWN button to select the item [Yes].
6: Press the SHUTTER/OK button to lock/unlock the current file or all files.
7: Press the MENU button to close the menu.
• If the file has been locked the icon
will display on the LCD screen. The
locked file can not be deleted.
Delete files
1: Press the MENU button in playback mode.
2: Press the UP or DOWN button to select the item [Delete…].
3: Press the SHUTTER/OK button to enter the submenu.[ One]: Delete current file.
[All]: Delete all files except locked files.
Page 24

22
4: Use the UP or DOWN button to select the item.
5: Press the SHUTTER/OK button to confirm the setting. A dialog box will appear.
Using UP or DOWN button to select the item [Yes].
6: Press the SHUTTER/OK button to delete the current file or all files.
Play a slide show
1: Press the MENU button in playback mode.
2: Press the UP or DOWN button to select the item [Slide Show…].
3: Press the SHUTTER/OK button to enter the submenu.
[Start]: Select this item to prepare for slide showing after setting the slide show
mode.
[Interval]: Set the interval time by pressing the LEFT or RIGHT button.
The range of interval time is 1 second to 10 seconds.
[Repeat]: Press the LEFT or RIGHT button to set the repeat function on or off.
4: Use the UP or DOWN button to select [Start].
5: Press the SHUTTER/OK button start slide show.
6: Press the MENU button to end slide show.
• Only the still image can be show in slide show.
Page 25

23
Effect
1: In Playback mode, select and display the photo you want to change color tone.
Press the MENU button.
2: Press the UP or DOWN button to select the [Effect].
3: Press the SHUTTER/OK button entering the submenu: [B&W], [Sepia], [Negative],
[Red], [Green], [Blue], [Binarize], [Sunset], [Warm], [Cold], [Contrast].
4: Press the UP or DOWN button to select an effect to change the image’s color
tone.
5: Press the SHUTTER/OK button to confirm the setting.
Rotate the image
1: Select an image you want to rotate in playback mode.
2: Press the MENU button to display the menu.
3: Press the UP or DOWN button to select the item [Rotate…].
4: Press the SHUTTER/OK button to launch the submenu:
Page 26

24
Rotate: Each time the SHUTTER/OK button is pressed the image will rotate 90°.
Save: Select this item to save the rotated image.
Back: Select this item to close the submenu.
Resize
1: Select an image you want to resize in playback mode.
2: Press the MENU button to display the menu.
3: Press the UP or DOWN button to select the item [Resize…].
4: Press the SHUTTER/OK button to launch the submenu.
5: Press the UP or DOWN button to select the item.
6: Press the SHUTTER/OK button to save the resized image.
• The image can only be resized to smaller size.
Add voice memo to image
1: Select an image you want to add voice memo in
playback mode.
2: Press the MENU button to display the menu.
3: Press the UP or DOWN button to select the item [Voice Memo…].
Page 27

25
4: Press the SHUTTER/OK button to display the dialog box as illustration.
5: Select the item [Add] and then press the SHUTTER/OK button to start recording
voice memo.
6: Press the SHUTTER button to end the recording.
7: To playback voice memo please first select desired photo with
microphone icon and then press the SHUTTER/ OK button
• To cancel the voice memo please select [Delete] when the dialog box appears
and then press the SHUTTER/ OK button to delete the memo.
MAKING CONNECTIONS
Connecting the Camera to a TV
When plug in the TV-out cable (supplied) to the camera Video output jack the LCD
screen turns black, Connect the camera to a TV and the TV screen now performs as
the camera LCD screen.
Page 28
26
1. Connect the camera to a TV via the TV-out cable (supplied) as illustrated.
2. Turn on the TV and the video camera, and then set the TV to “AV” mode.
3. When the camera is set to record mode, you can preview the subjects you
want to record on the TV screen.
4. When the camera is set to Playback mode, you can review all the pictures,
video and audio clips stored in the camera on the TV.
Connecting the Camera to a PC
There are two ways to download files from the camera's internal memory or memory
card to a computer:
• By inserting the memory card into a card reader.
• By connecting the camera to a computer using the supplied USB cable.
Using a Card Reader
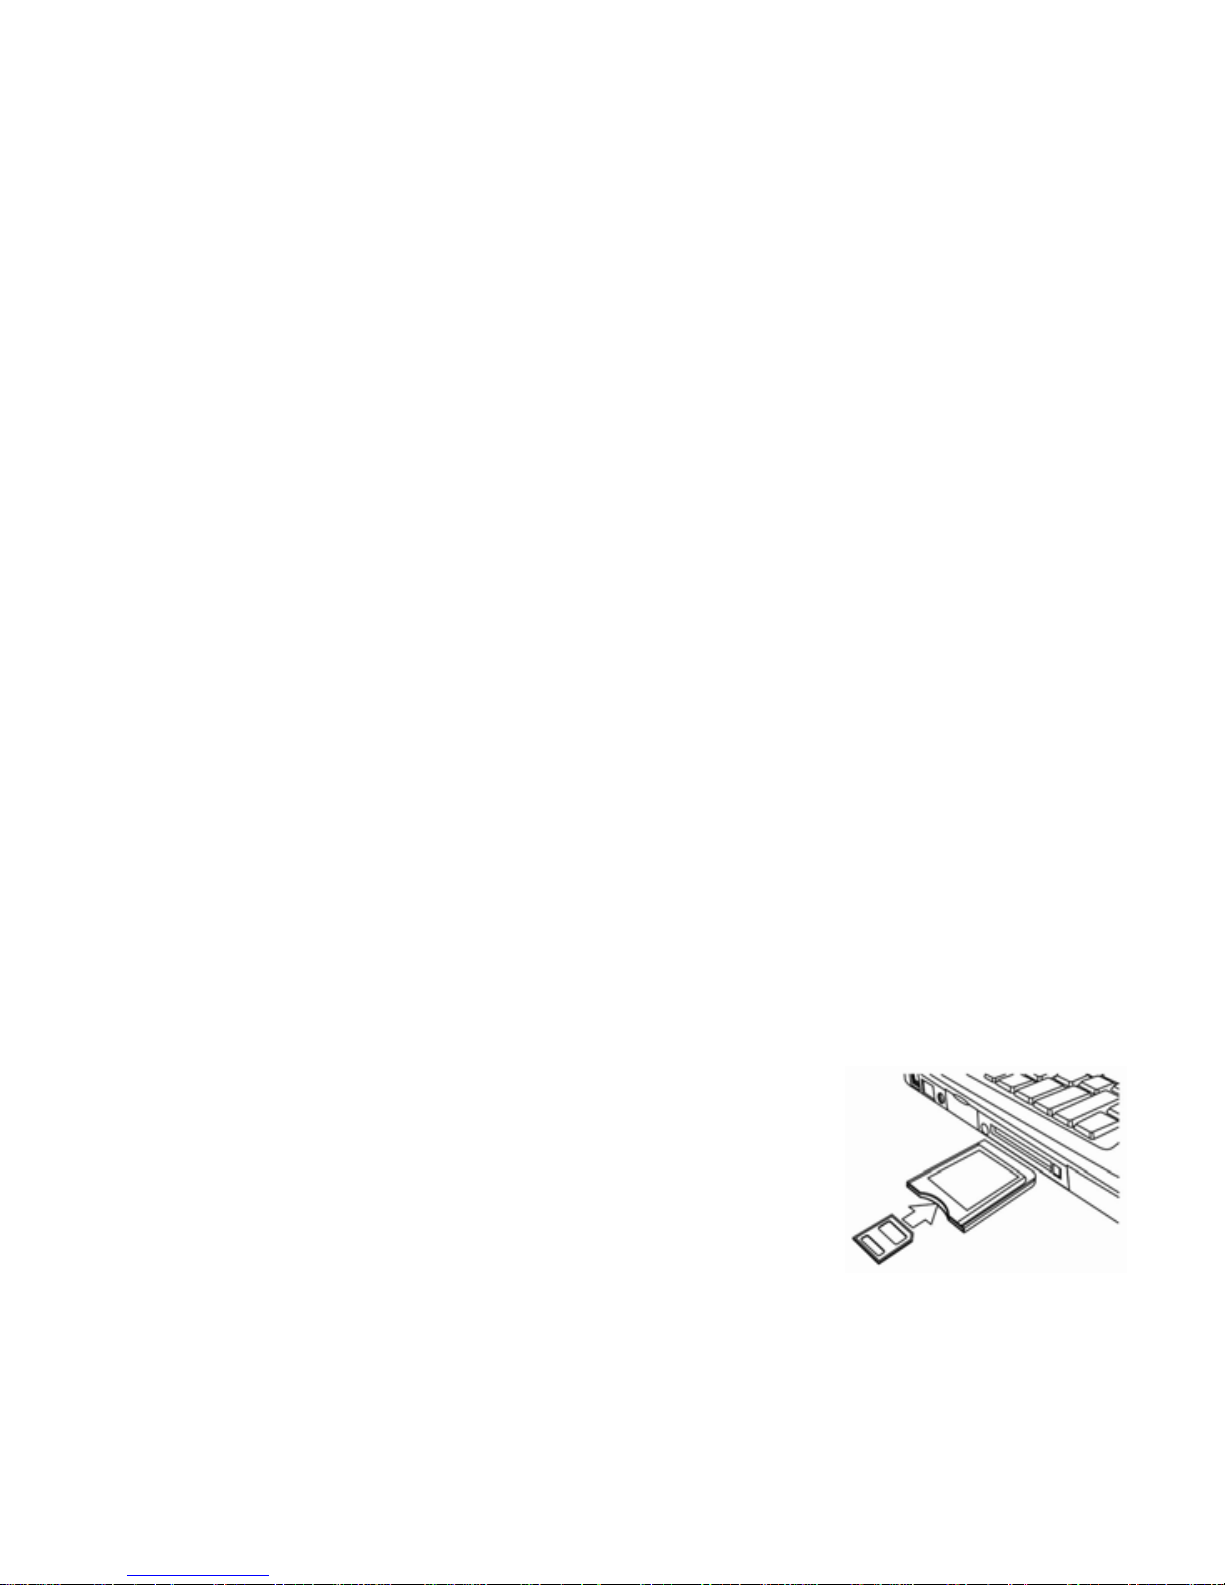
1: Eject the memory card from the video camera and insert
it into a card reader that is connected to a computer.
2: Open [My Computer] or [Windows Explorer] and
Page 29

27
double-click the removable disk icon that represents the memory card.
3: Copy images from the card into a directory of your choice on the computer’s hard
disk.
Connecting the Camera to a PC with the USB Cable
1: Set the USB mode to [MSDC] mode..
2: Connect the supplied USB cable to the computer's USB port and turn on the
camera. A message “MSDC” appears on the screen when connection to the
computer has been successfully completed.
3: Open [My Computer] or [Windows Explorer]. A "Removable Disk" appears in the
drive list. Double-click the "Removable Disk" icon to view its contents. Files stored on
the camera are located in the folder named "DCIM".
4: Copy the photos or files to your computer.
DRIVER INSTALLATION
Install Driver
1: Click [Install Driver].
2: Follow the on-screen instructions to install the driver.
Page 30
28
How to use the PC Camera function
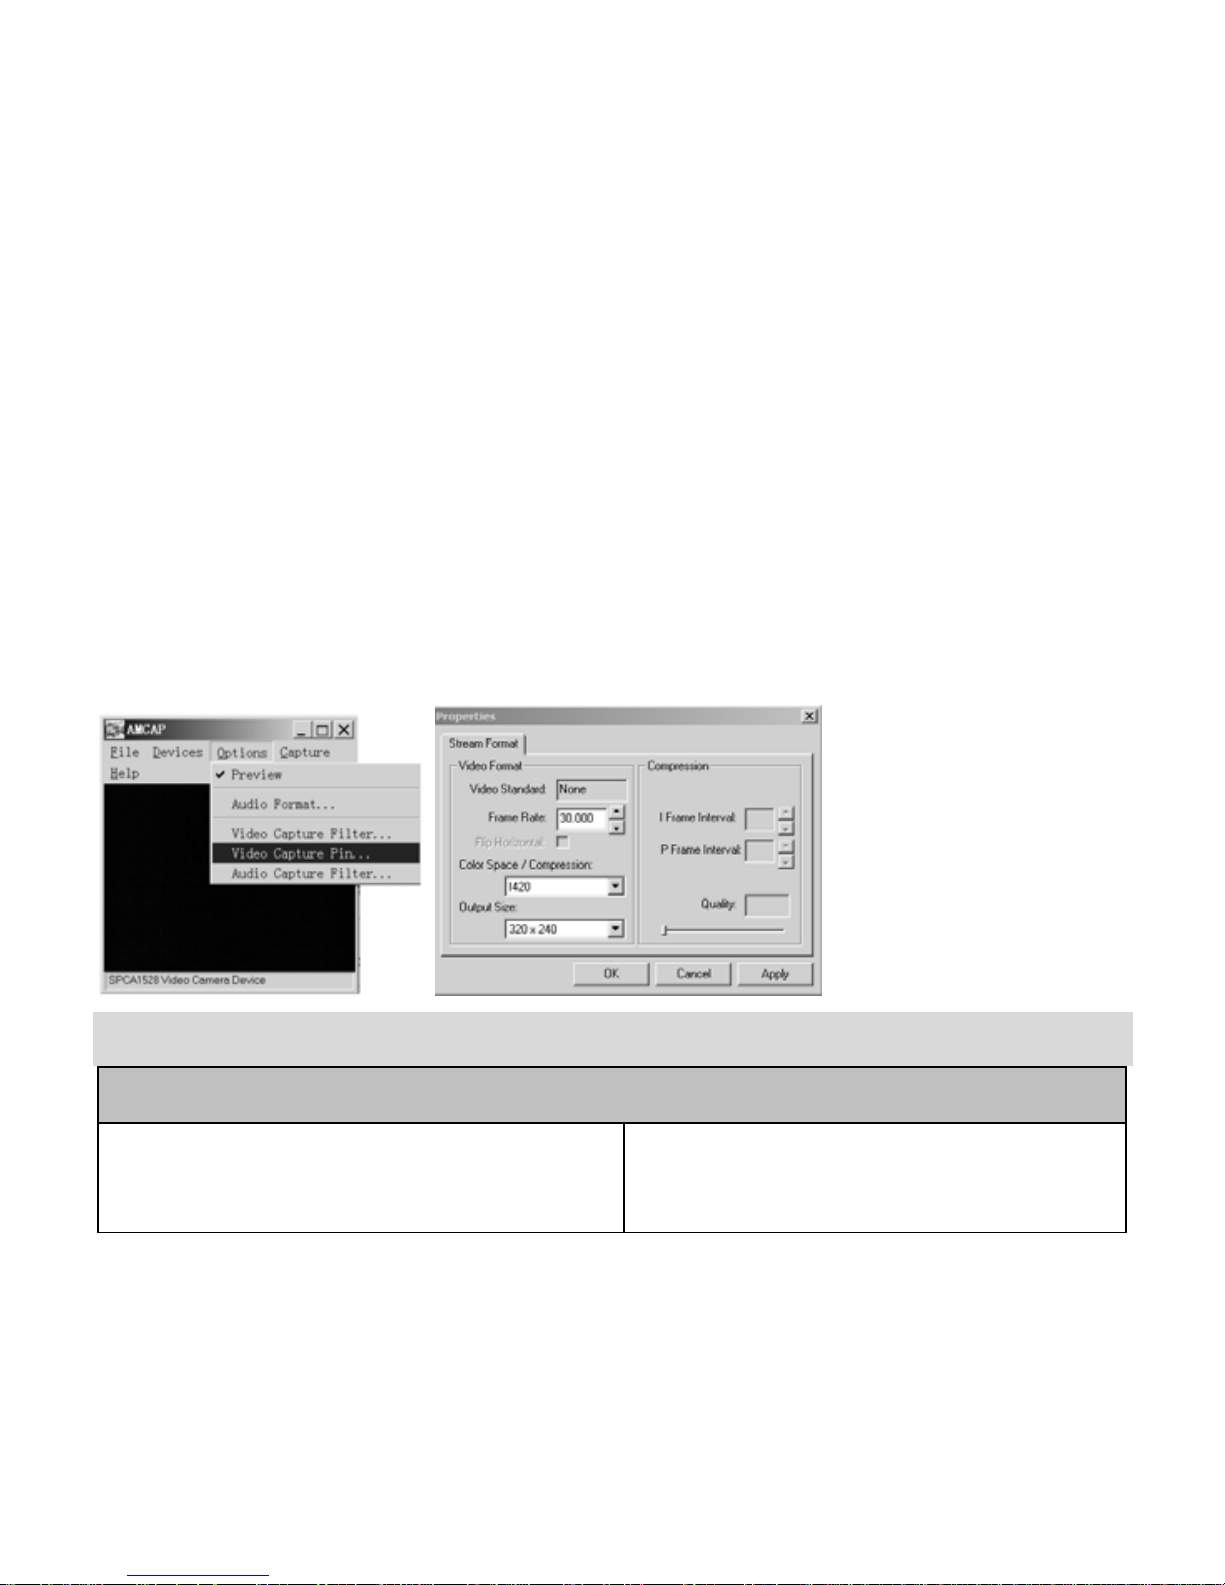
Please install the camera driver first. Connect the camera to the computer with a
USB cable, run the program Amcap on the desktop. If it was the first time you use
this function please select the item < Preview> as in the illustration. And then you
can use it as the pc camera function.
If you want to change the imaging size, select <Video Capture Pin> to change the
Output Size.
TROUBLESHOOTING
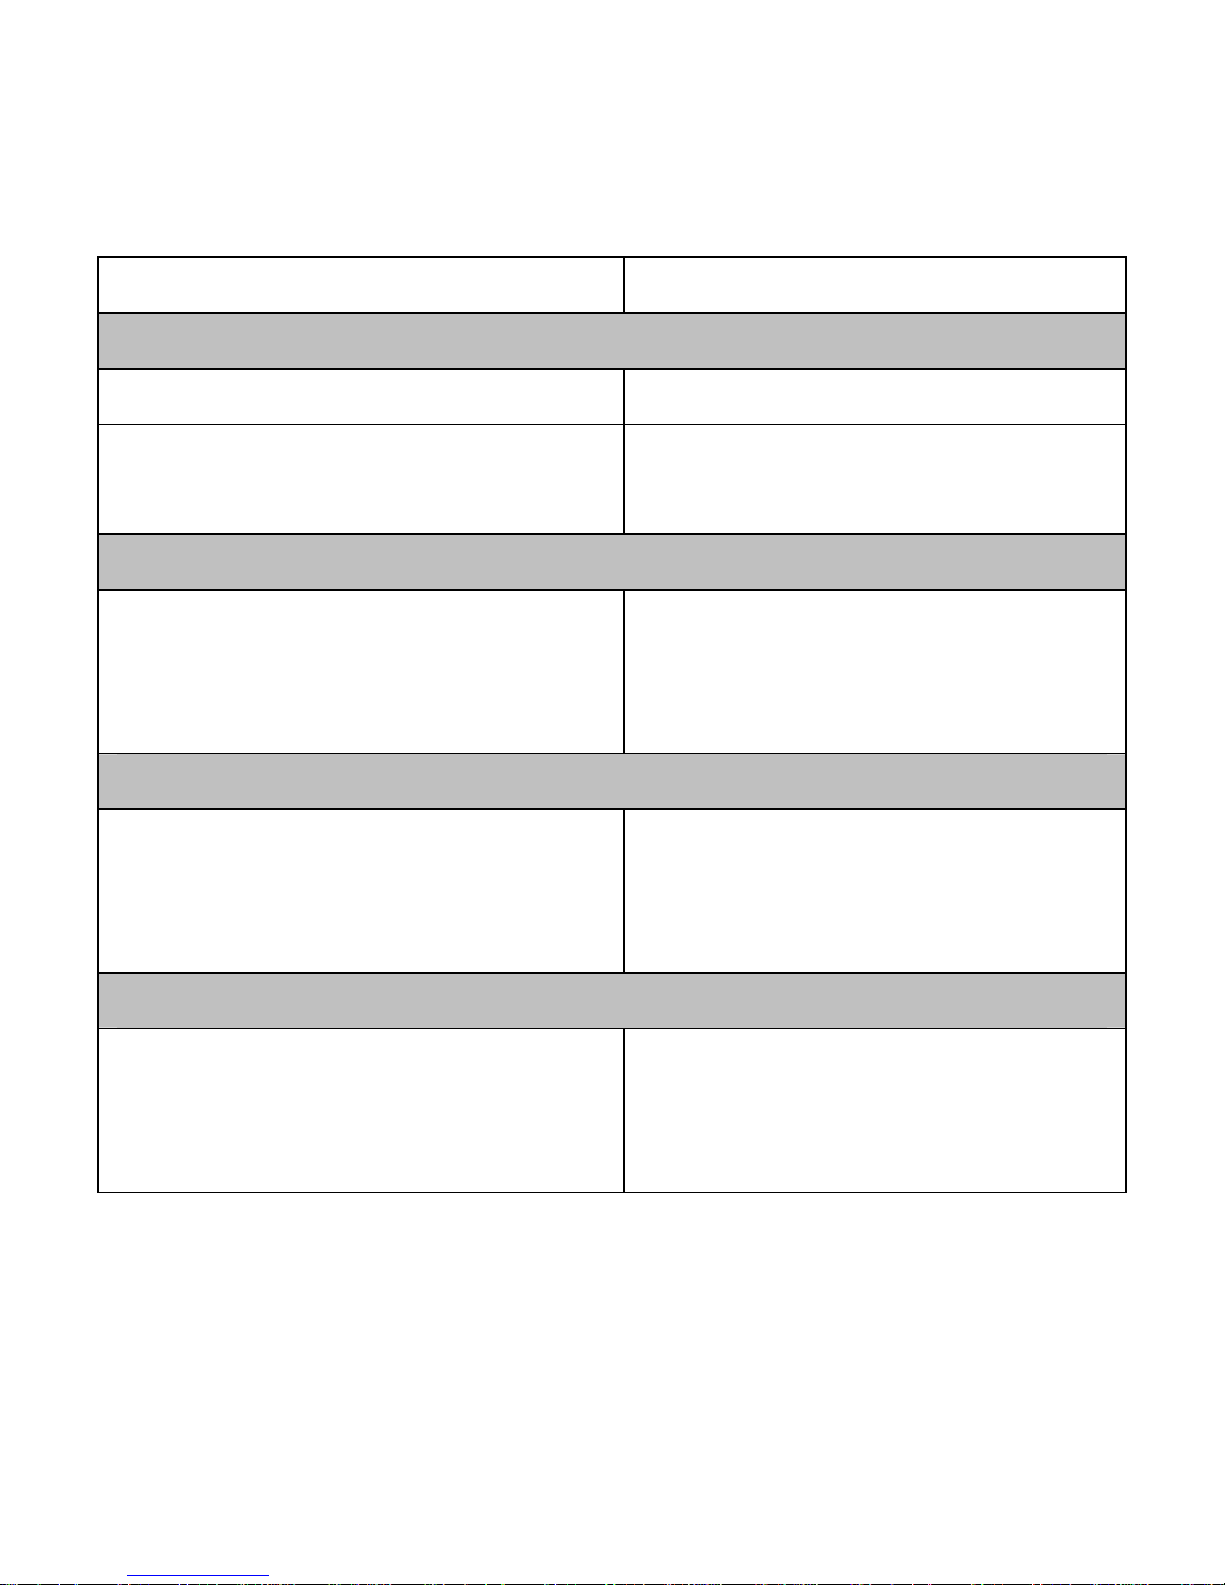
Power does not turn on.
1. Battery is inserted in the wrong
direction.
★Reload battery in the correct
direction.
Page 31
29
2. Battery is insufficient to power on. ★Replace or recharge the battery.
The camera does not take pictures.
1. Memory is full. ★Insert a new memory card.
2. Memory card is not formatted
correctly.
★Format the memory card again or
use a new card.
Image is blurry or out of focus.
1. The video camera was moving when
the image was captured.
★Hold the video camera steady when
shooting picture.
Image is not displayed on the LCD monitor.
1. A memory card with non-SUNP****
images (recorded with other camera) is
loaded.
★This video camera cannot display
non-SUNP**** images.
Recorded images are not saved in memory.
1. The video camera was turned off
before the images are saved in
memory.
★If the battery low indicator appears
on the LCD monitor, replace the
battery immediately.
Page 32
30
DISPOSAL
Electrical and electronic equipment (EEE) contains materials, parts and
substances which can be dangerous to the environment and harmful to
human health if waste of electrical and electronic equipment (WEEE) is not
disposed of correctly.
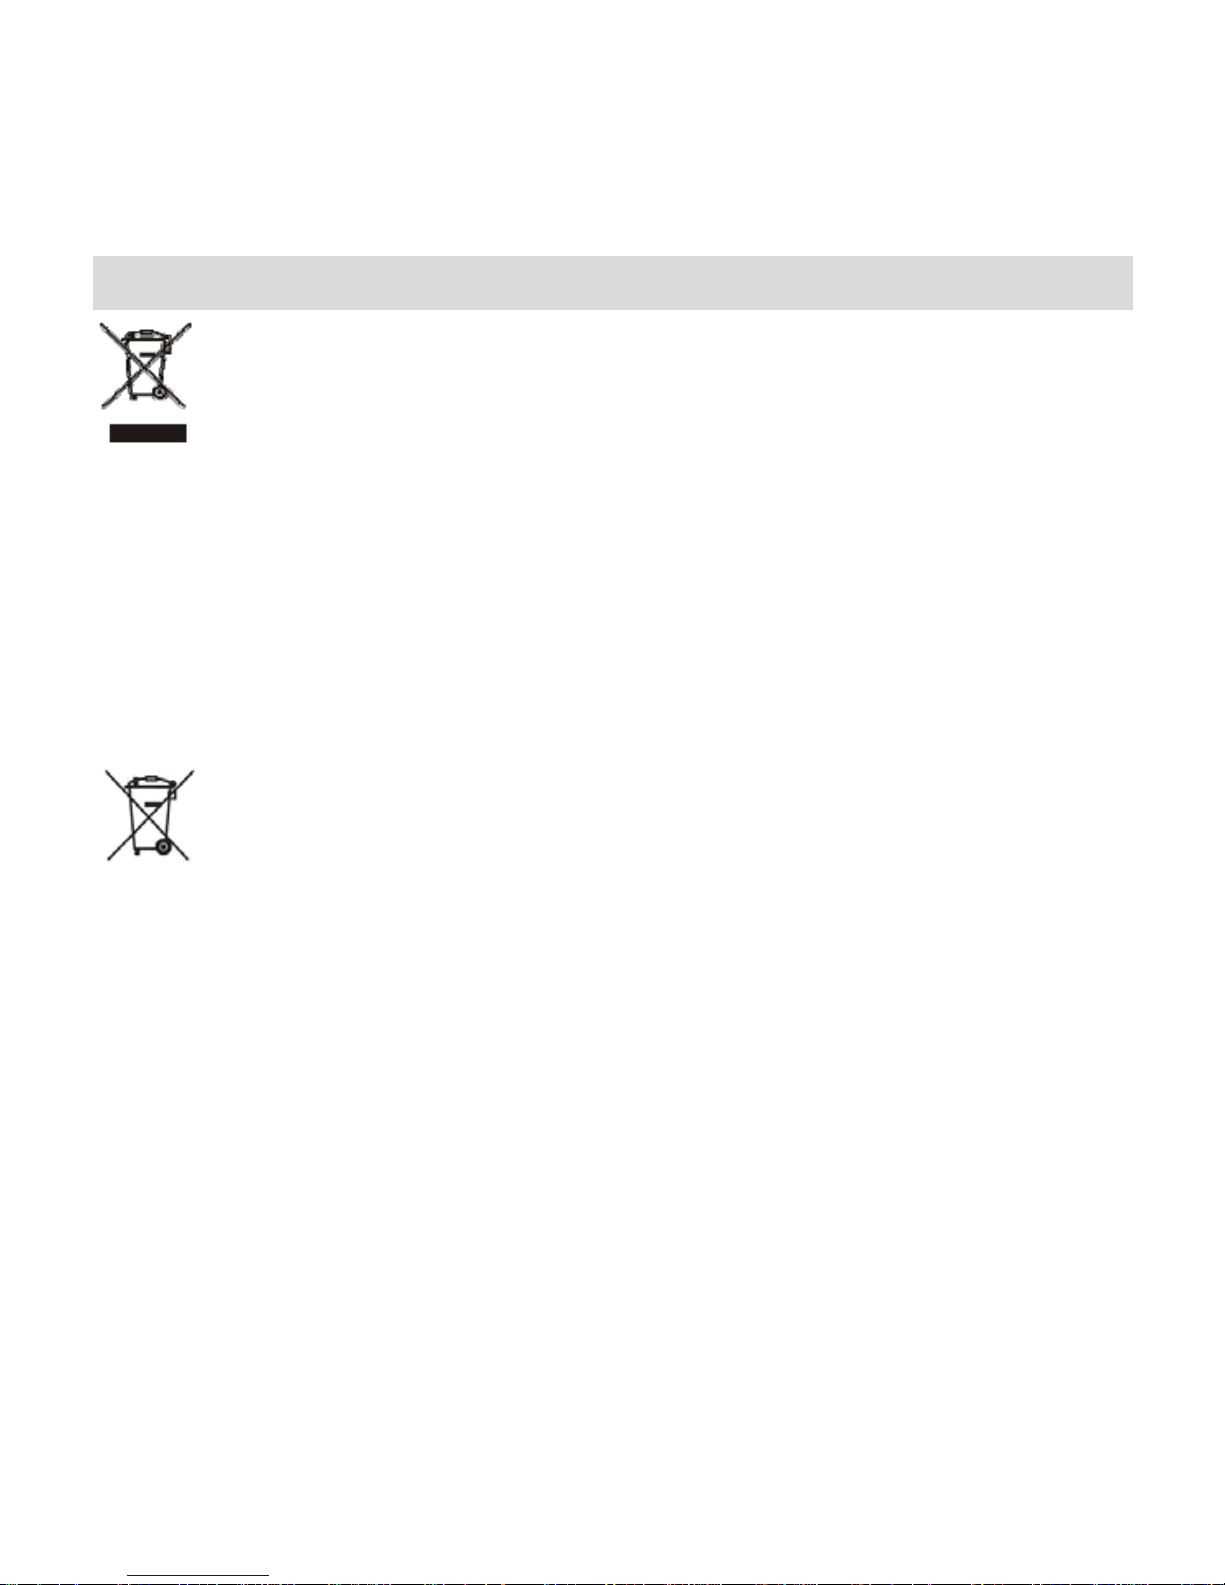
Equipment, which is marked with the WEEE logo (as shown on the left),
should not be thrown away with your household waste. Contact your
Local Authority Waste Disposal Department as they will be able to provide
details of the recycling options available in your area.
Used batteries are hazardous waste and NOT to be disposed of with the
household waste! As a consumer you are legally obligated to return all
batteries for environmentally responsible recycling – no matter whether or
not the batteries contain harmful substances*).
Return batteries free of charge to public collection points in your
community or to shops selling batteries of the respective kind.
Only return fully discharged batteries.
*) marked Cd = cadmium, Hg = mercury, Pb=lead
• Only use mercury and cadmium-free batteries.
Page 33

31
• Non-rechargeable batteries are not to be recharged.
• Rechargeable batteries should be removed from product before
recharging.
• Rechargeable batteries should be charged under adult supervision.
• Different types of batteries or new and used batteries are not to be
mixed.
• Batteries are to be inserted with the correct polarity.
• Batteries should be replaced under the supervision of an adult.
• Exhausted batteries are to be removed from the product.
• The supply terminals are not to be short-circuited.
• Used batteries are hazardous waste and NOT to be disposed of the
household waste!!! Return the batteries to your dealer or to collection
points in your community.
• Keep batteries away from children. Children might swallow batteries.
Contact a physician immediately if a battery was swallowed.
• Check your batteries regularly to avoid battery leakage.
Page 34

32
• Batteries shall not be exposed to excessive heat such as sunshine, fire or
the like.
• CAUTION: Danger of explosion if battery is incorrectly replaced
Replace only with the same or equivalent type.
Ingo Devices assumes no responsibility for any errors that may appear in
this manual.
Due to our continuous improvement, Ingo Devices reserves the right to
change without notice, product offerings, specifications and compatibility.
www.ingodevices.com
Page 35

 Loading...