


Android Cloud Terminal MOTION HD V-1 User Manual
I. Packing list
Item Description Quantity Item Description Quantity
1 MOTION HD V-1 1pcs 4 User Manual 1pcs
2 Remote Controller 1pcs 5 Warranty card 1pcs
3 Power Adapter 1pcs 6 Battery (AAA) 2pcs
Optional: HDMI Cable 1pcs
Optional: Wireless mouse 1pcs
Optional: Wireless mouse & Keyboard 1pcs
Optional: F-Dolphin air mouse 1pcs
Please make sure you have all order items before setting up the device.
Installation Guide
II.
1、I/O Interface
①Microphone socket ②Ethernet socket ③HDMI Socket ④Audio interface ⑤AV socket ⑥YPbPr
socket ⑦DC input socket ⑧USB Sockets ⑨Power switch ⑩Vol um e up
Card socket
2、Installation:
Step1:
a. HDMI port; Connect MOTION HD V-1 to TV set by plugging the HDMI Cable between TV HDMI
terminals and the HDMI socket on the device.
b:A V port; Connect MOTION HD V-1 to TV set by plugging the AV Cable. One side connect to device
‘s AV port, the other side connect the red, yellow, white interface of TV, respectively
corresponding three different color lines. As shown in picture 6.
13Power Indicator, Infrared receiver
○
11 Volume down ○12SD
○

Picture 6
c:YPbPr port; Connect MOTION HD V-1 to TV set by plugging the YPbPr Cable. One side connect
to device ‘s YPbPr port, the other side connect the green, blue, red interface of TV, respectively
corresponding Y port, Pb port and Pr port.. As shown in picture 7
Picture 7
Step2: Connect the Ethernet cable to the Ethernet socket.
Skip this step if using Wi-Fi.
Step3: For using wireless mouse and keyboard, insert the USB Receiver into USB socket. To save
energy, you can press any key to wake up the mouse and keyboard from sleep mode.
Step4: Connect the power adaptor to the device.
3. Starting:
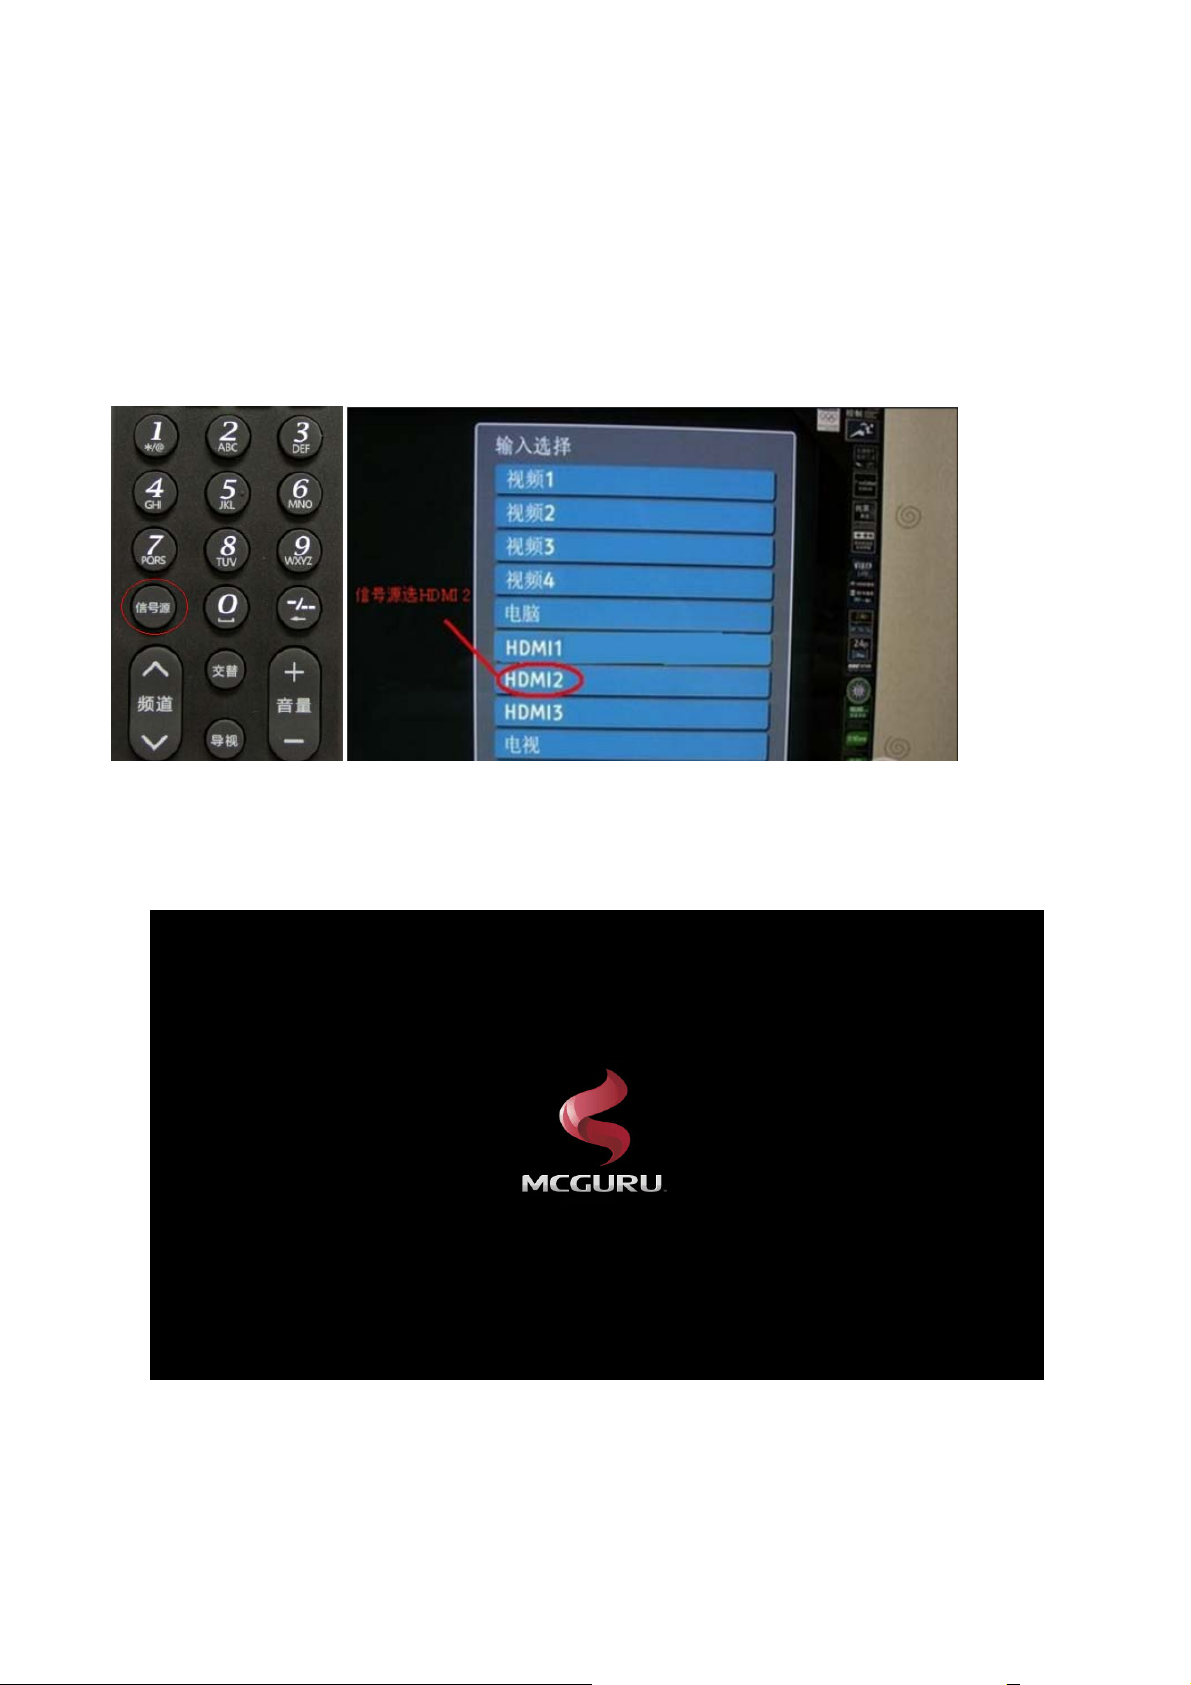
1) Turn on the TV(or monitor) and use TV
YPbPr) from ‘signal source’ (Such as HDMI 2) shown as Picture 10 and then use MOTION HD
V-1’s remote control and press ‘HDMI or AV or YPbPr’ button to set up MOTION HD V-1’s output
mode.
Caution: ①About YPbPr connection, Please select on TV choosing input channel (YPbPr) from
remote control choosing input channel (HDMI or AV or
‘signal source’.Then use MOTION HD V-1’s remote control and press ‘YPbPr’ button to set up
MOTION HD V-1’s output mode. There is no audio output to TV when using YPbPr connection,
please connect the amplifier to “AV” interface for audio.
②About AV connection, Please select on TV choosing input channel (AV) from ‘signal source’.
Then use MOTION HD V-1’s remote control and press ‘AV’ button to set up MOTION HD V-1’s
output mode.
Picture 10
2)Red LED light on the power indicator indicates power adaptor is connected. Press ‘power switch’
to turn on the terminal, flashing green light indicates system is booting up. Solid green light
means system has booted up properly. The Boot interface as shown in picture 11.
Picture 11

3)Into the main interface, as shown in picture12
Picture 12
4. Resolution and screen scale adjusting:
After the start up booting you can adjust resolution and screen scale if the display resolution and
screen scale by system is abnormal .Follow the instructions:
1) Click the Home page—Setting—Screen—HDMI Mode, 1280*720p and 720*480p resolution,
select one of them as your need.
2) Click the Home page—Setting—Screen—Screen scale, then drag your mouse to adjust the
screen scale according to your TV size .
III Network setting:
1. Wireless network
1) Go to home page and click the Setting ,as shown in picture 13

Picture 13
2) Click “OFF” of Wi-Fi to turn on the Wi-Fi, as shown in picture 14
Picture 14
2) Select the Name of wireless network which you want to make connection. Input password and
click “Connect”, for an open network just click ‘connect’ without password.

2. Ethernet network
1) Connect the Ethernet cable to the Ethernet socket. Go to home page and click the Setting , as
shown in picture 15
Picture 15
2) Click “OFF” of Ethernet to turn on the Ethernet, as shown in picture 16

3.
PPPOE dialing setting
Picture 16
1) Go to home page and click the Setting ,as shown in picture 17
Picture 17
2) Click “More”, Select “PPPoE”, as shown in picture 18

Picture 18
3) Select ”Add PPPoE Account” as shown in picture 19.
Picture 19
4)Fill in the“ name” “User” “password” “DNS1”and “ DNS2” according to the dialog box.

Picture 20
Remarks:If Ethernet connection fail, can see this icon on the top right-hand corner of the
screen, if the connection is successful, can see this icon ;If Wi-Fi connection is successful, can
see this icon on the top right-hand corner of the screen;If PPPoE connection is successful,
can see this icon on the top right-hand corner of the screen. If the screen show network failure,
can come back to” Setting” to set “Wi-Fi”, Ethernet or PPPoE .
IV: One-click for preloaded application
Our device provides some popular Apps for your reference. Please check the following steps:
1) Home pages->Apps->One-click for preloaded application. As shown in picture 21.

Picture 21
2) Click “Agree” from dialog box of installation application, as shown in picture 22.
Picture 22
IVI : A brief introduction of Home page

Ethernet state:Display
Wi-Fi state:Display Wi-Fi
Ethernet connection
connection
.
Video player:Play local video when click it
Games:Click it directly and play games as well as put your favorite games.
Site Navigation:Click it to surf internet directly
All Apps:Click it to open all application’s interface directly
E-Office:Click it directly to open E-office as well as put your favorite office software.
Cloud:Click it to open remote connect application directly ,can logo and remote control
computer in practice.
Setting:Click it to open setting system.
Switch off :Click it to turn off the device.
Remarks:The application of Main interface is delivery service , the latest popular application will be
recommended, click on the corresponding pictures, application can be downloaded.

Application classification
Click “ into the application interface, click the left mouse on the required application icon,
and hold left mouse until the popup dialog box of classification, select and click the corresponding
classification, complete the application's classification. so you can directly open the corresponding
application in the classification next time .
If you want to delete unwanted application of classification, you can click left mouse and hold until
appear delete dialog box, click delete, finish delete step.
Menu
Instruction:Right-click open the options menu.
Weather: Click the “Weather” to change the Weather system of interface

Wallpaper:Click the “Wallpaper” to set up the background
Help:Click the “Help” to get the complete Manual of MOTION HD V-1 .
Opened button:Click the opened browsing and operate directly.
Power off
Return button:Click the back button, return to the last step.
Home page:Click the home page button, return to the main interface.
Instruction:There are four ways to turn off the device:
1) Long press on the" power switch "button of device into shutdown interface, choose "shut down".
2) Into the main interface, right-click, click on the "off", enter the shutdown interface, choose "shut
down".
3) Long press on "power" button of the remote controller and click on the "off", enter the shutdown
interface, choose "shut down".
4) Click "Power off “icon from main interface and into shutdown interface, choose "shut down".

Note: The device has to be kept a distance of 10cm from human body and its has
no ad-hoc function.
This device complies with part 15 of the FCC rules. Operation is subject to the
following two conditions: (1) this devic e may not cause harmful interference,
and (2) this device must accept any interference received, including
interference that may cause undesired operation.
NOTE: The manufacturer is not responsib le for any radio or TV interference
caused by unauthoriz ed changes and modifications to this equipm ent. Such
changes and modifications could void the user’s authority to operate the equipment.
NOTE: This equipment has been tested and found to comply with the limits for
a Class B digit al device, pursuant to part 15 of the FCC Rules. These limits
are designed to provi de reasonable prot ection against harmful interference in
a residential inst allation. This equi pment generates uses and can radiate
radio frequency energy and, if not inst alled and used in accordance with the
instructions, may cause harmful interference to radio communications.
However, there is no guarant ee that interference will not occur in a particular
installation.
If this equipment does cause harmful interference to radio or television
reception, which can be determined by turning the equipment of f and on, the
user is encouraged to try to correct the interference by one or more of the
following measures:
- Reorient or relocate the receiving antenna.
- Increase the separation between the equipment and receiver.
-Connect the equipment into an outlet on a circuit different from that to which
the receiver is connected.
-Consult the dealer or an experienced radio/TV technician for help.
 Loading...