

Page 1

TD40 Broadcast Video FAQs
NOTE You change most settings on the TD40 with the remote control. For information about using the
remote, see TD40 Remote Control FAQs.
I just hooked up cable TV to the TD40, but nothing appears on the screen.
1 Make sure that the TV source is set to cable television (CATV). Press the Menu/Set button on
the remote control and go to TV > Channel Type. Change the setting to CATV.
2 Run Auto Scan to enter the available channels into memory. To do this, select the Auto Scan
menu item in the TV menu.
You can also set up specific channels manually if you do not want to memorize all available
channels. Make sure CATV is selected as the Channel Type, then tune in a specific channel
with the keypad on the remote. Once the channel appears, press the CH ADD button the remote
to save it.
The TV image is stretched horizontally.
Normal TV has a 4:3 aspect ratio, while the TD40 has a 15:9 aspect ratio for HDTV. Press the V.Size
button on the remote control to change the aspect ratio. Each time you press the V.Size button, you go
to the next setting. Press it until you see 4:3. The picture resizes so that the image fits from top to
bottom, leaving black areas on the right and left sides.
Can I receive HDTV through my antenna?
Yes, you should be able to use an outside antenna to receive local HDTV signals. Set the source to AIR,
HRC or IRC. You may need to fine tune the signal.
1 To fine tune a channel, press the Menu button on the remote control. Then navigate to TV Menu
> Fine Tune. (See Remote Control FAQs for information about using the remote control.)
2 Adjust the internal tuner using the VOL+ and VOL– keys until you get the best image.
3 If the fine tuning is ineffective, this is probably an antenna issue. The signal may be weak. Try
adjusting the antenna. If that is ineffective, consider upgrading the antenna.
Can I use a high definition set top digital cable box with the TD40?
Yes. For best HDTV reproduction, we suggest you connect the box and the TD40 through either the
component cable or a DVI cable. You can also run coax cable from the set top box to the cable input on
the TD40. Note that when you watch video through the set top box, you change the channels with the
remote provided with the box. The TD40 remote will not change the channels.
What sources can I use with PIP (Picture-in-Picture)?
Generally, you can view any one source with another source. For example, you can tune a cable
channel as a picture in a picture while viewing a DVD movie. You can also view two TV channels
simultaneously.
There are several combinations, however, that the TD40 cannot combine in PIP view.
• Component 1 with Compon ent 2, PC (computer), or DVI source
Page 2
• Component 2 with Compon ent 1, PC (computer), or DVI source
• PC (computer) with Component 1, Component 2 or DVI source
• DVI source with Component 1, Component 2 or PC (computer)
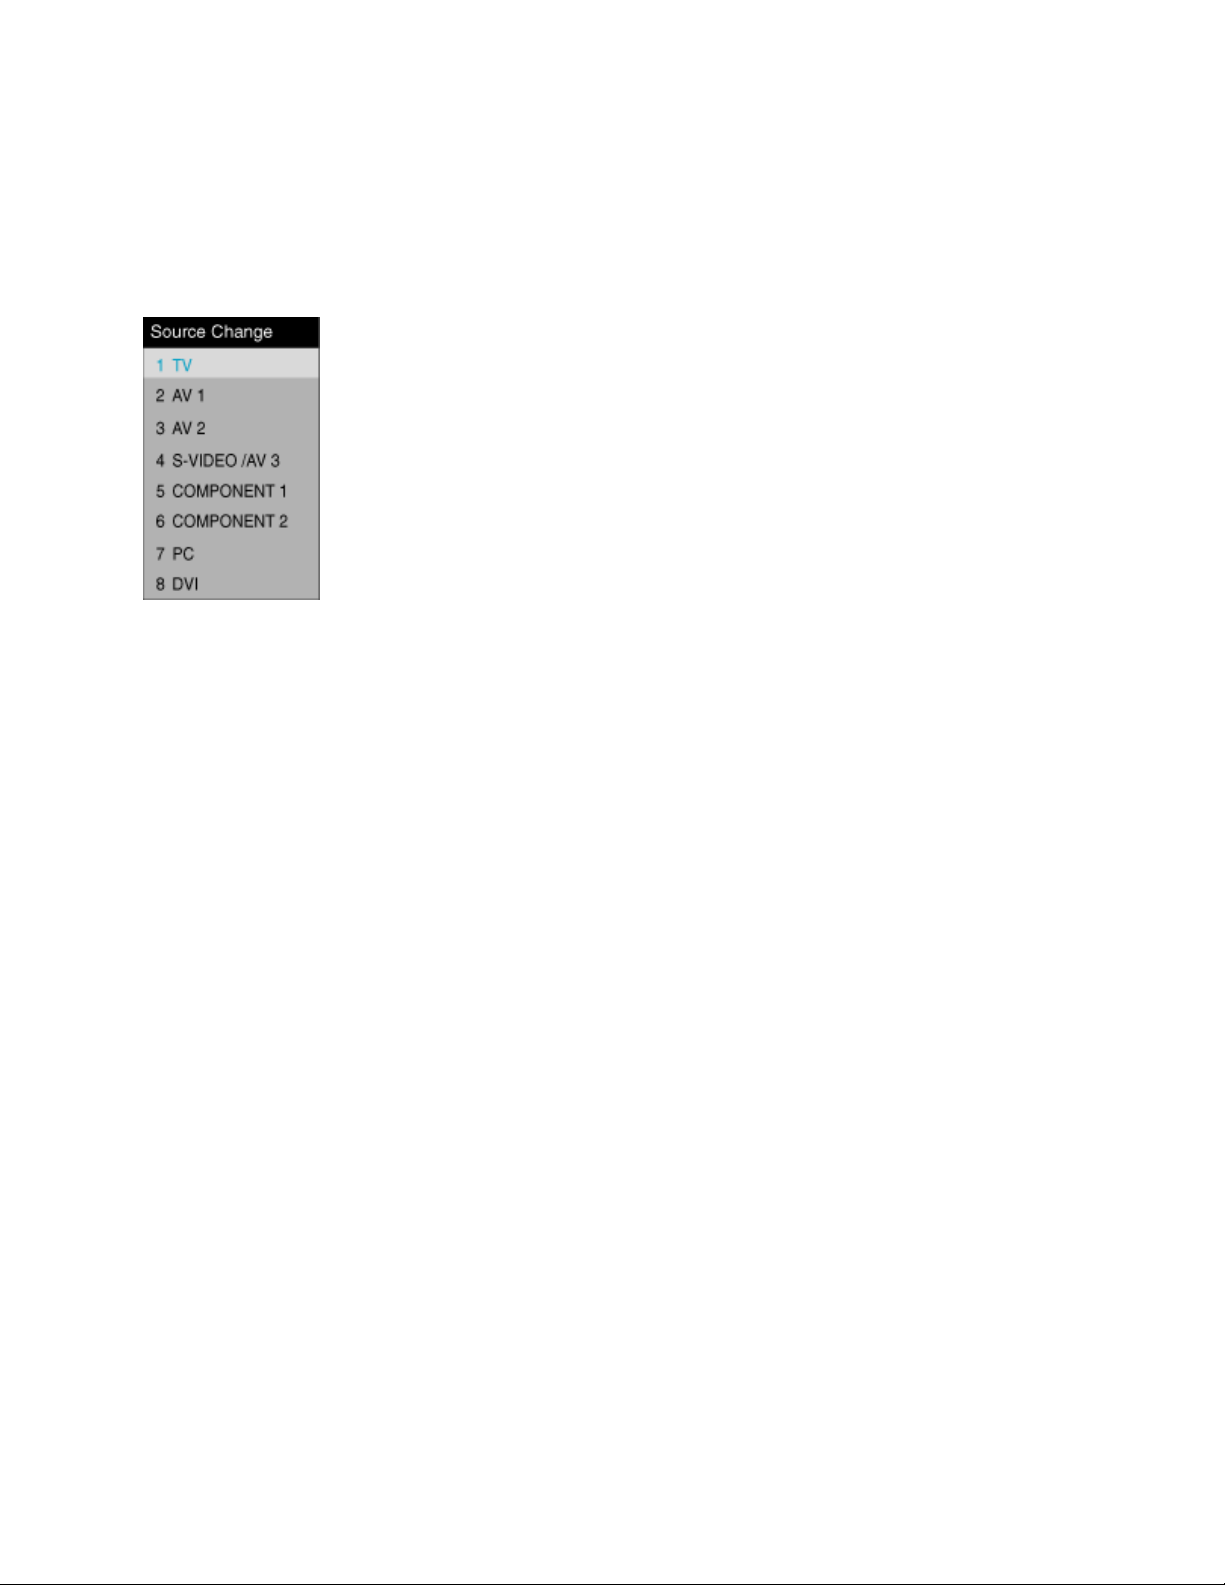
How do I change from source to source?
Press the Input button on the remote control. The Source Change dialog box appears. Use the CH+ or
CH– buttons to cycle through the sources. Press the Menu/Set button to select a source.
The screen turns blue on some channels.
The Full Blue Screen setting is activated. On the TD40, you can choose to have a blue background
instead of video noise when there is no signal on the selected channel. To check this setting, press the
Menu button on the remote control. Select Setup, then select Advanced. On the Advanced menu, select
Blue Back. Use the VOL+ or VOL– button to change the setting.
If a signal should appear on the selected channel, you need to tune your set. See Some channels are
missing. Only a blue screen or video noise appears, or the channels are skipped for information about
tuning the TD40.
What is the DIGEST button for?
The Digest function allows you to view still frames of 14 adjacent channels. The small ‘thumbnails’ of the
channels surround the currently selected channel. The channels appear one at a time, first with motion,
and then as a still. After the first fourteen channels appear, the next 14 (if available in memory) appear
one at a time. The cycle continues until all channels (up to 125) appear.
The image on a specific channel should be color but is black and white.
Try fine tuning the channel. A out-of-tune channel can appear black and white.
1 Press the Menu/Set button, and use the VOL– to navigate to the TV menu.
2 On the TV menu, use the CH– to select Fine Tune, and then press the Menu/Set button.
A slider adjustment appears on the bottom of the screen.
3 Use the VOL+ and VOL– buttons to adjust the setting.
4 When you finish, press the Back button until the menus disappear.
2
Page 3

No image or very poor image on a specific channel. The other channels work.
5 Make sure the channel is in the tuner memory. If it is not, tune in the channel with the remote
control keypad, then press the CH ADD button.
6 To fine tune a channel, press the Menu button on the remote control. Then navigate to TV Menu
> Fine Tune. (See Remote Control FAQs for information about using the remote control.)
7 Adjust the internal tuner using the VOL+ and VOL– keys until you get the best image.
8 If the fine tuning is ineffective, this is probably a cable or antenna issue. The signal may be
weak. If you have cable, contact your cable provider. If you have an antenna, try adjusting the
antenna.
Jittery or shaky image
1 Confirm that the video signal is compatible with the TD40. The NTSC version is compatible only
with NTSC standard video, and the PAL version is compatible only with PAL/SECAM video. If
you play PAL or SECAM video through the NTSC version, the image is likely to be unstable,
noisy, or may be in black and white.
2 Check the image from a video player (DVD or other).
If the video image does not shake, the issue probably lies with the cable or antenna.
If video image is also jittery, the unit probably requires repair.
The colors, brightness or contrast is not right. What can I do?
The TD40 includes four color modes, Standard, Vivid, Mild and User. Press the Picture button on the
remote control to cycle through the four settings. The image changes as you select each mode. To
customize any of the settings, see How do I change the color, contrast, and tint? The preset values are
not what I want.
How do I change the color, contrast, and tint? The preset values are not what I want.
Change the Picture mode to your own custom setting. Picture modes include settings for b rightness,
contrast, tint, sharpness and color saturation. You can change the three preset modes to suit your taste,
and you can create a user-defined mode.
1 Press the Menu button on the remote control, then select Mode in the Picture menu.
2 Use the CH– button to cycle through the four mode choices: Standard (default), Vivid (higher
contrast and saturation), Mild (lower contrast and saturation), and User (your personal settings).
3
Page 4

When you select a mode, the picture changes. If one of the preset modes is satisfactory, press
the Back button until the menu disappears.
3 To change one of the preset modes or to create a user mode, select the mode, and then press
the Menu/Set button. Then use the CH– button to select the setting you want to change. Press
the Menu/Set button to select the setting, then use the VOL+ and VOL– buttons to change the
setting.
The image on the TD40 will change as you adjust the setting.
NOTE If you want to return the previous setting, select Recall.
4 When you finish, press the Back button to exit the menus.
TIP To quickly change from mode to mode, press the Picture button on the remote control.
You cycle through the four settings and select the one you want.
The image has spots that flicker
Flickering spots are usually caused by a weak broadcast signal. First, play a DVD or other no nbroadcast video source. If the spots do not appear, the issue lies with the broadcast signal. If the spots
remain, there is an internal issue with the TD40. Contact Tech Support.
If you use an antenna to pick up the broadcast signal, you can try adjusting its orientation. You can also
use signal amplifiers, which are available at TV supply stores. If you use cable, you can try adding a
signal amplifier to the system. You may need to contact your cable company.
Does the TD40 have closed captioning? How does it work?
The TD40 includes the closed captioning feature. To activate this feature, press the CLOSE CAPTION
button on the remote control. Each time you press the button, you cycle through the list of available
closed caption options, including CC1, CC2, Text1 and Text2. Most closed captioning works with the
first option. To turn off closed captioning, press the CLOSE CAPTION button and select OFF.
4
Page 5

The image has horizontal lines, vertical lines, a white stripe or is lopsided.
Confirm that the abnormalities appear when playing a DVD or other video. If the lines do not appear,
there is an issue with the incoming signal. If the lines continue to appear, the unit probably needs repair.
Contact Tech Support.
Channels arbitrarily change from one to another
Turn the unit off, and then unplug the power cord. Plug it back in and power up the unit. If this does not
solve the problem, the unit may need repair. Contact Technical Support.
Some channels are missing. Only a blue screen or video noise appears, or the channels are
skipped.
There are two ways to make the channels appear, through the Channel Add function and the Auto Scan
function.
If you want to add specific channels, use the number pad on the remote control to tune the channel in,
then press the CH ADD button on the remote control. Do this for each channel you want to appear. (You
can also delete any channel from the TD40 memory by tuning the channel and then pressing CH
ERASE button).
If you want to make sure that every available channel is stored in memory, you use the Auto Scan
function. The Auto Scan function checks each available channel from channel 1 through chann el 125
and memorizes it. Press the Menu/Set button to open the user menus. Select the TV main menu. Select
the Auto Scan menu choice, then press the Menu/Set button. The tuning bar appears and the scan
begins.
5
 Loading...