

Page 1
To determine your projector’s
SplashX
Required equipment
Source image specifications
SplashX compatibility
Before you begin
Use these instructions to load a custom image onto your SplashX compatible projector, such as
your company or school logo. The custom image can be used as a search screen or blank
screen image.
• USB-A to USB-B cable
• Windows
• SplashX-compatible projector
• Power cord
®
computer
Supported formats
BMP (≤24 bit color depth), JPEG, or PNG.
Image resolution
The source image should be the same size as the
target projector.
resolution: Select the Advanced Menu >
Status/Service > Projector Info submenu
in the projector OSD menu and review
Native Resolution.
Windows XP, Vista, 7, 8, 10
Use these instructions to turn off Power Saving Mode in your projector.
IN1116/IN1118HD note: You cannot turn off Power Saving Mode on the IN1116 and IN1118HD
projectors. If you have an IN1116 or IN1118HD projector, please proceed to the next section.
1. Turn on the projector.
2. Press the Menu button on the remote or projector keypad.
3. Navigate to the Advanced Menu > Setup > Power submenu.
4. Change the Power Saving Mode to Off.
5. Turn the projector off.
Page 1 of 4
009-1650-00
Page 2

Setup and installation
1. Connect your projector to the computer using a USB cable (either a USB-A to USB-B or
USB-A to USB Micro-B depending on your projector).
2. Connect a power cord to your projector.
3. If you have an IN1116 or IN1118HD projector, turn on the projector. Otherwise do not
turn on your projector.
4. Download the SplashX.exe application from www.infocus.com/support
your computer.
5. Unzip the SplashX file.
6. Double-click the SplashX executable file (.exe).
7. If you see a Windows security warning, click Run.
and save it to
8. Click the Browse (…) button and navigate to the image you wish to upload.
Page 2 of 4
009-1650-00
Page 3
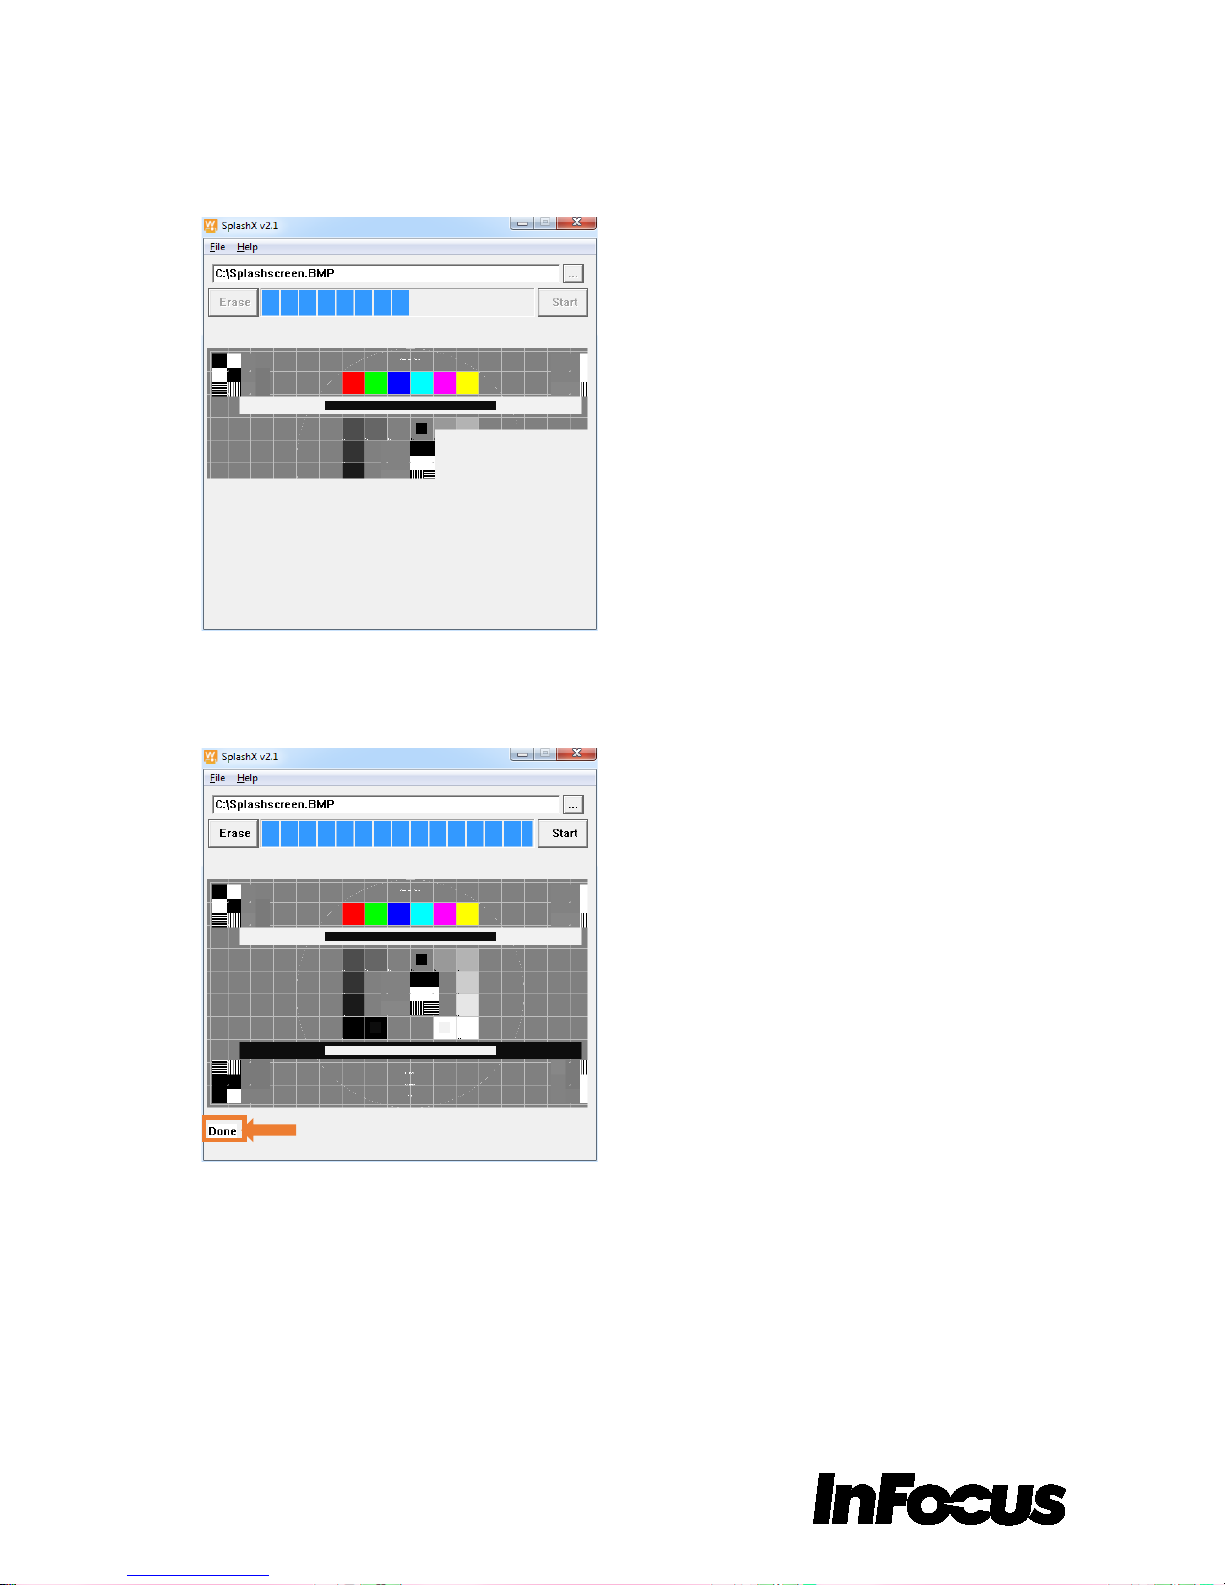
9. Click Start and wait patiently. Your image will begin to display in the SplashX window.
Note: If this is the first time you have used SplashX, it will take several minutes for your
image to load.
10. When the process is complete, the image will be fully displayed in the SplashX window
and the message “Done” will appear in the lower left of the screen. Your custom image is
now the default Search Screen image.
11. To assign your custom image as the projector’s Blank Screen:
a. Turn on the projector and click the Menu button on the projector keypad.
b. Navigate to the Advanced Menu > Setup > Keypad/Remote submenu.
c. Navigate to Blank Key and select User.
Page 3 of 4
009-1650-00
Page 4

Erasing the custom image
Troubleshooting
1. Follow the Setup and installation instructions above, but click Erase when the SplashX
window appears.
2. Turn off the projector and disconnect it from power.
3. Reconnect the power cord and turn on the projector.
4. Your custom image is now deleted from the projector.
If the message “No found projector” appears:
1. Verify that your image is the same size as the projector resolution and is either a BMP
(<24 bit color depth), JPEG, or PNG
2. Verify that your projector is SplashX compatible and that your computer uses a
compatible Windows operating system.
3. Click Start again. Wait several minutes.
4. If you continue to experience issues, contact InFocus Support at
www.infocus.com/support
.
Page 4 of 4
009-1650-00
 Loading...