

InFocus Projector Setup Manual

InFocus Projector Setup Guide for a Nintendo GameCube
How to connect a Nintendo GameCube to an InFocus projector
Power
Digital AV Out
Analog AV Out
Table of Contents
Good
Better
Best
- For the quickest setup with the Nintendo GameCube, see page 2.
- If you have the GameCube S-video cable, see page 3.
- If you have the GameCube Component Video cable, see pages 4-5.
For more information and troubleshooting...
Read the tips, common issues and frequently asked questions on pages 6-8.
VGA
M1-DA
RS-232
S-video
Y
Pb
Pr
Component
Composite
L
R

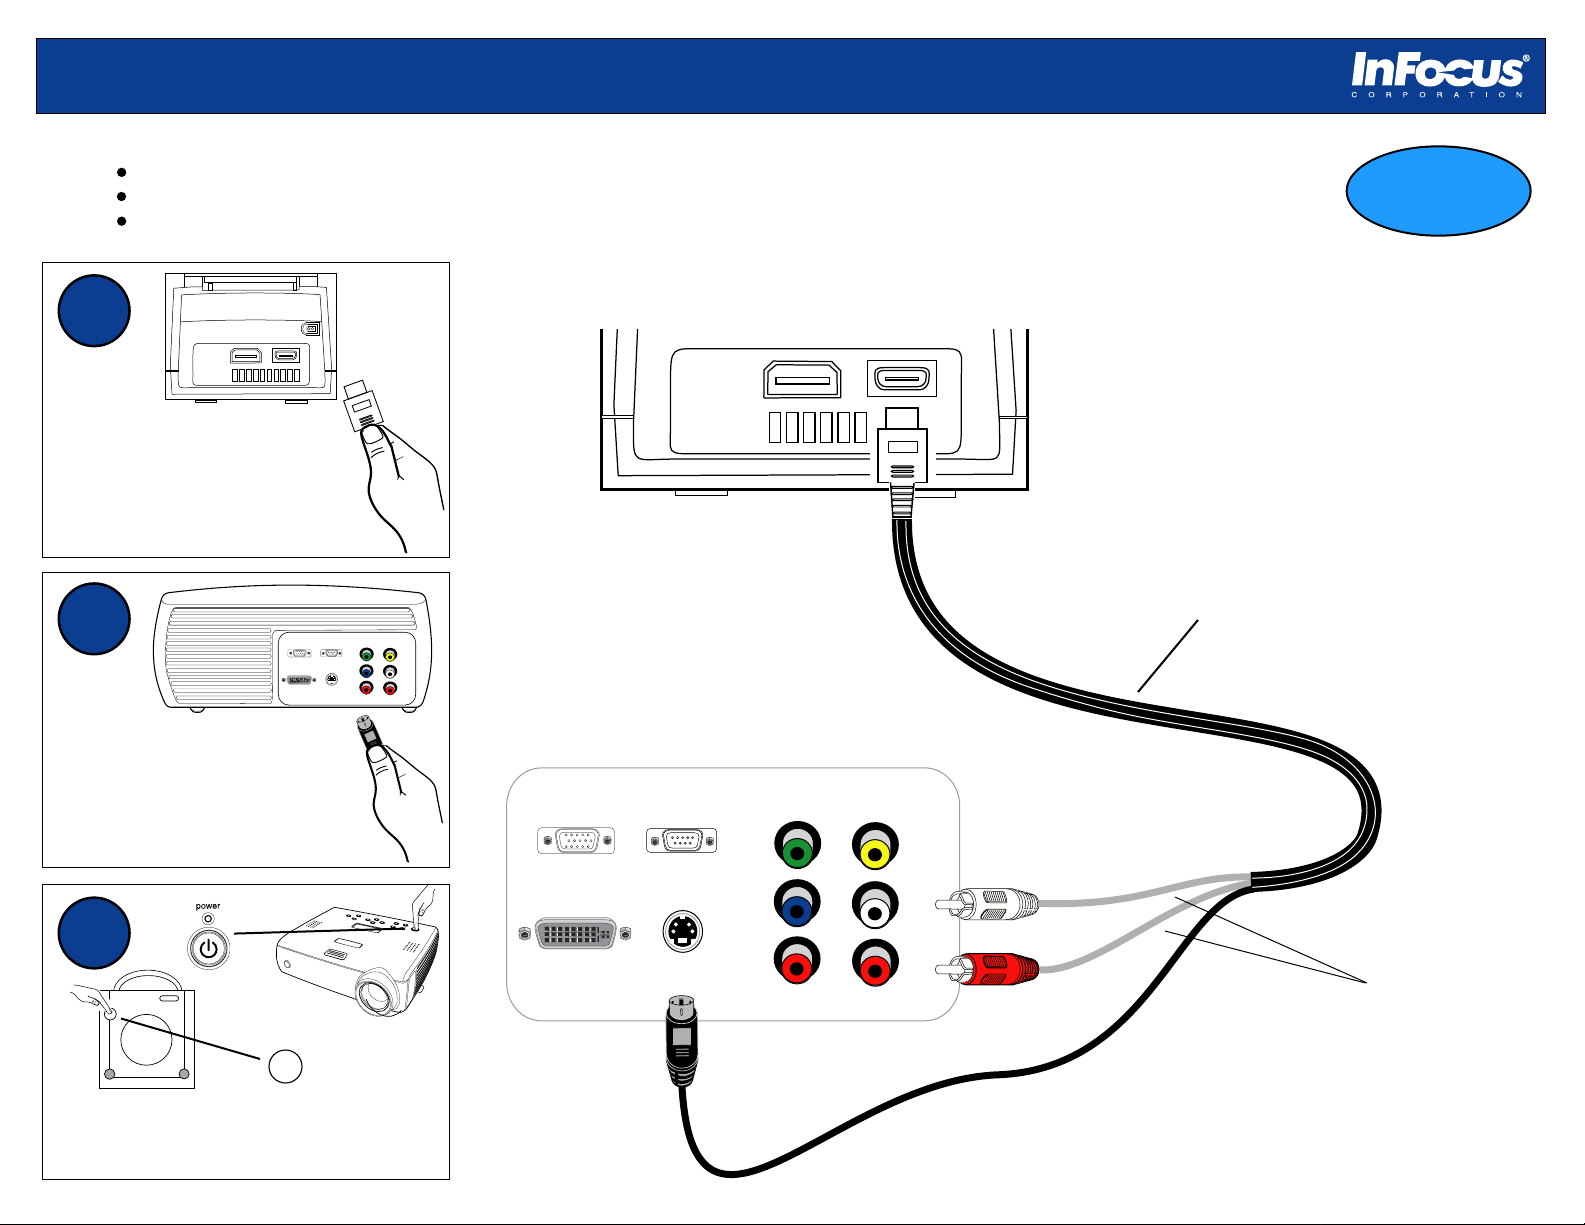
Connect a Nintendo GameCube to a projector using a RCA (composite) video cable
Setup Requirements
Nintendo GameCube game console
Projector with composite video-in port
GameCube Stereo AV cable (GameCube AV connector to male composite AV connectors)
GameCube Rear Connector Panel
Power
Analog AV Out
1
Digital AV Out
Analog AV Out
Power
Plug the GameCube
AV connector to the
AV port on the GameCube.
2
Digital AV Out
Component
Composite
Y
VGA
RS-232
Pb
L
Pr
M1-DA
S-video
R
Good
GameCube Stereo AV Cable
(GameCube standard accessory)
Connect the RCA video
connector to the composite
video port on the projector.
Connect the audio connectors to
the projector or an audio receiver.
3
Nintendo
P
ow
e
r
N I N T E N D O
GAMECUBE
Re
se
pen
t
O
Power on the projector, then the
GameCube. Insert your game disc.
You are ready to play your game!
power
Projector Connector Panel
Component
VGA
RS-232
Y
Pb
M1-DA
S-video
connector panel may vary from actual product
Pr
2
Composite
RCA video connector
Optional audio connections *
* We recommend connecting your GamecCube to an external
sound system to provide the best audio experience.
Connect a Nintendo GameCube to a projector using an S-video cable
Setup Requirements
Nintendo GameCube game console
Projector with S-video-in port
GameCube S-video Stereo AV cable (GameCube AV connector to male S-video and audio connectors)
Better
1
Digital AV Out
Analog AV Out
Power
Plug the GameCube
AV connector to the
Analog AV port on the
GameCube.
2
VGA
M1-DA
Connect the S-video
connector to the S-video port
on the projector. Connect audio
connectors to the projector or an
audio receiver.
3
Nintendo
P
ow
e
r
N I N T E N D O
GAMECUBE
Re
se
pen
t
O
power
GameCube Rear Connector Panel
Power
Digital AV Out
Analog AV Out
GameCube S-video Stereo AV Cable
(GameCube optional accessory)
Composite
Component
Y
RS-232
Pb
L
Pr
S-video
R
Projector Connector Panel
Composite
L
VGA
Component
Y
RS-232
Pb
M1-DA
S-video
Pr
R
connector panel may vary from
actual product
Optional audio connections *
Power on the projector, then the
GameCube. Insert your game disc.
You are ready to play your game!
* We recommend connecting your GameCube
to an external sound system to provide the
best audio experience.
3
 Loading...