

Page 1
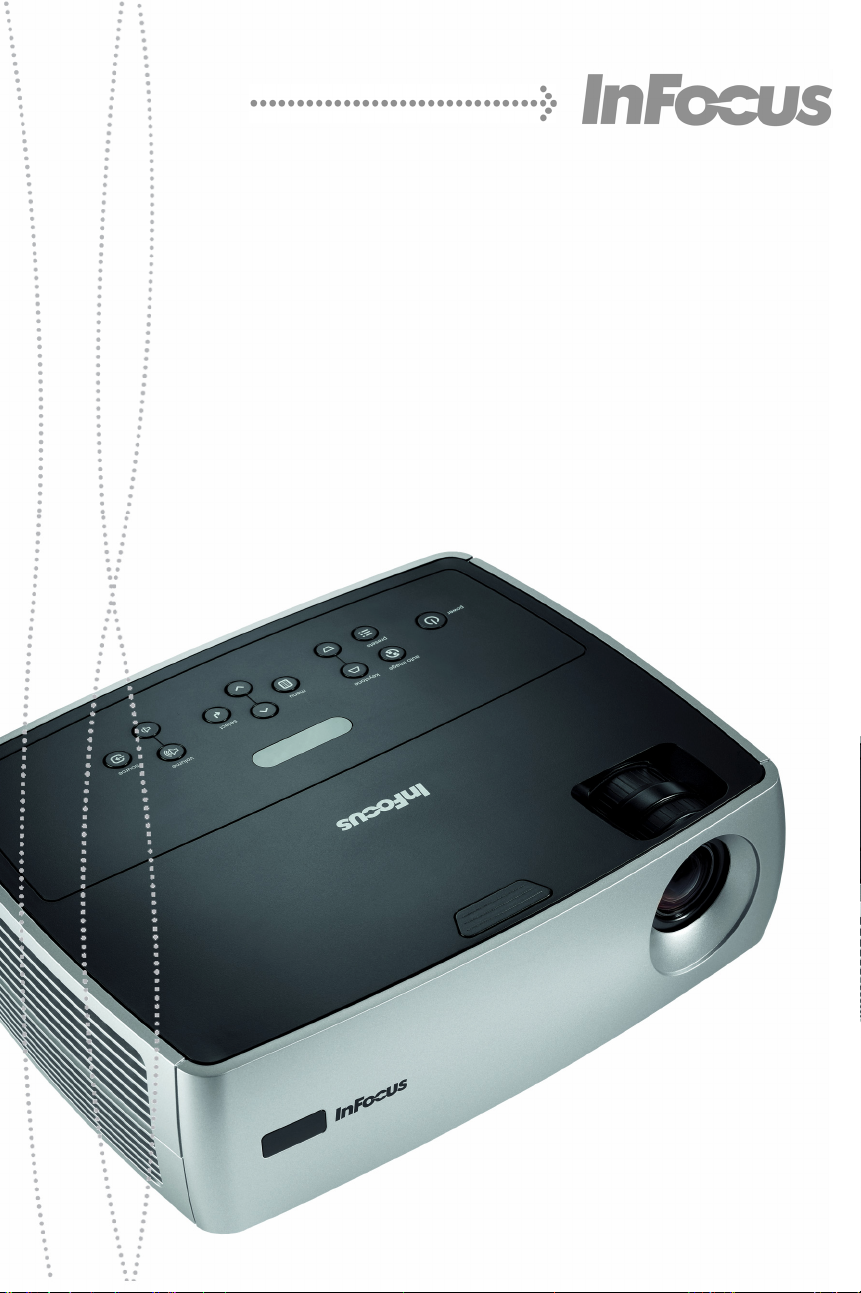
IN20 SERIES
User’s Guide
Page 2
Please read the safety instructions booklet before setting up
the projector.
Unpack the box
1
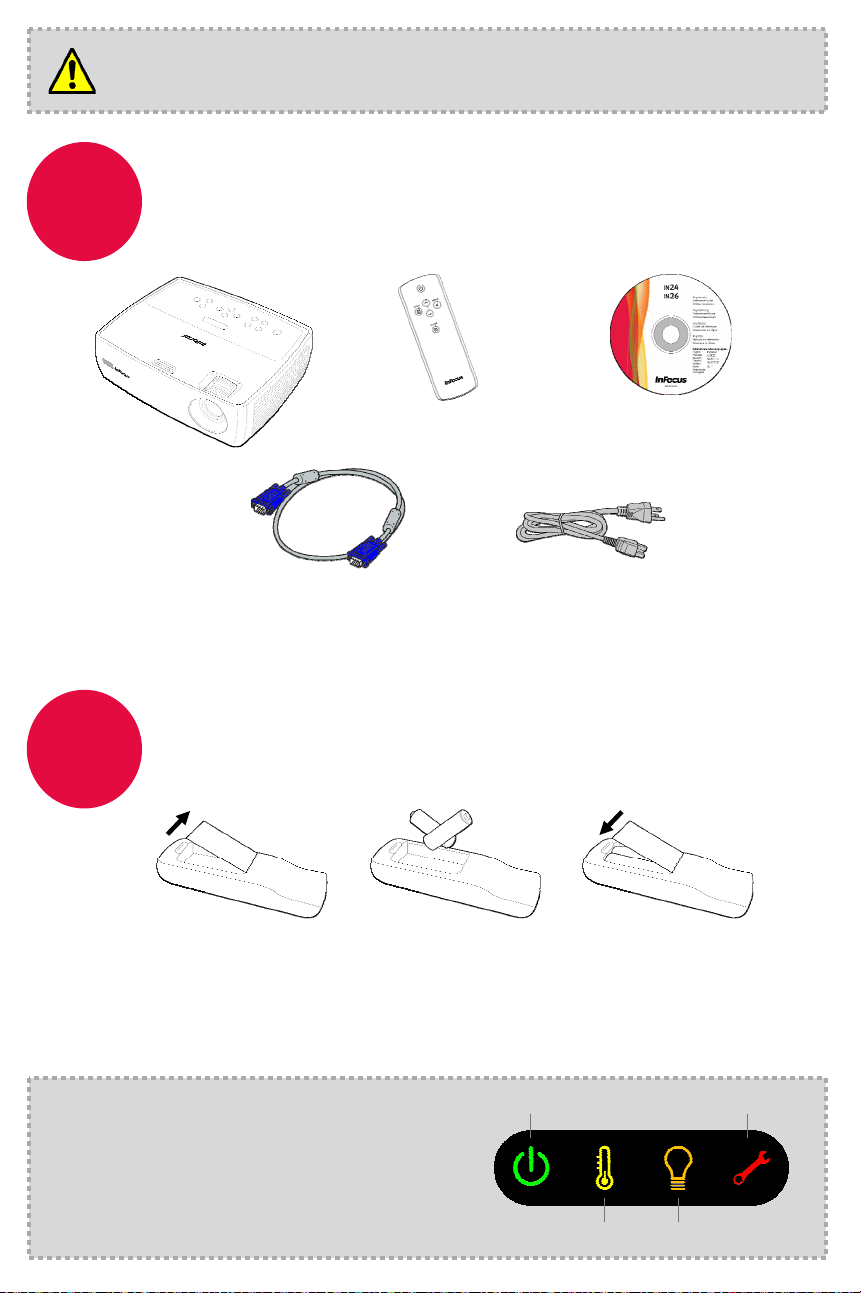
Here’s what’s included:
Projector
Remote
Computer Cable
Save the box and packing materials.
Power Cord
CD-ROM
Product Registration
and Reference Guide
Put batteries in the remote
2
Please dispose of batteries in an environmentally proper manner.
The remote uses 2 AA batteries.
+
1
Buy a Full-Featured Remote and Other Custom Accessories
2
www.infocus.com/store
+
-
3
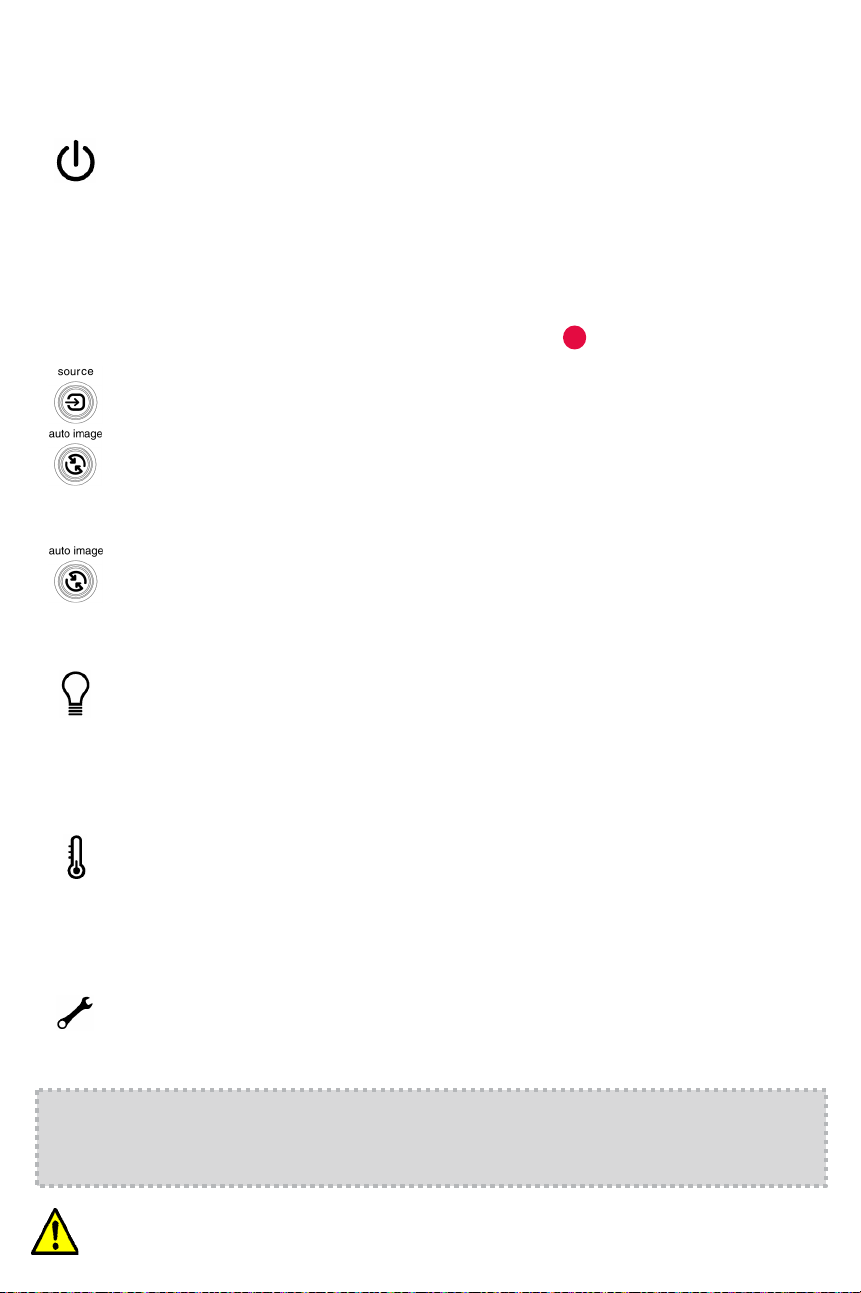
Status Indicator Panel
The top of your projector includes a
convenient indicator panel with symbols that
light up to show important status.
For details, see Troubleshooting.
Power/Standby
High Temperature Replace Lamp
Service Required
Page 3
Connect source
3
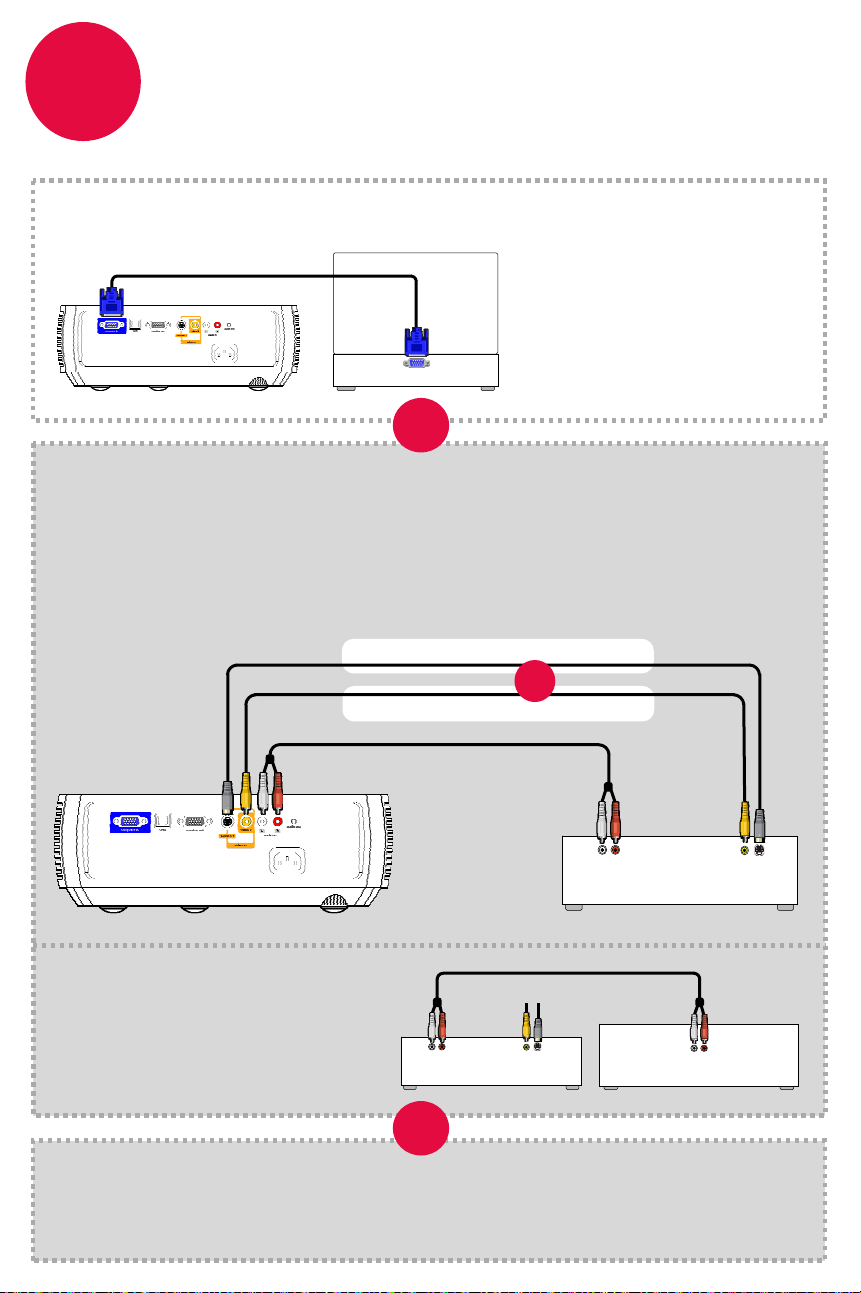
Connect to: Computer
Connect to: DVD or VCR* (using optional cables)
Connect video using either an S-Video or a Composite Video cable
1
www.infocus.com/store part no. SP-SVIDEO-10M or SP-CPSTVID-5M
Connect audio using an RCA Audio cable
2
www.infocus.com/store part no. SP-RCAAUD-5M
Color-coded connections make it easy.
You can connect more than one source if needed.
Computer Cable (included)
Computer
OR
Got an Apple computer?
You may need a VGA adapter to
connect to the computer cable. For
model-specific information and
more cabling options, see computer
connection How-To Guides at
www.infocus.com/service/howto
S-Video Cable
Composite Video Cable Good
* Also for game console or cable box.
Want better sound?
Connect the source’s audio output to a
receiver/amplifier or home theater
system with separate speakers.
RCA Audio Cable
To Projector (see above)
LR
Audio Out
DVD or VCR
OR
RCA Audio Cable
Video Out
Better
!!
!
LR
Audio Out
DVD or VCR
Home Theater or Receiver
LR
Audio In
OR
Connect to: Other kinds of sources
How-To Guides are available at www.infocus.com/service/howto
Video Out
Page 4
4
Turn on projector and source
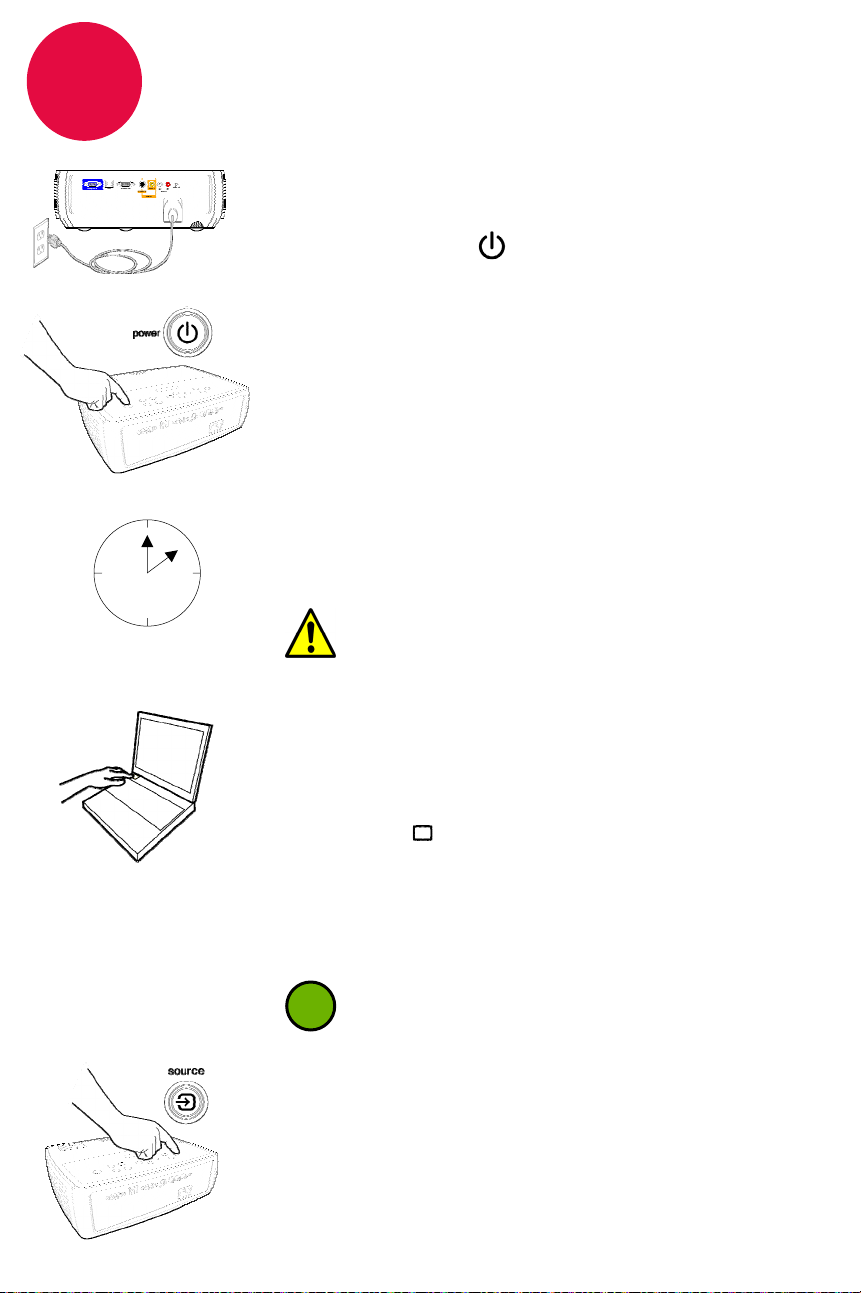
Connect the power cord to the projector
1
and to an electrical outlet
The green power light on the projector will turn on.
Turn on the projector
2
Press power (on the projector or remote).
The power light will start blinking.
Wait for the lamp to warm up
3
After a few seconds, the power light will stop blinking and stay
on. It can take a minute for the lamp to reach ful
5-10 sec.
Warning: Do not look directly into the lens
when the projector is turned on.
l brightness.
4
Turn on computer or other source
You may need to press a specific key combination to activate
your laptop’s external video port. On most laptops, hold down
the Fn key while pressing a key labeled CRT/LCD, LCD/VGA,
a monitor icon , or similar. Key combos for popular models:
Apple F7
Dell Fn+F8
Fujitsu Fn+F10
Complete laptop activation chart at www.infocus.com/service
Important: If there is still no video, restart your
i
computer (first make sure it’s con
projector and the projector is turned on).
Change source if needed
5
If needed, press source (on the projector or remote) to view the
source. You may have to press it more than once.
Gateway Fn+F3 or Fn+F4
HP/Compaq Fn+F4 or Fn+F5
Sony Fn+F7
IBM ThinkPad Fn+F7
Toshiba Fn+F5
nected to the
Page 5
5
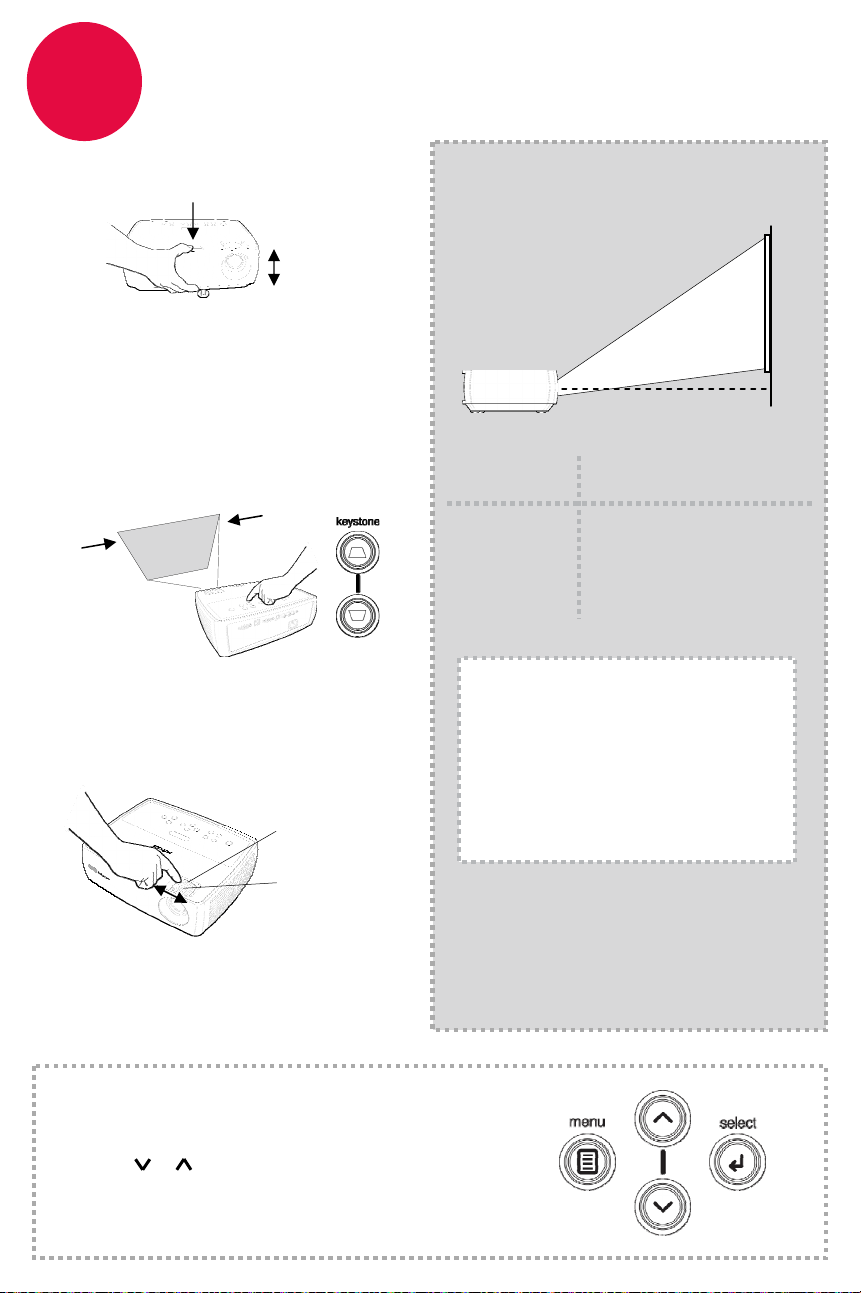
1
Height
1
2
3
Keystone
2
Adjust the picture
1
2
Hold down the release button on top
of the projector.
Lift the front of the projector to the
desired height.
Release the button.
Projector location
As distance increases, the
image gets larger and
moves upwards.
Lens center line
Diagonal
60” / 1.5 m
80” / 2 m
92” / 2.3 m
150” / 3.8 m
Distance to Screen
Minimum MaximumScreen Size
7’11” / 2.4 m
10’6” / 3.2 m
12’2” / 3.7 m
19’8 / 6 m
8’2” / 2.5 m
11’2” / 3.4 m
12’10” / 3.9 m
21’ / 6.4 m
Press the keystone buttons to
make the picture square.
Zoom and focus
3
Zoom
(rear)
focus
(front)
Adjust zoom first, then focus the
center of the image.
Using the menus
1
Press menu to show menus
Press or to choose items (or adjust setting)
2
Press select to confirm menu choice
3
Press menu to hide menus
4
Interactive Screen Size and
Distance Calculator
www.infocus.com/calculator
Buy a Screen and Other Custom
Accessories
www.infocus.com/store
Ceiling mount?
To flip the image, enable Ceiling in the
System menu (press menu, then select
Settings > System > Ceiling).
Page 6
6
7
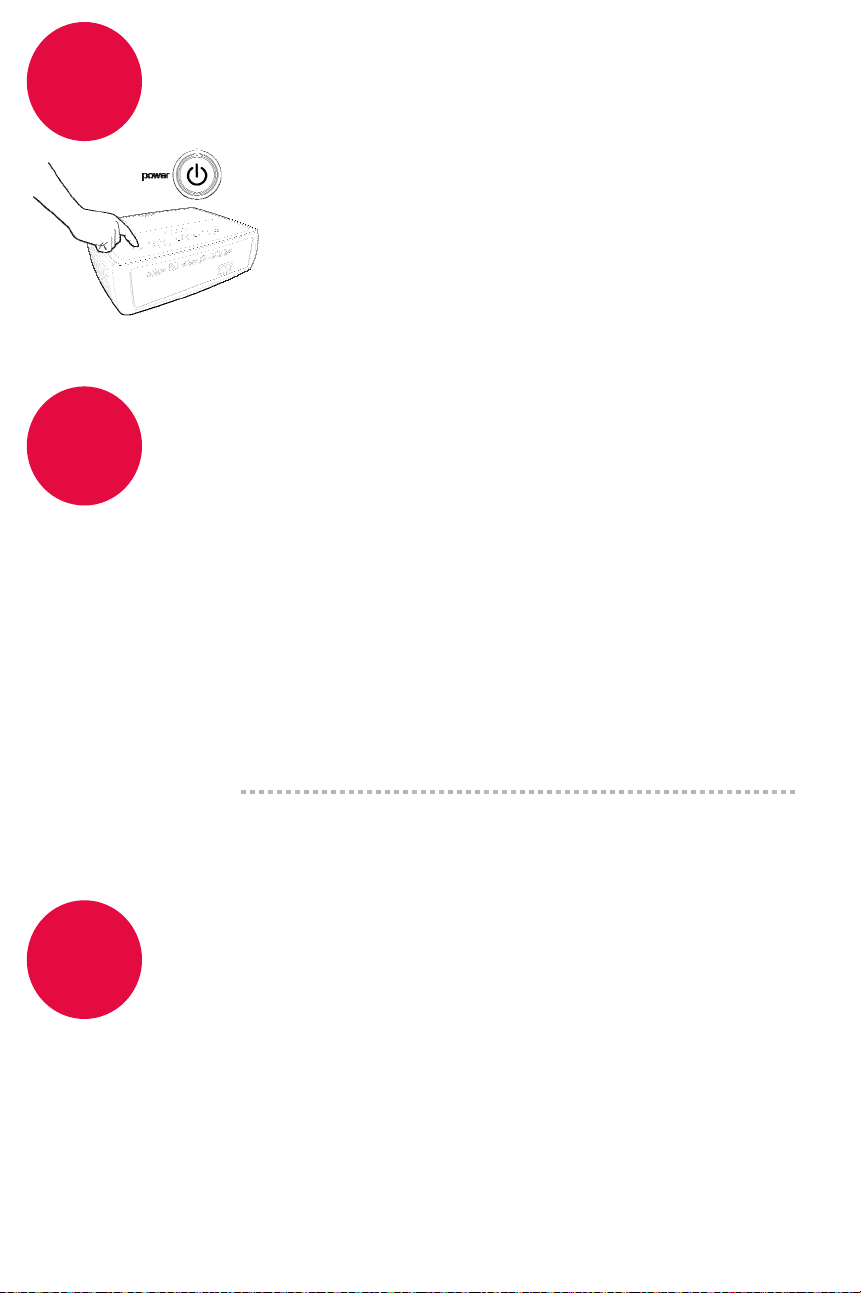
Turn off the projector
Press the power button twice
The first press shows a confirmation message; the second
press confirms that you want to power off.
The power light on the projector will blink while the fan cools
the lamp. If you need to unplug the projector, wait until the
fan stops and the power light stops blinking and stays on.
Note: While the power light is blinking, button presses on the
projector and remote are ignored.
Register with InFocus
It’s quick, easy and secure
Activate your warranty to ensure eligibility for
service and support. Get special offers and
notifications about free product updates.
Write down your projector’s serial number
1
It’s printed on the label on the back of the projector. You’ll need it to register (and if you
ever need to contact InFocus support).
Serial number:
Go to www.infocus.com/register
2
Read the Reference Guide
8
Insert the CD-ROM, or go to www.infocus.com/service
The Reference Guide is on the CD-ROM in multiple languages. It covers advanced setup and
operation, including lamp replacement instructions. The Reference Guide is also available at
www.infocus.com/service
Windows* users: The CD-ROM also includes links to the InFocus web site, including
shopping for custom accessories, service & support, and an interactive screen
size/distance calculator.
and visit the InFocus web site
Page 7
Troubleshooting
If there is no picture or the picture is blank
If the power light is off, make sure the power cord is connected and plugged
into a live electrical outlet. If the power light is on but not blinking, press the
power button.
Check video source and cables. Make sure the video source (computer, DVD player,
VCR, etc.) is turned on and cables are securely connected between the source and
the projector.
Make sure your computer’s video port is enabled. Press the key combination that
activates your laptop’s external video port (see step ). If there is still no image,
restart your laptop.
Press the Source button. You may need to press it several times to view the
correct source.
Press the Auto Image button.
If “Signal out of range” is shown, or the picture looks bad
Press the Auto Image button. If that doesn’t help (and the source is a computer),
reduce your computer’s display resolution or vertical refresh rate.
4
If the replace lamp light is on
Turn the projector off and wait at least one minute, then turn it on again. If the
replace lamp light turns on again, the lamp needs to be replaced. For lamp
replacement instructions, see the Reference Guide, which is on the included CD-
ROM or can be downloaded at www.infocus.com/service
If the high temperature light is on
Turn the projector off and remove anything that may be blocking the air vents on
its side. Leave the projector off for at least one minute to let it cool before turning it
on again. Important: Continuous operation at high temperature may reduce the
lifetime of the lamp and/or projector.
If the service required light is on
Turn the projector off and wait at least one minute, then turn it on again. If the
service required light turns on again, the projector needs to be serviced. Visit
www.infocus.com/service or call InFocus sup
More troubleshooting options are in the Reference Guide
The Reference Guide is on the included CD-ROM,
or download it at www.infocus.com/service
Warning: In the unlikely event of a lamp rupture, particles may be ejected from the projector.
Keep out of the area under and around the projector when it is turned on. See the safety
instructions booklet for more details.
port to arrange for service.
Page 8

Questions? InFocus is here to help!
InFocus is here to support you with your new purchase. We can help you with…
• Determining screen sizes
• Documentation in other languages
• Connecting your sources (TV, DVD, Cable/Satellite, Game, etc.)
• Selecting optional accessories
•Product warranty protection plans
USA, Canada, Latin America
Customer Support Telephone
+1 (503) 685-8888
TOLL FREE: 800-799-9911
Mon-Fri, 7 am – 5 pm Pacific
[email protected]
Asia Pacific
Customer Support Telephone
Singapore: +65 63539449
China: 800.828.2268
Australia: 1300-725-295
Australia Direct Sales: 1800-885-841
Europe, Middle East, Africa
Customer Support Telephone
+31 (0)20 579 2820
Mon-Fri, 08:00 – 18:00 CET
[email protected]
Mon-Fri, 9 am – 6 pm SGT
[email protected]
Warning: This product has a lamp which contains a very small amount of mercury. Dispose of it as required by local, state, or federal
ordinances and regulations. For more information, see www.eiae.org.
Declaration of Conformity
Manufacturer: InFocus Corporation, 27700B SW Parkway Ave. Wilsonville, Oregon 97070 USA
European Office: Strawinskylaan 585, 1077 XX Amsterdam, The Netherlands
We declare under our sole responsibility that this projector conforms to the following directives and norms: EMC Directive 89/336/EEC,
Amended by 93/68/E
93/68/EEC, Safety: IEC 60950-1:1st Edition
Trademarks
Apple, Macintosh, and PowerBook are trademarks or registered trademarks of Apple Computer, Inc. IBM is a trademark or registered
trademark of International Business Machines, Inc. Microsoft, PowerPoint, and Windows are trademarks or registered trademarks of
Microsoft Corporation. Adobe and Acrobat are trademarks or registered trademarks of Adobe Systems Incorporated. InFocus, In Focus,
and INFOCUS (stylized), LP, LiteShow, ScreenPlay, LitePort, ASK and Proxima are either registered trademarks or trademarks of InFocus
Corporation in the United States and other countries.
FCC Warning
Note: This equipment has been tested and found to comply with the limits for a Class B digital device, pursuant to part 15 of the FCC
Rules. These limits are designed to provide reasonable protection against harmful interference in a residential installation. This
equipment generates, uses and can radiate radio frequency energy and, if not installed and used in accordance with the instructions,
may cause harmful interference to radio communications. However, there is no guarantee that interference will not occur in a particular
installation. If this equipment does cause harmful interference to radio or television reception, which can be determined by turning the
equipment of
--Reorient or relocate the receiving antenna.
--Increase the separation between the equipment and receiver.
--Connect the equipment into an outlet on a circuit different from that to which the receiver is connected.
--Consult the dealer or an experienced radio/TV technician for help.
Canada
This Class B digital apparatus complies with Canadian ICES-003.
Cet appareil numérique de la classe B est conforme à la norme NMB-003 du Canada.
Agency Approvals Product Models: W240, W260
UL, CUL, NOM, IRAM, GOST, C-tick
Other specific Country Approvals may apply. Please see product certification label.
InFocus reserves the right to alter product offerings and specifications at any time without notice.
EC, EMC: EN 55022, EN 55024, EN 61000-3-2, EN 61000-3-3, Low Voltage Directive 73/23/EEC, Amended by
f and on, the user is encouraged to try to correct the interference by one or more of the following measures:
 Loading...