

Page 1

EZ WiFi/LAN for Windows
User’s
Guide
009-1453-01
Page 2

CPU
Dual Core Intel Core 1.6 GHz or higher (ATOM not supported)
HDD
40MB free space
CPU
Dual Core Intel Core i5 2.4Ghz
Memory
DDR 4GB
Graphic card
256MB VRAM or above
Operating System
Windows 7 SP1
Display Aspect Ratio
4:3, 16:9, 16:10
OS support
Windows XP SP3, Vista SP2, Win 7 SP1 and Win 8 (Starter versions not supported)
Interface
WiFi 802.11n (2T2R recommended)
Display mode
• Mirror Display
Setting
•
General Description
EZ WiFi/LAN is a powerful program which can project your PC’s screen to an EZ Suite enabled
TV or projector wirelessly. You can also extend your screen to show different content on a secondary
d isplay.
Features
• Full Screen Mirror Display and Extension Mode Display
• Performance and Quality selection
• Split Screen support
• Support Windows XP~Win8
System Requirements (Windows OS)
Graphic card Intel, nVIDIA or ATI graphic card with 64MB VRAM or above
Operating System Windows XP SP3, Vista SP2, Win 7 SP1 and Win 8
(Starter versions not supported)
Recommended System Settings (Windows OS)
Specifications
• Extension Display (not supported in Win 8)
• Performance mode
• Quality mode
• Split screen
• Audio on/off (Audio streaming is not supported by Win XP)
• Compatible mode
Split control
EZ WiFi Display Manual for Windows Page 2
Page 3
First
installation
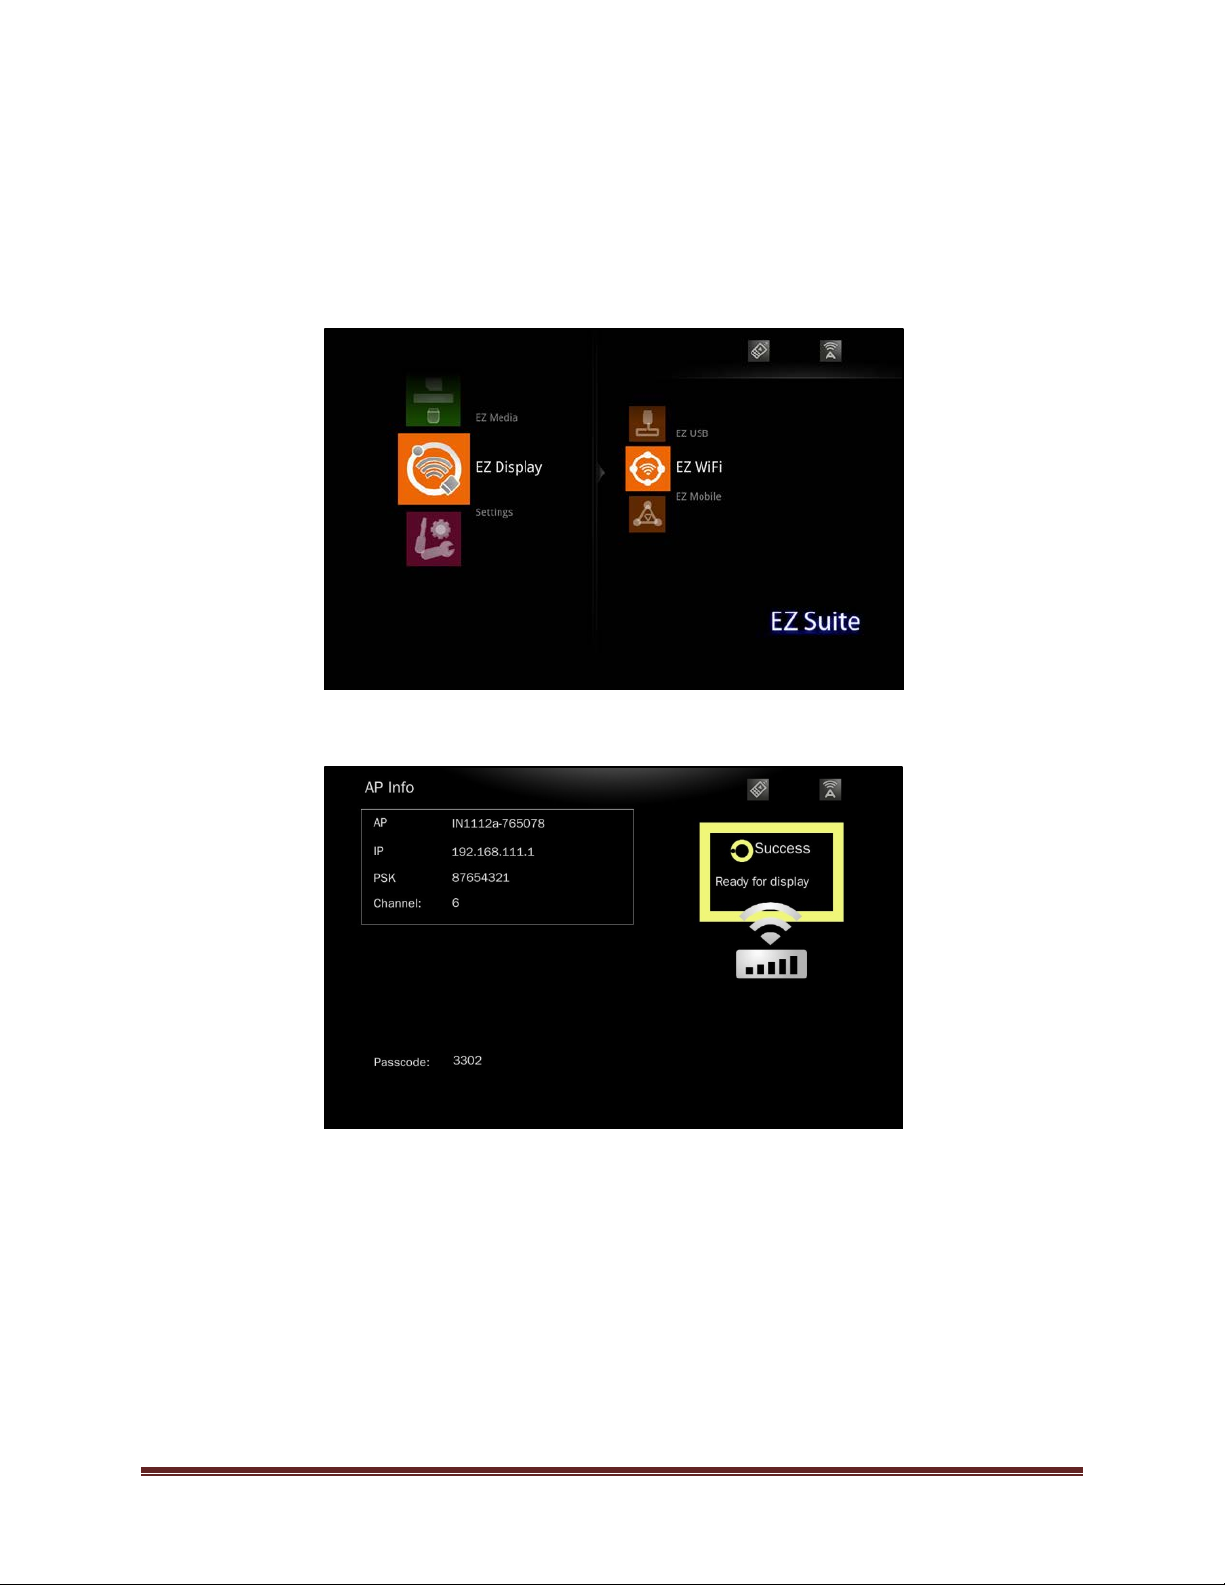
1. On the EZ Suite Display: Make sure that the USB WiFi adapter is inserted and enabled.
2. Select EZ Display > WiFi Display.
3. The WiFi Welcome page will be displayed, and the display is ready to receive wireless video.
EZ WiFi Display Manual for Windows Page 3
Page 4

4. From the PC, open the WiFi SSID list and select the access point indicated in the Welcome page.
Enter the displayed PSK if encryption is enabled.
XP
WIN7
EZ WiFi Display Manual for Windows Page 4
Page 5

WIN8
a. Select Connect using a security key instead.
EZ WiFi Display Manual for Windows Page 5
Page 6

b. Enter the PSK key shown on the EZ Suite Display.
5. After connecting successfully, open a web browser and key in the IP address
shown on the Welcome page (normally 192.168.111.1).
6. Click the EZ Display Windows OS button and click Run to download and install the
EZ WiFi/LAN software (EZ_WiFi_LAN_Win.exe).
EZ WiFi Display Manual for Windows Page 6
Page 7

7. Follow the Wizard instructions and select Next.
EZ WiFi Display Manual for Windows Page 7
Page 8

8. Click Cancel, when the EZ WiFi/LAN tries to connect to the display.
EZ WiFi Display Manual for Windows Page 8
Page 9

9. Click Next to reboot the computer.
10. Click Finish. The computer will reboot.
EZ WiFi Display Manual for Windows Page 9
Page 10

Operation
1. Establish the WiFi connection with the EZ Suite enabled display (refer to the above
instructions).
2. Find EZ WiFi/LAN on your Desktop and start the application. EZ WiFi/LAN will search all
connected display devices and list them.
3. Select the SSID of the device on which you want to display.
4. Input the 4-digit passcode shown on the Welcome page of your display.
5. The EZ WiFi/LAN control window will open and the PC’s desktop will be displayed
wirelessly.
6. Select the display mode (Mirror or Extension). If you want to display other people’s
screens in split screen mode, select the quadrant (1, 2, 3, 4 or L (left), R (right)) you want
to display in. Up to 4 different sources can be displayed simultaneously.
7. If the Windows graphics are not displaying correctly, you can enable Compatible mode by
placing a checkmark in the box. This may resolve the issue.
8. Turn on Audio Streaming to send audio wirelessly to your EZ Suite enabled display. (Wireless
Audio not available on Windows XP.)
9. The Link feature will open the display’s Web interface on your web browser.
10. Click Exit to disconnect from the display.
Note: Do not change the resolution while WiFi Display is active.
EZ WiFi Display Manual for Windows Page 10
 Loading...