

Indy CTTOOL Operation Instructions Manual
Light Commissioning Tool (CTTOOL)
Operation Instructions
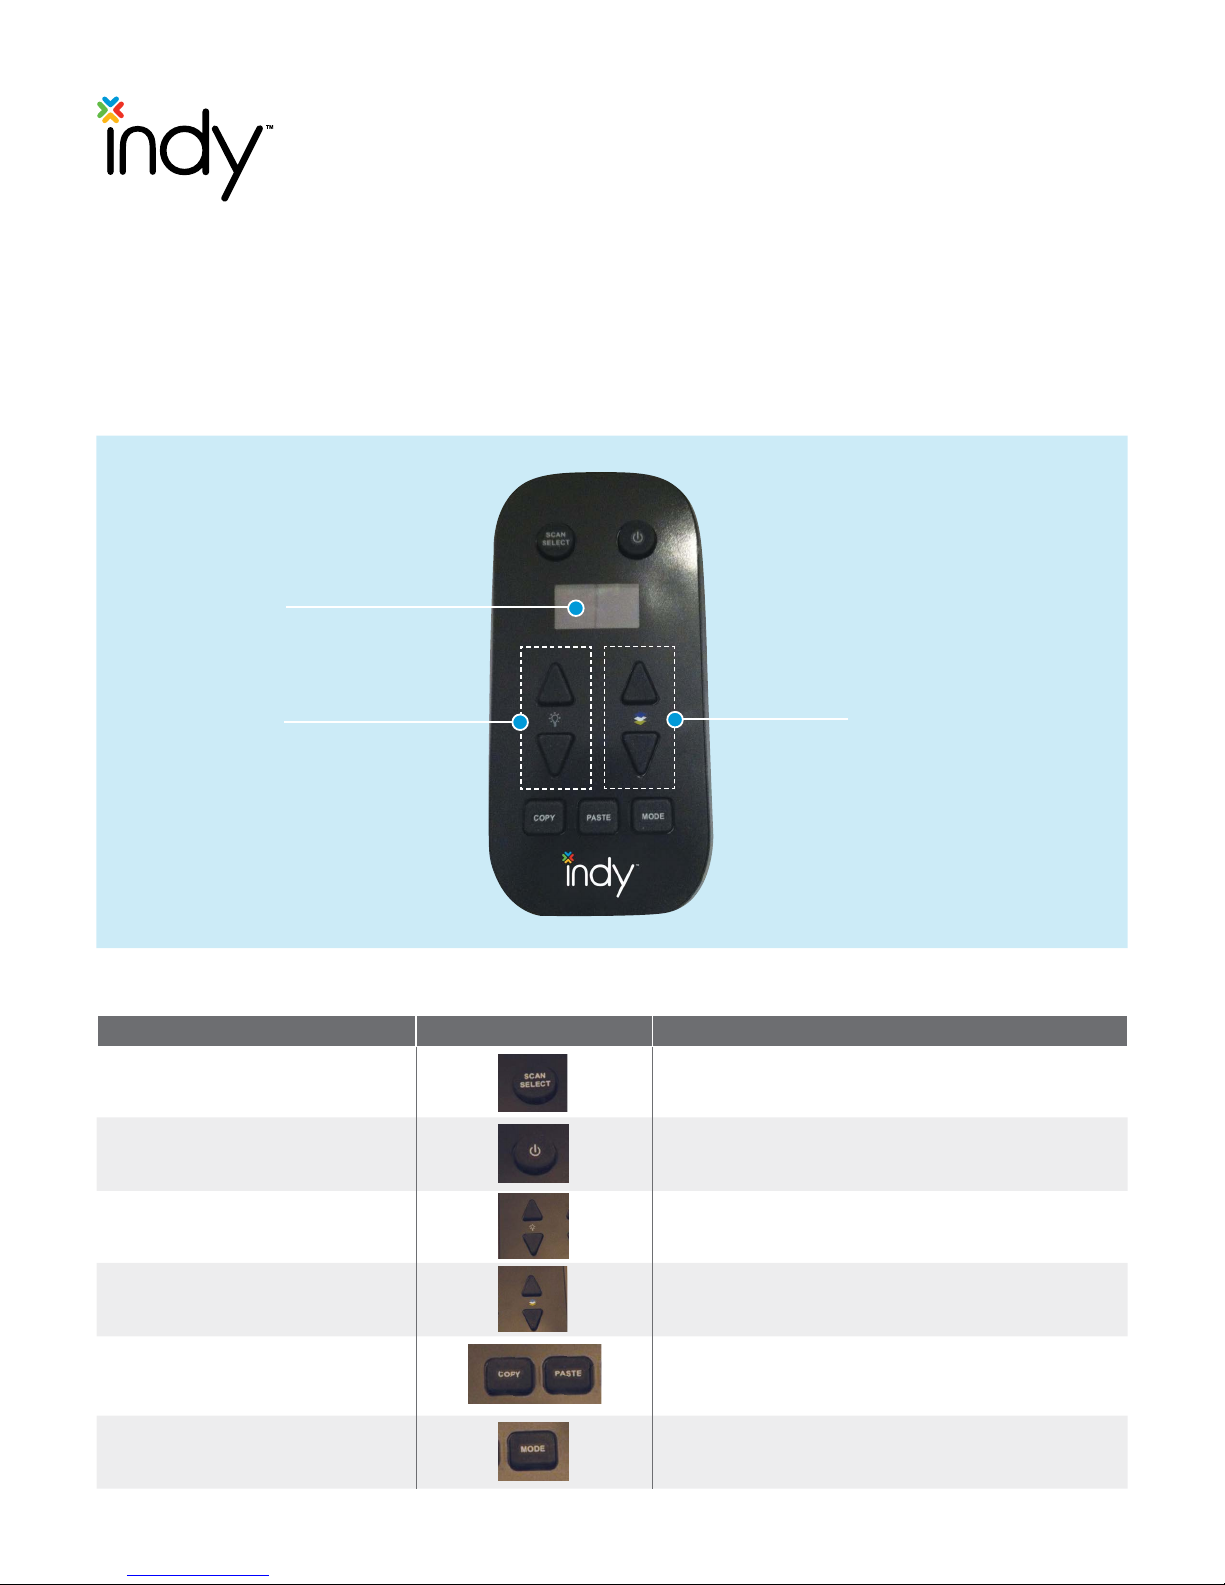
Light Commissioning Tool Functions
Display
Dimming/Saturation
Button Descriptions
Buttons Image Description
SCAN SELECT
POWER
DIMMING (UP/
DOWN ARROW KEYS)
Scans the network to discover luminaires and then
selects an individual lamp to control.
Controls the lamp power on/off.
Adjusts Dimming levels from 100% to 1%. These buttons
can also adjust Saturation after hitting Mode button.
CCT/Hue
CCT (UP/DOWN ARROW KEYS)
COPY/PASTE
3 Acuity Brands® | Indy™ Light Commission Tool Operations Instructions
MODE
Document #: 065-1140
Adjusts CCT in increments of 25K. These buttons can
also adjust Hue (Color) after hitting Mode button.
Copies lamps settings from one ChromaControl
and "pastes" it onto another ChromaControl fixture.
These buttons also set SCENE PRESETS.
Toggles between CTTOOL programming modes.
™
fixture
Light Commissioning Tool Functions
SCAN SELECT
Button
Mode Description
• DIM & CCT MODE Adjusts Dimming levels in increments of 1% and CCT in increments of 25K.
• SATURATION & HUE MODE Adjusts Saturation levels from 0-100% and Hue (Color) settings
from 0-60 representing all of the colors in the visible spectrum.
• PRESET EDIT MODE Sets, stores and recalls up to five presets. SCENE PRESETS can
also be copied from one ChromaControl luminaire and pasted onto another
ChromaControl™ luminaire.
Note: SCENE PRESETS are selected using a 0-10V wired lighting control.
Inserting the Batteries
• Remove the battery case on the back of the LCT by pushing the tab in and sliding the
cover down.
• Insert 3 AAA batteries ensuring that the positive and negative terminals are correctly matched.
• Replace the battery case.
• Remove batteries when not in use to preserve battery life.
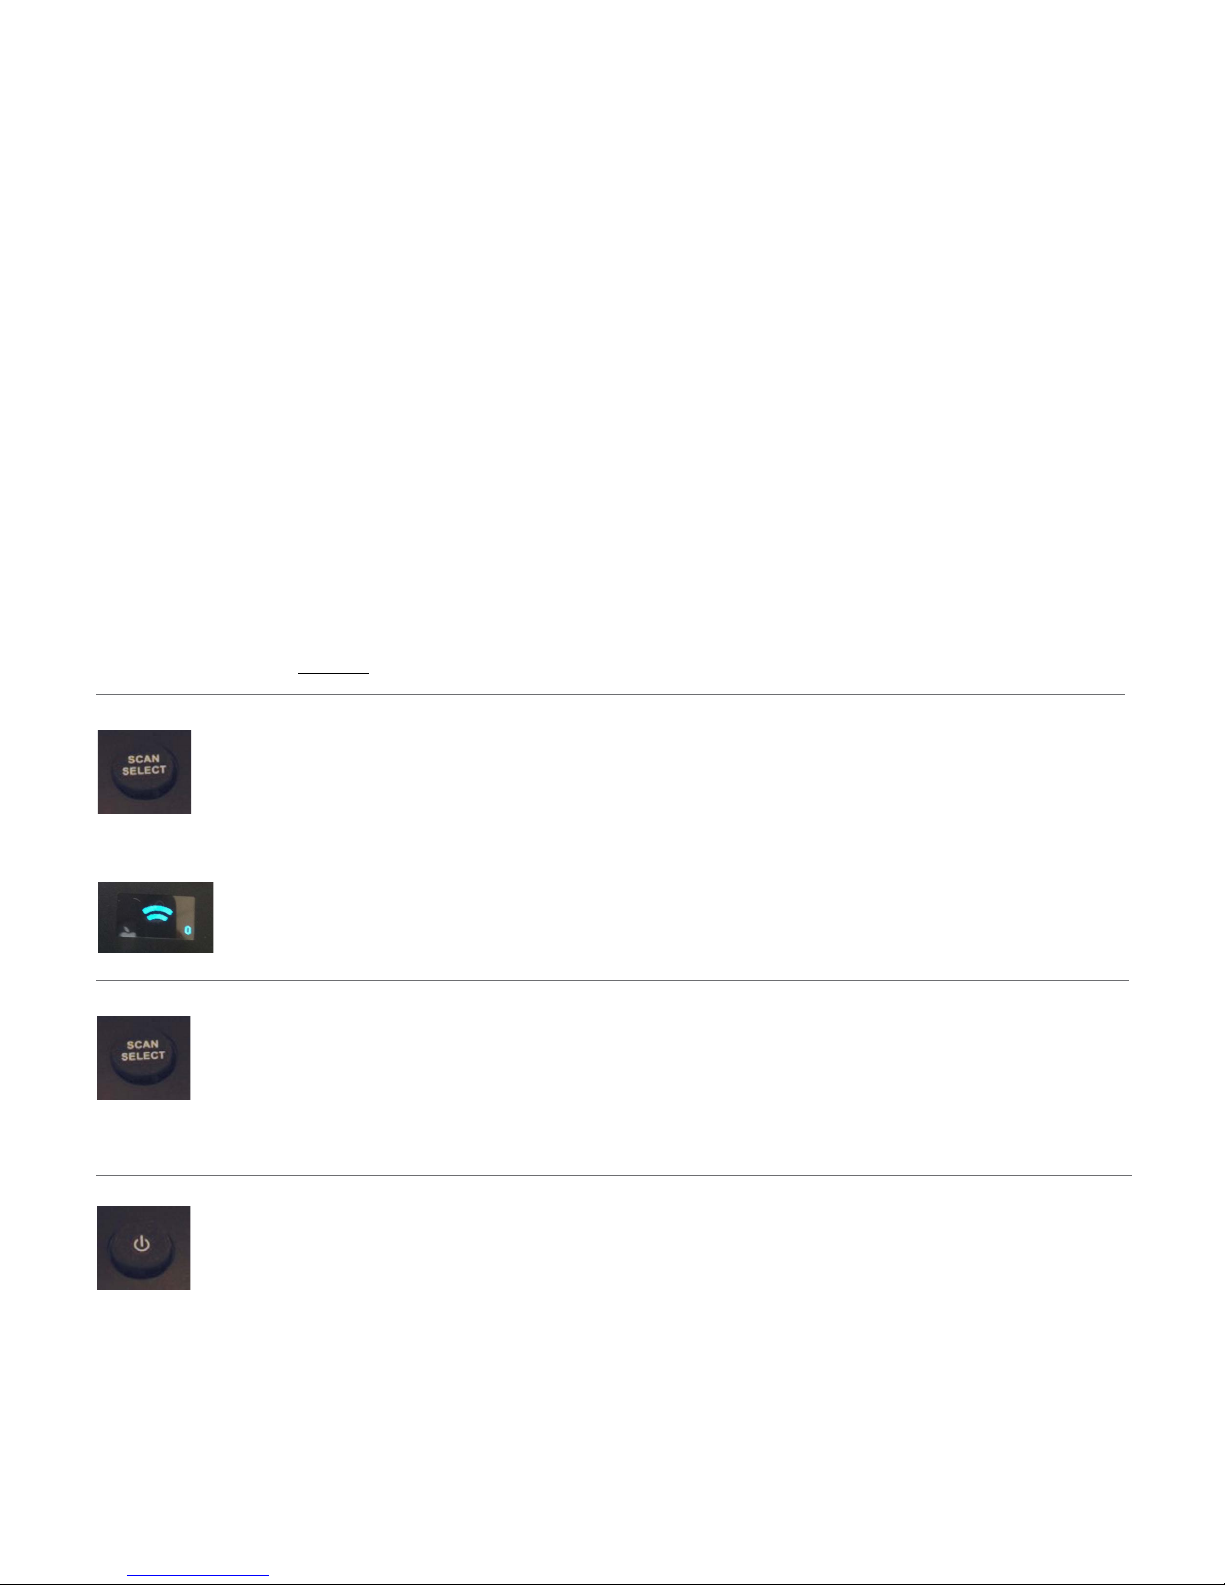
Network Scan to Discover Luminaires
• Press and hold the SCAN SELECT button for two seconds. When the scanning
indicator appears in the display, release the SCAN SELECT button.
• The display indicates that the Light Commissioning Tool is scanning the network
to discover all the luminaires (up to 60 luminaires can be detected at once).
• Once the discovery is complete, the display indicates the number of luminaires
discovered, assigns a number to the active luminaire and shows the settings.
Select a Luminaire
• To access a luminaire in the network, press SCAN SELECT again.
The next active luminaire in the network will flash.
SCAN SELECT
Button
• Continue to press SCAN SELECT until the desired luminaire flashes.
• The display will update to indicate the luminaire within the network.
Luminaire On and Off
• Press the POWER button and the selected luminaire powers on.
• The current mode and settings will be shown in the display.
POWER
Button
• To turn the luminaire off, press the POWER button.
• The luminaire OFF button is disabled when in Preset Edit Mode.
2 Acuity Brands® | Indy™ Light Commission Tool Operations Instructions
Document #065-1140
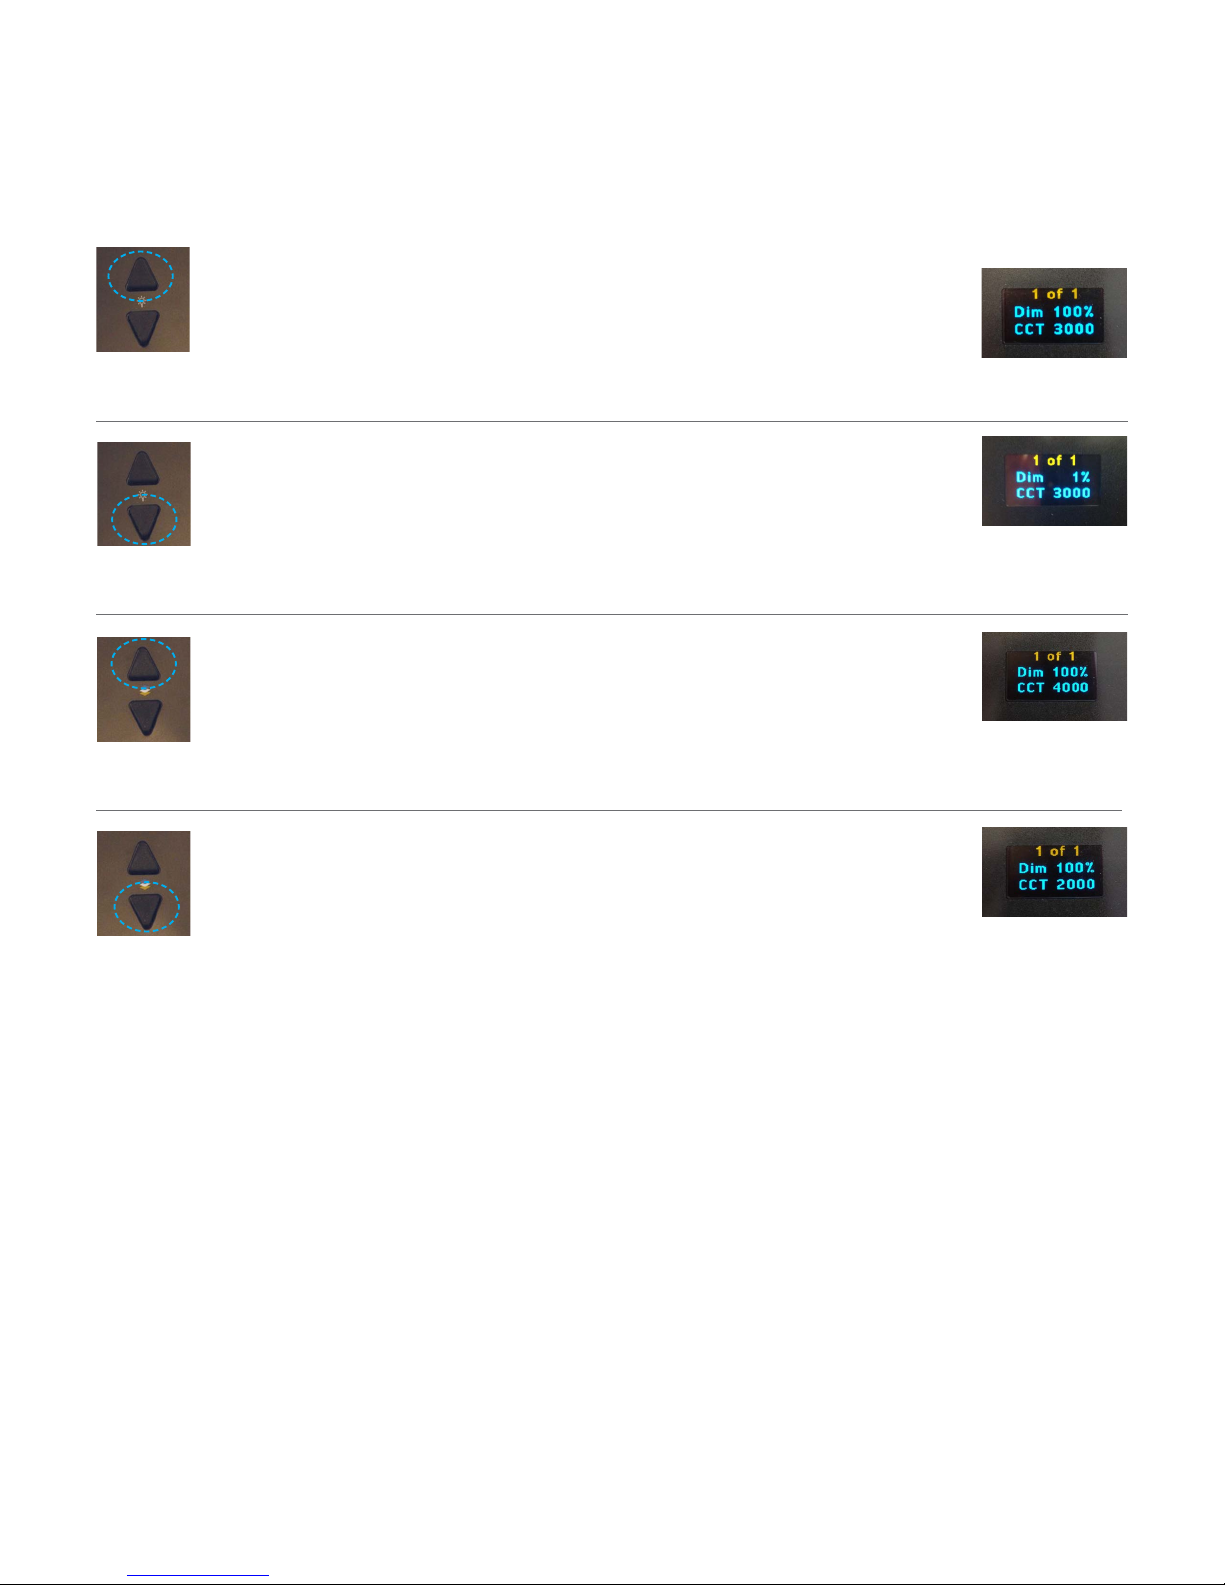
Adjusting Dimming & CCT
DIMMING UP
Button
DIMMING DOWN
Button
CCT UP
Button
Increasing Brightness
• The brightness increases in increments of 1%.
• Press the DIMMING UP key to increase the brightness.
• The selected dimming level is shown in the display.
Decreasing Brightness
• The brightness decreases in increments of 1%.
• Press the DIMMING DOWN key to decrease the brightness.
• The selected dimming level is shown in the display.
Note: If Dim is not shown in the display, press the MODE button to display Dim and CCT
Increasing Color Temperature (CCT)
• CCT increases in increments of 25K.
• Press the CCT UP key to increase the color temperature.
• The selected color temperature is shown in the display.
CCT DOWN
Button
Decreasing Color Temperature (CCT)
• CCT decreases in increments of 25K.
• Press the CCT DOWN key to decrease the color temperature.
• The selected color temperature is shown in the display.
Note: If Dim is not shown in the display, press the MODE button to display Dim and CCT
3 Acuity Brands® | Indy™ Light Commission Tool Operations Instructions
Document #065-1140
 Loading...